No-Knead Oatmeal Toasting Bread
This post may contain affiliate links. Please read my disclosure policy.
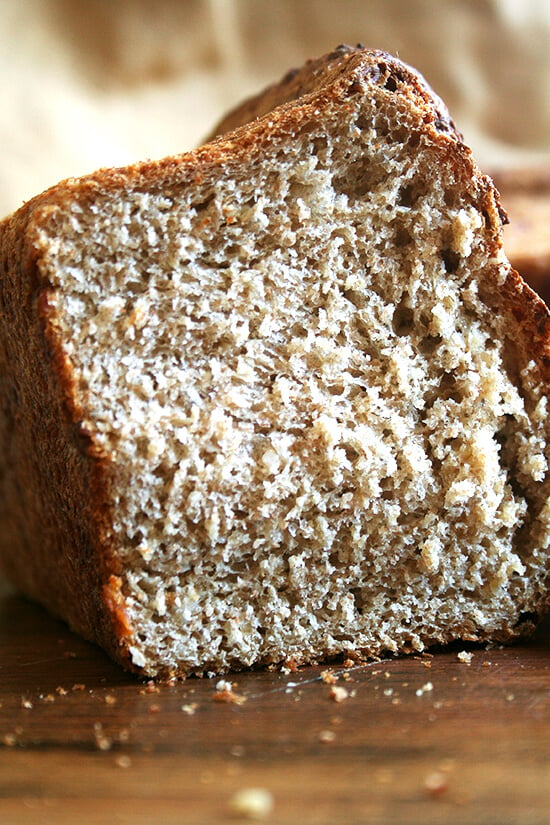
Before heading to the beach last week for a little vacation with the family, I spent some time in the kitchen preparing a few items to pack along: granola, granola bars (which, unfortunately, were inedible) and this no-knead oatmeal toasting bread, a tried-and-true family favorite.
The goal was meal supplementation — to avoid eating every meal out — and in retrospect, I wish I’d prepared more, namely biscotti, which were sorely missed, and something chocolaty to satisfy our post-dinner sweet tooths — midweek we caved and stocked up on chocolate-almond Hershey bars from the local convenience store … never have they tasted so good.
But this bread was a savior. We ate it every morning toasted and slathered with peanut butter and nearly every afternoon, at times with lettuce, tomato and bacon wedged in between, at others with nutella and peanut butter, and at others with a thick layer of melted cheese and sliced tomato.
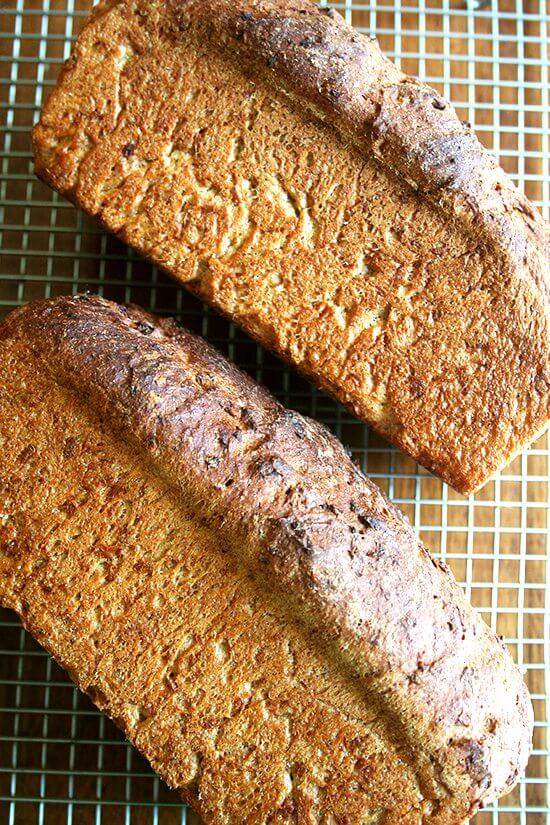
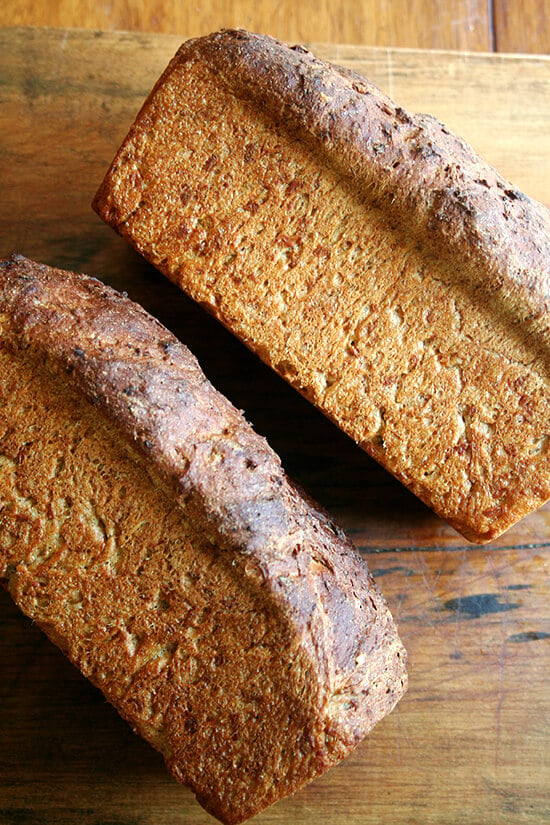
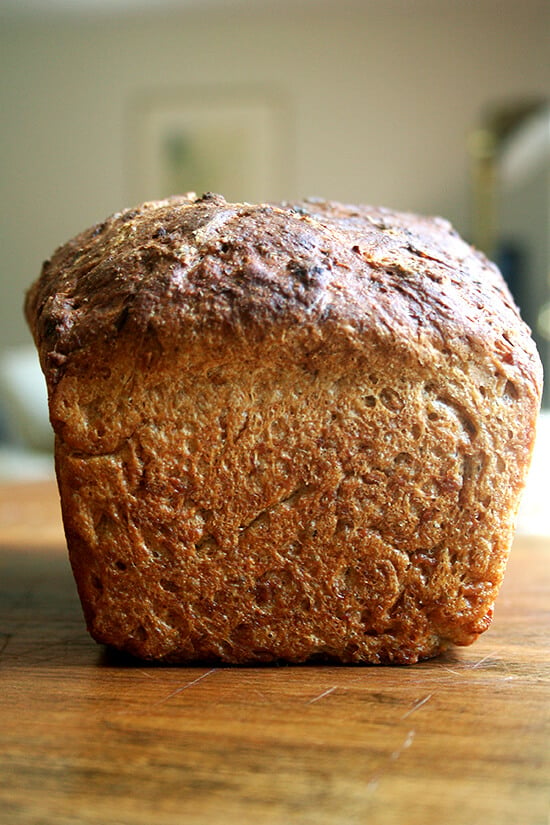
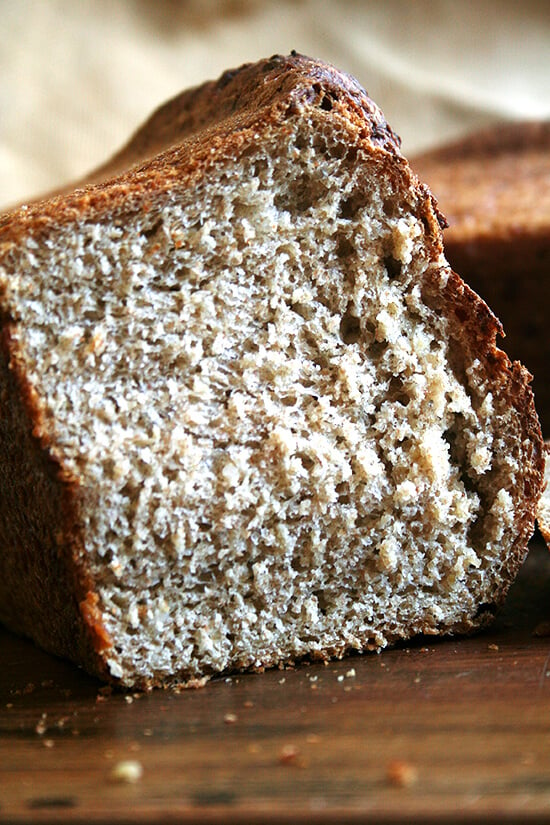
It is a cinch to prepare — true to the title, no kneading is involved — and the bread, chewy in texture and slightly sweet, is just straight-up delicious, a treat to have on hand on vacation or not.
My only goal tomorrow is to restock my freezer with another two loaves, and thanks to the 100ºF forecast, I’m almost certain to achieve it. Perhaps insufferable heat isn’t all that bad? Just trying to stay positive. Hope you’re all staying cool.
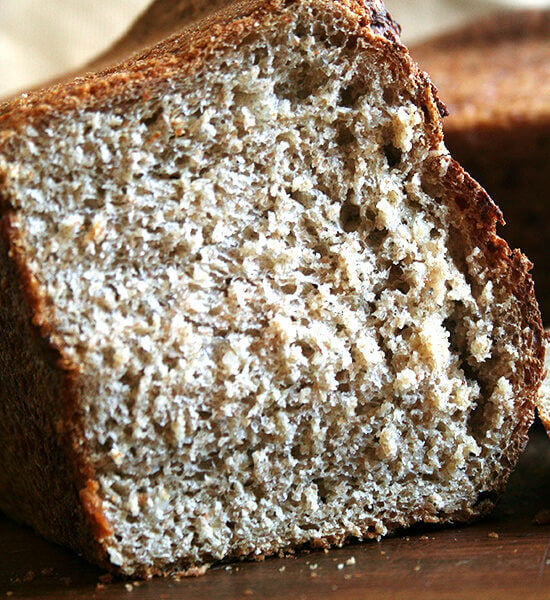
No-Knead Oatmeal Bread
- Total Time: 3 hours 20 minutes
- Yield: 2 loaves
Description
Adapted from Kathleen’s Bake Shop Cookbook
Ingredients
- 3/4 cup (160 g) brown sugar
- 1 tablespoon kosher salt
- 1 3/4 (175 g) cups old-fashioned oats
- 3 cups (681 g) boiling water
- 2 tablespoons (28 g) butter
- 2.25 teaspoons active dry or instant yeast
- 1/4 cup (57 g) warm water
- 3 cups (384 g) all-purpose flour
- 3 cups (384 g) whole wheat flour
Instructions
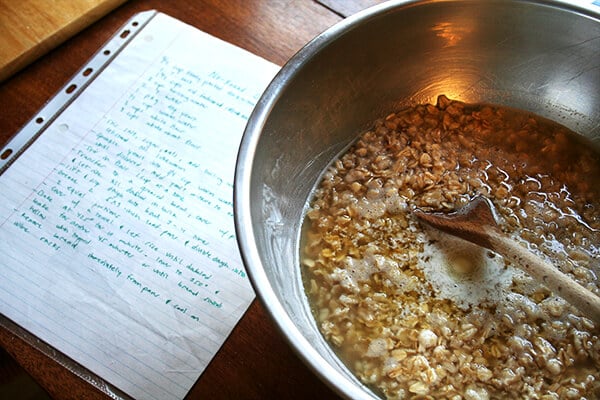
- Place brown sugar, salt and oats in a large mixing bowl. Add boiling water. Add butter. Let stand till lukewarm. Note: This is the only place where you could mess up the recipe. The mixture must cool to a lukewarm temperature so that it doesn’t kill the yeast.
- In a small bowl, sprinkle yeast over the 1/4 cup warm water. Let stand for about 5 minutes. Stir. Add this yeast mixture to the oat mixture and stir. (Note: If using instant yeast, simply whisk it into the two flours in a large bowl. Do still be sure to wait until the water-oatmeal-brown sugar mixture has cooled before adding the flours/yeast. Add the 1/4 cup water to the bowl of water-oatmeal-brown sugar.)
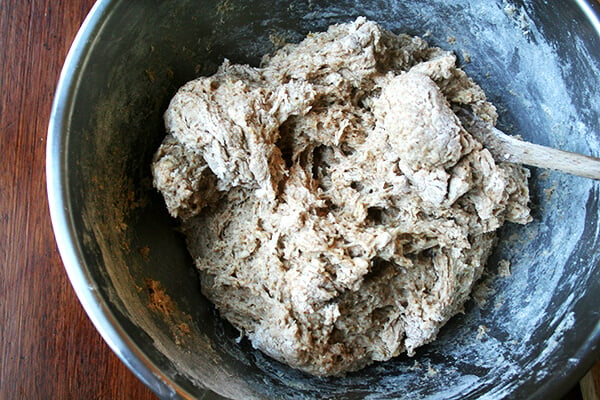
- Add the flours a little bit at a time. My old recipe says to add it one cup at a time, but I’m never that patient. Add it as slowly as you can tolerate, stirring to combine after each addition.
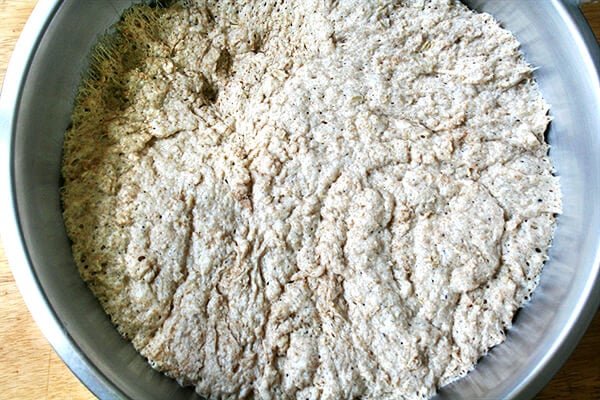
- Transfer dough to a lightly greased bowl and cover with a damp tea towel or plastic wrap. Let rise in a warm spot until doubled in bulk, about 2 hours. This is what I always do for my “warm spot”: preheat the oven to its hottest setting for 1 minute. TURN OFF THE OVEN. (Note: Only preheat the oven for 1 minute total — in other words, don’t wait for your oven to heat up to 500ºF and to sit at that temperature for 1 minute. You just want to create a slightly warm spot for your bread to rise.) Place covered bowl in the oven to rise until doubled.
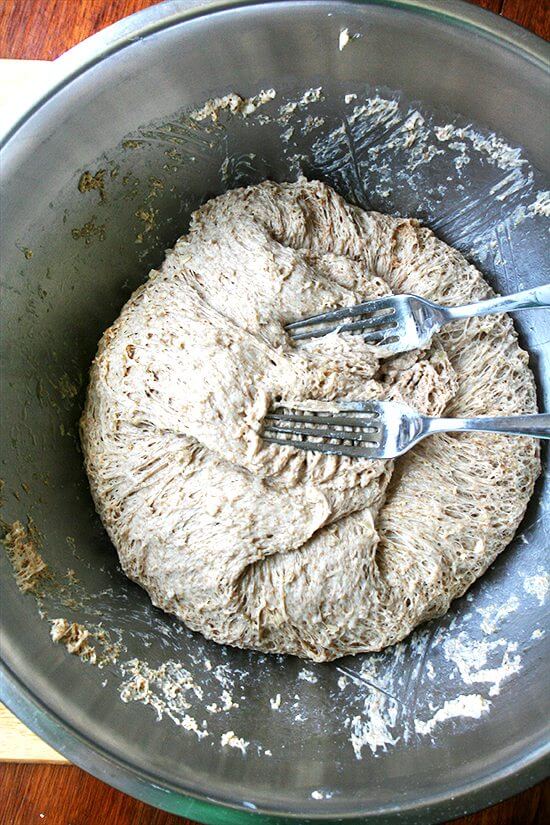
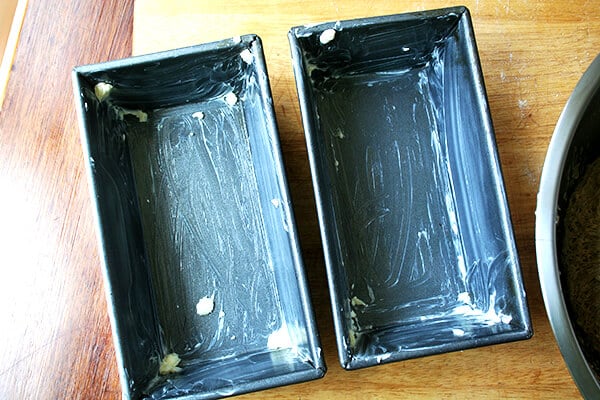
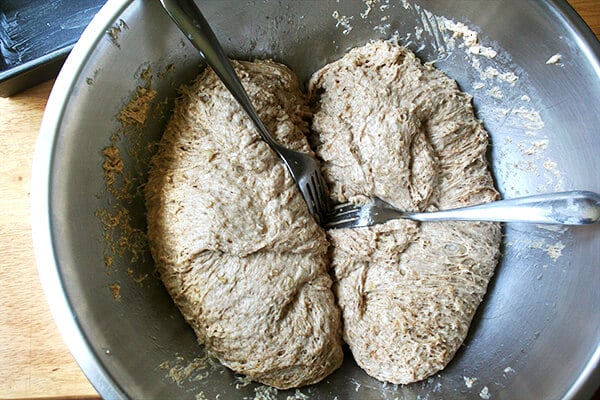
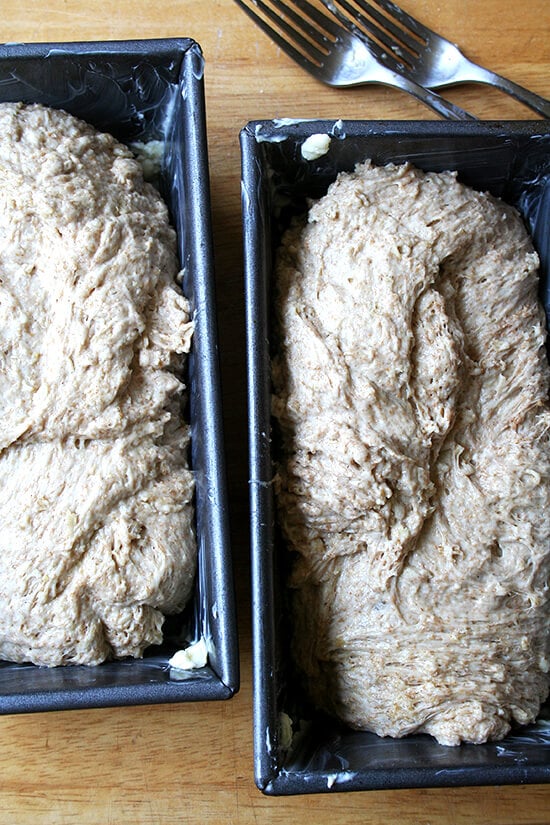
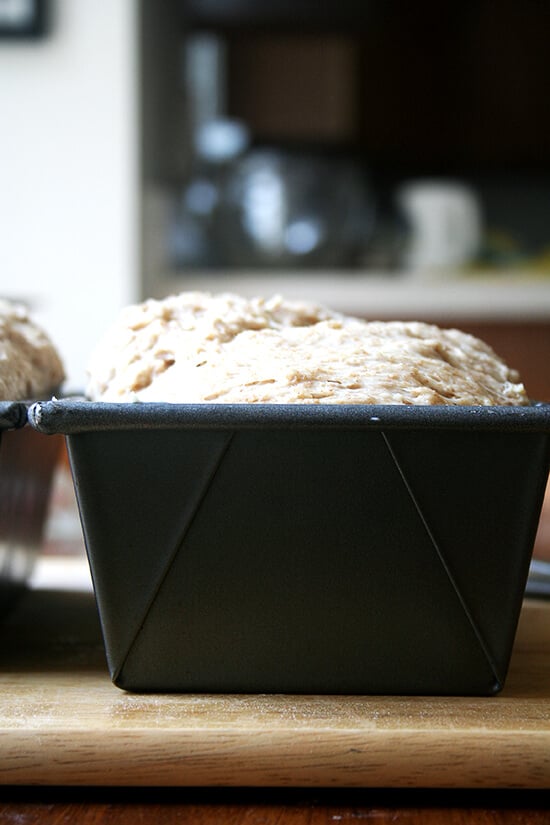
- Grease two standard sized loaf pans generously with butter. When dough has risen, punch it down. I use two forks to do this. I stab the dough in the center first, then pull the dough from the sides of the bowl towards the center up onto itself. Then I take my two forks and, working from the center out, I divide it into two equal portions. Place each portion into your prepared loaf pans. Let rise until dough creeps above the rim of the loaf pan.
- Preheat the oven to 425ºF. Bake loaves for 10 min. Reduce heat to 350ºF. Bake for another 40 to 45 more minutes or until the bottom of the loaf sounds hollow when tapped — you have to (obviously) remove the loaf from the pan to test this. Turn loaves out into wire racks immediately to cool.
- Prep Time: 20 minutes
- Cook Time: 50 minutes
We had a wonderful time on vacation. We stopped in Williamsburg on the way to Virginia Beach (obviously to give Ella and Graham a little history lesson); we stayed in awesome cabins; we bought as-fresh-as-fresh-can-be fish (rockfish and sea bass) every night from Dockside, which we grilled whole and devoured; and we spent hour upon hour at the beach.
This post may contain affiliate links. Please read my disclosure policy.




213 Comments on “No-Knead Oatmeal Toasting Bread”
After great success with your Peasant Bread, I tried this Oatmeal Loaf today. I have just pulled it from the oven and eaten a slice warm with butter – it is delicious!! If I don’t finish the loaf this afternoon I will look forward to enjoying a couple of slices for toast tomorrow morning. Thank you for another great recipe. -Alex
Alex — so happy to hear this! Isn’t it wonderful having homemade bread on hand? I don’t think it gets much better than a slice of this bread warm with butter.
Can’t wait to try this bread. I have a similar recipe that was my great grandmother’s but uses molasses instead of brown sugar and all white flour. My mother said sometimes my grandmother would use maple syrup. Haven’t tried that yet. Wanted to comment on your lovely pictures. When my kids were about that age we also went to Williamsburg and Virginia Beach They are grown now but often talk about the “educational” vacations we took. Even amusement parks can teach sience. Enjoy them because unfortunately they grow up all to soon.
Made the peasant bread a couple days ago and absolutely loved it. Tried this bread today, mostly b/c I have a son who is extremely picky – but loves oatmeal- made this today and he loves it!!! This is the first time he was excited to eat bread, lol! Great recipe! I did have the same problem as Pam though and didn’t get it to rise all the way during the second rise, but it still tastes great!
Lisa — so happy to hear this! And I’m so glad your picky son approves. This is one of my faves as well. I’m sorry about the issues with the second rise. How long about did you let it rise second time around?
For the second rise I only waited about 1/2 hour, so maybe next time I’ll wait more like 45 minutes. Either way, totally worth another shot 🙂
I’m just wondering what precisely is the size of a standard loaf pan? I have two nonstick loaf pans that look like the ones you are using, but they seem so big! They are 4 1/2 x 10. My hubby uses them for banana bread.
I also have some refrigerator dishes that are maybe 3×8 1/2.
I think I’ll try the one big and two smalls to see how it comes out.
Karen
OK. So I made two smaller loaves and one regular.
The larger pan was a good size, and the smaller ones worked out as well! This bread is delicious!
I am a huge fan of your peasant bread as well. I also made that today!
I’ve made the peasant bread many times now and its a huge hit with my whole and extended family. Of course I would love to have let them think I was a bread baking genius, but I shared your site with them instead.
Keep sharing your brilliance! We sure do appreciate your delicious recipes!
Karen
Oh Karen, thanks so much for this nice comment. And I am sorry I didn’t get to your previous comment before you began your baking, but I’m just glad to hear that this turned out well for you. I use two pans that are about: 8 1/2″ x 4 1/2″ x 2 3/4″ high. I bet your mini (or mini-ish) loaves were cute? Fun to serve at a lunch with a nice soup? You probably could have gotten away with dividing the dough in half and baking each half in the larger pans, but size doesn’t really seem to matter here.
And I am so happy to hear that you like the peasant bread. I just want everyone to have the same results as you with that recipe — so easy and so good! Thanks so much for writing in.
I’ve made this no-knead oatmeal bread several times now and it is SUPERB! Whole grains, great flavor, light texture, quick… And seemingly NO-FAIL! I let it rise in a warmed microwave. Though I DO knead it slightly, just to shape and ensure a springy but not sticky dough texture. I’ve tried different grains – musli, farro, raisins, … The kids like it… AND you get two loaves! This is my go-to bread recipe now! Excellent! Thank you!
Mary — So wonderful to hear this! And I love your warmed microwave trick for letting the dough rise. My kids love this one, too — there is just something about it. So comforting and delicious. Thanks for writing in!
A silly question: The bread is to bake at 425 for 10 minutes; reduce heat and bake for another 40-45 minutes. Do you remove the bread from the oven, wait for the oven temp. to cool and replace the bread? Or do you leave the bread in while the oven cools?
Thanks for the recipe and thanks in advance for the help!
Meg — Just leave the bread in the oven when you reduce the heat. Happy Baking!
Hi, thinking about trying this recipe, just wondering if I could use instant yeast instead. If so do I still need to add the 1/4 cup of water? Thanks!
Ravina — I would still add the water. I know it’s such a small amount, but I think the dough needs it. You can just add 1/4 cup more boiling water to your brown sugar, salt and oats mixture. Good luck with it. I love this bread!
This looks delicious. Can the first rise be done in the same bowl used for mixing, as in the your peasant bread recipe?
Thanks!
Kristen, Yes. I have started doing this with all of these no-knead breads. Why dirty another bowl? Now, my mother is a firm believer that using a freshly buttered bowl both adds flavor and assists in rising, but I take my chances. If you do the warm oven trick and let the bread rise for two hours or until it is doubled, it will bake off just as nicely. Good luck with it!
Success! I left the dough to rise in the same bowl I mixed it in and it rose beautifully. I ended up adding an extra 1/4 c. or so of water to the dough to get it to fully combine, but other than that no problems at all. And the finished product is super yummy. Thanks!
Kristen — thanks so much for reporting back! And I’m so happy to hear you like this. I’m bringing a friend a loaf tomorrow. Just so you, you can make the dough and let it rise overnight in the fridge. I have even frozen it after the first rise once I’ve placed it in its buttered loaf pan.
I’m confused about the oven temp. for creating a warm space. Your peasant bread recipe has “highest setting” crossed out, but still visible, then says “lowest”setting. Now this recipe, which I am about to try for the first time, says preheat for one minute on highest setting. Which is it? I used lowest setting for the peasant bread and always wondered why mine didn’t rise as much as yours. I live at 4400 feet above see level, too. Still, love the peasant bread!
Lisa – hieeee. Sorry about this confusion. The truth is is that I always just turn the knob up to the highest setting and then shut it off after a minute. The reason I switched the instructions in the peasant bread is bc i think a lot of people were not understanding my instructions and preheating their ovens for too long at too high a setting and so were par baking their loaves during what should have been the first rise. You can preheat your oven at whatever setting you want as long as the oven is on for no more than a minut total. Does that make sense? As for altitude, I can’t offer much guidance. But, what size bowls are you using for the bread? I think my bowls make the second rise look more dramatic than it actually is. When I make the loaves in larger bowls, they don’t seem to rise as much, but it’s all relative to the bowl. Hope that helps!
Bingo! So excited! I made the peasant bread once more just to compare the oven temp methods. My first rise was much higher and the second also higher and faster than the results with the lower preheat. I am baking one loaf in the same bowl as yours (1.5 L). It was so pretty I had to buy one from eBay. I bake the other in my 2Q LeCreuset Dutch oven. They don’t come out the same size, but turn out equally well. I am so happy now ! Thank you!
Oh Lisa, it’s wonderful to hear this. Maybe I should try to rewrite the instructions again so that it’s clear. I’m not sure why I’m having such a hard time making this step in the instructions clear. I bought my bowls on eBay too!
Enjoying a delicious piece of oat bread right now. The bread turned out perfectly, thanks so much for the recipe!
Hannah
Hannah — wonderful to hear this! I love this one, too.
Greetings Alex,
Thanks for sharing your wonderful bread recipe.
I do like kneading it a little 🙂
The hardest part is waiting to taste it !
It’s the second time I make it, and is really delicious 🙂
Hi, I tried your bread, but something went wrong! just looking for some advice…I found that 3 cups of water was far too much. I even added another cup of flour after the prescribed 6 cups. I use instant yeast, and had no troubles with both rising times. I did not use the extra 1/4c. of water. When I baked it, it continued to rise, but with so much liquid, literally oozed over the sides, instead of making a nice, bread dome. The only thing I can think of is maybe I’m using the wrong oats? Though they are the old fashioned kind. I read all the reviews, and no one seems to think it was too much water, so, any insight would be helpful…I’m not a very seasoned baker: Thanks so much.
I substituted whey leftover from making mozzarella for the water. Delicious bread (and so easy!), thanks!
Awesome! Love this idea. How was the mozzarella? I would love to try my hand at it.
I have tried this recipe now 3 times and I love it! I have found that I much prefer the texture when baked in a cast iron loaf pan vs glass; it doesn’t rise as well but the texture is much nicer. Today I cut the recipe in half and it has turned out beautifully!
I am not a bread baker by design. I want to be however I lack patience. This recipe was right up my alley! Thank you!
Yay, so happy to hear this, Julia! I am curious about your cast iron loaf pan. Do I need to get one? It sounds cool. Is it a Lodge?
Yes it is; I actually have 2 loaf pans from them. Everything from bread, pound cakes, and meatloaf turn out AMAZING in the cast iron. You just need to really butter/oil the pans well.
I also wanted to add I made another batch this week and left the 2nd “loaf” still in the original glass bowl covered in the fridge. It did continue to rise for a few days in the fridge, but other than that, the bread came out of the oven as if I had mixed everything together that day. This is such an amazing recipe! I can do 7 minutes of work and have bread for the week.
Your blog is wonderful, a true gem! It has given me the confidence to expand my horizons and abilities. From one momma to another, thank you!
Oh Julia, you are too kind! You are so so welcome, and thank you so much for your nice words and for writing in.
I am so going to pick up some cast iron loaf pans the next time I am shopping (or perhaps later tonight if I take a peak at Amazon before bed :)). And I love that you can keep this bread in the fridge for a few days and bake it when you are ready. I have frozen the dough in the buttered loaf pan, and let it sit at room temperature for a few hours the day I plan on baking it — that works well, too. Hope you’re having a great weekend. You’re inspiring me to make bread tomorrow 🙂
I attempted to make this bread twice yesterday and each time, I was able to get the dough to rise well in the bowl but once I put it in the loaf pans, it didn’t rise. Of course, my bread is flat and dense. I’m not sure what I’m doing wrong. Any thoughts? This recipe is much like my grandmother’s recipe for white bread. The flavor is amazing. I just wish mine was fluffier.
Hi Mitzi, you are not the only one who has had trouble with this bread on the second rise. One question before I start brainstorming: Did you do the warm oven trick to let the bread rise? And if so, did you preheat the oven only for 1 minute total? Some people have made the mistake of letting their bread rise in a spot that is too warm and so the bread in fact cooks during the first rise. Let me know so that I can eliminate this possibility.
Thanks. I’m trying it again now. I did both of those things but I wondered if my oven got too hot in that short amount of time. Another question, are you able to stir all of the flour in with a spoon or do you use your hands. By cup 5 or 6 it was hard to get it to mix together. I’m relatively new to bread making. Thanks for getting back to me.
Mitzi, it is a little hard to work in all of the flour, but I do use a spoon. It sounds as though you might have a bit of a heavier hand with the flour than I do, too. Try just scooping flour into your measuring cup with another spoon or measuring cup, then level off with a knife. It’s better to err on the side of using less flour than more. And if your oven got too hot, there is definitely a possibility that your bread partially cooked during the first rise. Sorry for the delay in responding here! Hope you are making progress with the bread!
I use this recipe weekly and I love it!
It works very well as a starting place for variations as well.
Lately, I’ve sort of morphed it into a muesli breakfast bread, with raisins, dates, and dried cranberries, (I throw the dried fruit in at the 1st step to soak in the boiling water with the oats and sugar so they plump up), and either walnuts or pecans, depending on what I have on hand. I usually increase the sweetness a bit with molasses, and add cinnamon, cloves, nutmeg and a few drops of orange and vanilla extracts.
A few times I’ve even switched out the whole wheat flour for rye, which was delicious with molasses and dates.
Basically, this recipe takes whatever I throw at it and still works.
With all the additions, I almost never use as much flour as called for, but I do work a little more in after the first rise when I shape the loaves.
Thanks for sharing this recipe with the world. It made the idea of baking bread a lot less intimidating and has saved me a lot of money on breakfast.
Wonderful to hear all of this, Fay. I love the sound of a muesli breakfast bread filled with dried fruit and nuts — so healthy and such a great way to start off the day. Love the idea of the orange extract, too. I bet some zest would be good with all of those nuts and fruit, too. Definitely going to try some of these suggestions. Thanks so much!
Hi Alexandra!
I just stumbled upon your blog searching for scones recipes and found instead your bread recipes and you got me hooked on the “no-kneading” part. 😉 I tried your peasant bread yesterday and my family and I enjoyed it very much! WE had it for breakfast today, toasted with a smear of butter —- and it was delicious!!!! — no more store- bought breads from now on.
I really enjoy reading your blog and can’t wait to try other recipes 😉 Thank you!
So, this bread is seriously delicious. It tastes exactly how I hoped it would – lightly sweet, but not overly so, perfect with just some butter spread over it (although it sounds delicious with peanut butter or any other sandwich fixings). I did have some issues with it, but I’m thinking they’re probably mostly due to my high altitude (I’m at about 5,000 feet). I always add a second rise to breads before I shape them into the loaf pan because at high altitudes, breads rise too quickly and it doesn’t give the gluten enough time to develop, resulting in bread with no structure that falls apart when you slice it. I normally also don’t put my dough in a particularly warm place, just to help slow down the rising process a bit that way, too. However, I started this bread kind of late last night, so I went ahead and stuck it in a warm oven to rise. It rose very quickly, after about an hour it was huge, so I punched it down and let it rise again, which again it did very quickly. So I decided I’d do the last rise in the fridge so the gluten could have more time to develop. So I put the two loaves in the fridge to rise overnight. Well, I decided to check on them about an hour later and they were already ready for the oven! So I took them out and baked them, and thankfully they didn’t really rise anymore in the oven (I usually get pretty good oven spring so I was worried they would be enormous or would cascade over the sides of the pans). Anyway, slicing the bread this morning, it totally falls apart – there’s no way I could toast it or make a sandwich out of it. I’m still really pleased with the loaves because they taste SO good, but I’m going to have to tweak some things to see if I can get a better structure to the bread. I was a little worried about this because of not having to knead the dough, so I’m wondering if I need to knead the dough a bit? I’ll definitely not put it in a warm place to rise next time, and will try again to do the last rise in the fridge. I’ll let you know how it turns out!
Kelsey, hi! And thank you for all of this. It was so interesting to read. I am not familiar with high-altitude baking, so when I get questions about it, I never know how to advise. And I didn’t know that a fast rise inhibits gluten development, but, of course, that makes sense. I think your ideas make sense, and I think kneading will definitely help with the crumbling issue. A few other thoughts: what about decreasing the yeast some and letting the first rise happen slowly in the fridge, maybe even overnight? Then do the second rise at room temperature? You are inspiring me to experiment. I just made two loaves of Anadama bread from the Tate’s Bake Shop cookbook. I will report back if they are any good. Thanks again for writing in! Really appreciate your thoughts.
Dear Alexandra, hi! To give you just a bit of an overview, i am not a good cook. Not even by “home” standard. It gets worse with baking. Everytime i’m brave enough to attempt a cake or cookie or even the simplest brownie, 9 times out of 10 it’ll turn to a disaster and a huge waste of ingredients; let alone breadmaking.
Then i stumbled upon your no-knead peasant bread. With a genuine intention of being able to provide homemade bread for my toddlers, i gave it a try. It wasn’t what you call a total failure, but it’s far from perfect because the crumb texture was gummy and not appetizing. But quite strangely, i didn’t give up. There’s something about how you write that inspires me not to give up, and instead of feeling deflated as usual i was even eager to try again (perhaps because i can feel how you love to cook and bake for your family); until on the third attempt i can proudly tell you that i managed to make a decent no-knead oatmeal bread. The kids dislike it, but hubby loves it!
So to end this long story, i just want to thank you for sharing not only your recipe, but your spirit as well. Right now i’m waiting for the second rise of a new recipe, trying my hand on a kneaded bread.
Wish me luck!
Good luck! Teresa, thank you so much for writing in and sharing your experiences and being so honest. I wish I could spend a day in the kitchen with you making bread. But know that you are not alone — even the simplest bread recipes challenge many people. I am so happy to read that you persevered and have made an oatmeal bread you are proud of! Yay!! How did the kneaded bread turn out?
Perfect, if i do say so myself! Yesterday i made my third and fourth loaf (we finished the first and second loaves, no leftovers, which is pretty unusual) and the magic still works! I LOVE kneading! Combined with the soft smell of yeast, it’s so therapeutic! Now that i can make bread, i can finally feel like a woman! Lol…ok, i got carried away….thanks for responding, Alexandra, have a nice day!
You are hilarious! I love it. So happy you have found success making bread and that you are loving kneading to boot…best news ever!
LOVE LOVE LOVE this bread. I love the flavor of oatmeal in bread. I made my very first bread a couple weeks ago (finally got my kitchen aid mixer I’ve been dreaming of!) and it turned out good but it got me thinking… I love the taste of oats in bread so I began a search and found your recipe.
I was so excited. I made it yesterday and had some still warm from the oven and fell in love! This am I tried it again, toasted, best toast I’ve ever had! I ate had it plain today but I’m guessing with jelly, PB, or just about anything else it would be amazing !
Thanks so much for the recipe. I’m going to look you up and see what other recipes you have…
Thanks!!!
So, I must have messed something up this time. I’ve made this bread a couple of times (when I was living at a high altitude) and never had a problem with it rising. This time, I’m back at sea level, and for the first rise I put it in a warm oven to let it rise, but for the second rise I just put the loaf pans on top of the stove with the oven turned on (I wanted the oven to preheat while the dough was rising the second time, so I didn’t put them back in the oven), and the loaves rose, but very slowly. Like, I think I ended up letting them rise for about an hour and a half, and the dough was just at the rim of the pan, not rising above it yet. By this time it was getting late and I just had to get them in the oven, so I figured it would be fine to stick them in the oven how they were (I always get a good oven spring with breads, so I wasn’t worried about them not having risen quite all the way). However, I didn’t get any oven spring at all! So the loaves ended up being pretty dense, and they look more like a quick bread (and the texture is more like it too). Do you not usually get oven spring with these loaves? I was afraid that the dough was drying out too much sitting there on the counter for so long (I usually don’t cover the dough for the second rise).
The other question I have is, how long does it usually take for your water to cool down to room temp after you add it to your oat mixture? It’s been a while since I made these loaves, so I don’t remember how long it used to take, but I had to leave it for a couple of hours before it felt cooled down enough, and even then I added a couple cups of flour to the mixture before adding the yeast (and our house is cold!). Anyway, the mixture sat there so long that the oats soaked up a good amount of the water, it seemed like they soaked up more than normal. And then I couldn’t add all six cups of flour because it seemed like it would’ve been too dry, so I only added at most 5.5 cups (probably more like 5.25 cups).
So, there were a couple issues this time, and I was kind of bummed about how the loaves turned out, but they’re still edible, just not quite as enjoyable as usual. Any thoughts? Thanks!
I tried this at the request of my teenage son, adding chopped walnuts along with the oatmeal at the start of the recipe. It came out so well! Beautiful toasted, especially with a little cheese melted on top. My son has eaten half a loaf in 24 hours – success! Now to find somewhere to hide a few slices so I get some, too ;-).
Yay! So happy to hear this! Hiding spot: the freezer 🙂 Slice up what’s left, wrap them up, and tuck them away. The frozen slices toast beautifully.
Two loaves are looking and smelling fabulous as they bake right now! I’m wondering if you’ve used a Thermopen to determine when the bread is done? I rely on one and usually aim for 195F. Or so. Thoughts? Determining a hollow sound is do-able, but I like science!
I do! I aim for 207F-210F. I like science, too 🙂
This is a good article about bread temperatures. https://blog.kingarthurflour.com/2017/04/07/using-a-thermometer-with-yeast-bread/
I have made your peasant bread with wonderful success. It is delicious and gave me the courage to keep baking yeast breads. When you call for a cup of flour, what is the weight you usually use? 5oz? Thanks!
Wonderful to hear this, Donna! I typically weigh in grams now, and my standard is 1 cup = 128 g, which is about 4.5 oz. So happy you like the bread!
I messed up the raises, and ended up with dense bricks as a result, but they are the most delicious dense bricks! The slightly sweet-oatmealy-salty-yeasty flavor–so good. Will definitely try again! Thank you!
Whenever I do that, I make them into croutons!
I am noticing a different issue with this recipe. Once it has cooled to lukewarm, which I am putting at around 100 F for the active dry yeast optimal temp, I don’t find there is enough liquid. My dough is not wet, like in the other recipes, it is definitely drier and more stiff. I usually have to finish incorporating the flour in my stand mixer with a dough hook. The bread seems fine when it’s baked and rises and all that. I’m wondering if it’s because I live in a dry, northern climate? Would adding more water be ok, or should I just leave it be?
Hi d! Sorry for the delay here. Yes, definitely add more water to get it to the consistency you like. I’m sure your climate is affecting the dough … so many factors contribute to why doughs behave differently for different people even when working with the same recipe. Let me know if there is anything else!