
Gluten-Free Peasant Bread Recipe
This post may contain affiliate links. Please read my disclosure policy.
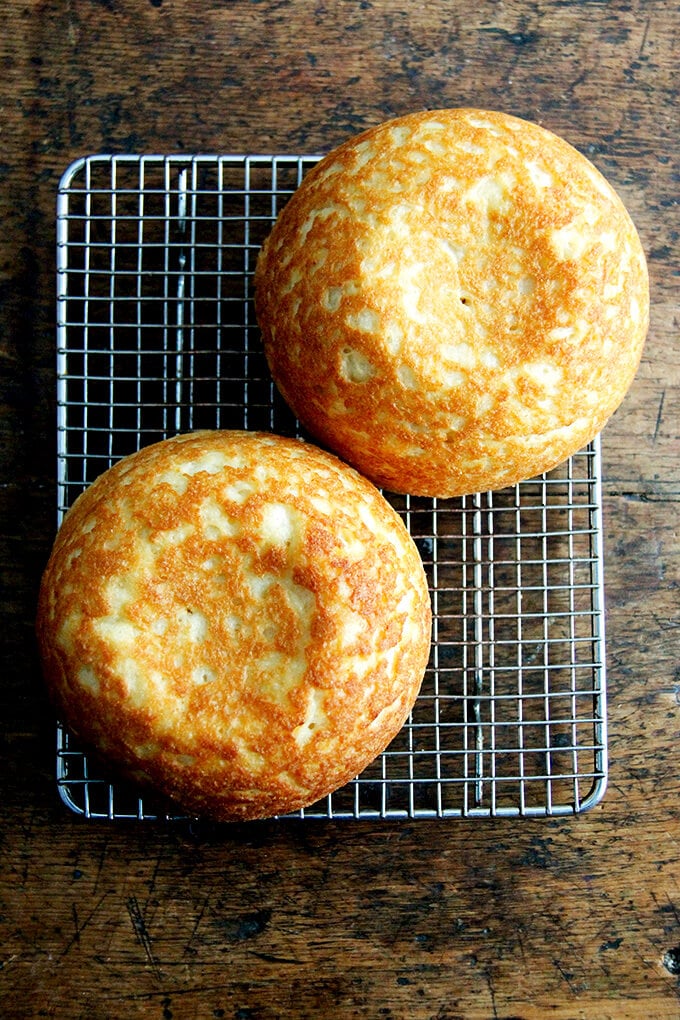
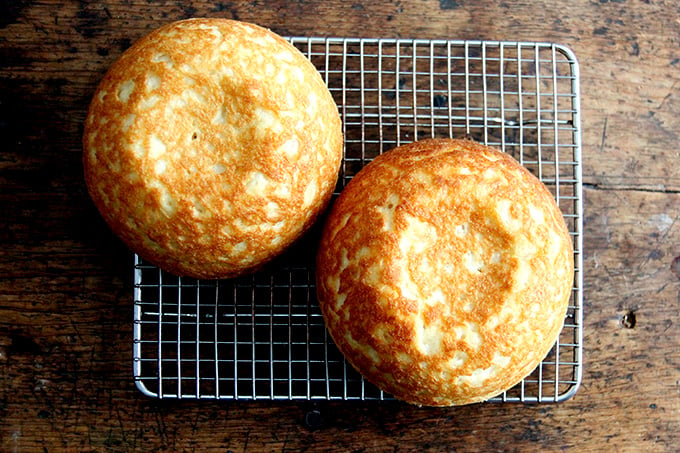
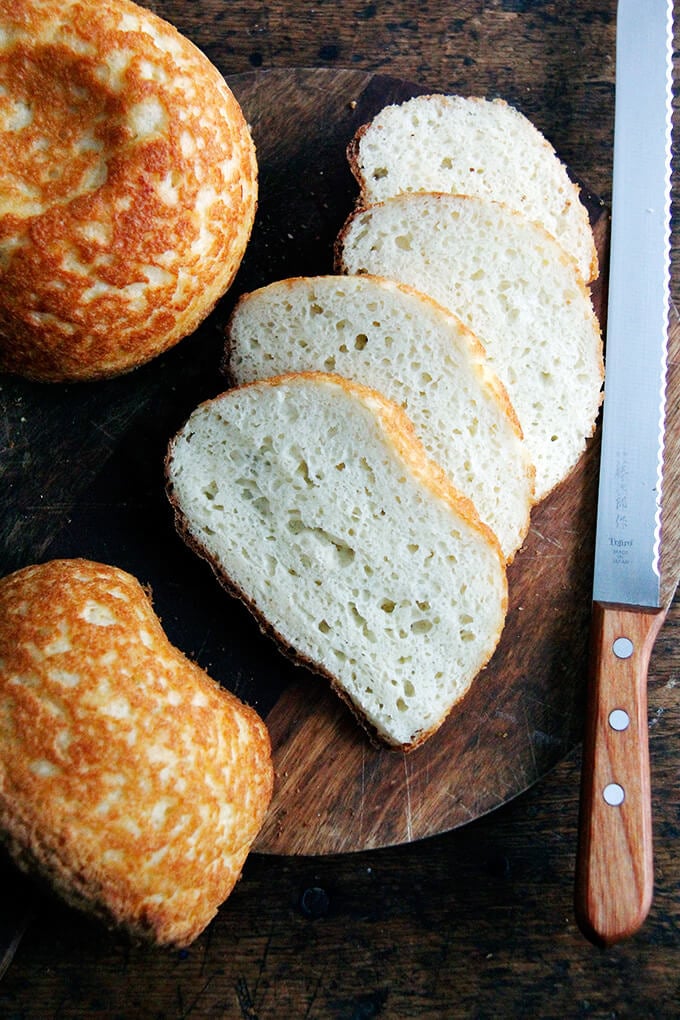
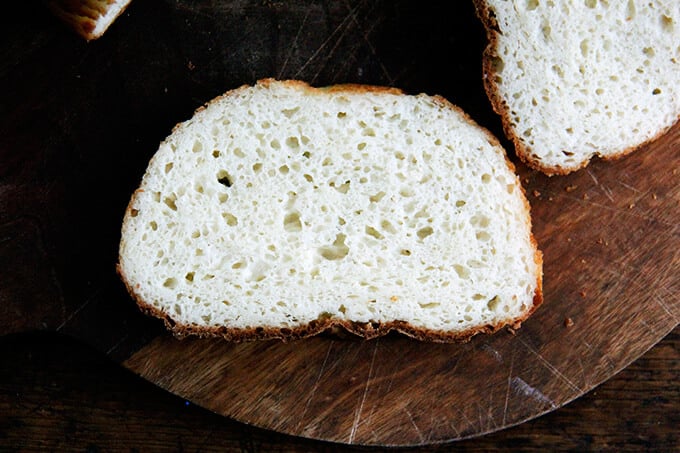
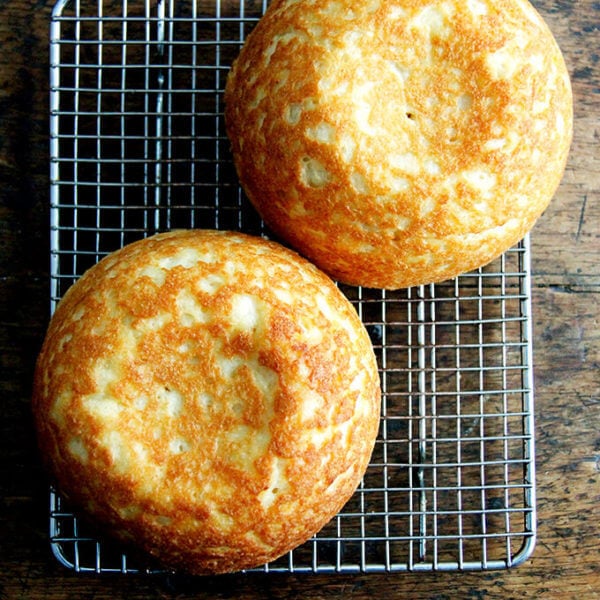
This gluten-free peasant bread has such a nice texture — soft and spongy, light and moist — and moreover, when sliced, the pieces hold their shape. Bread lovers, even those not adhering to a gluten-free diet, rave about the texture and flavor of this bread. This recipe comes from my cookbook, Bread Toast Crumbs!
For the past year, the most frequent question asked on this blog is this: Can the peasant bread be made gluten-free?
Everyone knows someone — a friend, an uncle, a cousin — recently diagnosed with Celiac disease who has had to forget bread as he/she once knew it.
You might have this friend, this uncle, this cousin. I do. And you might want to treat him/her to a loaf of freshly baked bread but you don’t know where to begin.
This is the position my mother found herself in a month ago while preparing for the arrival of her brother-in-law, who had recently adopted a gluten-free diet. Panicked by the thought of serving dinner without warm, fresh bread on the table, she called asking if I had ever successfully made the peasant bread gluten free. I answered as I have to everyone who has asked thus far: no, not yet.
It seemed like a good time to take an earnest stab at making a gluten-free peasant bread. Unfortunately, a respectable loaf did not materialize before my uncle’s arrival, but one has since.
Gluten-Free Bread Baking Tips
- For every cup of flour (128g), use about a teaspoon of xanthum gum.
- For every 2 cups of flour (128g), use 1 egg.
- Use a little more yeast proportionally to help lighten the bread’s texture.
- Use a high-quality gluten-free mix, such as C4C or King Arthur Flour. If your gluten-free flour mix contains xanthum gum, no need to add additional.
Gluten-Free Peasant Bread Recipe
- Total Time: 2 hours
- Yield: 2 loaves
Description
From my cookbook, Bread Toast Crumbs.
For best results, use a digital scale. It makes all the difference with bread baking.
Note: If you are using a different brand of gluten-free flour, you may not need all of the liquid. Because all gluten-free flours and mixes absorb water at a different rate, you may find your dough to be much more liquidy than mine — this is due to the flour. This is what I suggest: add the liquid a little bit at the time, mixing with a spatula to combine. Reference the video to see what the dough should look like as far as texture goes.
Loaf Pan: I have not tried this yet, but someone emailed me recently letting me know she bakes the entire batter in a 9×5-inch loaf pan, so if you don’t have the 1-quart Pyrex bowls, know that a 9×5-inch loaf pan is an option.
Ingredients
- 4 cups (500 g) gluten-free flour—my favorite is Cup4Cup, see notes above if using a different type of gluten-free flour
- 2 teaspoons (10 g) kosher salt
- 2 1/4 teaspoons (8 g) instant yeast
- 2 cups (455 g) lukewarm water
- 2 tablespoons (42 g) honey
- 2 eggs lightly beaten
- 2 tablespoons (28 g) olive oil or grapeseed or other neutral oil
- 1 teaspoon (4 g) white wine or cider vinegar
- softened unsalted butter for greasing
Instructions
- In a large bowl, whisk together the flour, salt, and instant yeast. In a medium bowl, pour the water over the honey and stir to dissolve. Add the eggs, oil, and vinegar. Add the wet ingredients to the dry and mix with a spatula to form a batter. (See notes above if you are using a different brand of gf flour.)
- Grease two 1-quart oven-safe bowls (or a 9×5-inch loaf pan, see notes above) with the softened butter—be generous. Divide the dough evenly between the prepared bowls. With wet hands, smooth the surface of the dough. Let the dough rise in a warm or draft-free spot for 30 to 45 minutes, until the top of the dough just crowns the rims of the bowls — this may take longer… just be patient and wait till the dough crowns the rim: it might take as long as 2 hours if your kitchen is cool. Halfway through the rising, set a rack in the middle of the oven and preheat it to 425 degrees F.
- Transfer the bowls to the oven, and bake for 15 minutes. Reduce the heat to 375 degrees F and bake for 17 to 20 minutes more, until golden all around. Remove the bowls from the oven and turn the loaves out onto the cooling racks. Let the loaves cool for at least 20 minutes before cutting.
- Prep Time: 15 minutes
- Cook Time: 40 minutes
- Category: Bread
- Method: Bake
- Cuisine: Gluten-Free
This post may contain affiliate links. Please read my disclosure policy.


527 Comments on “Gluten-Free Peasant Bread Recipe”
I’ve been doing GF baking for a while and will certainly be trying this peasant bread recipe very soon. Just a comment on your reference to the top surface of the bread being “funky” – if you just wet a rubber spatula (or your fingers) with water, you can gently smooth out those bumpy edges. Also if you have to handle the dough at all, wet fingers keep it from sticking. I also find sometimes 1 to of x an thin gum per cup of flour can be a bit “slimey”. I use just a wee bit less, but in saying this I realize this might also depend on the texture of the flour. I’m always experimenting! Thanks for sharing your recipe!
We’re now eating Paleo, but before that we were gluten free for several years. I’ve been cooking/baking from scratch my entire life, so these changes are challenging, to say the least.
Bob’s Red Mill is an excellent resource. For bread, pizza crust, and rolls we liked Sun Flour Mills best: their mixes are easy to use, and they have a nice variety. They even have award winning chocolate cake and carrot/spice cake mixes that are heavenly!
Thank you for the recipe — I’ll try it one day, when I can’t stand life without bread one more minute 🙂
I mix my dough in a large glass bowl and put it on top of my steamer and cover with plastic wrap for the first rising of 90 minutes. (I put coconut oil in my glass square pyrex bowls with parchment paper (2 pieces) cut to fit inside the dishes (the coconut oil keeps the parchment agains the dishes) and use spatula after the first rising into the parchment paper and let rise again in the square dishes. This allows me to take out of dishes easily when finished baking and I can cut thin to make shrimp or crab toast with pimento cheese (i do not use mayo in the pimento cheese mix, just the juice of the pimentos in the pimento cheese) sprinkle with chives and feast. I am not sure about adding pictures to your comment site….if you want pictures, let me know and I will send to an email if you will provide one for me. You can use these pictures if you want on your website.
Blessings, Anne
Wonderful to hear all of these tips. Thanks for sharing! I don’t think my blog is high-speed enough to allow photos in the comments :), but I of course would love to see your pictures. Here is my email: ali.c.stafford@gmail.com. Thanks!
Hello Alexandra – Wondering if you’ve yet tried the recipe with C4C (as you mentioned above ) and how it turned out?
Congratulations on your book-writing project. I will be first in line to purchase & now know what I will buy everyone for Christmas in 2017!
Thank you for the continued inspiration in the kitchen & in Life.
Every best wish.
Kathleen Mary
Kathleen, I have not unfortunately. I was on such a roll experimenting with this recipe, and then I just stopped… I need to get back into it. I still have the flour. And now that I think of it, I have a few egg whites I need to try. I will report back. Bug me if I don’t 🙂 Thank you for your kind words. Means so much.
I use better than cup 4 cup with very delicious results. I simplified the process by mixing in a big bowl….then immediately transferring to my square baking dish lined with parchment paper (make sure all glass is covered with parchment paper) then I rinse the big bowl and put boiling water in the bowl and placing the parchment paper filled dish on top of the bowl (make sure boiling water is below the bottom of square dish) cover with a towel and and let rise for 90 minutes and bake at 400 for 35 minutes. I increased the proportions to 3 cups of better than cup 4 cup flour… Increasing the other proportions appropriately… When finished baking I just lift the parchment paper and removed the paper and put on wire rack to cool. I do not do the second rising. Just once for 90 minutes
I use in square dishes which Works so well and the slices are shaped perfectly for sandwiches or shrimp toast.
I have also put seeds in the mix. Pine nuts, pistachio. Sesame both white and black. Black seeds Sunflower and pumpkin. I some times add dried fruit mango. Papaya. Date. Fig. Ginger. Wolf berries. Apricot. Pineapple. All diced small to make a seed and fruit bread. So delicious.
I have made it with Better Batter (www.betterbatter.org) and it works beautifully. It is similar to C4C. I hope that helps….
Thank you for sharing the link — I will check it out!
I have made the regular Peasant Bread for my family, they loved it! But my digestive system doesn’t do well with it. I was so happy to see you had a gluten free version. After reading all the comments. It was so helpful all the suggestions. I have had the best luck with Pamula’s baking mixes. It is an expensive endeavor to try and try. King Arthur is also amazing. I was told by a chef that flour has a lot of protein in it, and GF flours don’t. So he suggested I use an extra egg for the protein, not just the whites and whites are hard to digest. Quoina is a complete protein so it might be a good choice. I have heard raves about coconut flours. Gluten is the elastic for the bread and give regular bread that wonderful texture. So with GF breads one has to substitute the elastic therefore the use xgum ( but thanks Gail for your very informative post) I will be trying your suggestion! Guar gum! My final point is thank you for your efforts! I can not afford to waste food and I just don’t eat bread but will try again!
Gwendolyn,
Quick word of warning about coconut flour: it absorbs moisture much differently than other GF flours. It is truly a thirsty flour, therefore you must adjust your liquid quantity as such.
In adding an extra egg, that will also change the liquid:dry ratio and could possibly result in a bread which sinks once it sets. Generally, the reason an egg white is recommended is because you can whip it and add in structure, protein and some airiness rather than just more liquid.
I say try both if you can, but do so with less $$$ flours while you are playing. I know it’s painful. In opening my GF bakery 6 years ago, I probably wasted over $8000 on flours! Now, I’ve been approached by a large company to do R&D for bread, pizza crust, pie crust, etc. and the first sample batches are on my dollar to prove myself to them. Ouch!
Oh, also, if you are going to try out the bread again and don’t want to “waste” your money on experiments, make sure it isn’t a humid or rainy day. That also affects GF flours. Imagine the flours as a PMSing teenage girl. 🙂
Don’t get discouraged, they just need a little extra special handling.
Mary
I made the original and absolutely loved it, as did my family and dinner guests. A friend needs gluten free, so I replicated your buttermilk/water experiment, using xanthum gum in both. Mine looked exactly like yours when baked. I liked the buttermilk better than the water but both were a little gummy in texture. After reading gail’s comments and doing some research, I am going to try the buttermilk with psyllium instead of xanthum. Thanks so much for the fabulous original recipe (i bought vintage Pyrex bowls at an antique store =] ) and am really hoping to find the magic combo for the gluten free version. Have a great day !!
So happy to hear this! I’ll be curious to hear how the psyllium experiment goes. I bought some, too 🙂
THANKS!!! I just made this tonight and am so thrilled to have warm bread with melted butter. I followed your recipe exactly (C4C flour with xanthum gum already in it so I didn’t add any and quick acting yeast). I put melted butter on top of the dough before I put it in the oven and my top looked beautiful (like the original). I have not let it cool yet, so I can’t comment on how well it tastes as sandwich bread, but for a warm dinner bread with butter and jelly it is so yummy!!
Sharon, wonderful to hear this! I can’t believe I still have not tried this with C4C flour yet. Need to immediately. Love the idea of melted butter on top — perfect.
I made this again today with even better results. I used:
2 cups of buttermilk
3 teaspoons sugar
1 packet instant yeast
2 cups (256 g ) gluten-free flour (C4C)
2 cups oat flour
2 teaspoons (6 g) xanthum gum
2 teaspoons (6 g) kosher salt
1/4 cup honey
4 egg whites (80 g)
room temperature butter, about 2 teaspoons
After I divided the dough into the baking bowls, I brushed the tops with melted butter and sprinkled them with quick cooking oats. The result was the best texture with a great taste. It sliced great and will make great sandwich bread.
My 13 year old daughter is the pickiest eater. She goes days eating only cereal. She tasted this bread tonight and ate SEVERAL pieces. This was the best compliment and shows me it really does not taste gluten free!!!
Wow, fantastic! Thanks so much for sharing your variation. I’m excited to try this with c4c and oat flour. Fun! Love that your daughter approved 🙂
OOPS!! Only 2 Cups of Buttermilk!! Not 4
Oh, thanks! I’ll edit your comment to reflect the accurate amount 🙂
My family loves your mothers peasant bread and I’ve been so hoping I could make the gluten free peasant bread to closely resemble it. I weighed my flour (275 grams total – I used Bobs Red Mill 1-1 baking flour (3/4 cup), brown rice flour (3/4 cup) and 1/4 cup of Golden Flax Meal.
The bread smells amazing while it’s baking and tastes wonderful. It reminds me of a honey wheat berry.
It’s so good that both of my kids were begging for some if it as though it was wheat peasant bread!
Thank you, thank you for posting this recipe, all the instructions and pictures!
So happy to hear this, Debbie! Love the sound of your gluten-free mix.
I have a set of Gooseberry nesting bowls, but I have been afraid to use them for baking since I didn’t know what temperature they could take in the oven. Great to have your temperature information as well as a wonderful recipe that tastes delicious. Thanks so much!
thank you so much for sharing this recipe. I would like to make it for my gf daughter in law for Christmas dinner. Can it be made ahead and frozen?
Absolutely! Once it is thawed at room temperature, I would warm it in the oven before serving.
This recipe and entire blog post is absolutely amazing. When I first found it, I would drag my husband to take us to the thrift store to look for these magical Pyrex bowls you talk about. We finally found a big glass one, which we now use as a mixing bowl, and I also bought a proper 441 off the internet that I adore. The first few times I made this recipe (I’ve made it like six times now??) I actually baked it in the bigger glass bowl, and the results, while edible, were less than desirable; however I still used the bread to make some GF stuffing for Thanksgiving. 🙂 My last few tries have been in the cute 441 bowl, and with a very few slight changes, my husband and I are now craving this bread! Ahhh I can’t tell you how thankful I am for this, especially considering the $5+ loaves of gf bread at the store… Anyways, here are the changes I make real quick:
2 TSP sugar instead of 1 ½ TSP;
One whole egg instead of two egg whites;
And, lastly, the gf flour we have (Krusteaz) already has xanthum gum in it, so we don’t add any extra.
In regards to buttermilk, milk, or water… I’ve used almond milk, half almond milk half water, and water. Honestly water has been our favorite; maybe we’re more texture oriented than flavor? Dunno 🙂
Basically THANK YOU. Eating gluten free on a budget is difficult, but you’ve made it so much easier with this recipe!
Holly, you are too kind! Thanks so much for writing in, and I so appreciate you sharing your changes because it sounds as though you have really perfected it. I love the idea of using a whole egg instead of the whites — it’s not ideal having a jar of yolks in the fridge 🙂 — and I love the idea of cutting back the sugar, and I love that you prefer water to everything else…sometimes simple truly is best. Thank you thank you for writing in!!
I’m doing a very restricted diet due to many allergies. Wondering if you could use coconut milk (full fat) instead of buttermilk? I don’t do any grains so would have to use coconut or almond flour any ideas on ratios? I’m guessing that I would use a whole egg. Before I went GF I always said I could never give up bread. God is so funny , he won’t give us more than we can handle. But I have avoided GF bread b/c most of it tastes like wet cardboard. This recipe actually sounds appealing. Guess I need to get back into bread making. Gave it up after trying a few recipes with dismal results. Thanks for sparking the interest again.
Hi Kathy,
These are great questions, and I hope I can offer some guidance. I have never tried almond flour or coconut flour in this recipe, but I think you might be best making your own homemade blend using something like this grain-free blend recipe, which sounds promising. I think if you use coconut milk, you might need to thin it with some water as it is thicker than water, so the flour mixture might not absorb as well without a little bit more liquid. Let me know how it turns out if you give it a go!
I just made this and it is THE best gluten free bread I have ever tasted. I used aquafaba instead of eggs because I’m vegan and I forgot I was making it so it sat in my oven 5 hours. The extra rise time naturally made it a slight sourdough. The crust was crispy and chewy and the inside was light and fluffy. Thank you
so great to hear this, Carrie! And nice move on using aquafaba … I’ve read about it on Food52, but I’ve never tried using it. Excited to try! Thanks for writing in.
Has anyone tried this with almond milk, and if so,what were the results?
I made it with Bob’s Red Mill 1 for 1 GF baking mix, which has the xanthan gum in it, after first try with KA gluten free baking mix, did not have to make any other adjustments and I think I liked it better. Might try with lactaid 1 time, so my daughter can enjoy it.
Nice! Great to hear about the 1 for 1 baking mix. I’ll have to try it. Have you used C4C?
Have not seen C4C, we do have a local GF bakery that puts out a flour blend, I may try theirs as well.
Do you have any other GF recipes, especially breads or rolls?
I don’t have too many, but I a gluten-free bread in my cookbook, which comes out in April, and I modeled the recipe after C4C because it works so beautifully. It’s expensive, but the texture of the dough is always so nice.
FYI – I have also now substituted egg-beaters for my SIL who has egg allergy and thinks she now needs to be GF (as if one is not challenging enough, let’s have 2 problems! oy) and came out great, I also decided to use whole egg instead of egg whites, as I wanted to make 2 breads and don’t have much use for just the yolks, and it also turned out great.
I just left a question on your thyme rolls, as I would love to know if they would work GF.
Thanks for the great ideas – from formerly a baking hater!
Stephanie, SO sorry for the delay here. Just responded to your thyme dinner roll question. So great to know that whole eggs work in place of the whites — it is a pain storying and stashing and trying to remember to use the yolks or whites or whatever you don’t have use for at the moment. Thanks so much for writing in!
Hi thank you for this great recipe. Just a suggestion that you may want to make a gram measurement correction for the Salt and Gum. I strickly bake gf based on gram measurements. Thanks again!
So true! Will weigh them next time I make this. Thanks!
I’m a little spooked about using a pyrex mixing bowl, since the warnings on the current pyrex bowls say they must be used in a preheated oven, and even then I keep hearing about exploding pyrex. I’m trying to find alternatives, but most of the products marketed for ovenware doesn’t seem to have that round shape. Could a 1 quart souffle dish be used? It has much higher sides, would that be a problem.
Also, about how many portions does this make? A one quart bowl holds four cups — I looked at my 4 cup measuring cup and that seemed tiny for bread!
Thanks for posting this great recipe, and for experimenting with gluten free baking.
Hey! You can use any oven-safe vessel. The 1-qt Pyrex just make a really nice shape, and they’re easy to butter, easy to clean, easy to store … I love them. I order them 22 at a time (to get free shipping) from Shop World Kitchen, and I give them to everyone I know 🙂 Have no fear of exploding Pyrex!! I have seen those videos, however, and they are terrifying. The 1-qt soufflé dish will be great—I’ve used this in fact. It’s not too small.
Also, this is the gf peasant bread recipe from my book, Bread Toast Crumbs, which just came out, and I prefer it to the recipe posted here: https://feedmephoebe.com/best-gluten-free-bread-recipe/
Just made this. My bread turned out very hard, I wonder if that’s because the king arthur brand was an all purpose baking mix that had baking soda. The inside was moist, but outside was a brick.
Which one did you make? The old one or the new one from Bread Toast Crumbs? The one from BTC works particularly well with Cup4Cup flour. I can’t say how the baking soda would have affected the texture, but in the future I would look for gf yeast bread mixes as opposed to quick breads. With the BTC recipe, if you don’t use Cup4Cup, be sure to add the liquid slowly to the dry ingredients. You may not need all of it.
Did the first one. I see C4C has milk in it, and wonder if that gives the roll a better texture and taste? For someone who’s lactose intolerant, I wish I could try this. What noticeable difference was there between the two?
The texture is so much nicer with the C4C. I’m sure the milk has something to do with it. I’m sorry you’re intolerant! Wish I could offer more guidance. If you find a gf flour you like, I would suggest again just adding the liquid slowly as you may not need all of it. Hope this helps.
I made the bread, so good!I’m not used to buttermilk (or in this instant vegan milk), so what are the steps for that? Add lemon or vinegar to milk, and then add the sugar and active dry yeast, and wait 10 minutes? Are those the steps? I’m using active yeast
Hi! First, you want to make sure your buttermilk (or vegan milk) is not super cold, so zap it in the microwave or warm it up — but very very briefly. It should just be warm to touch. Then sprinkle in the sugar and yeast and let stand until foamy. Then proceed with the recipe.
NOTE: I highly recommend trying the recipe below the one you are reading from my cookbook Bread Toast Crumbs — use it with C4C flour … so good.
Help! I’ve been making the peasant bread with success but wanted to try this gluten free version. Is there only one rise here?
Yes! There’s no gluten development with gluten-free bread, so only one rise is necessary. Question: which of the two recipes above are you making? I highly recommend the one from Bread Toast Crumbs that calls for Cup4Cup Flour — the recipe featured in the video.
Also, be patient with the rise, especially in these colder months. It may take as long as an hour.
Can almond flour and almond milk be used?
Probably yes to the almond milk, but no to the almond flour … gf baking is so tricky. I am not an expert with gf baking, so can’t make too many suggestions here.
I’m soooo happy I found this recipe – I love love love all your recipes but my sister in law is gluten free. I made this twice so far – the first time was a bit doughy but I wasn’t baking at home. The 2nd time at home, I double sifted the cup for cup and added 1/4 cup more – it was heavenly. It looked and tasted like your original peasant bread! My sister in law said it was the best bread she’s ever eaten and is so happy to have “real” bread again. Thanks again
So happy to hear this, Michelle! Out of curiosity, what kind of gf flour did you use? and did you use a scale? Thanks!
I used Cup 4cup and I didn’t use a scale, I just used a measuring cup after double sifting. The GF flour seems a little heavier so i thought sifting it would help it be a little lighter.
Could you make this bread into bun size rolls for sandwiches? How much would you use in each cup. My small pyrex bowls are 4in diameter and almost 3 in tall. Also, how long should they bake. I am new to gluten free and have never tried to make individual rolls before. Schar makes a ciabatta roll and I think the taste is pretty good. It is just so expensive. I have already tried another recipe but it didn’t turn out so great. This bread looks really good and I thought I’d give it a try. Thank you
Rolls might be tricky — gf breads really do best when they are baked in either a loaf pan or any pan with sides to give it more support as it bakes. I think if you really want to do buns, you should invest in a jumbo muffin tin or even one of those muffin-top tins. I worry about how these would bake if just shaped and set on a baking sheet free form …. I just don’t think they would bake very well. Wish I could be more positive!
Could you half the recipe? Will be baking this for sure when my mom comes to visit next month. Thanks so much for posting this recipe so she can enjoy fresh baked bread!! I make your non-gf peasant bread all the time.
Yes, absolutely! So happy to hear this 🙂
Forgot to ask, do you prefer the C4C to the King Arthur flour in this recipe? I think you said you used the KA flour in the older gf peasant bread recipe, but in the video for the updated recipe you are using the C4C.
Thanks!!
I prefer the C4C!
Alexandra, Thank you for this GF recipe. I have two granddaughters with Celiac and we all love this recipe. Your cookbook is also a hit; it has become my favorite gift!
Diane Smith
So happy to hear this!
The is an excellent recipe. I have made it twice and it came out great both times. The second time, I used 3 cups Bobs one to one flour, 1/2 cup high maize flour, a few tablespoons of flaxseed, 2 tsp psyllium and the rest of that cup, oat flour (just to increase the fiber). I made this batch today. It looks like whole grain bread. I was afraid it would not raise, but it did and baked up nicely. I use the microwave to let the dough raise, by boiling a cup of water in the microwave, then when done, placing the two bowls in the microwave for the time needed to raise. I do not turn the microwave on when the dough is raising, but leave the hot water in there. Works great. Thank you so much!!
So happy to hear this, Teri! Your flour variations sound wonderful, too, as does your microwave trick. Thank you!
Just made this for dinner last night – we had GF friends coming over. It worked perfectly — I used the cookbook version of the recipe, C4C flour and a scale to measure it. I let it rise about 55 minutes and it never quite got to the height of the bowl rim, but it turned out just great – moist inside, and nice crispiness to the outside (well buttered bowls!). Everyone, GF or not, loved it. I couldn’t believe it was so easy and required so little time start to finish. Thanks Ali!
So happy to hear this, Laura! I should make a note about the rising time … sometimes, especially as it gets cooler, it just takes longer to rise. But I’m so glad you went for it and that it worked. So glad your friends approved, too!
I made the GF peasant bread featured in the Vimeo link and in Alexandra’s cookbook. It took about 1 hour to rise, but I think that is due to wetness of the dough and winter. For the last 6-7 minutes, I turned the temperature from 375 to 400. First time making bread, let alone GF. Omg, the results were amazing. We had it warm from the oven with butter and salt as Alexandra thoughtfully suggests. One of the small loaves is already gone, devoured almost entirely by my husband. Thanks so much for sharing a wonderful recipe, so he can now have GF bread that is actually tasty! Was also a joy to make!
Hina, I’m so happy to hear this! I should make a note about rising in the winter … you were smart to let it rise as long as an hour. Thanks for reporting!
i followed the recipe very badly because it’s my first time, i was super nervous (always thought bread would never be anything I could do) and still came out more than edible, it tasted GOOD, it was springy and spongey and delish.
It did come a lil salty but that was *my* bad bc i used table salt bc i don’t have gluten free kosher salt and i used the same amount of table salt so, if you’re using fine salt, add less, but seriously-
zero effort, just throw these thing let it do it’s bread thing and that’s it
Happy to hear this, Panur!