Bialy Recipe: A Step by Step Guide
This post may contain affiliate links. Please read my disclosure policy.
This post shows you step-by-step with lots of guidance, how to make a simple, foolproof, and delicious bialy recipe at home using a no-knead, overnight method. Let’s do this!

This past fall, while teaching cooking classes, I met a man named Len, who loved to bake and who always showed up to class a few minutes early, ready to help with any remaining prep work, always with some sort of baking adventure to recount.
Before the last class, Len asked me if I had ever made bialys, which he had learned to make at a “bagels and bialys” cooking class held at the local community college. When I told Len I hadn’t, he assured me bialys were very simple to make — much simpler than bagels as they don’t require boiling. He sent me the recipe later that night.
What is a bialy?
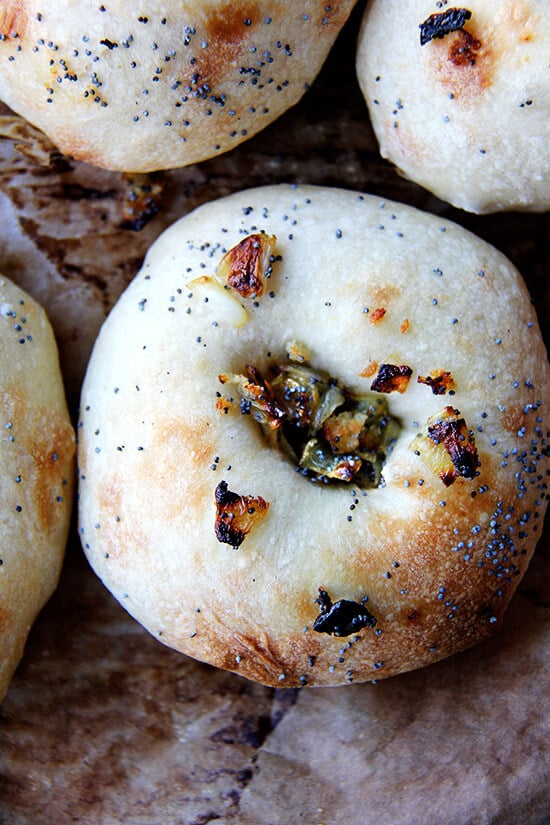
A bialy is a type of bread, similar in size and shape to a bagel, containing a depressed center, which is filled with sautéed onions, poppyseeds, and fresh bread crumbs.
Bialys originate from Bialystok, Poland and are a traditional dish of the Polish Ashkenazi Jewish cuisine. While they are often likened to bagels, they taste more like a roll. They’re not as chewy and are much lighter in texture than a bagel.
Overnight, No-Knead Bialy Method
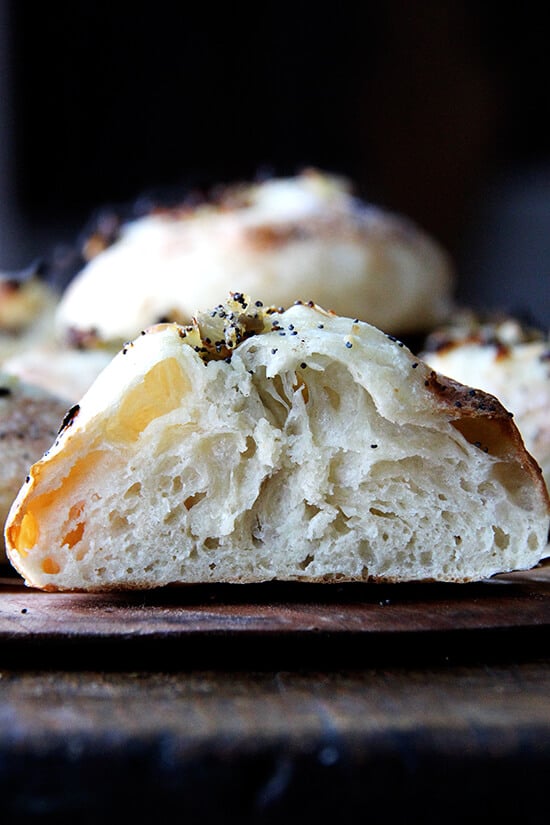
This bialy recipe is very similar to the Jim Lahey no-knead pizza dough recipe. As you know, I love the Lahey no-knead, slow-rise technique, which creates beautiful air pockets in the final product, whether it’s a boule, a pizza, or something else.
The overnight method works beautifully for bialys and, as it turns out, so does the no-knead method.
How to Make Bialys
- Whisk together flour, salt, and instant yeast. Add water. Stir to combine. Let rise at room temperature.
- Twelve hours later the dough will have doubled in volume, and its surface will be dimpled with bubbles.
- Portion the dough and ball up each portion.
- Make the onion, poppyseed, bread crumb filling.
- Make a well in the center of each portioned dough ball; then fill with the onion mixture.
- Bake on a preheated Baking Steel for best results.
How to eat a bialy?
Bialys can be eaten on their own, without a smear of butter or cream cheese. That said, here are a few more ideas:
- Halve and toast day-old bialys; then spread with softened butter or cream cheese.
- Bialy egg sandwich: Broil one half covered with a slice of cheddar; broil the other half naked. Slide a fried egg onto the toasty, naked half, and hit it with a healthy squirt of Sriracha. Top with the cheesed half. Enjoy.
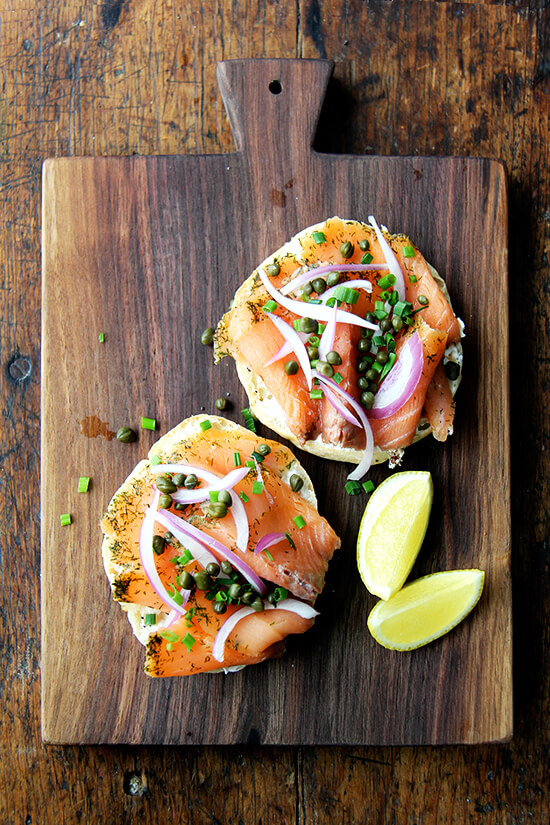
- Halve it, spread it with cream cheese, and top it with gravlax, capers, onions, chives and lemons. So good.
5 More No-Knead Bread Recipes to Try
- My Mother’s Peasant Bread
- Foolproof Homemade Bagels
- Easy, Homemade Pita Bread
- The Best, No-Knead Brioche Buns
- Overnight Refrigerator Focaccia = The Best Focaccia
All the bread recipes right here: Bread Recipes
Here’s the play-by-play: Mix the dough and let it rise at room temperature for 12 hours.
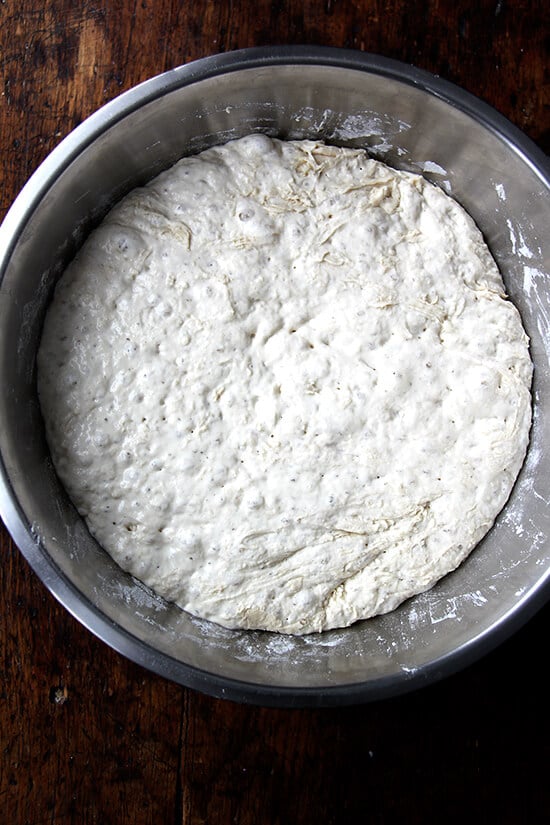
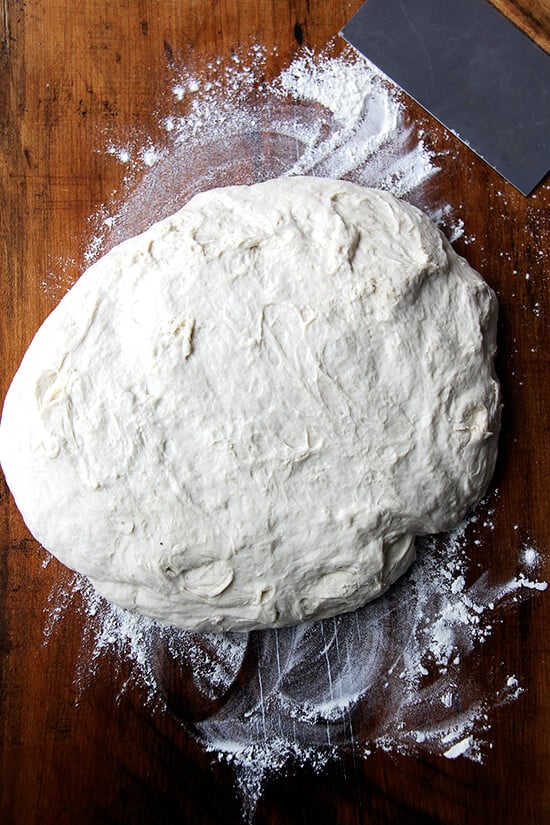
Turn the dough out onto a floured work surface.
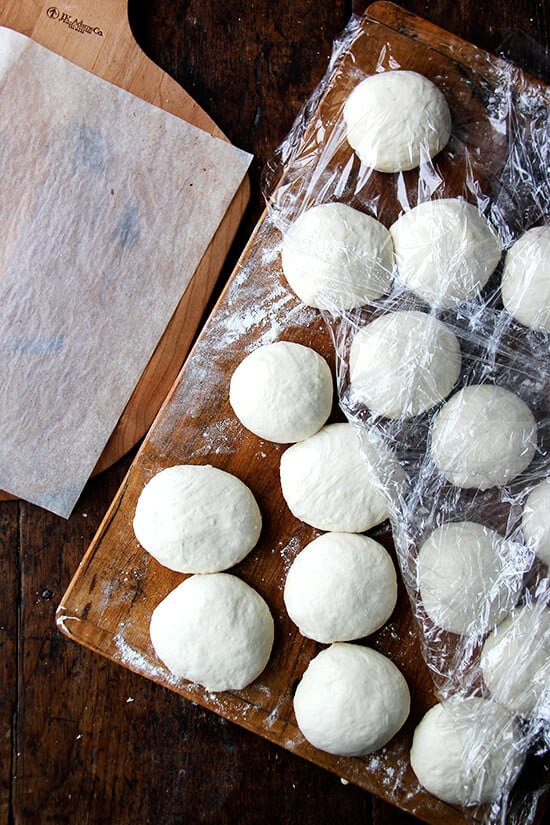
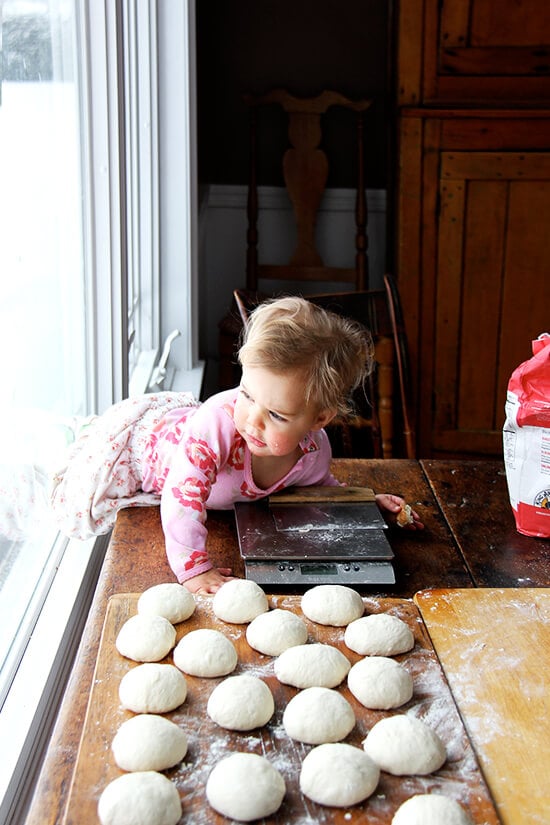
Portion the dough into 18 (roughly) equal pieces.
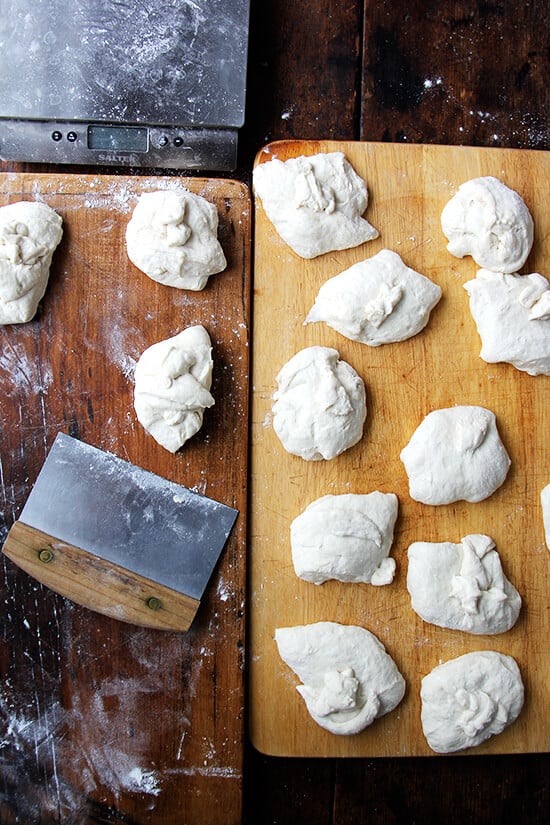
Ball each piece up.
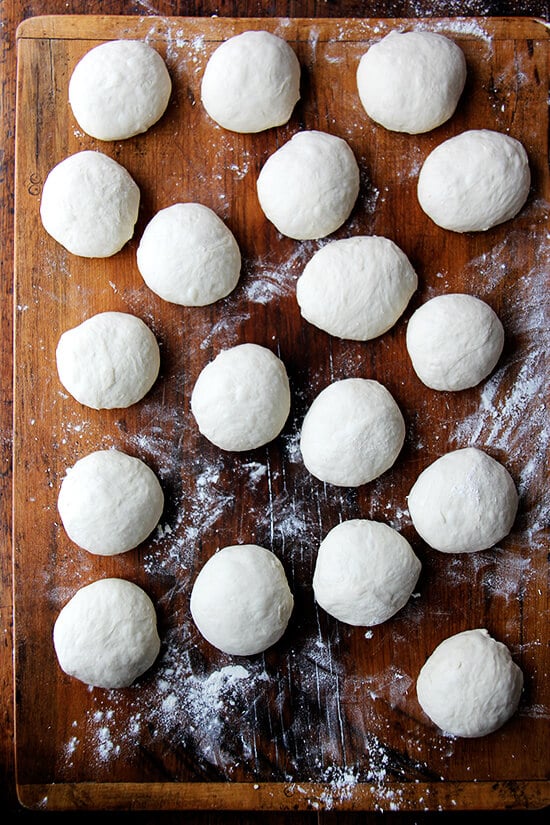
While the balls rest for another 45 minutes, get on with the filling:
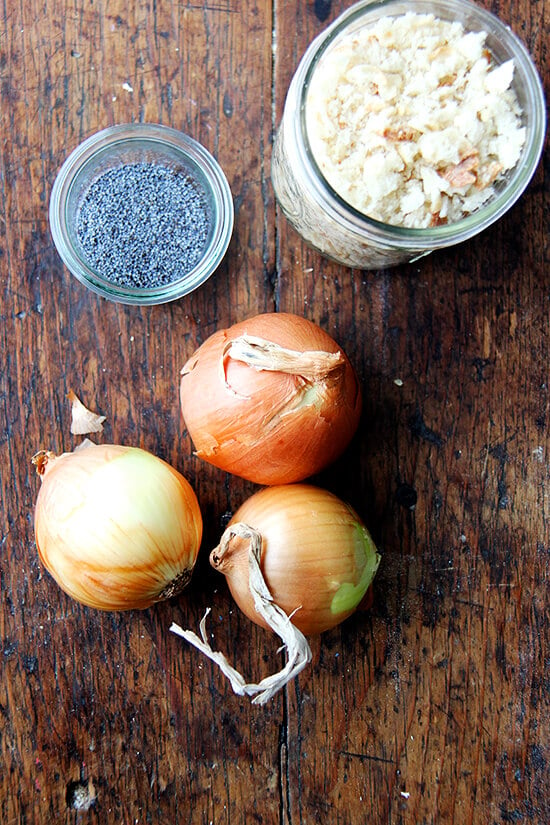
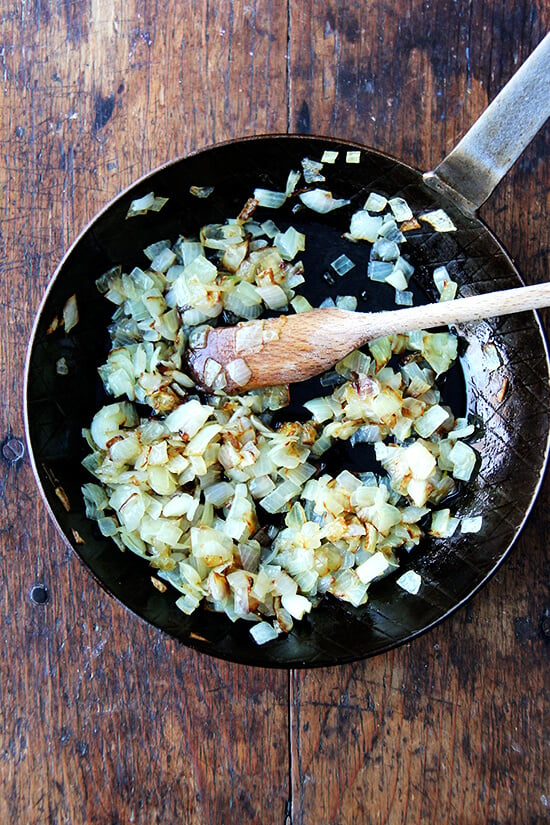
Sauté an onion.
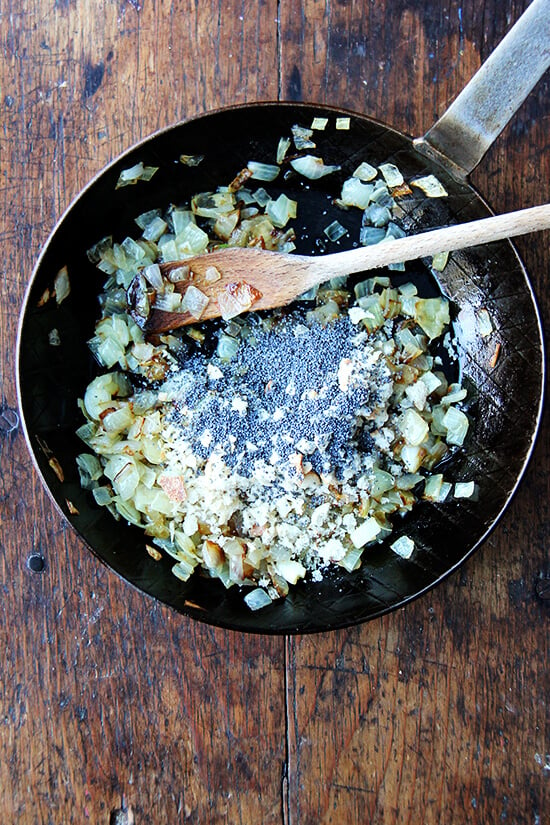
Then add poppy seeds and bread crumbs.
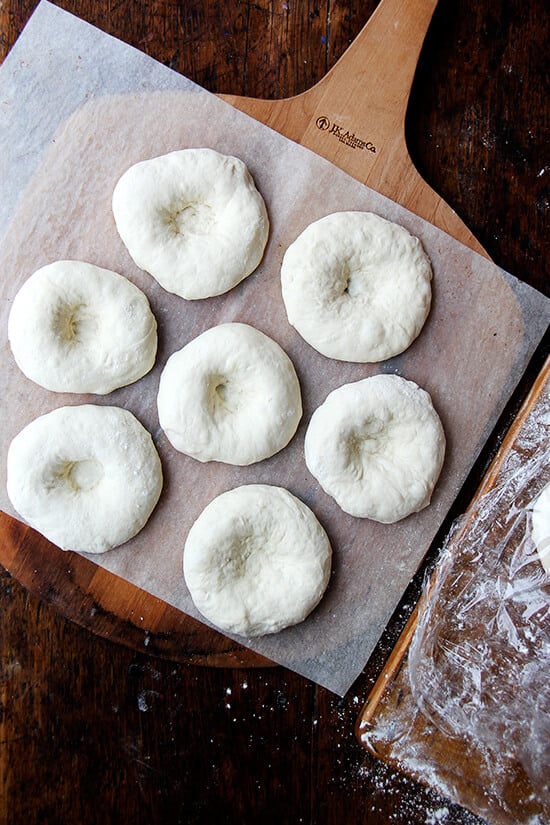
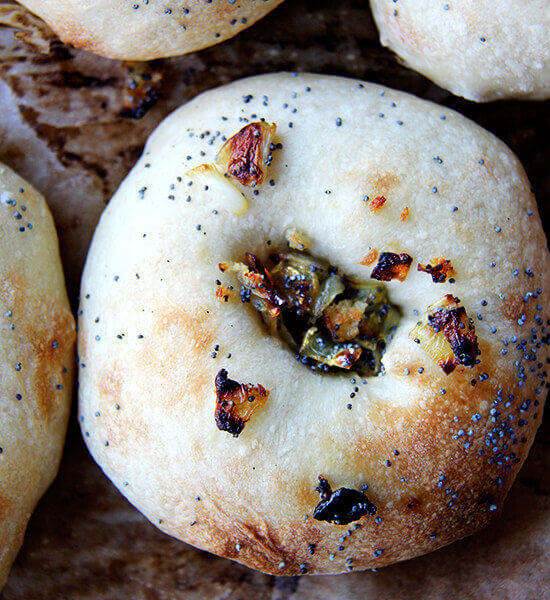
Make a well into the center of each bialy.
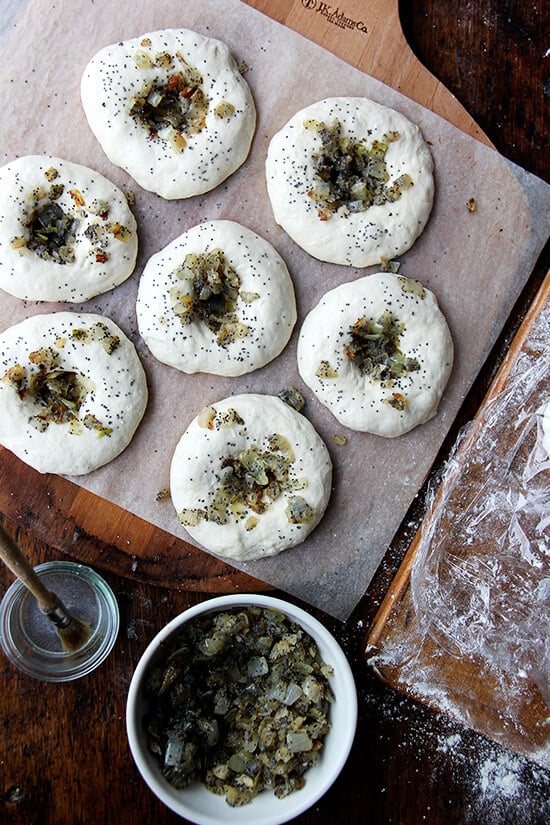
Fill each will with the poppyseed filling mixture.
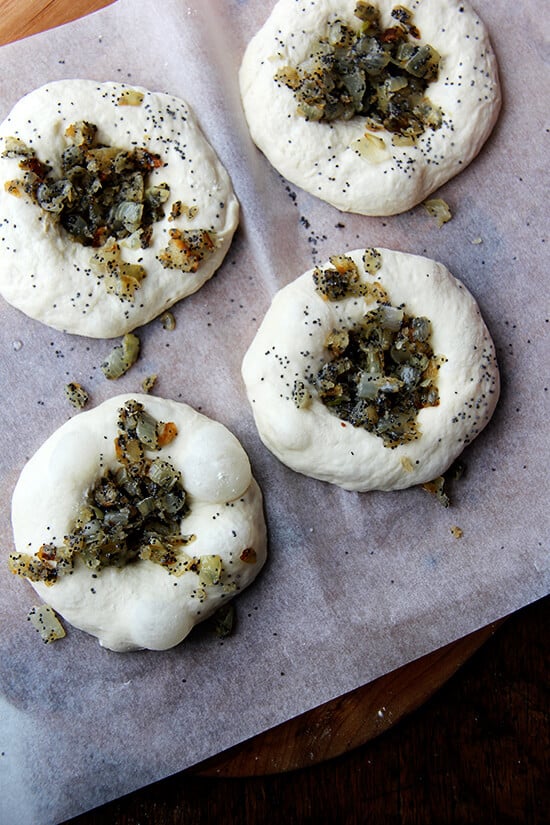
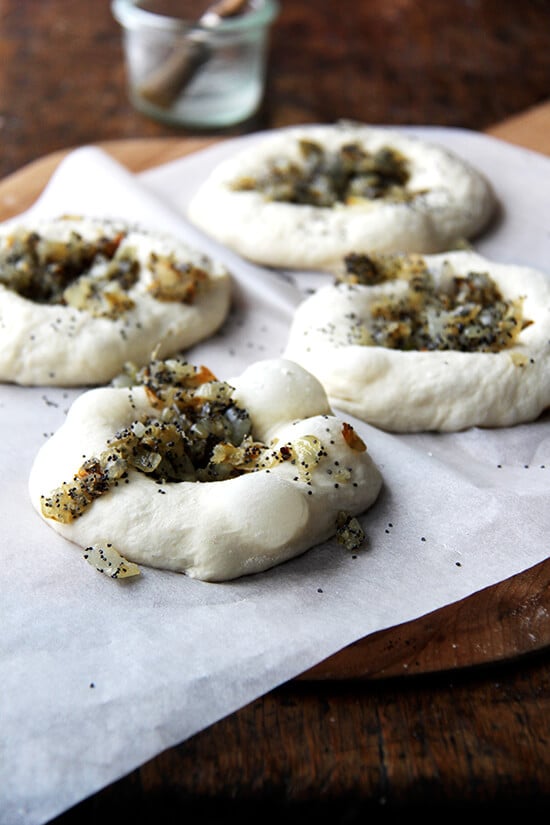
Transfer to preheated Baking Steel or pizza stone and bake for 8 to 12 minutes or until lightly golden.
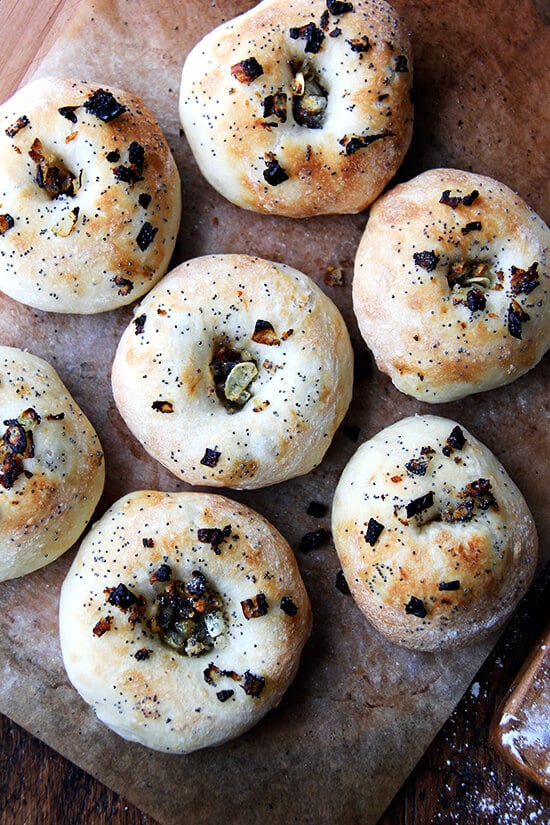
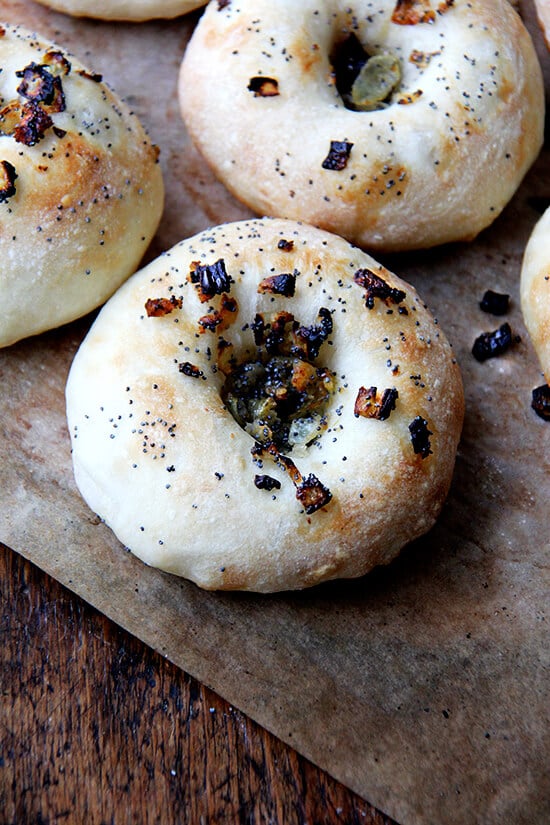
Eat as you wish. Here are a few ideas …
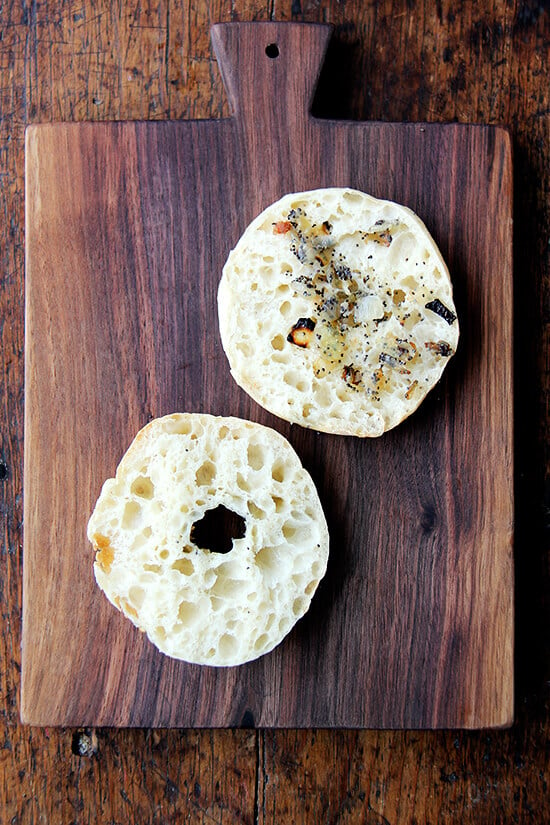
… topped with cream cheese, gravlax, capers, onions, chives, lemon.
… or melted cheddar, fried egg, and sriracha:

Note: The first batch I made puffed way up, which is totally fine and delicious, but maybe not as traditional. Be sure to really press down and stretch out that center area while you are shaping if you want that more traditional bialy shape.
Bialy Recipe: A Step by Step Guide
- Total Time: 13 hours 22 minutes
- Yield: 18 bialys
Description
Recipe slightly adapted from Paul Krebs of Schenectady County Community College. Method adapted from Jim Lahey.
Krebs recommends using a high-protein flour. For the Lahey dough and for these bialys, I am partial to Tipo 00 flour. As always, SAF instant yeast is my preference.
Notes: You don’t have to make these bialys using the no-knead, long, slow rise method. If you want to make them in the same day, increase the yeast to 2 teaspoons, and decrease the water to 2¾ cups. Knead the dough by hand or in a mixer until smooth and elastic. Let it rise for two hours, then proceed with the recipe.
Ingredients
for the bialys:
- 1000 g (7.5 cups) bread, all-purpose or tipo 00 flour
- 20 g (5 teaspoons) kosher salt
- 4 g (1 teaspoon) instant yeast* (see notes above)
- 3 cups (680 g) water** (see notes above)
for the filling:
- 2 tablespoons olive oil or neutral oil (grapeseed, canola, etc.)
- 2 small onions, diced
- kosher salt
- ¼ cup fresh bread crumbs
- 1 tablespoon poppy seeds plus more for sprinkling
Instructions
- Whisk the flour, salt and yeast together. Add the water. Stir with a wooden spoon until combined, then knead gently with your hands to make sure all of the flour is incorporated. The dough should stick to your hands.
- Cover bowl with plastic wrap and let rest at room temperature for at least 12 hours. When dough has risen, remove plastic wrap, and turn dough out onto a lightly floured surface. Portion dough into 90 g pieces.
- Using lightly floured hands or enough flour to keep dough from sticking to you and your work surface, shape each portion into a ball. Cover balls with plastic wrap, then let rest for 45 minutes.
- Meanwhile, place a baking stone or Baking Steel in your oven. It’s OK if you don’t have one. Preheat oven to 450ºF if you’re using a stone or Steel, otherwise, preheat to 500ºF.
- Make the filling: Heat the oil over medium or low heat. Add onion and sauté slowly until translucent. Add a pinch of salt. Continue to cook until onion is only slightly brown — I always overdo it…better to err on the side of underdone because the onions burn quickly once they are in the oven. Add breadcrumbs and poppy seeds to the pan. Stir to combine. Set aside.
- Shape your bialys into 5-inch rounds with a raised rim and thin center: I do this by first punching down in the center of each dough ball when it is resting on my work surface. Then I lift up the round and with my thumbs in the center of the dough, I gently stretch the dough out so that the center begins looking paper thin, while the rim stays ballooned. It will take a little practice getting your shaping technique/method down, but the truth is that it doesn’t really matter unless you are looking for that really traditional bialy shape — they will taste delicious regardless of the shape.
- After shaping each one, place it on a parchment-lined baking peel. When you have five or six on your peel, brush each ball lightly with water. Sprinkle sides with extra poppy seeds. Spoon filling into center or scatter it over the top of each. Bake for 8 to 12 minutes depending on oven, baking vessel, etc.
- When lightly golden, remove bialys from oven, let cool on wire rack and repeat baking process with remaining dough balls.
- Prep Time: 25 minutes
- Cook Time: 12 minutes
This post may contain affiliate links. Please read my disclosure policy.


115 Comments on “Bialy Recipe: A Step by Step Guide”
I would like to order Bialys
from Alexandras Kitchen
Can you use another type of filling? Something sweet? Not fond of onions.
Hi Ken. I had never thought about anything else, but what about some sort of cheese? I also have been adding a seed mix — equal parts flax, millet, sesame and poppy — to a lot of the breads I have been making, and I’m wondering if you, after you brush the dough with water, if you could just sprinkle the bread with the cheese, herbs (and bread crumbs if desired). The dough itself is delicious, so I think a minimal topping would be delicious.
Alexandra – I discovered your site through my google search for “no knead bialy” and made (baked) these yesterday. WOW. I can’t believe I made these wonderful creations myself. Thank you for a fantastic recipe, clear directions and great pics to lead me through the process. Best crumb I have ever produced in anything I have attempted in my many adventures through Jim Lahey’s no-knead bread / pizza, Reinhardt’s pizzas, milk breads, sourdoughs, etc. I used what I had: all-purpose flour and sesame seeds, (with the addition of a few olives for fun), (and brushed with milk for a darker finish), baked on a cookie sheet at 500 degrees (on middle rack). After 12 minutes they looked done, but weren’t browned enough on the bottom so I put them back in the oven on the lowest rack for a couple more minutes, which worked great. (Would probably start them there next time.) (Also next time I would probably try a 3-day retardation in the fridge to deepen the flavour.) I was surprised there didn’t seem to be an additional rise in the directions after shaping (although it looked like yours had risen in the pics before baking; but perhaps that was a second batch?) but mine rose very beautifully in the oven nonetheless, so I guess they really didn’t need that. THANKS again! I was thrilled with how mine turned out. Now I am keen to explore the rest of your site. :o)
Hi Bev! So sorry for the delay here! It’s been a crazy few weeks.
I’m so happy to hear all of this, and I would love to know how a 3-day retardation works for you. Bev, I think you must have missed the end of step 3.: “Cover balls with plastic wrap, then let rest for 45 minutes.” ? I’m so happy they turned out well without the second rise. Thanks so much for writing in! Please report back if you make them again 🙂
Hello again, Alexandra… Thanks so much for your reply. :o) Oh, I did do the second rise of 45 minutes at the end of step 3. What I meant was I thought there might have been an additional rise (ie third rise) after Step 7, but I’ve made your wonderful bialys 3 times now, and they have risen beautifully in the oven each time! I’m sorry I can’t report yet on the 3-day retardation, because I have not had the patience to wait !! The risen dough looks so wonderful and “pouffy” and the bialys are so delicious that I haven’t even been able to wait for a one-day retardation! I have batch #4 rising at the moment and am already keen to bake them tomorrow, despite planning to wait. What I should do is make up a 2nd batch tonight and leave THAT batch to retard. I don’t know why I have developed this fascination with bialys, but your recipe is SO successful for me. There is a “rating system” in my recipe organizer and I note the first time I made these, I had wanted to give SIX stars (out of 5). :o) I WILL report back once I am able to experiment with a 3-day retardation, though. Thanks again.
Hi Bev!
Ok, got it re third rise—I’m so happy to hear you’re liking this recipe!! And I know, it’s hard to wait so long, right? I think you’re on to something with the making a double batch … then the waiting won’t feel so interminable 🙂 Great to hear from you, and please do report back if you do a 3-day retardation, and I’ll do the same. Hope you had a Happy Fourth!
Ali
Hi again, Alexandra … YES, still loving this recipe. :o) OK, I managed to wait for 3 days for this last batch, just to try out a 3-day retardation. My conclusion is that I probably wouldn’t do it as a regular thing, as it didn’t seem to make much difference to me, in the flavour. I like knowing the bialys are still quite successful even after 3 days in the fridge, though, in case I ever needed to do that due to time constraints. I noticed the dough rose as usual from 1 cup to 4 cups (I was only doing half the recipe) initially, but after refrigeration, it seemed to “collapse” down a little, overnight, but just the first night, and it seemed to maintain itself, after that. I was a little worried it wouldn’t rise after that once out of the fridge, but the final bialys were pretty good, although didn’t get quite as much oven spring as the non-retarded batches, and so not quite as “airy” inside. They were still very good though. What I most like about this recipe is the great crust contrasted with the light and chewy crumb. They are best very fresh, so a little difficult to give to friends as gifts, although I’ve tried to do that with detailed instructions about how to reheat / toast (in a toaster oven.) Thanks again for a recipe which makes me feel so successful !! :o) (I’d also like to try some variation of it for my pizzas, but I see you have some others on the site I could try, too.)
Hi again, Ali – sorry, a correction to my previous post. I had actually been doing about a QUARTER of the recipe, scaled down from 18 bialys to just 4 bialys. (222 grams of flour to 152 grams water (=2/3 cup water) It scaled beautifully; just so you know, the recipe works even for a tiny batch. :o) Also, I’ve just started using a ‘swedish dough whisk” to make these, and while I don’t know if it makes a better bialy in the end, it is really fun to use and easier to wash up than a spoon. :o)
My grandmother came from Bialystock, home of the bialy. I’ve never known them to be made with any other filling except onions and poppy seeds – if so then it’s not a bialy… You’re right your batch is more puffed up than the traditional bialy, but I’m betting I’d prefer yours to the more flat bialy! It truly looks like a cross between a bialy and a bagel. :-0. Beautiful!
Thank you, Heidi! I had no idea there was a place called Bialystock … thank you for sharing 🙂
These were amazing! Used regular flour, but will try next time with bread flour. So easy! My only issue is with my propane gas oven (in our summer home)…hard to get it at 500 degrees…so they needed little extra time. Can’t imagine I will have a problem with my electric oven at home. I don’t have a baking peel, just used a heavy cookie sheet with parchment but the paper did slightly burn! What type of peel do you use?? Is that the same as a silpat? And would you still need to use parchment with the silpat.
The family raved over them…will definitely make again. Love your site!
Hi Ali!
Since New York on Pause started I’ve been making your peasant bread almost every week, and in honor of my mom (since quarantine means I can’t go to her house and have Mother’s Day breakfast with her) I made a batch of these yesterday and toasted one up for breakfast today. My mom was glad to see the photos, and I am thrilled to have fresh bialys to eat all week! My shaping needs a little work but the flavor and texture is wonderful. Thank you for this recipe and the much-needed bite of a bialy during this difficult time.
One fun substitution, I didn’t have plain poppy seeds and don’t want to go to the store for just one ingredient, so I used everything bagel seasoning to delicious effect. 🙂
Thanks so much!
Oh wonderful to hear all of this, Zoe! Thanks so much for writing. Also: I love the idea of using everything bagel seasoning here instead of poppy seeds. So fun! Have a great week!
Ali, such awesome bialy’s! Thanks for the recipe and pictures and all the descriptions to assist me all along the way. As you recommend I weighed the flour and other ingredients except the water. For the first time making I must admit, wonderful & so delicious. I added dried minced onion and onion powder to the dough and everything seasoning to top them off instead of the poppy seeds. My dough was a little sticky, after the 45 minute rest had to dust with flour to shape them. Should I have kneaded in more flour so not sticky during the kneading and shaping time?
So nice to hear this, Robin! Love the ides of your toppings/seasonings.
I don’t think kneading would have helped actually. Two thoughts: next time, you could start with less water (try 2.75 cups … I should really add a weight here). OR, you can be more aggressive with how much flour you are using when you are balling up the bialy’s.
This definitely is a sticky dough! I never hesitate to add flour as needed while I am shaping.
First attempt at bialys as my husband prefers them. Very easy to follow and did pretty well. Over sauteed onions, but know for next time 😉. He devoured them – used for lox, cream cheese and capers also made a few as a log which hi likes. Thanks!
Wonderful to hear this Debbie! It all sounds so delicious. I have been craving bialys recently. Thanks for writing!
I love this recipe. I’ve made your overnight bagels several times, with a perfect chubby result. I made these bialys today using the same-day option, but I halved the recipe. I just don’t have room in my freezer for 18 bialys. They are perfect. I’m not into social media, but I had to snap a pic of these, and send it to a couple of friends who are now drooling all over their shirt. Thank you, Alexandra.
So nice to hear this, EllenMarie!! Great to hear halving the recipe worked well, too 😍😍😍
Delicious! Freezes well
So nice to hear this, Stephanie!
Hi I am new to bialys as of a few weeks ago although I haven’t tried your recipe specifically. I found the recipe I made watching late night Apple TV called Kitchen Stories (recipe by Lisa Scholzel) which made one of the best breads I’ve made. In any event, my POINT is the alternate topping she provided which I made and was Phenomenal! She made half of her batch of 18 with the topping you have set forth in your recipe and for the other she made a topping as follows. She made it while the bialys were rising after they were portioned out:
1 med red onion, diced
5 spriigs thyme
1 T honey
1 T sesame seeds
1 sm log plain goat cheese, crumbled
S&P
Mince red onions and pluck thyme leaves from stems. In a small frying, heat some olive oil.and sauté red onion until brown. Add thyme leaves, sesame seeds, honey and a pinch of kosher salt and pepper. Let cool.
When you get to the step of adding the topping to the bialys, brush each generously with water and sprinkle a bit of poppy seeds on each then add the onion mixture, pressing down firmly. Then add 2-3 pieces of crumbled goat cheese on top of the onion filling. The filling is divine!!!
Since my first batch, I have made them with a variety of toppings and I have also made a batch with no topping as it makes them more versatile. The toppings we have used are fresh roasted, diced Hatch green chile, salt and sharp cheddar (or Monterrey Jack). For a non traditional twist, I used 1”cube of cream cheese dipped in melted butter and then rolled in a cinnamon sugar mixture. These were also sublime!
I have also envisioned using sticky bun toppings or perhaps roasted chopped spicy honey pecans and goat cheese or a even a brown sugar crumble topping. Although I realize that traditionally these are only served with savory onion toppings, they are delicious with the sweet toppings. In fact, for the plain bialys I made, I topped a fresh roasted bialy with a schmear of cream cheese and jam.
Dana, oh my goodness these toppings all sound amazing!! I LOVE the idea of goat cheese, but I also really really love the idea of diced Hatch chile. Thanks so much for writing and sharing all of the details.
They came out fantastic. Made with 00 flour. The chew amazing. Saved seeds from other rolls and bagels and used them. Your directions were spot on. I put some cornmeal on bottom of paper.
I am a food educator @donnadishes and appreciated the tips. Can’t wait to try your other recipes.
Here is an article I wrote on bagels earlier during lockdown. https://www.google.com/amp/s/www.westchesterbites.com/blog/play-dough-bagels-bagels-bagelsbaking-with-a-shmear-of-ingenuity%3fformat=amp
Wonderful to hear this, Donna! Thanks so much for writing, and thanks so much for sending your article along! I have yet to try the yogurt bagel but I have been so intrigued since I first learned about it, and I can’t wait to give it a try.
NY bialy’s pre-1960 used rendered chicken fat for the fried onion-poppy seed center..they were flat with a raised rim about 1″ around the center.
Yum! That sounds amazing.
These are absolutely delicious! Just like I remember them when I lived on the East Coast. (No idea why we can’t get them like this on the West Coast.). Anyway, they are light, they have a delicate but substantial crust, toast up beautifully, and even with regular, all purpose flour (as opposed to Tipo00) they are amazing! Trying a batch subbing some vital wheat gluten, just to up the protein, for a bit of the flour. I now make them regularly because we always want some around! (I store them in the freezer so they always taste fresh.).
So nice to hear this, Ellen! Maybe you should open a West Coast bialy shop?? “West Coast Bialy” has a nice ring 🙂 🙂 🙂 And I hear you: when I get on a bialy kick, I don’t want to make anything else. They’re so good and so fun to have around. Thanks for writing!
I haven’t yet tried this recipe but will very soon. Going to adapt to sourdough method. My mind was blown when I saw you mention Paul Krebs! He was me favorite instructor in school 💜
Oh no way!! I love this 🙂 🙂 🙂 Thanks for writing.
These are outstanding! So easy and pretty much fail-proof. I didn’t have any poppy seeds, so I just did sautéed onions (no bread crumbs). I baked them on the steel for about 10 minutes each batch. Mine also turned out a little puffy, but we didn’t mind, they are delicious. These will now be our new breakfast sandwich bread. Thank you for such an easy recipe!
Wonderful to hear this, Melinda! Thanks so much for writing. I love a bialy breakfast sandwich! So good.
How do I sign in to. Retrieve my saved recipe.
Hi Sandi!
This is from Slicksctream, which is the web app that powers the search/save function:
“The way the favorites lists work is that your visitor’s favorites are stored in their browser storage until they sign up. That is, when they start creating their favorites list, that list is kept within their browser. If at any point they want to permanently save their list or make it available on another device they need to sign in. To do so, they hit “SIGN IN” in the “Protect your favorites SIGN IN” link they see at the top of their favorites list.”
Let me know if that helps!
Prepared the dough the night before. What a luscious dough! Followed your instructions to the letter and did my best to create a well for the filling. The bialys puffed while baking, pushing the filling out a bit. My shaping needs work! But they taste amazing, smell yummy, sliced beautifully and toast up to a delicious roll. I will practice shaping next time but I am so delighted for the guidepost. Another winner, Ali! Lox and goat cheese-here I come!
So great to hear this, Hillary!! I am so impressed by your quick work getting after these 🙂 🙂 🙂
Shaping bialys (like bagels) definitely takes a bit of trial to get right. I think in short the key is being more aggressive than you think you can be when creating that well. I’ve made many a puffy bialy in my day … you can see from the photos that many of mine are puffy too.
So glad the taste and texture were nice. Thanks for writing!! xo
I can’t wait to try making this, every recipe I’ve tried on your site has been a huge hit and success! At what step would you recommend freezing this if there’s no one around to eat an entire batch?
Hi Thai! I would freeze them post baking. Alternatively, you could freeze the individual dough balls after you ball them up.
Hello! 🙂 would love to try this however I live in a tropical country where room temperatures are about 27 degrees Celsius at night. Do you recommend a first rise and then the fridge overnight? Thank you in advance! ❤️
Hi Su! I think you’re right to consider using the fridge. I would let the dough rise at room temperature until it doubles, punch it down; then transfer to the fridge for an overnight rise. Hope they turn out well for you!
Thank you so much Ali! And so I did! Breads turned out lovely 😍
Wonderful to hear this!
The bialys came out like mounds of dough. The filling fell off. They tasted good though.
I think the recipe is a bit too wet. There was no way I could shape the bialys in 5-inch rounds.
Sorry, I won’t make it again. ☹
Bummer to hear this, Pia! Question: are you using a scale for the flour? I should really add a weight to the water. Also: what type of flour are you using? And do you live in a humid environment? I’m wondering if the recipe would work if you simply reduced the amount of water given your environment/the flour you are using?
Hi Alexandra
yes, I did use a scale and followed your recipe to a T.
Maybe I’ll try again.
Thanks for all your hard work.
Pia
This is a fantastic recipe! Not only do they taste like the bialy’s I grew up with (though a tad more sophisticated) they are so easy that I have shared the recipe with friends who were missing their favorite breads during lockdown. And they loved the recipe as well! Plus it made enough that I could do bialy deliveries down my street, as a fun surprise for neighbors during lockdown.
For what it’s worth, I do like them after a 3 day retardation in the fridge, but they are nice at any time. Thank you for sharing this gift of a recipe.
So great to hear this! Love the idea of a longer, cold fermentation. Thanks so much for writing!
I’m trying this recipe now. This is probably a rookie question but does it matter what the temperature the water is? Usually the recipe states lukewarm…Thank you!
I actually don’t use lukewarm water here because of the long, slow, room-temperature rise. If it were lukewarm, it potentially could cause the dough to ferment too quickly. I use cold water from the tap here or water that’s been sitting out in a pitcher on my table (so room temp-ish).
Absolutely the best bialy recipe I have ever used! I have done it both ways and they come out amazing either way. We moved to an area that doesn’t have them so for me to be able to make these for my husband now is awesome! He is so happy and his coworkers are always asking him to bring more in so I’d say we have a winner or a recipe here! Thank you for sharing this!
Great to hear, Amy! Thanks so much for writing and sharing all of this 🙂 🙂 🙂
10/10 recipe! We can’t get bialys anymore since we moved a few years ago and although I’m a semi decent cook/baker I never thought I could make these . They come out fantastic every time and are just like the ones i remember. My family asks for them all the time and my husbands co-workers fight over them.. that is when I can convince my husband to share lol. Thank you so much for this great recipe!
Great to hear. Amy! Thanks so much for writing and sharing all of this.