
Overnight, Refrigerator Focaccia = The Best Focaccia Bread Recipe
This post may contain affiliate links. Please read my disclosure policy.
Cold, refrigerated dough is the secret to making delicious focaccia! Allowing the dough to rest 18 to 48 hours in the fridge will yield extra-pillowy and airy focaccia, though if you are pressed for time, you can make this start-to-finish in 3 hours. This 4-ingredient recipe requires only 5 minutes of hands-on time. Video guidance below!
⭐️⭐️⭐️⭐️⭐️ Review:
“Love this recipe! I’ve made this so many times that I’ve lost count. Super simple and delicious. My family loves it. Whenever someone asks me for a focaccia recipe, I always show them this one. This recipe is awesome. Thank you for sharing!” — Lucy
I’ve said it before and I’ll say it again: focaccia is the bread recipe for beginners. Why? Because:
- The no-knead, 4-ingredient dough takes 5 minutes to mix together.
- It requires no special equipment, no tricky shaping technique, and no scoring.
- If you have a 9×13-inch baking pan and your fingertips (for dimpling), you’re good to go.
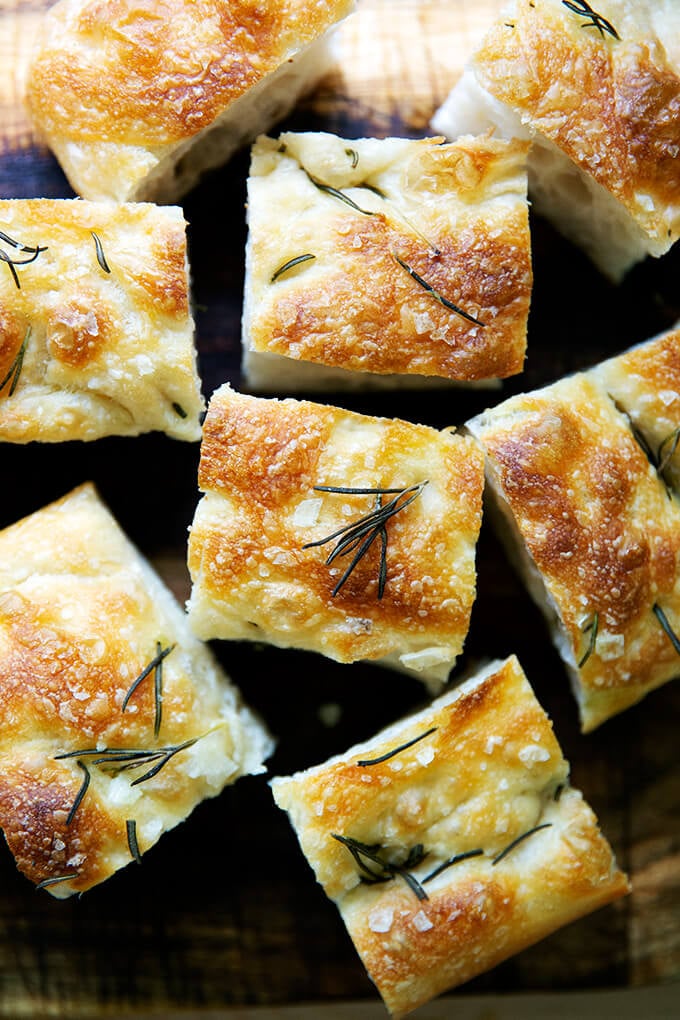
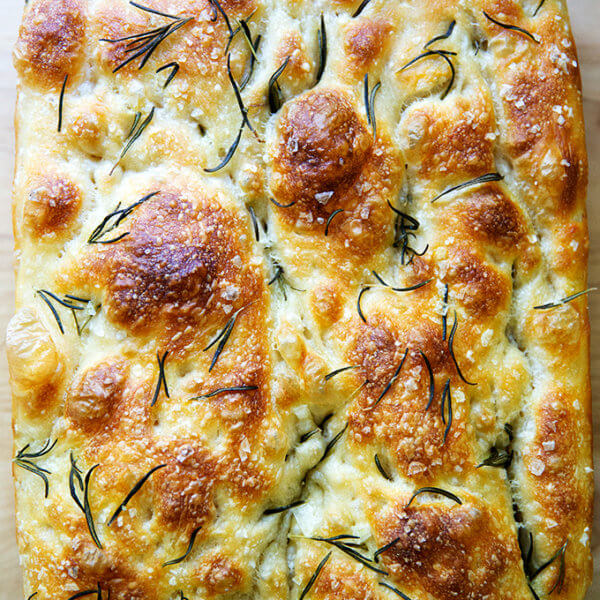
- It emerges soft and pillowy, olive oil-crusted, golden all around, and it’s completely irresistible.
In sum, it’s hard to beat focaccia (pronounced foh-kah-chuh) in the effort-to-reward category. If you are intimidated by bread baking, this is the recipe I suggest making first, both for its simplicity and flavor. After all, this focaccia bread recipe is adapted from my mother’s simple peasant bread recipe, a recipe that has removed the fear of the bread baking process for many.
For the past few months, I’ve been making the focaccia bread recipe from my cookbook Bread Toast Crumbs, but changing the method: using more yeast, using less yeast, doing longer, slower rises at room temperature, doing longer, slower rises in the refrigerator. Find the results below.
This post is organized as follows:
- What Makes The Best Focaccia
- Four Tips for Success
- How This Focaccia Recipe Differs from Others
- Focaccia Bread Ingredients
- How to Make Focaccia, Step by Step
- Adding Rosemary, Herbs and Other Toppings to your Focaccia Dough
- How to Make a Focaccia Bread Art
- Tomato Focaccia
- How to Make a Focaccia Bread Sandwich
- Can I Skip the Overnight Rise?
PS: Once you master this simple focaccia, try your hand at this simple sourdough bread recipe, another recipe that requires minimal effort but yields spectacular results.
What Makes The Best Focaccia?
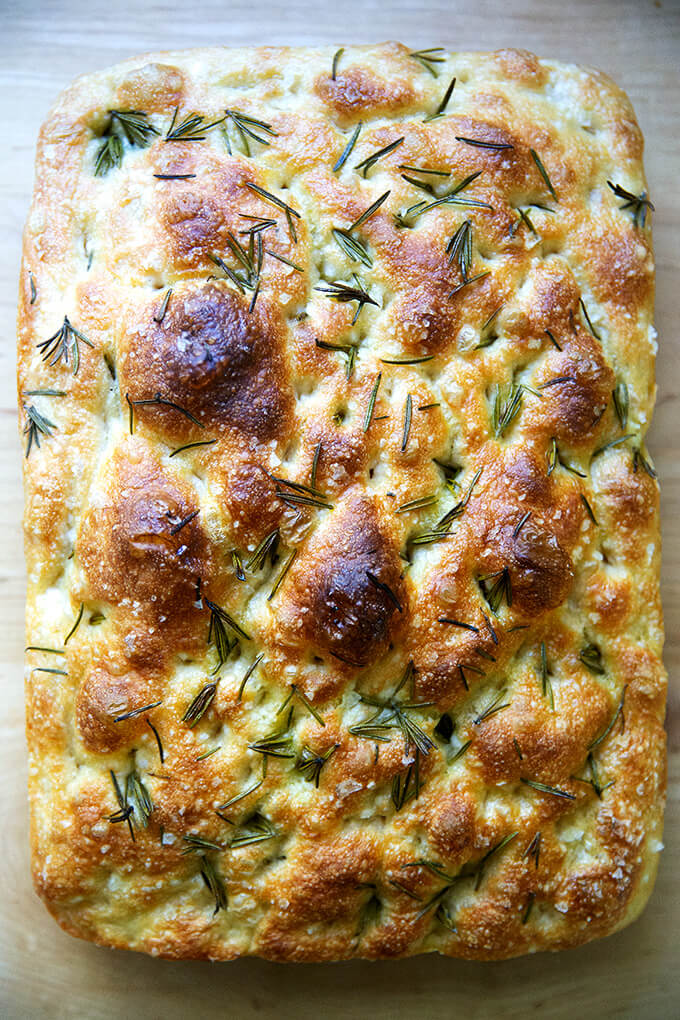
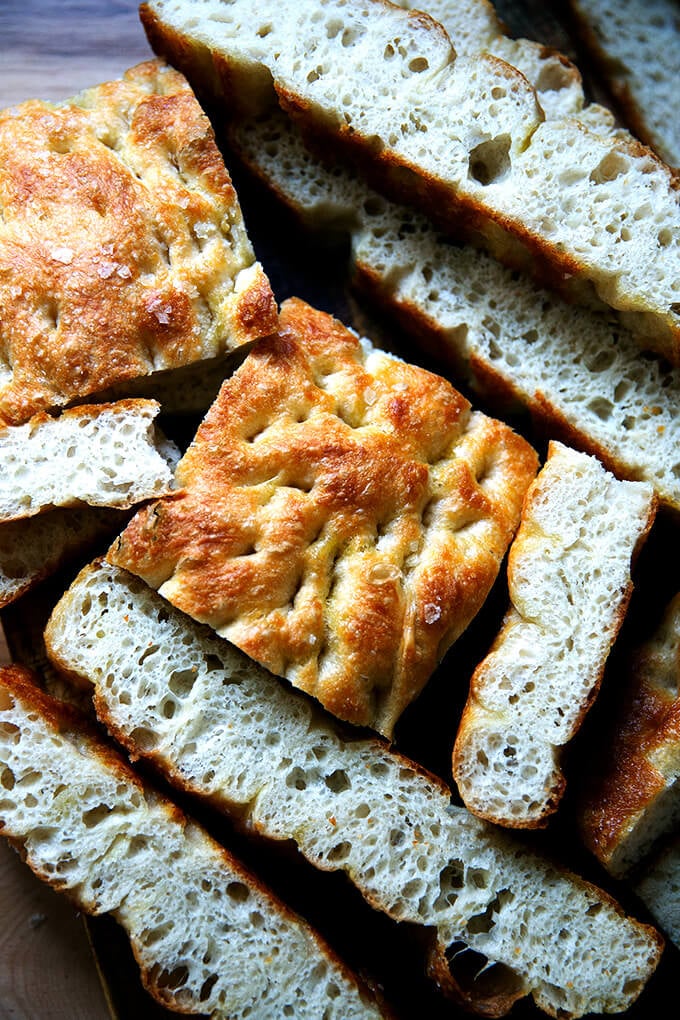
I’ll spare you all the details of the various experiments and skip straight to what I’ve found creates the best focaccia, one that emerges golden all around, looking like a brain, its surface woven with a winding labyrinth of deep crevices: high-hydration, refrigerated dough.
This is nothing novel—many bakers extol the virtues of the cold fermentation process—and it came as no surprise to me either: it was, after all, past-prime Jim Lahey refrigerated dough that showed me how easy focaccia could be: place cold, several-days-old pizza dough in a well-oiled pan, let it rise for several hours or until it doubles, drizzle with more oil, dimple with your fingers, sprinkle with sea salt, then bake until done.
Employing a refrigerator rise requires more time because the cold environment slows everything down initially, and during the second rise, the cold dough takes time to warm to room temperature. The overall effort, however, is very hands-off, and the result — a light, airy, pillowy dough — is well worth it.
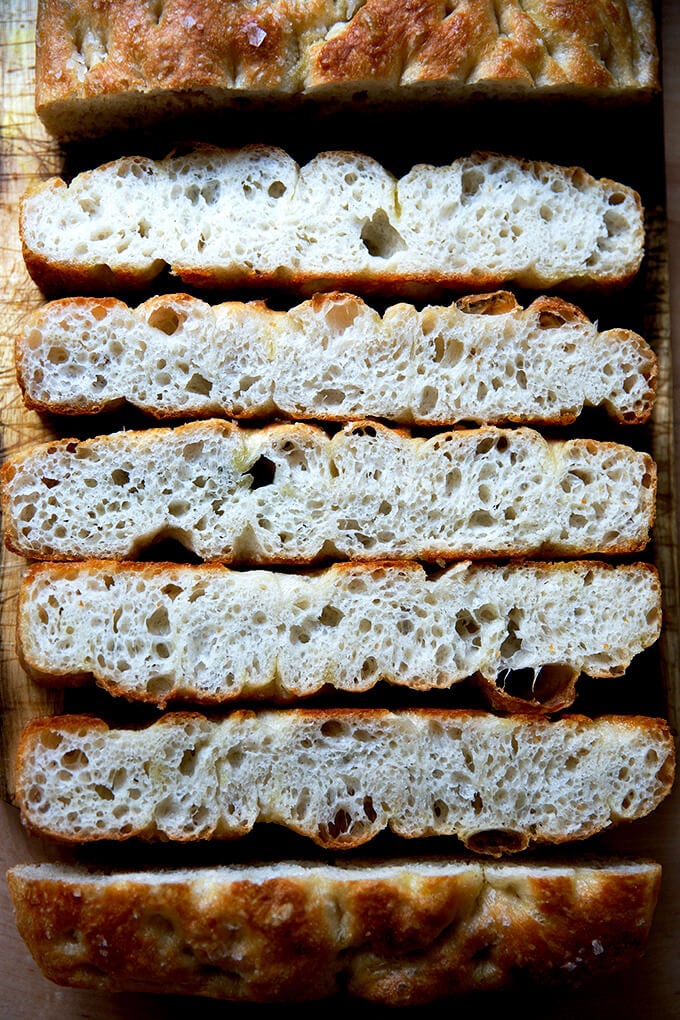
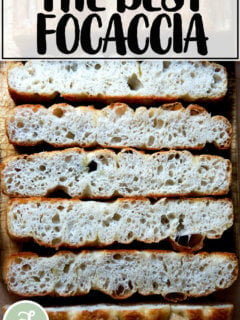
As important as refrigerating the dough is using a high hydration dough, meaning a dough with a high proportion of water relative to the flour. The high proportion of water will create a dough with beautiful air pockets throughout. (Incidentally, this is the secret to making excellent pizza dough as well as light, airy sourdough sandwich bread.)
How This Focaccia Recipe Differs from Others
There are lots of focaccia bread recipes out there, so why make this one? This one differs from many of the recipes out there in two ways:
- The long, cold, refrigerator rise.
- The absence of sugar or honey or any sort of sweetener.
Why isn’t there any sweetener in this recipe? Simply stated, a sweetener is just not needed — the yeast, contrary to popular belief, does not need sugar to activate or thrive. Sugar will speed things up, but when you’re employing a long, slow rise, speed is not the name of the game.
Moreover, and this is getting a little scientific, but during the long, cold fermentation: enzymes in both the flour and the yeast will break down the starches in the flour into simple sugars, which will contribute both to flavor and to browning, again rendering sugar unnecessary. Cool, right?
Four Tips for Success
- Allowing the dough to rest 18 to 24 hours in the fridge yields the best results. (You can leave the dough in the fridge for as long as 72 hours.)
- A buttered or parchment-lined pan in addition to the olive oil will prevent sticking. When I use Pyrex or other glass pans, butter plus oil is essential to prevent sticking. When I use my 9×13-inch USA Pan, I can get away with using olive oil alone.
- Count on 2 to 4 hours for the second rise. This will depend on the temperature of your kitchen and the time of year.
- After the second rise, dimple the dough, then immediately stick the pans in the oven — this has been a critical difference for me in terms of keeping those desirable crevices. If you dimple and let the dough rise again even for 20 minutes before popping the pan in the oven, the crevices begin to dissolve.

Ingredients
- Flour: bread flour or all-purpose flour will work equally well here. If you live in a humid environment or abroad, I suggest trying to get your hands on bread flour. King Arthur Flour is my preference.
- Yeast: SAF Instant Yeast is my preference, but active dry yeast works just as well. See recipe box for instructions on how to use active-dry yeast in place of instant.
- Salt: I say this all the time, but a big part of making a good loaf of bread comes down simply to using the right amount of salt given the amount of flour you are using by weight. It’s like anything: bread has to be well seasoned. At a minimum, use 10 grams (2 teaspoons) of salt for every 500 grams (4 cups) of flour. I highly recommend investing in some good, flaky sea salt for sprinkling on top of the focaccia dough — it tastes better than the more finely ground varieties of salt. I use Diamond Crystal kosher salt for the dough, but any salt you have on hand will work just fine for the dough.
- Water: There is a lot of water in this dough — it’s 88% hydration — and all of that water helps produce a light, airy, pillowy dough.
- Olive oil: Olive oil both in the bottom of the pan and on top of the dough is essential for encouraging nice browning, flavor, and that quintessential oiliness we all love about focaccia.
- Rosemary or other seasonings: Rosemary is a classic focaccia topping, and you can either sprinkle it over the dough before baking or you can chop it up and add it to the dough. Many people love sun-dried tomatoes and olives in their focaccia. See below for how to incorporate these other ingredients into your focaccia dough.
How to Make Focaccia Bread, Step by Step
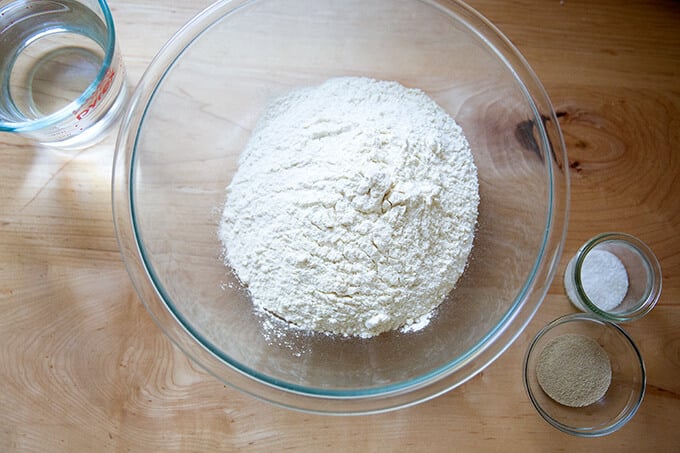
Gather your ingredients: 4 cups (512 g) flour, 2 teaspoons (10 g) salt, 2 teaspoons (8 g) instant yeast (SAF is my preference), 2 cups (455 g) water:
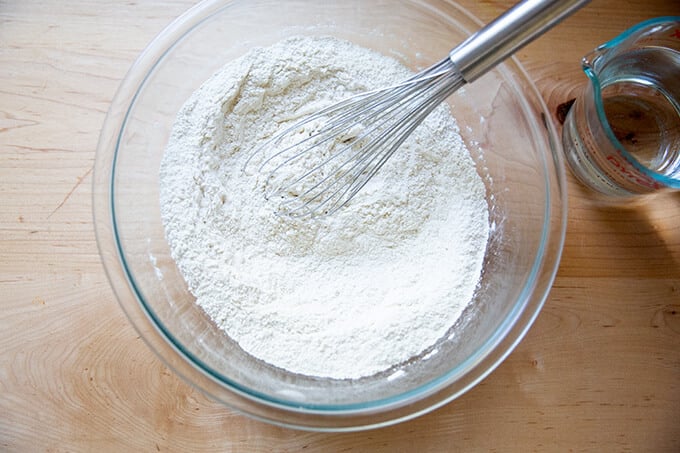
Whisk together the flour, salt, and yeast first:
Add the water:
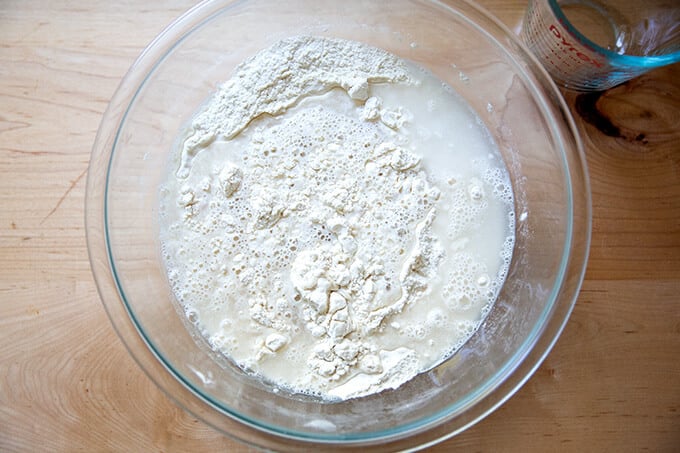
Use a spatula to stir the two together.
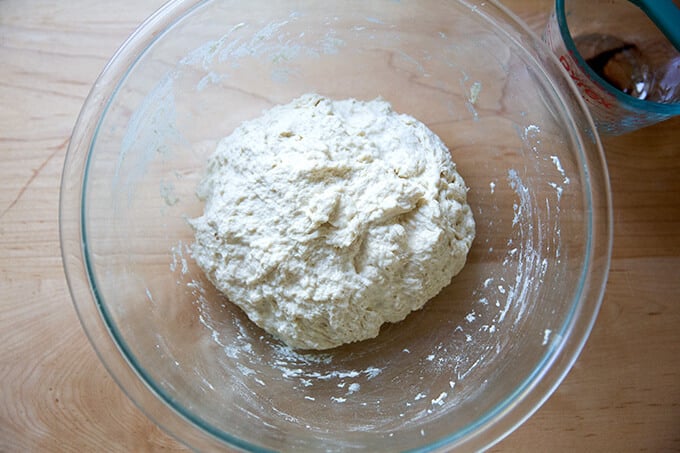
Slick the dough with olive oil:
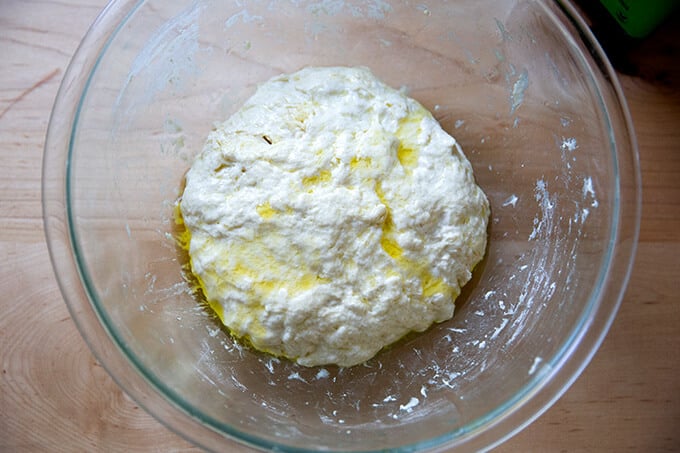
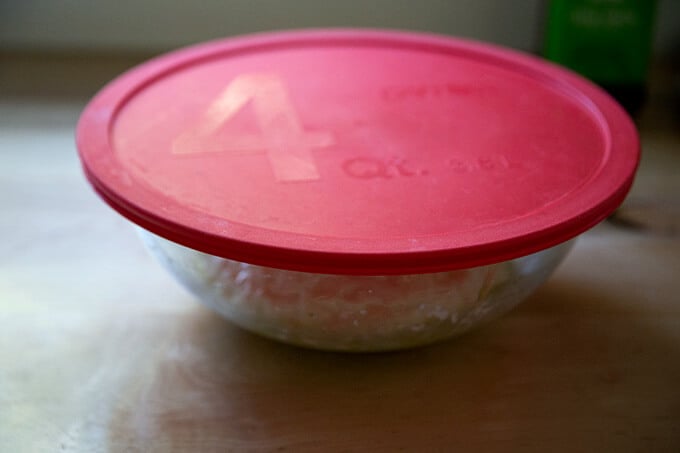
Slick the surface of the dough with olive oil; then cover the bowl. You all have one of these, right? Stick the bowl in the fridge immediately; leave it there to rise for 12 to 18 hours (or longer—I’ve left it there for as long as three days). NOTE: It is important the dough really be slicked with olive oil especially if you are using a cloth bowl cover or tea towel as opposed to plastic wrap or the lid pictured in the photo below this one. If you are using a tea towel, consider securing it with a rubber band to make a more airtight cover. If you do not slick the dough with enough oil, you risk the dough drying out and forming a crust over the top layer.
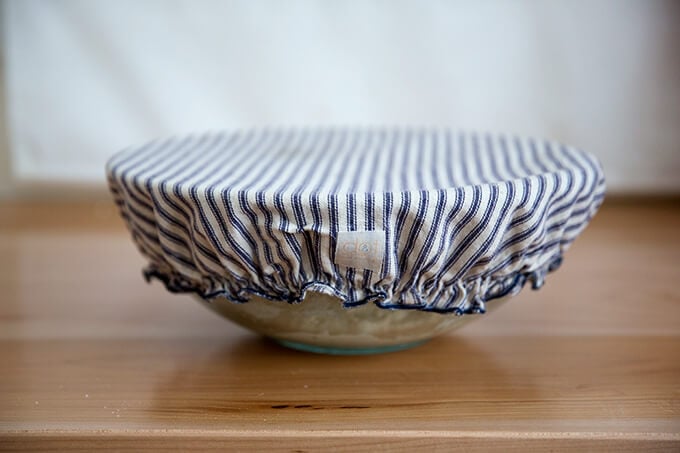
Another option: the lid that comes with the 4-Qt Pyrex bowl. This is handy for fridge storage because you can stack things on top of it.
Remove from fridge, and remove the cover:
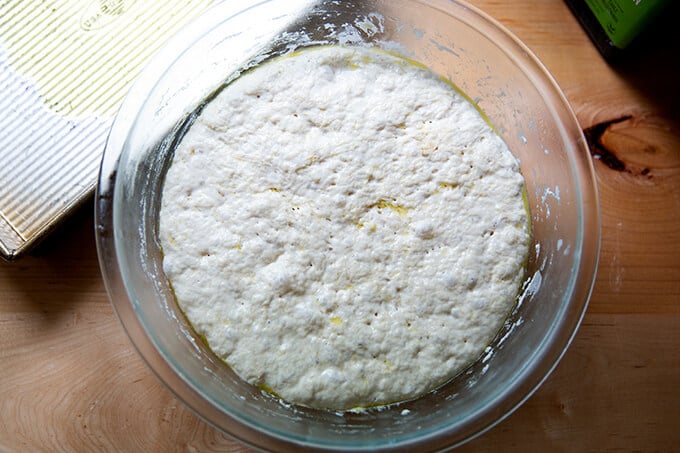
Deflate the dough and transfer to a prepared pan. I love this 9×13-inch USA pan. If you don’t have one you can use two 8- or 9-inch pie plates or something similar. If you are using glass baking dishes be sure to grease the dishes with butter before pouring a tablespoon of olive oil into each. (The butter will ensure the bread doesn’t stick.) Don’t touch the dough again for 2 to 4 hours depending on your environment.

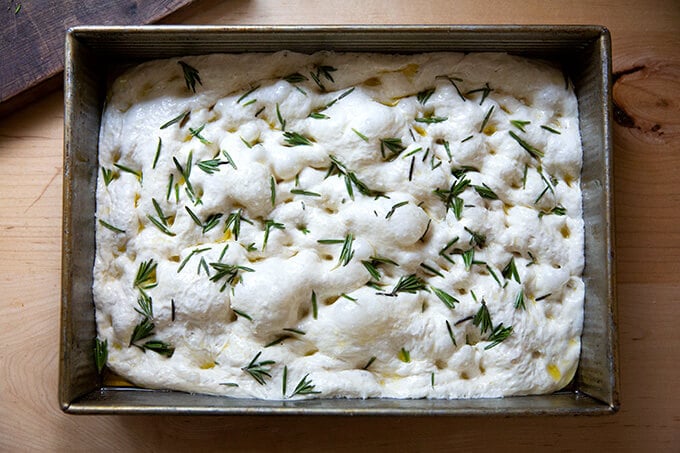
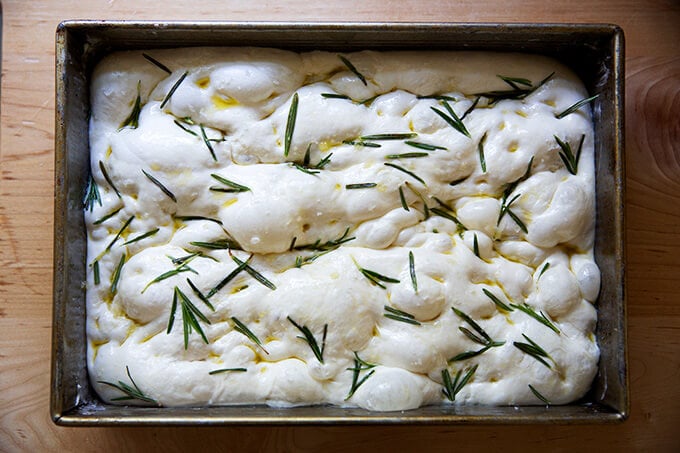
After two to four hours, or when the dough looks like this…:
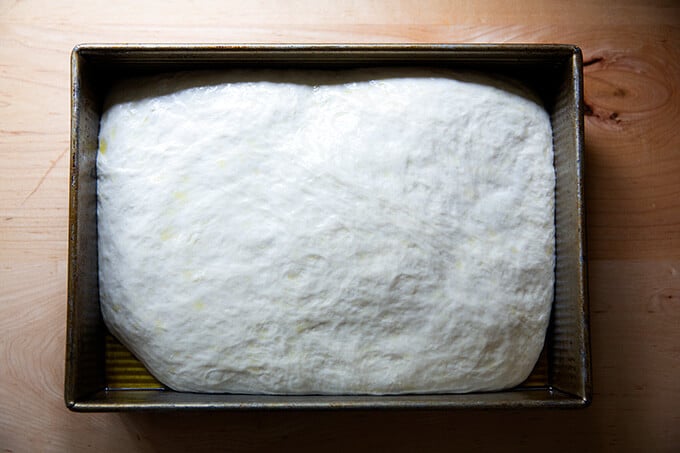
… it’s time to dimple it! You can use simply olive oil and salt — I recommend good, flaky sea salt for this. Note, the dough in the photo below spent three days in the fridge, and the dough was super bubbly!
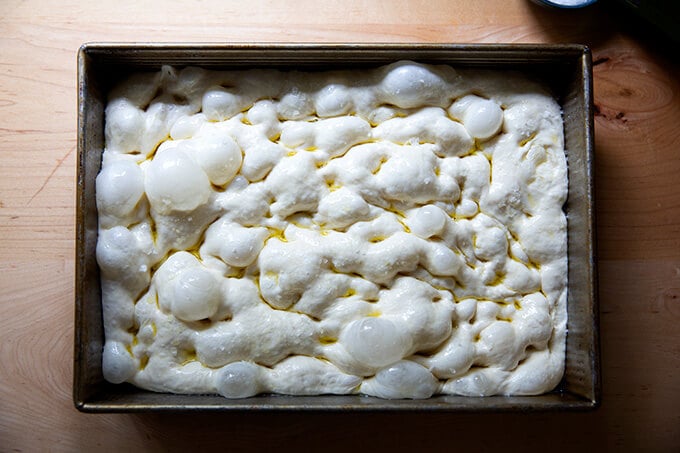
if you are using rosemary, sprinkle it over the dough. Then pour two tablespoons of olive oil over the dough, and using your fingers, press straight down to create deep dimples. Sprinkle with flaky sea salt — again, something like Maldon is great here.
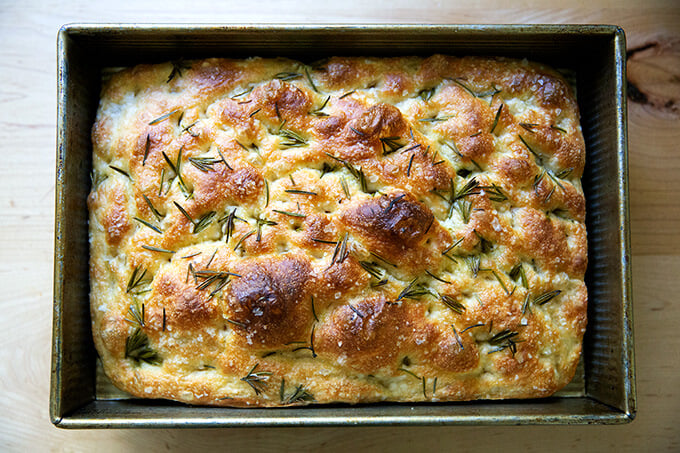
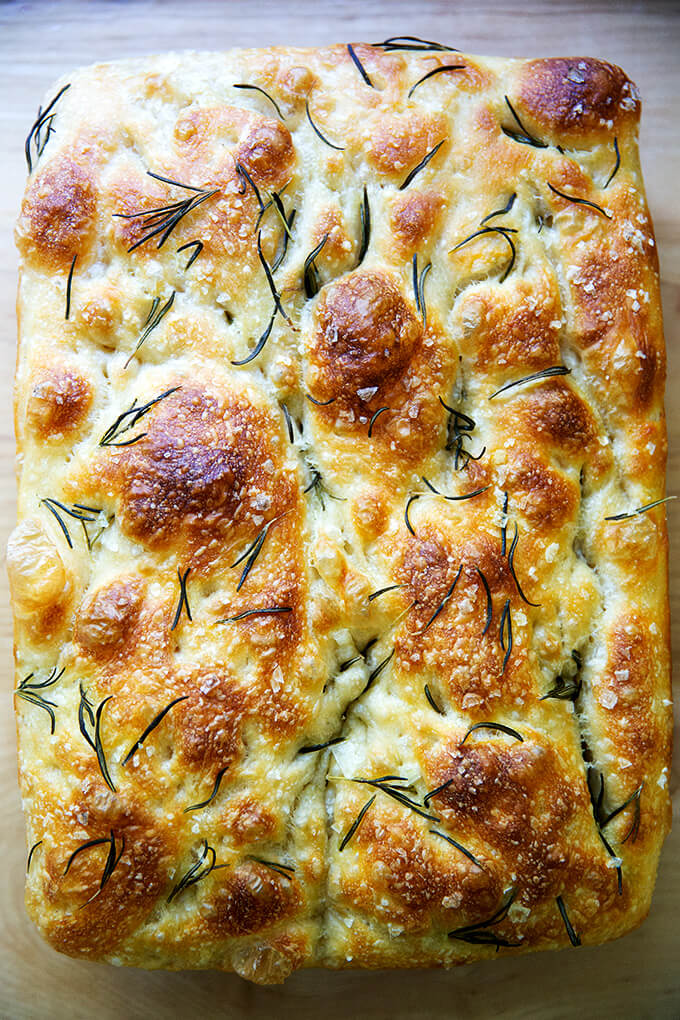
Transfer to oven immediately and bake at 425ºF for 25 minutes or until golden all around. Remove focaccia from pans and place on cooling racks.
How to Incorporate Rosemary, Herbs, and Other Ingredients & Toppings into Your Focaccia Dough
One of the most frequently asked questions I get is: How can I add other toppings or ingredients to my focaccia bread? You can do this in two ways:
- Add them on top as you would rosemary or other herbs. The key is to make sure the ingredients are slicked lightly with olive oil to ensure they do not burn in the oven. I like to sprinkle the rosemary over top of the dough, then drizzle it with olive oil, then dimple the dough.
- You can add them directly to the dough. In step one, when you whisk together the flour, salt, and instant yeast, add your ingredients — chopped olives, sun-dried tomatoes, roasted garlic — to the flour and toss to coat; then add the water.
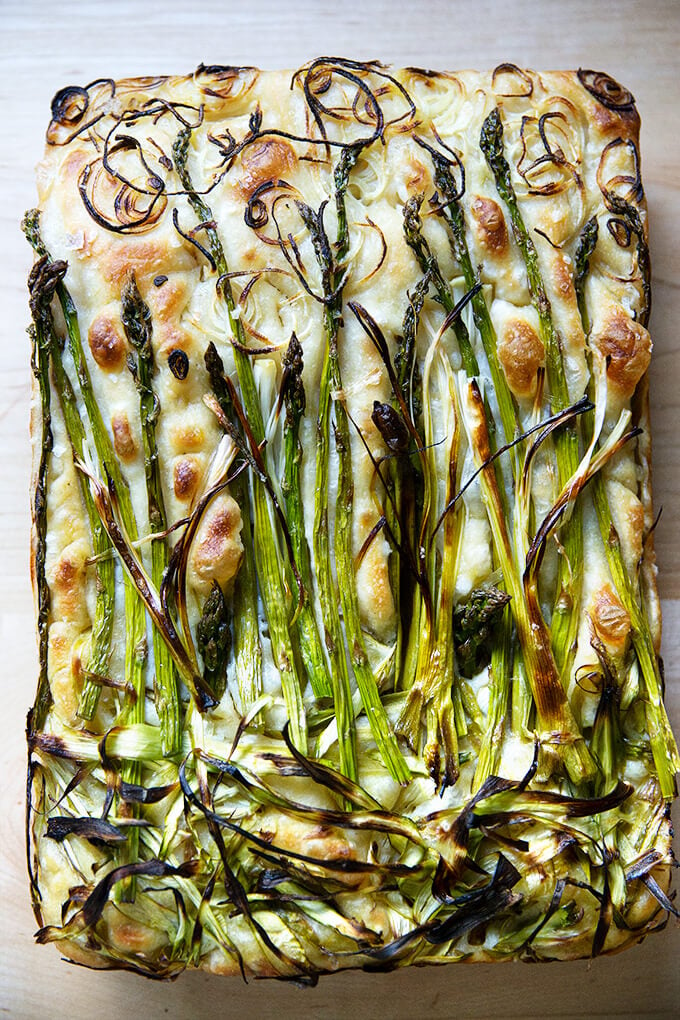
How to Make a Focaccia Bread Art
Pictured above is my “Ode to Spring” (🤣) Focaccia Bread Art (or Garden Scape). As noted above, the key with adding toppings is to slick them lightly with olive oil to ensure they don’t completely char. Keep in mind that some items will char, and a little charring is not a bad thing.
To make a focaccia bread art:
- Follow the recipe through the step in which you dimple the dough just before baking. Arrange your toppings — sliced peppers, asparagus, scallions, olives, tomatoes, onions, etc. — over top and dimple again, pressing the ingredients into the dough to embed them — you can be more aggressive than you think.
- Brush the entire surface with olive oil; then sprinkle with sea salt.
- Bake as directed.
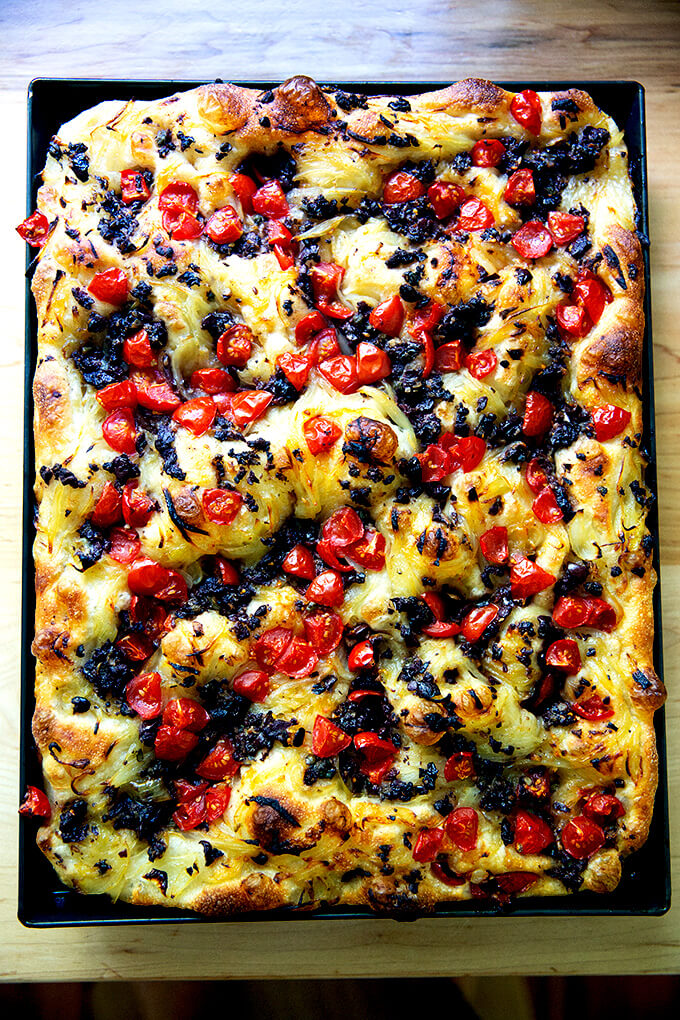
Tomato Focaccia
Pictured above is a cross between pissaladière and tomato focaccia. I love the addition of tomatoes to pissaladière because it adds a freshness and brightness, a hit of acidity to offset the sweet caramelized onions and salty anchovies, olives, and capers.
You can use any summer tomatoes you have on hand — diced cherry tomatoes, Roma, plum, sliced beefsteak tomatoes, heirloom tomatoes, etc. If you choose to dice up Roma or plum tomatoes, there is no need to seed them, but leave any juices lingering on the cutting board behind.
Top the unbaked focaccia with a thin layer of tomatoes; then bake as directed.

How to Make Focaccia Bread Sandwiches
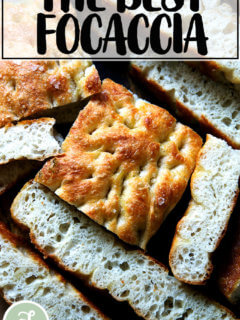
One of my favorite things to do with either the rounds of focaccia or the 9×13-inch slab of focaccia is to make a giant sandwich: simply halve the whole finished loaf of focaccia in half crosswise; fill it as you wish, close the sandwich; then slice and serve.
Here’s one of my favorites: Roasted Red Peppers, Olive Tapenade, & Whipped Honey Goat Cheese
Can I Make this Overnight Focaccia Without the Overnight Rise?
Yes, you can. In fact, in my cookbook, Bread Toast Crumbs, I do not employ an overnight rise. Start-to-finish it can be made in about three hours. The finished bread will not be as pillowy, but it will still be light, airy, and delicious.
To skip the overnight rise, simply let the mixed dough rise at room temperature until doubled, about 1.5 to 2 hours. Then proceed with the recipe, knowing the second rise will only take about 30 minutes.
The Best, Easiest Focaccia Bread Recipe
- Total Time: 18 hours 30 minutes
- Yield: 2 loaves
Description
Cold, refrigerated dough is the secret to making delicious focaccia! Allowing the dough to rest 18 to 24 hours in the fridge will yield extra-pillowy and airy focaccia, though if you are pressed for time, you can make this start-to-finish in 3 hours. This 4-ingredient recipe requires only 5 minutes of hands-on time. Video guidance below!
Adapted from the focaccia recipe in Bread Toast Crumbs.
A few notes:
- Plan ahead: While you certainly could make this more quickly, it turns out especially well if you mix the dough the day before you plan on baking it. The second rise, too, takes 2 to 4 hours.
- If you are short on time and need to make the focaccia tonight: Let the mixed dough rise at room temperature until doubled, about 1.5 to 2 hours. Then proceed with the recipe, knowing the second rise will only take about 30 minutes.
- You can use various pans to make this focaccia such as: two 9-inch Pyrex pie plates. (Use butter + oil to prevent sticking.) One 9×13-inch pan, such as this USA pan — do not split the dough in half, if you use this option, which will create a thicker focaccia . A 13×18-inch rimmed sheet pan — this creates a thinner focaccia, which is great for slab sandwiches.
- As always, for best results, use a digital scale to measure the flour and water.
- I love SAF instant yeast. I buy it in bulk, transfer it to a quart storage container, and store it in my fridge for months. You can store it in the freezer also.
- If you are using active-dry yeast, simply sprinkle the yeast over the lukewarm water and let it stand for 15 minutes or until it gets foamy; then proceed with the recipe.
- Flour: You can use all-purpose or bread flour here with great results. If you live in a humid environment, I would suggest using bread flour. If you are in Canada or the UK, also consider using bread flour or consider holding back some of the water. Reference the video for how the texture of the bread should look; then add water back as needed.
Ingredients
- 4 cups (512 g) all-purpose flour or bread flour, see notes above
- 2 teaspoons (10 g) kosher salt
- 2 teaspoons (8 g) instant yeast, see notes above if using active dry
- 2 cups (455 g) lukewarm water, made by combining 1/2 cup boiling water with 1 1/2 cups cold water
- butter for greasing
- 4 tablespoons olive oil, divided
- flaky sea salt, such as Maldon
- 1 to 2 teaspoons whole rosemary leaves, optional
Instructions
- Make the dough: In a large bowl, whisk together the flour, salt, and instant yeast. Add the water. Using a rubber spatula, mix until the liquid is absorbed and the ingredients form a sticky dough ball. Rub the surface of the dough lightly with olive oil. Cover the bowl with a damp tea towel, cloth bowl cover, or plastic wrap and place in the refrigerator immediately for at least 12 hours or for as long as three days. (See notes above if you need to skip the overnight rise for time purposes.) NOTE: It is important the dough really be slicked with olive oil especially if you are using a cloth bowl cover or tea towel as opposed to plastic wrap or a hard lid. If you are using a tea towel, consider securing it with a rubber band to make a more airtight cover. If you do not slick the dough with enough oil, you risk the dough drying out and forming a crust over the top layer.
- Line two 8- or 9-inch pie plates or a 9×13-inch pan (see notes above) with parchment paper or grease with butter or coat with nonstick cooking spray. (Note: This greasing step may seem excessive, but with some pans, it is imperative to do so to prevent sticking. With my USA pans, I can get away with olive oil alone; with my glass baking dishes, butter is a must.)
- Pour a tablespoon of oil into the center of each pan or 2 tablespoons of oil if using the 9×13-inch pan. Using two forks, deflate the dough by releasing it from the sides of the bowl and pulling it toward the center. Rotate the bowl in quarter turns as you deflate, turning the mass into a rough ball. Use the forks to split the dough into two equal pieces (or do not split if using the 9×13-inch pan). Place one piece into one of the prepared pans. Roll the dough ball in the oil to coat it all over, forming a rough ball. Repeat with the remaining piece. Let the dough balls rest for 3 to 4 hours depending on the temperature of your kitchen (Note: no need to cover for this room temperature rise).
- Set a rack in the middle of the oven and preheat it to 425°F. If using the rosemary, sprinkle it over the dough. Pour a tablespoon of oil over each round of dough (or two tablespoons if using a 9×13-inch pan). Rub your hands lightly in the oil to coat, then, using all of your fingers, press straight down to create deep dimples. If necessary, gently stretch the dough as you dimple to allow the dough to fill the pan. Sprinkle with flaky sea salt all over.
- Transfer the pans or pan to the oven and bake for 25 to 30 minutes, until the underside is golden and crisp. Remove the pans or pan from the oven and transfer the focaccia to a cooling rack. Let it cool for 10 minutes before cutting and serving; let it cool completely if you are halving it with the intention of making a sandwich.
- Prep Time: 18 hours
- Cook Time: 30 minutes
- Category: Bread
- Method: Oven
- Cuisine: Italian
This post may contain affiliate links. Please read my disclosure policy.


4,113 Comments on “Overnight, Refrigerator Focaccia = The Best Focaccia Bread Recipe”
This is such a good recipe and believe me because I screwed it up twice. Third time is a charm. I’m getting used to a new oven which takes a long time to preheat. I started dimpling and the oven wasn’t ready, so I got concerned about the instructions to not let the dough sit too long after dimpling, so I kept dimpling, oven still not ready, more dimpling. I got impatient so I put it in the oven before the preheat was done. Then, to make matters worse (because I’m all in at this point), I over baked it looking for that dark color on top. The result was a hard thin dough. My husband loved it but I got tired of chewing. Second time, I was cautious. I preheated all the way. And, dimpled VERY lightly and baked until just lightly browned. I ended up with a billowing pillow that wasn’t quite crisp. A few minutes to re-heat did the crispy trick but it was still very thick. Forward to today’s result, which turned out perfect. I confidently dimpled JUST enough and baked until nicely browned (never did turn out as brown as the pics) and it was incredible.
By the way, get the GIR spatula, it’s the best spatula ever. But, some colors are more expensive than others. Unless you love her teal color, get a cheaper color like black or gray. Thanks Ali!
I LOVE this recipe. I make it 2 ways: exactly as you suggest and also in a 1/4 sheet pan which I especially love because it produces a bread with even more holes. Probably for sandwiches the round loaves are a little better because thicker and easier to slice, but the 1/4 sheetpan breads are crispier and also easier to remove from the pan. Either way, the bread is so delicious. I will often mix the dough in the late afternoon or after dinner and then refrigerate it until ready to use. It’s fine to let it sot for two days. I like to cover the bo with a cloth and a plate in the fridge and not plastic wrap which can create off tastes. But first rate dough andfun and impressive to make.
Hi,
Can I add other flavorings to this? Thinking garlic and rosemary. When and were if I can. Thanks!
chop garlic and rosemary very fine; sprinkle on after you brush with oil, before you start dimpling it. I have an Italian friend who always does this
Yum!
Hi! I’m a new fan to your website – although have realized I’ve been loving your Food52 recipes for awhile. I had done your earlier version of this recipe (with bread flour I believe, a sheet pan, and I think different temperature instructions), but tried this one today. I found with the sheet pan the bottom got a little overly crisped before time was up, but with the pie plates I had the opposite issue – having to leave it in for closer to 40 minutes. The bread looks great today – I’m excited to dive in. Do you think this is just because of the pie plate being pyrex? Or perhaps because there seemed to be a bit more oil lingering when I used the pie plates?
Hi Rachel! So sorry for the delay here. Thanks for the kind words.
So, yes — the more I bake and cook, the more I realize how the material and size of the pan makes such a difference. So, for the sheet pan, the dough was probably more spread out, right? I think a thinner dough will crisp up on both the top and bottom more quickly than a thicker dough, plus the sheet pan was probably aluminum or stainless steel, right? I don’t know the science of it all, but I think these types of pans (perhaps because they conduct heat more quickly?) encourage browning. That said, I find I’ve made this focaccia in Pyrex pie plates, metal pie plates, and an Emilie Henry Pie plate that has one of those stone/earthenware bottoms, and each pan takes about the same amount of time. So, I don’t know what the answer is??
You were smart to keep the bread in the oven until it looked golden all around, because that’s a great visual sign that the bread is done.
Does your oven generally work well? Are there hot spots? I mean, every oven has hot spots, but I’ve cooked in some ovens in friends’ apts this past year, and I found the bread often browned on top first, and I had to reduce the temperature and cook everything longer to ensure the breads cooked through.
What about using a pizza stone? I have some dough waiting for me in the fridge!
Sure! Are you going to use a greased pie plate, too? Or were you thinking about baking the focaccia free form on the stone?
Free form on the stone; what do you think? Use parchment? Hankering for some rosemary/sea salt focaccia with lots of holes today as we are going down to 8 degrees tonight outside Philadelphia.
yeah, go for it! I would definitely use parchment paper. Stay warm! It’s been snowing all day up here. Love it 🙂
I just began to make this dough, but unfortunately it is very very sticky.
I used 520gr flour and 470ml lukewarm water. Because it was so sticky I added some more flour, but it’s still sticky.
Is my conversion of 2 cups of water to 470ml wrong?
Best regards
Stefan
Hi Stefan,
Sorry for the delay here! The dough definitely is wet and sticky — not meant to be handled or kneaded. 2 cups of water is about 470 ml, so you’re not off there. Did you end up going through with the recipe?
Hello Alexandra,
although my dough was a bit more sticky than yours it went out great. Easy recipe and great result.
I did one bread simply with fleur de sel and the other bread additional with black and green olives.
Thank you for the recipe and greetings from Germany.
Stefan
So happy to hear this, Stefan. Olives sound so yummy. And greetings!!
Is this only really delicious on the day it’s baked, or would it still be great the next day?
It’s especially good the day it is baked, but it’s still really good the next day, too. I would heat it up on day 2 and beyond for sure, however.
Just want to let you know that I made your Peasant Bread for Easter and it was a hit! So easy and delicious. Thank you!
So happy to hear this, Nilda!
I made this last week and the whole family loved it! We ate the first loaf with labneh and beet salad and the second one was used for sandwiches, which were a huge hit with the kids! Both loaves turned out dome-shaped, however. It didn’t affect the taste at all, but any idea why this happens? Dome or not, we will be making this time and again!
So happy to hear this, Honeybee! Your beet salad an labneh sandwiches is making me hungry … YUM!
Question: what kind of vessels were you using to bake the focaccia?
A cake pan the size you indicated, the kind with a removable bottom.
It’s possible that the material of the pan had something to do with it, but I don’t know enough science to say so for sure. When you dimpled the dough down with your fingers, did the impressions hold? And did you stick the pan in the oven immediately after making those impressions?
No, they didn’t hold and yes, I did bake the focaccia immediately. Nevermind the dome, though. This recipe is a keeper!
Ok, great, thanks Honeybee!
I love this bread! Would like to make for my gluten free friends. Besides GR flour are there any other changes to the recipe?
Thank you.
Susie
Hi Susie! GF baking is so tricky. I would check out this post before you embark … the recipe will need a little more tweaking. I don’t think an overnight rise will be that beneficial either, because there is no gluten development here. I would follow the recipe in the post I linked to, but instead of baking it in bowls, bake it in oiled pie plates or something similar. Hope this helps.
Hi Alexandra,
Quick question, do you think this would work with bread flour? I seem to have a lot on hand at the moment and wondered what you thought the result would be?
Yes, absolutely! Go for it.
Hi, is it possible to not separate it into 2 balls and just bake it in one sheet pan?
Yes, definitely! Go for it.
for the second rise, you say 2-4 hours depending on the temperature of the room. But for that instruction to work, don’t we need either a description of the dough at its fully risen state: double the volume?
Thank you.
Hi, yes, double is a good, rough visual cue. There’s a photo above that might offer some guidance, too. You can see from the photo before it how much it has grown to fill the space. Hope that helps.
sorry…bad editing. I meant simply a description of the dough such as doubled volume. “either” shouldn’t have been there.
I have the focaccia in the oven right now, I topped one with Trader Joe’s everything bagel topping, cake he apartment smells glorious!
Oops that should have been the apartment smells glorious
Hi Alexandra,
What is the actual temperature of lukewarm water? This isn’t the first recipe to call for boiled + cold water, but if I’m heating the water in the microwave, what temp should I look for?
Thanks for sharing your lovely recipes!
Alyce
I didn’t know either, so I googled what is the ideal temperature to activate instant yeast. The results I found were between 95 – 115 F. That is quite a range, so when my instant thermometer said 109 I poured it in. My bread did turn out a little flatter than I thought it would, not sure if that had something to do with it? Probably more just the humidity, maybe too much water, but more likely in my case, first time bread baker.
Yikes … sorry just seeing this! I would shoot for about 100 degrees. This is why, however, I do the boiled + cold water trick … no need to take the temperature, perfectly lukewarm every time.
The overnight focaccia is beautifully textured and the Maldon salt adds immeasurably. I’ve made it several times now, twice for dinner parties, and everyone raved and wanted the recipe! I love using a quarter sheet pan, which makes a particularly bubbly bread, if your readers like that texture. It toasts beautifully, too, the next day. I was thinking about Stefan’s question from Germany–likely the flour, humidity, yeast and water all differ, thus creating a particularly sticky dough. If he reduces the water by a tablespoon or two, maybe he’ll strike the right formula.
H E A V E N L Y!!! Just heavenly!
I’ve been baking from your book for a few months now and have never been disappointed. You’ve taken me from someone who would not allow a packet of yeast in her home to baking bread multiple times a week. Thank you so much for sharing your gift of bread baking!
Oh ALICE!!! This makes me so happy. Thanks for writing, and thank you for your kind words 🙂 🙂 🙂
Hi! I’m trying this recipe for the first time. I just made the dough, but I think I may have messed up already. I didn’t whisk the flour, yeast and salt together before I put the water in. Is it going to ruin the dough?
Hi —
Can active dry yeast work instead of instant yeast?
Yes! With this long of a rise, you can use the two interchangeably. Note: if you are making bread and doing a 2-3 hour rise, you’ll need to bloom the yeast in warm water first. Hope that helps!
Hi Alexandra,
I’m new to your beautiful site. Love some of the recipes
and wanted to pin them to Pinterest for a later use, but pinning is not possible in your site. Is there a way I can pin these recipes instead of printing them? I don’t like to print and waste paper when possible.
Thank you.
Hi Carmela, welcome! Question: if you hover your mouse over the image, will a “p” pop up to allow you to pin? If not, I will get to the bottom of this immediately … I am a pinner as well, and love being able to pin recipes. I never thought this was an issue with my own site!
Hi, I’m in the U.K. and going to attempt to make this for a dinner party. Is all purpose flour the same as plain flour or should I be using a bread flour? I’ve found different posts mentioning both so thought I would double check. Many Thanks!
This recipe is a revelation! Such delicious bread.
I make the whole recipe in my large, well-seasoned cast iron skillet and it’s honestly one of the most delicious things I’ve ever tasted.
This is now a go-to recipe for me when I have leftover things in the fridge: spare garlic gloves, onions (which I caramelize and out on top), tomatoes, and herbs.
Thanks!!
I made this bread and cooked it on two seperate days. There are only 2 of us so I was testing it out to to see how it did so we could have fresh bread from one recipe. Cooked one half the first day and it did great.
The 2nd day we were out all day and ate out and I didnt want to cook it so I waited to cook it the 3rd day. It did fine. In the future I would not hesitate to wait a 3rd day in order to eat it fresh, because nothing beats fresh bread.
So happy to hear this, Sandra!! I agree: nothing like fresh bread.
This is absolutely the easiest and best bread EVER!… I have made it multiple times. Some time right by the recipe, sometimes I sprinkle with grated parmesean cheese, italian herbs, or rosemary. It is always great….
So happy to hear this Margaret!!! Love the sound of pam and herbs. Yum.
I love your recipes, thanks for sharing them. In step #4 you say to put the sheet pan in the oven. Do the pie plates go on a sheet pan? I read the recipe several times and couldn’t find another reference to a sheet pan. Thanks, can’t wait to try this:)
Good catch Robyn! I’ve edited the recipe. When I made the focaccia for my book, I baked it on sheet pan. No need to put the pie plates on a sheet pan. Transfer each one to the oven. Thanks for the kind words!
Thanks! I love the cookbook!! Beautiful photos and so many great recipes:)
🙂 🙂 🙂
Super simple, tons of flavor, and can be eaten with a variety of dishes. I made it with pasta. Next time I’ll try a sandwich.
Yay! So happy to hear this, Gina.
I just pulled this out of the oven and it is ALMOST perfect. I got a little heavy handed with the Maldon flaky salt. 🙁 I would either not sprinkle this with salt next time, or ask her to call out a better suited salt & perhaps amount for those of us who need a little more direction. Other than that, it turned out a little flatter than I thought it would, to me its seems more like ciabatta than focaccia. I did put it out on a sheet pan instead of two pie pans because I wanted to use it for sandwich bread and I wanted squares/rectangular pieces. I used parchment paper with about 2T of olive oil on the bottom and the bottom is crispy, slightly oily – perfect. The bread texture is wonderful and springy. It tastes great, after I picked off all the salt!, and I would definitely make again. Very hands off. It was my first attempt at focaccia, so I’m happy!
Too bad about the salt! Regarding height, I would maybe try a 9×13-inch baking dish as opposed to a sheet pan — that will definitely give you some more height.
Curious…. is the dough supposed to rise a lot int he first rise in the fridge? I did my dough last night and this morning it was flatland spread out like your pic but now 12 hours later its the same?? I thought its supposed to rise in the fridge?
It won’t have risen dramatically, but there should be a little bit of rise. I think it’s going to be fine … where are you in the process now? Did you make any changes to the recipe?
I rarely use the same recipe twice-I just love trying something new! I can’t wait to try this.
Hope you love it !