
The Best, Easiest No-Knead Brioche Buns
This post may contain affiliate links. Please read my disclosure policy.
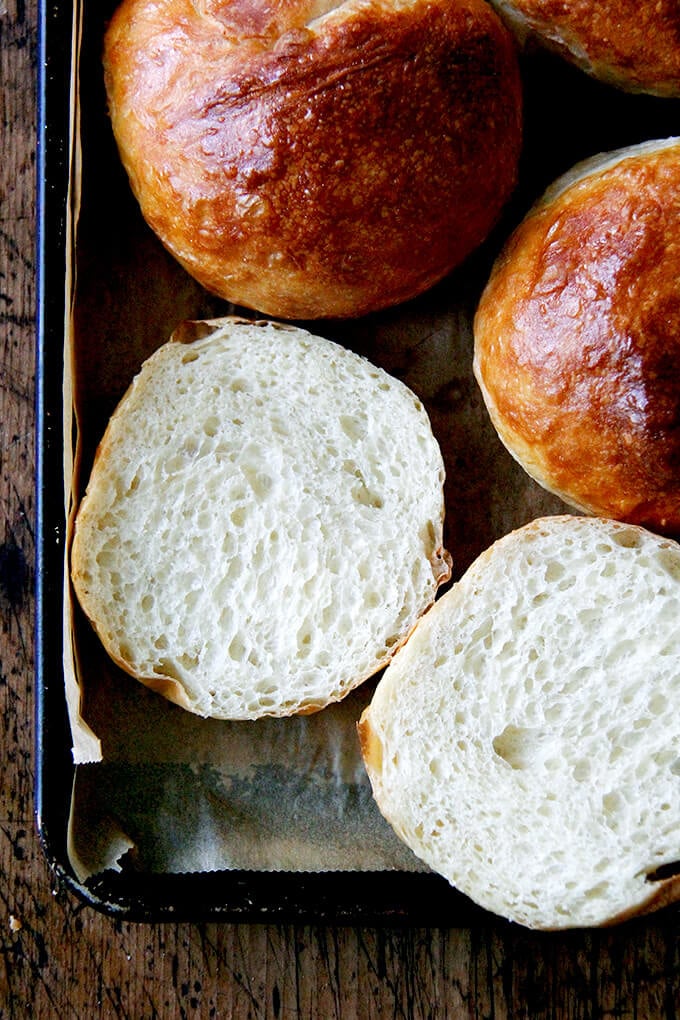
The dough for these no-knead brioche buns comes together in no time, and the buns are so light and airy. These buns are perfect for burgers, but they’re great for sandwiches of all kind! Video guidance below 🍞🍞

Today, I offer my sincerest apologies. On May 22, 2012, I posted a recipe for light brioche buns, promising you the brioche bun to end all brioche buns. Look no further, I said.
And then, in the recipe, I asked you to use not only bread flour but also a third cup of all-purpose flour. And I didn’t offer you any measurements in weights; I gave you cups only.
And I asked you to bloom your yeast in warm milk and warm water, but I didn’t tell you how warm the milk and water should be.
And I had you soften butter and massage it into the flour. I even asked you to scoop up the mixed dough and slap it down on the counter. And I asked you to knead your dough for 8 to 10 minutes until it was smooth and elastic.
Friends, I am sorry. I promise never to do this again. I promise never to ask you to use two types of flour unless it’s completely necessary. I promise never to ask you to bloom yeast. I promise to always give you weights of flour. I promise never to ask you to knead dough unless it serves some purpose.
I promise. I promise. I promise.
PS: Foolproof Homemade Bialys: A Step by Step Guide
How to Make Brioche Buns, Step by Step
The recipe included below is similar in makeup to the light brioche bun I once loved — there’s a little milk, a little butter, a little egg — but the method is simpler: in sum, it follows the Bread Toast Crumbs no-knead method.
Instant Yeast vs. Active Dry Yeast
In nearly every bread recipe on this site, I call for using instant yeast, SAF being my preference. The reason for this is because with instant yeast, you do not need to proof it — you simply stir it into the flour and salt or other dry ingredients just as you would baking soda or baking powder. Instant yeast makes bread baking so much easier and faster. If you can only find active-dry yeast, however, here’s what you do:
How to Proof Yeast
In general, proofing yeast simply requires sprinkling the active-dry yeast over the lukewarm water with a little bit of the sugar, letting it rest for 10-15 minutes or until the yeast gets foamy; then proceeding with the recipe. In this recipe, this is what you’ll do:
Whisk the egg with the water. Add the heated milk-butter mixture. Stir to combine. The mixture should be lukewarm to the touch. Sprinkle the yeast over top and let stand for 15 minutes or until it gets foamy; then proceed with the recipe.
Mix the Brioche Dough
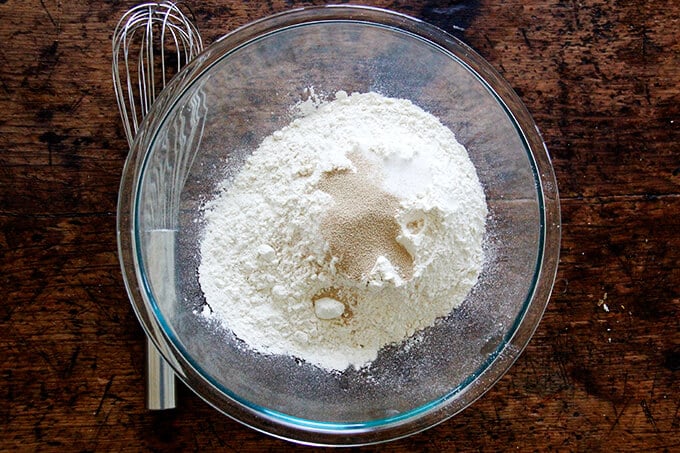
Whisk together the dry ingredients (flour, salt, sugar, and instant yeast). I cannot recommend enough using a digital scale to measure the flour. Volume measurements simply are not accurate.
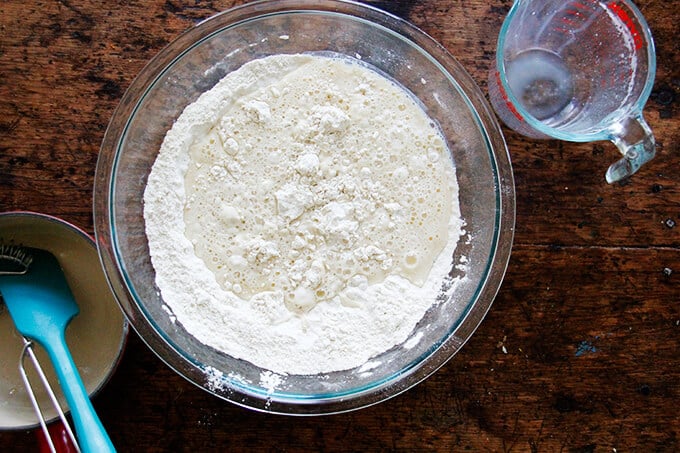
Create a lukewarm liquid by whisking together a hot milk-butter mixture into a cold water-egg mixture. The combined liquids will be perfectly lukewarm — no need to take its temperature.

Combine the wet and dry ingredients.
No Knead to Knead
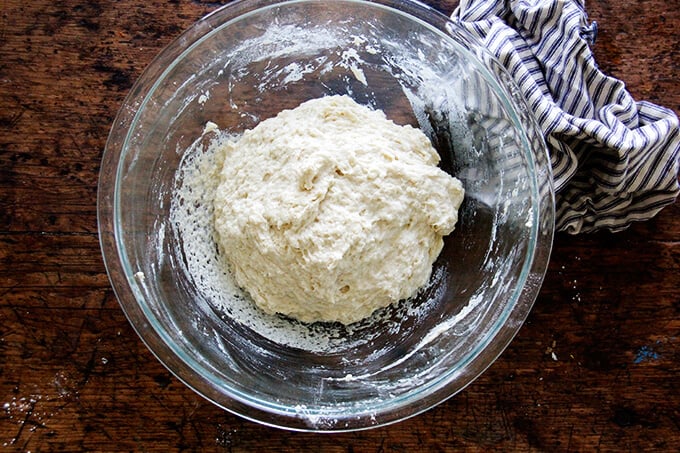
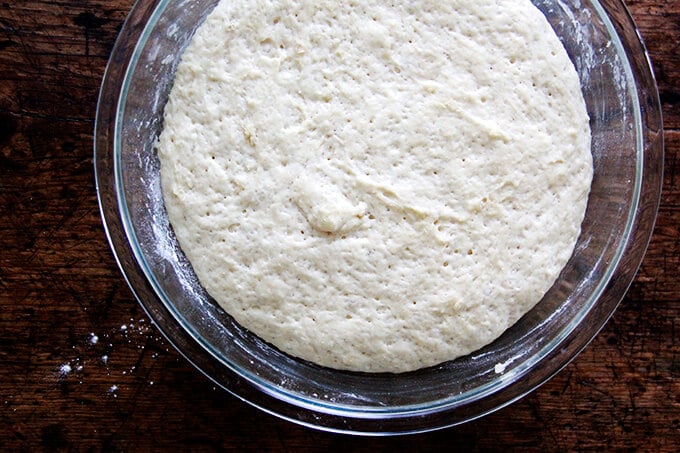
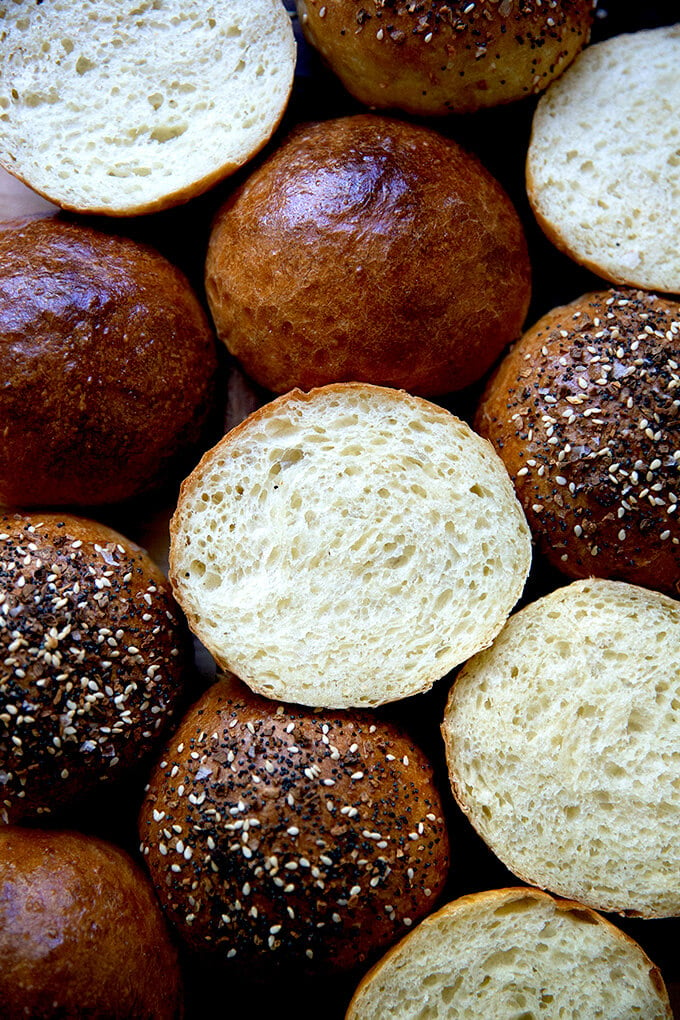
Mix with a spatula, stirring just until a sticky dough ball forms — no kneading necessary… save yourself the trouble! This is a high-hydration, wet dough. There is no need to knead it, which would require adding a lot more flour to the dough to make it manageable, which is what we don’t want. The high hydration dough makes for a light, airy crumb.
Place in a warm spot to rise (see the tip in the recipe box below for creating a warm spot to rise), and let rise till doubled.
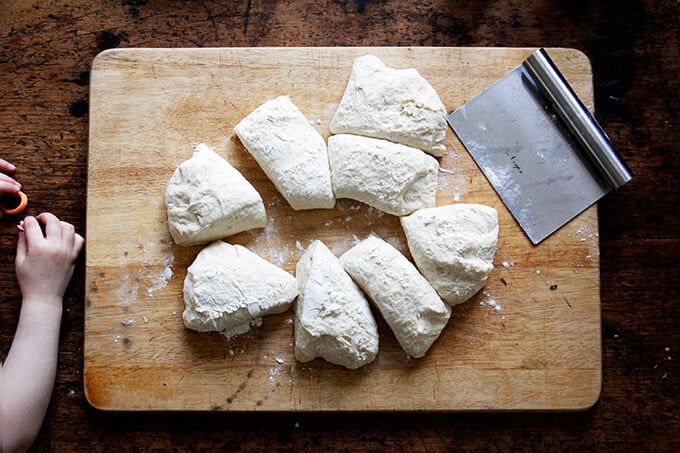
Punch the dough down using two forks.

Portion the dough into 8 to 10 pieces.
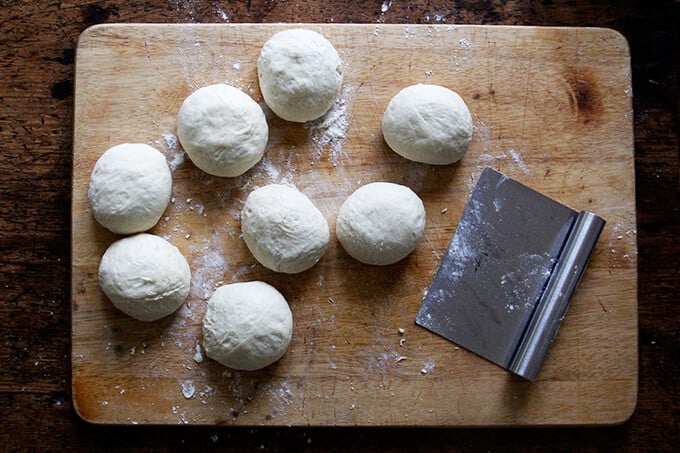
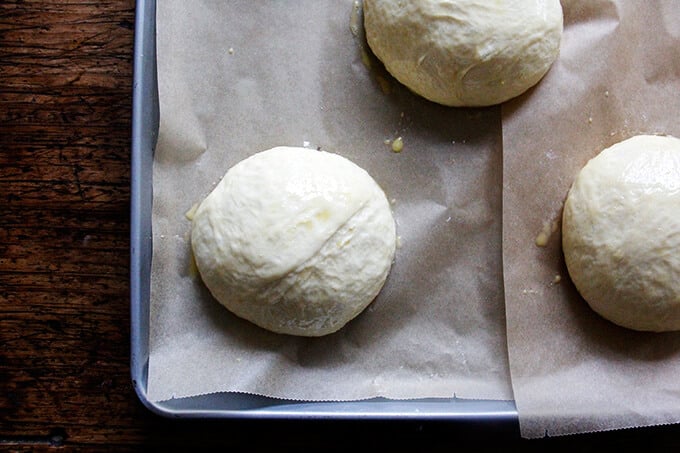
Shape the Brioche Buns
Using flour as needed, shape each portion into a ball, using the pinky edges of your fingers to tuck the dough under and create tension. See video for guidance.
Let the Buns Rise
Depending on the time of year and the temperature of your kitchen, the second rise here will take more or less time. The buns likely won’t double in volume, but they’ll look considerably puffed and they’ll feel light to the touch.
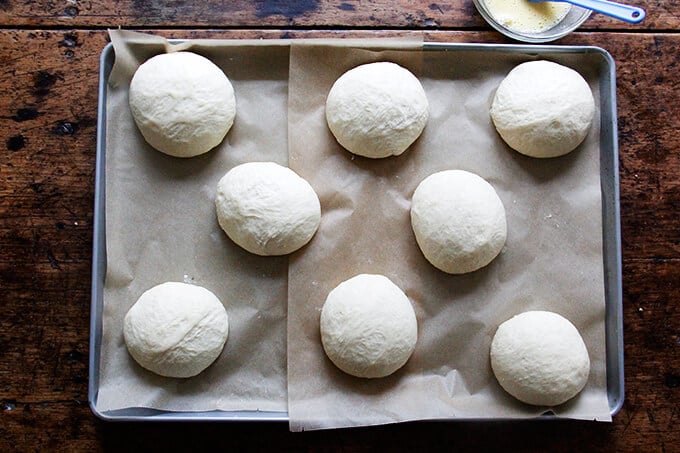
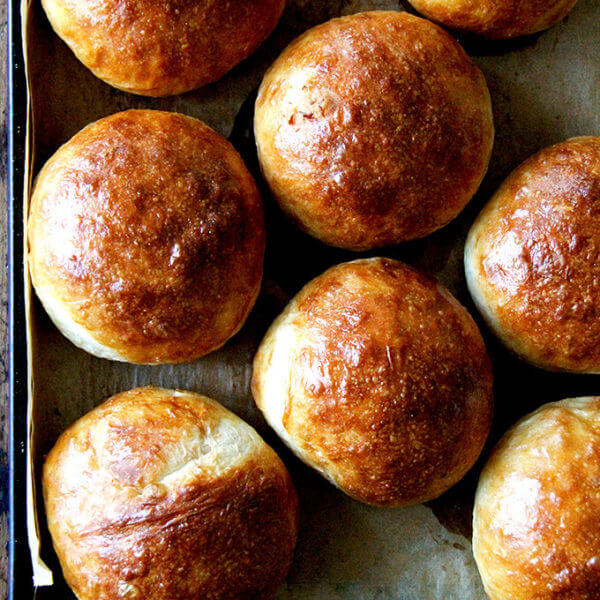
Brush each bun with an egg wash.
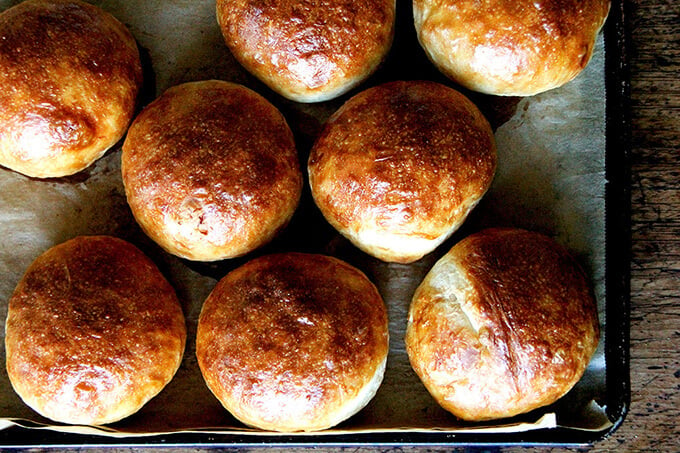
Bake the Brioche Buns
Transfer the pan to the oven, and bake for about 15 to 20 minutes or until the buns are evely golden.
Baking Timeline
You can make these rolls two ways:
- Mix the dough, let it rise for 2 to 3 hours, then shape and bake.
- Or you can mix the dough at night, store it in the refrigerator, and shape and bake in the morning.
I love the convenience of mixing dough at night and baking the following day, but you absolutely can mix and bake these the same day and get great results.
PS: No-Knead Thyme Dinner Rolls
PPS: Overnight Brioche Cinnamon Rolls
These brioche buns are perfect for burgers, pulled pork, and sandwiches of all kind, but I especially love them with Joanne Chang’s Famous Egg Sandwich from the Flour, Too cookbook:

You can sprinkle the buns with seeds or everything bagel seasoning, too:
The Best, Easiest No-Knead Brioche Buns
- Total Time: 3 hours 20 minutes
- Yield: 8-10 rolls
Description
If you have Bread Toast Crumbs, this is essentially 2/3 the light brioche recipe in the book with the sugar cut back by a bit more.
To create a warm spot for your bread to rise, turn your oven on for one minute, then shut it off. That brief blast of heat will create a cozy place for your bread to rise.
As always: for best results, use a digital scale to weigh the ingredients.
Water: Some people find this dough very wet and tricky to work with. If you live in a humid area, I would consider cutting some of the water back. If you are measuring with cups, hold 1/3 cup water. If you are using a scale, hold 75 g. You can always add the water back in when you are mixing if it seems dry. Reference the photos above and the video for how sticky/wet the dough should appear.
If using active dry yeast: Whisk the egg with the water. Add the heated milk-butter mixture. Stir to combine. The mixture should be lukewarm. Sprinkle the yeast over top and let stand for 15 minutes or until it gets foamy; then proceed with the recipe.
A Fun Variation: After brushing with the buns with the eggwash, sprinkle the buns with seeds or everything bagel seasoning.
Ingredients
- 4 cups (512 g) all-purpose or bread flour
- 2 teaspoons (10 g) kosher salt
- 2 teaspoons (8 g) instant yeast, see notes above if using active dry yeast
- 2 tablespoons (28 g) sugar
- 1 1/3 cups (300 g) cold water, or less, see notes above
- 1 egg
- 1/3 cup (78 g) milk
- 4 tablespoons (57 g) butter
- for the egg wash: 1 egg beaten with 1 tablespoon water
Instructions
- Whisk together the flour, salt, yeast, and sugar.
- In a medium bowl, whisk together the cold water and the egg.
- Heat the milk and butter together until the butter is melted. Pour this hot mixture into the cold water-egg mixture. The combined mixture should be perfectly lukewarm. Add it to the flour bowl and stir with a spatula till you have a sticky dough ball. Drizzle a teaspoon or two of olive oil over the dough and rub to coat — this prevents a crust from forming on the dough during the rising.
- Cover bowl and let rise in a warm area (see notes above) for 2 to 3 hours or until doubled. Alternatively, stick bowl in the fridge immediately and let it rise overnight or for 12 to 18 hours.
- Cover a work surface lightly with flour. Deflate dough, turn out onto work surface, and divide into 8 to 10 equal portions (use a scale and weigh each roll if you want perfectly even rolls: about 128 g each for 8 rolls and 102 g for 10 rolls). Using as much flour as necessary, roll each portion into a ball, and place on a parchment-lined sheet pan or two. I have an extra-large sheet pan (15x21x1) that I use to fit all 8 or 10 rolls on at once. (Note: If you refrigerate the dough, you can deflate it immediately after taking it out of the fridge … no need to let it come to room temperature first.)
- Let rise until the rolls puff and feel light to touch — 30-45 minutes roughly. Preheat the oven to 425ºF.
- Brush rolls with egg wash. Bake 15 to 20 minutes or until golden all around. Transfer rolls to wire rack to cool completely.
- Prep Time: 3 hours
- Cook Time: 20 minutes
- Category: Bread
- Method: Oven
- Cuisine: French, American
This post may contain affiliate links. Please read my disclosure policy.


516 Comments on “The Best, Easiest No-Knead Brioche Buns”
Making twice in a week! Blown away by how easy AND delicious these were. I live in the humid south and followed the suggestion to reduce water by 1/3 cup. Perfection!
Wonderful to hear this, Julie!
I made these twice this week! The recipe is sooo easy to follow and the buns are simple perfection! Thank you for sharing your expertise!!!
Wonderful to hear this, Maureen!
Thank you for this wonderful recipe. I live on Hawaii Island Kona side where decent bread is difficult/costly to come by in the best of times, worse now. I do a lot of bread baking for a 2-3 people household one of which is a very picky 56 yo eater who wants ‘no stuff in my bread’! After the first rise, I wrap each ball in plastic wrap, fit them into a 9 x 13 dish and store them in the fridge. I remove them an hour before the bake, unwrap them and put them under those Pyrex bowls I have to make your mom’s bread. Cut into 8 pieces they are a good sized bun for Smash Burgers. He likes them, he really does! And i have fresh, hot bread every day. I do the same thing for flatbreads. Super convenient, wonderful taste at a fraction of the cost and now without the annoyance of donning a mask. Hmm..if I bake 4 tonight, I can have the leftover toasted with butter and fresh housemade apricot jam tomorrow a.m.
Oh Nancy, I love all of. this! Your method of individually wrapping the balls is brilliant, and I’m so happy to hear your husband approves!
This recipe is amazing. Made 4 buns of about 145 gms, then divided the rest into 3 balls in a loaf pan. Buns and a brioche loaf! Froze like a dream. Soft inside, but firm enough for a burger and pulled pork sandwich. With just 2 people, I don’t like to have to buy a pkg of 8 hamburger buns. Never again!
Forgot to rate the recipe!
😍😍😍😍😍
Cindy!! Amazing to hear this 😍😍😍 Love that you made a brioche loaf, too. Thanks so much for writing/sharing all of this.
These brioche buns are phenomenal!!!!! And EASY!!! I dont need to say much more! They are soft, tender, fluffy, and delicious!!! I put the dough in the frig overnight, just added extra flour on the board as needed. The egg wash makes them shine and so pretty, and I sprinkled with sesame seeds. I wanted slightly smaller buns, so I made 16 of them, 8 each on each sheet pan (rotate the pans half way through baking)- each about 2 1/4 ounces of dough. I love a product called Freeze-Tite that I get on Amazon, and wrap what buns I am not using in that, for perfect buns at a later time! I made them with Moosewood’s Classic Tofu Burgers (chock full of veggies, nuts and tofu) found in Moosewood Restaurant Favorites. Heaven!!! I am “never” buying buns again!
Nancy amazing!! Where to begin?? I am so happy you love the buns. I love the idea of baking smaller ones. I am so intrigued by Freeze-tite … going to look it up ASAP. And yay re tofu burgers! I cannot wait to give the recipe a try. I have two of the moosewood books, but not this one, but I found the recipe on the moosewood website: https://moosewoodcooks.com/2012/08/tofu-burgers-or-meatloaf/ yay! Thanks for writing 💕
That recipe is very similar to the one I made.
https://moosewoodcooks.com/2014/01/moosewoods-classic-tofu-burgers/
Good luck!
Wonderful! Thank you 😍
Love the buns. We had hamburgers last night and the buns were great! I would like to make loaves next time. Do I bake it longer or change the baking temperature? Also do you have a sourdough brioche recipe?
Hi Jocelyn! Great to hear. OK, for loaves, I do 1.5X the recipe and bake the bread in two 8.5×4.5-inch loaf pans. 375ºF for 45 minutes.
No sourdough brioche recipe! But your request is making me want to experiment …
Been using this recipe many times. Has never failed me. Love the simplicity of the recipe with delicious result.
Wonderful to hear this, Lola!
I’m so excited to use this recipe for our bbq today. Would it make sense to half rise in a warm place and the other half in the fridge? I’d like to bake these in the late afternoon but want to put the dough together right now. I feel like I’m talking nonsense lol
Hi Kiran! You can absolutely mix the dough now, let it rise at room temperature for an hour or so; then transfer to the fridge. I would remove the dough at least 2 hours before you plan on serving them, so you have time to shape them, let them rise again, and bake them.
You also can simply mix the dough, let it rise, shape and bake … they will absolutely still be fresh for the bbq. But if you need to be away from the house or you just don’t have time till the afternoon, then do the fridge method.
Perfection, absolute perfection! They are beautiful, easy to make, totally delicious, and are fast becoming a “must have on hand at all times” staple in my house.
Wonderful to hear this, Harriet!
Great recipe. Easy and delicious. Dough was a bit sticky to work with but tasted great. Video was helpful. My family says we are never going back to store bought hamburger rolls. Thanks for a fantastic recipe!
Wonderful to hear this, Michelle!
Such a great recipe! Thanks so much for this. I always said I would never bake bread (even though I love to cook!) because I could always get delicious bread at a bakery, but recently I haven’t had access to great fresh bread recently, so I started baking your focaccia and now these. My family is so so happy to have fresh bread all the time and I know I will continue baking bread even after things go back to normal. I’m addicted!
Oh wonderful! Tiffany, I’m so happy to hear all of this! Thanks for writing. 😍😍😍🍞🍞🍞
These are perfect and so pretty and so quick. I would definitely recommend refrigerating the dough overnight because it makes handling and shaping the buns much easier. They look beautiful and are especially delicious with…everything, but we did love Alexandra’s sweet potato, quinoa, mushroom veggie burgers. The few minutes of preparation really are worth the effort.
Wonderful to hear this, Mary!
Hey! Could i 1/2 or 1/4th the recipe if i wanted to make 2 or maybe 4 buns?
Im just a lone girl in uni so i dont have a need for these many buns haha 🙂 (im low on freezer space so no freezing suggestion please)
Absolutely! If you scroll back through the comments, in fact, you’ll find that someone did just this — scaled the recipe back to make 2 or 4 buns … I forget exactly. The only problem I foresee with the math is the egg… I think it would be fine to omit.
Thank you so much! Will be making these on Monday, cant thank you enough! 🙂
Just made the brioche buns. I used your book recipe & this version. HOLY COW. These are Delicious!! Is it wrong that I ate one ALL BY MYSELF fresh out of the oven? I promise I’ll share the rest of them. One small snafu, even though I used the egg wash they didn’t come out shiny?? Any thoughts on why?
NOT wrong at all 😍😍😍 So great to hear this, Carol! Regarding the shine, strange! I just did some googling. You could try next time using egg yolk alone whisked with 2 teaspoons water and see if you get more of a shine.
Fabulous. Have made them 2x and can’t believe how easy they are. I normally bake sourdough, but sometimes ya need a good quick brioche hamburger bun!! Thx you!
Totally 🙂 🙂 🙂 So happy to hear this, Linz!
Yum! Mine turned out a little dense, and my crumb looked different from yours pictured, so I suspect a bit too much flour. Just got a scale, and will try again. So good toasted with butter and jam 😋
Wonderful to hear this, Cynthia! And yay re scale — it will change everything!!
this is my go to bread recipe, I replace the 1 cup of the AP flour with whole wheat for more fiber and then sprinkle chia seed on the top before I put in the oven. Love it!!!
Wonderful to hear this, Asri! Love the idea of chia on top 😍
Hi Ali, can I use sourdough starter instead of yeast for this? If, how much please. Thank you.
Hi Jessy! I have been meaning to try this. I would try 100 g starter. Let me know if you give it a try… I’ll try soon, too.
Yes, 100g sourdough starter works!! So yummy.
Wonderful to hear this, Jessy!
Hi Ali, do you need to substract something in the recipe besides yeast if you add 100g sourdough starter? The process of mixing and overnight rise is the same?
I would subtract 50 grams each flour and water from the recipe. Mixing will be the same. The first rise will take much much longer, so get the dough into a straight-sided vessel, and wait until it increases in volume by at least 50% or up to 75%. I would cold proof them, too, after you shape them for 24 hours though you could do a room temperature rise instead if that is preferable.
Now that I think of it, maybe just cut back 50 grams of the water but leave the flour the same. This is a wet dough, and I worry that it might be problematic with a sourdough starter if it is too wet.
I definitely want to try this recipe but I have a question. In the video you smear oil on the mixed dough but it’s not mentioned in your comments or the recipe as written.
Hi Halinka! The truth is that it is not a critical step. I smear oil over the dough especially when I am going to do a refrigerator rise to prevent a crust from forming on the dough. If you are doing a short rise (2-3 hours), you can get away with not using oil.
So nice of you to reply so quickly. I appreciate it and will definitely be making them. One more question, about how wide do these bake up? We like big burgers.
Sure thing! I don’t know exactly, but if you like big burgers, I would definitely divide this into 8 portions as opposed to 10.
Excited to try these! Currently proofing in the fridge. I have done the ones from your book and they are fantastic. I just wanted to say the step to grease before proofing is in your video, but not the instructions :).
Thanks for the heads up Charley!! Going to edit now 🙂
Is it possible to let the dough rise, shape into balls, and THEN refrigerate overnight (similar to the method for your overnight cinnamon rolls), and let come to room temp the next day and bake instead of having to shape and rise the second day?
Hi Emma! Yes, I think so. These are my concerns: 1. The dough drying out. To prevent it, I would rub each ball in olive oil or other. 2. Over-proofing. Because they aren’t packed tightly together the way cinnamon rolls are, I worry they might grow too big. That said, I think you could play it by ear. If they look nicely grown in the fridge, I would bake them immediately from the fridge; if they still look like they could use some proofing, you could let them rise at room temperature briefly before baking them.
You could also do a test with half of the dough so as to not waste a whole batch of dough should the fridge method not work.
This is our family go to brioche loaf. It started out dense, but somewhere along the way we figures how to shape and mix it and what an amazing thing it is. Beautiful, sky high, soft loaves. Thank you for the recipe.
Since this has been used for your cinnamon roll recipe as well, is it possible to adapt the same for a brioche babka of sorts? Or should I stick to your challah recipe, which again is stellar and one of the first bakes I’ve done..
So nice to hear this! And yes, absolutely you can use this dough for a brioche babka … please report back 🙂 🙂 🙂
UPDATE: Tried making them into a babka and miserably failed. Well not truly miserably. Everything was manageable till I rolled it up. Turns out the quantity is more than what would fit a loaf pan. So cut off a few as rolls and baked them, glazed them – amazing! BUT the babka itself flopped over with all the extra hydration. The dough did bake out well, but the texture overall was too soft and gooey for the filling ratio. I’d stick to your challah recipe instead. Adapt these into filled rolls instead.
Thanks. 🙂
Oh no! I steered your wrong … I’m sorry. I assumed bc I use this dough to make cinnamon rolls, it would be fine with babka, but I suppose the dough does probably need a bit more strength. Thank you for experimenting, and thank you for reporting back. Sorry it didn’t work out!
Oh no. Don’t apologise. It’s always fun trying out new things. The strength did lack but then again I did a riff on adzuki bean filling using moong beans. That could also have been the issue. On the positive side, it tastes brilliant just out of the fridge, cold. 😅
Thank you so much for your prompt response. You are a wonderful person.
Awww, you’re too sweet Aashna 🙂 🙂 🙂 Thanks so much. The adzuki bean filling sounds fabulous!
I am definitely going to make these buns but I have two questions. What size of egg do you use and should I use fresh milk as opposed to the long-life UHT milk.
Love your blog and have your book on order.
Hi Cheryl! I use large eggs, and though I’ve never used UHT milk here, I think it would be fine. Whatever you have on hand or is easiest, go for. Thank you re book and blog 🙂 🙂 🙂
This recipe is amazing, it’s so easy to mix upI I keep some dough in the refrigerator at all times, so we can always have fresh rolls & we never buy bread at the store. I’ve baked it immediately after removing from the fridge. I’ve forgotten I took some out of the fridge to rise, so it was 4 hours before I baked it. Always absolutely delicious.
Wonderful to hear this, Deborah! Thanks so much for writing.
Can’t wait to make this recipe! I am planning to freeze a portion of the buns. What are the baking instructions for baking these from frozen? Thanks!
Hi Christina! Are you planning on freezing the unbaked dough? If so, I would freeze the shaped buns immediately after shaping them. To bake, I would thaw overnight in the fridge; then transfer to sheet pan the following morning. Play it by ear: if the buns look thawed and puffed, you can bake them straight from the freezer; if they don’t, let them come to room temperature until they puff.
I’ve made the recipe with instant yeast and all the water. I baked it same day for 15 min. I found the texture to be a bit dry and crumbly. I thought brioche bread had more elasticity. I don’t know if it’s because I am at high elevation 5,800 feet, or because this is a no-knead recipe and it’s suppose to be like that. Any suggestions, comments? I am new to baking, so I don’t know how to fix it.
Hi Anna! Are you using a scale to measure?
I did not. I’ll try with the scale next time. Thank you
I made these today, and they turned out fabulous.
Wonderful to hear this, Dorina!
Made these last Sunday! I don’t think there will ever be a need to buy burger buns again if I do a little planning. They were so good, light and soft, with the perfect crust thanks to the egg wash. And they were beautiful to look at too! Thanks for the lovely recipe. You have upped our burger game.
So wonderful to hear this, Gentry! Thanks for writing!
Would you need to change anything besides making them smaller to just make dinner rolls instead of buns?
Nope! Well, maybe reduce the cooking time ever so slightly … just keep an eye on them towards the end.
Can I make these dairy free? So use oat milk instead of milk and oil / dairy free butter instead of butter?
Hi! Yes, absolutely! Sorry for the delay here.
This review is for the buns in Bread, Toast Crumbs, which may be the most valuable recipe in the book. I don’ know how many times in the past I’ve run out at the last minute to buy buns. No more! These were a little dense ( the brioche buns are probably softer and lighter, and I’ll try them next) but so easy to make, required only pantry ingredients, and stood up well to pulled pork
So nice to hear this, Mira! Thanks for writing 🙂
You can buy the Freeze-Tite at Costco. They also have the regular plastic wrap. Both really great products and a great price too!
I bought your book and absolutely love 💕 love 💕 love 💕 it!! I haven’t tried this particular brioche recipe because I prefer the richer one in the book. Am I imagining this or is the book brioche recipe 1 1/2 times this brioche recipe?? Are they basically the same or only a yield increase?? Thanks!!
Nope, not imagining anything! This is essentially 2/3 the light brioche recipe in the book with the sugar cut back by a bit more. Thanks so much for buying my book 🙂 🙂 🙂 So nice to hear you like it. And thanks for the tip on the Freeze Tite! Thank you 🙂
brilliant recipe, ali.
thank you so much.
not only did these taste better than any rolls i’ve baked before, but the instructions were simple and streamlined. no struggle involved at all.
we ate them with deb perelman’s pulled pork and i’m already wondering what to use them for next.
So nice to hear this, Jude! I’ll have to look up Deb’s recipe … that sounds amazing!