
Simple, 4-Ingredient Homemade Pizza Dough
This post may contain affiliate links. Please read my disclosure policy.
Up your pizza game with this simple, no-knead homemade pizza dough recipe. Made with 4 ingredients — flour, water, salt, and yeast — this dough is a snap to throw together, and you can use it the same day you mix it or store it in the fridge for up to 5 days (or freeze it!). If you love pizza with ballooned edges and crisp but pliable crusts, this is the pizza dough recipe you’ll come back to again and again. 🍕🍕🍕🍕🍕
Listen up: Don’t let anyone tell you you can’t make great pizza from start to finish in three hours. This is a simple 4-ingredient pizza dough recipe. The proportions are based on my mother’s peasant bread recipe, a high-hydration, no-knead, quick-to-stir together dough. It is the simplest of the simple homemade pizza recipes and, in my opinion, the tastiest, too.
Grab a bowl, a whisk, and a spatula — let’s get slinging 🍕🍕🍕🍕🍕
This post is organized as follows:
- Why High Hydration Pizza Dough is Best For a Home Oven
- Neapolitan Pizza Dough Recipe vs. Home-Oven Pizza Dough Recipe
- Pizza Dough Ingredients: Flour, Water, Salt, Yeast
- No-Knead Pizza Dough
- How to Handle High-Hydration Pizza Dough
- Two More Tips for Making the Best Pizza at Home
- Other Pizza-Making Equipment
- How to Make Pizza Dough, Step by Step
- Timing
- How to Freeze Pizza Dough
- 4 More Pizza Styles to Try
- FAQs + Troubleshooting
- My pizza cookbook: Pizza Night
Why High-Hydration Pizza Dough is Best For a Home Oven
The first step to making excellent pizza at home is to get comfortable working with high-hydration pizza doughs. High-hydration doughs, such as Jim Lahey’s popular no-knead dough, this simple sourdough pizza crust, or the one from my cookbook, Bread Toast Crumbs (which is the recipe below), are doughs made with a high proportion of water relative to the flour. The high proportion of water allows these types of doughs to be mixed together quickly and easily — no kneading or stand mixer required — and it also creates a pizza crust that stays crisp but moist during the cooking process with beautiful air pockets throughout.
Why? Let’s back up.
Neapolitan Pizza Dough Recipe vs. Home-Oven Pizza Dough Recipe
In your search for the perfect pizza dough recipe, you may have come across very promising-looking recipes for Neapolitan-style pizza with photos depicting crusts with beautifully ballooned outer edges. Contrary to what you might think, Neapolitan-style pizza dough is actually on the lower end of the hydration spectrum. If you compare those recipes to the one you find below, you’ll notice that those Neapolitan-style pizza crust recipes call for significantly less water relative to the amount of flour with hydration percentages ranging from 60 to 65 as opposed to the 88 percent hydration dough recipe below.
But didn’t you just say the secret to making excellent pizza at home is to use a lot of water? I did.
So why do Neapolitan pizza crusts perform so well at such low hydrations? Because Neapolitan pizzas cook in 60 to 90 seconds in 900ºF ovens. Yeah, and so? Stay with me here: When you bake in a super-hot oven, the cooking time will be reduced, which means there will be less time for the water in the dough to evaporate. In other words, when the cooking time is brief, the dough will be able to retain a lot of its moisture.
So, despite the low hydration, a baked Neapolitan crust is light and airy because the dough is able to retain its moisture during its brief time in the oven.
If you were to bake a 65% hydration Neapolitan pizza dough in your home oven, which can only get up to 550ºF at the most, which will in turn require a longer baking time, you likely will be disappointed with the result because the longer cooking time will allow too much water to evaporate, leaving you with a dry, tough crust.
Make sense? In other words, in order for pizza dough not to dry out in a home oven, it needs more water from the start.
(Incidentally, a high hydration dough is also the key to making excellent focaccia, like this simple sourdough focaccia or this overnight, refrigerator focaccia.)
Pizza Dough Ingredients: Flour, Water, Salt, Yeast
OK, so now that we’re on the same page — a home oven requires a high-hydration dough for best results — let’s talk about how to make this simple dough.
The recipe below calls for flour, salt, water, and yeast, all of which we will discuss in more detail below. What you will not find in this recipe is olive oil, sugar or honey, or diastatic malt. Why? For one, simplicity. But more importantly, for this style of pizza, these ingredients do not help. Here’s why:
Olive Oil: Olive oil is added to dough recipes that call for long bakes because olive oil helps keep dough tender by “shortening” the gluten network. But for a short bake, such as the 5- to 6-minute bake called for here, olive oil mostly helps transfer heat from the cooking surface to the dough, which can result in too much browning.
Sweetener: Simply stated, a sweetener is not needed — the yeast, contrary to popular belief, does not need sugar to activate or thrive. Sweeteners, moreover, can cause the dough to ferment too quickly and they can also cause the dough to burn when baked at hot temperatures.
Diastatic Malt: Diastatic malt, an enzyme that converts the starches in flour to sugar, is added to pizza dough to promote good browning in the crust. Truthfully, I’ve never used it because I don’t like running around for odd ingredients that I don’t believe to be necessary. Ideally, with this recipe, the dough will spend some time in the fridge (see below: How to Make the Best Pizza Dough at Home: Two Tips), during which time enzymes in both the flour and the yeast will break down the starches in the flour into simple sugars, which will contribute both to flavor and to browning.
No-Knead Pizza Dough
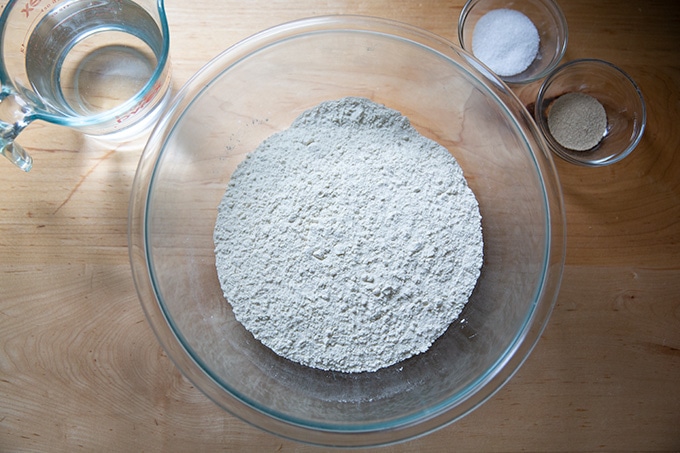
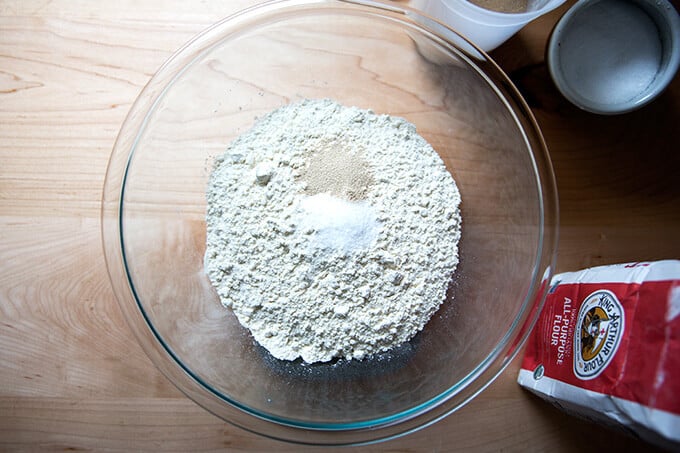
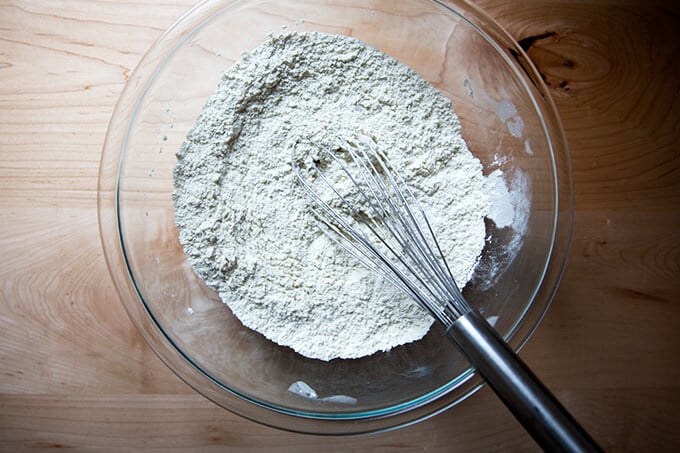
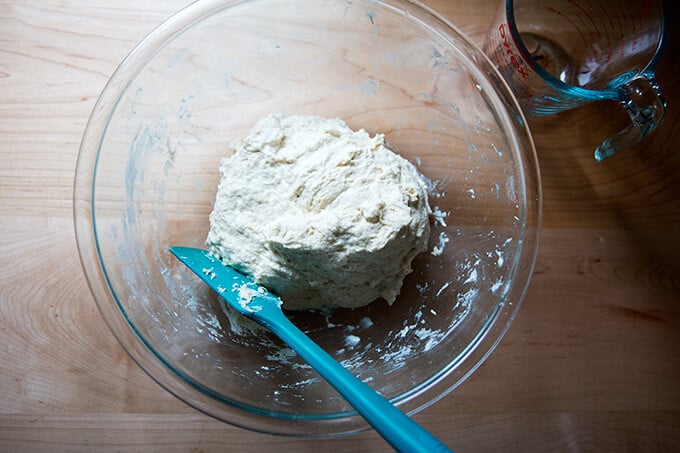
To make this dough, you’ll whisk together flour, salt, and instant yeast. Then you’ll add water and stir with a spatula until the water is absorbed and you have a wet, sticky dough ball. That’s it. That is the beauty of a no-knead dough. Let’s take a look at the ingredients in more depth:
Yeast
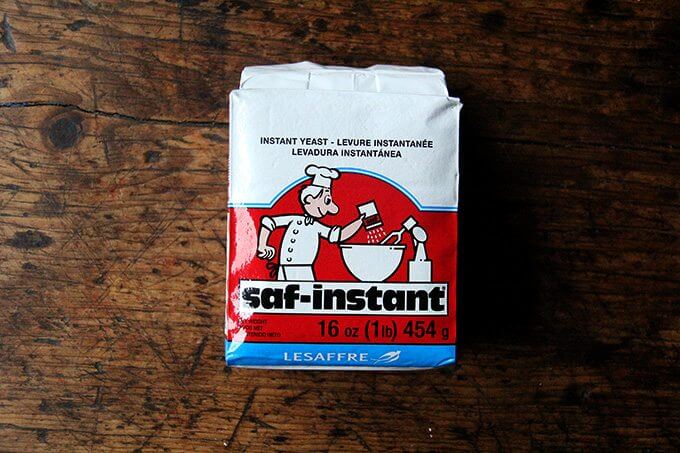
Yeast is what will make your pizza rise, and my preference for all pizza and bread recipes is SAF Instant Yeast. The beauty of instant yeast is that you can stir it directly into the flour — no need to “proof” or “bloom” it.
Active Dry Yeast works here, too: Red Star Active Dry is my preference. To use active dry yeast instead, simply sprinkle it over the lukewarm water and let it stand for about 10 minutes or until it gets foamy before adding to the other ingredients.
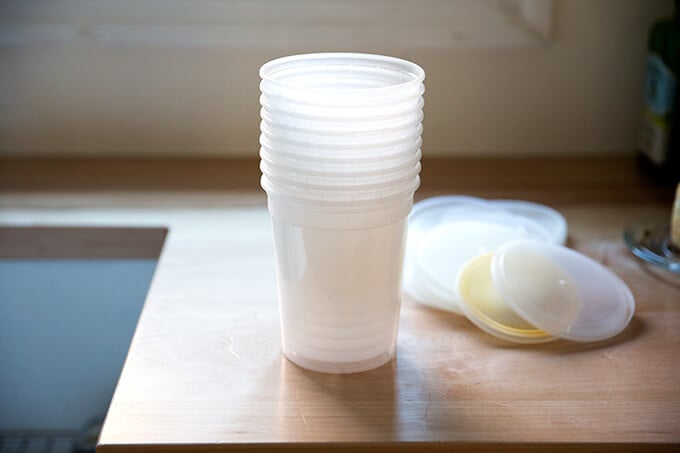
Store yeast in the fridge or freezer for up to a year. These quart containers are great for storing yeast.
If you would prefer to make pizza with a sourdough starter, see this Sourdough Pizza Crust Recipe
Flour: Tipo 00 vs. Bread vs. All-Purpose
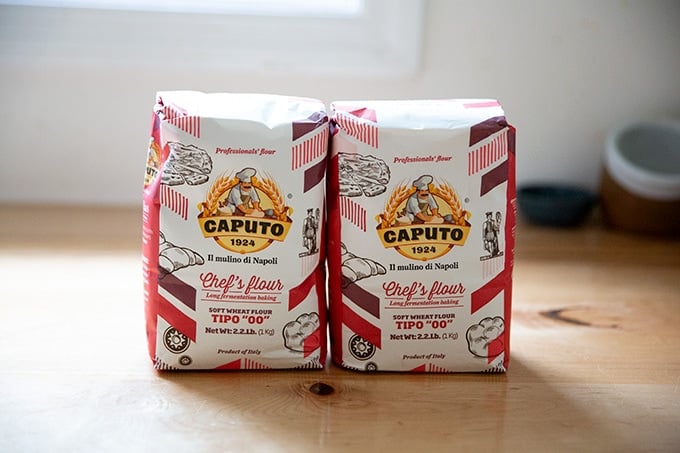
Tipo 00 flour is the flour requisite in the production of D.O.C. Neapolitan pizza. Contrary to popular belief, the “00” is not an indicator of protein content. It refers, rather, to the fineness of the milling, “00” being the finest grade in the Italian classification system.
If you have never used tipo 00 flour, you may have enjoyed how nicely your dough handled, how easily it extended.
There was a period during which I used tipo 00 flour exclusively, but today I find I get just as good results when I use bread flour or all-purpose flour, King Arthur Flour being my favorite brand.
What is the difference between the two? Mostly the protein content. KAF bread flour has a higher protein content (12.7% protein) than the all-purpose flour (11.7% protein).
A dough made with bread flour as opposed to all-purpose flour will absorb slightly more liquid and will therefore be slightly stiffer. If you live in a humid environment and often find your dough to be too wet, using bread flour may help.
I must confess I am constantly changing my opinion about what type of flour makes the best pizza and this, I’ve learned, is because the flour itself is constantly changing from season to season and from year to year.
Moreover, every brand of flour absorbs water differently. For instance, King Arthur Flour’s 00 flour will absorb water differently than Giusto’s 00 Flour and Caputo’s 00 flour. Each of these varieties of 00 flour will taste differently, too. Same goes for different brands of all-purpose and bread flours.
In sum, the key is to use good flour: unbleached and unbromated flour. And I encourage you to experiment. What works best for me in my environment might not work as well for you in yours.
Salt
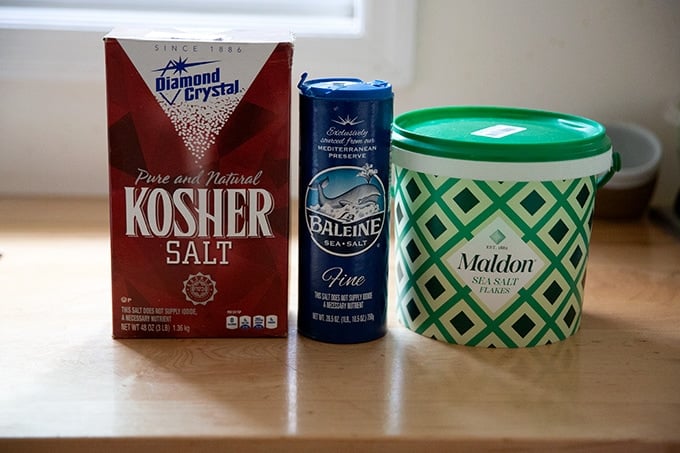
For pizza dough, my preference is Diamond Crystal kosher salt or Baleine fine sea salt, both of which dissolve quickly.
For finishing, I love Maldon sea salt. I finish nearly every pizza dough round I top with a drizzle of olive oil and a sprinkle of sea salt.
Water
I have no trouble using cold water from my tap, which I mix with boiling water to create perfectly lukewarm water (see recipe box for details). That said, if you suspect your water is adversely affecting your pizza dough, here are two tips:
- Use water that you’ve left out overnight to ensure any chlorine has evaporated.
- Buy spring water. In some places, letting water sit out overnight will not be effective.
Working with High Hydration Dough
OK, let’s review: to make great pizza at home, a high-hydration dough made with four good ingredients is best. Now let’s talk about how to deal with this super wet dough.
#1 Tip: Handle it gently.
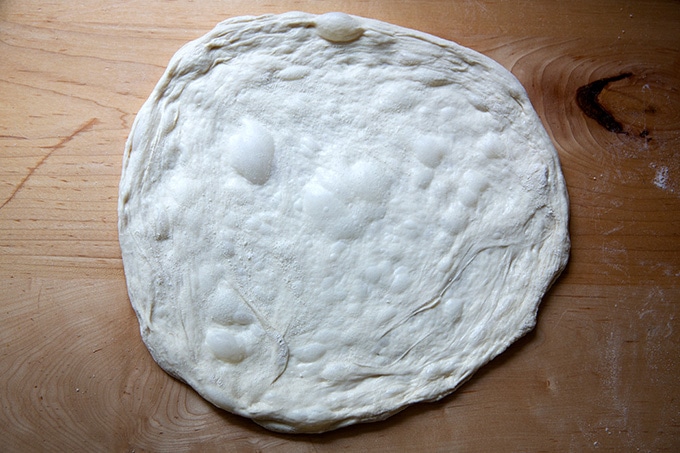
“As soon as I began really paying attention to how I shaped my pizza rounds by taking care to use a gentle hand, I noticed a difference in the finished product. The air pockets pervading the unbaked round really affect the texture of the baked pizza.”
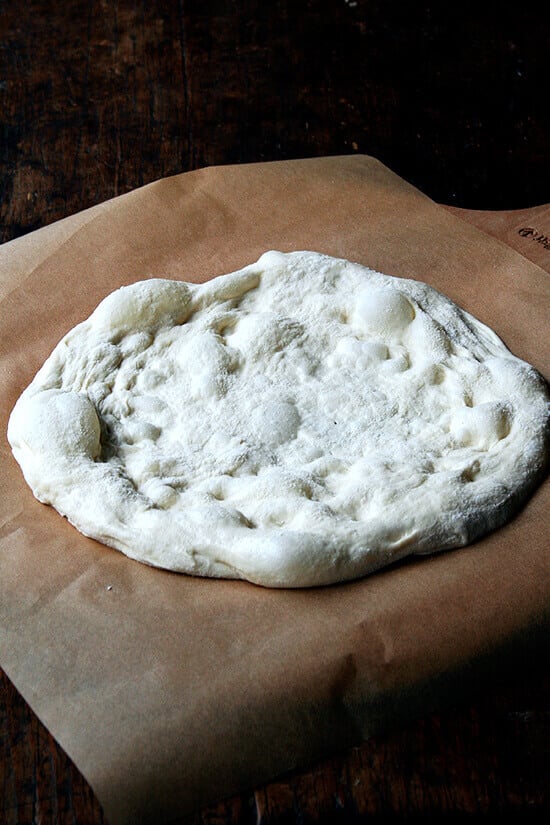
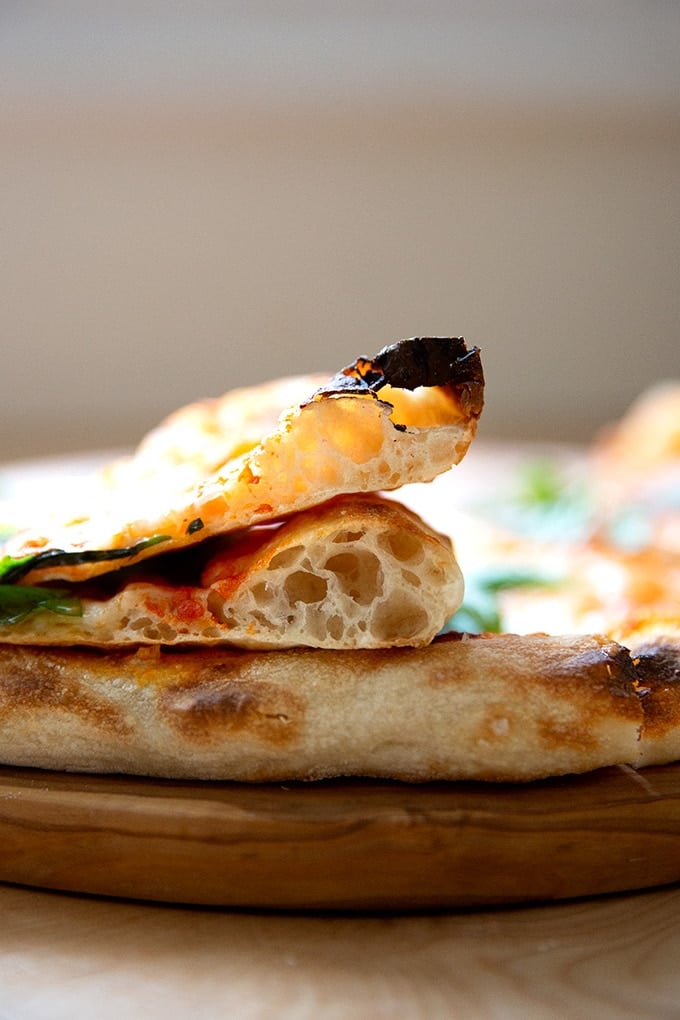
During the shaping process — the point at which you are stretching your ball of dough into a 10- to 12-inch round — take care to use a light touch (see the video above for reference). When you handle the dough minimally, you preserve the bubbles created during the rising. See these bubbles? …
Those bubbles become these ballooned textures throughout the dough:
Two More Tips for Making Excellent Pizza at Home
Let’s review again, to make excellent pizza at home, you should:
- Use a high-hydration pizza dough.
- Use good quality ingredients.
- Handle the dough minimally.
Here are two more tips:
1. Invest in a Baking Steel
The single best and easiest/most affordable step you can take to make better pizza at home is to invest in a Baking Steel. In short, steel is a more conductive cooking surface than stone. This means heat transfers more quickly from steel to food than it does from stone to food. Why is this important for pizza? Serious Eats’ Kenji J Lopez Alt offers this explanation:
“How does the baking surface affect hole structure? Well those crust holes develop when air and water vapor trapped inside the dough matrix suddenly expand upon heating in a phenomenon known as oven spring. The faster you can transfer energy to the dough, the bigger those glorious bubbles will be, and the airier and more delicate the crust.”
I get the best results when I place my Baking Steel in the upper third of my oven, but every oven is different, so play around with placement till you find the sweet spot.
The beauty of the Baking Steel + a high-hydration dough.
2. If Time Permits, Refrigerate The Dough
During a long, slow, cold fermentation, enzymes in both the flour and the yeast will break down the starches in the flour into simple sugars, which will contribute both to flavor and to browning. Moreover, during this time in the fridge, the dough will relax, making it easier to stretch.
Other Pizza Making Equipment
As always, for best results with bread or pizza recipes, use a digital scale. I cannot emphasize enough the importance of this. Measuring by weight is the only way to truly measure your ingredients accurately. It also, in turn, allows you to make meaningful adjustments to a recipe — i.e. reducing the water quantity — to make it work best given the flour you are using and your environment.
A pizza peel. You need a mechanism to get the dough round from your counter to your Steel. A peel plus a sheet of parchment paper makes this easy.
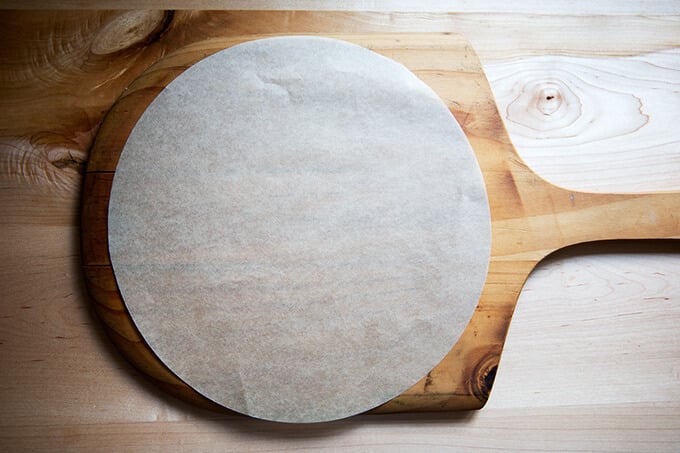
Parchment paper. For easy transfer of pizza from peel to Steel, my preference is to use parchment paper, which stays with the pizza in the oven. The alternative is to sprinkle your peel with cornmeal or flour or something to prevent it from sticking. These ingredients ultimately end up burning on the Steel or making a mess on your oven floor. No thank you. Recently, I’ve been buying these rounds, but standard rectangular sheets of parchment work just fine, too.
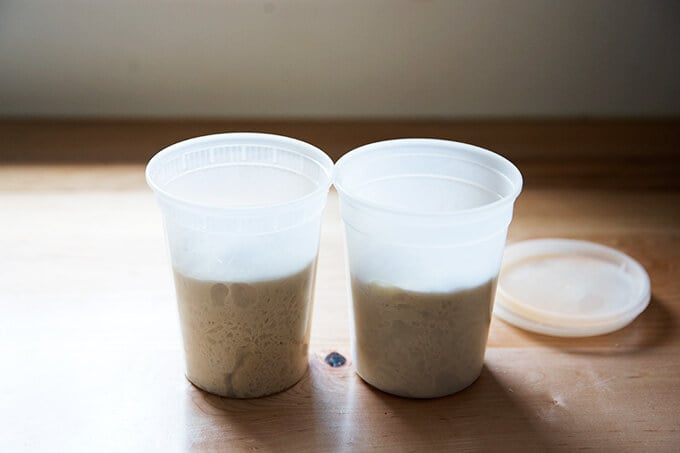
Quart containers: These are the handiest containers for all sorts of things (soups, stocks, stews, storing yeast) but especially rounds of pizza dough. Dough can stay in the fridge for up to 5 days or frozen for up to 3 months.
How to Make Pizza Dough, Step by Step
OK! Are you ready? Let’s make pizza dough:
Whisk together flour, salt, and instant yeast (SAF is my preference):
Add water, and …
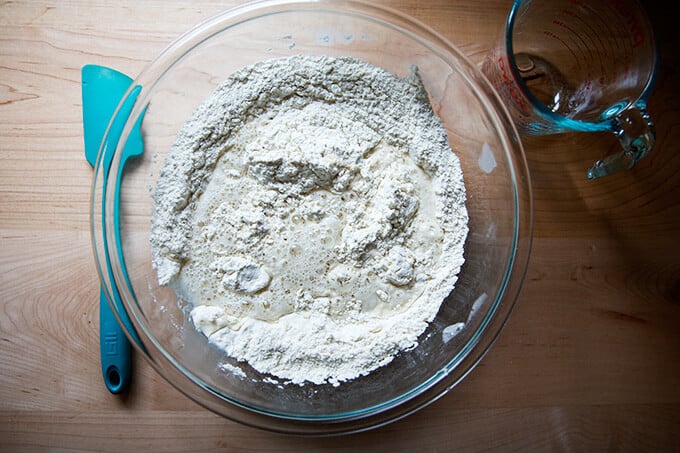
… mix to form a sticky dough ball:
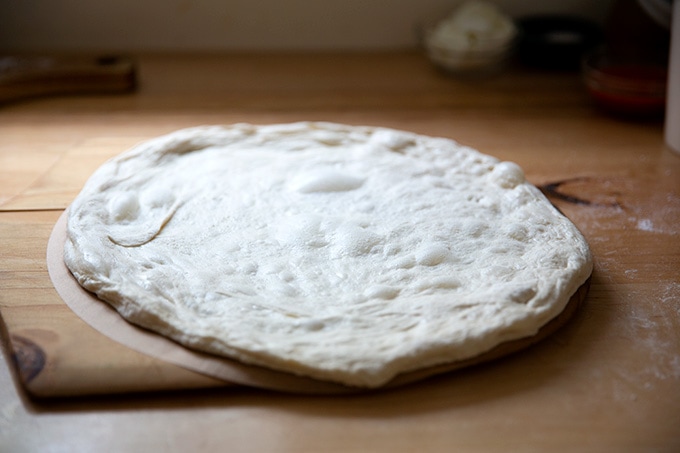
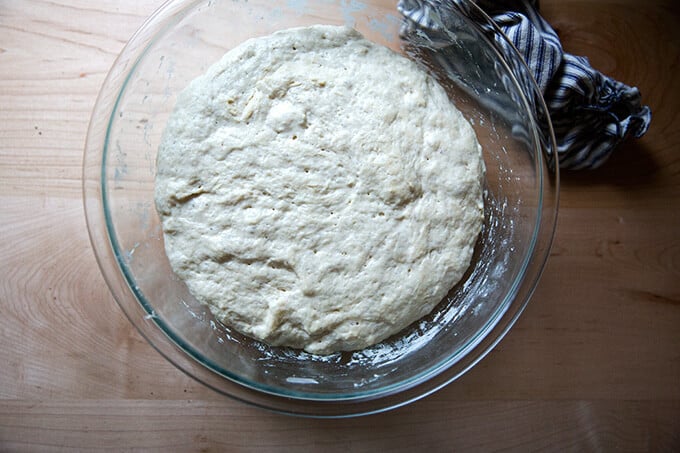
Let rise in a warm spot till nearly doubled, about 1.5 hours.
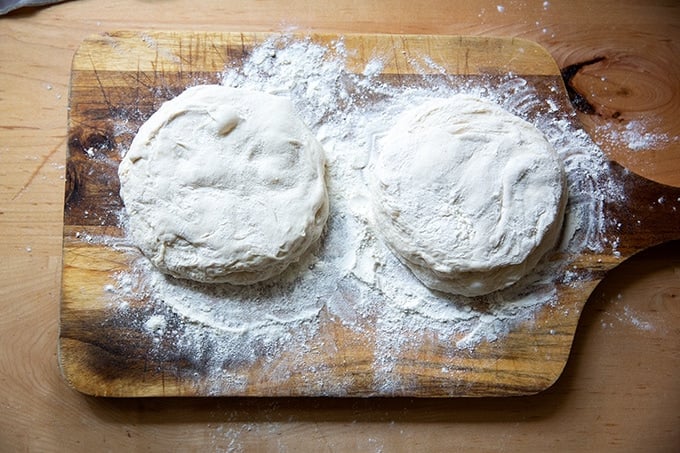
Turn out onto a floured work surface.

Divide into four portions and …
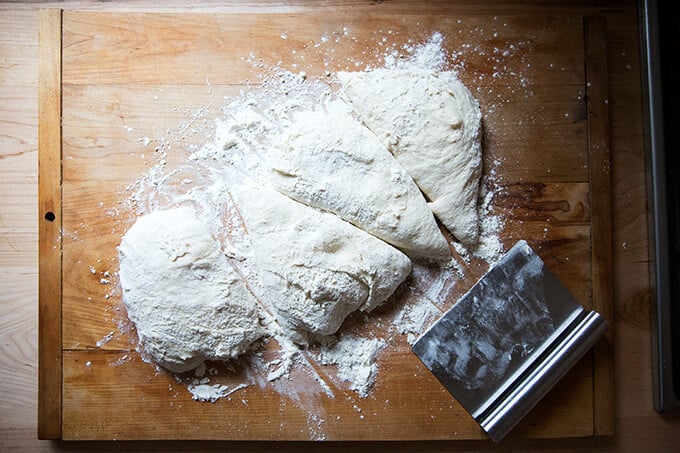
… ball up, using as much flour as needed.

If you are baking pizza immediately, let the dough rest for another hour before shaping. Otherwise, transfer the balls to quart containers and stick them in the fridge.

This is the dough after a night in the fridge.
Turn the dough out onto a floured work surface and use your hands to cup the dough into a round.
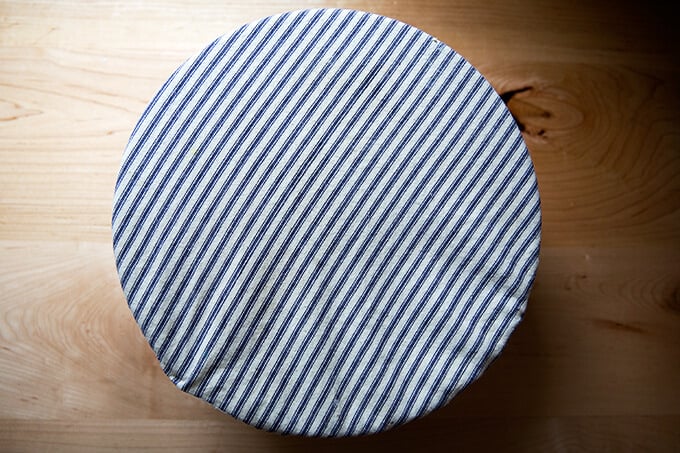
Let the rounds sit for about an hour covered in a towel.

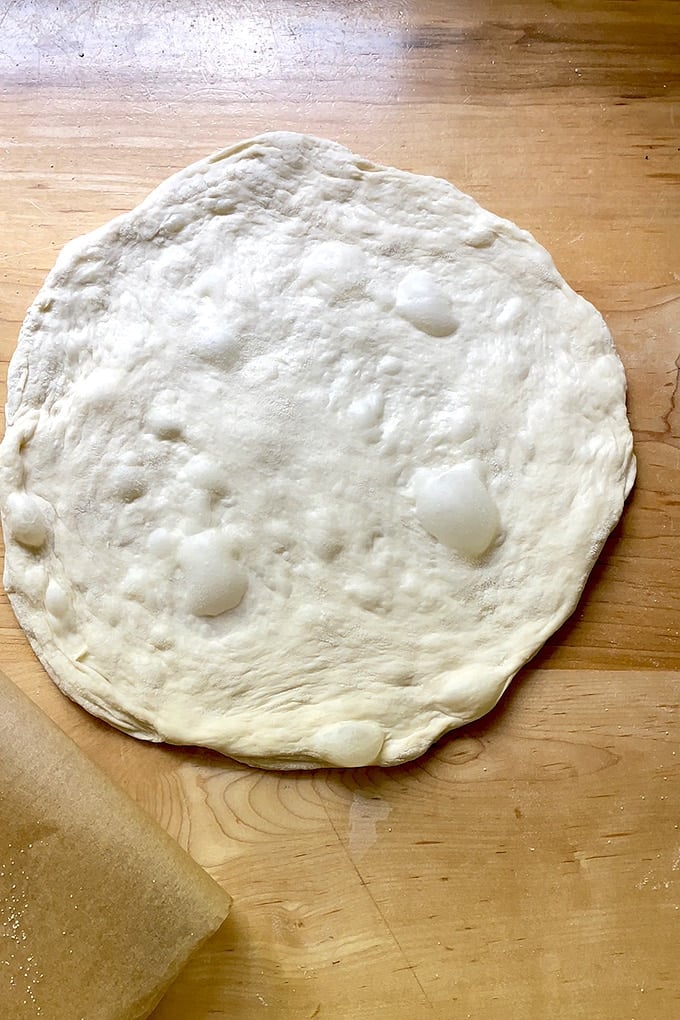
Gently stretch a round into an 11-inch round (roughly).
Transfer the round to a peel lined with parchment paper.
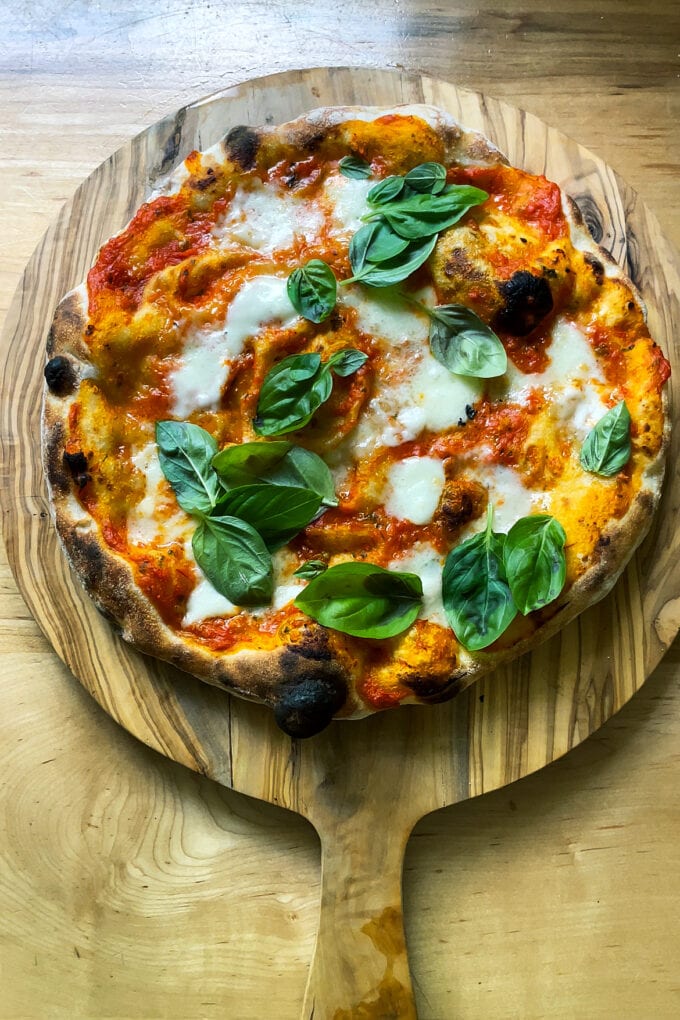
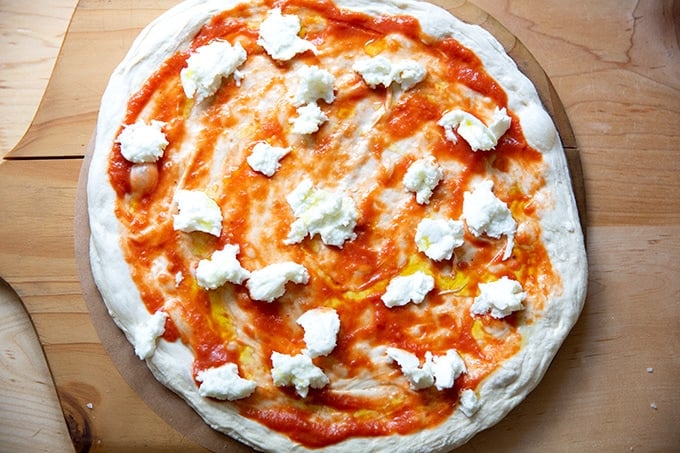
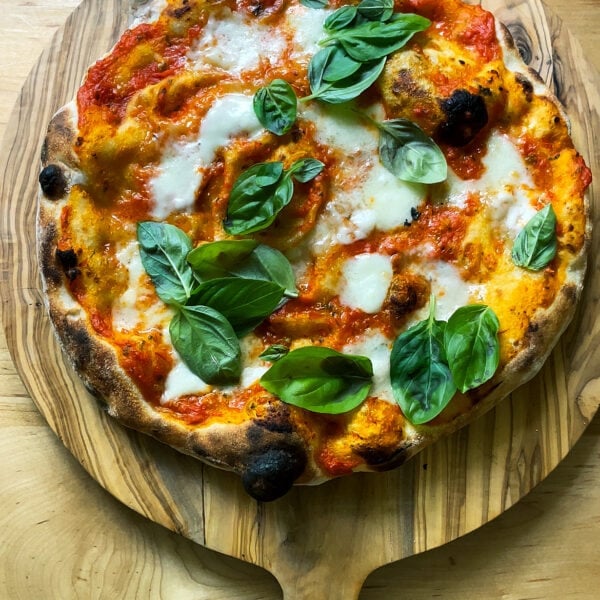
Get your toppings ready. For a classic Margherita pizza, youll need tomato sauce, mozzarella, and fresh basil.
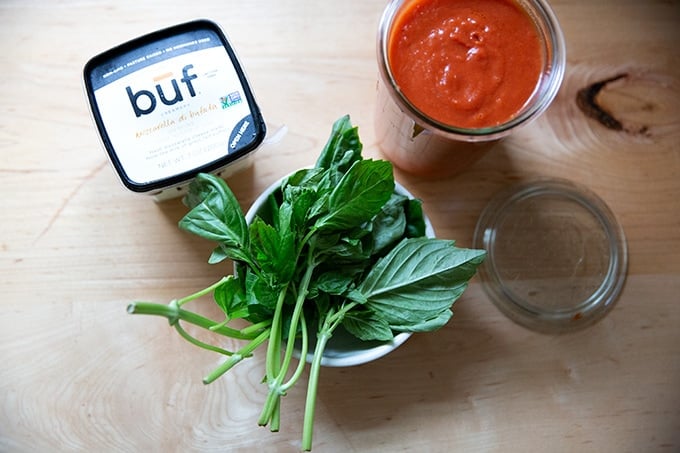
Spread about 2 ounces of tomato sauce over your dough.
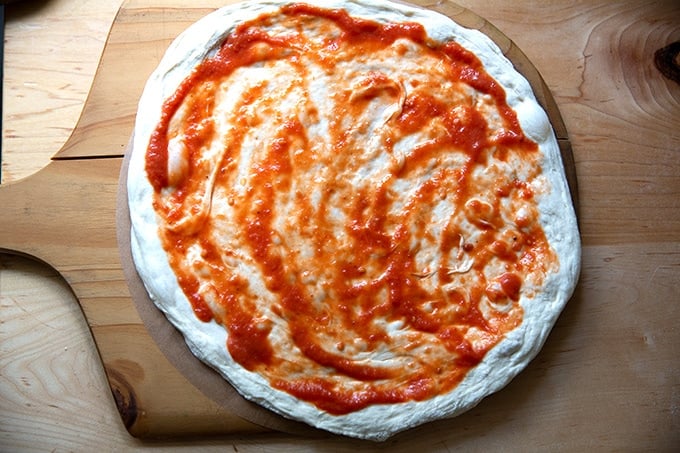
Top with about 3 ounces of mozzarella. Drizzle lightly with olive oil and sprinkle with sea salt.
Bake on a preheated Baking Steel at 550ºF for 5 to 6 minutes. Shower with fresh basil out of the oven.

The beauty of the Baking Steel + high hydration dough: oven spring.
Timing
As noted above, you can mix and use this dough today — it does not require a long, slow rise. If you want to make it ahead of time, however, and stick it in the fridge until pizza night, that works, too:
- Make it Tonight: Plan on 3 hours start to finish from when you mix your dough to when you turn out a freshly baked pizza.
- Make it Tomorrow (and beyond): Method 1: Mix your dough today, let it rise for 1.5 hours (roughly). Portion it into 4 balls; then transfer to the fridge for up to 3 days (or even longer). When using dough you’ve stored in the refrigerator, remove it one hour prior to baking.
- Make it Tomorrow (and beyond), Method 2: Mix your dough, cover the bowl with an airtight lid or seal it tightly with plastic wrap, and immediately transfer it to the fridge. When you are ready to bake, remove the dough from the fridge 60 to 90 minutes prior to baking, portion it into 4 balls; then transfer as many as you wish to bake to a well-floured board. Transfer the remaining balls to the fridge for up to 3 days (or even longer). When using dough you’ve stored in the refrigerator, remove it 60 to 90 minutes prior to baking.
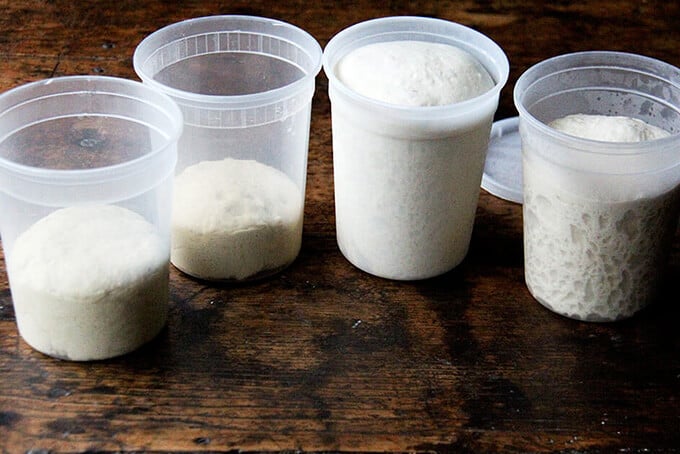
The refrigerator is your friend: The two quart containers on the left are holding freshly portioned dough; the two quart containers on the right are holding dough after 2 days in the refrigerator. Look at those bubbles!:
Can You Freeze Pizza Dough?
Yes! This has been a game-changer. To freeze pizza dough, make it through step 4 in the recipe below or until after you transfer the portioned rounds to quart containers. At this point, transfer the quart containers to the freezer for as long as 3 months. To thaw, remove a container (or more) and let thaw in the refrigerator for 18 to 24 hours or thaw at room temperature for 4 to 8 hours. Then, proceed with the recipe.
PS: Easy, Homemade Pita Bread Recipe
Four More Pizza Styles to Try
Find ALL the pizza recipes here. Below are links to four different styles of pizza to try.
FAQs & Troubleshooting
Why is my pizza dough too wet?
It is possible that given your environment and the type of flour you are using, you are using too much water relative to the amount of flour. The fix is simple: reduce the amount of water. Ideally, you are measuring with a scale, so you can ensure you are measuring accurately and making meaningful adjustments. Try holding back 50 grams of water and seeing if that helps.
That said, please read above about the importance of using a high-hydration pizza dough in a home oven. If your dough, upon being mixed, is unable to form a sticky dough ball, you likely need to reduce the water. Reference the video for dough texture.
Why is my pizza dough soggy?
There are several culprits here:
- too much sauce, cheese, and/or toppings
- oven not hot enough
- too short of a baking time
Solutions:
- Invest in a Baking Steel. Read why above.
- Try laying the cheese on top of the dough; then the sauce. The cheese might provide some insulation from the sauce, thereby preventing the dough from getting soggy.
- Consider employing a parbake: bake your pizza “naked” for one minute; then continue baking for 4 to 5 minutes more once topped.
- Try using semolina on your peel.
- Before stretching your dough ball into a round, slick it lightly in a bit of olive oil.
- Use a lighter hand when topping.

Pizza Night
My cookbook, Pizza Night, which includes 52 pizza and 52 salad recipes, one pair for every week of the year, as well as five simple desserts is now available for preorder 🍕🍕🍕
It’s organized seasonally and includes recipes for the home oven, outdoor oven, the grill, Sicilian-style, Detroit-style, grandma-style, skillet pizzas, gluten-free, and more. There are both yeast and sourdough recipes for every style of pizza in the book.
Get your copy here: Pizza Night.
Simple, 4-Ingredient Homemade Pizza Dough
- Total Time: 2 hours 35 minutes
- Yield: 4 pizzas
Description
If you love pizza with ballooned and blistered edges and a crisp but pliable crust, this is the pizza dough recipe you’ll come back to again and again. And it’s easy to make—the pizza dough is no-knead, made with 4 simple ingredients, and doesn’t require special flour. Video guidance below.
**Attention Pizza Fans**: My new cookbook, Pizza Night, is available for preorder.
NOTES:
This recipe yields 4 rounds of dough. Recipe can be halved; dough can be refrigerated for up to five days. I refrigerate individual rounds of dough in quart containers.
Dough can be frozen, too. After the first rise and after you transfer the portioned rounds to quart containers, this is your opportunity to freeze. Transfer the quart containers to the freezer for as long as 3 months. To thaw, remove a container (or more) and let thaw in the refrigerator for 1 day or thaw at room temperature for 4 to 8 hours. Then, proceed with the recipe.
Yeast: If you need to use active dry yeast instead of instant, sprinkle it over the lukewarm water and let it stand for about 10 minutes or until it gets foamy before adding to the other ingredients.
Warm place to rise: Here’s a trick for making the perfect warm spot for the dough to rise. Turn the oven on and let it preheat for 1 minute; then shut it off. The temperature will be between 80° F and 100° F. you should be able to place your hand on the oven grates without burning them.
Flour: You can use bread flour and all-purpose flour here but if you live in a humid environment, I would consider using bread flour if you can get your hands on it. If you are in Canada or the UK, also consider using bread flour or consider holding back some of the water (see next paragraph). Reference the video for how the texture of the bread should look; then add water back as needed.
Water:
I find the sweet spot for me to be about 418 grams of water, which is roughly an 82% hydration dough. If this is too high, try using 400 grams of water or even 395 grams of water, which will lower the hydration to 77%.
As noted above, this is a variation of the peasant pizza dough recipe in my cookbook. If you are unfamiliar, the peasant bread dough is a very wet, no-knead dough. The key when handling it, is to use as much flour as necessary to keep it from sticking to the board and your hands. That said, you absolutely can start with less water to make the dough more manageable. If you live in a humid environment, if you live abroad, if you are using all-purpose flour or Tipo 00 flour, if you dislike handling wet doughs, consider starting with 400 to 425 grams of water. Add water as needed to get it to the right consistency (reference the video).
To make lukewarm water, use 1 part boiling liquid to 3 parts cold liquid. For 2 cups of lukewarm water, use 1/2 cup boiling, 1 1/2 cups cold water. You don’t have to be so precise, but using this rough ratio will give you perfectly lukewarm water.
Parchment: These rounds are so handy.
Toppings: In the notes below the recipe, find the toppings for a classic Margherita pizza and for a kale, parmesan, and crème fraîche pizza. See above for 6 other favorite pizza recipes.
Ingredients
- 4 cups (512 g) bread flour or all-purpose flour, plus more for assembly
- 2 to 3 teaspoons (12 g) kosher salt
- 1 teaspoon (4 g) instant yeast
- 1.75 to 2 cups (400 to 454 g) lukewarm water, see notes above
Instructions
- To make the dough: In a large bowl, whisk together the flour, salt, and instant yeast. Add the water. Using a rubber spatula, mix until the water is absorbed and the ingredients form a sticky dough ball. Pour a drop or two of oil over top and rub with your hands to coat.
- Cover the bowl with a damp tea towel or plastic wrap and set aside in a warm spot to rise for 1 to 1 1/2 hours, or until the dough has doubled in bulk.
- If you are baking the pizzas right away (as opposed to refrigerating the dough for another day), place a Baking Steel or pizza stone in top third of oven and preheat oven to its hottest setting, 550°F. Be sure the Baking Steel heats for at least 45 minutes once the oven temperature reaches 550ºF.
- Cover a work surface or cutting board liberally with flour — use at least 1/4 cup and more as needed. The dough is very wet, so don’t hesitate to use flour as needed. Turn the dough out onto your floured surface and use a bench scraper to divide the dough into 4 equal portions. With floured hands, roll each portion into a ball, using the pinkie-edges of your hands to pinch the dough underneath each ball. If you are not baking the pizza the same day, transfer each round of dough to a plastic quart container (or something similar), cover, and store in the fridge. (At this point, transfer the vessels to the freezer for up to 3 months. See notes above for thawing.) If you are baking right away, let the balls sit on their tucked-in edges for at least 30 minutes without touching.
- To Make the Pizzas: If using refrigerated dough, pull out a pizza round from the fridge one hour (or even 90 minutes if time permits) before you plan on baking. Dust dough with flour and place on a floured work surface. Cover the dough with a towel or plastic wrap to prevent it from drying out. (Update: I now let my dough balls rest in a lidded vessel or a pan covered with plastic wrap to ensure the dough balls do not dry out during the 60-90 minutes at room temperature.) Let rest untouched for 60 to 90 minutes.
- Handling the dough as minimally as possible, shape the dough into a 10″–12″ round. If the dough has proofed sufficiently, you should be able to pick it up and stretch it very easily using the back of your hands. Lay a sheet of parchment paper on a pizza peel, and pour a few drops of oil into the center of it. (Note: the oil is optional. It’s especially helpful if you find shaping dough using the backs of your hands tricky.) Transfer the dough round to the parchment-lined baking peel.
- Top pizza as desired or to make the Margherita pizza: spread 2 ounces of tomato sauce over your pizza dough. Top with 3 ounces of mozzarella. Drizzle with olive oil. Season with a pinch of flaky sea salt. Shimmy the pizza, parchment paper and all into the oven. To make the kale and crème fraîche pizza: Place the kale in a small bowl, drizzle lightly with olive oil, season with sea salt, and toss with your hands till the kale is coated in oil and salt. Spoon crème fraîche over the dough leaving a 1/2-inch border or so—I use 1 to 2 tablespoons per pizza. Sprinkle with the garlic and a handful of the grated Parmigiano Reggiano. Top with the kale. Shimmy the pizza, parchment paper and all into the oven.
- Bake pizza until top is blistered, about 5 minutes. Transfer to cutting board. Shower basil over the pizza Margherita. Cut and serve. Discard parchment paper.
Notes
Margherita Pizza:
- 2 ounces tomato sauce, such as this one
- 3 ounces fresh mozzarella (if using buffalo mozzarella, drain before using)
- olive oil
- flaky sea salt
- fresh basil
Kale & Creme Fraiche Pizza:
- extra-virgin olive oil
- a couple handfuls of baby kale
- 1 to 2 cloves garlic
- Sea salt, such as Maldon
- 2 tablespoons crème fraîche
- grated Parmigiano Reggiano, about 1/4 to 1/3 cup
- Prep Time: 2 hours 30 minutes
- Cook Time: 5 minutes
- Category: Pizza
- Method: baked
- Cuisine: American, Italian
This post may contain affiliate links. Please read my disclosure policy.


601 Comments on “Simple, 4-Ingredient Homemade Pizza Dough”
Why the full 1t or 4g yeast? I’ve always used the 1g /1/4 tsp in the Lahey recipe and done 2 day rise in fridge.. is it for quick rise same day? And always seems to come out better somehow when I divide the dough in thirds. Ordered your book, can’t wait. Thanks as always.
Hi and thank you 🙂
In the book, I use much less yeast. Yes, the higher amount of yeast is mostly if you want it to rise in a timely manner. You can absolutely reduce the amount of yeast and employ a long, slow rise before balling up the dough and refrigerating it.
I use your peasant bread pizza crust from your cookbook. It is soo good that we’ve started having Friday pizza night. Even my super picky youngest son loves your crust. I’m super excited about your pizza cookbook coming out.
So nice to read this, Renee 🙂 🙂 🙂 And thank you so much re book. Friday nights are our pizza night as well. Thanks for writing!
Hi Ali! I did the make ahead method #2 and my dough hasn’t risen at all after 11 hours in the fridge. I halved the recipe, using 256g APF, 2g instant yeast, and about 180g water (plus salt). Did I do something wrong, or does it just need more time? Thank you!
Hi! And apologies for the delay here. You didn’t do anything wrong… just needs more time. Did you end up giving it more time?
Hi Ali, thanks for the reply. Yes, it’s been in the fridge 4 nights now and it’s barely doubled. I don’t know what went wrong.
I would remove it and let it rise at room temp and see if anything happens. What kind of instant yeast are you using?
Amazing recipe,
I always wanted to make pizza napoletana but some of the recipes are long and a bit complicated,
This one is super simple and very tasty,
I just put a little more flour at the beginning because the dough was a little too liquid.
But overall is was perfect.
Thank you for the recipe.☺️
Great to hear, Anca! Thanks for writing 🙂 🙂 🙂
Never in my life did I think I’d be making really good pizza at home, but here I am on my 9th straight Friday of pizza night at home! This dough is so easy, so delicious. I ended up getting the baking steel and those round parchment sheets a few weeks ago. Absolute pizza heaven! Thank you!
Awwww Lauren! This makes my heart sing 🙂 🙂 🙂 Thanks so much for writing.
Could you cook your pizza crust (dough) and then add your toppings and THEN freeze it. For uses like meal prep or taking a meal to a new mama? Thanks!
You can! I have not totally perfected the method and go through phases where I try and try, and then I stop experimenting, and then I forget what I’ve done, so I’m afraid I can’t totally advise, but it definitely will work. I would parbake for 90-ish seconds; then top; then freeze.
Just a question about your note that those in Canada might want to use less water. Canada is a big country, so wondering if this is applicable to places with high humidity, or high or low elevation, or is it because of the flour that is available to us here? I
It’s because of the flour — I think the ap flour might absorb water differently. This note is a result of troubleshooting with many people over the years from Canada (and the UK) — bread flour just seems to work better.
Thank you! I rarely see bread flour in the store so I’ve been replacing 1 T per cup of AP with vital wheat gluten. Not sure where I learned that trick — maybe from you?
Not from me, but that’s a great tip! Thanks for sharing 🙂
I am in Canada (west coast) and used the regular (RH) AP flour (with the full amount of water the recipe calls for) and it turned out great.
Great to hear, Hilla! Thanks for writing.
Hi I do not like any black on my pizza. Can I bake at about 180 degrees celcius with fan oven?
Sure! It will likely take a lot longer… I’d start checking it after 10 minutes.
Made the dough and let it sit in the fridge for a few days in those large deli containers. Absolutely delicious and going to make more now to have for this weekend!!! I do have a question, my dough rose and kept rising in those containers in the fridge like even popped the lids off a few times. Is that ok? I mean it tasted amazing but wasn’t sure if it was suppose to do that because store bought dough is in balls and not like that.
Hi! Great to hear! Yes, it’s fine, but not ideal, especially if dough seeps out and makes a mess of your fridge or potentially dries out. Next time, try using even less yeast: 1/2 teaspoon.
Hi Ali!
I notice that you show a wooden pizza peel in your photos. Do you have a recommendation as to whether a pizza peel should be wooden or metal?
Thanks for another great recipe! Even when using other recipes, I am finding that changing the proportions to yours tends to work better.
I am partial to wooden peels! This Epicurean peel is my favorite. Thank you for your kind words 🙂
I got to this page from an email. The email had a photo of a squash blossom pizza. Is that recipe anywhere? I can’t find it on this site. It looks amazing!
Amy, hi! It’s not on the blog… see if this link works (it will take you to Instagram). I do have this recipe in my new pizza book, Pizza Night, out April 16th.
Made this tonight and it was amazing! 87% hydration level. Only wish my oven would get hotter— tops out at 500 degrees. Mixed lemon with ricotta and then topped with roasted asparagus and prosciutto strips. So good! Thanks for all your amazing recipes. Love them all!!😋😋
YUM!!! Great to read all of this, Julie 🙂 🙂 🙂 Thanks so much for writing and sharing these notes.
Made this recipe for the first time, using the baking steel + parchment rounds you recommended, and I am blown away by how well the pizza baked up in my home oven. I could cry over how much I love the crust! I have been searching for the perfect homemade margherita pizza recipe for a long time now, as restaurant pizza is expensive and not always very accessible. I also did not want to spend hundreds of dollars on a pizza oven. I’m so glad I tried your method first! Thank you so much for the detailed instructions. I did have one question, though I’m not sure if this affected the final bake or not – I used active dry yeast and followed the instructions to make lukewarm water. After the rise at room temp, I portioned the dough into fourths and placed them in clean yogurt containers. They had two full days in the fridge. I’m noticing now that my dough did not rise in those containers nearly as much as the ones in your pictures. Is this because I used active dry yeast instead of instant? It’s definitely fresh and I have used it to make other things. The pizza looks like it baked up the way it was supposed to though, so I am not sure if I even need to worry about it. Just curious for next time!
Hi Anna! Great to read all of this. Thanks so much for writing 🙂
The lack of rise in the fridge may be due to using active dry yeast — I use SAF instant yeast and it is more concentrated/powerful. That said, it’s also possible your fridge is simply colder than mine. Regardless, it doesn’t matter if you got great results!
Can you par-bake this dough and then freeze the shells to thaw and top later?
Yes! Love doing that 🙂
I love this pizza recipe, especially the way the pizza puffs when it hits the heat of the oven. I used it to make BBQ chicken pizza. I did have two problems which I need to figure out how to correct. The pizza when hot was somewhat saggy (cue the knives and forks)- once it was less hot it was fine to eat by hand. It probably would have benefited from a short parbake. The second problem is that I didn’t get much char on the edges of the top crust (did put it directly on a pizza steel). I had it around 12″ from the top of the oven, so maybe it needs to bake at a lower position.. I love baking it on parchment – no more deformed pizzas – and the bottom crust was adequately browned. This is the kind of pizza I really love – a hybrid of Neapolitan and Sicilian styles.
Hi Mary,
Great to read all of this. Questions for you: How hot does your oven get? And how long are you preheating your Baking Steel for?
I actually get the best results, when my Steel is on my top rack (so, very close to the top of the oven). And I try to preheat the Steel for at least 1 hour.
Also: Are you cold proofing your dough balls for any amount of time?
Hi Ali, Thanks for responding. I cold proofed for a little over 24 hours and the dough was beautiful when I took it out of the fridge (I used bread flour, btw) so no complaints there. I am very on board wit the high hydration…that’s a great tip.
My oven goes to 550 degrees which is the temperature I used to bake the pizza. I did not, however, preheat the steel for 1 hour. My oven does have a true convection setting and I am thinking of trying that as an experiment next time (I have not found one recipe yet that calls for using convection.) I usually keep the rack just under the highest level so that I can turn on the broiler if necessary. However, I had read several recipes that encourage baking the pizza low (or even on the oven floor) to take advantage of the heat from the bottom of the oven. I am not sure how well that would work with my oven.
I have another dough ball in the freezer which I will make on Saturday. I will try pre-heating the oven for an hour and baking it high up to see what happens.
OK, got it, again, great to read all of this.
Definitely try 550ºF convection roast — that may definitely help with the browning, and if time permits, try preheating the steel for at least 1 hour. It is definitely worth experimenting with your steel in different locations in your oven — I always encourage people to do this because what works for me in my oven might not work as well for you in your oven.
I asked about the cold proofing because time in the fridge allows enzymes in both the flour and the yeast to break down the starches in the flour into simple sugars, which will contribute both to flavor and to browning. 24 hours is great! You may have even better results with 48 hours.
If the longer preheat of the steel doesn’t work, you can also try reducing the water slightly. You could try holding back 25 grams of water and see if that makes a difference. Finally, a 60-90 second parbake might sold all of your soggy-crust woes 🙂
This pizza crust was a-ma-zing! It was chewy, crunchy and so good. The only thing was I think I got it too thin in the middle because the first bite or 2 was a little soggy but it was still so good. My stone heated for at least 45 mins at 550 degrees and I just made the dough today so it was not cold proofed. Any suggestions would be helpful cuz this will be my go to pizza dough from now on!
Great to read all of this, Jody! Questions for you before I make suggestions:
Are you using a scale to measure?
What type of flour are you using?
Ali
One of the best pizza dough recipes I have ever used, hands down! Easy to follow, works with a busy schedule and makes 4 pizzas at once?! Amazing. Made two pizzas day of after cold proofing in the fridge for about 4hrs then coming to temp on counter as she suggested. I left one in the fridge for a use later in the week and another I froze. Wanted to try around all 4 methods and see which I like best. I baked on parchment, on a pizza stone at 525 (as high as my oven gets) and it worked well.
My only complaint is if this pizza goes a few minutes too long, the outer crust really becomes inedible. I am all for a good crunchy crust, but it should still have that pull and it lacked that.
Next time will try par baking the dough first, then baking for less with toppings to see how it comes out as far as light and fluffy.
Great to read all of this, Jenna! Thanks so much for writing and sharing all of your notes. Parbaking for 1 minute or 90 seconds will definitely help promote a crisp crust and properly cooked toppings.
Hi Alexandra!
I make this so much, you’d think I’d have it memorized. I finally wrote it on a piece of paper to stick to the fridge, but that has finally disintegrated, so I just now wrote in pen on the back of our 100 year old kitchen cabinet, where I hope it will live for another 100!
Hi Ali,
Just discovered this recipe and am very excited to give it a try, but have one question. I am planning on trying this recipe during my upcoming visit with my brother and his family. He has one of those home pizza ovens which we are planning on using. I don’t know what brand it is or how high the heat goes, but in general do you think we would have to adjust the water amount if it goes above 550? Have you tried one of these ovens?
Is it a table top electric oven like the Breville? If that is the case, I do recommend lowering the water slightly: try 360 grams water. That will lower the hydration to 70% and will make the dough more forgiving. If there’s too much water, the dough will burn before it cooks through and the crust will taste a little doughy. Let me know what brand the oven is if you have a chance!
Lol, seems that it is not really an oven. It’s one of those models that opens like a waffle maker, and your only option is on/off. Some users have estimated that it doesn’t get much higher than about 410 farenheit. The product description doesn’t say anything about temps, just that it is 1400 watts.
🤣🤣
OK, got it. I don’t think you’ll need to reduce the water in the recipe then 🙂
Hello!
I’ve done this recipe and it works perfectly! I’ve just bought an Ooni oven though and I’m not sure if it’s going to work the same due to its high amount of water. Do you have any tips for this? Thanks!
Hi! I’d reduce the water to 360 grams. THis will bring the hydration down to 70%. You may want to add a set of stretches and folds 30 minutes after you mix the dough — this will help the dough come together if it’s a little dry upon mixing. I also like to cook my pizzas at a slightly lower temperature: between 650-750ºF for 2.5-3 minutes.
Looks amazing! How well does this dough work without parchment paper? It’s not really supposed to be heated beyond 420-450, and I don’t love the idea of overheating silicone oil into my pizza. Thanks!
I would suggest using the parchment paper for the transfer, then opening the oven 1 minute later and pulling it out. Of course, you can try transferring the dough to the steel without parchment, but it is a wet, sticky dough. You’ll definitely need to use semolina or rice flour or ap flour on the peel.
I have an Ooni pizza oven and I wonder which of the pizza crusts you would recommend with the Ooni? I was thinking that I might try prebaking the crust ahead of time (in the oven) so I can use a higher hydration recipe like the Sicilian or 4 ingredient crust and then just cooking in the Ooni to melt cheese and do the final cooking and get a little of that smoky flavor. Do you have any other modifications that you’d suggest using an Ooni?
I like your parbake idea! Sounds fun.
When using this dough for the outdoor oven, I like to reduce the water to 360 grams. You may need to add a set of stretches and folds 30 minutes after you mix the dough to help it come together in a more cohesive ball. I also cook my pizzas at a slightly lower temp: 650-750ºF for 2.5-3 minutes.
Love the recipe! Made it one day and fixed pizza the next per recipe. I cooked on our outdoor grill preheated to 500 degrees. Put the pizza on grill mats. The pizza doesn’t stick to grill mats and can easily be turned as needed. After too many recipes to count, this one was perfect; light, crisp, and delicious! It is fabulous!! Thank you!!
Wonderful to hear this, Camille! Can you elaborate on the grill mats? I’m on intrigued! Sounds like a good thing to pick up before summer!
I get these on Amazon. Great for a lot of other uses but work really well for pizza on the grill. Grill Mat Set of 6 – 100% Non-Stick Reusable Mats for Gas, Charcoal or Electric Grills – Easy to Clean – 15.75 x 13-Inch, Black
Tonight I made your 4 Ingredient Pizza Recipe, amazing flavor, taste, and texture.
Your 4 Ingredient Pizza Dough Recipe is straightforward. I am grateful that you added the following suggestions:
(1) How you prepare your lukewarm water; and (2) Warm your oven for one minute, shut oven off, place mixed dough bowl with damp towel covering mixed dough in oven for 1.5 to 2 hours, or until double in size. These are wonderful and helpful suggestions.