Easy Sourdough Sandwich Bread
This post may contain affiliate links. Please read my disclosure policy.
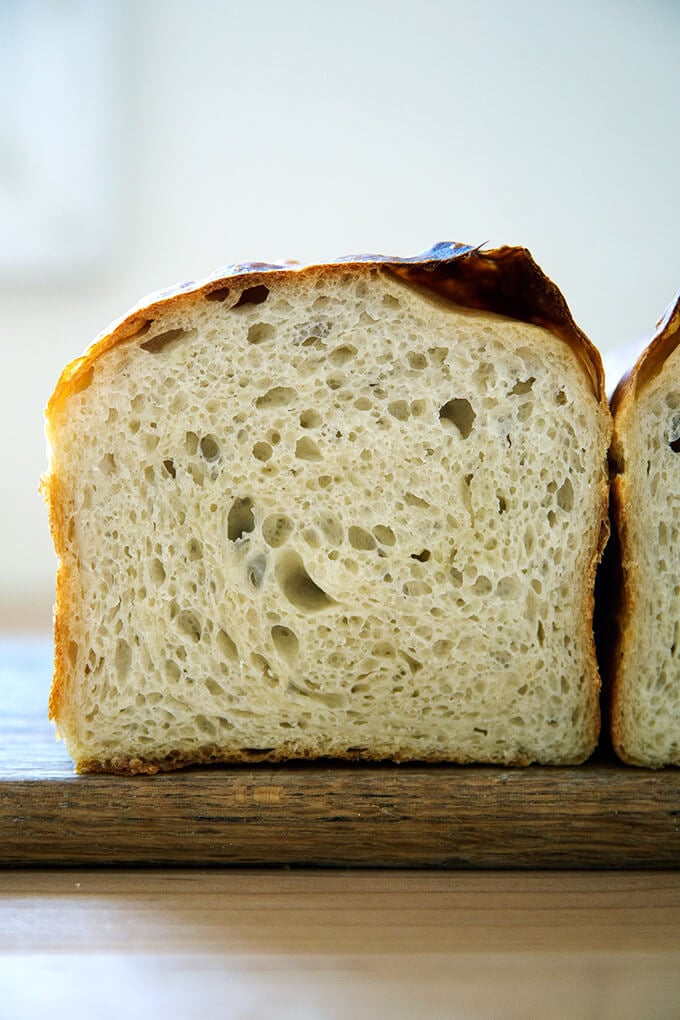
As I mentioned a few weeks, a number of requests about how to make my mother’s peasant bread with a sourdough starter encouraged me to dip my toe into the wonderful world of naturally leavened breads. You can read more about that experiment here, which led to this simple sourdough focaccia recipe, an adaptation of my favorite yeasted, refrigerator focaccia.
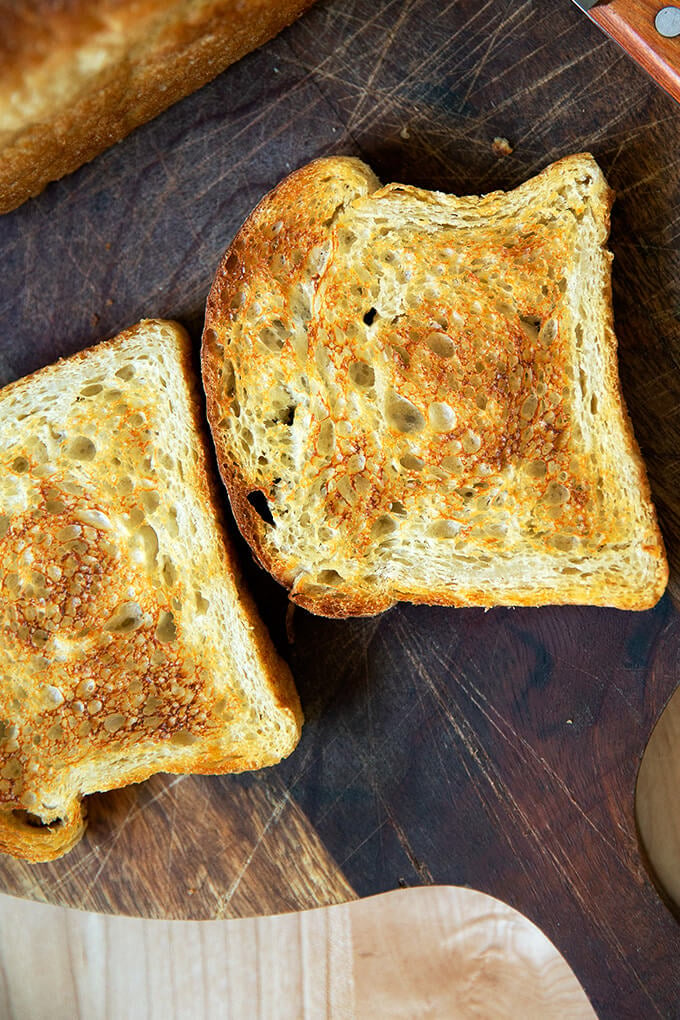
It also led to this sourdough toasting bread, which is essentially the same formula, just baked in a different vessel and without the slick of oil and sprinkling of sea salt on top. I’ve been making this bread even more often than the focaccia these days because I love the shape: it’s so nice for morning toast and for sandwiches.
PS: How to Build a Sourdough Strater from Scratch
PPS: How to Activate, Feed, and Maintain A Sourdough Starter
Simple Sourdough Toasting Bread: What You Need
- A sourdough starter. I recommend buying one (read why here). But if you’re up for it, you can make one from scratch in just about a week.
- Time. As with the focaccia, this bread rises first for about 6 to 18 hours (depending on the time of year and strength of your starter), then again for another 4 to 6.
- A large loaf pan. I’ve been using this 10 x 5-inch loaf pan. If you only have two smaller loaf pans, such as 8.5 x 4.5-inch pans, you’ll need to split the dough in half after the first rise.
That’s it! Ready? Here’s the play-by-play:
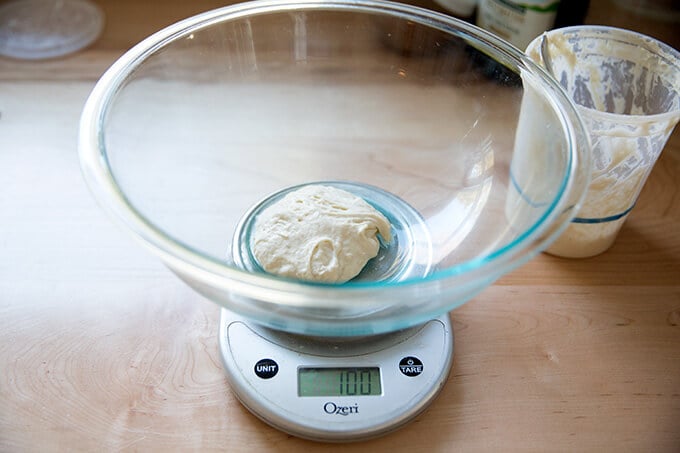
As always, when mixing sourdough doughs, it’s best to weigh everything with a digital scale. Start with 100 g starter. (If this looks familiar, it is: this is the same basic process for the sourdough focaccia.)
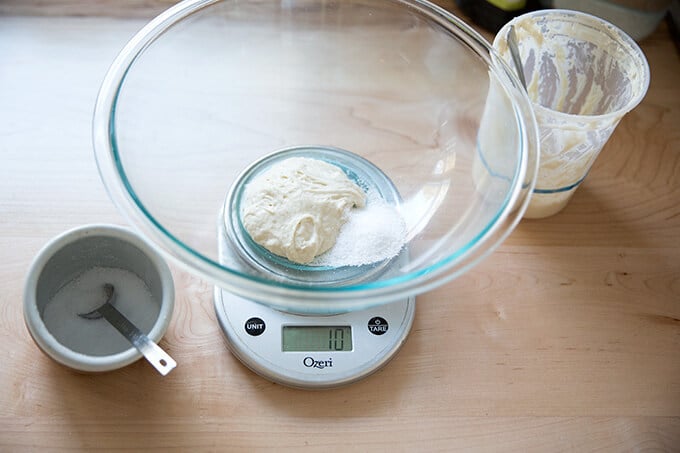
Add 10 g kosher (or other) salt.
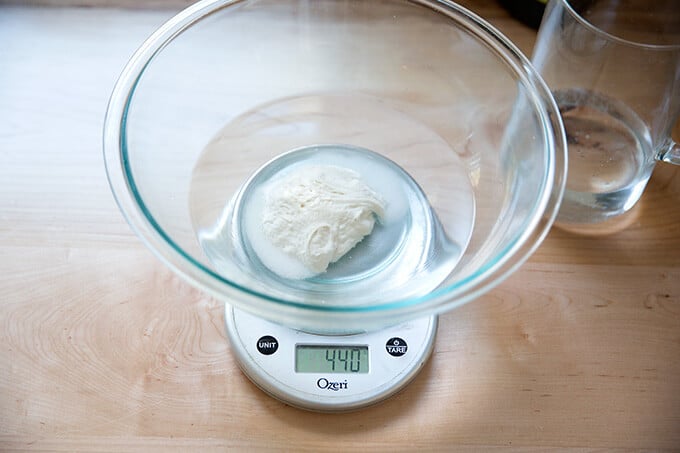
Add 430 g water. (Or less, see recipe for notes.)
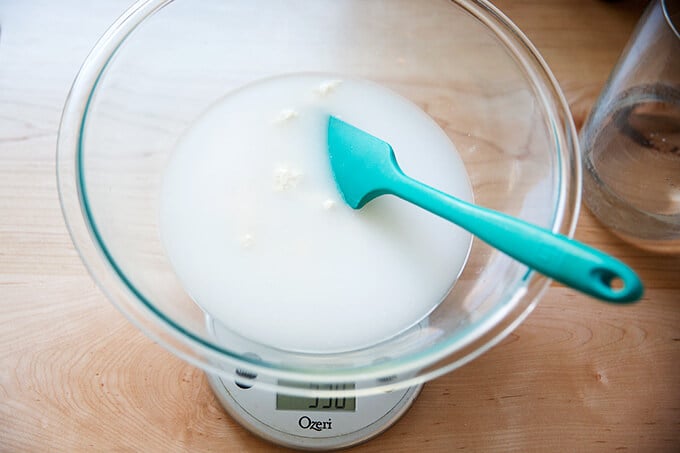
Stir to combine.
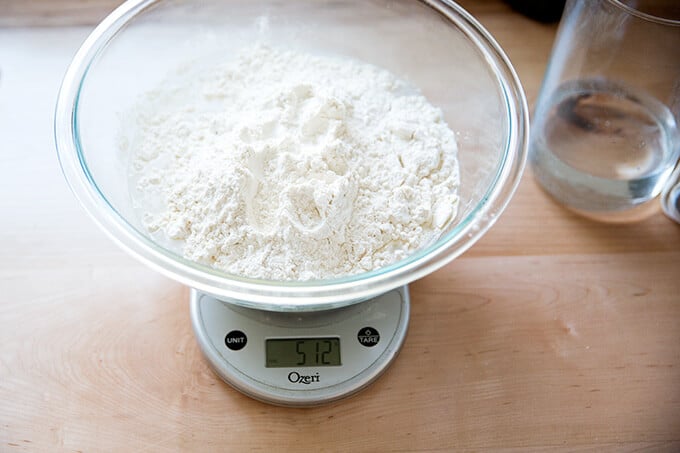
Add 512 g bread flour.
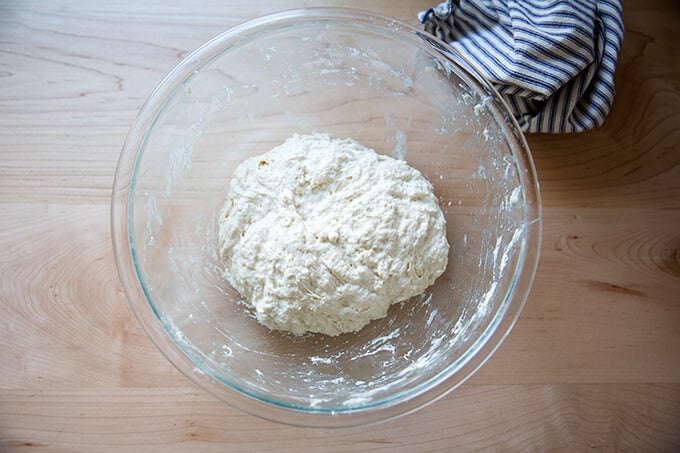
Stir to form a sticky dough ball.
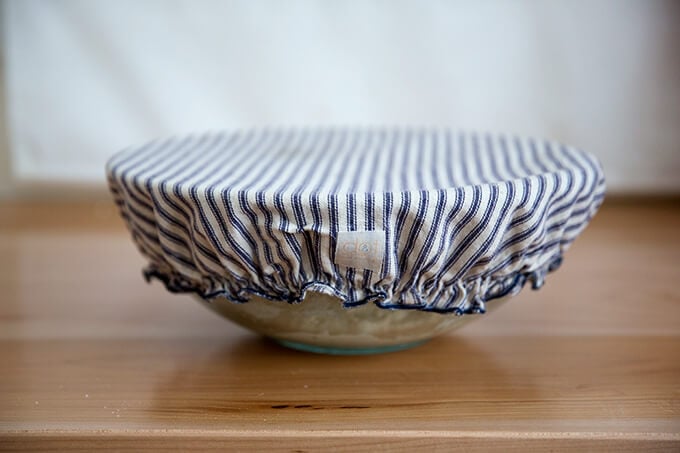
Cover with a towel or bowl cover, and let rest for 30 minutes. Then, perform a series of stretches and folds. See video for guidance. Repeat this 3 more times for a total of 4 sets of stretches and folds during the first two hours. Then, let rise for 6 to 18 hours* (see recipe notes) at room temperature:
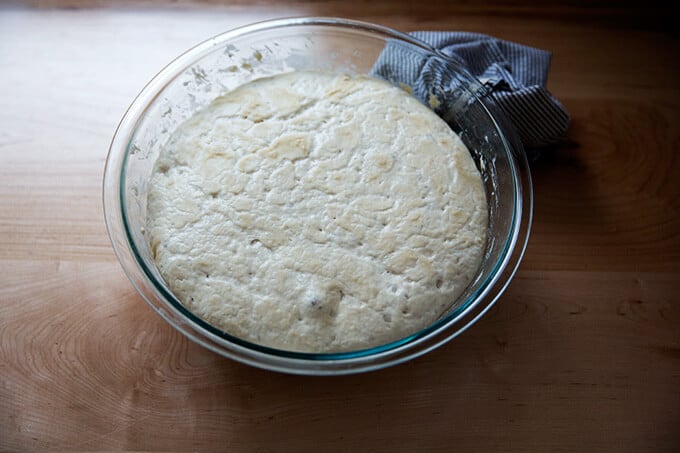
After 6 – 18 hours, it will look something like this:
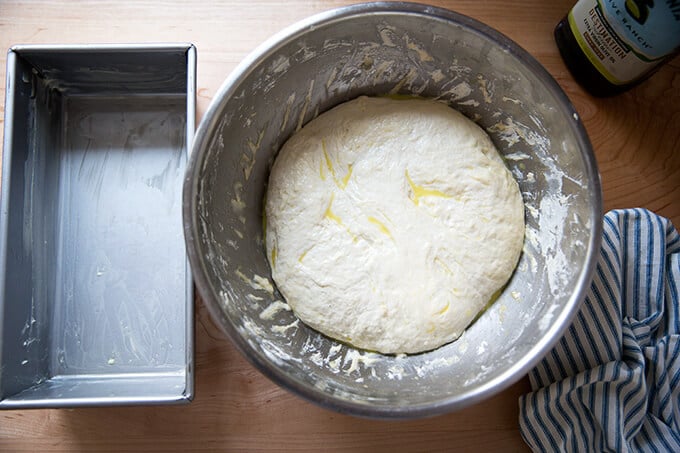
Drizzle the surface of the dough with a little bit of olive oil; then fold the dough inwards from the sides to deflate.
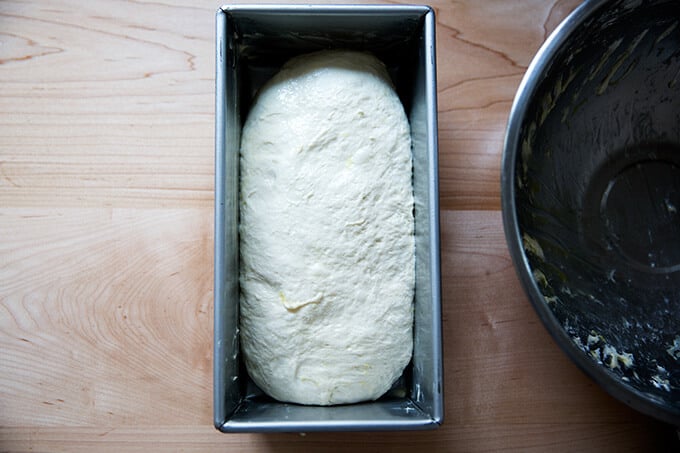
Transfer dough to loaf pan.
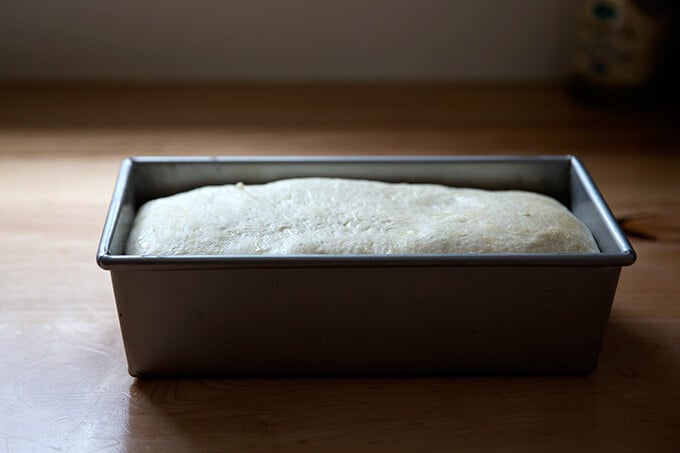
Let rise till dough just begins to crown the rim of the pan, about 6 hours.
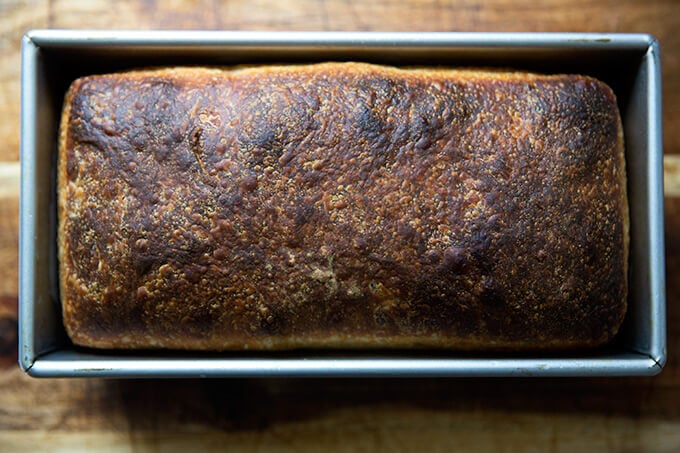
Bake for about 45 minutes.
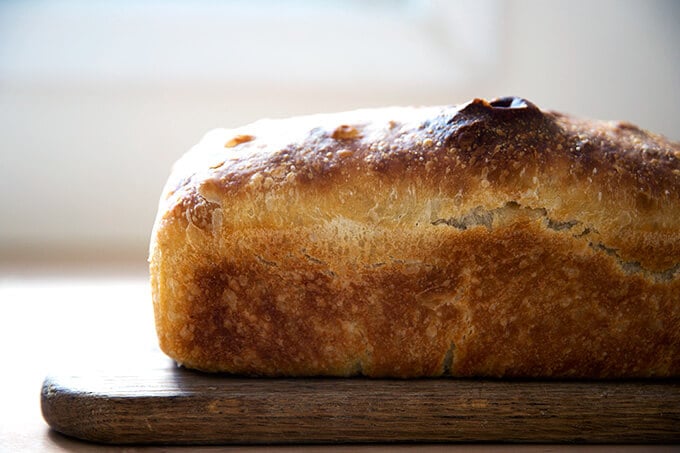
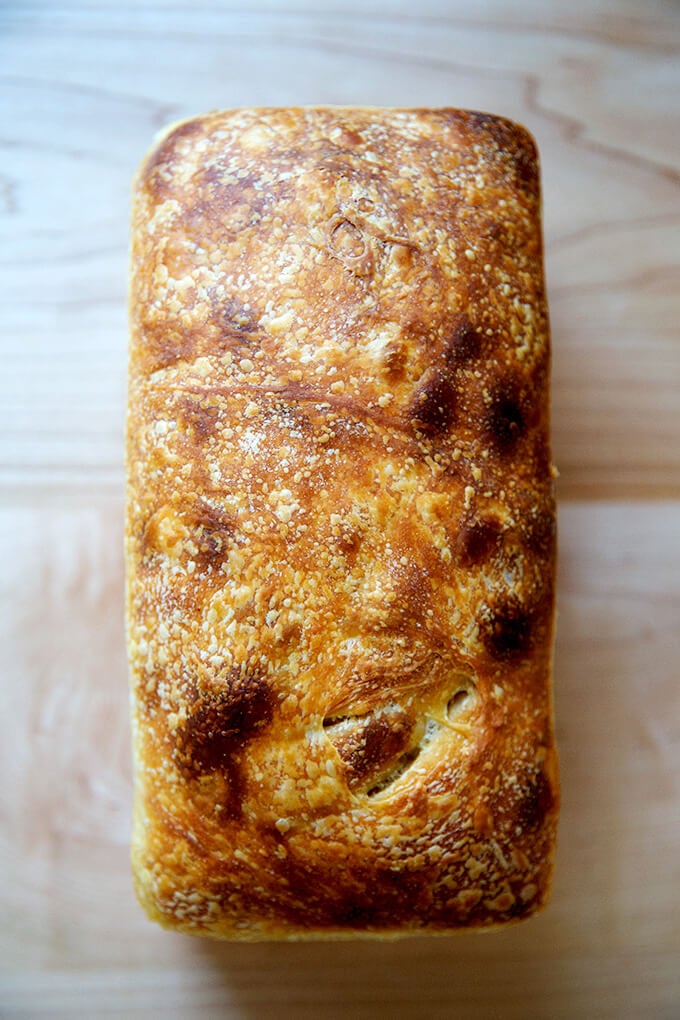
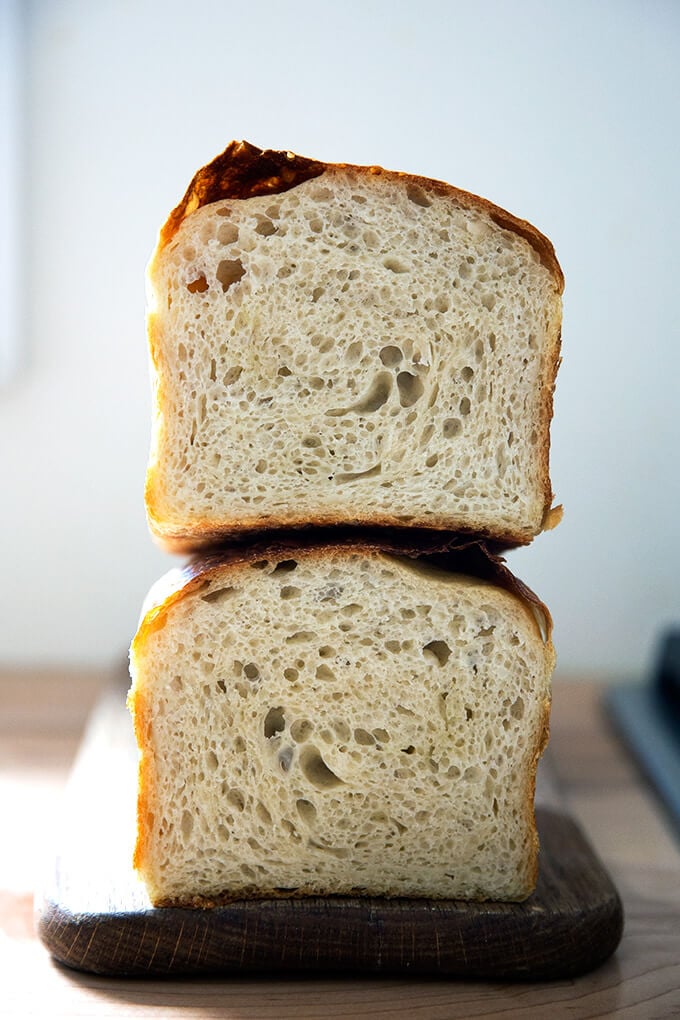

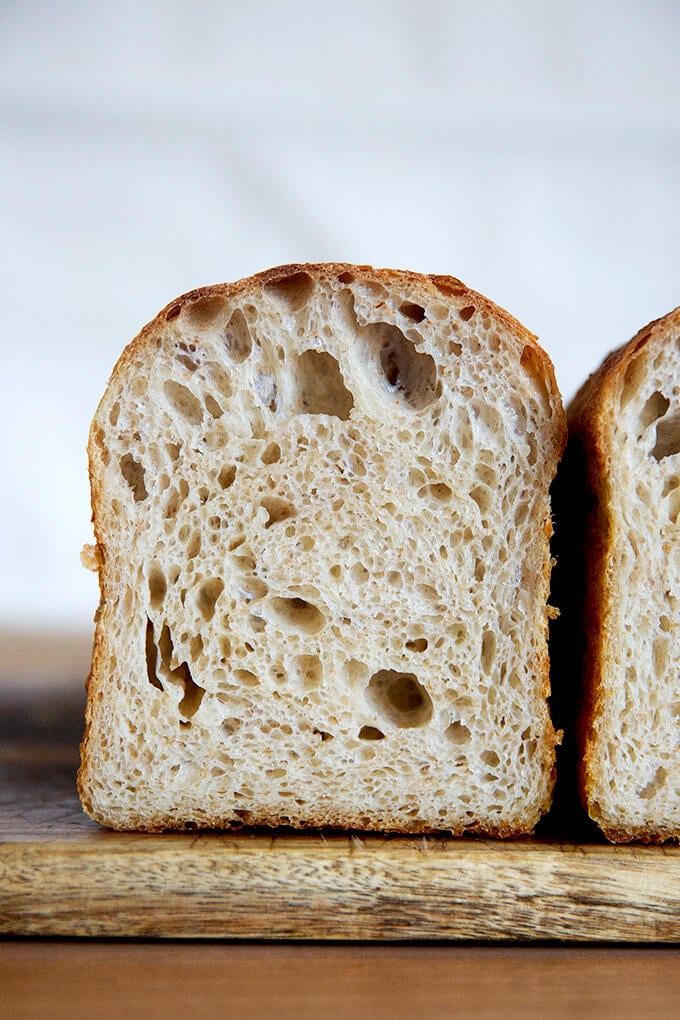
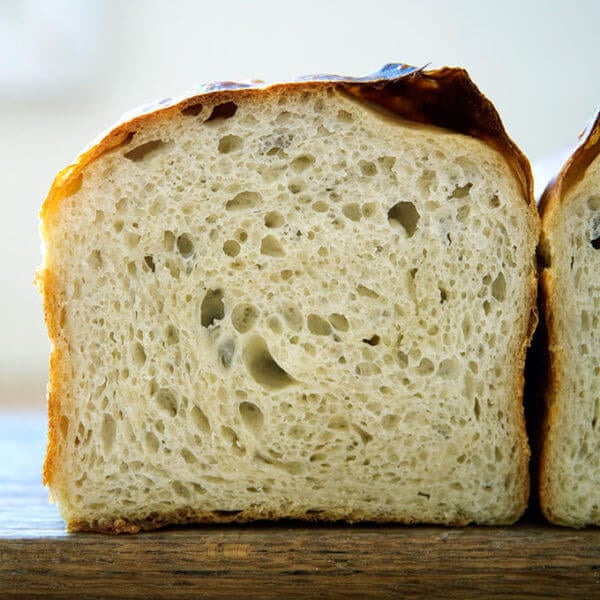
I baked this loaf in a tall-sided pullman loaf. Love the shape!
Easy Sourdough Sandwich Bread
- Total Time: 24 hours 40 minutes
- Yield: 1 loaf
Description
** UPDATE: VIDEO GUIDANCE IS HERE **
The makeup of this dough is the same as this sourdough focaccia. Here, the dough is baked in a loaf pan, and there is no sea salt on top.
This recipe yields one large loaf. You’ll need a 10 x 5-inch loaf pan, such as this one. If you only have two smaller loaf pans, such as 8.5 x 4.5-inch pans, you should probably split the dough in half after the first rise.
Plan ahead: This dough rises first for 6 to 18 hours (or less if it is super hot out or if you live in a humid area) or until the dough doubles in volume; then again for about 4 to 6 hour or until the dough crowns the rim of the baking vessel.
Troubleshooting: If you have issues with your dough being too sticky, please read this post: Why is my sourdough so sticky? The 4 common mistakes.
If you’re just getting started with sourdough, check out this post first. You’ll find tips there on procuring a starter as well as how to feed it and maintain it. If you’re up for making your starter from scratch, you can do so in just about 1 week.
Water: Chlorine in water can adversely affect sourdough. Leaving water at room temperature for 24 hours will allow most of the chlorine to escape. When I am in the habit of making sourdough bread, I fill a large pitcher with water and leave it out at room temperature. I use this for my sourdough breads and starter. Truth be told, I’ve used water straight from the tap and have not noticed a difference.
Water quantity: Also, depending on where you live and the time of year, you may need to cut the water back. If you live in a humid environment, for instance, I would suggest starting with 400 g or 420 g water. If you are not using bread flour, you also may need to cut the water back a bit. So much success with sourdough relies on getting the water quantity right.
Starter: I use a 100% hydration starter, meaning it is equal parts by weight flour and water. If you need guidance on how to maintain a starter, see this post.
Ingredients
- 100 g (about 1/2 cup) active starter, see notes above
- 10 g (about 2.5 teaspoons) kosher salt
- 430 g water, (or less, see notes above) room temperature
- 512 g (4 cups) bread flour, such as King Arthur Flour
- a few tablespoons extra-virgin olive oil
- room temperature butter, for greasing
Instructions
- Mix the dough: Place the starter, salt, and water in a large bowl. Stir with a spatula to combine — it doesn’t have to be uniformly mixed. Add the flour. Mix again until the flour is completely incorporated. If you have a straight-sided vessel, transfer the dough to it — it really helps monitor the rise and allows you to see the true growth in volume of the dough.
- Perform one (or more) “folds”: 30 minutes after you mix the dough, reach into the bowl and pull the dough up and into the center. Turn the bowl quarter turns and continue this pulling 8 to 10 times. See video for guidance. If time permits, repeat this “folding” step every 30 minutes for the first two hours. (Note: even if you perform just 1 fold, your dough will be in good shape.)
- Drizzle with a splash of olive oil and rub to coat. Cover bowl with a tea towel or bowl cover and set aside to rise at room temperature (70ºF/21ºC) for 4 to 18 hours — if it is super hot out or if you live in a humid environment, it may only take 4-6 hours. When the dough has nearly doubled in volume (or UPDATE: increased in volume by 50%, which is when I now end the bulk fermentation), it is ready. (Note: Do not use an oven with the light on for the bulk fermentation — it will be too warm. It is best to rely on visual cues (increasing in volume by 50% or doubling if you’ve had success with doubling) as opposed to time to determine when the bulk fermentation is done. A straight-sided vessel makes monitoring the bulk fermentation especially easy.)
- When the dough has nearly doubled, grease a 10 x 5-inch loaf pan with butter (or nonstick spray). Drizzle dough with a few tablespoons of olive oil. Rub your hands with a little bit of oil to coat. Use your hand to release the dough from the sides of the vessel, being careful not to completely deflate the dough. Video guidance here. Turn dough out onto a work surface. Quickly, shape the dough into a rectangle — I fold the dough envelope-style first; then I use a bench scraper to shape the dough into a rough rectangle. Transfer dough, seam-side down to prepared loaf pan and gently stretch into an oblong shape. (At this point, you can transfer the pan to the fridge if it makes sense with your schedule: rub the dough with oil and cover with a cloth bowl cover or plastic wrap. Transfer to the fridge will the next day. Then proceed with the recipe.)
- Leave alone for 5 to 6 hours or until dough begins reaching the rim of the pan — this may take less time when it is very warm out. Do be patient with this second rise: to get good height, the dough should be near the rim of the pan before you transfer it to the oven.
- Heat oven to 425ºF. Transfer pan to the oven and bake for about 20 minutes. Reduce heat to 375ºF. Bake for 20 to 25 minutes more or until golden all around. If you have an instant read thermometer, it should register 206-210ºF or so before removing. Remove pan from oven and turn bread out onto a cooling rack. Cool at least 30 minutes before slicing.
- Prep Time: 24 hours
- Cook Time: 40 minutes
- Category: Bread
- Method: Sourdough/Natural Leavening
- Cuisine: American
This post may contain affiliate links. Please read my disclosure policy.


893 Comments on “Easy Sourdough Sandwich Bread”
It came delicious on the first try! Moist, tangy, perfect for sandwiches. I’ll be making this again soon, maybe today.
Wonderful to hear this, Brian! Thanks for writing 🙂
I don’t know why my sourdough bread very sour.Could you please tell me so I can fix.Thanh you so much
Hi Kim! It’s likely due to your starter. I would read this troubleshooting post and see if it helps pinpoint the issue.
Thanks for your reply.God Bless
Hi there, may I please know how do I calculate how much dough I need to increase or decrease according to my pan size please? I googled it but just cannot cope with the Math. My loaf pan is 11.8inches x 5.6inches with a height of 4.8 inches. Please help!
Many thanks
Hi Khurs, I would do 1.25x the recipe.
This is my go to recipe for sandwich bread- it is easy and flexible- I often use whole wheat bread flour and I do tend to start it in my stand mixer with the dough hook. I do the first rise right in the bowl.
Love this, Rachel! Thanks so much for writing and sharing 🙂
Loved this recipe thank you! Worked out perfectly. It was a hot day so I was able to do the whole process in 8 hours. Turned out super delicious!! Definitely using the method to make more and more loafs!
I used the tip of using a straight edge vessel, which I never did when making a sourdough loaf, but I loved it. So clear to see how it’s doing!
So great to hear all of this, Noelle! Thanks for writing. And I know: the clear, straight-sided vessel makes such a difference.
Ever tried incorporating einkorn flour into this or the related recipes (HUGE fan of the focaccia)? Would you use the same principles as subbing in whole wheat or rye — i.e., start with a small proportion? What would you recommend? (Looking to make a little bit healthier loaf that I can toast up for breakfast “guiltlessly” every day. I’m not a big breakfast person, but I just came back from Spain, where toast and coffee is a typical breakfast and it felt just right for me!)
Toast + coffee is my ideal breakfast!
Yes, I would use the same principle, starting small, though I think with einkorn you could start slightly less small, so with this recipe, I think you could start with 200 grams einkorn and see how it works.
Good luck!
Update on the einkorn project… Attempt #1: I subbed in 200g all purpose einkorn flour but didn’t adjust anything else (turns out einkorn does not absorb as much water), and let it overproof (apparently with einkorn you don’t want to proof as much, since it doesn’t have much gluten to maintain structure… or something like that? :). I managed to flop it into a pan and it was surprisingly edible, but it was pretty much a puddle after proofing.
Attempt #2: subbed in 200g all purpose einkorn flour, reduced water to 375g,u used only 50g starter to keep the proofing under control, and I only proofed to 50% volume increase. Came out great! I really like the nuttiness and richness the einkorn adds.
Attempt #3, also a success: 50% einkorn flour, 355g water, 50g starter, 50% rise.
Next on the list to try — whole wheat einkorn! I might even mill my own if I can get a hold of some berries…
Thanks for your guidance getting me started… time for toast and coffee!
Wow, Kristi, amazing! Thanks so much for writing and sharing all of this. It’s always so interesting to me to hear how different flours behave — how they absorb water, how they impart different flavors and textures, etc. I haven’t experimented with einkorn in a while, but you are inspiring me to try. And I have yet to go the home-milled flour route yet, but I have been tempted for years. Thanks again for writing!
Hi Ali, I like your recipes and I have your book as well. I want to try to add cheese on this loaf/ sandwich bread. Do I have to reduce any ingredients? I got the idea from your peasant cheese bread from your book. Also can I make peasant bread with starter?
Thanks so much in advance. I love what you do
Siwi
Great to hear, Siwi! Yes, absolutely you can add cheese here. No need to reduce any of the ingredients. That said, if you find your dough to be very wet typically, you might consider reducing the water by 50 grams.
And yes, you can use starter in the peasant bread recipe. If you visit this post and scroll down to the What to do with sourdough discard? section, you’ll find some proportions.
Thank you so much Ali. Somehow I didn’t see your reply. It says I will get notified through email but I never got it. Anyway thanks again. FYI, I tried many times making of this sandwich sourdough & always came out very good, however the past 2x I failed. I think I proof them too long. So I tried again, came out very nicely. I have been making the bread for my families. Thank you.
Sorry if this has been asked before but do you have the nutritional content for the toasting bread loaf? I’d like to be accurate when logging my meal info
Hi Lisa! Unfortunately, I don’t. You can enter the recipe into My Fitness Pal to calculate it.
Can you sub all purpose flour for bread flour?
Hi! Yes, but I would consider reducing the water a bit. Hold back 50 grams or so.
Also, last time I made sourdough it came out a bit raw at the edges and it broke apart very easily. Any idea what I did wrong?
This appears to be the same as the focaccia less the oil, is that right?
Yes, it is!
I love this bread, making it now for the 4th time. But it doesn’t get an oven spring. Is that right? Thanks.
Hi Larry! You should definitely be seeing some rise. How long roughly is the bulk fermentation? And how long roughly is the proof? Is the dough crowning the rim of the pan before it goes in the oven?
Hello! I am really interested in trying this one out, too. How can I adapt this recipe using instant dry yeast? Thanks so much for the help!
Hi! Honestly, I would use this peasant bread recipe (which is a very similar recipe to this one), but bake it in a 9 or 10×5-inch loaf pan.
My favorite soft loaf for sandwiches and toast. Thanks!
Great to hear this, Olivia! Thanks for writing 🙂
So delicious and easy to follow. This makes a perfect loaf for sandwiches. All your sourdough recipes are amazing. I use them all the time!! The sourdough focaccia is one of our very favorites.
So nice to hear this, Danielle 🙂 🙂 🙂 Thanks so much for writing.
I love this bread! Its my go to for our weekly loaf – i want to start trying some additions, and i thought it would work during the stretch and fold stage do you think its possible to turn this into cinnamon raisin bread? Or would the additions mess up the rise?
Hi Ashley! Great to hear! And yes, add the ingredients after a few sets of stretches and folds — during the 3rd or 4th set. Cinnamon raising would be delicious. If you want to make it more like cinnamon swirl bread, I would let the dough complete the bulk fermentation. Deflate it, let it rest for 15-20 minutes; then stretch it out gently into a rectangle, spread with butter, cinnamon sugar, raisins; then coil up; then tranfer to pan and proceed.
Does that make sense?
Yes! Oh that sounds great! Going to try this today – thank you so much!
Excellent bread! I think this will be my new go to bread recipe. Easy to do and tastes amazing. Thank you so much for sharing!!
So nice to hear this, Tracey! Thanks so much for writing 🙂 🙂 🙂
This ratio of ingredients has become my go-to for basically all the bread I bake– loaf bread, focaccia, boules, rolls…it’s pretty much the perfect master recipe. The water volume changes slightly depending on the type of final bread I’m making, but always just within the 430-440g range.
The only other thing I sometimes change is replacing the 10g of salt with 25g of Everything Bagel seasoning, which is just amazing, especially in focaccia.
Thanks for a great master sourdough recipe! No more active/instant yeast jars for me!
So nice to hear all of this, Jacob! Thanks so much for writing and sharing all of your notes. I especially love the Everything Bagel Seasoning tip … so good! Thanks 🙂
Just made this. So good! Thank you for the recipe! I make regular boules, but needed to add sandwich bread to my life and here it’s finally happening. Smell ya later super expensive “healthy” bread made with toxic oils…hello gut friendly sandwiches!
Yay! So nice to hear this, Johanna 🙂 🙂 🙂 Thanks so much for writing.
This is going to be my new go to sandwich bread recipe. I love that it is cooked in a bread pan.
The crust is crunchy, but not too hard.
On my first try, the dough was very wet, but I have worked with high hydration. It turned out great.
2nd attempt. I cut water by 50g, much more manageable. I added about a cup of strong grated cheddar. Sesame seeds on top.
.
It turned out wonderful. Big hit with the family.
Thanks so much for sharing. Gorgeous blog and great recipes!
Wonderful to hear all of this, Roz! Nice work adjusting the water amount… that’s what sourdough is all about. Your sesame-cheddar loaf sounds amazing. Thanks for writing!
Hi,
I tried this recipe down to the tea.
But im getting the same issue that i seem to have with all my bread and i cant work it out!
It looked identical to yours apart from the crumb is gummy and plasticky.
Any ideas?
My starter is about 2 months old and doubles in size in 4 hours.
Bulk fermention was 14 hours and it double in size at about 20 C.
4 hours proof in the tin.
Cheers
Ryan
Hi Ryan, I think you’re over fermenting the dough. Are you using a straight-sided vessel for the bulk fermentation? Regardless, try letting the dough bulk ferment for less time — let the dough increase in volume by 75% (or even less, 50%) as opposed to 100%. See if that makes a difference. Proofing time can stay the same.
Yeah I’ve tried it with normal sourdough loafs at 25% and 50% like other people say but whatever I do I just seem to get the same result.
Is baffling me!!
Ryan, I have the same problem and can’t find a solution anywhere either 🙁 Gummy crumbs for me and I have tried many different recipes. All the troubleshooting I find doesn’t help.
Well glad it’s not just me!!
Must of made 30 odd loafs with different changes but same result everytime!
So annoying!!
Questions for both of you:
Are you using a homemade starter?
What type of flour are you using?
I’m using a 2 month old homemade starter which doubles consistently in 4 hours. I also have the same problem with commercial yeast too.
Using manitoba oro bread flour at 14.5 protein.
Have also tried AP flour with the same results.
Are you in Canada? If so, I would try reducing your water quantity considerably. For this recipe, try holding back at least 100 grams.
My next suggestion would be to let the bulk fermentation go only until the dough increases in volume by 50%. Then shape it, transfer it to the pan and either cold proof it for 24 hours or let it proof at room temperature until the dough reaches the rim of the pan.
No I’m in the UK.
Have tried lower hydration. Also tried fridge proof.
Have also tried 25%, 50% and 100%.
Must have made 20 odd loafs between this recipe, regular soughdough, commercial yeast bread and baguettes. Same issue on all of them.
Am at a total loss!!
OK, I’m sorry to hear this.
Love this recipe. How do you store it( if any is left)
I always use ziplock bags, and I store the bread at room temperature. This keeps the crumb the softest the longest. The crust will soften in the bag, but will revive upon heating (in the toaster or the oven). If you don’t think you’ll eat the bread within a week, I recommend freezing it at its freshest point — once it has cooled completely, cut it in half (or into however many pieces you want) and freeze one of the portions. Hope that helps! Great to hear 💕
I’ve used your recipe with my homemade starter a few times, love the simplicity. I recently made a loaf and because we weren’t going to eat it right away, I stored it in a plastic bag in the refrigerator.
When pulling it out of the refrigerator a few days later, there’s the dreaded “nail polish remover” smell to the bread. When toasted, the bread tastes fine, but how do I avoid the smell to the refrigerated bread loaf? Did I bag it before it was fully cooled? My starter smells good and I’ve not had this happen before. Thoughts?
Interesting! I don’t know that smell, but I have a few thoughts: 1. It’s possible the bread was not cooled completely before you stored it. 2. I would either store the bread at room temperature if you think you’ll eat it within a week — I always toast/reheat day old bread, and I find sourdough bread lasts a long time at room temperature (well over a week if not two) without getting moldy. If you don’t want to keep it at room temperature, slice it, then freeze it. I don’t love using the fridge for bread.
Hope that helps!
Hi Ali, thank you for the recipe. Love your simple video as well. I made this sandwich bread three times now. The first and third one didn’t rise. The second one was very good! Do I need to use active starter for making this bread?
Hi Tomoko! Yes, definitely use active bubbly starter here, ideally 6 to 8 hours after you feed it or when it has doubled or tripled in volume.
Thank you. Although I am making it with the same starter (active-ish). If didn’t rise tomorrow when I bake it, I will definitely use very active one. Thank you for your quick reply!
OK, sounds good, keep me posted and good luck!
Hi Ali, Well, didn’t rise. Every thing it seemed well until baked. I will definitely use active one from now on. Thank you for your support.
Such a bummer… with an active, bubbly starter you’ll have much better luck.
I’m on a search for the best-tasting, easiest recipe for my 13″ x 4″ Pullman pan, and I think this one may be it! (We love your focaccia, so knew this one would be a hit.)
Notes for anyone with this size pan:
– Increased numbers to 120% (120g starter, 1 Tbsp kosher salt, 516g water, 614g flour) and it seemed to be the perfect amount for a nice square loaf.
– Set proofer (a game-changing investment!) at 77F with water in the tray, rose in bowl for 4.5 hours with stretch/folds, then 3.5 hours in the pan until it was roughly 3/4 of the way up.
– 425F for 25 min, then removed lid when lowering to 375F for 20 min. 208F internal temp, but sides caved in immediately while cooling and crust wasn’t browned. Crumb cooked completely but was a bit too moist.
Will adjust cooking times/temps/water percentage on the next go-around and report back!
The entire thing disappeared within hours, and I was left wishing I had a second pan. Thank you, thank you, *thank you*as always for creating and posting the most amazing recipes that pass through my busy kitchen!
Oh my goodness, Kristin! I love this so much. You are too kind to write and share all of your notes. I have one of those pans, and I will definitely try this sometime soon, maybe with slightly less water per your notes.
Thank you thank you again, and thank you for your kind words, too. Means a lot 🙂 🙂 🙂
Hey, Alex
How long can this hang out in the fridge before needing to bake? Thanks!!
Hi! I would say 48 hours at the most.
This was my first attempt at making a loaf and it came out so great! Amazing recipe/easy to follow. Wondering what the best way to store it? Slice it or leave it whole?
Great to hear!
Unpopular as they are, ziplock bags (or something similar) are my choice storage vessel. Or an airtight vessel such as a Rubbermaid. I always reheat day old bread: either in the toaster or the oven, which revives the crust (and the crumb) beautifully. Hope that helps!
Just re-reading your comment and realized I didn’t answer the question. I leave it whole when I store it. If you are going to freeze it, you can slice it up and wrap it in plastic wrap — I like to bundle 4-5 slices together and freeze smaller bundles as opposed to freezing the whole loaf in one unit. Tuck the wrapped bundles into a ziplock bag; then freeze.
If you store at room temperature in a ziplock bag, do not slice it ahead of time.
Dear Ali! I have tried several of your bread recipes and oh my! It’s a success each time. I especially love this sourdough sandwich bread, just so perfect!
Thank you so much for your great website and recipes. By the way I appreciate your videos formats, no talking, no unbearable music, great images and the details of the recipe all along. Love it!
So nice to hear this Amélie! Thank you for writing and thank you for your kind words. Means a lot 💕💕💕
This recipe is very good, easy to follow. However, can you provide tips on using two 8.5×4.5 loaf pans instead of one 10×5? The smaller pans are what I have. I had difficulty applying Step 5 proofing, as in “nearly rise to the rim of the pan.” I let the dough proof for 4.5 hours in a 60 degree kitchen and it overproofed (or I think it did; sourdough beginner here) The resulting loaves were dense (but still edible as toast). Or can you scale the recipe to fit the two smaller pans? Yes I use a scale, reduced water a bit, a straight vessel for bulk rise.
Hi Wendy! When you placed the dough into the loaf pan after the bulk fermentation, how much did it fill the pan?
Regarding using two 8.5 x 4.5 -inch loaf pans, I think if you make 1.5 x the recipe, you’ll be able to split the dough in half after the bulk fermentation and make 2 loaf pan loaves.