
Simple Sourdough Pizza Crust: A Step-by-Step Guide
This post may contain affiliate links. Please read my disclosure policy.
Here is my guide for making sourdough pizza crust at home. As far as sourdough pizza recipes are concerned, this one is as simple as it gets — it’s made with all-purpose flour and there is no autolyse or preferment. Everything gets mixed together at once and you are on your way! Ready? Wake up your starter! Let’s do this 🍕🍕🍕

One of the most frequently asked questions I’ve received these past few weeks is: “Have you ever replaced the yeast in “X” bread recipe with sourdough starter?”
And specifically: “Could I use sourdough starter in your pizza dough recipe?”
Yes! And today, I’m going to show you how. The process is very similar to how I make yeast-leavened pizza, and the resulting pies are similar: ballooned and blistered edges with crisp but pliable crusts. In the recipe below, there are instructions for making three favorite pizzas 🍕🍕🍕:
- Classic Margherita
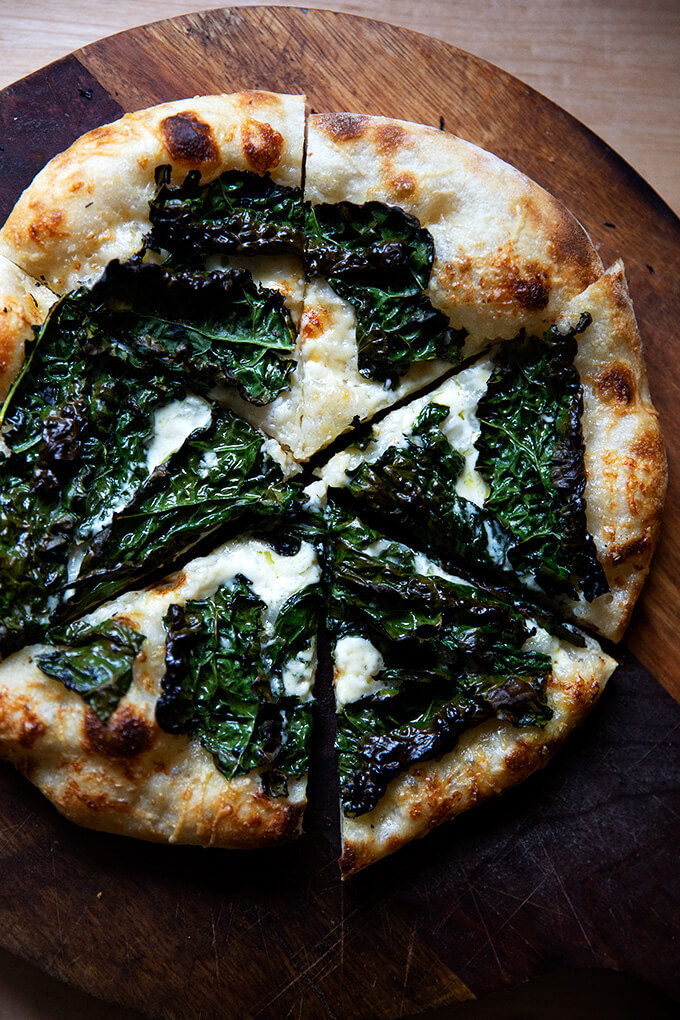
- Kale and Crème Fraîche
- Naked Pizza with Spicy Scallion (or Ramp!) Oil … made this on Instagram over the weekend
Simple Sourdough Pizza Crust: The details
This sourdough pizza crust is …
- Basic! Given supply constraints, I didn’t get creative with the flour mix here. This dough is made with 100% all-purpose flour. You absolutely can use bread flour or tipo 00 flour (read more about tipo 00 flour here) if you can get your hands on either. If you have been having a hard time finding flour, Baker’s Authority is a great option — great prices, too, even with shipping tacked on.
- 75% hydration. This is a classic sourdough formula: 375 g water, 500 g flour. (Note: This calculation is not quite accurate, because I am not including the weight of the water and flour of the sourdough starter in the calculation.)
- Simple! As with all of the sourdough recipes on this site, there is no autolyse or preferment or levain. I do call for some stretches and folds, which build strength in the dough. I like to do 4 stretch and folds, but even if you can only perform one stretch and fold, your dough will benefit.
Can you Freeze Sourdough Pizza Dough?
Yes. In my experience, the pizzas made from frozen dough do not spring as high upon being baked, but they still taste delicious.
Also, in my experience, the more time dough spends in the freezer, the more air bubbles the dough seems to lose. After 1 week in the freezer, my dough will bake up beautifully. After 3 weeks in the freezer, my dough will be less bubbly and will bake into a thinner and crisper crust.
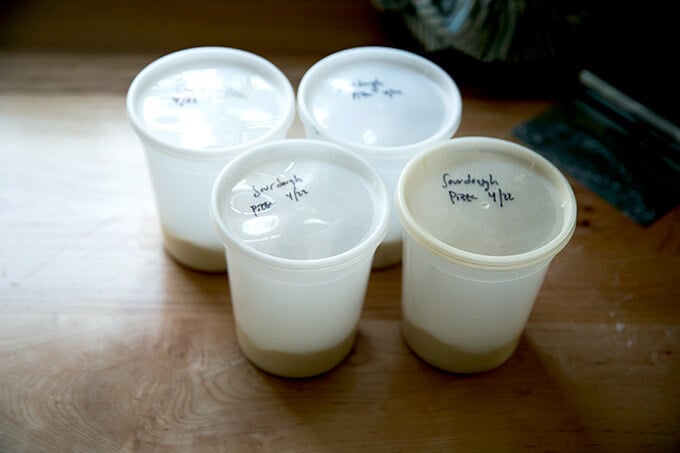
To freeze sourdough pizza dough: make it through step 4 in the recipe below or until after you transfer the portioned rounds to quart containers. At this point, transfer the quart containers to the freezer. To thaw, remove a container (or more) and let thaw in the refrigerator for 1 day or thaw at room temperature for 8 hours. Then, proceed with the recipe.
5 Keys to Excellent Pizza Every Time
Regardless if you are using yeast or sourdough, these (for me) are the keys to making excellent pizza at home every time.
- High-hydration Dough: When handled properly, doughs with a high proportion of water relative to the flour bake into beautiful, ballooned-pocketed crusts.
- Refrigerator time: After the first rise, time (at least 6 hours, but up to 3 days) in the fridge further develops flavor and improves the texture of the pizza dough.
- 1 hour at room temperature: If time permits, letting the dough come to room temperature an hour before baking, allows for easier shaping — room temperature dough will more easily stretch into a round than cold dough.
- Minimal handling of dough: Using a delicate hand to shape the dough, preserves the air pockets created during the fermentation process. I learned this from Jim Lahey:
“As soon as I began really paying attention to how I shaped my pizza rounds by taking care to use a gentle hand, I noticed a difference in the finished product. The air pockets pervading the unbaked round really affect the texture of the baked pizza.”
- Baking Steel: As you might know, I am a huge fan of the Baking Steel. In sum: steel is a better conductor of heat than stone — i.e. it transfers heat to the dough faster — which promotes great oven spring which translates to glorious bubbles throughout the dough. (Read more about the Baking Steel here.)
To be clear, I do not think you need to use a sourdough starter to make excellent pizza at home. A high hydration dough + leavening of choice + proper handling will give you excellent pizza every time, including that baked in a skillet: How to Make Excellent Skillet Pizza.
Here’s my guide to making yeast-leavened pizza dough at home: How to Make Pizza

Pizza Night
My cookbook, Pizza Night, which includes 52 pizza and 52 salad recipes, one pair for every week of the year, as well as five simple desserts is now available for preorder 🍕🍕🍕
It’s organized seasonally and includes recipes for the home oven, outdoor oven, the grill, Sicilian-style, Detroit-style, grandma-style, skillet pizzas, gluten-free, and more. There are both yeast and sourdough recipes for every style of pizza in the book.
Get your copy here: Pizza Night.
New to Sourdough?
If you are intimidated by sourdough bread baking, I have a free email course that covers the basics: Sourdough: Demystified.
And if you are looking for other easy sourdough bread recipes, this simple sourdough focaccia recipe, as well as this simple sourdough bread recipe, are the recipes I suggest attempting first, both for their simplicity and flavor. Another great beginner’s bread recipe to try is this overnight, refrigerator focaccia, which requires minimal effort but yields spectacular results.
PS: Easy, Homemade Pita Bread Recipe
PPS: My Mother’s Peasant Bread: The Best Easiest Bread You Will Every Make
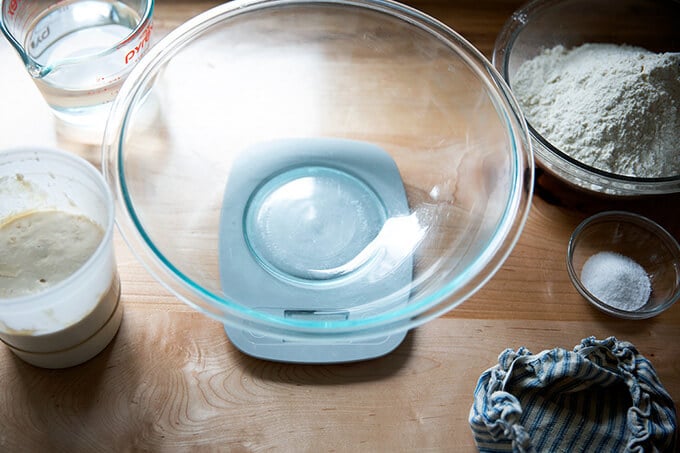
Here’s the simple sourdough pizza crust play-by-play: As always, a scale is essential for best results. You need water, flour, salt, and a sourdough starter. I am a proponent of buying a starter (see recipe box for sources), but if you are up for it, you can build a starter from scratch in just about 1 week.
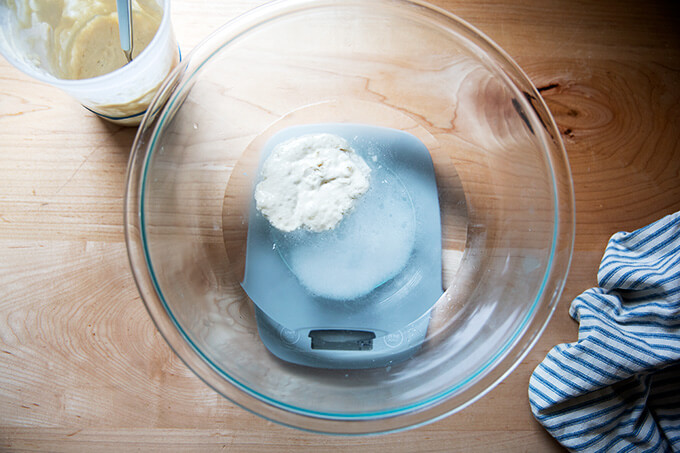
Combine 375 g water, 100 g sourdough starter, and 10 g salt in a bowl. (See notes in recipe box about using less water if you live in a humid environment.)
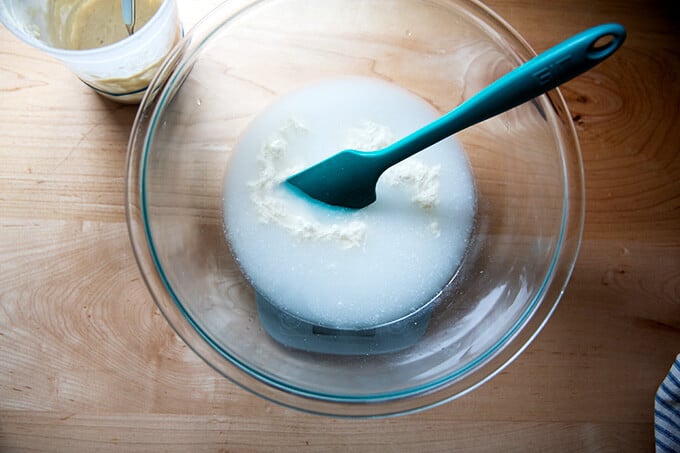
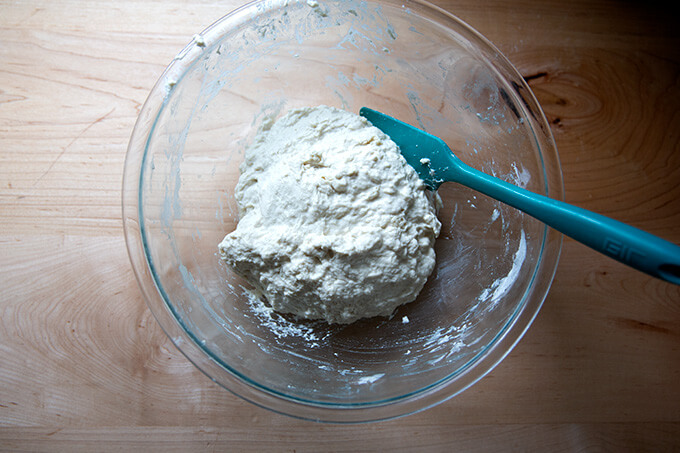
Stir to combine; then add …
… 500 g all-purpose flour.
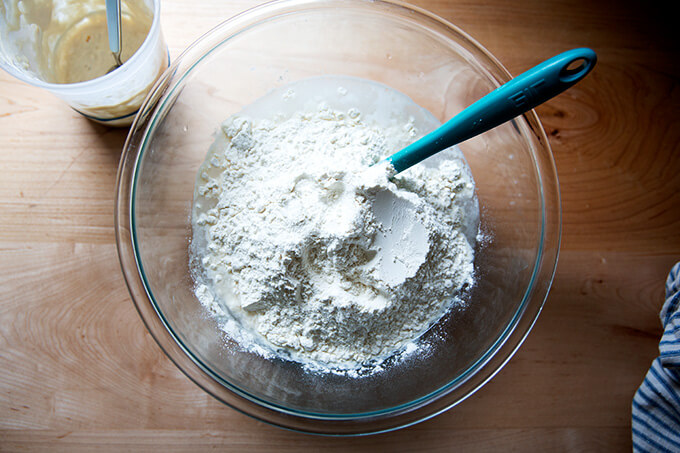
Stir until you have a sticky dough ball.
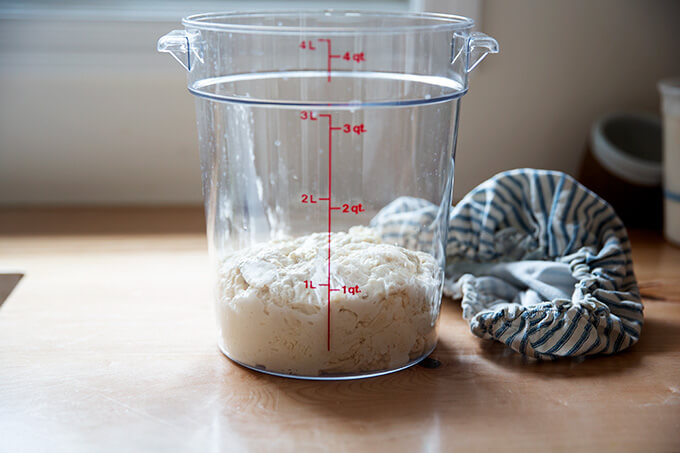
Transfer to a straight-sided vessel (if possible) and let rest for 30 minutes. Then, “stretch and fold” the dough (see video for guidance) 4 times at 30 minute intervals. Cover the vessel. Let it rest for 6 to 12 hours (see recipe notes for timing) or until the dough…
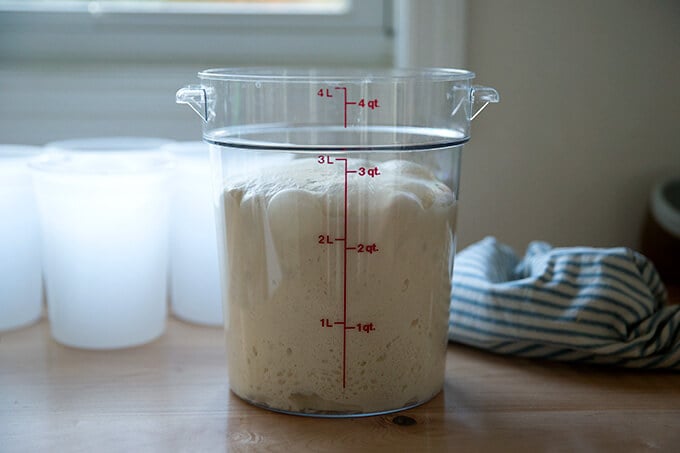
… has about doubled in volume. (Note: This is a little bit more than double. Ideally you don’t want your dough to rise much beyond double. More recently, in fact, I stop the bulk fermentation when the dough has increased in volume by 50%.)
Turn dough out onto a work surface. Use flour here as needed.
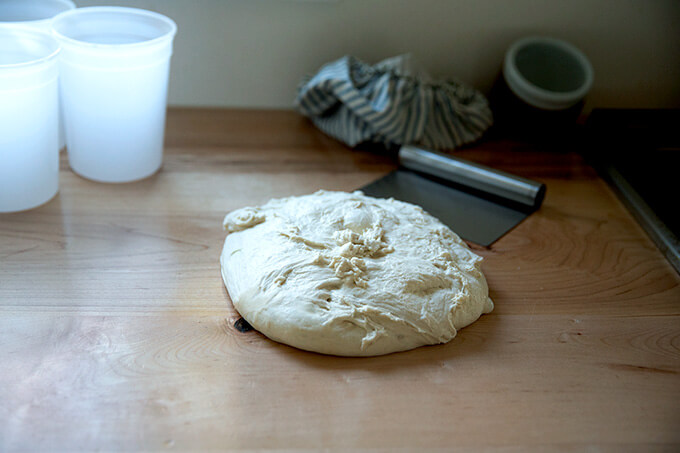
Portion into 4 equal pieces, again using flour as needed.
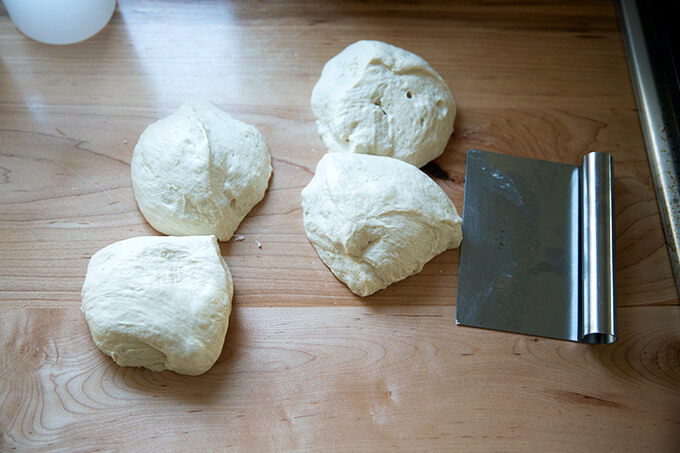
Ball up and transfer to quart (or other similar-sized) containers (I love these deli quart containers). Transfer to the fridge, ideally for at least 6 hours and up to 3 days.
An hour prior to baking, remove a round (or more) of pizza dough, and place it on a floured work surface. If you have a Baking Steel, place it in the upper third of your oven, and heat the oven to 550ºF. (See recipe for other options.)
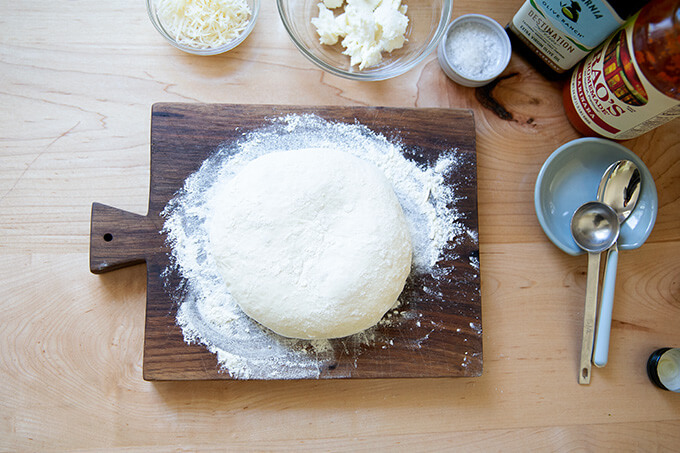
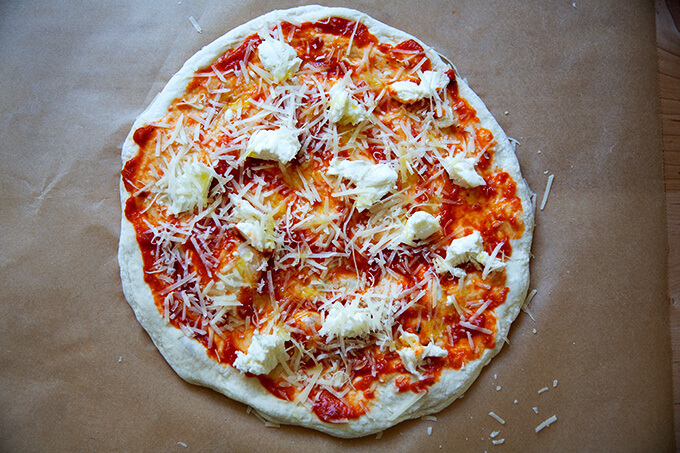
Delicately stretch the dough into a round, trying as best you can to preserve those air pockets.
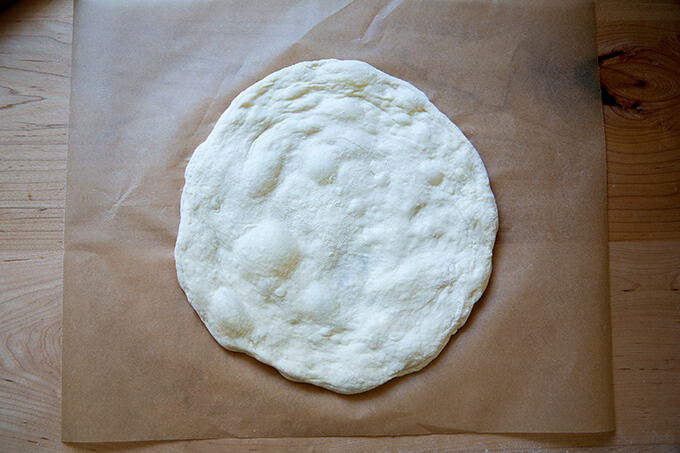
Top as you wish. This one is spread with tomato sauce and topped with fresh mozzarella, parmesan, olive oil, and sea salt.
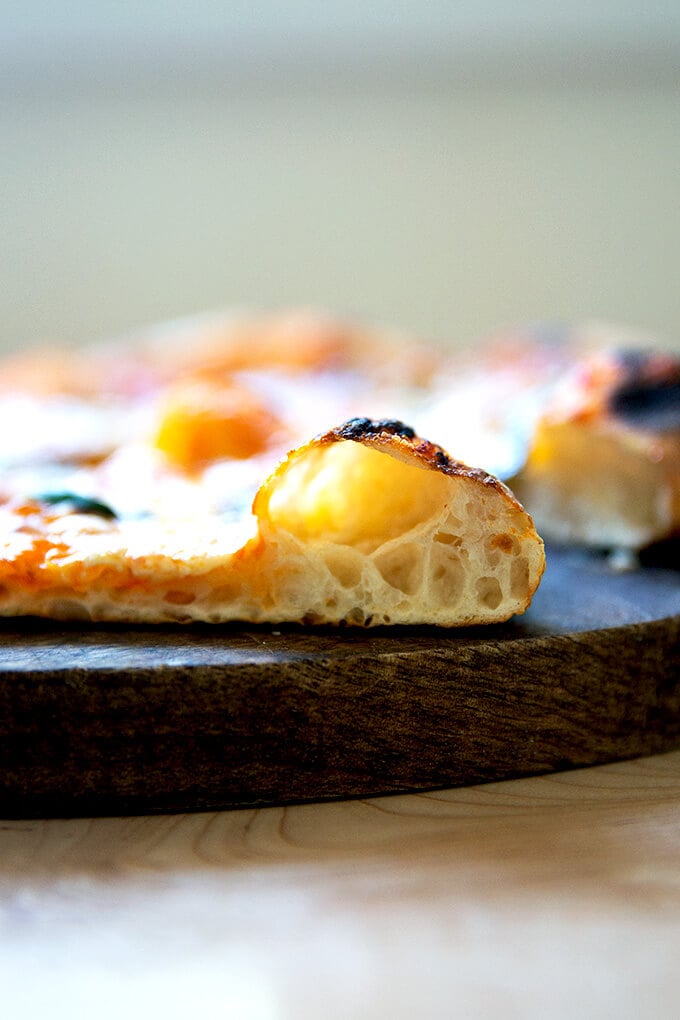
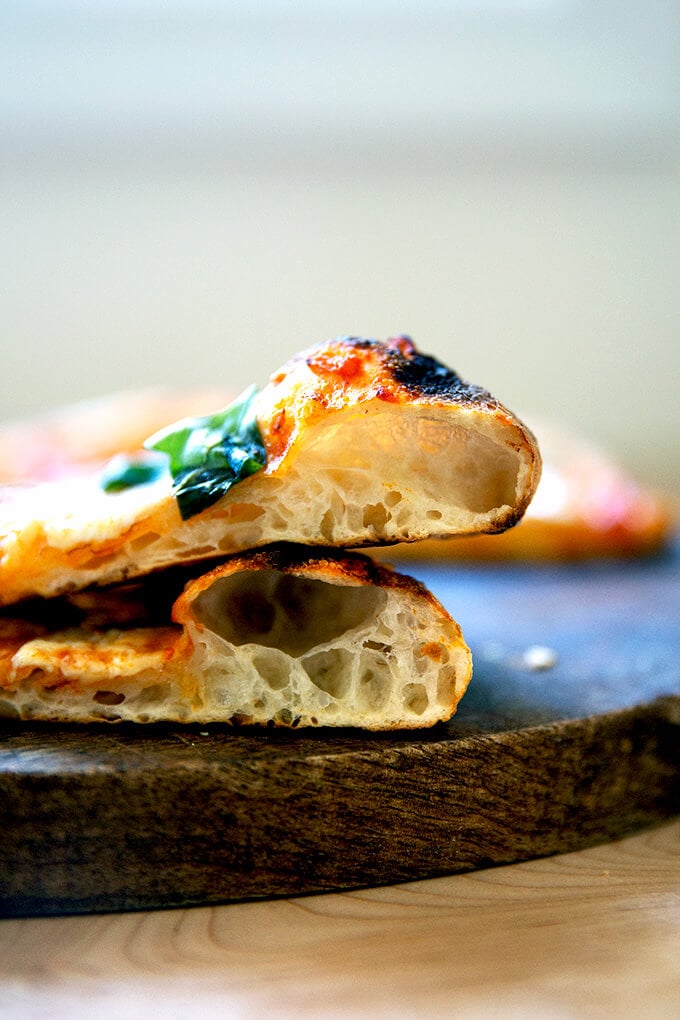
Transfer pizza, parchment paper and all to a preheated Baking Steel or stone in a 550ºF oven. Bake 5 to 6 minutes or until cooked to your liking.
Slice and serve.

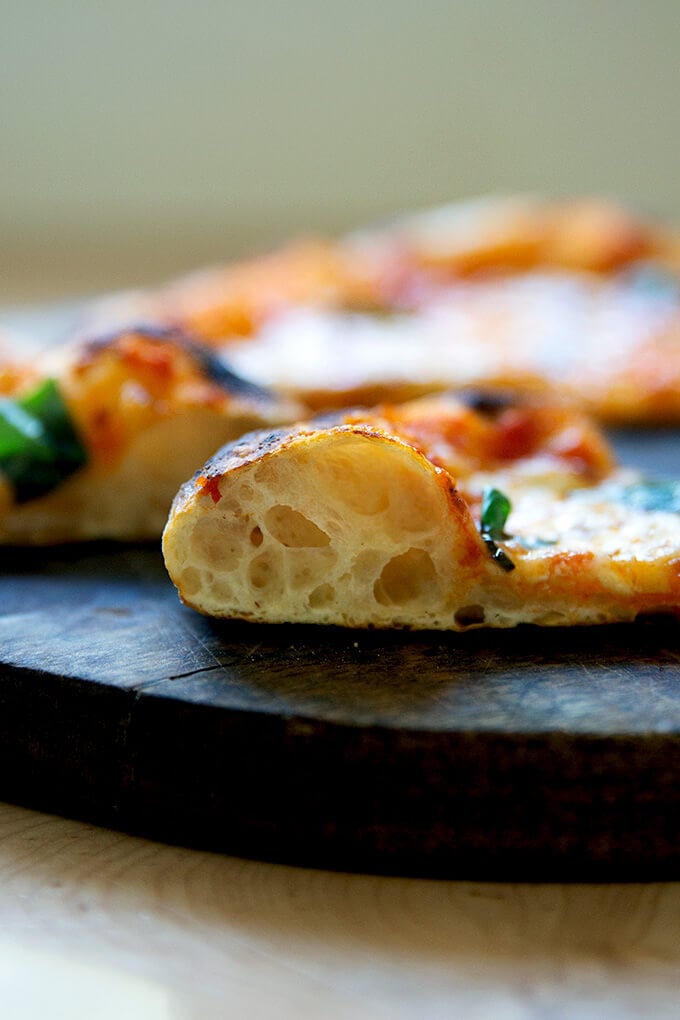
A little fresh basil is always nice.

This is the beauty of the Baking Steel: oven spring!
Another favorite: kale + crème fraîche:
Another favorite: “naked” + spicy scallion (or ramp) oil:


Simple Sourdough Pizza Crust
- Total Time: 1 day + 1 hour
- Yield: 4 pizzas
Description
**Attention Pizza Fans**: My pizza cookbook, Pizza Night, is now available for pre-order. Get your copy here: Pizza Night
What you need to make this recipe…:
- …a sourdough starter. Ideally, you want to use your starter 4 to 6 hours after you feed it, when it has doubled in volume and is very bubbly and active. You can build a starter from scratch in just about 1 week. Or you can buy one. Here are three sources:
- …time. Once your starter is ready to go, this recipe requires an initial 6 – 18 hour rise, followed by at least 6 hours in the fridge or up to 3 days.
Timing/Schedule:
The more I make sourdough, the more I realize that the timing of each bake depends so much on the time of year and the temperature of my kitchen. In the summer, because it is warm and humid, the first rise (bulk fermentation) of all my sourdoughs takes between 6 – 8 hours; in the winter it will take longer, 10 to 12 hours.
It is best to rely on visual cues. For the bulk fermentation, you want the dough to double or less than double: I now end my bulk fermentation when the dough has risen by 50% to 75% in volume. This is why I cannot recommend using a straight-sided vessel (as opposed to a bowl) enough. It makes gauging the first rise easier.
If at any point you are worried the dough will over-ferment — say, for example, the bulk fermentation is nearly complete but you are tired and want to go to bed — stick the vessel in the fridge and pick up the process in the morning. (Note: If your dough rises above double, don’t despair … my dough has tripled in volume during an overnight rise, and the resulting dough still had plenty of strength and spring.)
Schedule: I like mixing this dough in the evening, performing 4 stretch and folds before I go to bed (if time permits), then letting the dough complete its bulk fermentation at room temperature (68ºF) overnight or in the refrigerator (especially in the summer, when my kitchen is much warmer). In the morning, it’s typically ready to be portioned (if it rose at room temperature), transferred to quart containers, and stashed in the fridge. If I had let my dough spend time in the fridge for the bulk fermentation, I remove it in the morning, and let it complete its bulk fermentation at room temperature. Once complete, I portion the dough and stash it in the fridge. Sometimes I’ll use the dough that same evening; sometimes I’ll use it the following day or the next. I encourage using the dough within 3 days.
In short: If you want pizza for the weekend, mix your dough on either Wednesday or Thursday.
Troubleshooting: If you have issues with your dough being too sticky, please read this post: Why is my sourdough so sticky? The 4 common mistakes.
Water: If you live in a humid environment or if you are making this on a particularly humid day, consider starting with less water, such as 335 grams of water, which will bring the hydration down to 70%. This amount of water will still produce a light airy crust but the dough will be more manageable.
Flour choice:
- Due to supply issues, I’ve been making this recipe with all-purpose flour, and it works beautifully. You absolutely can use bread flour or tipo 00 flour if you can get your hands on either. If you can’t, know that all-purpose (unbleached) flour works great here. If you use 00 flour, you’ll likely need to reduce the amount of water. I would start with 350 g, and adjust moving forward based on your results.
Favorite Pizza-Making Tools:
- Baking Steel
- Pizza Peel
- Parchment Paper: I bake my pizzas on parchment paper on my Baking Steel. Parchment allows for easy transfer from peel to steel.
- Cast Iron Skillet: If you do not have a Steel or stone, you can use a cast iron skillet. Rub a half teaspoon of oil over its surface, transfer a stretched dough round to the skillet. Top as desired. Bake at 450ºF for about 15 minutes.
- Quart Containers for storing dough
Ingredients
For the dough:
- 375 g water (or less, see notes above)
- 100 g sourdough starter, active and bubbly, see notes above
- 10 g salt
- 500 g all-purpose or bread flour
For each Margherita pizza:
- 2 tablespoons tomato sauce
- 1 to 2 oz mozzarella
- handful of grated Parmigiano Reggiano (less than an ounce)
- drizzle olive oil
- pinch sea salt
For each kale and crème fraiche pizza:
- extra-virgin olive oil
- a couple handfuls of baby or Tuscan kale
- 1 to 2 cloves garlic
- Sea salt, such as Maldon
- 2 tablespoons crème fraîche
- grated Parmigiano Reggiano, about 1/4 to 1/3 cup
For each naked pizza with ramp or scallion oil:
- 1/4 cup olive oil
- 1/4 cup minced scallions or ramps
- 1 teaspoon crushed red pepper flakes
- 1 to 2 tablespoons crème fraîche
- handful grated Parmigiano Reggiano
- sea salt
Instructions
- Mix the dough. Place the starter, salt, and water in a large bowl. Stir with a spatula to combine — it doesn’t have to be uniformly mixed. Add the flour. Mix again until the flour is completely incorporated. Transfer to a straight-sided vessel (if you have one.) Cover vessel with tea towel or cloth bowl cover and let stand 30 minutes.
- Stretch and fold: after 30 minutes have passed, reach into the vessel and pull the dough up and into the center. Turn the vessel quarter turns and continue this pulling 8 to 10 times. See video for guidance. Let the dough rest for another 30 minutes; then repeat the stretching and folding. If possible, repeat this cycle twice more for a total of 4 stretch and folds. By the 4th cycle, you will notice a huge difference in the texture of the dough: it will be smoother, stronger, and more elastic.
- Bulk fermentation: Cover vessel with a tea towel or bowl cover and set aside to rise at room temperature (70ºF/21ºC) for 4 to 18 hours (the time will vary depending on the time of year, the strength of your starter, and the temperature of your kitchen; see notes above) or until the dough has roughly doubled in volume. (UPDATE: In the past I have recommended letting the dough rise until it doubles in volume. If you’ve had success with this, continue to let the dough double. Recently, I have been stopping the bulk fermentation when the dough increases by 50% in volume, and I feel my dough is even stronger in the end.) Note: Do not use your oven with the light on for the bulk fermentation — it is too warm for the dough. When determining when the bulk fermentation is done, it is best to rely on visual cues (doubling in volume) as opposed to time. A straight-sided vessel makes monitoring the bulk fermentation especially easy because it allows you to see when your dough has truly doubled.
- Portion and shape: Turn the dough out onto a work surface and shape into a rough ball, using as much flour as needed — the dough will be sticky. Using a bench scraper, divide the dough into 4 equal portions. Sprinkle portions with flour. With floured hands, roll each portion into a ball, using the pinkie-edges of your hands to pinch the dough underneath each ball. Transfer each round of dough to a plastic quart container, cover, and store in fridge for at least 6 hours or up to 3 days or transfer to the freezer (see notes in post about thawing).
- Make the pizzas: Pull out a round (or more) of dough from the fridge one hour before you plan on baking. Dust dough with flour and place on a floured work surface. Let sit untouched for about an hour (a little longer or shorter is fine). Place a Baking Steel or pizza stone in the top third of your oven. Set oven to 550ºF. Heat oven for at least 45 minutes but ideally 1 hour prior to baking.
- Shape the dough: Gently shape dough into a 10-inch (roughly) round handling it as minimally as possible. (See video for guidance.) Lay a sheet of parchment paper on top of a pizza peel. Transfer the dough round to the parchment-lined peel.
Top and Bake
- To make a classic Margherita-style pizza: Spread 2 tablespoons of tomato sauce over the surface of the dough. Top with mozzarella to taste. Sprinkle with parmesan to taste. Drizzle with olive oil. Sprinkle lightly with sea salt. Shimmy the pizza, parchment paper and all into the oven. Bake pizza until top is blistered, about 5-6 minutes. Transfer to cutting board. Sprinkle with basil, if you have it. Cut and serve. Discard parchment paper.
- To make a kale and crème fraîche pizza: Place the kale in a small bowl, drizzle with olive oil, season with sea salt, and toss. Spoon crème fraîche over the dough leaving a 1/2-inch border or so—I use about a tablespoon per pizza. Sprinkle with minced garlic and a handful of grated Parmigiano Reggiano. Top with the kale. Shimmy the pizza, parchment paper and all into the oven. Bake pizza until top is blistered, about 5 – 6 minutes. Transfer to cutting board. Cut and serve. Discard parchment paper.
- To make a naked pizza with scallion oil: Heat 1/4 cup olive oil in a skillet with 1/4 cup of minced scallions (or ramps!) and 1 teaspoon crushed red pepper flakes. Keep it over low heat while you make the pizza. Spoon crème fraîche over the dough leaving a 1/2-inch border or so—I use about a tablespoon per pizza. Sprinkle with a handful of grated parmesan. Shimmy the pizza, parchment paper and all into the oven. Bake pizza until top is blistered, about 5 – 6 minutes. Transfer to cutting board. At this point, the scallions should be starting to “frizzle”. If they aren’t, crank up the heat until the oil is sizzling. Spoon a few tablespoons of the hot oil over the pizza (you’ll have extra oil). Sprinkle with a pinch of sea salt. Cut and serve.
- Prep Time: 24 hours
- Cook Time: 5 to 6 minutes
- Category: Pizza
- Method: Oven
- Cuisine: American, Italian
This post may contain affiliate links. Please read my disclosure policy.


1,107 Comments on “Simple Sourdough Pizza Crust: A Step-by-Step Guide”
Love this sourdough pizza recipe. It’s critical to have a well floured surface during shaping to avoid dough sticking to table.
Great to hear this, Victor! Thanks for writing.
This is my favorite pizza dough recipe! I’ve only used active starter so far, and I agree with some of the previous comment threads that the sweet spot is around 2 days of cold fermentation. There’s a really wonderful depth of flavor that doesn’t come through for me with less than a full day in the fridge, although the crust is still great. And when I’ve gone 3 full days, I’ve lost a bit of the light and airy texture and had fewer and smaller bubbles. I’m excited to try this with unfed discard now that I see others have had success!
So nice to hear this, Jessie! Thanks so much for writing. And I would agree: 2 days in the fridge is the sweet spot.
Let the dough sit in the fridge for three days, then made pizzas in a Gozney outdoor pizza oven. The pizzas were amazing! Thank you for such a great recipe – delicious dough
So great to hear this, LP! Thanks so much for writing. I just got an Ooni Koda … haven’t broken it out yet. Can’t wait.
when you say 2 days of cold fermentation, do you mean step 3, the bulk fermentation? Or do you mean after the dough has been divided in to 4?
Hi Cindy! It’s after you divide the dough and portion it into balls and transfer it to the fridge then.
I made calzones with this recipe and they were outta this world! Fantastic crust. I am so impressed. Thank you!!
Wonderful to hear this, Gwen! I love a good calzone 🙂 🙂 🙂
How do you prevent it from getting gummy under the toppings? I have found I have to bake the dough separately for 5 minutes then add toppings and bake for the remainder otherwise it doesn’t cook under the topping. Even if I am not adding much sauce or any wet ingredients… Any advice?
Hi Abby! Interesting. Questions: are you using a Baking Steel or pizza stone? If not, what are you using? And does your oven run cool? Or are you able to crank it up to 500ºF or so?
I used the dough tonight to make a sausage, black olive and mushroom pizza. The dough was very easy to work with and made a beautiful pizza. Truly a five star recipe. Thanks for sharing.
That sounds amazing, Bruce! Totally trying that combination. Thanks so much for writing.
If I’m going for more of New York style pizza (foldable vs soft) can I simply add a little bit more flour and some olive oil?
Hi! Yes, sure, that sounds like a good idea … I don’t know how to advise on proportions, but whatever you do — 50 g or 75 g more flour, a tablespoon of olive oil — definitely write it down so you can adjust next time around with more or less. Good luck!
What if it is left for four days in the fridge? Is it better to freeze at 2 or 3 days and then just thaw on the fourth?
Hi Andrew! Yes, I would say it’s best to freeze it right away: as in, right after you shape it and transfer each round to a quart (or other) container. Honestly, I wouldn’t freeze it after 4 days. One thing I haven’t tried but which I have been meaning to do is to parbake the crust: so bake it for 2 to 3 minutes, remove it, let it cool, then transfer to an airtight bag. This way you bake the dough when it’s still in the optimal time frame; then you finish it when you are ready with the toppings, etc. It probably won’t be as good as when baked fresh, but it will still be delicious and it would be a way to save the dough from going bad.
Delicious! From my learnings I’d recommend trusting the recipe. Use the exact amount of water – it seems wet but it absorbs over time. The first time I added extra flour – the pizza is lighter without it. And at 250 deg Celsius (hottest my oven goes) in a preheated cast iron frying pan – perfect. Just go light on the toppings so it doesn’t get soggy. Thanks so much for sharing this great recipe! The first time it seemed like a lot of work, but once you do it once, it’s pretty easy. You just have to remember to start the process the day before. I like that the dough keeps for a couple of days.
Thanks so much for all of this. Great to hear. I think topping the pizzas minimally is key as well.
The best sour dough pizza crust I have ever made.. holy moly !!! Yummy perfection!
Great to hear this, Judy! Thanks so much for writing 🙂 🙂 🙂
Hi, Ali. I have the dough made and ready for bulk fermenting. Some of the sourdough recipes I’ve made say to cover the bowl with a damp towel and others say just to cover with a towel, as yours does. Either way, my dough gets a dry crust on top. I usually just fold it in during shaping. Should I oil the bowl and turn the dough in it so it’s lightly oiled to avoid that? I’ve seen that in yeast dough recipes however never for sourdough. Thanks for sharing your recipe! We can’t wait to try the pizza in a couple days!
Hi Diane! If you are consistently getting a dry crust on your pizza dough and other bread dough, then I would definitely always lightly slick your dough with oil and turn it to coat before allowing it to rise. A damp towel may help, but oil will work better. Hope you love the pizza!
The pizza was delicious! Thank you!
Great to hear, Diane!
I don’t usually comment on blog recipes but this is an exception. I’ve been making pizzas in my woodfired oven for years and have been experimenting with sourdough recipes for almost as long. This one nails it. My crust looked every bit as good as the one’s in your pics. Thanks, this really is the best.
So great to hear this, Steve! Thanks so much for writing. Jealous of your wood-fired oven. I just bought one of those Ooni Kodas… haven’t fired it up yet. Likely won’t be the same as wood-fired, but I’m looking forward to getting some better blistering.
Hi Ali! Love this pizza dough. I’ve made it many times since the pandemic. Last night I forgot I had set out my starter to make it, so I only had time for 1 stretch and fold before the fridge. Should I continue with stretch and fold this morning, or is it too late?. I saw in your post it was ok to continue if your stretch and folds were almost complete, but is it different if was just getting started?
Hi Sheri! Sorry for the delay here. I think you could do either and probably have similar results with either method. What did you end up doing? You can’t harm it if you did some folds, but I don’t think it would have been necessary in the morning either.
Hi! I’m on west coast time, so no delay at all! I just took it out of the fridge about an hour ago and hadn’t decided what to do. It looks like it had a good beauty sleep in the fridge. Perhaps a few stretch and folds and some time on the counter to ferment? Thanks for responding so quickly. I’ll let you know how it turns out!
Perfect plan! Keep me posted on how it turns out.
Hi Ali! Pizza turned out great as usual! Good to know that it is so resilient. We haven’t ordered pizza since we’ve been making your dough! Thanks!
Oh Yay! Wonderful to hear this, Sheri! Thanks for reporting back.
Hi I’m in desperate need for help! I made double the dough in preparation for a pizza dinner on Sunday. I live in a very hot and humid country so cut the water to 725 but had to add another 30-50g of flour. The dough was sticky during the first 2 stretch and folds so I wet my hands a lot during the process. My dough had increased 2.5x when I woke up and I shaped them with flour and refrigerated the doughs. 7 hours later, I prepped 1 portion with lots of flour. The dough tore a little when I shaped it into a flat circle but was mostly tight. My oven can only reach 350C and I preheated it with a baking steel for 1.5 hours. I baked it for 15 minutes. It was a little hard to slice into and the inside was slightly gummy. There weren’t as many bubbles as yours either. Any idea what went wrong and if the remaining dough is salvageable? Should I try using olive oil to prevent sticking instead of flour? Thank you!
Hi! It sounds as though your dough over-fermented during the bulk fermentation. When you shaped the balls, was there any strength to the dough? Or was it very slack and without elasticity? The texture of your baked pizza makes me think that the dough over fermented and unfortunately there is not much you can do … you can spread the dough out onto sheet pans (parchment lined), brush with butter or oil and sprinkle with seeds and turn it into crackers, but I don’t think you’ll be able to get a good pizza crust out of it. Such a bummer. I’m sorry. Here is my troubleshooting post that might help you pinpoint where things went wrong.
Hey just to update you in case you were curious, my dough wasn’t overproofed. It turned out I didn’t let it rest on the counter after removing it from the oven long enough. It was still cold to touch when I shaped and stretched it yesterday. I waited until it was completely room temperature today, prevented it from sticking using cornmeal and a little olive oil. My pizza wasn’t charred beautifully like yours but it wasn’t gummy and I got a lot of nice big bubbles. It still is a little too chewy than I would like but it’s still delicious.
Edit: I didn’t let it rest on the counter after removing it from the refrigerator long enough oops
Oh wonderful to hear this! I’m so glad you persisted and that you were able to get a nice crust as well as air bubbles. So appreciate you reporting back and sharing this.
After mixing my pizza dough, it was still rather runny. I weighed all ingredients. It’s now sitting awaiting the first stretch and fold. What to do if way to sticky.
Hi Connie! Is it runny or sticky? Sticky makes sense; runny sounds as though it’s too much water. What type of flour are you using?
Plain all purpose flour. I would like to send you a quick video of a spoon test. Do you have an email I can send it to?
Yes! alexandra@alexandracooks.com
Not really runny, but sticky yes, and stretches as it falls from spoon or hands. I would say it is elastic like, but didn’t think it would stick to my hands so much while folding and stretching. Hopefully video will help, and maybe all is as it should be. Last stretch and fold in 30 minutes.
Hope it turns out OK, Connie!
I think my problem was that I used my discard. So next time I will try after it’s been fed and doubled in size, then take what I need for the recipe.
Ok, sounds good, Connie! Keep us posted.
Excellent dough – will be my go-to sourdough recipe. It was so good that following the initial test, I made a double batch to give away to friends and neighbors. Tomorrow we’re all having a social distancing pizza night!
That is so much fun! I love this so much 🙂 🙂 🙂
When you say “starter”, do you mean fed and active or is unfed ok
I always use an active and fed starter, but others have had success using discard … if this is your first time making it, I would use fed, active starter.
Excellent recipe. The only thing I would change would be taking the word simple out of the title. I made a sourdough bread the day before this that didn’t have half the details this recipe does. Not a criticism just overwhelming for a novice.
Great to hear this, May! And great feedback, too — I can understand how this could be overwhelming.
HELP! Ok so I am a bit of a novice at sourdough! My cousin has been coaching me! She lives in WA but I live in Missouri! It’s pretty dry here right now! I intiially started my rise of sourdough Tue afternoon at about 8pm central time I put it in the fridge for overnight! It rose a SMIDGE… I have left it on the counter since about 8am Wednesday (yesterday). Last night it was only a little over the one! Has not gotten to the 2 on the vessel. today at 6:00am it is still there! I did NOT use active starter! I fed my started Sunday am and started it Tue am! I didn’t know if there was a way to give it a little warm place to rise for an hour?
THANK YOU!!!
Brittany!!
Hi Brittany,
It’s really hard to say how it will turn out … I’m worried your starter was not active enough to make the dough rise. What did you end up doing? Did you turn it out and portion it? If so, how was the texture of the dough?
Afternoon Ali. I don’t give up easily so I’m trying again today with my starter that is active and was fed this am. Waited 4 hours got a nice double size bubbly starter. Starting here rather than as before with the discard. Will get all 4 stretch and folds in today and then to the fridge it will go for hopefully a nice pizza crust for tomorrow’s dinner. Still not using yeast in my recipe. Wondering if all the great crust results were achieved due to using starter and yeast.?
New batch did much better, didn’t use discard, but do use fresh active and fed, bubbly starter. Still no yeast. It was much better but still no airy layers of crunchy mixed with chewy.
Ok, great to hear this, Connie.
Are you using a Baking Steel or a pizza stone? How long are you letting the dough rest at room temperature before shaping and baking it?
Great to hear you are giving it another go, Connie! I do not use yeast in any of my sourdough bread recipes. How did this one turn out?
I’ve never focused on pizza dough before but when I saw that the initial sourdough proportions were the same as for your most excellent easy sourdough bread recipe, I just peeled off a small bit of dough before the long cold proof for my boule and did an experiment using a cast iron skillet and yes! I’m hooked! My boules may be smaller from now on.
Oh I love this, Mel! Brilliant idea. Smaller boule + pizza sounds like a win to me 🙂 🙂 🙂
This is the very best pizza dough I have tried after trying many that didn’t work. And great that you do not need a stand mixer. I left the dough in the fridge for 4 days and it expanded beautifully, lots of bubbles and it made amazing Napoleon style pizza. Thank YOU!
Amazing to hear this, Marlene!! I love your 4-day ferment. Question: Did you let it rise at all at room temperature? I love the idea of mixing the dough and just stashing it in the fridge 🙂
Hi Ali
I hope you had a lovely holiday and arrived well in the new year.
We have not bought bread since I started my bread and then sourdough journey, mostly with a lot of information from your website and videos. Now it seems, our local pizza guy will loose some business 😉 I have been making this on a baking steel, and they come out perfect every time. I still feel that I am new to this, so it is such a great feeling to be successful.
Question: if I want do double the recipe, do I double the amount of starter? I read somewhere, that after a certain amount, too much starter will be counterproductive. And also; is there a dough-technical reason for letting the dough ferment in the fridge in single portions?. If I am going to use the entire amount, could I just protion it out on the day I am making the pizza? It would be more practical for space reasons to store it in bulk.
So nice to hear this, Emine 🙂 🙂 🙂 Thanks so much for writing.
To answer your questions:
If I want do double the recipe, do I double the amount of starter? I read somewhere, that after a certain amount, too much starter will be counterproductive.
I would actually double the starter for this recipe. 200 g of starter given the amount of flour actually isn’t too much. One of KAF’s recipes calls for over 200g starter for around 600 g flour, so I think doubling is a good idea here.
And also; is there a dough-technical reason for letting the dough ferment in the fridge in single portions?. If I am going to use the entire amount, could I just protion it out on the day I am making the pizza? It would be more practical for space reasons to store it in bulk.
You can definitely try storing the entire amount of dough in the fridge, but you may find potentially that your pizzas aren’t as airy. The beauty of the single portion container is that it allows you to handle the dough very minimally before shaping and baking it. When you are dealing with a huge batch of dough, you’ll have to portion it, shape it, etc., and you’ll just be handling it a lot more closer to baking time than you would when you portion the dough individually.
All of this said: I haven’t tried! Bread baking and sourdough bread baking, in particular, is all about experimenting. You may find your pizza come out just as well, so if storing the mass of dough in one large container is better for you, then it’s totally worth a shot experimenting.
Thank you Ali, for the speedy and helpful answer. I did suspect that storing the single portions had to do with the handling on baking day. I will try and stick to it as long as I have enough space.
On a different note; I had made the sourdough focaccia today to go with a fish soup for a patry of four, thinking we will have plenty leftovers for tomorrow. Not one crumb left unfortunately…
So nice to hear this, Emine! That focaccia never lasts long here either 🙂 🙂 🙂
My family was in for a real treat tonight!
I had your sourdough dough ready and the dark chocolate cookies with oats and coconut cooling.
Both recipes worked really well!
I lived 22 years near Naples and this recipe filled my heart because it took me back home.
The cookies… yum!
If I make them again I would definitely make half of the recipe though, I made them and weighed them like suggested and I made many more than 16.
The freezing option is great!
I’m looking forward to receiving your book that I e ordered.
Regards,
Francesca
Ps: I did like you suggested and made the sourdough sandwich bread with 100g WWF and 22g rye flour.
I baked it after an hour of the second proof and it was amazing.
So wonderful to hear all of this, Francesca! I am dying to get to Naples … I was hoping to go this summer or fall, but I’m not sure what the travel situation will be then … there’s always 2022 🙂 Thank you for your kind words. Your kit is in the mail!
We have an outdoor pizza oven. Anytime has success with this dough? We always well flower our pizza peel I’m assuming it would react the same way as our regular pizza dough
Hi Kelly! I don’t have an outdoor oven, but a number of commenters have made this in their outdoor pizza oven and says it works great. Good luck!
I’m here to reply back- Totally worked!!
Yay!! So great to hear this, Kelly!
AM-AZ-ING recipe took my pizzas to another level, thank you
Yay! Wonderful to hear this Mo!
I decided to pre bake my unused dough for later use instead of putting it back in the fridge after it had been sitting at room temperature for over an hour. What i found was the oven spring on the dough is so much better with no toppings. My oven temperature and baking steel wasn’t as hot as it could be. Now i can see why the oven has to be sooo hot if there is going to be toppings weighing it down. the crumb wasn’t airy like in your pictures especially beneath where the toppings were. perhaps it was also overfermented since i slept in and the dough had slightly more than doubled. This was my first try. Wish i had used all purpose instead of 00 to experiment as 00 is so expensive. Nevertheless it was delicious and the kids loved it. Thanks for the great instructions and tips.
So interesting to read all of this. And yes: when I bake my dough “naked” it is amazing to see the air bubbles and puffiness. Great to hear the kids approved!
Hi,
New here but one thing I’m wondering is what size pizza does this recipe make? Can see 4 dough balls but what weight are they roughly? And what size pizza can each roughly stretch too?
Thank you!
Hi Dale! The total dough weight will vary, but generally mine weighs around 885g, and I portion the dough into 4 balls, each weighing 220-222 grams. You can stretch the dough to about 10 inches, give or take an inch. Hope that helps!
Fantastic recipe! I’m brand new to the world of sourdough baking, and gave this a shot. It was super easy to follow and the results were INCREDIBLE. Thank you so much!!!
Wonderful to hear this, Adam! Thanks so much for writing 🍕🍕🍕🍕🍕
Hello I am in the process of making this and I followed all the steps and set it out to do it’s bulk fermentation and it’s been 16 hours and hasn’t risen at all. The only thing I did differently was put it in a big glass bowl instead of a straight sided vessel because I didn’t own one. I also realized that my starter didn’t grow but it did get really bubbly. Do you think that’s what the problem is?
Thanks
Hi Amanda,
Yes, unfortunately, I think your starter is the issue. Your starter has to rise — it has to double in volume after a feeding within 6-8 hours. Here is my troubleshooting post — there’s guidance in that post for strengthening your starter.
This is an amazing amazing amazing amazing recipe! Did i say amazing?
I’m a total rookie, super newbie to sourdough and this pizza came out fantastic. I must say i was afraid my sourdough wouldn’t be up for the challenge (since only it was born only few days ago) so I used 1/2 teaspoon of instant yeast. Another reason for that was that I started my pizza on Thursday night to eat it on Friday and i didn’t think the temperature/time factor will be on my side. So i let it rise at room temperature for about 3 hrs, leave it in the refrigerator from 11pm-8am, took it out for another rise for another 3 hrs, back in the fridge for 3hrs more and took it out 1 hrs before shaping/baking. I know all that was probably unnecessary but IT WORKED! we had the best pizza ever. I’ve been trying to ever to have a pizza like that and this recipe was my answer!
My husband is in heaven and so are my daughter and I.
Thank you so much!
If you have some comments about my process I’d appreciate it!
Oh yay! Wonderful to hear all of this, Beba. I think you probably could have gotten away with leaving it in the fridge from 11 pm until one hour prior to baking, especially since you used a teensy bit of yeast. But, your instincts are great, and you should continue to follow them 🙂 🙂 🙂