
Easy Brioche Loaf Recipe (No-Knead)
This post may contain affiliate links. Please read my disclosure policy.
The dough for this easy, no-knead brioche loaf comes together in 5 minutes and requires nothing more than a bowl, whisk, and spatula. Start to finish, it can be made in 4 hours but requires only 25 minutes of active time 🍞🍞🍞
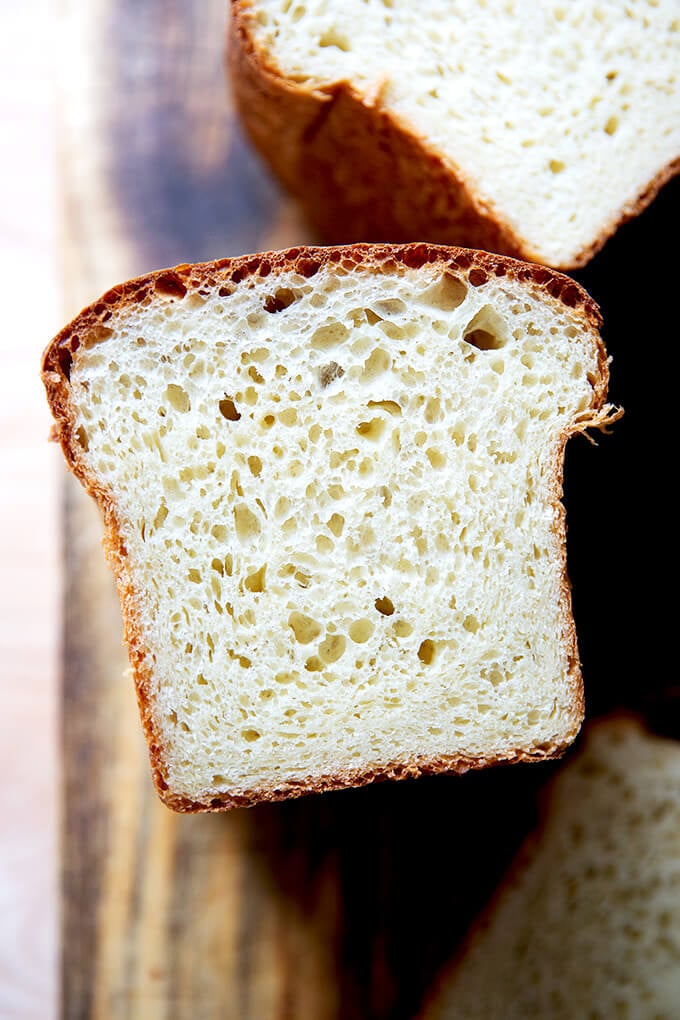
Brioche is a soft-textured, slightly sweet, rich-tasting bread often made with sugar, milk, and heaps of eggs and butter. I recently came across a recipe calling for 6 eggs and 20 tablespoons of butter. The recipe yielded one loaf. One loaf! Two and a half sticks of butter for one loaf!
Even if that brioche is the brioche to end all brioches, I will never make it. I can’t get myself to load dough up with so many enrichments knowing that a lean dough — one made with flour, water, and salt alone — can produce something completely delicious and satisfying.
Moreover, I know that a modest amount of enrichments goes a long way. With challah, for example, the inclusion of two eggs and a little bit of oil and honey yields a light and airy loaf, golden-hued, soft-textured, and rich tasting.
Would using even more eggs, oil, and honey make that challah that much better?
I don’t know — I’ve never tried! But my hunch is no. For me, the law of diminishing returns applies with bread: at a certain point, more eggs, oil, butter, sugar, and milk won’t make a loaf of bread materially better.
The first brioche bread recipe I made came from the original Tartine cookbook. I recently re-read the introduction to that recipe, which notes that “different types of brioche dough are made depending on how they will be used, with the formulas varying primarily in the percentage of butter.” Tartine intentionally makes a less-rich brioche because they use it for bread pudding and bostock, and they “need the crumb structure to hold up” to the rich ingredients they use in these recipes.
And this is perhaps the most compelling reason in my mind to make a “light” brioche: if you view brioche mostly as a vehicle for making exceptional bread pudding, French toast, and the like, it might be wise to save all of those eggs and all of that butter for a recipe in which they’ll really shine.
About this Brioche
Until very recently, I noted in my favorite bread pudding recipe that the brioche recipe I used required 2 days of work. I warned: “Be sure to plan ahead!”
Years after posting that recipe, I have learned that very good brioche can be made simply and quickly. The recipe below comes from my cookbook, Bread Toast Crumbs, though I’ve made some changes:
- I’ve added weights for all of the ingredients because I’ve learned precision is important not only for dry ingredients but also wet.
- I offer a range of water quantities because I think depending on where you are, the amount of water you should use will vary.
- Instead of simply splitting the dough in half with forks and plopping it into the two buttered loaf pans, I now turn it out onto a lightly floured work surface, weigh each portion — I like the loaves to be as similarly sized as possible — and shape each into a batard. (Note: If you prefer the “peasant bread method” of never having to deal with a floured work surface or with shaping, you can use that method here.)
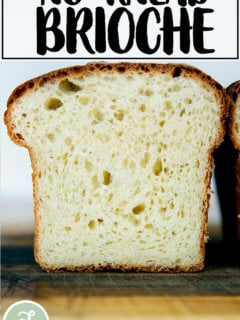
But the spirit of the recipe is still the same. This brioche is:
- Light. (For reasons outlined above.)
- No-knead. (There’s just no need 😂😂😂.)
- Fast. (Start to finish it’s ready in about 4 hours, with about 25 minutes of active work. If you wish to do an overnight, fridge rise with the dough, however, you can do that, too.)
- Easy. (Many brioche recipes call for a stand mixer and softened butter, which you work into the dough piece by piece. This one calls for melted butter.)
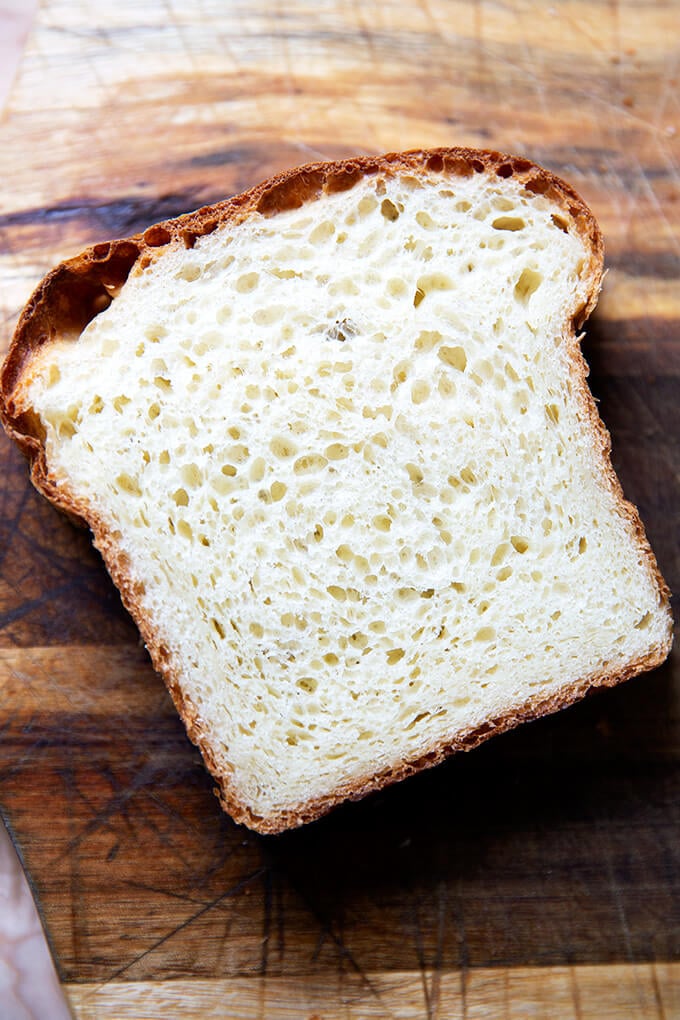
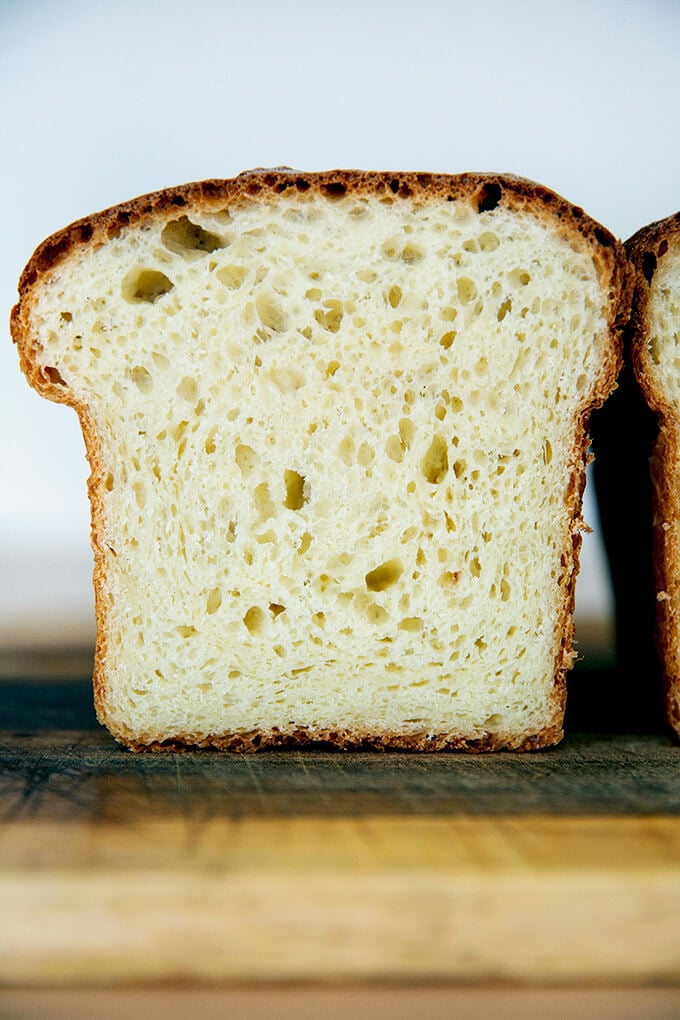
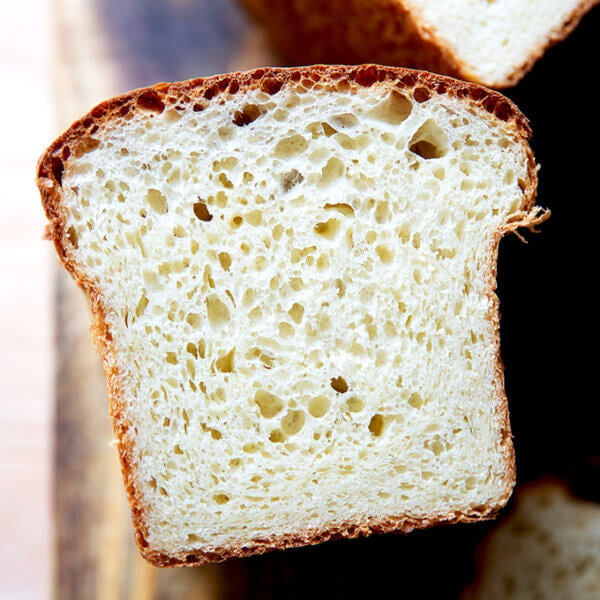
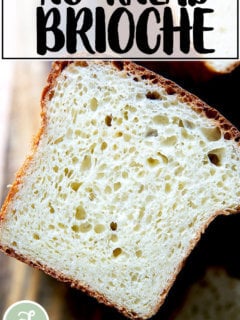
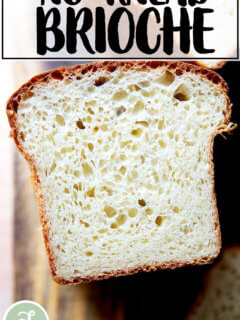
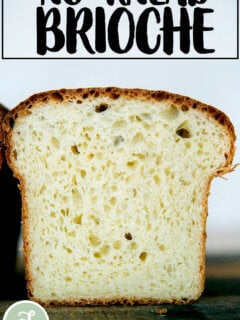
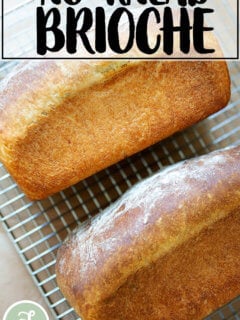
- Delicious. (This brioche bread is nicely seasoned — subtly sweet, perfectly salted — and is an excellent candidate for bread pudding and French toast, overnight or otherwise.)
How to Make Brioche: A Step-by-Step Guide
Here’s the play by play: Gather your ingredients.
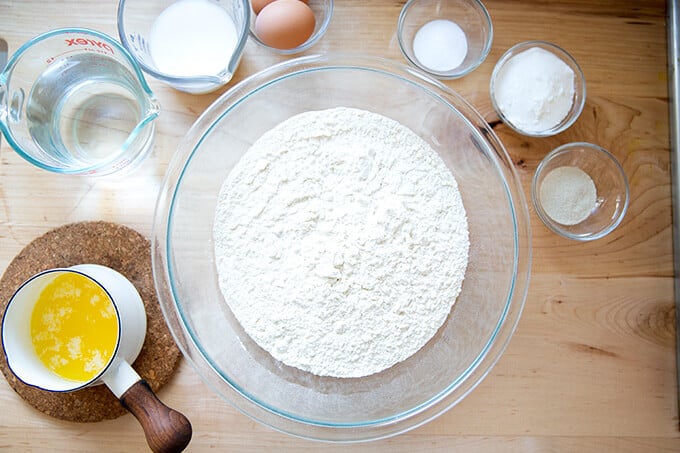
Stir together the dry ingredients. Whisk together the wet.
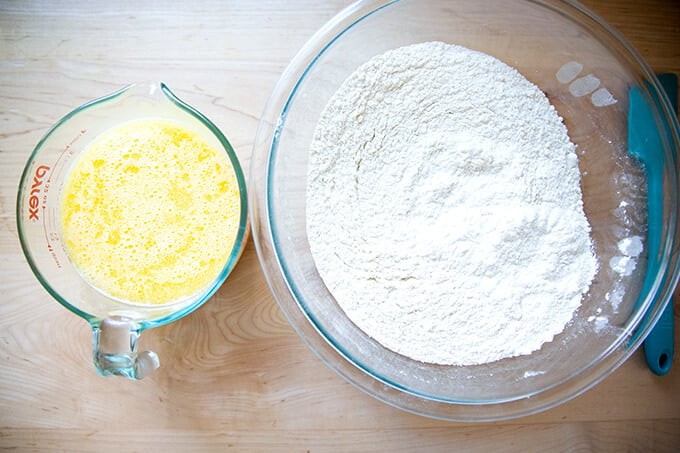
Combine the two until until you have a sticky dough ball:
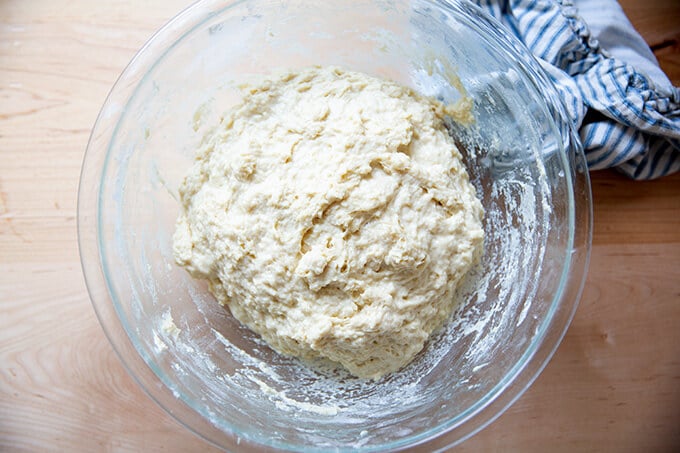
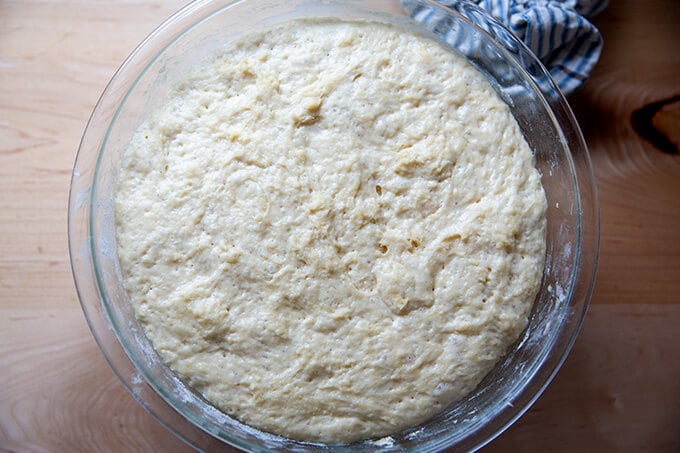
Let rise in a warm spot until doubled in volume, roughly two hours.
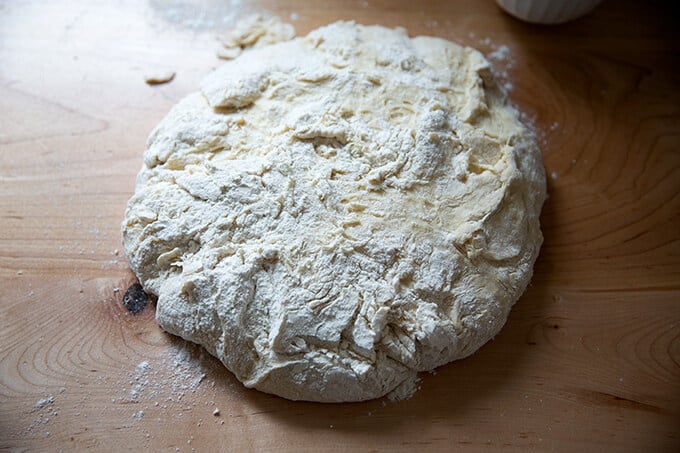
Turn out onto a lightly floured work surface:
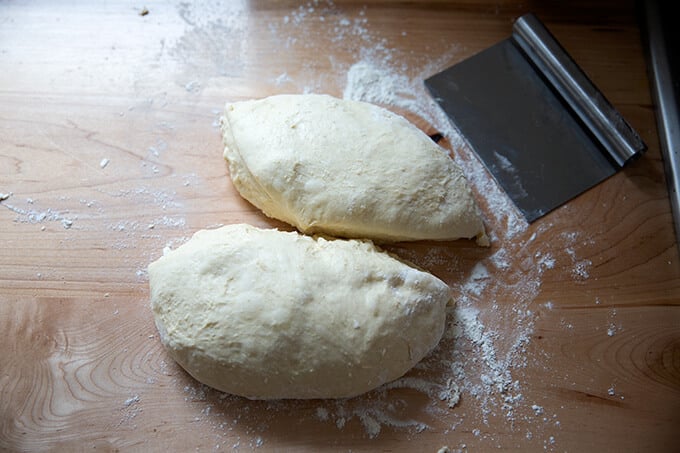
Divide into two equal portions.
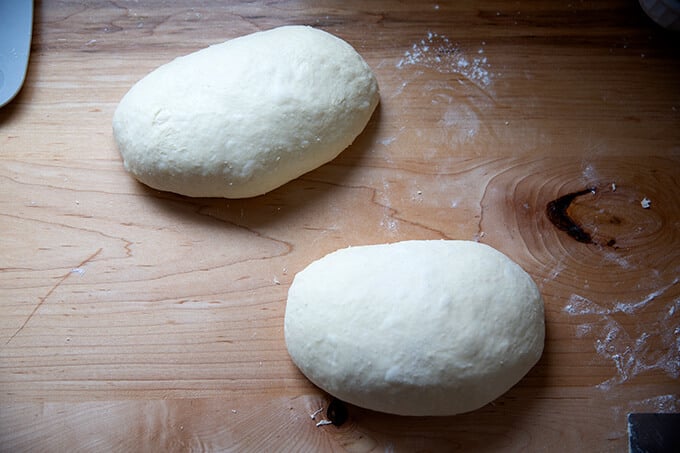
Shape into batards.
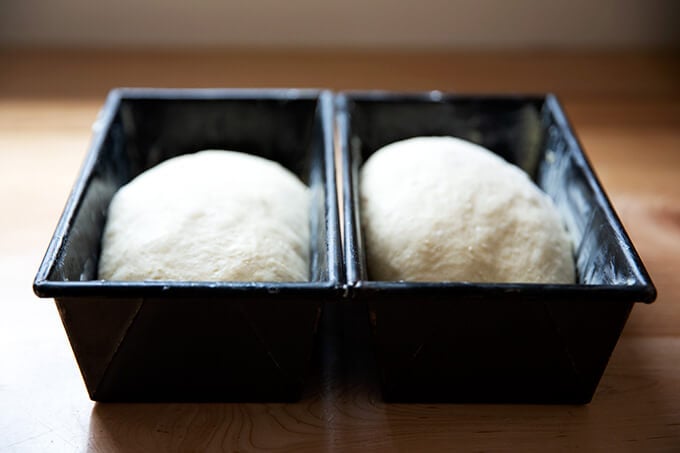
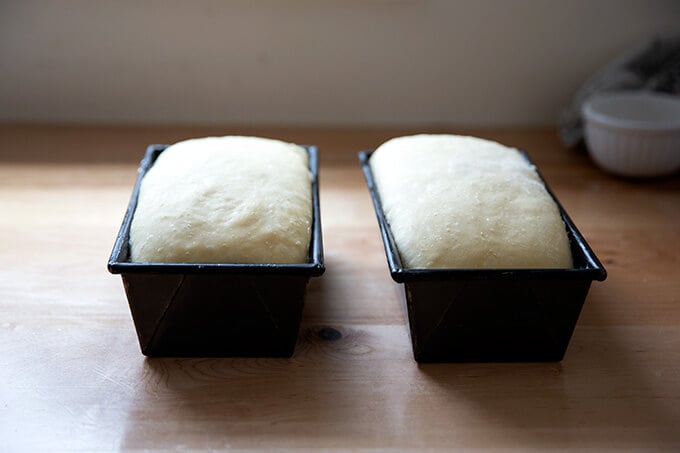
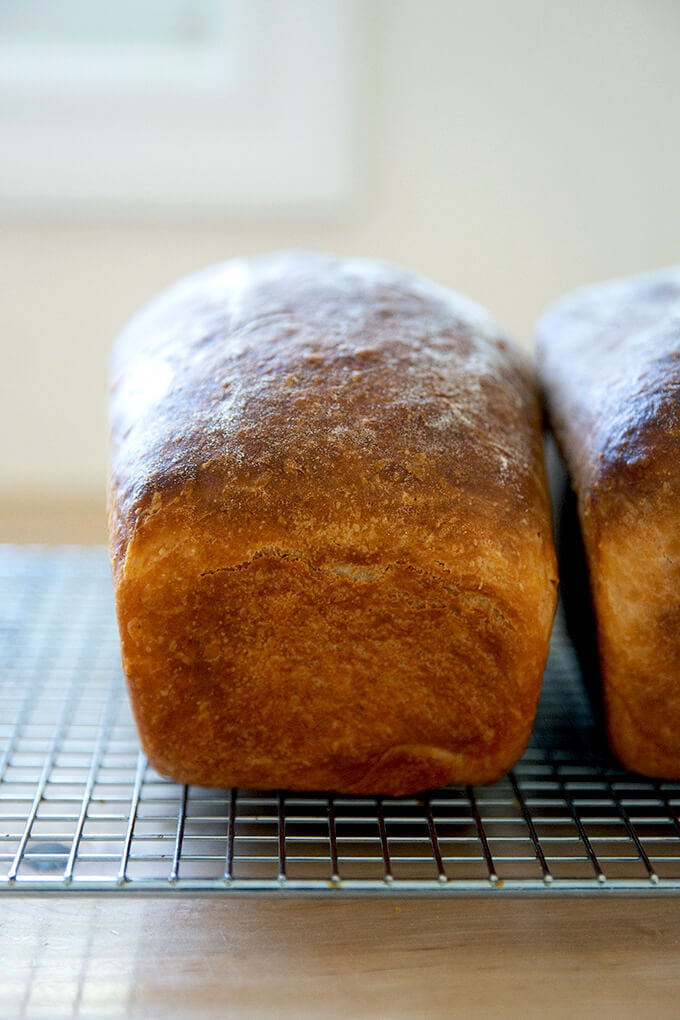
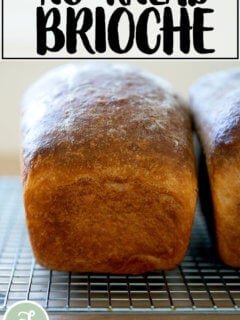
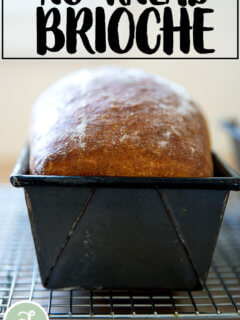
Transfer to buttered loaf pans and let rise until the dough crowns the rim of the pans. I love these pans for this recipe and others (namely this banana bread.)
Transfer to a 375ºF oven for roughly 45 minutes.
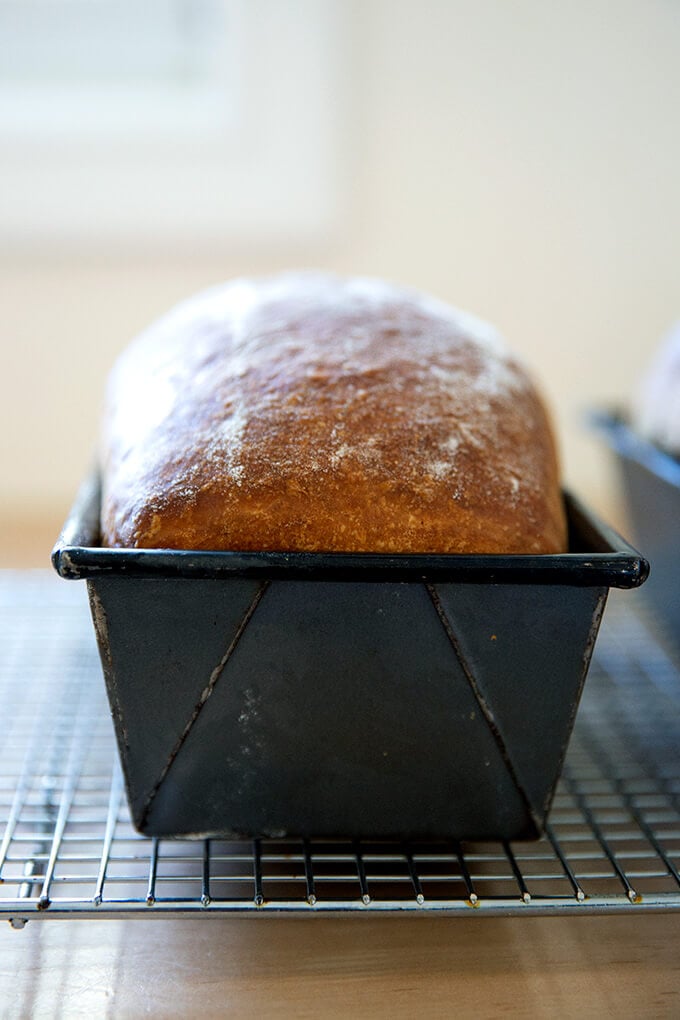
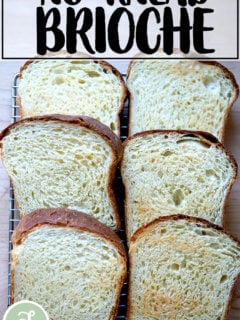
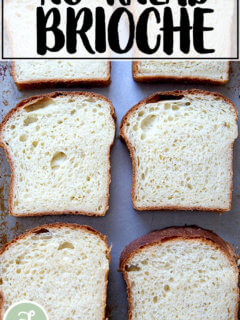
Let cool for at least 30 minutes before slicing.
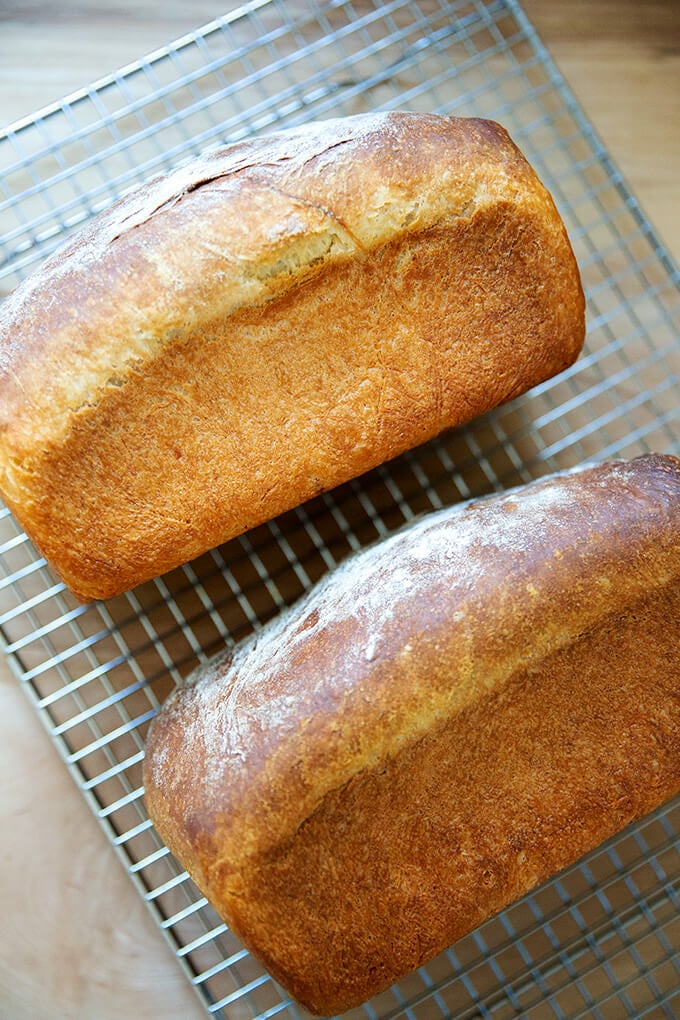
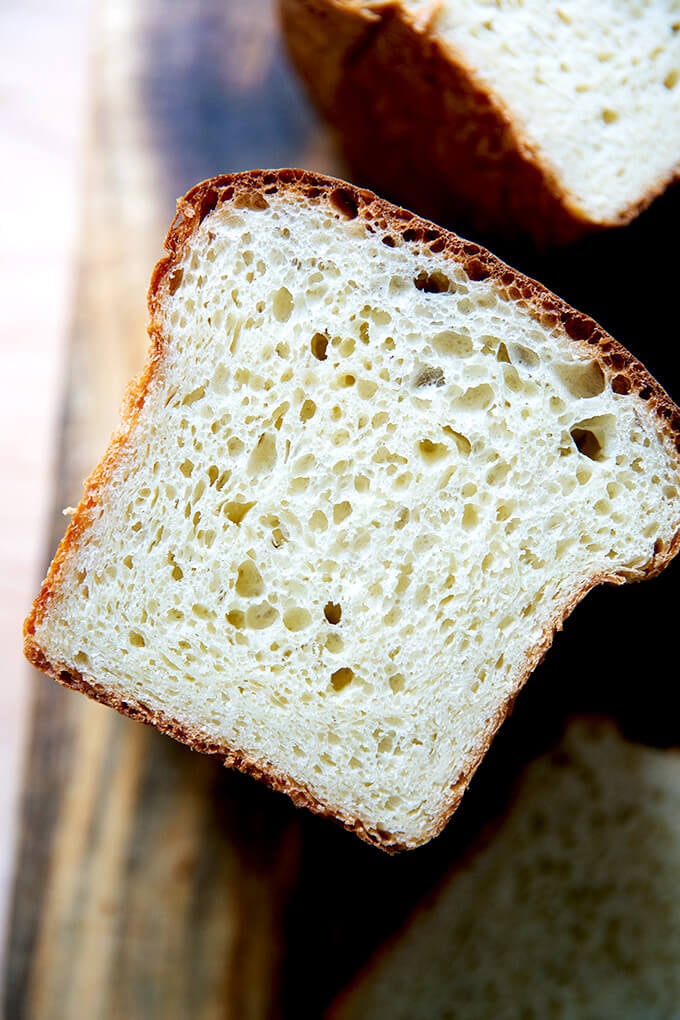
This brioche is delicious toasted with butter and jam, but it’s especially good in this brioche bread pudding recipe.
And it freezes beautifully, too. See notes in the recipe below.
Easy Brioche Loaf Recipe (No-Knead)
- Total Time: 4 hours
- Yield: 2 loaves
Description
Adapted from my cookbook, Bread Toast Crumbs.
This recipe is very similar to the one in my book, but I’ve added weights for all of the ingredients, and instead of simply dividing the dough and plopping it into bread pans, I now like to turn it out onto a floured work surface, divide it into two even portions (by weight), and shape it before transferring it to the buttered loaf pans.
To create a warm spot for your bread to rise, turn your oven on for one minute, then shut it off. That brief blast of heat will create a cozy place for your bread to rise.
As always: for best results, use a digital scale to weigh the ingredients.
For a half recipe, see the notes below.
Water: This is a very wet dough. If you live in a humid area or you have trouble working with sticky doughs, I would start with 1.75 cups (425 g). Reference the photos above and the video for how sticky/wet the dough should appear.
If using active dry yeast: Sprinkle the yeast over the whisked together wet ingredients (which should be lukewarm to the touch) and let stand for 15 minutes or until it gets foamy; then proceed with the recipe.
To freeze: Let the dough cool completely, then tuck into an airtight bag or vessel and freeze for up to 3 months (or a bit longer).
Ingredients
- 6 cups (768 g) all-purpose or bread flour
- 1 tablespoon (15 g) kosher salt
- 2.5 teaspoons (8 g) instant yeast, see notes above if using active dry yeast
- 1/3 cup (77 g) sugar
- 1.75 –2 cups (425-450 g) lukewarm water, see notes above
- 2 eggs (100 g)
- 1/2 cup (125 g) milk
- 6 tablespoons (80 g) butter, melted
Instructions
- Whisk together the flour, salt, yeast, and sugar.
- In a medium bowl, whisk together the eggs, milk, water, and melted butter.
- Pour the wet ingredients into the dry ingredients, and stir with a spatula till you have a sticky dough ball.
- Cover bowl and let rise in a warm area (see notes above) for 2 to 3 hours or until doubled. Alternatively, stick bowl in the fridge immediately and let it rise overnight or for 12 to 18 hours.
- Grease two 8.5 x 4.5 inch loaf pans with butter. Heat your oven to 375ºF.
- There are two ways to proceed after the first rise: 1. You can simply deflate the dough using forks to release the dough from the sides of the bowl and to divide it into two equal portions; then use oiled hands to transfer the dough to your prepared pans. (Dough is very wet and sticky—this is normal.) 2. Or you can cover a work surface with flour. Turn the dough out onto the floured work surface and shape it into a rough ball, using as much flour as necessary—the dough is very wet and sticky. Use a bench scraper to divide the dough into two equal portions. (Depending on how much water you are using, each portion will weigh between 790-805 grams.) Shape each portion into an oblong loaf or batard (see video guidance here) and transfer to prepared loaf pans.
- Let rise until dough begins to crown the rim of your pan. This may take 45 minutes to an hour (or more or less depending on how warm your kitchen is).
- Transfer pans to oven and bake for about 45 minutes or until evenly golden or until an instant-read thermometer registers 205ºF or higher. Turn loaves out onto cooling racks and let cool for at least 30 minutes before cutting.
Notes
Half Recipe Quantities:
- 3 cups (384 g) all-purpose or bread flour
- 1.5 teaspoons (7 g) kosher salt
- 1.5 teaspoons (5 g) instant yeast
- 3 tablespoons (38 g) sugar
- 0.75 –1 cups (170-227 g) lukewarm water, see notes above
- 1 egg (50 g)
- 1/4 cup (62 g) milk
- 3 tablespoons (40 g) butter, melted
- Prep Time: 3 hours 15 minutes
- Cook Time: 45 minutes
- Category: Bread
- Method: Oven
- Cuisine: French
This post may contain affiliate links. Please read my disclosure policy.


170 Comments on “Easy Brioche Loaf Recipe (No-Knead)”
The best recipe for bread yet……….i wish I could give it 10 stars………I I made it in my bread machine light crust
Great to hear, Geo! Thanks for writing!
I made your brioche bread recipe and it was absolutely delicious. However, I found it too dense if you were making a sandwich. I’m looking for a really light and fluffy every day sandwich bread.
Do you have a recipe for that?
Love your recipes!
I think I might consider making the peasant bread but in a loaf pan: https://cupofjo.com/2022/02/02/found-easy-same-day-peasant-bread-recipe/
Hi Ali,
My family loves this bread! Just made the full recipe twice in the last couple weeks!
Wondering if you have tried using honey instead of sugar and what the ratio would be?
Would I have to add less water?
Thank you so much!
Veronica
Hi Veronica! Great to read all of this and apologies for the delay here. I think it might be a good idea to hold back some of the water — maybe start by holding back 25-50 grams and see how the dough looks/feels… you can always add some of the water back in if the dough looks dry.