
How to Make Fresh Homemade Ciabatta Bread
This post may contain affiliate links. Please read my disclosure policy.
This post will teach you how to make a crusty, open-crumbed loaf of ciabatta bread. Below you will find a detailed guide full of tips and tricks as well as a troubleshooting section with answers to FAQs to help you make a loaf of ciabatta bread with a crisp, golden exterior, and a light, airy crumb. Video guidance, too!
Friends, today I have a saga to share with you, one that fortunately ends happily: with a crusty, open-crumbed loaf of ciabatta bread, the recipe for which I hope you make soon and then all summer long, for beach lunches and mountain hikes, for dinner with friends and family, perhaps beside a fire or under twinkling bulbs strung from tree to tree, a pool of olive oil at the ready to dunk into at will. This has become one of my favorite homemade bread recipes.
Grab a cup of tea, let’s start from the top …
After posting this sourdough ciabatta bread recipe in April, I felt determined to make a comparable, yeast-leavened variation. For reasons I cannot explain, when I revisited a recipe I had posted here years ago, the photos for which looked promising, I couldn’t get it to work quite as well. The rolls, while tasty, had a tight, closed crumb, not as light or as open as I remembered (or as pictured).
In search of that more wild, amorphous crumb, which ciabatta is known for, I turned to my various bread baking books, namely The Bread Baker’s Apprentice, which noted that ciabatta often is made with a poolish or biga, meaning a small amount of flour and water mixed with a leavening agent and left to ferment for a short period of time.
This got me thinking: could I replace the 100 grams of sourdough starter in the sourdough ciabatta recipe with 100 grams of poolish? I gave it a go, stirring together 50 grams each flour and water with 1/2 teaspoon instant yeast and then letting it sit for three hours. When the surface of the poolish was dimpled with holes, I proceeded with the recipe, adding water, salt, and flour; mixing the dough; stretching and folding it; letting it rise, and finally transferring it to the fridge overnight.
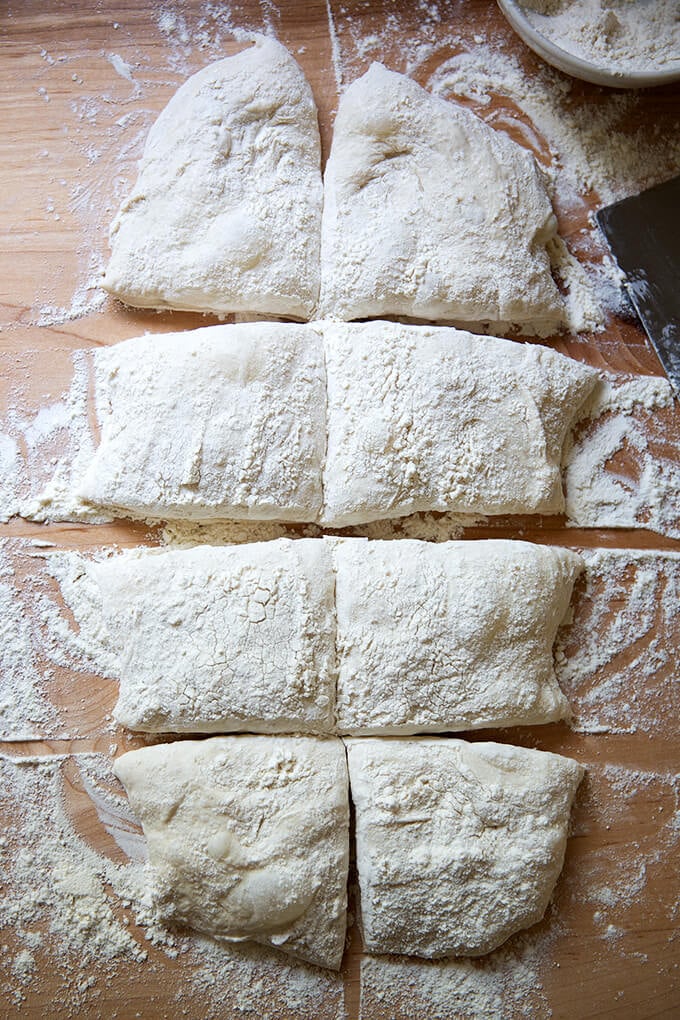
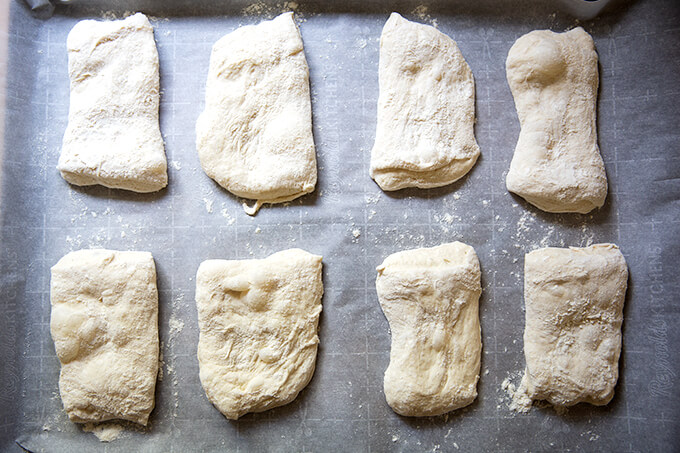
The following morning, I turned the dough out onto a floured work surface, cut it into eight portions, and transferred them to a sheet pan. One hour later, I baked them.
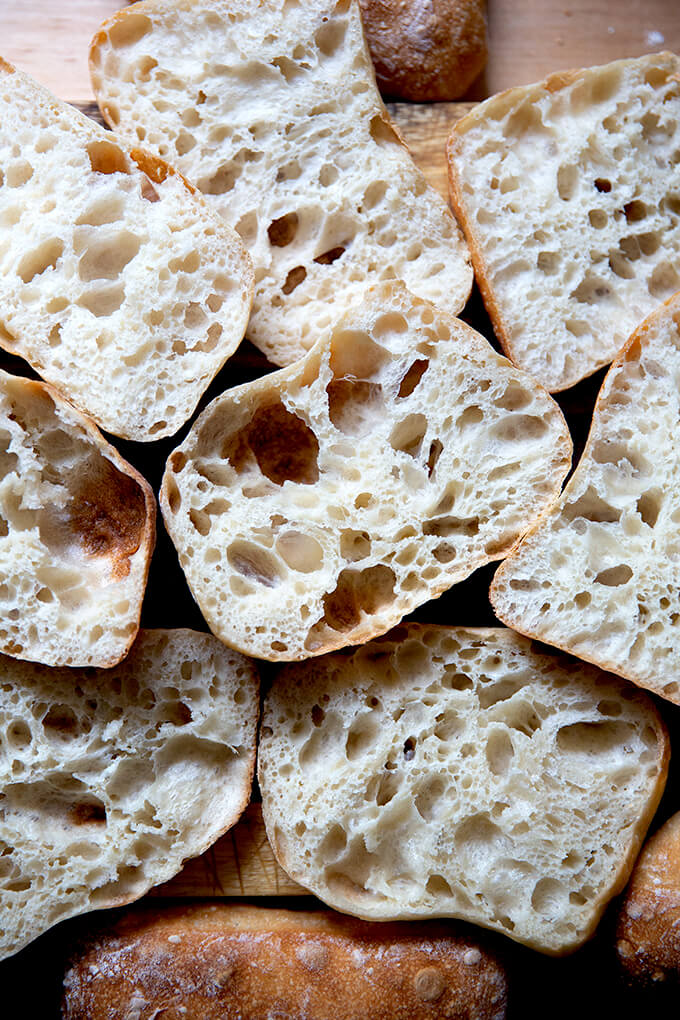
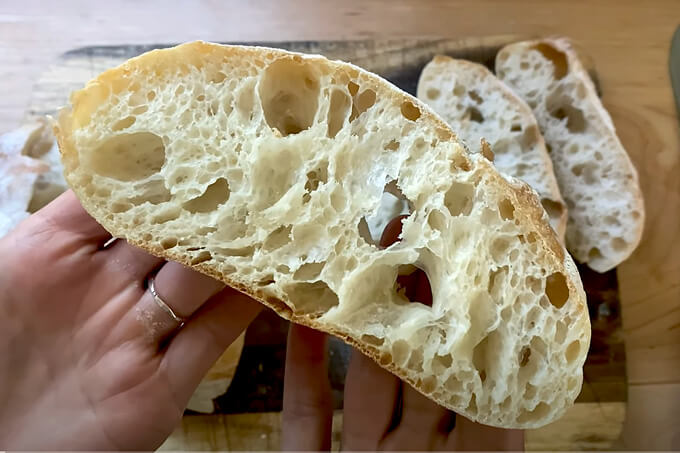
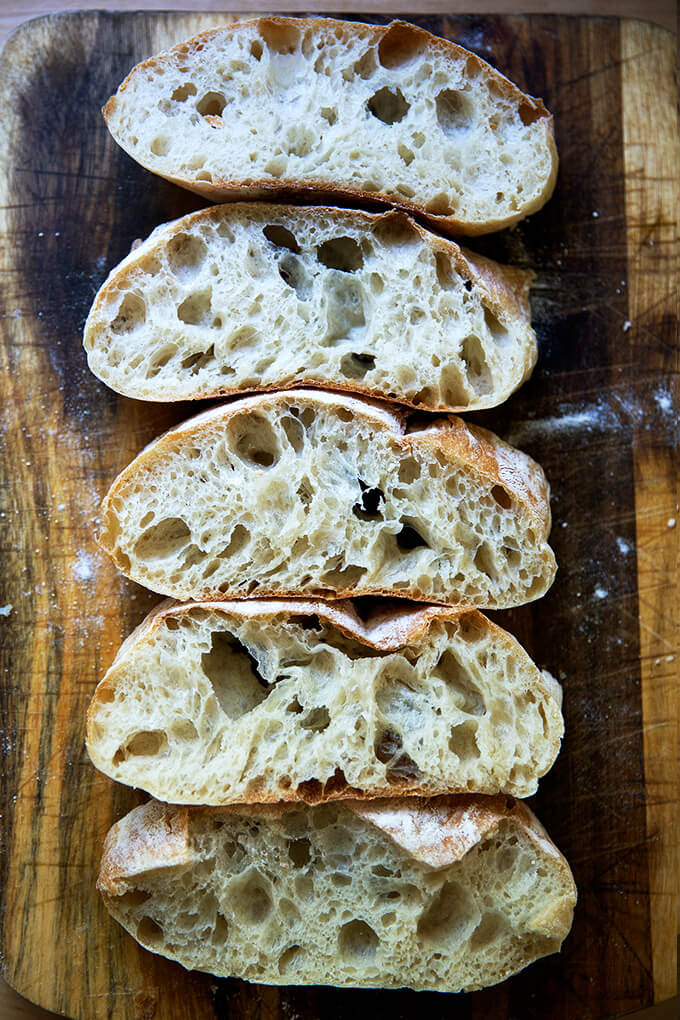
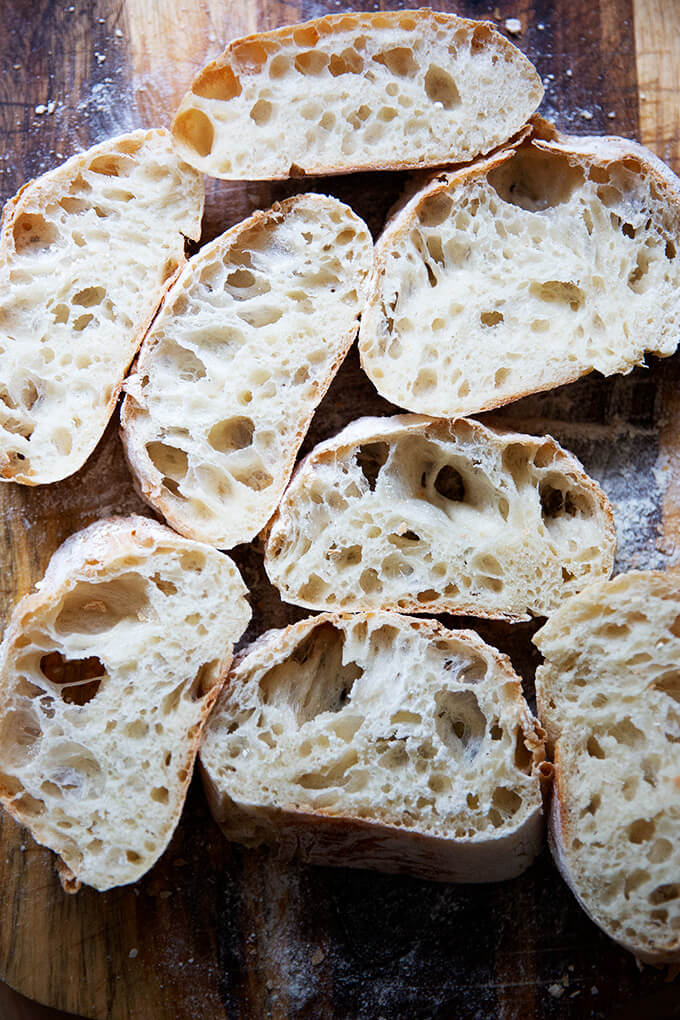
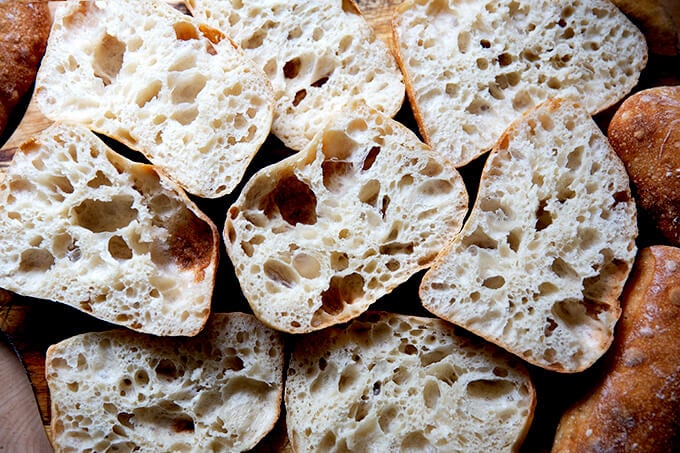
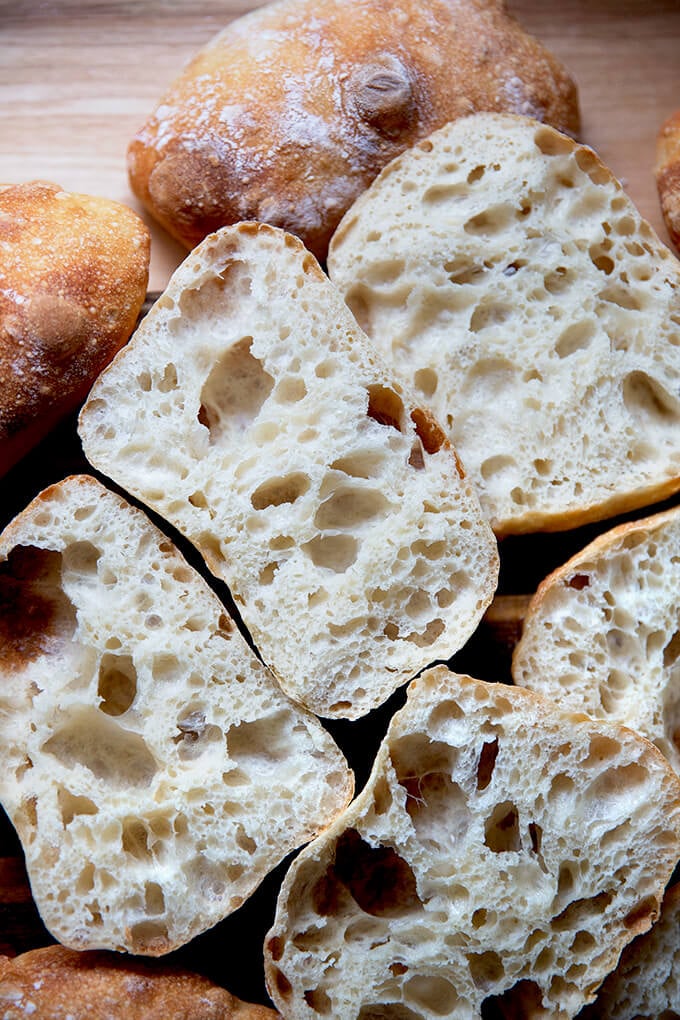
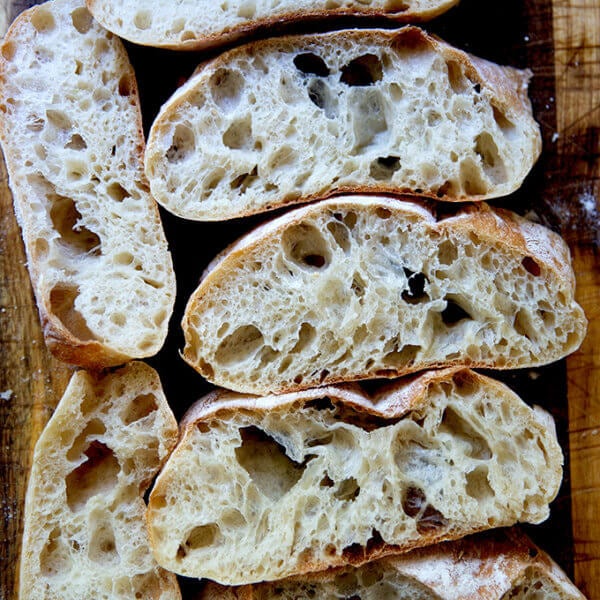
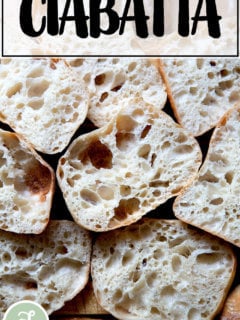
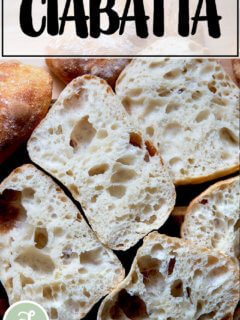
Friends! It worked beautifully. The crumb, while not quite as honeycombed as the sourdough version, was full of holes, giving the ciabatta its characteristic lightness and airiness. I felt really good about the recipe — it was simple enough, nearly identical to the sourdough version without having to use a sourdough starter, and very tasty.
I almost posted the recipe but anticipating that some people might want a loaf of ciabatta as opposed to rolls, I decided to test the recipe in loaf form.
This is where the saga begins. The two loaves I pulled from the oven, while crusty and beautiful from the exterior, were … HOLLOW! I had baked, in essence, two gigantic pita breads, perfect for housing torpedo-sized falafel. (Stay tuned … the saga continues! Kidding.)
This experience sent me on a tear to figure out where I went wrong. As I read about “tunneling”, I tried many things to fix the situation — lowering the hydration, increasing the hydration, kneading the dough, lowering the oven temperature, decreasing the amount of yeast, eliminating the cold proof — and in the process, I made many many loaves of hollow ciabatta. At the risk of sounding a little dramatic, this quest paralyzed me creatively — truly: without this ciabatta puzzle solved, I couldn’t create a single new recipe for the blog.
In the end, after doing a bit more digging, the fix was simple: to lengthen the final proof. Whereas the sourdough ciabatta can rest at room temperature for only an hour before baking; the yeasted ciabatta — at least in loaf form — needs much more time, more like 2 to 2.5 hours.
Why? Because, as I’ve learned, when under-proofed dough enters an oven, the yeast has lots of remaining energy, which leads to fast and furious gas production. This explosion of gas breaks the structure of the bread, causing the tunnel to form.
As soon as I extended that room-temperature proof, the tunnels, thankfully, vanished.
Friends, if I’m being honest, it is not without trepidation that I post this recipe. As I type, I have two bowls of ciabatta dough rising — just to be sure! I have made more ciabatta these past two months than any other bread I think ever (with the exception, of course, of my mother’s peasant bread), and though I am now consistently met with great results — with loaves that emerge from the oven flour-dusted, golden-crusted with both a chewy and light, porous texture — I still worry. Those hollow loaves haunt me.
As you can see, I’m a bit anxious for you all to give this recipe a try. My wish, as noted at the start, is for this to become your summer dinner bread, your trusty swiper for all those delicious, oily, corn-studded, tomato-infused, basil-specked dregs. They deserve it.
If you give it a go, please let me know how it turns out.
PS: Foolproof Pita Bread Recipe
PPS: Overnight Refrigerator Focaccia = The Best Focaccia
Traditional Ciabatta: An Overview
Let’s review what ciabatta is:
- Traditional ciabatta is characterized by a slipper shape as well as an extremely porous and chewy texture. Originating from the Lake Como region of northern Italy, ciabatta means “slipper” in Italian.
- Ciabatta dough is wet and sticky with hydration levels often 80% or higher. Both the recipe below and this sourdough version are 82% hydration. (If you are unfamiliar: To calculate hydration percentage, simply divide the weight of the water by the weight of the flour; then multiply it by 100. In this recipe, that’s 410/500=0.82 | 0.82 x 100 = 82%)
- Traditional ciabatta recipes call for very little yeast and a long, slow rise. Many recipes call for making a biga or poolish (as noted above), which helps produce that light, airy texture.
- Some ciabatta recipes call for milk or olive oil, but neither of these ingredients is required to make a traditional loaf of ciabatta.
And let’s review what ciabatta isn’t:
- Shaped! In the ciabatta bread recipe in Jeffrey Hamelman’s Bread, he notes: “There is no preshaping or final shaping—once divided, the dough is simply placed onto a floured work surface for its final proofing.” With the sourdough ciabatta bread recipe, I follow this no-shaping rule. In this yeasted recipe, I deviate! After a number of experiments, I prefer doing a pre-shape — it’s counterintuitive but I actually get a more open crumb when I preshape the dough. That said, for ciabatta rolls, I stick to the no-shaping rule — it’s nice not having to ball up 8 portions of dough. (Of course, you can experiment and see which method you like best.)
- Scored! Unlike other crusty loaves of bread, ciabatta is not scored.
Troubleshooting
If your dough does not cooperate the first time around, you may need to make some changes:
- Water: This is a very high-hydration dough, and depending on the flour you are using and your environment (if you live in a humid environment, for instance), you may need to reduce the amount of water. If, for example, when doing your stretches and folds, the dough never came together in a cohesive ball, I would reduce the water by 50 to 60 grams next time around.
- Flour: All flours absorb water differently. Through troubleshooting with people all over the world often with people making this sourdough pizza recipe, this yeast-leavened pizza recipe, and most recently this sourdough ciabatta recipe, the type of flour being used plays a critical role in how the dough turns out. Often the water needs to be reduced considerably for the dough to come together. If you live abroad or in Canada, you can either make the recipe once as written or add the water slowly, mixing as you do, until the dough resembles the dough in the video.
- Shaping: Because this is such a wet dough, shaping may be tricky. I have smooth, wooden countertops (there’s some sort of sealant on top) that work nicely for shaping, and I imagine granite and marble would work well, too. My mother loves her Roul’ Pat for shaping. All of this is to say, if you are having trouble shaping, the surface you are shaping on could be playing a role.
How to Make Ciabatta Bread, Step by Step
The first step of the recipe calls for making the poolish. To do so, gather your ingredients: flour, water, and instant yeast. SAF is my preference.
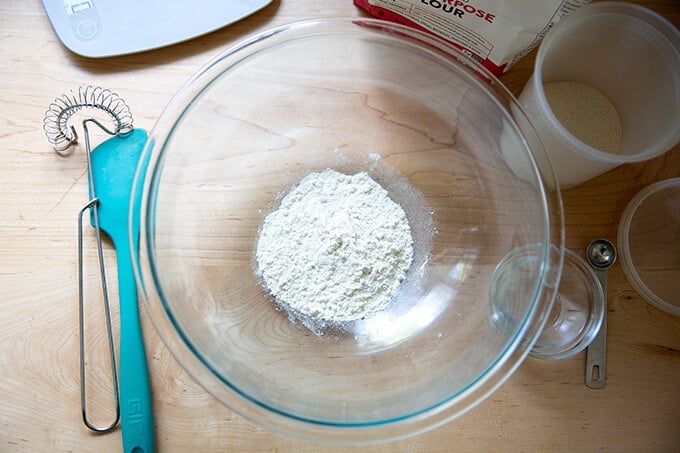
Whisk together 50 grams flour and 1/2 teaspoon instant yeast.
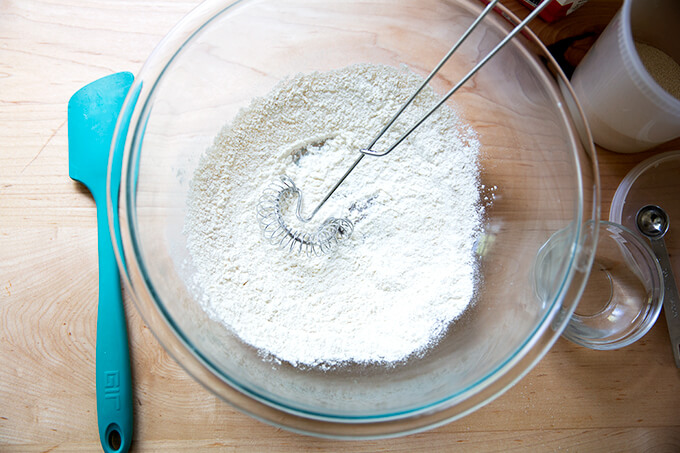
Add 50 grams water.
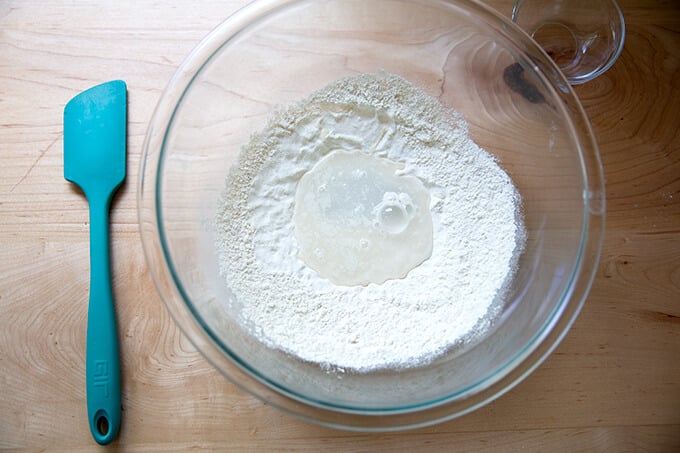
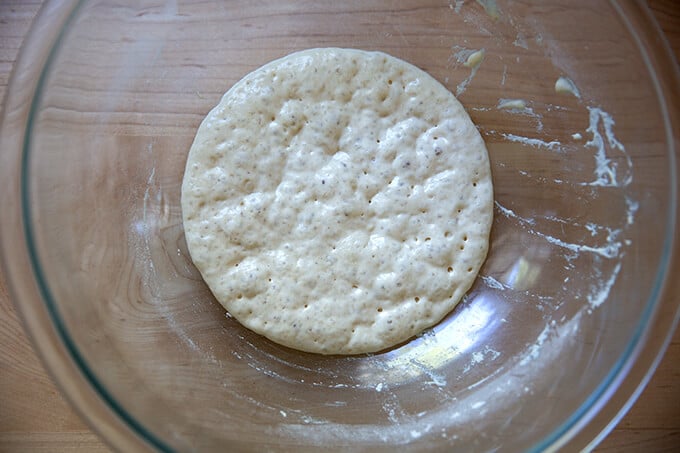
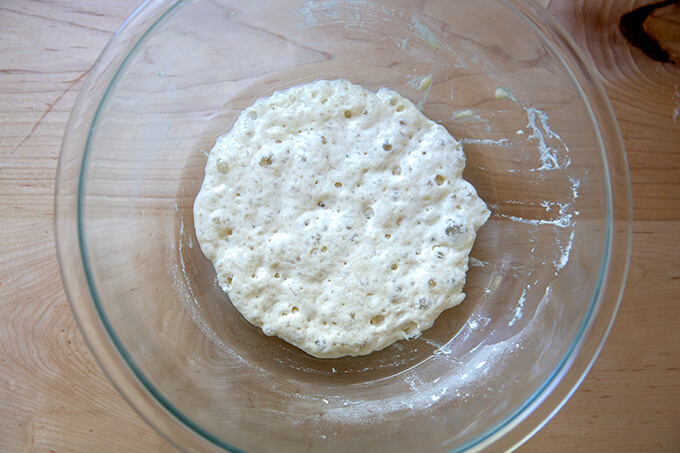
Stir to combine. Cover the bowl and let sit for 3 to 4 hours or until…
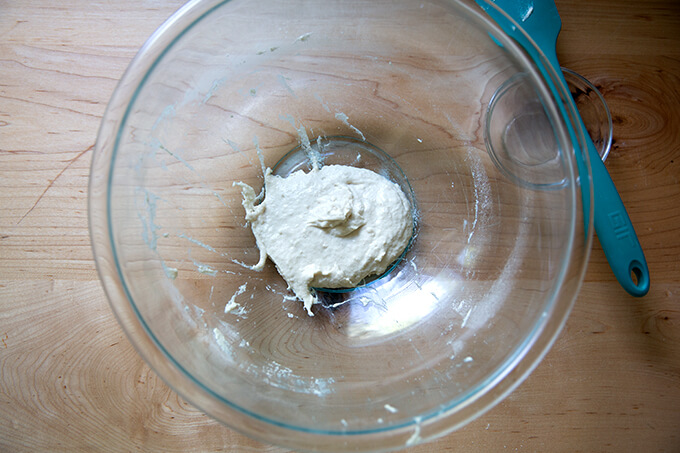
… the surface of the dough is dimpled with air pockets.
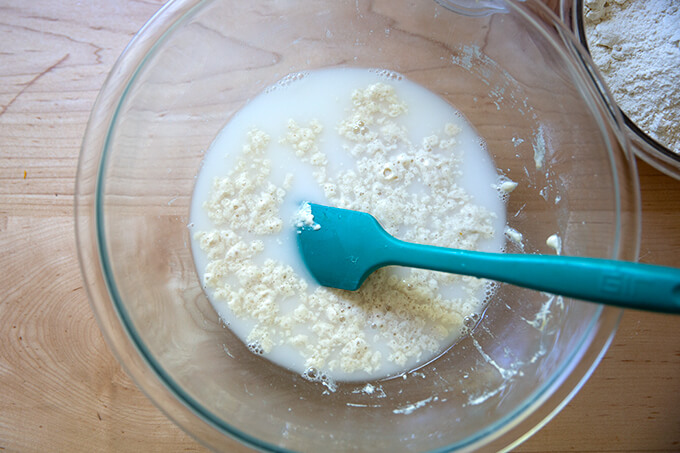
Add 360 grams water. (This part is really fun … the poolish bubbles up as a unit and floats on top of the water… it really feels alive!)
Stir to combine; then add 12 grams salt and stir again to combine.
Add 450 grams flour, preferably bread flour.
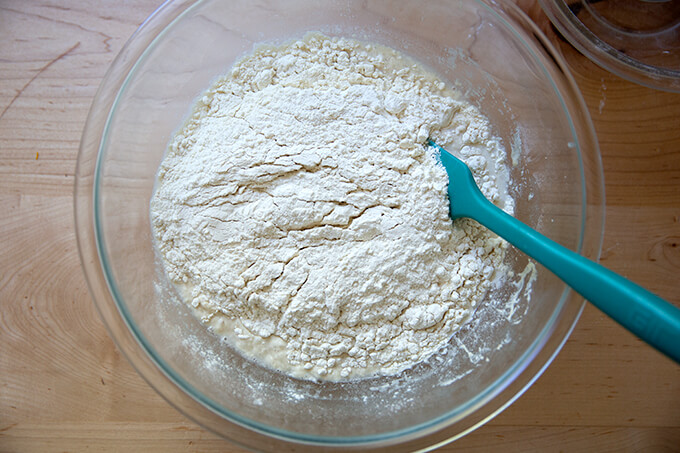
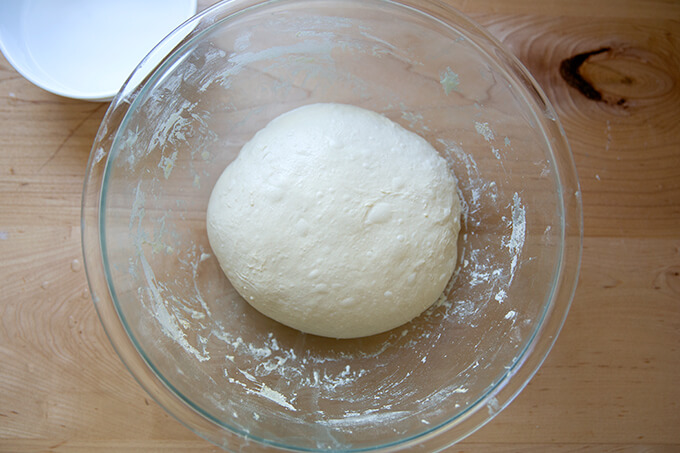
Using a spatula, stir until you have a sticky dough ball. Cover and set aside for 30 minutes.
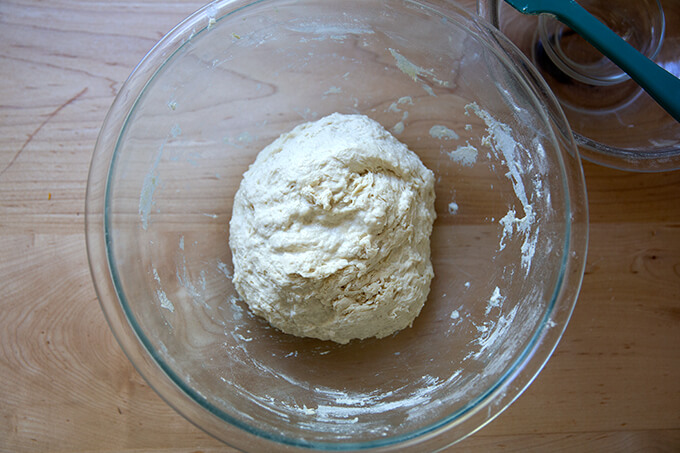
With wet hands, perform a set of stretches and folds, by grabbing one side of the dough, and pulling it up and to the center. Rotate the bowl a quarter turn, and repeat the grabbing and pulling. Do this until you’ve made a full circle. (Watch the video for more guidance. I employ a sort of “slap and fold” technique, which is helpful with this very wet dough.) Cover the bowl.
Thirty minutes later, repeat the stretching and folding.
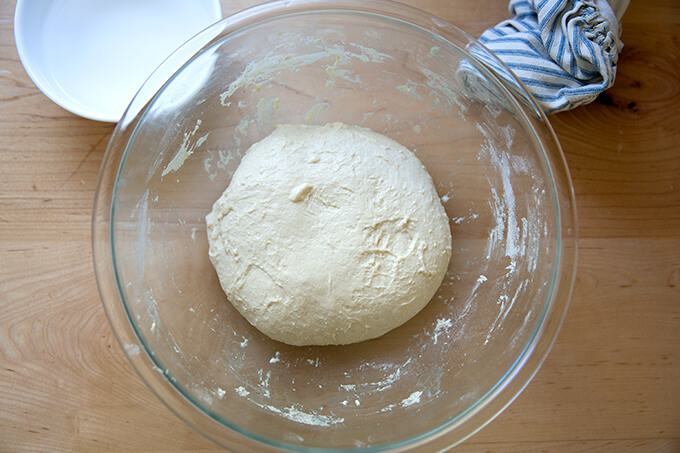
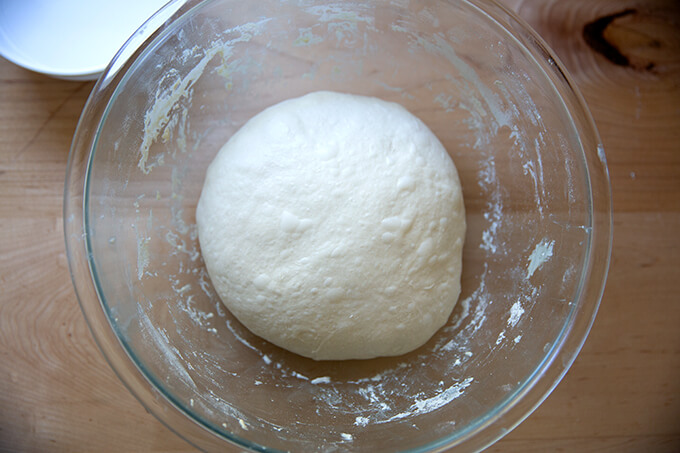
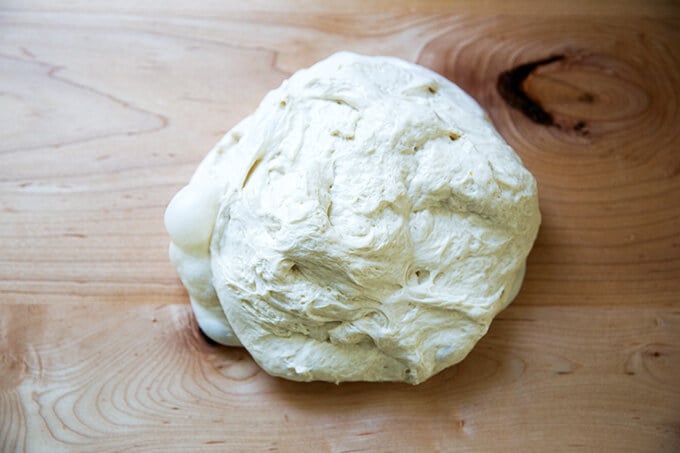
If time permits, repeat this stretching and folding twice more at 30-minute intervals. This is what the dough looks like after the third set of stretches and folds:
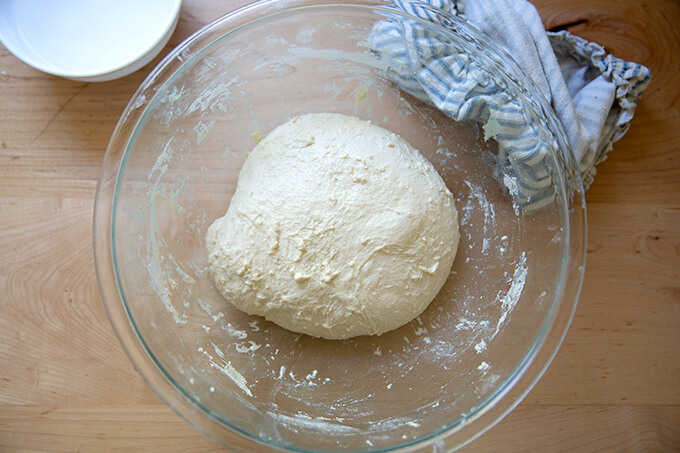
This is what the dough looks like after the 4th set. Feeling the dough transform from a sticky dough ball to a smooth and elastic one is really cool.
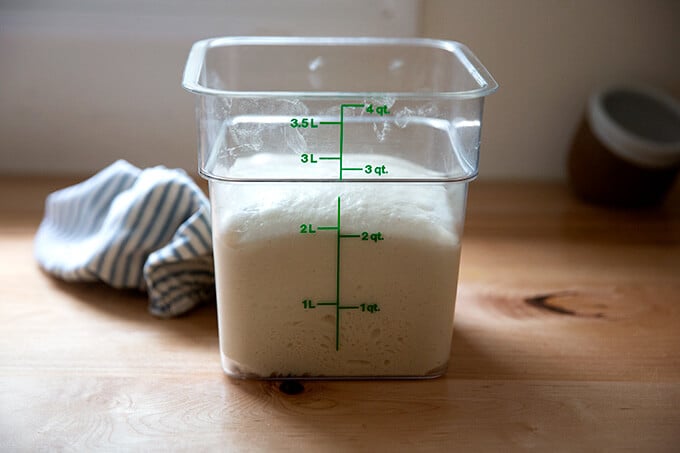
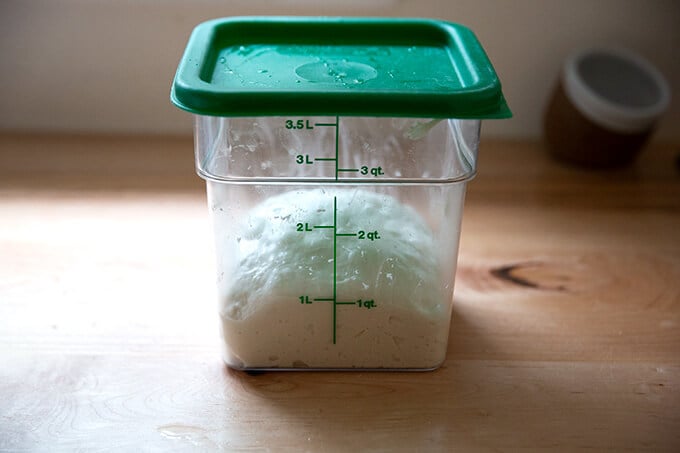
Transfer the dough to a straight-sided vessel and let it rise at room temperature until…
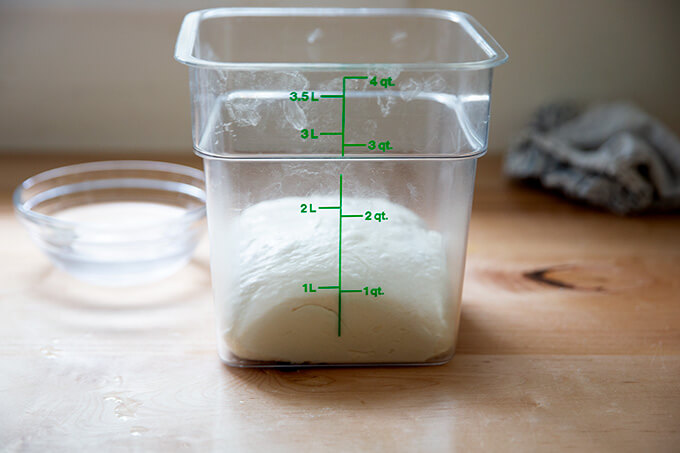
… it doubles in volume. (Note: If you don’t have a straight-sided vessel, you can simply let the dough rise in a bowl. I personally like using a straight-sided vessel because it allows me to see when the dough has truly doubled in volume.)
Then, punch down (deflate) the dough — I like to remove the dough from the vessel …

… and ball it up using wet hands.
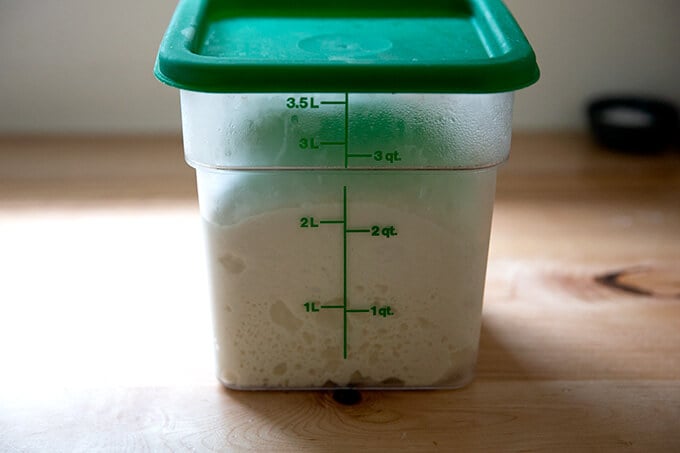
Return the dough to the vessel; then transfer to the fridge. (Another plus of using the straight-sided vessel is that it’s easier to store in the fridge than a bowl.)
The dough will likely double in volume overnight in the fridge.
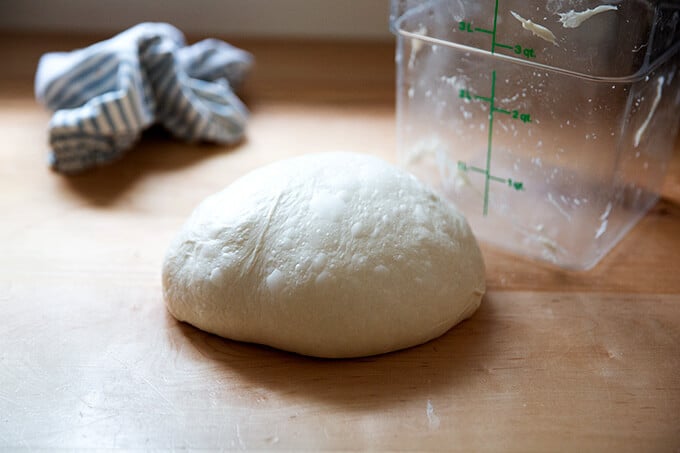
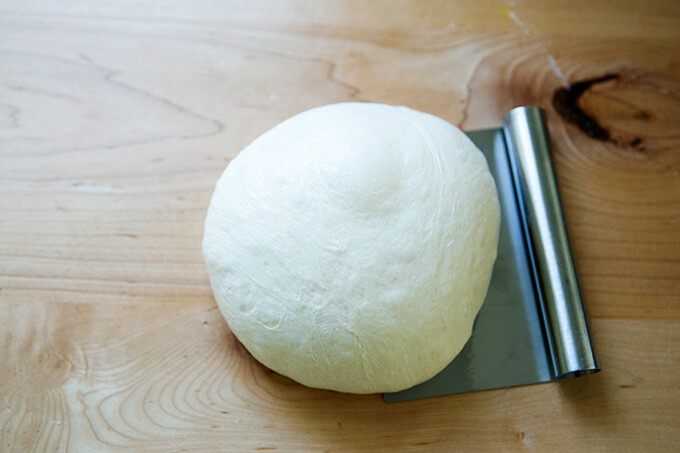
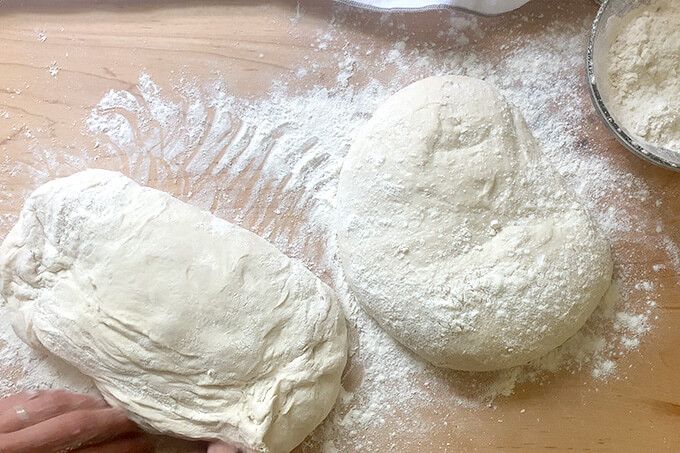
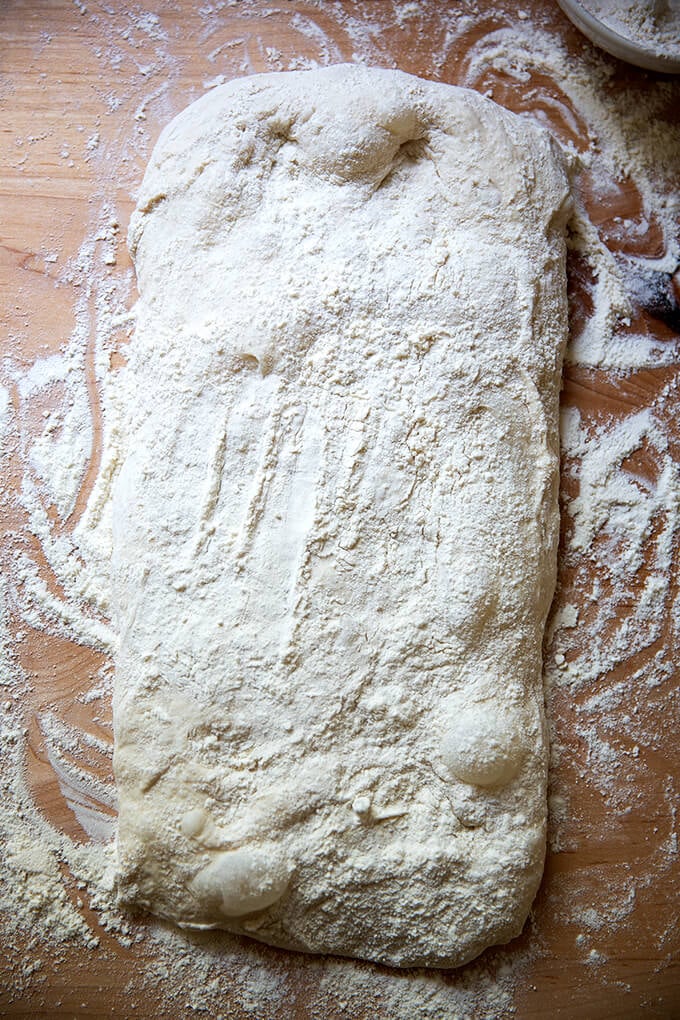
Remove the dough, turn it out onto a work surface…
… then ball it up. (Note: This is where I deviate from the traditional ciabatta-making method. If I were to follow the traditional path, I would have simply patted that blob of dough pictured above into a rectangle; the cut it in half. I find I get a more open crumb when I preshape the dough.)
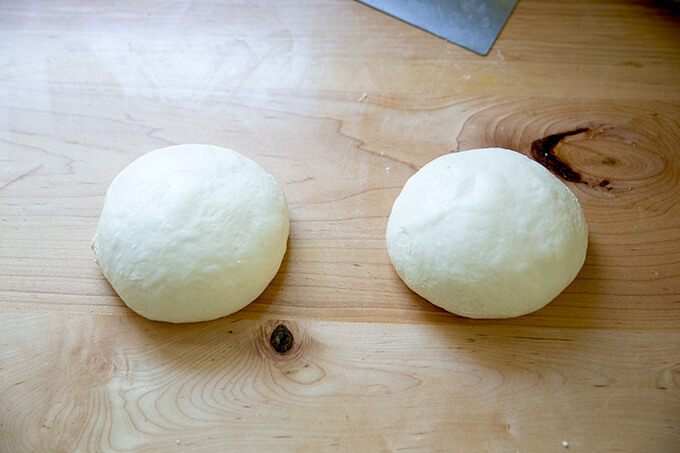
Divide the dough into two equal portions. Ball up each portion. I like to do this with very little or no flour — I find I get better tension with less flour.
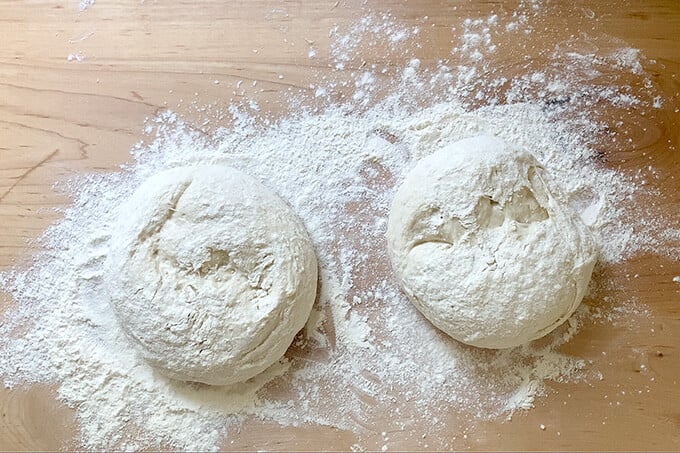
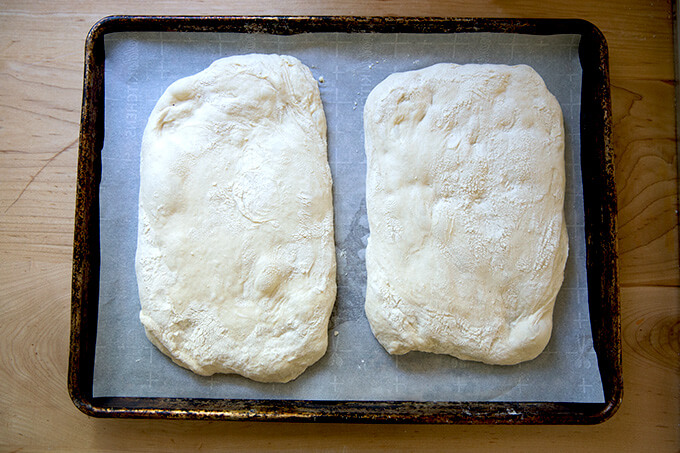
Sprinkle a work surface liberally with flour. Place the balls top-side down (the smooth side); then sprinkle the balls liberally with flour. Cover with a tea towel and let rest for 2.5 hours. Line a sheet pan with parchment paper.
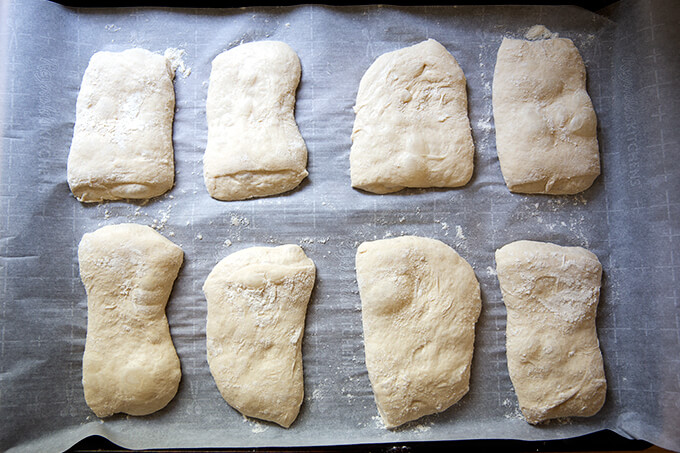
After the 2.5 hours… the dough balls will look like this:
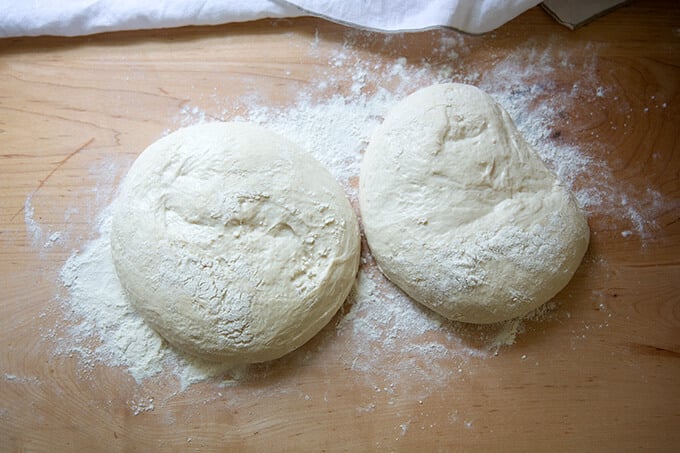
Turn the balls back over…
… then carefully transfer them to a parchment lined sheet pan.
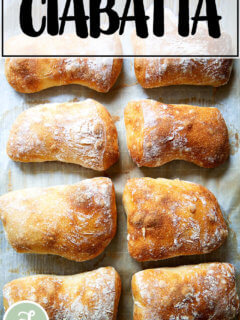
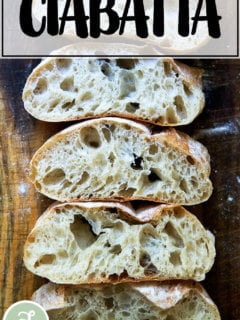
Bake at 425ºF for 20-25 minutes or until nicely golden:
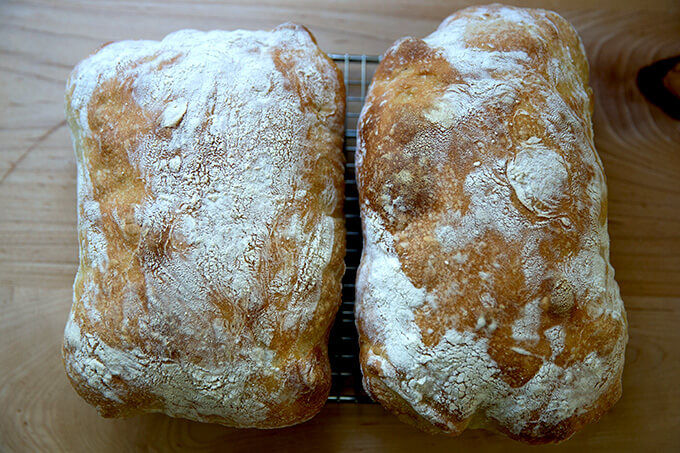
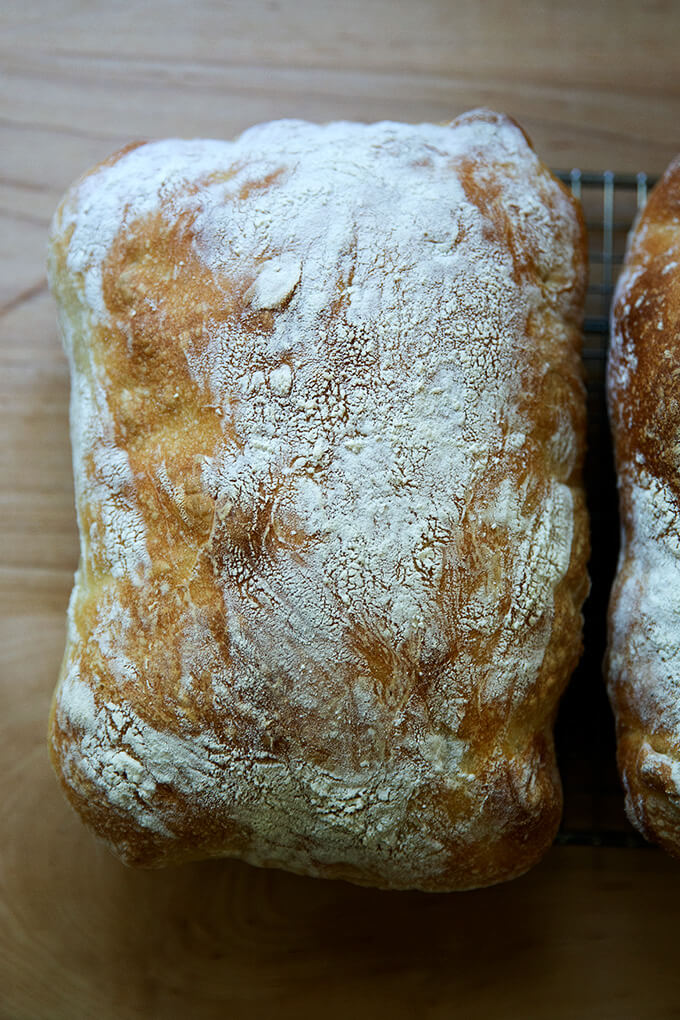
Let cool at least 20 minutes before slicing.
How to Make Ciabatta Rolls
Follow the recipe as outlined above or in the recipe box below until the step in which you remove the dough from the refrigerator; then, sprinkle a work surface with flour. Turn the dough out, sprinkle the surface with more flour, and pat it into a rectangle. (Note: This method, unlike above, follows a traditional ciabatta method — there’s no preshape or final shape. I prefer doing this with rolls for simplicity. It’s nice not having to ball up 8 portions of dough. If you wish, of course, you can ball up each round of dough.)
Divide into 8 portions.
Transfer to a sheet pan, cover with a tea towel, and let stand for 2 to 2.5 hours.
Transfer the pan to the oven, and bake at 425ºF for 20 to 25 minutes.

Let cool for at least 20 minutes before halving or slicing.

How To Make Fresh Homemade Ciabatta Bread
- Total Time: 24 hours 20 minutes
- Yield: 8 rolls
- Diet: Vegan
Description
This post will teach you how to make a crusty, open-crumbed loaf of ciabatta bread. It calls for making a poolish (a preferment), and it’s a very high hydration dough (82%), which means the dough will be wet and sticky. I highly recommend watching the video before attempting the recipe.
Notes:
- As always, for best results, use a digital scale to measure the flour.
- I have had success using all-purpose flour, but if you can get your hands on bread flour (I use King Arthur Flour Bread Flour, which is 12.7% protein), that is ideal, especially if you live in Canada or abroad. If you live abroad or if you live in a humid climate, this may take a try or two to get right — I suggest making it once as written; then reducing the water by 50 grams or so depending on your results.)
- I find a bench scraper particularly helpful for this recipe.
- I also really love using a straight-sided vessel (with lid) both for letting the dough rise and storing it in the fridge.
Ingredients
For the sponge:
- 50 grams (about 1/3 cup) all-purpose flour
- 2 grams (1/2 teaspoon) instant yeast, SAF is my preference
- 50 grams (about 1/4 cup) water, lukewarm or room temperature
For the ciabatta dough:
- 360 grams (about 1.5 cups) water, lukewarm or room temperature
- 12 grams (about 2 teaspoons) salt, kosher or sea salt
- 450 grams (about 3.5 cups) bread flour, see notes above
Instructions
- Make the poolish: In a large bowl, whisk together the 50 grams flour and the 2 grams (1/2 teaspoon) instant yeast. Add 50 grams water and stir with a spatula until combined. Cover the bowl with a tea towel or cloth bowl cover and set aside for 3 to 4 hours or until the dough’s surface is dimpled with holes.
- Make the dough: To the bowl of the poolish, add the water. The sponge should release from the bowl and parts of it, if not all of it, will float. Add the salt and stir briefly. Add the flour, and stir until you have a wet, sticky dough ball — dough will be very sticky. Cover with a tea towel or cloth bowl cover and let sit for 30 minutes.
- Stretches and folds: With wet hands, grab one side of the dough, and pull up and to the center. Rotate the bowl a quarter turn, and repeat the grabbing and pulling. Do this until you’ve made a full circle. (Watch the video for more guidance. I employ a “slap-and-fold” technique, which is helpful when handling these wet doughs.) Cover the bowl. If time permits, repeat this process three more times at 30-minute intervals for a total of 4 sets of stretches and folds over the course of two hours. If you are short on time, know that doing just one or two sets of stretches and folds is totally fine.
- Let it rise: Transfer the dough to a straight-sided vessel, if you have one, or leave it in the bowl if you don’t. Cover the vessel with a towel and let rise until doubled in volume. Punch down (deflate) the dough — if your dough is still in the bowl, you can deflate it using wet hands right in the bowl; if your dough is in a straight-sided vessel, it may be easier to turn the dough out onto a work surface and ball it up using wet hands to prevent sticking. Return the dough to the vessel, cover it with an airtight lid, and transfer it to the refrigerator immediately for at least 12 hours. The dough can remain in the fridge for as long as 48 hours.
- Portion and shape: (Note: This is where I deviate from traditional ciabatta bread recipes. See notes in the post above for the more traditional shaping method.) Turn the dough out onto a work surface. I prefer to do this step without flour, but absolutely sprinkle your surface lightly with flour as needed to make the dough manageable to work with. Using a bench scraper or your hands, shape the dough into a tight ball; then use the bench scraper to divide the dough in half. If you want perfectly even balls, each portion will way roughly 455 grams. Again, use the bench scraper or your hands to ball up each portion into a tight ball — see video for guidance.
- Proof: Sprinkle your countertop liberally with flour. Place the balls top-side (smooth side) down onto the flour. The seam-side will be on top now, and it may split open — this is fine. Sprinkle the top surface of the balls liberally with flour. Cover with a tea towel and let rest for 2.5 hours. After 2 hours of proofing, heat the oven to 425ºF.
- Line a sheet pan with parchment paper. When the dough has finished proofing, gently flip each ball over — I find a bench scraper to be helpful here. Then use both hands to stretch each ball out gently into a rectangular shaped “slipper”. Transfer to the prepared pan.
- Bake for 20 – 25 minutes or until the loaves are golden all around. Remove pan from oven. Transfer ciabatta rolls to a cooling rack. Let cool for 20 to 30 minutes before slicing.
- Prep Time: 24 hours
- Cook Time: 20 minutes
- Category: Bread
- Method: Yeast
- Cuisine: Italian, American
This post may contain affiliate links. Please read my disclosure policy.


260 Comments on “How to Make Fresh Homemade Ciabatta Bread”
Great recipe! My bread came out so beautiful and tasted amazing. Followed the recipe exactly as written but used white flour. Baked on a pizza stone with a pan filled with water on the bottom rack for steam.
Wonderful to hear this, Sally! Thanks so much for writing and sharing your baking notes. So helpful for others. Happy Baking! 🍞🍞🍞🍞🍞
If I was to add Kalamata olives to this. Do you suggest putting it on top while baking or inside the dough?
I would put them in the dough. I would add them in step one — toss them with the flour.
Hi, I’ve made this recipe four or give times with great success so thank you! Is there any easy way to make a whole wheat version?
Hi Mary! Great to hear this! I would start small with the whole wheat flour — use maybe 25% whole wheat flour. The trouble with whole wheat flour is that the more you use, the denser/less airy the bread will be. So as long as you manage your expectations about the resulting texture of the bread, you can use as much whole wheat flour as you like: just know it will be denser/heavier in texture.
I have been looking for a great ciabatta recipe and I just found it! The bread turned out great! Thanks for the recipe!
Great to hear this, Vanessa! Thanks so much for writing 🙂 🙂 🙂
I have two batches brewing in my fridge right now. I followed everything in the recipe for the first batch. The dough was very wet at the end of the 4th set if stretching. It’s almost soupy. I do live in a humid country so I cut back 50g on the water on my second batch. It was still wetter than your dough and won’t form a cohesive ball. I think, the water from my hands when I do the stretches added to its wetness ( I made sure I shake the excess water from my hands when doing the stretches). I used bread flour, too. Is there a way I could salvage these? I really wanted to make them work. T.T
Hi Grace! It’s likely a combination of the humidity and the difference in flour. The dough should still be salvageable: I might plop it into loaf pans, let it rise, and bake it once it has nearly doubled. Next time around, I would hold back even more water — more like 100-150 grams. You can always add more water back in slowly if the dough seems to dry.
Can I use bread flour instead of all purposes flour in step 1?? I used all purpose but it comes so thick dough
You can! Are you using a scale?
Hi! Often times i am pressed for time and want/need great bread within 3-4 hours like your peasant bread recipe! Is it possible to make this recipe without the poolish? And can i skip the refrigerator rise? Ideally i’d do all those things but can i achieve a similar result by getting this done in 3-4 hours? How do i do that? And using the methods above, can i make it into the “baguettes” like in your sourdough version? Thank you again!
Hi! Unfortunately, I don’t think you’ll get the same open crumb with all of these modifications. Without the modifications, I think you could use the recipe to make baguettes, but I haven’t tried, so I’d hate to steer you wrong.
Alexandra, thanks so much for providing such clear and easy to follow instructions! Every one of your recipes that I’ve tried turns out perfectly and this one was no exception. My husband thought this came from a nearby artisanal bakery. It was tasty, with a crisp crust, and perfect for mopping up a bowl of your delicious cheesy broccoli soup. 🙂 I’m also a HUGE fan of your book which introduced me to no-knead baking and ultimately led me to this outstanding site. Thank you for making great cooking so accessible!
Diane, thank you 🙂 🙂 🙂 You are too kind. It is so nice to read all of this. I’m so happy the ciabatta turned out well, and I’m so happy to hear you paired it with that broccoli-cheddar soup… love that one so much. Thanks so much for taking the time to write.
Happy to report my 1st attempt was a success! Thank you for the easy to follow recipe and especially for the video! My dough was still really sticky even after several rounds of stretch and folds but flour solved that issue. I think the problem may be using AP flour instead of bread (I used a scale and am not in a humid climate) – may try reducing the water next time as you have mentioned.
Great to hear, Lisa! And yes, I am sure the AP flour is causing the stickiness … reducing the water next time around should make the dough easier to work with. Happy baking and happy New Year!
Hey Alexandra, I am so very much relieved to have found your Ciabatta recipe. I did make several loaves and found them to be sticky even though I baked them for the right length of time. Because of your great explanations on all the why’s things happen, I reduced the water by 5 grams and it cam out PERFECTO! I live in Louisiana and of course it is humid year round.
I do have 1 question: What do you mean by this: I find I get a more open crumb when I preshape the dough. What is “open crumb”?
Thanks so much for all your efforts in this recipe and your web site. Brave!
Made this for the umpteenth time and now discovered I am using bread flour for the poolish and my bread does’t have all those nice holes…could this be why?
I don’t think that’s why! Questions: are you using a scale to measure? Is your dough looking similar to the dough in the video? What type (brand) of flour are you using?
Hey Ali! Thanks for helping me out! Yes to using the scale, King Arthur all the way, and yes to looking like your dough! My only difference ( and just discovered this a few days ago ) when making the poolish, I am using Bread flour instead of AP!
So interesting! And great to hear all of this. It’s definitely worth a shot trying all-purpose flour for the poolish. I have not made this recipe in a while, but you have inspired me to get back on it … just made the poolish. Will report back if I have any insights along the way… stay tuned!
Can I use active dry yeast instead, if yes how do I proceed when making the poolish? How long do I leave it for? Is overnight too long?
Hi Pina! Yes. I would sprinkle the yeast over the water and let it stand for 20 minutes; then add the flour and stir to combine. Then proceed with the recipe. I think. you probably could get away with leaving the poolish overnight, but I would make sure the bowl is covered somewhat tightly (as in with a lid as opposed to a towel) to ensure it doesn’t dry out.
Ohhhh no. I got all the way to the deflate and put in the refrigerator step when I realized I used active dry yeast. 😩 Do you think it will still turn out okay? Or is there anything I can do at this point?
Thank you!
It should be fine. How did it turn out?
It turned out PERFECT!! I had so much fun making this recipe. The video was so helpful and working this dough was therapeutic! I’m a new fan! Thank you!
Great to hear, Jess! Thanks for writing 🙂
Hi Ali! I have closely studied your recipe and there is one thing I feel confused. In your recipe, it says to do 4 sets of stretch and fold over 2 hours with 30 minutes interval, but in the video the last stretch and fold was actually followed by waiting for the doubling of the dough which could take unknown length of time instead of 30 minutes. Am I understanding it correctly?
Also, a lot of of wet dough recipes always warn us not to punch down the dough, however this recipe does call for deflating the dough once. Is this because you will let the dough rise in the fridge again?
Thank you for sharing!
Hi Yang!
So I do do 4 sets of stretches and folds over the course of 2 hours at 30-minute intervals. This stretching and folding step is then followed by exactly what you say: an unknown length of time during which the dough will double. I hope this is what both the video and the recipe are reflecting … I think they are, but please let me know if I need to clarify further.
Regarding the deflating, if I did not deflate the dough, it would, I think, be very fragile in that it would be filled with so much air, and I think it would collapse upon entering the oven. You can give the no-deflating method a shot here, but I do worry. Please report back if you give that method a go. The long, cold fridge rise will help produce lots of nice air bubbles.
Hi Ali! I’ve already commented on how much I love the ciabatta and I was wondering if the yeasted dough could be shaped and baked as a baguette the same way you do with the sourdough version? Thinking along those lines I was also wondering why the baguettes aren’t scored? Just the difference in the structure of the dough? Thanks for all the great recipes and the time you put into this site! Kathy
Hi Kathy! I have not tried, but I imagine that yes, you definitely could.
I do not score the sourdough ciabatta baguettes and I wouldn’t suggest scoring the yeast ones either because the dough is so wet and it’s at room temperature. I score my sourdough boules and batards because they need those scores to spring/bake properly in the Dutch oven. And those dough as cold when I score them, so it’s much easier.
For whatever reason, and I can only speak to my experience with the sourdough ciabatta baguettes, they don’t need to be scored to bake properly. Wish I had a more scientific explanation!
Nice! I will have to try it out and then let you know what I think!
Recipe is quite putzy for bread. Tried it anyway and followed to the letter. Taste was on point but no light, air-filled pockets in the bread. It was firm and tight all the way through. Perhaps it was knocked down too often? Might try again and simplify a few steps.
Bummer you didn’t get any air pockets! Questions: are you using a scale to measure? What type of flour are you using?
does it need a steam bath to add extra crustiness?
It gets pretty crusty without the steam, but go for it if you are comfortable doing so.
I weighed 2 teaspoons of diamond crystal salt….it weighed 6 grams…3 tsp weighs 12 grams. which measurement should I be using? I have made this before…just not with diamond crystal kosher salt.
thanks,
Julie
Hi! Do the 12 grams/3 teaspoons measurement.
I’m a beginning baker. The only thing I’ve consistently produced is pure (only 4 ingredients) Whole Wheat bread for the past 4 years. During the beginning of the pandemic the store shelves were empty; no King Arthur! I struggled online to find flour and happened upon Gristmill Stoneground Mills from Waco Texas and Palouse brand flours from eastern Washington State. I use a combo of them for my bread and love them. I started trying ciabatta a couple months ago. I tried three different YouTube methods but they didn’t work for me. I tried your ciabatta bread recipe and VOILA. I’ve only made it four times so far but they all came out looking like yours. I’ve been using King Arthur Bread flour for it and will continue. I’ve had to greatly reduce the H20, probably because we live on an island in Puget Sound and have higher humidity than most folks. THANK YOU! I’m getting hooked on baking. I will be trying more of your recipes now. What a nice addiction to be working on, no? Allen and Judy on Bainbridge Island.
So nice to read all of this! Reading your comment brought back memories of searching for flour during the pandemic — what a wild time that was? I had better luck finding 50-lb bags of flour at that time, so my counters looked like warehouse shelves. Anyway, I’m so glad you’ve had success with all of your various flours, and I’m so happy the ciabatta bread recipe turned out well. Thanks for writing and sharing your notes regarding water. Happy Baking!
An absolutely great recipe. Thank you. Since retiring I enjoy taking on and learning new skills and the one skill I have always wanted to learn is the art of bread making. I have tried several recipes and have attempted to learn the secrets of flour, hydration, and baking. I have had some success but without a doubt, this recipe is a winner. I have taken the liberty to try different flour mixtures, baking temperatures, and bread shapes. My latest attempt turned out so well I thought I would share it. 90/10 ratio of bread flour and whole wheat. 82% hydration. One large round loaf versus the two ‘slipper’ shapes. Preheated oven to 450, baked on a pizza stone for 30-35 minutes with internal bread temp. of 199f. or 93c. I used a water bath under the bread and spritzed bread with water at the beginning of baking. Everything else I did was the same as the recipe.
So great to read all of this, Jim! Thank you so much for writing and sharing all of your notes — so helpful for others. I love the idea of using some whole wheat flour here. Great tips regarding the water bath and spritzing and baking stone, too. Thanks so much!!
Not seeing a note on how to make loaves instead of rolls
Hi Jan! Sorry for the confusion here. This recipe actually does explain how to make two large loaves as opposed to 8 rolls. I edited the note I added in the instructions to point people back up to the blog post. Traditional ciabatta is not shaped, so after the first bulk fermentation, rather than turn the dough out, divide it in half and ball up each half, you would simply turn the dough out onto a floured work surface, cut it and let it rest. Let me know if you still have questions!
Hi Alexandra!
I cooked my bread for 25 minutes and it was golden on top, but it was still a little doughier than I would like in the middle. Is there another indicator to look for to determine when the bread is done?
I love your bread recipes. I always struggled with yeast until I found your blog. Now, I get consistently positive results! Thanks!!
Hi Sarah! A few thoughts:
• You can let the rolls cool completely on the pan — the residual heat will help cook the rolls further once out of the oven.
• Be sure to let them cool completely before cutting.
• You can cook the rolls for 5 minutes more (if they’re not getting too brown) or lower the temperature halfway and increase the cooking time by 5 minutes or so.
• The best option, though the most expensive: invest in an instant-read thermometer — if it registers 207ºF- 210ºF, the rolls are done.
Thank you for your kind words! Means a lot 🙂
I have not made this bread yet, but plan to! One question before I tackle it – is it possible to use good quality regular yeast vs rapid rise for this recipe?
Yes! Are you thinking about active dry yeast or fresh yeast?
Can I use a kitchen aid mixer for this recipe? I live in a high desert, and this recipe gave me grief when it came time to fold the dough. I think I was adding too much water to my hands when it came time to fold, so I tied withholding water but the final product didn’t yield a desirable hight.
Hi Debby! Yes, give the kitchen aid mixer a try. If the dough was too wet, you can try holding back some of the water from the start.
Didn’t have bread flour, so I used APF for bith the poolisha and the dough and they still turned out nice. Very happy with the results of my first attempt. Thanks, Alexandra!
Great to hear, Karlo! Thanks so much for writing 🙂 🙂 🙂
The ciabatta bread is fool proof and absolutely delicious. Thank you Alex for sharing such a treasure of a recipe.
Wonderful to hear this, Ronit! Thanks so much for writing 🙂 🙂 🙂
Hi! Can this be doubled or tripled even?
Yes!
Hi Ali
Thanks for your amazing recipes. I have just made the ciabatta bread following the instructions exactly. I didn’t get as much oven spring as I hoped and the crumb was not as open as yours but the bread has great texture and flavour. My flour has only 11.7% protein though, so maybe that explains the difference. I will definitely be making this recipe again as this is delicious bread.
Thanks again for your awesome site and videos. Really enjoy making your recipes.
All the best from South Africa,
Dineshree xxx
So great to hear all of this, Dineshree! Regarding the oven spring, it definitely could be a factor of the flour. Are you able to get a bread flour with a higher protein content? Thank you so much for your kind words 🙂 🙂 🙂
While I get a yummy loaf I struggle to get holes what am I doing wrong Cheers
Phenomenal!!! I’ll be making again for sure! I added 50 g of whole wheat in place of total amount of bread flour, so incredibly yummy!!
Great to hear this, Ida! Thanks so much for writing 🙂 🙂 🙂