Description
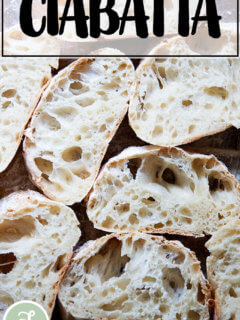
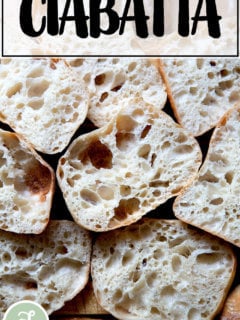
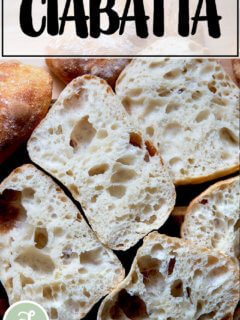
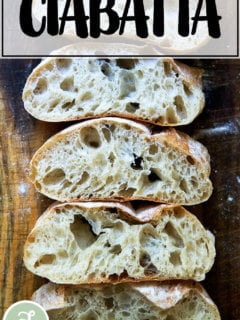
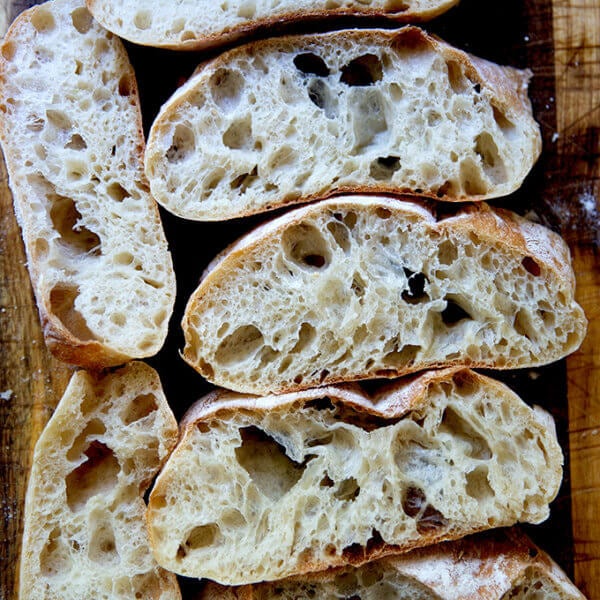
This post will teach you how to make a crusty, open-crumbed loaf of ciabatta bread. It calls for making a poolish (a preferment), and it’s a very high hydration dough (82%), which means the dough will be wet and sticky. I highly recommend watching the video before attempting the recipe.
Notes:
- As always, for best results, use a digital scale to measure the flour.
- I have had success using all-purpose flour, but if you can get your hands on bread flour (I use King Arthur Flour Bread Flour, which is 12.7% protein), that is ideal, especially if you live in Canada or abroad. If you live abroad or if you live in a humid climate, this may take a try or two to get right — I suggest making it once as written; then reducing the water by 50 grams or so depending on your results.)
- I find a bench scraper particularly helpful for this recipe.
- I also really love using a straight-sided vessel (with lid) both for letting the dough rise and storing it in the fridge.
Ingredients
For the sponge:
- 50 grams (about 1/3 cup) all-purpose flour
- 2 grams (1/2 teaspoon) instant yeast, SAF is my preference
- 50 grams (about 1/4 cup) water, lukewarm or room temperature
For the ciabatta dough:
- 360 grams (about 1.5 cups) water, lukewarm or room temperature
- 12 grams (about 2 teaspoons) salt, kosher or sea salt
- 450 grams (about 3.5 cups) bread flour, see notes above
Instructions
- Make the poolish: In a large bowl, whisk together the 50 grams flour and the 2 grams (1/2 teaspoon) instant yeast. Add 50 grams water and stir with a spatula until combined. Cover the bowl with a tea towel or cloth bowl cover and set aside for 3 to 4 hours or until the dough’s surface is dimpled with holes.
- Make the dough: To the bowl of the poolish, add the water. The sponge should release from the bowl and parts of it, if not all of it, will float. Add the salt and stir briefly. Add the flour, and stir until you have a wet, sticky dough ball — dough will be very sticky. Cover with a tea towel or cloth bowl cover and let sit for 30 minutes.
- Stretches and folds: With wet hands, grab one side of the dough, and pull up and to the center. Rotate the bowl a quarter turn, and repeat the grabbing and pulling. Do this until you’ve made a full circle. (Watch the video for more guidance. I employ a “slap-and-fold” technique, which is helpful when handling these wet doughs.) Cover the bowl. If time permits, repeat this process three more times at 30-minute intervals for a total of 4 sets of stretches and folds over the course of two hours. If you are short on time, know that doing just one or two sets of stretches and folds is totally fine.
- Let it rise: Transfer the dough to a straight-sided vessel, if you have one, or leave it in the bowl if you don’t. Cover the vessel with a towel and let rise until doubled in volume. Punch down (deflate) the dough — if your dough is still in the bowl, you can deflate it using wet hands right in the bowl; if your dough is in a straight-sided vessel, it may be easier to turn the dough out onto a work surface and ball it up using wet hands to prevent sticking. Return the dough to the vessel, cover it with an airtight lid, and transfer it to the refrigerator immediately for at least 12 hours. The dough can remain in the fridge for as long as 48 hours.
- Portion and shape: (Note: This is where I deviate from traditional ciabatta bread recipes. See notes in the post above for the more traditional shaping method.) Turn the dough out onto a work surface. I prefer to do this step without flour, but absolutely sprinkle your surface lightly with flour as needed to make the dough manageable to work with. Using a bench scraper or your hands, shape the dough into a tight ball; then use the bench scraper to divide the dough in half. If you want perfectly even balls, each portion will way roughly 455 grams. Again, use the bench scraper or your hands to ball up each portion into a tight ball — see video for guidance.
- Proof: Sprinkle your countertop liberally with flour. Place the balls top-side (smooth side) down onto the flour. The seam-side will be on top now, and it may split open — this is fine. Sprinkle the top surface of the balls liberally with flour. Cover with a tea towel and let rest for 2.5 hours. After 2 hours of proofing, heat the oven to 425ºF.
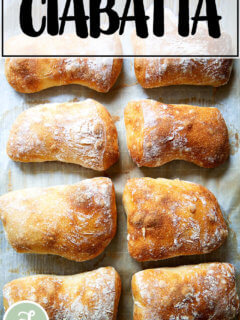
- Line a sheet pan with parchment paper. When the dough has finished proofing, gently flip each ball over — I find a bench scraper to be helpful here. Then use both hands to stretch each ball out gently into a rectangular shaped “slipper”. Transfer to the prepared pan.
- Bake for 20 – 25 minutes or until the loaves are golden all around. Remove pan from oven. Transfer ciabatta rolls to a cooling rack. Let cool for 20 to 30 minutes before slicing.
- Prep Time: 24 hours
- Cook Time: 20 minutes
- Category: Bread
- Method: Yeast
- Cuisine: Italian, American