
How to Make Fresh Soft Pretzels at Home
This post may contain affiliate links. Please read my disclosure policy.
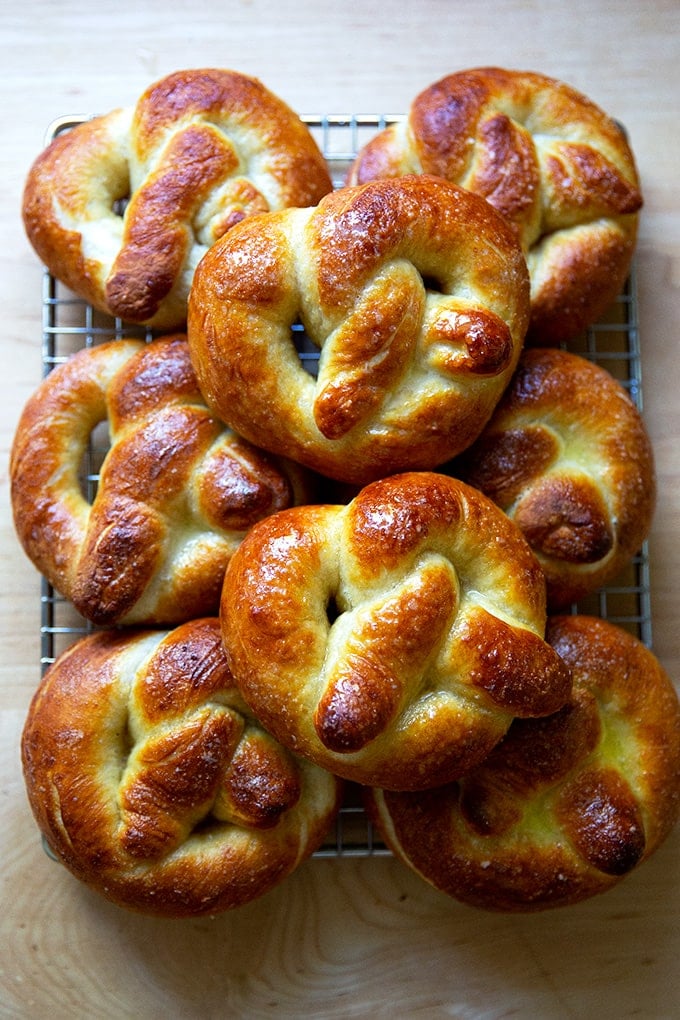
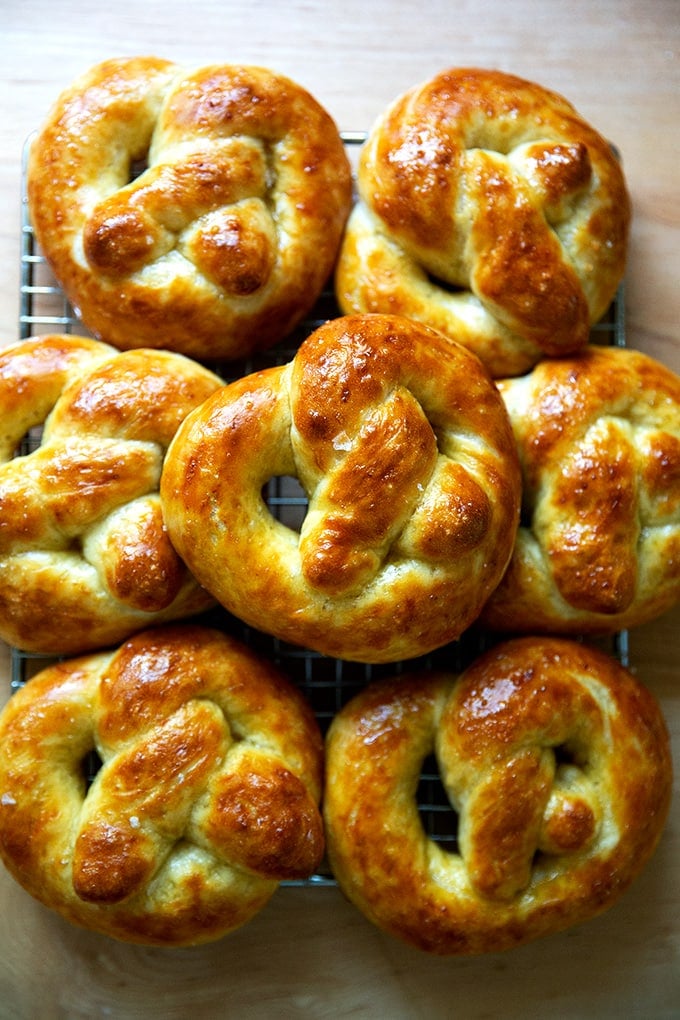
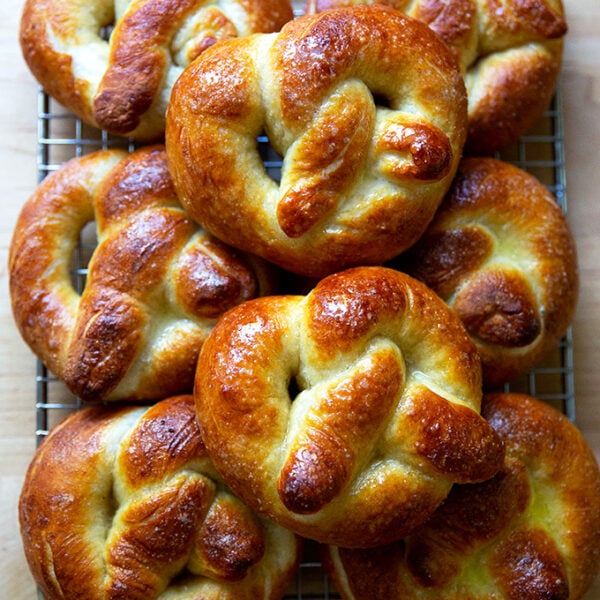
These homemade fresh soft pretzels are buttery soft in texture, perfectly sweet and salty, and astonishingly simple to make: they require a quick kneading (by hand or in a mixer), a simple shaping, and no boiling. They are a massive hit with adults and children alike and truly irresistible straight out of the oven.
I knew I would love Vicki the moment I met her, which was two summers ago during our annual trip to Lake George with Ben’s family. Vicki is my brother-in-law’s girlfriend, she is 100% Greek, and food is her love language.
Five minutes after her arrival, she knocked on our door, her hands loaded with goodies, coloring books and colored pencils for the children, and an enormous Tupperware filled with koulourakia, the twisted Greek Easter cookie, perfect for dunking in coffee or tea, for us.
As the week went on, Vicki would bestow us with more treats, including chicken cordon bleu, tacos served in flat-bottomed, stand-up shells, and, most memorably, these buttery soft pretzels.
Upon seeing Vicki this summer at Lake George, the first thing my children asked her was: When are you making the pretzels?
Bad manners aside, the question was fair: I wanted to know, too. These pretzels are so delicious and, true to their title, are buttery and soft in texture. Knowing their reception, Vicki always makes a double batch to ensure everyone can have two. Not an easy task in a small rental kitchen. What a gem!
This year I made sure to get the recipe, and when I asked Vicki if it was OK if I shared the recipe here, she said, Of course, noting she got the recipe years ago by searching online for an Auntie Anne’s pretzel recipe.
Friends, I am so excited to share this recipe with you. These pretzels have been a massive hit with my family and, these past few weeks, with the neighborhood children passing through my kitchen, enjoying their last few days of freedom before the school year begins.
PS: Homemade Soft Pretzel Rolls
Buttery Soft Pretzels: Some Notes
When I first read the recipe, I couldn’t help but want to fiddle: the recipe called for active dry yeast and 4 teaspoons of it, which seemed like a lot, but which made sense given the short, one-hour rise. It also had a fair amount of sugar, 1/2 cup, which I thought might be able to be reduced, though I never found the pretzels to be too sweet tasting.
I made the recipe once as written, converting the volume measurements to weights, and then I started playing around: I reduced the yeast from 4 teaspoons to 2 teaspoons, and I made two more batches, one with 1/4 cup of sugar, and one with 1 tablespoon of sugar.
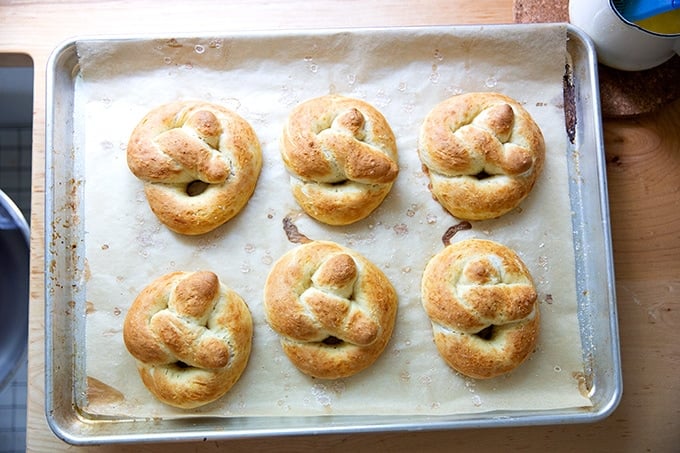
Friends, as much as I wanted to like the lower-sugar batches, I didn’t — they didn’t brown well in the oven, and their texture suffered as well. The children remarked: These are good Mom, but what’s different? There is a photo below just above the recipe box of the just-baked 1/4-cup sugar batch. As you’ll see, they don’t have quite the same gleam.
Buttery Soft Pretzels: An Overview
Overall, the process here is surprisingly simple:
- Mix the dough: You can do this by hand or with a stand mixer. The dough is lower hydration than many of the no-knead bread recipes here on the blog, and as a result, it will require a brief knead in the bowl and then again on the countertop, about a minute or so. I’ve been enjoying using my stand mixer — it’s fast and less messy.
- Let dough rise one hour (or longer if that works better with your timeline).
- Divide the dough into 12 portions, roll into logs, then shape into pretzels.
- Dip the pretzels in a baking soda hot water bath. When I read this step, I texted Vicki to confirm: You don’t boil the pretzels? Do you boil the water? Nope! Vicki simply uses hot water from the tap, and the pretzels simply get a quick dip — in and out — in the water bath. Because my mother over the years has made me concerned about the potential of lead in the hot water pipes, I’ve been using my electric kettle to boil the water for the hot water bath.
- Sprinkle with salt, bake, then brush with melted butter.
- Eat immediately.
How to Make Soft Pretzels, Step by Step
Gather your ingredients: flour, yeast, sugar, salt, water, and oil.
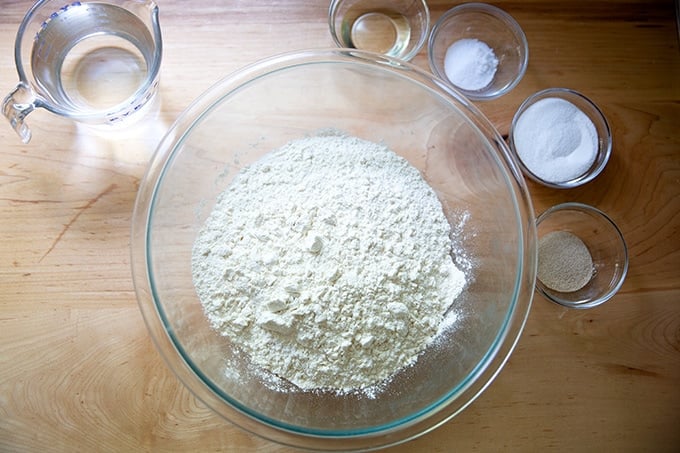
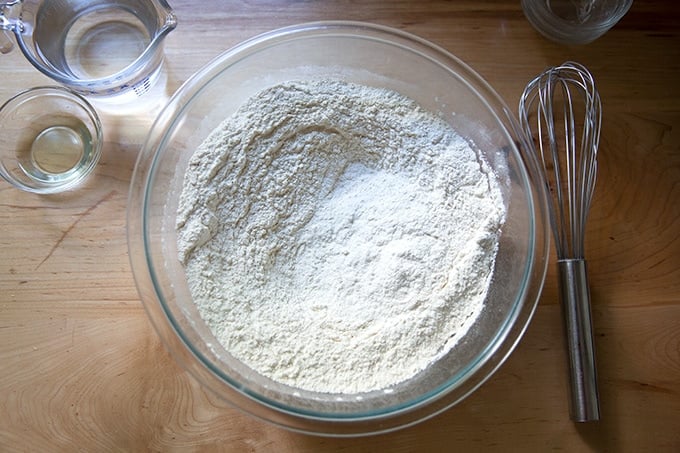
Whisk together the dry ingredients:
Add the water and oil.
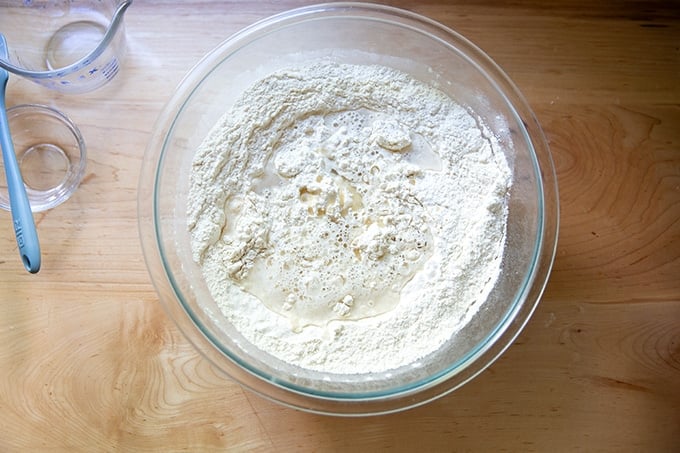
Mix until a shaggy dough forms.
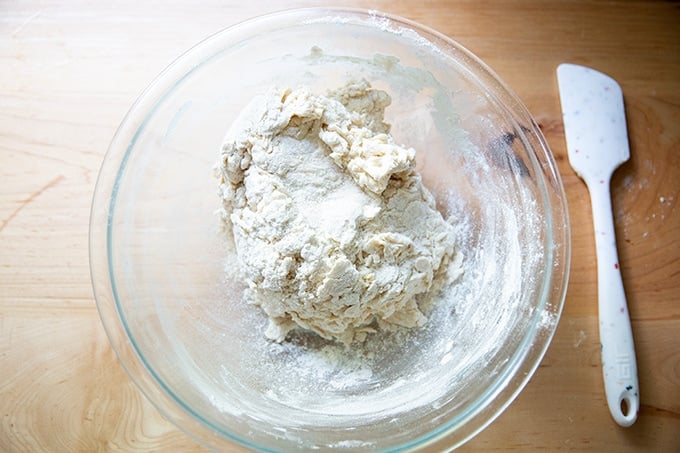
Knead briefly until…
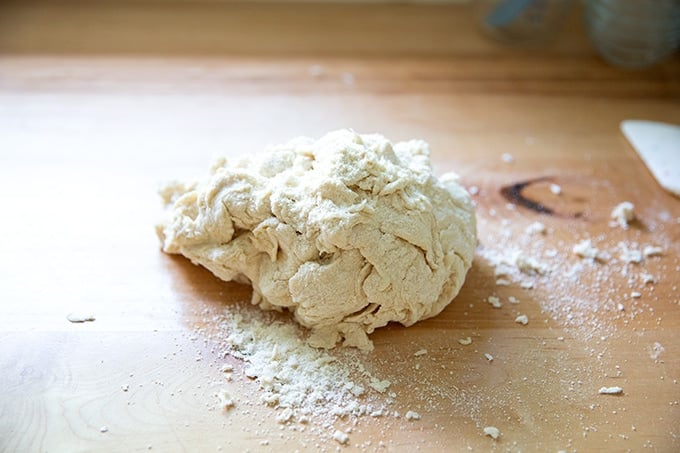
… dough comes together and feels tacky to the touch, about 1 minute.
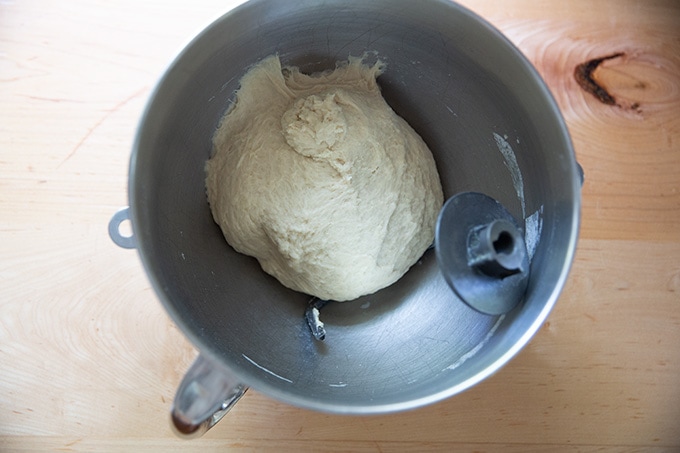
Alternatively, this can all be mixed in a stand mixer, which will take 2 to 3 minutes total. I actually prefer making these in the stand mixer now — it’s fast and less messy.
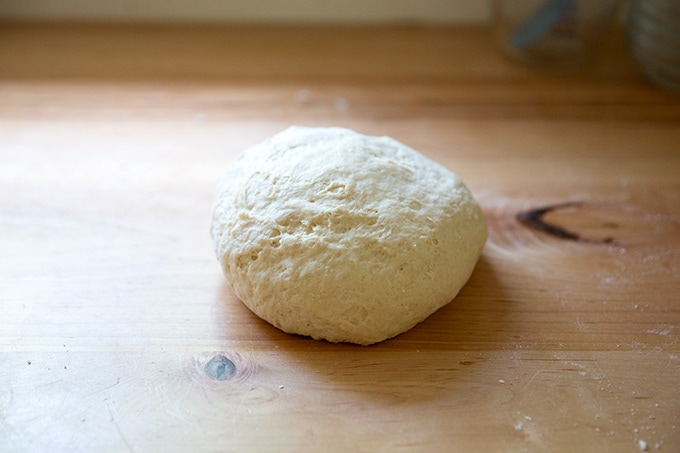
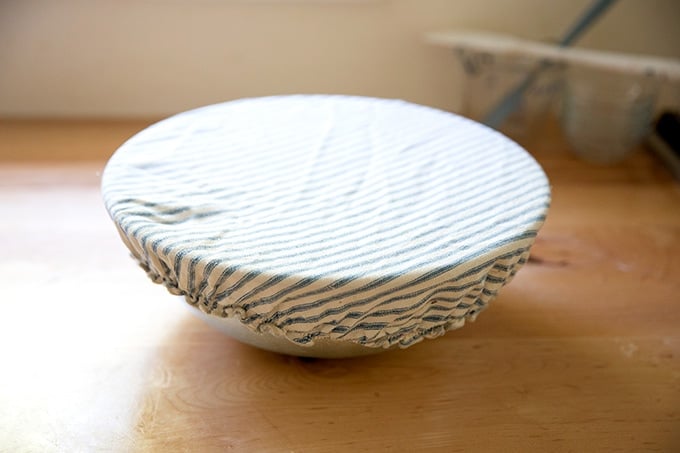
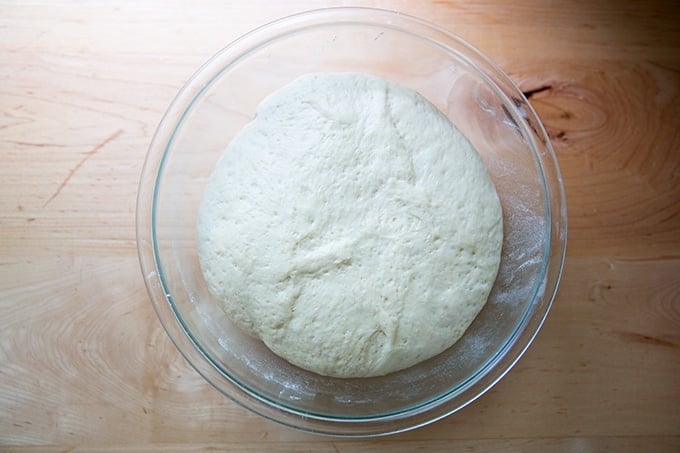
Transfer the dough to a bowl and let rise in a warm spot for 1 hour.
The dough may not necessarily double in volume.
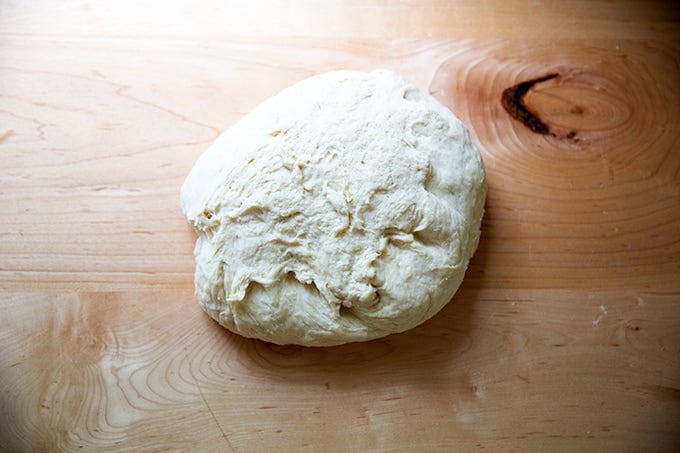
Turn the dough out onto a work surface.
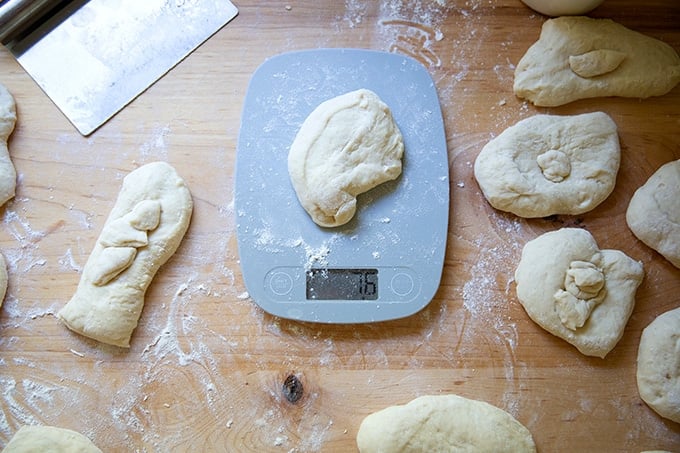
Divide the dough into 12 portions, using flour as needed:
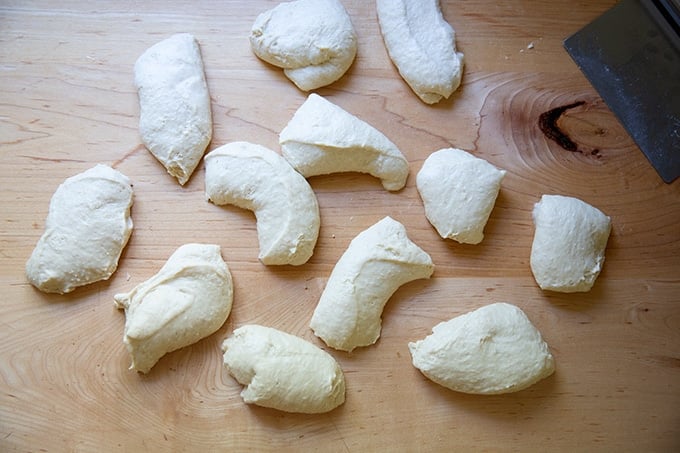
If you care about being precise, you can cut and weigh each one — 75 grams each is about right.
Roll each portion into a 12-inch log. You’re going to roll them out longer afterward, but I find that rolling them once, then letting them rest, allows the gluten to relax a bit and allows you to roll them out longer more easily the next time around.
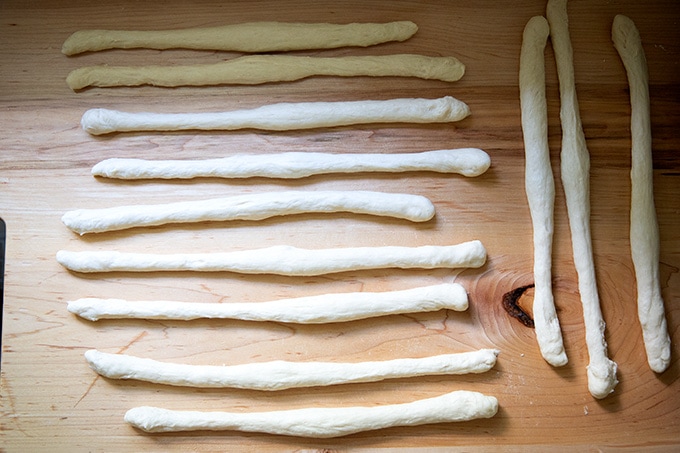
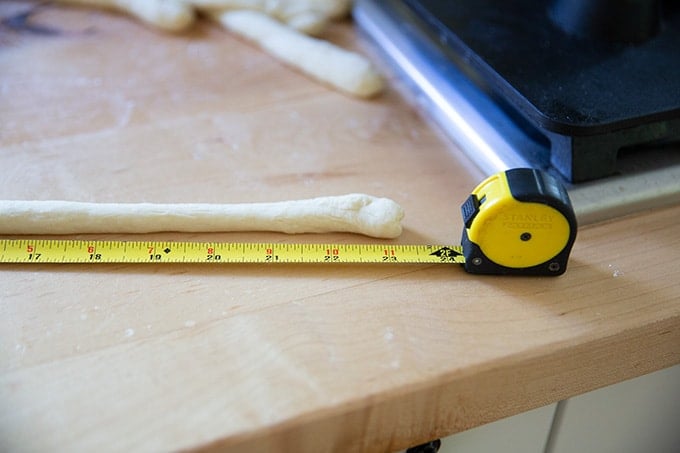
After all 12 have been rolled out once, roll each one out to 22 to 24 inches long:
How to Shape Pretzels
Step 1:
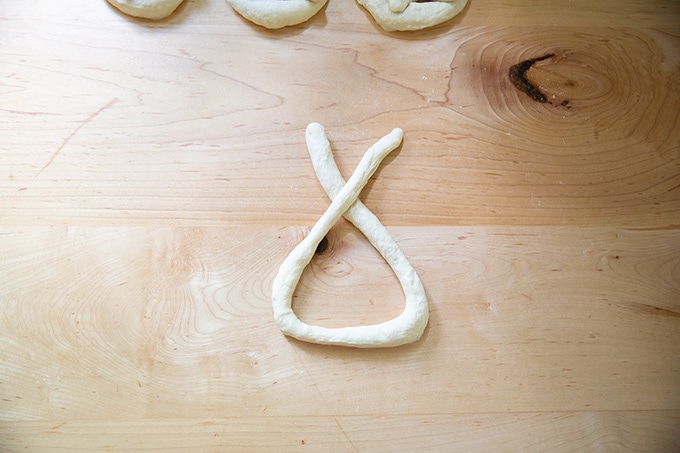
Step 2:
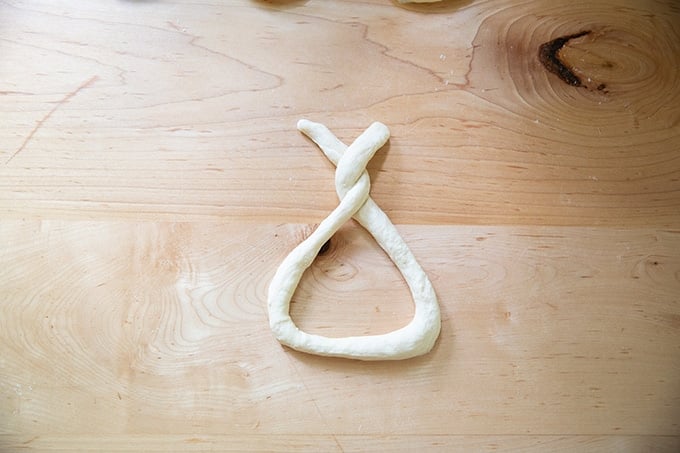
Step 3:
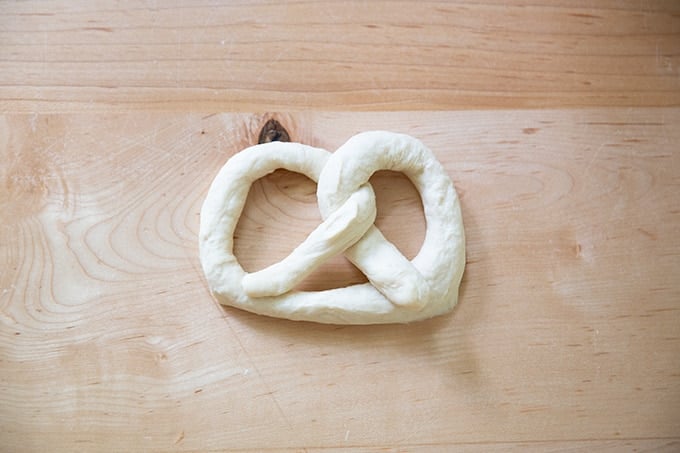
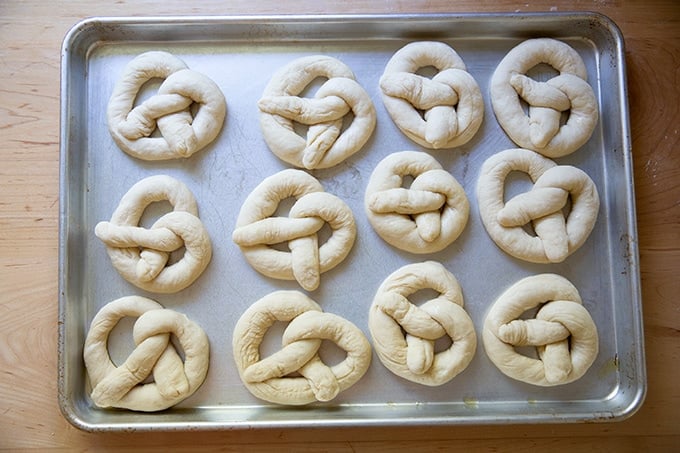
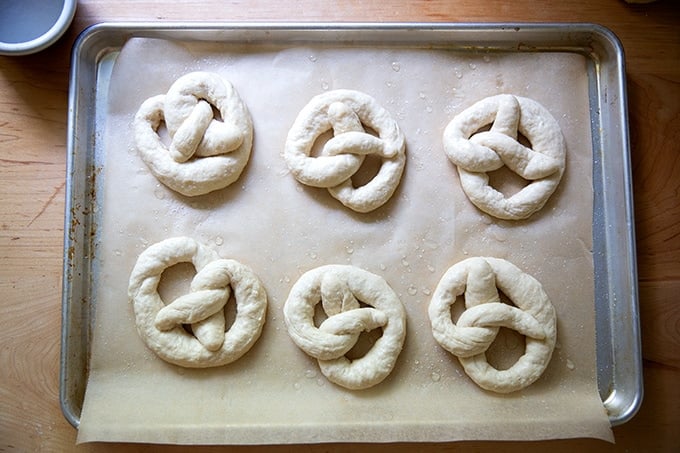
I like to transfer the pretzels to a lightly oiled sheet pan as I shape.
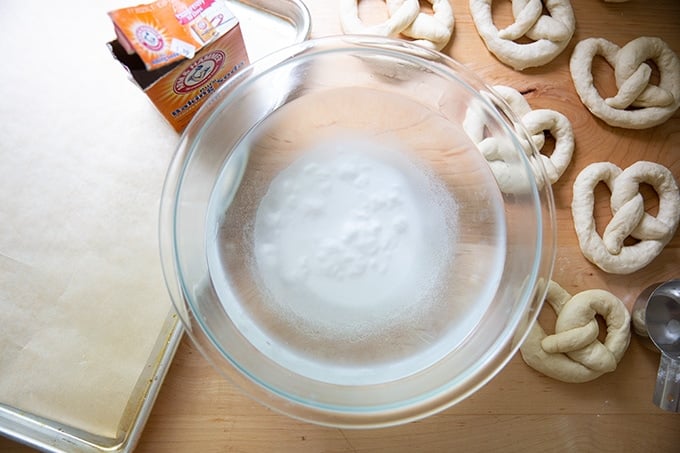
Once shaped, dissolve 1/2 cup baking soda into 4 cups of hot water. You can use hot tap water or you can boil water.
Working with one pretzel at a time, dip each one into the water, then place on a parchment-lined sheet pan.

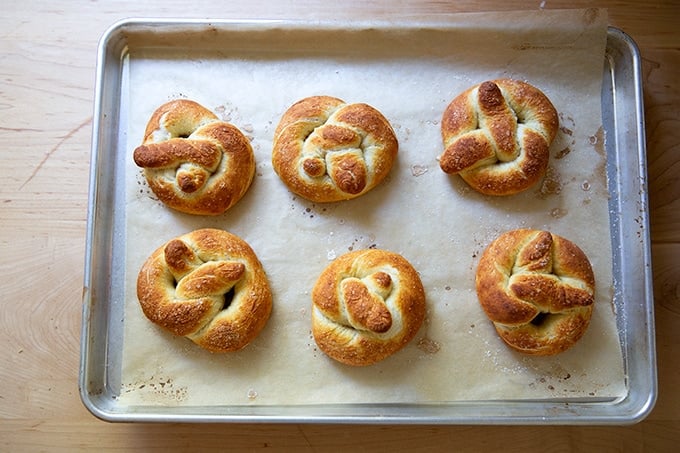
Sprinkle with salt.
Bake at 425ºF for 10 to 12 minutes.
Brush with melted butter immediately.
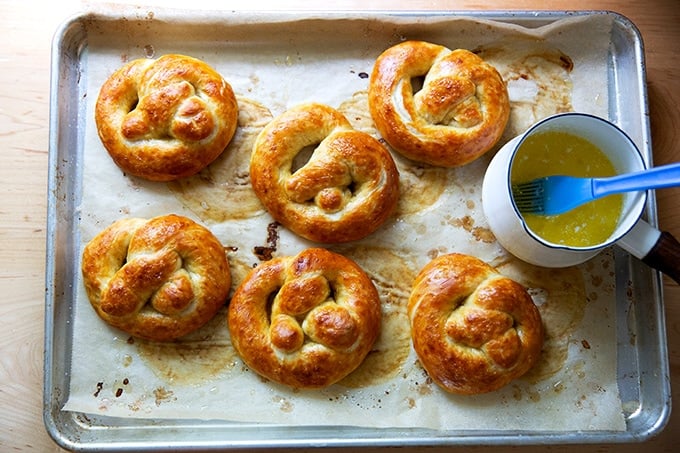
Transfer to a cooling rack immediately.
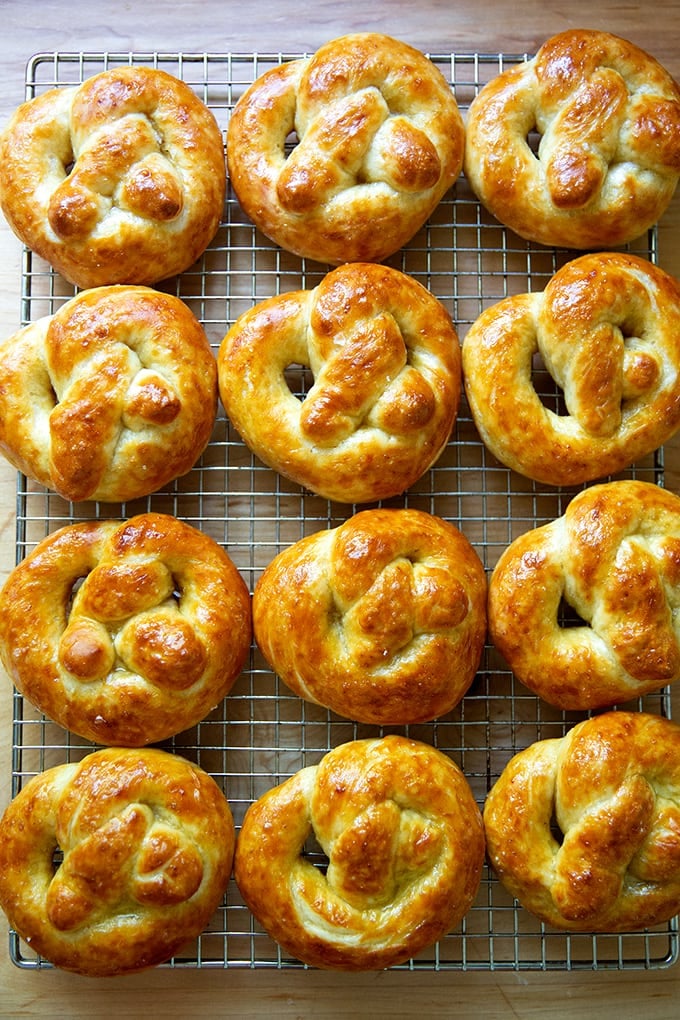
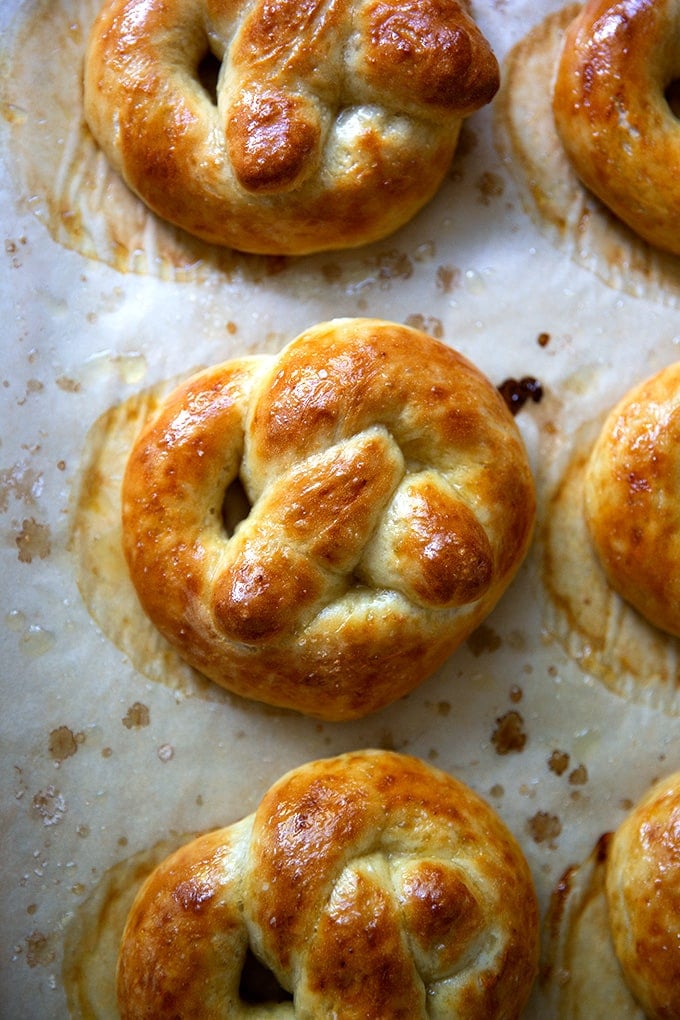
Serve warm. So good.
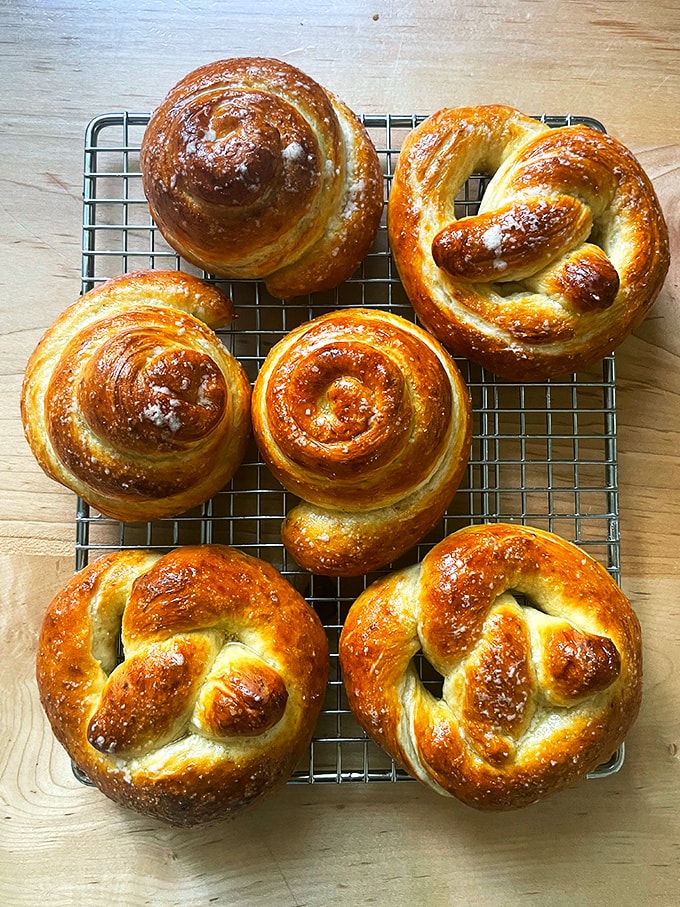
When I made these with Wren recently, she shaped some of the pretzels into spirals, which I loved:
This is the batch made with 1/4 cup sugar. As you can see they don’t brown as well. They are still tasty, but the texture suffers somewhat, and, even with a butter glaze, they just don’t have the same gleam.
How to Make Fresh Soft Pretzels at Home
- Total Time: 1 hour 50 minutes
- Yield: 12
Description
These homemade fresh soft pretzels are buttery soft in texture, perfectly sweet and salty, and astonishingly simple to make: they require a quick kneading (by hand or in a mixer), a simple shaping, and no boiling. They are a massive hit with adults and children alike and truly irresistible straight out of the oven.
Adapted from my brother-in-law’s most wonderful girlfriend, Vicki Roberts.
Notes:
- Yeast: If you are using active dry yeast, sprinkle it over the warm water with 1 teaspoon of the sugar. Let it stand for 15 minutes; then proceed with the recipe.
- Salt: I’ve been using fine sea salt in my bread recipes recently, but kosher salt is fine, too.
- Sugar: As noted in the post above, I tried several batches with lower amounts of sugar, and they just weren’t quite the same in texture, taste, and appearance.
Ingredients
For the dough:
- 5 cups (640 grams) all-purpose flour
- 2 teaspoons (8 grams) instant yeast, see notes above if using active-dry
- 1.5 teaspoons (9 grams) salt
- 1/2 cup (110 grams) sugar
- 1.5 cups (350 grams) warm water
- 1 tablespoon (15 grams) neutral oil or olive oil
For finishing:
- 1/2 cup (115 g) baking soda
- 4 cups hot water
- Kosher salt
- 4 tablespoons melted butter
Instructions
- In a large bowl, whisk together the flour, yeast, salt, and sugar. Add the water and oil and stir with a rubber spatula until a shaggy dough forms. Use your hands to knead the dough briefly in the bowl, then turn the dough out onto a work surface and continue kneading until the dough comes together and feels tacky to the touch, about a minute. Alternatively, you can do this all in your stand mixer, which will take roughly 3 minutes total. (The stand mixer is my preferred method.)
- Place the dough back in the mixing bowl, cover with a towel or bowl cover and let rise in a warm spot for 1 hour. Longer is fine, too. Dough will not necessarily double in volume. This is fine.
- Heat oven to 425ºF.
- Turn dough out onto a work surface and portion into 12 pieces, using flour as needed if dough is sticky. Note: If you want identically sized pretzels, weigh your total dough, then divide by 12. (Each portion should roughly weigh 75 grams.) Also: Be careful about using too much flour here: it will make it difficult to roll out…just use a sprinkling to prevent the dough from sticking.
- Roll each portion into a 12-inch (roughly) log. You’ll roll each piece longer afterward, but the brief rest will allow the gluten to relax, making them easier to roll out longer later.
- Once all the portions have been rolled, continue to roll each portion to 22 to 24 inches long. Twist each piece into a pretzel shape. See video or photos for guidance. At this point, I like to transfer the shaped pretzels to a lightly oiled sheet pan.
- When all of the pretzels are shaped, dissolve the 1/2 cup of baking soda in 4 cups of hot water. You can use hot tap water here or boil 4 cups of water — I’ve been using my electric kettle. Stir to dissolve the baking soda.
- Line two sheet pans with parchment paper.
- Working with one pretzel at a time, drop it into the water. Use a spider to remove it and transfer it to a parchment-lined sheet pan. (Note: I like to drop the pretzel in top-side down, then I use the spider to remove it and flip it onto the sheet pan top-side up. I find dipping it top-side down ensures the top of the pretzel gets sufficiently coated in the baking-soda solution, which promotes more even browning.) Repeat until all pretzels have been dipped.
- Sprinkle pretzels with salt. Transfer pan — I like to bake one pan at a time — to the oven and bake for 10 to 12 minutes or until golden.
- Remove pan from the oven and immediately brush the hot pretzels with the melted butter. Transfer pretzels to a cooling rack. Repeat with remaining pan of pretzels.
- Let cool briefly. Serve warm. Pretzels reheat nicely — I love them halved, toasted, and spread with butter.
- Prep Time: 1 hour 30 minutes
- Cook Time: 20 minutes
- Category: Bread
- Method: Oven
- Cuisine: American
This post may contain affiliate links. Please read my disclosure policy.


146 Comments on “How to Make Fresh Soft Pretzels at Home”
I’ve made a lot of soft pretzels, but this just became my new favorite recipe! I made the dough, let it rise, deflated, then put it in the refrigerator overnight. In the morning, I continued the recipe. I LOVE that I don’t have to boil the pretzels. Just using a hot water dip made everything so much easier. Thank you!
So nice to read this, Karen! Thanks so much for writing. These are a family fave 🙂
Hi, Ali: These look delightful, but my partner can only eat wheat that’s been fermented (ie sourdough): do you happen to have an adaption for that? I ask because I make your sourdough focaccia–a fabulous recipe, btw, so thank you for that and so many more great recipes here–for which I know you have a commerical yeast alternative.
Hi Lisa! I have not made these with sourdough, but for recipes with roughly this amount of flour, I always suggest simply swapping in 100 grams of starter and subtracting 50 grams each flour and water from the original quantities (and omitting the yeast). From here, follow the same process but allow more time for the first rise given that you’ll be using sourdough starter. Hope that helps!
Great formula to know of: many thanks, Ali! When I give it a try, I will be sure to report back.
I made these today…. THEY ARE EXCELLENT! And easy… I will be making these monthly for my husband and myself.. This is a keeper recipe! THANK YOU!!
Great to hear, Mary! Thanks so much for writing 🙂
Soooooo easy and delicious!!!! Followed it to a T and everyone ate them all! Made it twice since we found your recipe last month. Thanks!!!!
Great to hear, Lore! Thanks so much for writing 🙂 🙂 🙂