
Homemade Ricotta Cheese Danishes with Lemon Zest
This post may contain affiliate links. Please read my disclosure policy.
These cheese danishes, a Nigella Lawson recipe, are made with a food processor dough and a lemon zest-scented ricotta cheese filling. The food processor allows the cheese danish pastry dough to come together in seconds. The dough is flaky and buttery and combined with the lemony ricotta filling, it’s consistently one of the most delicious breakfast pastries I turn out of my kitchen. Truly restaurant worthy.

You know what I hate? When I stumble upon this line in a recipe: refrigerate overnight.
‘Stumble upon’ being the key here. As in, surprise! Gotcha! You thought you’d have me in your belly this morning? Ha! Nice try. Let’s reconvene tomorrow, K?
This past Sunday I was expecting my Auntie to arrive in the early afternoon. She was making a special trip to help me out with the kids, and I wanted to welcome her with something extra special.
Nigella Lawson’s cheese Danishes, a recipe I had spotted in How to Be a Domestic Goddess the night before, sounded ideal for a number of reasons: the pasty is made in the food processor; the filling contains lemon zest and ricotta cheese, two of Auntie’s favorite ingredients; and at one point in the recipe Nigella notes that the cheese Danish is her all-time favorite.
It was the intro to the recipe that got me. Nigella describes the practice of making this sort of pastry dough in the food processor as revolutionary not only because the dough comes together in seconds but also because it produces an authentic Danish pastry. She even includes a word of encouragement from Beatrice Ojakangas, the Scandinavian chef who taught her the method via Dorie Greenspan: “Don’t think you’re cheating by taking the fast track — this is how it’s done these days all over Denmark.”
Fast track. I never suspected the phrase ‘refrigerate overnight’ to be in a ‘fast-track’ recipe. Lesson learned. And truthfully, I should have known better — these sorts of recipes almost always require a lengthy rest period.
Or do they?
Remember now, Auntie would be arriving around 2 pm. Perhaps I still had time. Perhaps the true test of the domestic goddess was making croissant-style pastries in one quarter the amount of time? I would have to make a few changes, the first being to give the yeast a little push — instead of processing it with the flour, sugar and salt, I would “bloom” it with the water and milk and a little bit of the sugar.
The overnight refrigeration, too, would have to be condensed to two hours, and a 30-minute chill period, omitted. And most importantly, under no circumstances would I be allowed to throw a tantrum when the pastry did not behave, bake, or taste as I had hoped. Disposition of a true domestic goddess would foremost be preserved.
When Auntie called to tell me she was passing IKEA — just 20 minutes out — I placed the Danishes in the oven. And when Auntie walked through my door, I pulled a tray of beautifully golden, feather-light, lemon-ricotta filled, flaky parcels from my oven.
Truly, of all the baking efforts I have made over the years to transform my kitchen into one of my favorite cafes, none has succeeded more than this food processor Danish pastry — it was as if we were dining at 18th and Guerrero or 23rd and Lombard or 6528 Washington Street. These Danishes are spectacular.
Now, do I advise taking this extra-fast-track route? For the sake of keeping stress to a minimum, maybe not. Because what is actually really nice about this recipe is that the dough in fact can be — wait for it — refrigerated overnight. What’s more, the dough can actually be refrigerated for as long as four days, which means if you were to make the dough today or tomorrow, cheese Danishes could, with little effort, be in your Saturday or Sunday — both even — mornings.
It’s a beautiful thing. Planning ahead. Reading instructions. One day I’ll learn.

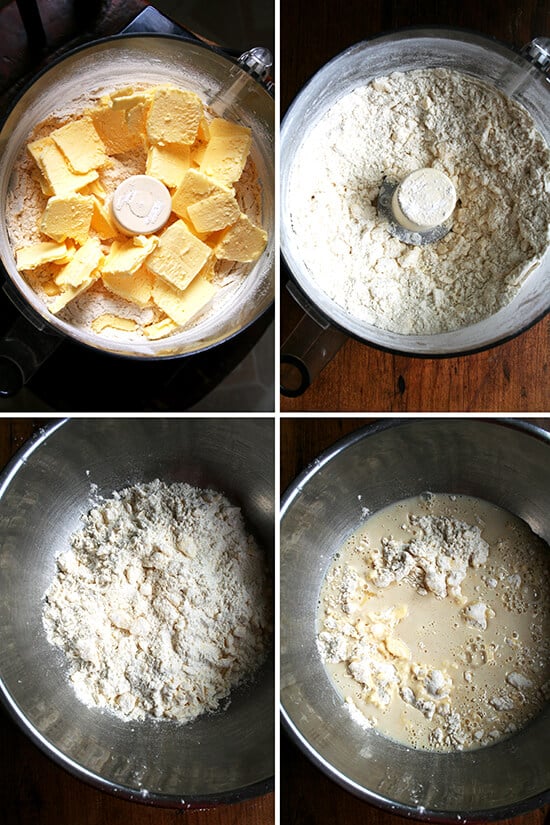
With a food processor, the dough comes together in seconds:
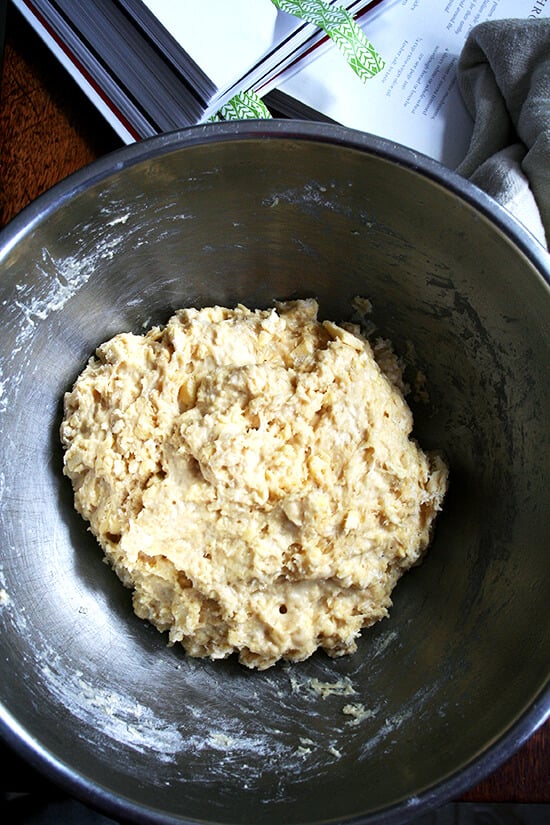
It then rests in the fridge overnight or for as long as four days:
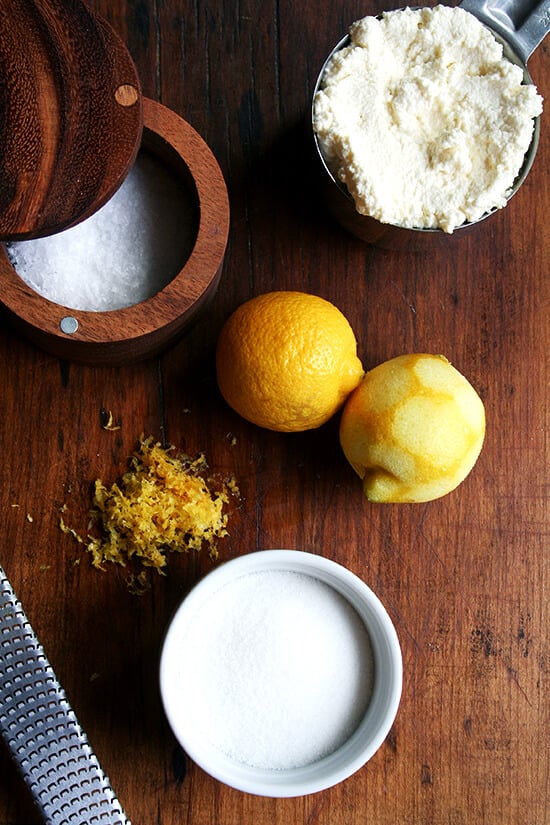
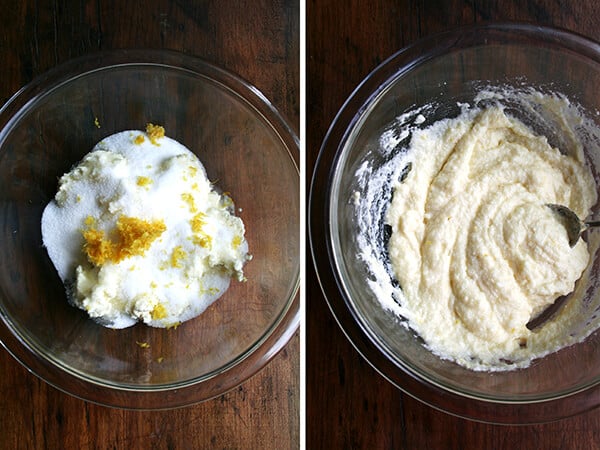
In the meantime, make the filling, a mixture of ricotta, lemon zest, salt and sugar:
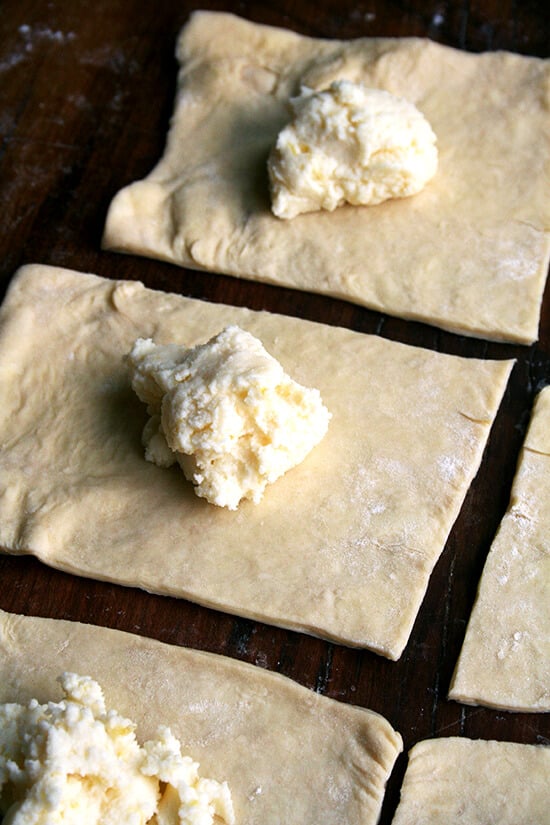
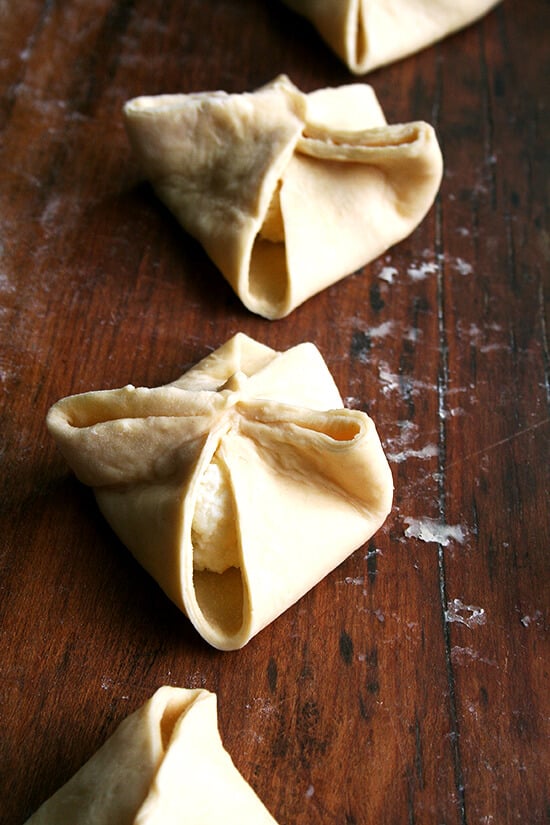
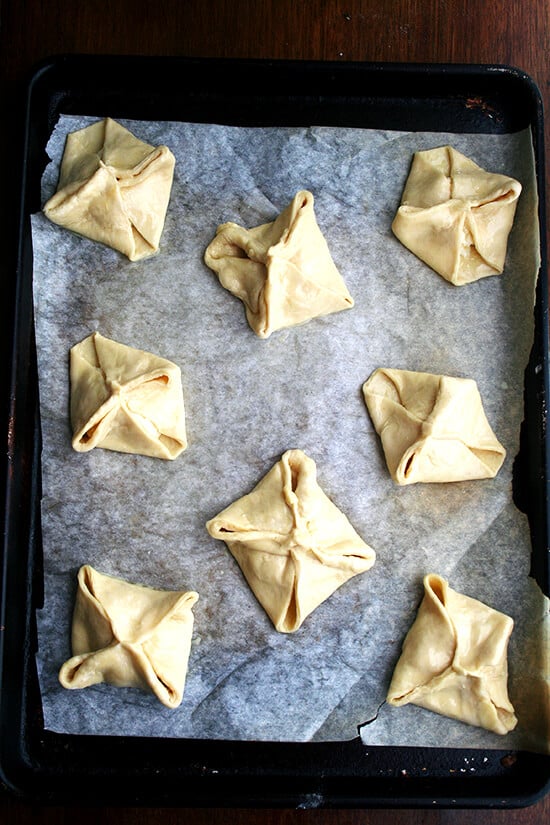
Assembling the parcels requires rolling and folding and filling and pinching:
The assembled Danishes make one last 1.5-hour rise before baking for 15 minutes:


I had a couple of comments/questions regarding the rolling out process and how to do it without adding too much flour. I hope this video offers some guidance:

Homemade Ricotta Cheese Danishes with Lemon Zest
- Total Time: 11 hours 40 minutes
- Yield: 12-16 pastries
Description
Source: Nigella Lawson’s How to Be a Domestic Goddess
Notes: As noted above, the dough for these Danishes should rest in the fridge overnight. I have included notes below if you need to rush the process along — the Danishes can be made start to finish in as few as 6 hours.
The filling amount listed below is for 6-8 pastries. Double it if you are making the full amount of pastries.
Day-old pastries reheat quite nicely at 350F for 10 minutes or so.
Ingredients
processor danish pastry:
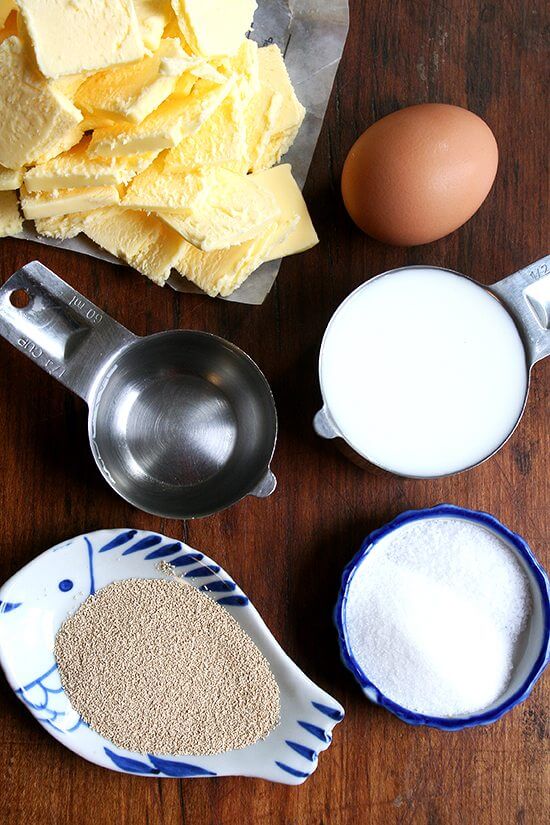
- 1/4 cup (60 ml) warm water
- 1/2 cup (125 ml) milk at room temperature
- 1 large egg at room temperature
- 2 1/4 cups (286 g) all-purpose flour
- 1 package (2.25 tsp. | 7 g) instant yeast
- 1 teaspoon kosher salt
- 1 tablespoon (25 g) sugar
- 1 cup (250 g) unsalted butter, cold, cut into thin slices
cheese danish:
- 1/2 quantity of the processor danish pastry
- 1 cup ricotta cheese (I used homemade bc it’s SO easy and SO delicious)
- pinch of salt
- 1 tablespoon lemon zest
- 6 tablespoons sugar
- 1 large egg, beaten
- 3 tablespoons unsalted butter, melted and cooled
egg wash:
- 1 egg beaten with 2 tablespoons of milk
Instructions
make the pastry:
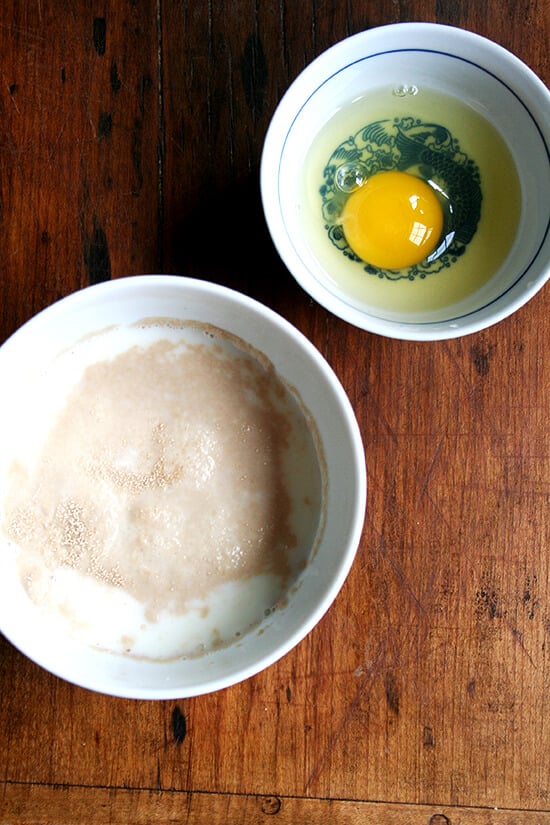
- If you are using rapid-rise yeast or fresh yeast and have planned ahead such that you know you will be refrigerating the dough overnight: Pour the water and milk into a measuring cup and add the egg, beating with a fork to mix. Set aside. If you need to speed up your cheese-danish-making process or want to make sure your yeast is alive and well: Sprinkle yeast over the warm water and milk with a little bit of the sugar (I take 1/2 teaspoon from the 1 tablespoon) and let stand until the mixture starts to foam a little bit. Then, beat egg with a fork until broken up and add to milk-yeast mixture. Beat mixture with fork again until just combined. Set aside.
- Place a large bowl near your food processor. Then put the flour, yeast (if you haven’t mixed it with the milk), salt and sugar in the processor, and give it one quick whizz just to mix. Add the cold slices of butter and process briefly so that the butter is cut up a little. You still want visible chunks of butter about least 1/2 inch in size — about 5 short pulses.
- Empty the contents of the food processor into the large bowl, then add in the milk-egg mixture. Use your hands or a rubber spatula to mix the ingredients together, but don’t overdo it: expect to have a gooey mess with some butter lumps pebbling it. Cover the bowl with plastic wrap, put in the refrigerator, and leave overnight or up to 4 days. (Note: If you have “bloomed” your yeast as noted in step 1, you can get away with two hours in the fridge at this step.)
- To turn the dough into pastry, take it (or half of it — I find it easier to work with half the amount of dough at this step) out of the refrigerator and roll the dough out roughly into a 20-inch square, using flour as needed. Fold the dough square into thirds, like a business letter, turning it afterward so that the closed fold is on your left, like the spine of a book. Roll the dough out again into a large square, repeating the steps above 3 times (see video for guidance).
- Wrap the dough in plastic wrap, and put it in the refrigerator for 30 minutes (you can keep it in the refrigerator for up to 4 days, if you haven’t already done so at the earlier stage), or refrigerate half to use now and put the other half in the freezer to use later. Note: If you are pressed for time, skip this 30 minute chill time.
make the danishes:
- Combine the cheese, sugar, salt, lemon zest, egg, and butter to make the filling. Roll out the pastry into a big rectangle and cut it in half. Divide each half into fourths and place a tablespoon of filling on each piece of dough. Fold the opposite corners up together and seal with a pinch. Place on a baking sheet lined with parchment paper and brush with the egg wash. Leave them to rise until they double in size, about 1 1/2 hours; they should then feel like marshmallow. Note: With both these cheese danishes and the prosciutto & gruyere croissants, it never looks as though the pastries have doubled nor does the texture of the dough feel like marshmallow. I just stick them in the oven after 1.5 hours regardless of how they look.
- Meanwhile, about 30 minutes before they’re ready to be cooked, preheat the oven to 350°F. Pinch corners back together if they have come apart, then place in the oven and bake for 15 minutes or until puffy and golden brown.
- Remove to a wire rack to cool.
- Prep Time: 11 hours
- Cook Time: 25 minutes
- Category: Breakfast
- Method: Oven
- Cuisine: French
This post may contain affiliate links. Please read my disclosure policy.


96 Comments on “Homemade Ricotta Cheese Danishes with Lemon Zest”
I’m with you, I need to make it NOW! no waiting overnight!
I think cheese danish are my favourite too! Good of them to play along with your shortcuts!
Alicia, I know, such cooperative little guys 🙂 I am so grateful. I don’t think it gets better than a cheese danish.
Do you think one of those gorgeous little danishes will marry me?
No, seriously. 🙂
These look so good, Ali. I have been waffling about buying a full-size food processor or robo-coupe for months, and this is exactly the answer I was looking for. Food processor it is!
Whitney — Yesss. Do itttt. Seriously, I use my food processor all the time, especially recently as I’ve been on this breadcrumb kick. I hope these danishes are one of the first creations your processor produces. They are SO good. Also, just ordered some more of your vanilla beans, which you obviously know. Can’t wait to put them to use!
Care to share your breadcrumb recipe? :0)
Hi ! I just whizz day-old bread in the food processor and either toast them up in a skillet with oil or butter and seasonings, or if I just want to make panko-style crumbs, I dry them out slowly in the oven at 250 for like 45 minutes or so.
Oh hell yes. What perfect little packets of love.
Thanks, Wendi!
The fact that you do make the pastry the night before is a godsend as you mentioned. I have made something similar from another Food Network cook using premade puff pastry. They were delicious but I can tell these would be even more tasty.
Val — it is indeed. I have another batch of dough chilling in the fridge for when my parents arrive tomorrow. I can’t wait to treat them to this!
So glad to hear I am not the only one with this problem! Thanks as always for your lovely photos and the story behind them.
Martha — Glad to hear I am not alone! I should be better by now at reading a recipe entirely through before I decide to make it.
What beauties!!! Your photos are incredible…thanks for the step by step! As always, your post is amazing!
Thanks, Carol and Martha!
Agh, I do that far too often! I need to get in the habit of the whole reading a recipe all the way through start to finish ahead of time. In any event, these look fantastic, overnight refrigeration or not! I haven’t ever attempted danishes, but I just might have to now!
Natasha — I had never attempted danishes either, but these truly are SO easy. Definitely give them a go. I am feeling totally inspired.
These look lucious! How much sugar goes in the ricotta filling? 1/2 cup? I think maybe you have a typo there. Thank you for the recipe!
Ha!!! I had a typo in my comment about your possible typo … LUSCIOUS!
Lisa!! Thank you. Totally my bad. It is 6 tablespoons of sugar. SO sorry!! I hope nobody attempted these yet. Just updated the post!
I am right there with you! I hate to wait overnight for what I should be eating in 20 minutes. What makes this recipe the fast track? Did they say?
Sandra — The only reason it seems to be a fast-track recipe is that the dough itself is made in the food processor. I think this sort of pastry making usually requires a more lengthy butter-“laminating” process, during which butter is added and the dough is rolled and folded, etc. The dough here truly takes seconds to prepare, and while the rolling out process does take a little bit of time, overall it is pretty painless. And yes, I wanted to be eating these 20 minutes after I spotted the recipe 🙂
This is such a beautiful recipe and your photographs bring it to life wonderfully. I love cream cheese danishes and although I’ve made some using shortcuts, I’ve never made my own totally from scratch like this and I need to try. Pinning this!
Averie — definitely try this one. The pastry dough is incredibly easy to prepare, and the finished pastry is incredibly light and flaky — it’s been a very rewarding process for me discovering this recipe. What’s nice about it, too, is that the dough can be refrigerated overnight, but the finished pastries do still need a 1.5-hour final rise before they are baked…just a head’s up — I know how you like that overnight option 🙂
They look delicious I’m very glad I found them. But I need to straiten out a few facts. I have never seen them or the method in Denmark, just wondering where the “Don’t think you’re cheating by taking the fast track — this is how it’s done these days all over Denmark.” comes from. And Beatrice Ojakangas is from Finland (which is not a part of Scandinavia*) so she would be a Nordic chef rather.
*Fact: The Scandinavian countries are Norway, Sweden and Denmark (No, Denmark is not a part of Sweden, Not that you say or hint it to be. Just want to be clear.)
Never the less I love the recipe you’ve shared. Thanks a lot I’ll be making them soon.
Love from Denmark
A DanishGuy — Very interesting. Thanks for sharing the facts about the true Scandinavian countries — I definitely would have guessed that Finland was a part of Scandinavia had you not shared this. It’s funny though, because on Beatrice’s website, her subtitle is “Recipes from the Scandinavian Chef.” Strange? Hope you like the danishes!
Hmmm, Finland lies, or part of it, on the Scandinavian Peninsula, so maybe from the Geographically point of view they are considered Scandinavian, but from all the other (cultural, historic, linguistic) they have nothing in common with the Scandinavians. Denmark itself DOES NOT lie on the Scandinavian Peninsula, but together with Norway and Sweden share a common ethno-cultural heritage. This is in fact Scandinavia, a historical, cultural and linguistic concept, that is usually confused with the purely geographical term Scandinavian Peninsula. Sorry, I could not help it! Please, don´t mind me. Speaking about Cheese Danish….
No worries at all! I so appreciate this kind of comment. One other commenter pointed out the same thing, and I loved getting a little geography lesson, so thank you. What I found was interesting is that Beatrice Ojakangas (https://beatrice-ojakangas.com/) refers to herself as the Scandinavian Chef.
Love cheese danish!!!! I think I need to buy a food processor just to make these!
Lokness — Yes you do! I am trying savory variations tomorrow — ham and cheese. I will be sure to report back!
In the recipe, did you substitute the same weight of all purpose flour for bread flour called for in Nigella’s recipe?
Angela — yes! I didn’t make any changes to the weights. Good luck with the recipe. I made savory prosciutto and gruyere croissants with half of the dough this past weekend. Hoping to blog about them tonight or tomorrow — so good! Let me know if you have any other questions!
I’m inspired by this post and the lovely prosciutto & gruyere croissants. Have you tried freezing anything made with this dough?
Keri — I have not tried freezing anything yet, but that is high on my list of things to try — how nice would that be? When I get to it, I will be sure to report back. I’m wondering at what stage they should be frozen? It would be nice if I could freeze them after the last 1.5 hour rise, so that when I want to bake them off, I can stick them straight in the oven from the freezer — no thawing, rising involved. The dough itself (as noted in the recipe) can be frozen at various steps. And the baked pastries I am sure will freeze well, because they do very well on the counter top in a ziplock back for 2 to 3 days — just reheat in the oven for 15 minutes at 350ºF.
Back at work after an Easter weekend full of food I have to give a big YUMMY and THUMBS UP for this recipe!! I made it by hand with a pastry cutter and it was super quick and easy! I had to substitute Ricotta for plain full fat cream cheese but it was still amazing! 2nd batch came with cheese and ham and it was a big winner too! Thanks for the recipe and the extra pounds on my behind 😉
Hi
I have the dough in the fridge – it has been resting overnight but it doesn’t seem to have changed shape very much – it is supposed to rise at all in the fridge?
Gugs — It will hardly look any different. So funny, I have been texting with a friend about this all day — I think I added better notes on the prosciutto and gruyere croissant post (just updated this post, too). Also, after you shape the pastries and are letting them make the last 1.5 hour rise, they will also hardly look any different — original recipe said they should look doubled in bulk and feel like marshmallow, but they really never look much different. I always just bake them off after the 1.5 hour rise regardless of how they look. Hope that helps! Let me know if there is anything else.
Fantastic! I can t wait to try it! Will you tell me, please, whether the dough may be frozen? or maybe it is better to freeze the Danishes before freezing? Thank you for the wonderful recipes.
You are so welcome!
sorry, my question was in fact whether it is better to freeze the Danishes before baking, of course, not before “freezing”, as I write in my previous comment
I have to apologize again. I read very carefully the recipe and the comments and you do not need to answer my questions about freezing the dough. Thank you again for your wonderful recipes!
No worries!
How big is the finished product? They look like kolache. Such flakiness, but don’t think I am going for a food processor even though it looks like a miracle.
wonderful ! made a test batch today ! well worth the wait overnight for the dough . Thanks so much for the recipe , I plan on rolling these into crescents for my Thanksgiving table , can’t wait for my guest to try them !
Yay! So happy to hear this! Your table is going to look so pretty (and delicious)…what a treat!
I actually have the exact recipe from the same cookbook in the fridge…. It’s been there for three hours. I didn’t read ahead and was shocked when I read it needed to be refrigerated overnight! I didn’t get to bloom my yeast to do a shortcut. But, the dough was made at noon and I’m going to attempt assemblage after supper….. That is almost overnight.
Absolutely! I bet it works well — I find this dough to be pretty forgiving. How’d it go?
I’m so going to try this! As a novice cook i’ve encountered a few recipes that requires refrigeration overnight and it sooo sucks! So now I totally read the recipes more than 3x then check the pantry before proceeding- thanks for this post I hope I can make my favorite blueberry danish pastry with this recipe!
Wayyyyy too tedious with the time and watching you rolling this out. I have an awesome kringle,am Danish,and our shortcuts are puff pastry and crescent rolls.
Yeah, I know, I describe the video as tedious myself. It’s not meant to be interesting, it’s meant to be instructive. And honestly, to me, using crescent rolls and puff pastry are not shortcuts. To me that’s cheating. This recipe and technique still requires work and planning but uses real ingredients and produces a final product that rivals recipes that take days of laminating and much more work. If you want to open a can of crescent rolls, great, go for it.
Thanks for this! I have another recipe that I usually use, but I’m really pressed for time tonight. I kept pushing off putting the dough together all weekend and I have to have them ready for my son’s lunch tomorrow morning… It’s good to have the reassurance for a quick method for a last minute baker like me. I’m gonna try shaping them with shortened first rise and no second stage, then let the shaped pastry rise overnight in the fridge. Might be a bad idea but we’ll find out in the morning! May have to run to the store in the morning to get something to pack for his lunch. Thanks again!
How’d they turn out?! Sorry just seeing this.
I made these several times over the years where I found this recipe on another website. They are amazing. I have never tried the cheese filling though. I did cherry, raspberry, almond, nutella, and cherry/cheese but the cheese filling for that was just sugared cream cheese. QUESTION…with your cheese recipe, because the cheese danish is baked, can they be left out overnight? I want to make them the night before for a brunch party, but don’t want to have to refrigerate them. Thank you!!!
I think you probably can. I am pretty lenient when it comes to these things, and as long as your kitchen isn’t super hot, I don’t foresee any problems. Good luck!
Always hated ricotta UNTIL I saw this recipe :). Mine came out creamy and flavorful and like you said SO EASY TO MAKE! Can’t wait to add it to my lasagna. Danishs came out WONDFERFUL, btw, only did the egg wash 😉
Yay!! So happy to hear this. And I know, I felt the same way about ricotta till I made it from scratch. So glad the danishes came out, too!
Made these yesterday they were perfect and easy! I’ve never attempted anything like this! How do you store the leftover baked cheese danish?
Thanks
Hi Marlo! So happy to hear this!! And so sorry for the delay here. I just store them at room temperature but for no more than 1 day. Any longer, I would stick them in the fridge, and I would heat up in the oven before serving. You could freeze these, too.