
How to Feed, Maintain, and Store a Sourdough Starter
This post may contain affiliate links. Please read my disclosure policy.
In this guide, I share everything you need to know about buying, feeding, maintaining, and storing a healthy sourdough starter. Below you will find video guidance and step-by-step instructions. Let’s go!
If you are interested in dipping your toe into sourdough bread baking, for starters you need a starter (😂). In this sourdough starter guide I share my tips for:
- Buying a sourdough starter online
- Activating a sourdough starter
- Feeding a sourdough starter
- Maintaining a sourdough starter
- Storing a sourdough starter
- Knowing when a sourdough starter is bad
- How to use your discard in delicious recipes
Although building a sourdough starter from scratch is very gratifying, I am a huge proponent of purchasing a starter. I outline why in more detail here — Sourdough Focaccia: A Beginner’s Guide — but in short, it’s because:
- If you’re curious about sourdough, get to it! Making a starter from scratch can take weeks.
- They’re relatively cheap (or free if you get one from a friend or baker).
- A purchased starter potentially will be stronger/more active than a young, homemade starter.
- Before you spend weeks making a starter, find out if you like the process — again, a purchased starter allows you to get straight to it.
Where to Purchase a Sourdough Starter
I have had success purchasing and activating sourdough starters from three places:
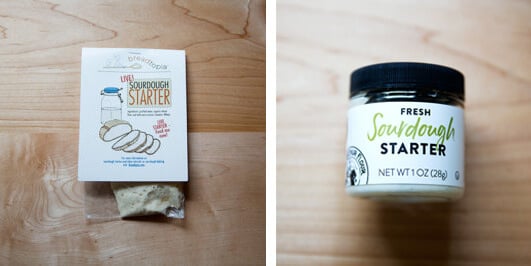
- Breadtopia ($9)
- King Arthur Flour ($9)
- Cultures for Health ($11)
Each place offers guidance for “activating” the starter. Breadtopia’s instructions live on its website. King Arthur Flour sends along a booklet with details, but also provides online help. Cultures For Health offers video guidance here.
In short, to “activate” each, you simply add flour and water, stir, and wait — that’s all there is to feeding a sourdough starter.
How to Activate a Sourdough Starter
A purchased starter generally arrives in a small bag or container. I’ve created a short video for activating a King Arthur Flour sourdough starter. You can use this same process for activating a Breadtopia starter as well:
Follow these steps to activate it:
- Place starter in a vessel. I love these deli quart containers for this purpose.
- Add 45 g each of all-purpose flour (organic if possible) and room-temperature water. (Note: The consistency should look like a thick batter.)
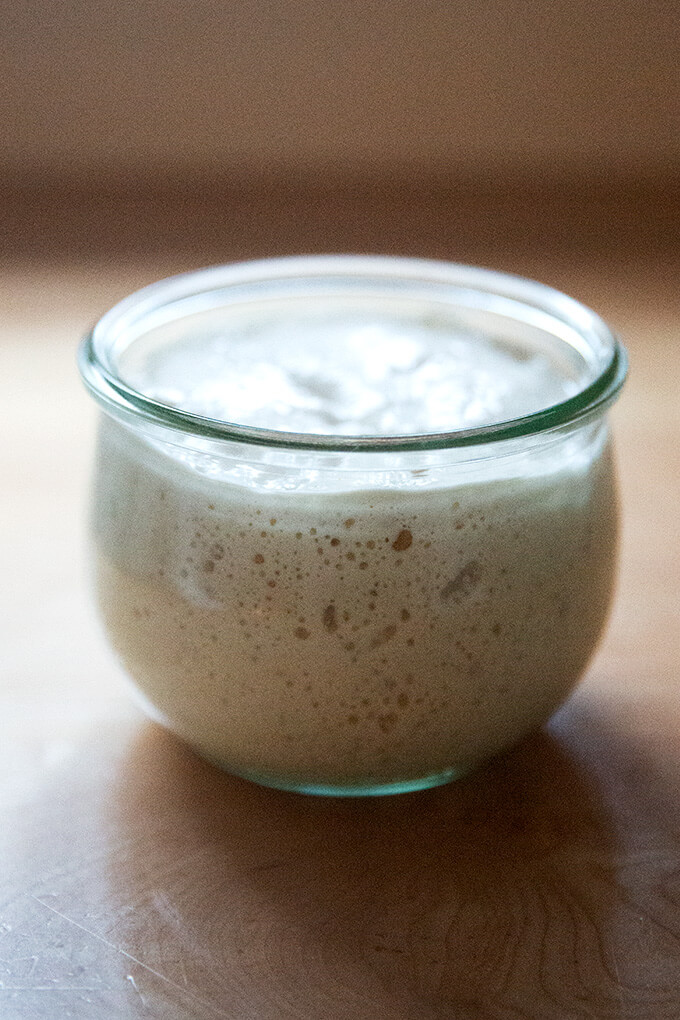
- Wait. You may see bubbles and action (rising!) in as few as 6 hours; it may take more like 18 to 24 hours. Variables include the time of year, the temperature of your kitchen, the temperature of your water, how much water and flour you used, etc.
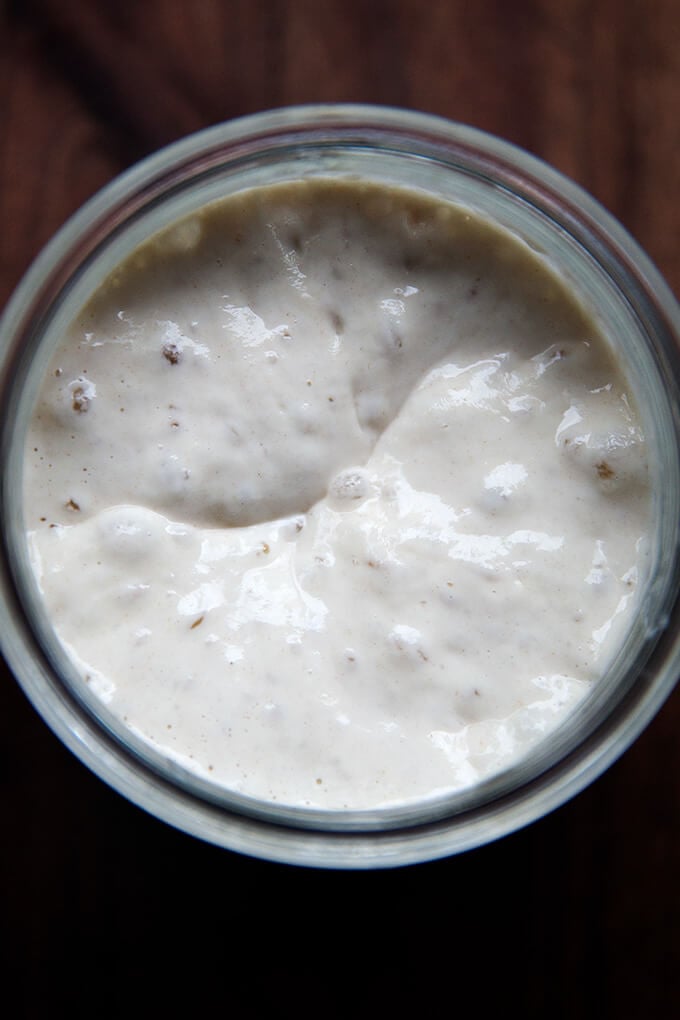
- When the starter has roughly doubled in volume, it’s likely ready to go. Drop a spoonful of it in a glass of water. If it floats, you’re ready!
- If it doesn’t float after 24 hours, add more flour and water (equal parts), stir again, and wait.
- If you aren’t seeing any action after another 12 hours, discard most of it, and add more flour and water (equal parts), stir, and wait. Just be patient. Before you know it, your starter will be rising and bubbling and ready to go.
How to Feed A Sourdough Starter
If your starter floats, and you’re ready to start baking, measure the required amount into a bowl and proceed with the recipe. Here are four great beginner’s sourdough recipes:
- Simple Sourdough Focaccia: A Beginner’s Guide
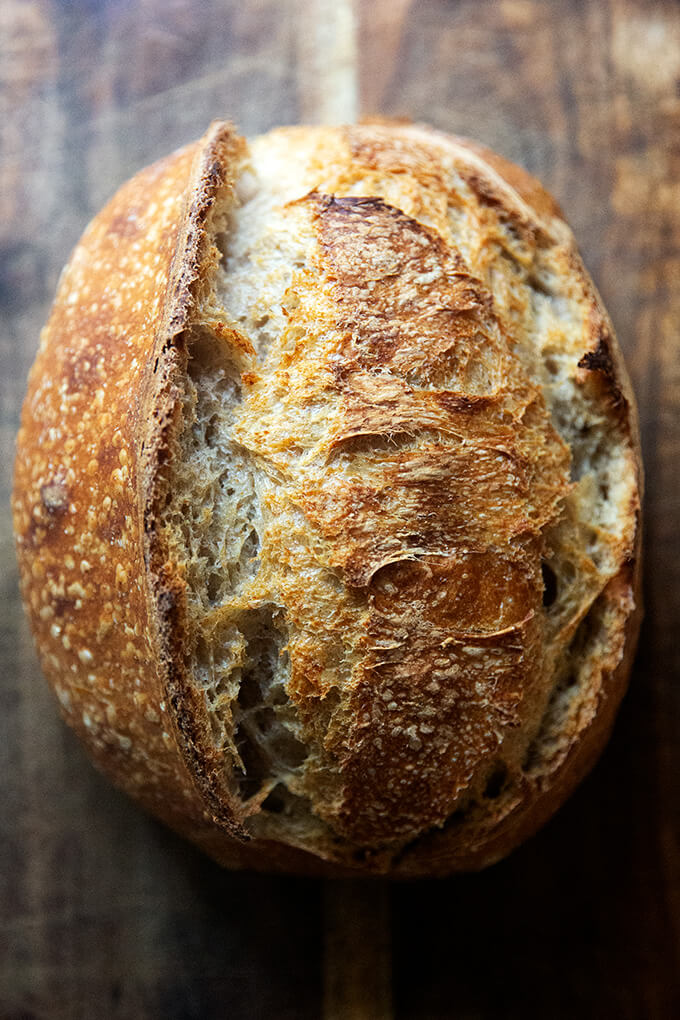
- Simple Sourdough Bread: A Step-by-Step Guide
- Favorite, Easy Sourdough Bread (Whole Wheat-ish)
- Simple Sourdough Ciabatta Bread
If you’re not ready to bake, discard most of it, add an equal amount of flour and water (45 g each or so), stir it together, cover it, and stash in your fridge.
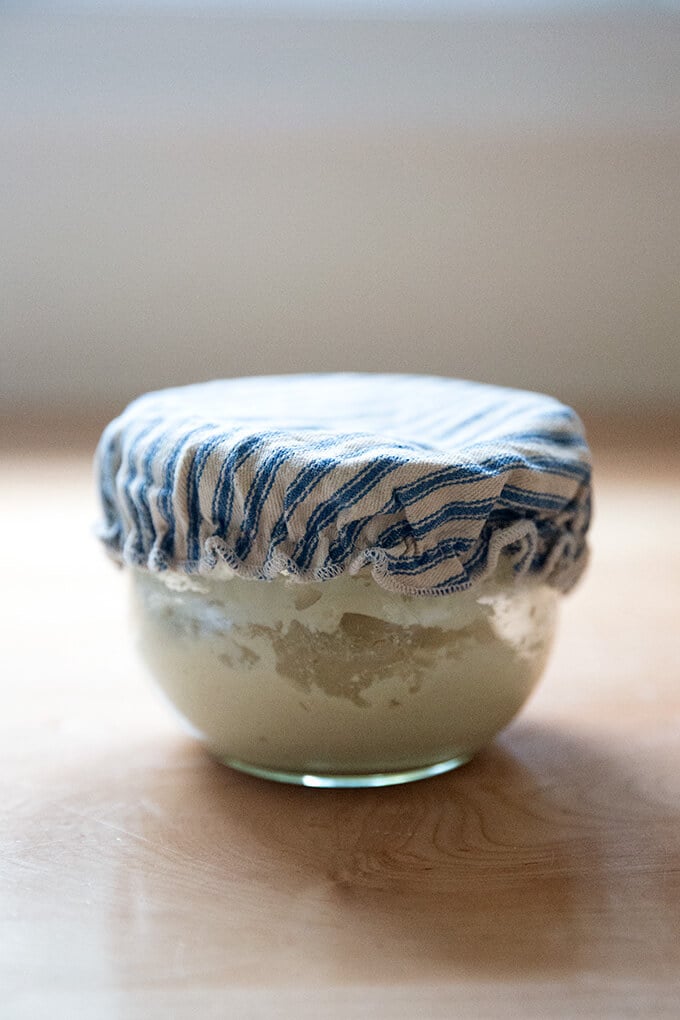
My preferred storage vessel is a deli quart container. When I store my starter in the fridge, I use the lid that comes with the quart container. When I feed my starter and let it sit at room temperature, I use a breathable lid.
From here on out, you’ll need to feed it roughly once every two weeks — I’ve left it for as long as three-four weeks without a feeding, and it has been fine, but I don’t recommend waiting that long in between feedings.
Here’s the play-by-play:
1. Place the vessel holding your starter on a scale, and add 45 g flour:
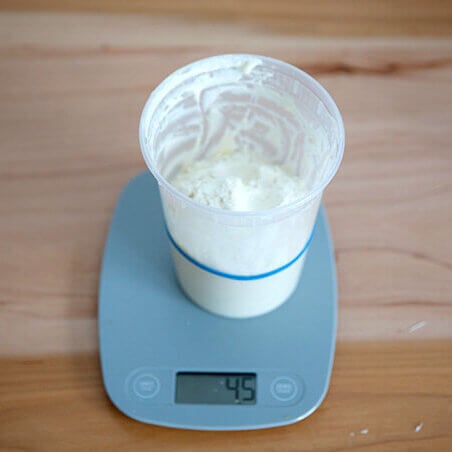
2. Add 45 g water:

3. Stir together and mark the top of the mixture with a rubber band:

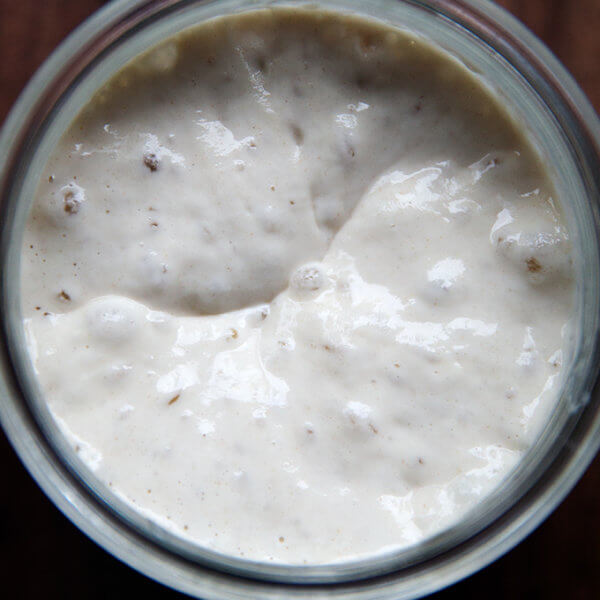
4. Wait until the starter doubles or nearly doubles:

5. Test it! If it floats, you’re good to go!

Before long, you’ll get the hang of your starter’s rhythm: how it rises and falls, how it behaves when you feed it more regularly, how it behaves when you neglect it, how it smells at various stages, etc.
When you’re ready to bake, the goal is to “catch” the starter at its peak (i.e. at its doubling point, when you see lots of bubbles covering the surface) — this is when it is the strongest/most alive. If you miss the opportunity, and the starter collapses, don’t despair: simply discard some of it (or don’t), and feed it again with equal parts flour and water by weight, stir, and set it aside to rise again.
Maintaining a Sourdough Starter
- Something that deterred me from sourdough for a long time is the waste element: I hated discarding so much and “feeding” so much. I’ve learned over time that there are ways to keep your starter on the lean side to reduce the waste factor. Here’s how:
- After I use my starter for a bread recipe, I do one of two things:
- If there is a fair amount of starter left (a half cup or 100 g), I simply stir it up, cover it, and stash it in the fridge.
- If there are only a few tablespoons of starter left, I like to replenish it with a very small amount of flour and water (45 g of each). Once I add the flour and water and stir it all together, I cover the vessel, and stash it in the fridge.
- Every time I use it or feed it, I discard most of it, and feed it with equal amounts by weight water and flour.
- When life gets in the way, and I can’t find time for sourdough, I tend to it every 2-3 weeks by discarding most of it, and feeding it with 45 g each flour and water.
Storing a Sourdough Starter
If you are not baking regularly, store your starter in the fridge.
As noted above, my preferred storage vessel is a deli quart container. When I store my starter in the fridge, I use the lid that comes with the quart container. When I feed my starter and let it sit at room temperature, I use a breathable lid.
Ideally, strive to feed your starter roughly once a week or every two weeks if you are not finding time to bake regularly. If you are baking regularly, feeding your starter once a week will be a natural part of your baking rhythm. If you are looking for ideas for what to do with the discard, try these sourdough flour tortillas, this Irish soda bread, these pancakes or make peasant bread as outlined in this troubleshooting post.
As noted above, I’ve left my starter for as long as three to four weeks in the fridge without feeding it, and it has “awakened” beautifully, though I don’t recommend, if you can help it, waiting that long in between feedings.
How to Tell if Your Starter is Healthy
If you are just getting started with sourdough, it may be hard to “read” the various smells of your starter. Depending on what “phase” a starter is in — i.e. freshly fed or neglected for weeks in the fridge — it can smell anywhere from stinky and acidic to fresh and sweet.
Don’t be alarmed if your starter, upon pulling it from the fridge, smells a little funky. It might smell like alcohol or, as one commenter noted: dirty socks. As soon as you discard most of this sharp-smelling starter and feed it with equal parts flour and water, the aroma will instantly change. As your starter rises and approaches a doubling point, it should smell fresh and sweet.
You know you have a healthy starter when it …
- … doubles in volume within 4 to 6 hours (roughly) of feeding it.
- … floats when you drop a spoonful of it in water.
So how do you know if your starter is bad? When …
- … you see mold.
- … it doesn’t rise or is slow to rise after a feeding.
Unfortunately, if you see mold in your starter, you probably should toss it, and start over. Alternatively, you could scrape off the moldy bits, transfer a few tablespoons of what looks healthy (not moldy) to a clean jar, and feed it with equal parts flour and water.
If your starter is not doubling in volume within 4 to 6 hours of a feeding you should spend a few days strengthening it. This is what I always recommend:
- Be aggressive with how much of it you are discarding: throw away most of it, leaving behind just 2 tablespoons or so. Feed it with equal parts by weight flour and water. Start with 40 g of each or so.
- Use water that you’ve left out overnight to ensure any chlorine has evaporated. (This isn’t always necessary, but it might make a difference.)
- Buy spring or distilled water. In some places, letting water sit out overnight will not be effective, and your tap water may kill your starter.
- Feed your starter with organic flour or a small amount of rye flour or stone-milled flour (fresh or locally milled if possible). My store sells 2-lb. bags of King Arthur Flour organic all-purpose flour for $3.49 — I use it exclusively for feeding my starter.
- Once you feed your starter, cover the vessel with a breathable lid, and leave it alone at room temperature. After 6 hours (more or less), repeat the process: discard most of it and feed it with 40 g each flour and water.
Once you have a strong starter on hand — one that is doubling in volume within 4 to 6 hours — you can bake with it (using it at its peak doubling point) or stash it in the fridge. When you feed your starter, place a rubber band around the vessel to mark the starter’s height, which helps gauge when it has doubled
Sourdough Discard Recipes

Though I generally keep a small starter (as outlined above), inevitably I end up with sourdough discard on my hands due to the nature of the sourdough starter feeding process. And when I am organized, I put that discard to delicious use. Here are four simple recipes calling for sourdough discard:
- Simple Sourdough Discard Crackers (Pictured above.)
- Sourdough Tortillas
- Favorite Pancakes
- Irish Soda Bread
Questions? Thoughts? Shoot!
How to Feed, Maintain, and Store a Sourdough Starter
- Total Time: 24 hours
- Yield: 1 cup
Description
Where to Buy a Sourdough Starter
I have had success purchasing and activating sourdough starters from three places:
- Breadtopia ($9)
- King Arthur Flour ($9)
- Cultures for Health ($11)
As with all sourdough bread baking (and all baking in general), you will have the best results if you measure with a digital scale. The amount of starter you start with is not really important here. What is important is that you feed your starter with equal parts by weight flour and water — this is called a 100% hydration starter, and it is what many sourdough bread recipes, including all of the ones on this site, call for.
Flour
If you can find King Arthur Flour organic all-purpose flour at your local supermarket, buy that. Organic flour or a little bit of freshly milled flour will help your starter thrive.
Water
I always use tap water that I’ve left to sit out overnight, which ensures any chlorine has evaporated. In some places, letting water sit out overnight will not be effective, and your tap water may kill your starter. If you are unsure about your water, consider buying a gallon of spring water to use exclusively for feeding your starter until you get the hang of the process.
Ingredients
- 45 grams (or more or less) sourdough starter, see notes above
- 45 grams flour, see notes above
- 45 grams water, see notes above
Instructions
To Activate Your Sourdough Starter:
- Place starter in a vessel. I love these deli quart containers for this purpose.
- Add 45 g each of all-purpose flour and room-temperature water. (Note: The consistency should look like a thick batter.)
- Wait. You may see bubbles and action (rising!) in as few as 6 hours; it may take more like 18 to 24 hours. Variables include the time of year, the temperature of your kitchen, the temperature of your water, the type of flour you are using, etc.
- When the starter has roughly doubled in volume, it’s likely ready to go. Drop a spoonful of it in a glass of water. If it floats, you’re ready!
- If it doesn’t float after 24 hours, add more flour and water (equal parts), stir again, and wait.
- If you aren’t seeing any action after another 12 hours, discard most of it, and add more flour and water (equal parts), stir, and wait. Just be patient. Before you know it, your starter will be rising and bubbling and ready to go.
To Feed Your Sourdough Starter:
-
Place the vessel holding your starter on a scale, and add 45 g flour:

2. Add 45 g water:
3. Stir together and mark the top of the mixture with a rubber band:
4. Wait until the starter doubles or nearly doubles:
5. Test it! If it floats, you’re good to go!
How to Maintain Your Sourdough Starter:
- After I use my starter for a bread recipe, I do one of two things: If there is a fair amount of starter left (a half cup or 100 g), I simply stir it up, cover it, and stash it in the fridge. But if there are only a few tablespoons of starter left, I like to replenish it with a very small amount of flour and water (45 g of each). Once I add the flour and water and stir it all together, I let it rise until it doubles. Then I cover the vessel and stash it in the fridge.
- Every time I use it or feed it, I discard most of it and feed it with equal amounts by weight water and flour.
- When life gets in the way, and I can’t find time for sourdough, I tend to it every 2-3 weeks by discarding most of it and feeding it with 45 g each flour and water.
To Store Your Sourdough Starter
If you are not baking regularly, store your starter in the fridge.
My preferred storage vessel is a deli quart container. When I store my starter in the fridge, I use the lid that comes with the quart container. When I feed my starter and let it sit at room temperature, I use a breathable lid.
Ideally, strive to feed your starter roughly once a week or every two weeks if you are not finding time to bake regularly. If you are baking regularly, feeding your starter once a week will be a natural part of your baking rhythm. If you are looking for ideas for what to do with the discard, try these sourdough flour tortillas or make peasant bread as outlined in this troubleshooting post.
Note: I’ve left my starter for as long as three to four weeks in the fridge without feeding it, and it has “awakened” beautifully, though I don’t recommend, if you can help it, waiting that long in between feedings.
- Prep Time: 24 hours
- Category: Bread
- Method: Sourdough
This post may contain affiliate links. Please read my disclosure policy.


174 Comments on “How to Feed, Maintain, and Store a Sourdough Starter”
Hi Alexandra Thanks so much for your informative and helpful information. I have a couple of questions: 1. Do I remove a half cup of starter for next time from the starter in the fridge, or from the mixture that has risen? 2. Your info says to add water and flour to the half cup of starter before placing it in the fridge. Then when I want to use it, I again add flour and water. Is this right? It seems like I am adding flour and water twice. Thanks for your help with this
Hi Connie!
Sorry for the confusion here. To clarify, I only have one vessel that contains my starter. I store that vessel in the fridge. When I am ready to use it, I remove the whole vessel from the fridge, discard most of the starter (leaving just a tablespoon or two behind), then add fresh flour and water (equal parts by weight) to that vessel. I let it rise until it doubles, then I use it (as in I take what I need for whatever bread recipe I am making), then I replenish what is leftover with fresh flour and water. I just edited the instructions slightly: after I replenish it with fresh flour and water, I like to let it rise until it doubles before storing it. This way I’m storing it when it is loaded with natural yeast and bacteria.
Does that clarify? Please let me know if you still need clarification.
I am sorry, but do you have a printable copy of the amounts in cups, tsp, etc? I don’t have a way to measure grams.
I am excited to try this!! My teens have been asking me to.
I have a practical question about cleaning containers containing dough residue. Do you wipe out most of the leftover dough/starter mixture out of the container with a towel before washing it? Now that I’m getting better at bread making (thanks to you!!), I’m concerned all this stuff is going to collect in my sink drain. I know to only use cold water when washing dishes with flour residue so it doesn’t get gummy in the drain, but don’t know if there are other steps.
Great question! OK, when I am discarding lots of sourdough starter and not saving it (in the fridge for discard recipes), I most often put it in the trash. When I am rinsing out dough containers with small amounts of leftover starter, I’ll put it down the drain, but I do always let the water run for a bit with the disposal going and I add a few squirts of “dawn for dishes” to help ensure flour/dough is not gumming up my drain.
Hope that helps!
So happy to have this recipe!! Thank you!!
I am trying to activate my starter and I used vapor distilled water and it’s not bubbling at all, or expanding. I’ve fed it twice now 24 hours apart. I’m going to try switching to spring water but I’m worried about the health of my starter.
I would switch to spring water, and I would maybe switch flour, too. What kind of flour are you using? Which starter are you activating?
I attempted to make a loaf of bread and it completely flopped. I’m new at this, so I’m giving myself some slack. I feed my starter every Tuesday. I don’t discard any, guess I’m too cheap. I just add 1/4 cup of water and an equal amount of distilled water. I store my starter in a glass Ball jar. When I get too much, I use it to make cookies, cakes, or pan cakes. The starter is very healthy. So I fed my starter on Tuesday, put it the frig. On Thursday is was still bubbly and had not fallen. I decided to bake bread to use most of it up. I added flour, water, and wheat gluten, and left it sit 7 hours per the recjpe. After 7 hours, it was still as sticky and wet as it was when I started, but had doubled in size. What did I do wrong, and since I added wheat gluten, can I use it? I have some starter without gluten as well so I can start again. Thank you.
Thank you for clarifying so many points on sourdough! I have fine tuned my process based on your clear, logical explanations.
Here is my question. I am now following your process to maintain starter… discard most then add 45-50g water and flour. This is great to have about 100g starter to make one loaf but wondering how you scale it up if you decide you need 200g of starter to make 2 loaves. (Assuming each loaf needs 100g starter). Is there a ratio to follow when trying to bulk up the amount of starter as you feed it the night before you want to mix the dough? Make two separate jars of starter? I did it once and just sort of saved more starter and added more flour and water but am curious what you suggest.
Thanks so much! Everyone who gets to eat the bread I make thanks you too!
Great to hear, Sharon! To answer your questions:
How you scale it up if you decide you need 200g of starter to make 2 loaves? Is there a ratio to follow when trying to bulk up the amount of starter as you feed it the night before you want to mix the dough?
I do what you did: I simply save a little more starter (like 2 to 3 tablespoons… but I don’t measure), then I add by weight more flour and water: 100 grams each or so.
Not sure if I’m doing this right. This is all new to me.
With my new starter from a friend, I was able to make your sourdough bread.
It came out fantastic!
This next part I’m not sure I did right.
So from the starter I used for the bread I put 50g in the refrigerator. 10 days later I wanted to make sourdough English muffins.
I took the starter out of the refrigerator, took 30 g, fed it with 30g of flour and water and put it back in refrigerator for a new starter. (Was I supposed to let it double before I put it in the refrigerator? )
Then from the 10 day old starter I took another 30g of starter and fed it 30 g each of water and flour to use to make the muffins. It doubled in 6 hours. Should I have gotten 90g?
I only got 75g which was just enough. It did float when I tested it. I made the recipe. This recipe said I could do the fermentation over night in the refrigerator. I think something is wrong, it did not rise at all. I took it out and now have it in a warm 80 degree room to try and save it.
So disappointing, had high hopes since my bread came out great.
Hi! Questions answered below:
Was I supposed to let it double before I put it in the refrigerator?
Yes, ideally you want to store your starter at its peak state.
Should I have gotten 90g?
You would think but sometimes starter math doesn’t always add up. I like to feed my starter with slightly more flour and water than I actually need to ensure I have enough for whatever recipe I am making.
This recipe said I could do the fermentation over night in the refrigerator. I think something is wrong, it did not rise at all. I took it out and now have it in a warm 80 degree room to try and save it.
Sourdough dough generally won’t rise in the fridge. It’s too cold. But you should be able to salvage the dough by simply letting it rise at room temperature until it doubles or nearly doubles in volume.
Thank you! Your answers were so helpful.
It took 6 hours. It was only 1” high and after 6 hours it rose to 4” filling a 3 quart bowl.
Starters must be very forgiving. I think I’m starting to understand this.
The English muffin came out picture perfect.
You’re the greatest!
I’ve made my starter recently and it produced my first sourdough bread. I’ve followed the directions exactly as written. My question is: Can I use the starter straight from the fridge? Or it needs to be at room temperature?
It’s best to remove it and feed it (by discarding most of it and feeding it with fresh flour and water or taking a small portion of it and feeding it fresh flour and water) before using it. I like to do this twice in fact before using it to ensure the starter is very strong.
I have a question for you about discarding. Why do you discard almost all of your starter when you pull it from the refrigerator? Is there a reason to not add flour and water to the starter and let it grow? I have never discarded my starter when I pull it from the refrigerator but now questioning if I should!
Love your recipes, your sourdough turns out perfect for me every single time!
Hi! For two reasons: one, if you keep it all, you need to use a lot more flour and water to feed it. And two, it can be very sour if you use it all. But those are my preferences. I am a believer in doing what works for you! If your method has worked, continue doing it! Thanks for writing 🙂
I have used this recipe for a couple years. Excellent bread, clear and concise directions. Thank you for sharing.
Great to hear, Nanci 🙂