
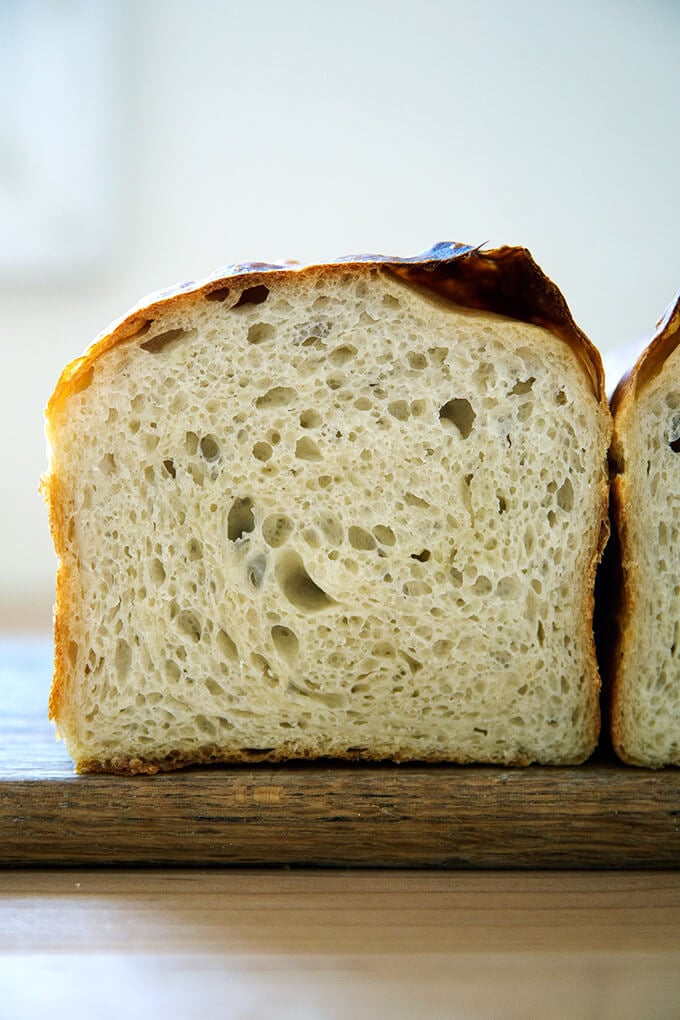
Easy Sourdough Sandwich Bread
This post may contain affiliate links. Please read my disclosure policy.
As I mentioned a few weeks, a number of requests about how to make my mother’s peasant bread with a sourdough starter encouraged me to dip my toe into the wonderful world of naturally leavened breads. You can read more about that experiment here, which led to this simple sourdough focaccia recipe, an adaptation of my favorite yeasted, refrigerator focaccia.
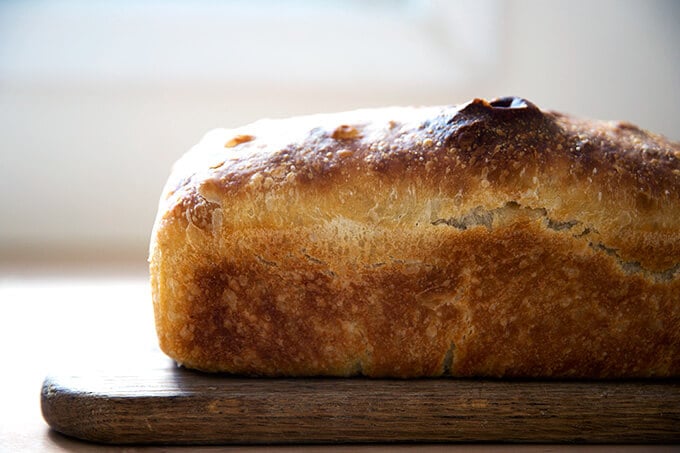
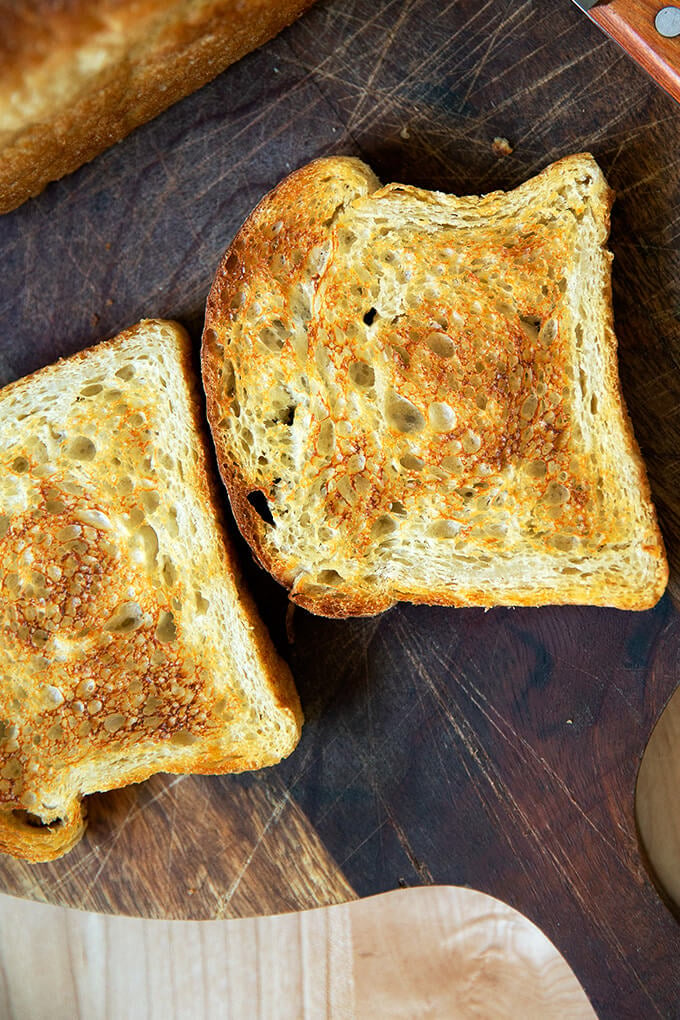
It also led to this sourdough toasting bread, which is essentially the same formula, just baked in a different vessel and without the slick of oil and sprinkling of sea salt on top. I’ve been making this bread even more often than the focaccia these days because I love the shape: it’s so nice for morning toast and for sandwiches.
PS: How to Build a Sourdough Strater from Scratch
PPS: How to Activate, Feed, and Maintain A Sourdough Starter
Simple Sourdough Toasting Bread: What You Need
- A sourdough starter. I recommend buying one (read why here). But if you’re up for it, you can make one from scratch in just about a week.
- Time. As with the focaccia, this bread rises first for about 6 to 18 hours (depending on the time of year and strength of your starter), then again for another 4 to 6.
- A large loaf pan. I’ve been using this 10 x 5-inch loaf pan. If you only have two smaller loaf pans, such as 8.5 x 4.5-inch pans, you’ll need to split the dough in half after the first rise.
That’s it! Ready? Here’s the play-by-play:
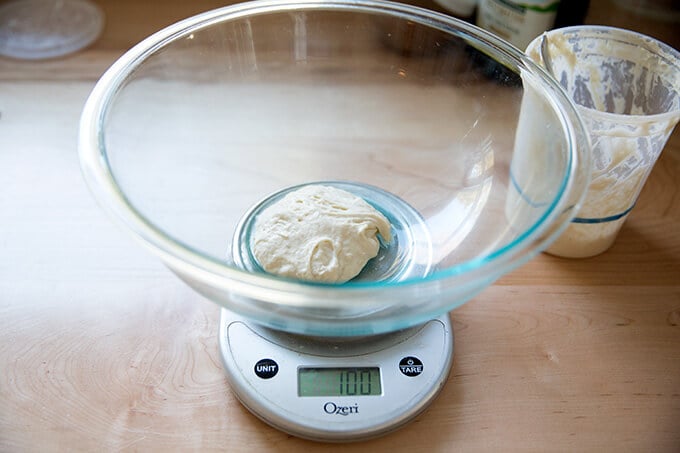
As always, when mixing sourdough doughs, it’s best to weigh everything with a digital scale. Start with 100 g starter. (If this looks familiar, it is: this is the same basic process for the sourdough focaccia.)
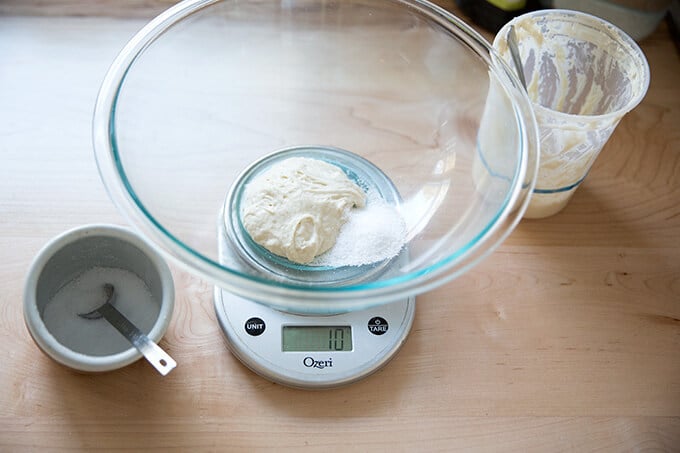
Add 10 g kosher (or other) salt.
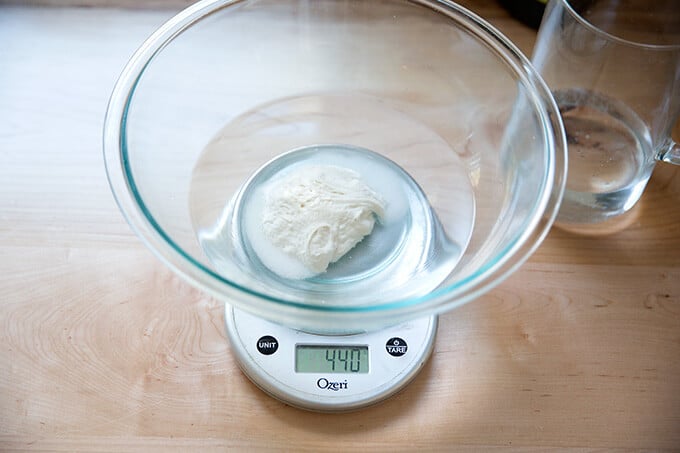
Add 430 g water. (Or less, see recipe for notes.)
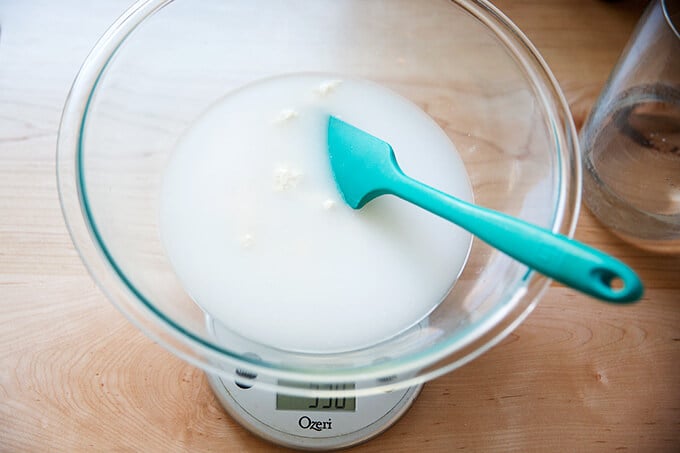
Stir to combine.
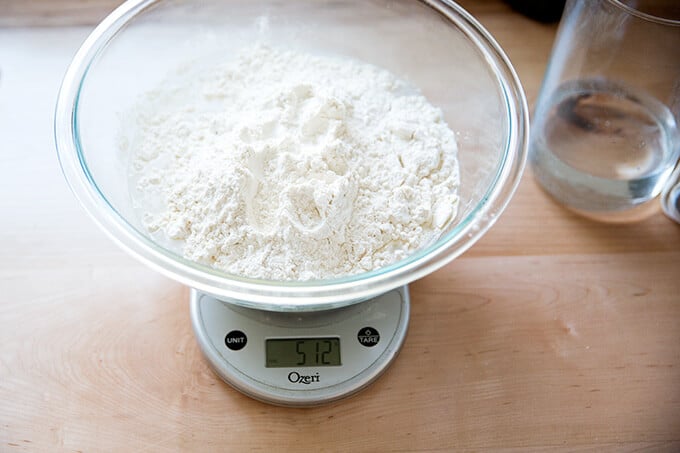
Add 512 g bread flour.
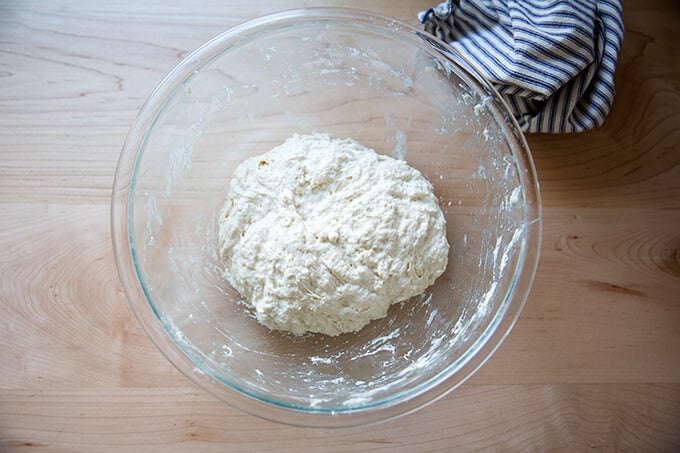
Stir to form a sticky dough ball.
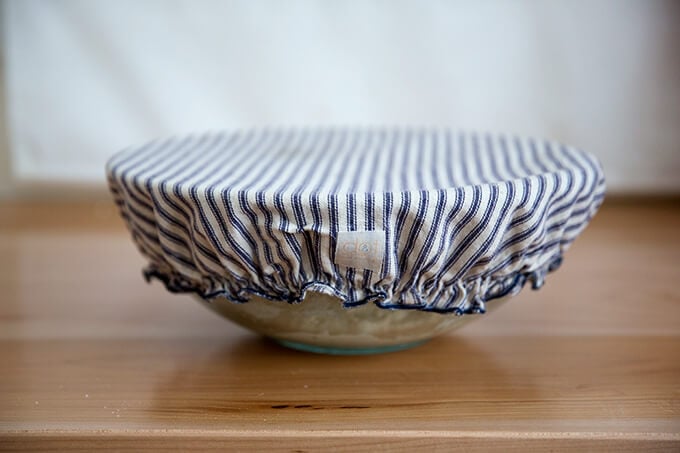
Cover with a towel or bowl cover, and let rest for 30 minutes. Then, perform a series of stretches and folds. See video for guidance. Repeat this 3 more times for a total of 4 sets of stretches and folds during the first two hours. Then, let rise for 6 to 18 hours* (see recipe notes) at room temperature:
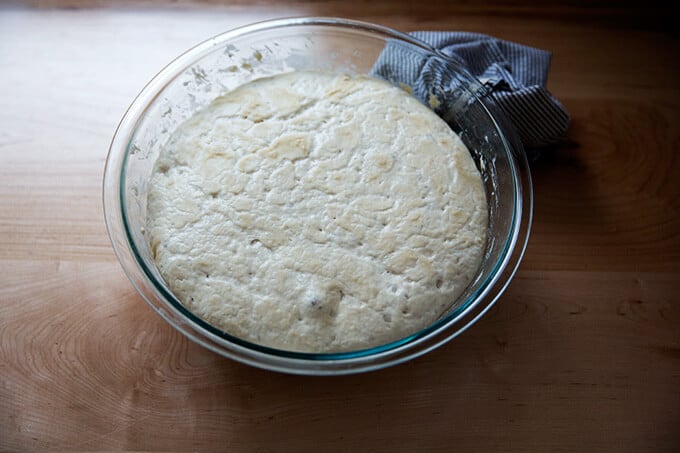
After 6 – 18 hours, it will look something like this:
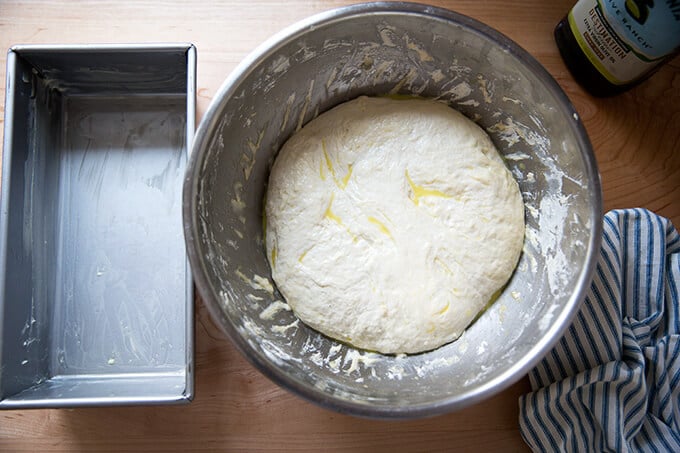
Drizzle the surface of the dough with a little bit of olive oil; then fold the dough inwards from the sides to deflate.
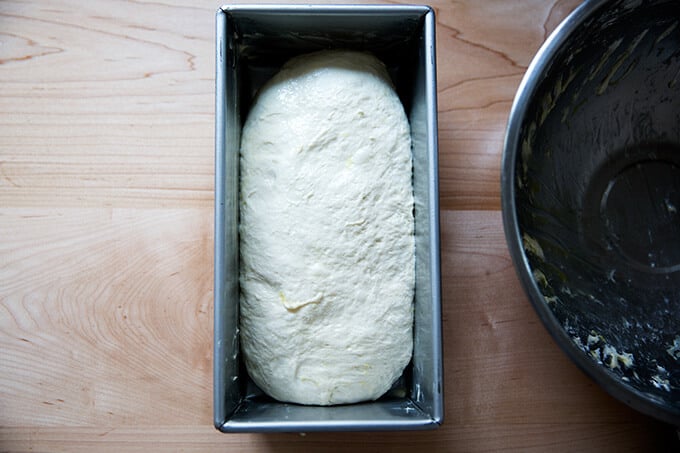
Transfer dough to loaf pan.
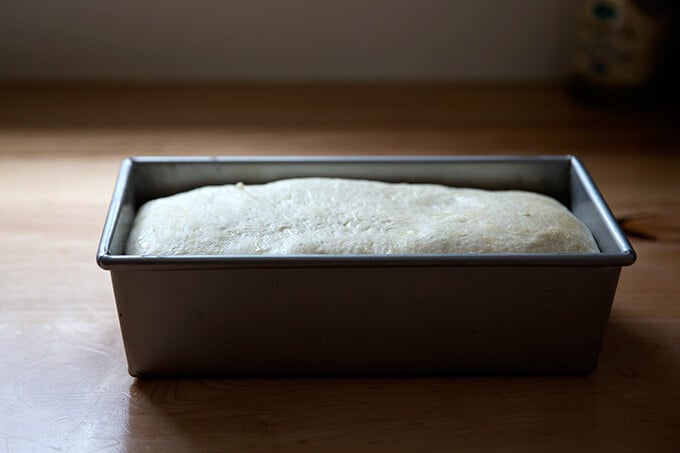
Let rise till dough just begins to crown the rim of the pan, about 6 hours.
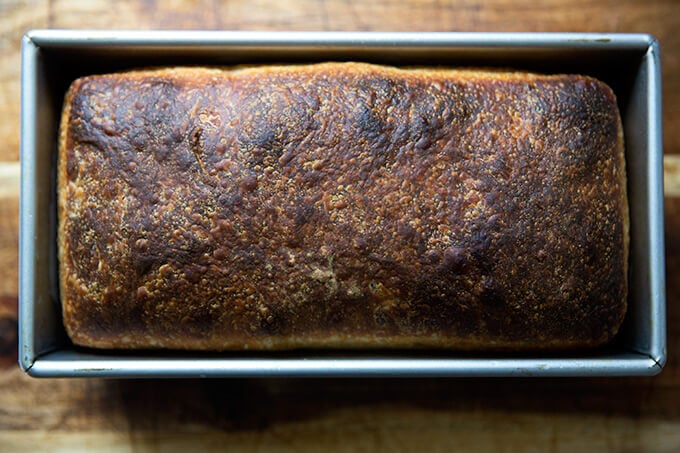
Bake for about 45 minutes.
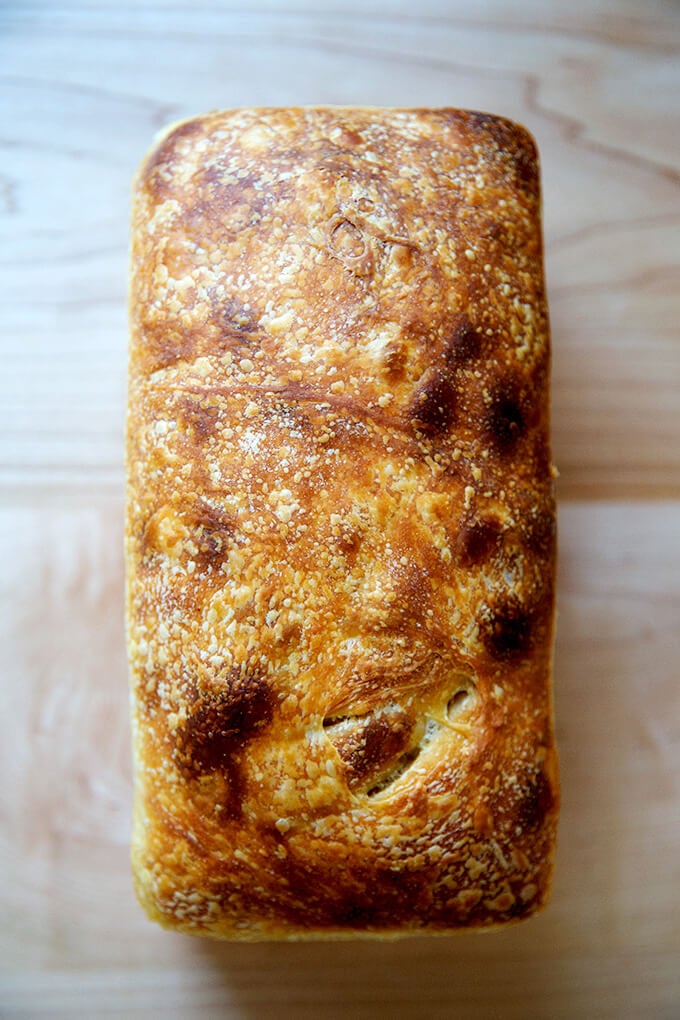

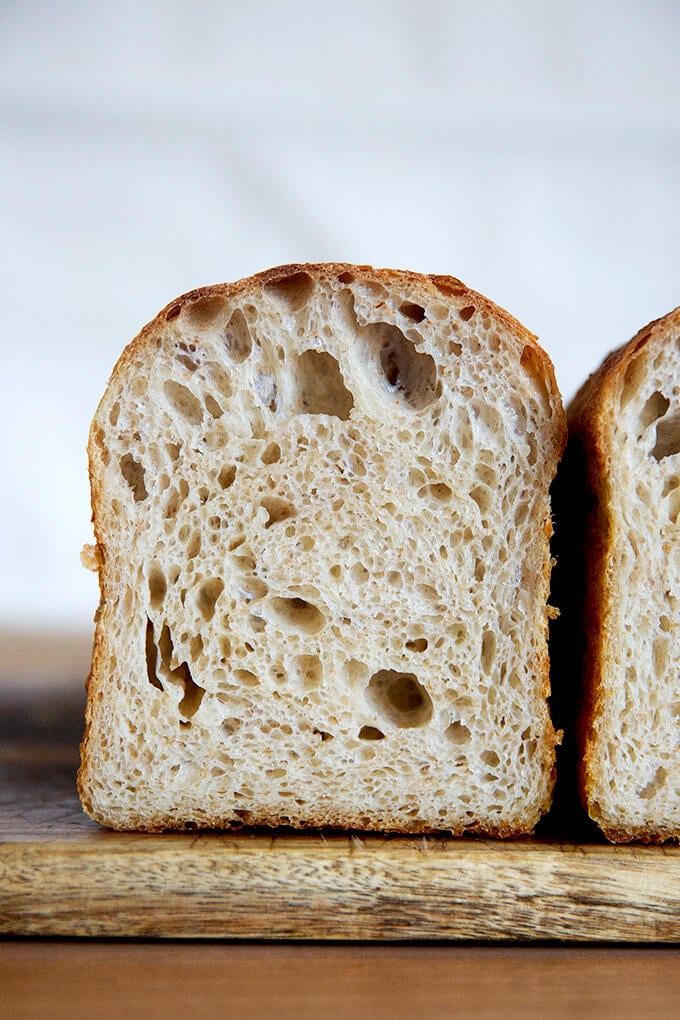
I baked this loaf in a tall-sided pullman loaf. Love the shape!
Easy Sourdough Sandwich Bread
- Total Time: 24 hours 40 minutes
- Yield: 1 loaf
Description
** UPDATE: VIDEO GUIDANCE IS HERE **
The makeup of this dough is the same as this sourdough focaccia. Here, the dough is baked in a loaf pan, and there is no sea salt on top.
This recipe yields one large loaf. You’ll need a 10 x 5-inch loaf pan, such as this one. If you only have two smaller loaf pans, such as 8.5 x 4.5-inch pans, you should probably split the dough in half after the first rise.
Plan ahead: This dough rises first for 6 to 18 hours (or less if it is super hot out or if you live in a humid area) or until the dough doubles in volume; then again for about 4 to 6 hour or until the dough crowns the rim of the baking vessel.
Troubleshooting: If you have issues with your dough being too sticky, please read this post: Why is my sourdough so sticky? The 4 common mistakes.
If you’re just getting started with sourdough, check out this post first. You’ll find tips there on procuring a starter as well as how to feed it and maintain it. If you’re up for making your starter from scratch, you can do so in just about 1 week.
Water: Chlorine in water can adversely affect sourdough. Leaving water at room temperature for 24 hours will allow most of the chlorine to escape. When I am in the habit of making sourdough bread, I fill a large pitcher with water and leave it out at room temperature. I use this for my sourdough breads and starter. Truth be told, I’ve used water straight from the tap and have not noticed a difference.
Water quantity: Also, depending on where you live and the time of year, you may need to cut the water back. If you live in a humid environment, for instance, I would suggest starting with 400 g or 420 g water. If you are not using bread flour, you also may need to cut the water back a bit. So much success with sourdough relies on getting the water quantity right.
Starter: I use a 100% hydration starter, meaning it is equal parts by weight flour and water. If you need guidance on how to maintain a starter, see this post.
Ingredients
- 100 g (about 1/2 cup) active starter, see notes above
- 10 g (about 2.5 teaspoons) kosher salt
- 430 g water, (or less, see notes above) room temperature
- 512 g (4 cups) bread flour, such as King Arthur Flour
- a few tablespoons extra-virgin olive oil
- room temperature butter, for greasing
Instructions
- Mix the dough: Place the starter, salt, and water in a large bowl. Stir with a spatula to combine — it doesn’t have to be uniformly mixed. Add the flour. Mix again until the flour is completely incorporated. If you have a straight-sided vessel, transfer the dough to it — it really helps monitor the rise and allows you to see the true growth in volume of the dough.
- Perform one (or more) “folds”: 30 minutes after you mix the dough, reach into the bowl and pull the dough up and into the center. Turn the bowl quarter turns and continue this pulling 8 to 10 times. See video for guidance. If time permits, repeat this “folding” step every 30 minutes for the first two hours. (Note: even if you perform just 1 fold, your dough will be in good shape.)
- Drizzle with a splash of olive oil and rub to coat. Cover bowl with a tea towel or bowl cover and set aside to rise at room temperature (70ºF/21ºC) for 4 to 18 hours — if it is super hot out or if you live in a humid environment, it may only take 4-6 hours. When the dough has nearly doubled in volume (or UPDATE: increased in volume by 50%, which is when I now end the bulk fermentation), it is ready. (Note: Do not use an oven with the light on for the bulk fermentation — it will be too warm. It is best to rely on visual cues (increasing in volume by 50% or doubling if you’ve had success with doubling) as opposed to time to determine when the bulk fermentation is done. A straight-sided vessel makes monitoring the bulk fermentation especially easy.)
- When the dough has nearly doubled, grease a 10 x 5-inch loaf pan with butter (or nonstick spray). Drizzle dough with a few tablespoons of olive oil. Rub your hands with a little bit of oil to coat. Use your hand to release the dough from the sides of the vessel, being careful not to completely deflate the dough. Video guidance here. Turn dough out onto a work surface. Quickly, shape the dough into a rectangle — I fold the dough envelope-style first; then I use a bench scraper to shape the dough into a rough rectangle. Transfer dough, seam-side down to prepared loaf pan and gently stretch into an oblong shape. (At this point, you can transfer the pan to the fridge if it makes sense with your schedule: rub the dough with oil and cover with a cloth bowl cover or plastic wrap. Transfer to the fridge will the next day. Then proceed with the recipe.)
- Leave alone for 5 to 6 hours or until dough begins reaching the rim of the pan — this may take less time when it is very warm out. Do be patient with this second rise: to get good height, the dough should be near the rim of the pan before you transfer it to the oven.
- Heat oven to 425ºF. Transfer pan to the oven and bake for about 20 minutes. Reduce heat to 375ºF. Bake for 20 to 25 minutes more or until golden all around. If you have an instant read thermometer, it should register 206-210ºF or so before removing. Remove pan from oven and turn bread out onto a cooling rack. Cool at least 30 minutes before slicing.
- Prep Time: 24 hours
- Cook Time: 40 minutes
- Category: Bread
- Method: Sourdough/Natural Leavening
- Cuisine: American
This post may contain affiliate links. Please read my disclosure policy.


898 Comments on “Easy Sourdough Sandwich Bread”
Fed or unfed starter?
Fed! Bubbly and active.
Recipe says can be baked in a pullman pan but does not give the size. I have an 8″ and 13″. Clicking on the Amazon link offers all different sizes.
Hi Patricia! I would go with the 8-inch. I think the 13 inch will be too large and will therefore end up in a squatter loaf.
I double this recipe and bake in a 13x5x5 Pullman pan. You’ll have to add baking time, so you’ll need an instant thermometer. It stays fresh for a good amount of time, and you can also freeze a portion of it.
Great to hear, Brian! Thanks for writing and sharing your notes. An instant-read thermometer is so helpful with larger loaves in particular. Hope all is well!
That’s the size Pullman I have and can never find a recipe! I just tried doubling a different recipe last night, and it overflowed out of the Pullman 🙈
Does this one, doubled, work perfectly?!
Nice recipe. If I transfer to fridge to cold retard overnight, do I need to let it rise first and then a second rise before baking? Can’t wait to try.
Hi Yong,
Can you clarify? Are you wanting to do a cold retard after the bulk fermentation? If so, yes: after the cold retard, remove the pan (or storage vessel) from the fridge and let the dough rise until it nearly crowns the rim of the pan. Then bake as directed.
Hey!! Excited to try this! Is it possible to use whole wheat flour, though? 🙂 thanks!
Hi Allie! You can use whole wheat flour as long as you manage your expectations about the finished texture of the bread — it won’t be as light and airy as what you see in the photos. It will be heavier/denser. But still tasty! Alternatively, you could use some whole wheat flour and some white flour.
Hi!
I would like to try doing half white and half whole wheat. Any suggestions on additional modifications to the recipe? I have started with whole wheat and read how it’s difficult to work with. Thanks!
Hi Ashlynne! What type of whole wheat flour are you using. With half whole wheat and half white you shouldn’t have to make any adjustments with the exception of maybe having to add a bit more water. I would just add water slowly until the dough resembles the texture of the dough in the video.
I just wrapped up a loaf for a friend and have another one bulk fermenting right now. This is my new favorite go to recipe!! It is so much simpler than any other loaf recipe I’ve tried and the flavor is amazing and consistent.
The dough is also a really fun consistency, my five year old has named it “Jiggly John”. Thanks for such a great recipe!
Jiggly John — too good! Love it. So nice to hear all of this, Faith! Thanks so much for writing.
Yup! It’s what’s baking in my oven right now! Between this and the focaccia and the sourdough recipes… wait, maybe the sourdough pizza one, too. Hey, they are all great. Thanks for your great blog and your videos. I really enjoy them and the family enjoys that I enjoy them! 😀
Great to hear all of this, Roxanne 🙂 🙂 🙂 Thank you for your kind words. It really means a lot.
Can you help me? I have been making your recipe and my family loves it!! I bake a loaf almost every day. I have a question though. My measurements do not equal the weights you list. 2.5 tsp of salt weighs 16g not 10g. 4 cups of bread flour weigh 650g. The loaf has turned out every time but I’m wondering if I should follow the measurements or the weights for a better loaf? Thank you!!
Hi Christine! Great to hear. Definitely follow the weight measurements. Everyone measures flour (and other ingredients) differently, which is why 4 cups of flour weighs 650 grams when you scoop, but weighs about 500 grams when I weigh. When we use weights, there is no variance.
I’ve been making this recipe weekly now! It’s so delicious and it’s pretty hard to mess it up. I love the texture of the bread and also that I can use my starter straight from the fridge!
We make sandwiches or eat it just with butter and salt.
My dad is incredibly picky and he loved this bread!!
So great to hear this, Michelle! Thanks so much for writing and sharing your notes. And yay for making dad happy!
Whoa, this is so good! Seems less likely to mess up than a regular sourdough loaf. I didn’t have a big loaf pan, so I split into 2 standard loaf pans. I let them rest in the fridge overnight before the second rise, and I wasn’t quite sure what I was looking for since I had split it, but they baked up great! Taste and texture is amazing. I may never go back to batards 🙂
So great to hear this, Laura! I hear you: this recipe along with this sourdough focaccia recipe are the two I point people to who can’t be bothered with the whole shaping process of batards/boules. Thanks so much for writing!
Made several times and it always turns out perfect! Love sourdough loaves over rounds. Definitely let it rise to the rim of your bread pan.
Great to hear, Amber! Thanks so much for writing!
First time making it. I’m on the step where I transfer to loaf pan and put in fridge. Can I leave it in the fridge for several days if I want to bake at a later date?
Thank you!
If I put the shaped loaf in the fridge overnight, do I need to take it out and let it rise for a few hours still, or do I bake it straight from the fridge?
Bake it straight from the fridge! Score it first, of course.
Hi Ali! I just wanted to clarify, if I put it in the fridge right after the first rise, then should I still let it sit in room temp until the dough has risen almost to the rim before baking? That’s assuming it didn’t already rise almost rise to the rim while in the fridge?
Correct!
I did the math to convert this recipe amount to bake in two 8.5×4.5×2.5 loaf pans. This optimizes my oven space plus I can share the second loaf. For one loaf in this pan size, reduce the amounts by half.
768g unbleached flour – all bread or mix with AP
154g active starter
1 tablespoon kosher salt
4-5 tablespoons or vegetable oil
644g water, about 72-75 degrees. Remove 25g to 50g and set aside.
Great instructions on this recipe and advice for commenters. I’ve learned a lot from you and would like to share two key tips I’ve found helpful.
“Dough is too wet” — I always hold back at least 3 tablespoons of water even with yeasted bread recipes. Know your environment. It was raining hard in Seattle when I mixed this dough; I withheld almost 49g (about 1/3 cup plus 1 tablespoon). You can always add the reserved water, about 1 to 1/2 tablespoon at a time during mixing if the dough seems dry.
Bulk rise overfermented — listen to Ali, folks. Use a container with straight sides. It takes the guesswork out. Without or with markings on the container, I use two rubber bands – one to show the top level of the dough and another to show the rise at 75%.
So great to read all of this, Wendy 🙂 🙂 🙂 Thanks so much for writing and sharing your notes and sharing this double-loaf recipe. So helpful for others! And I so appreciate you reiterating the importance of using a straight-sided vessel as well as holding back water as needed given your environment. Happy Baking Wendy!
Hi,I wanted to bake this loaf in a Pullman pan.I only have a 6inch pan,should I divide the dough into 2 ?.Thank you 🙂
Yes, I would!
I never touch this dough before it comes out of the pan..
I have been using your recipe for I think two years now – it is THE family favorite as we like a toasting bread and don’t like hard crusts.. Living in an old house, I don’t want any more dough to go down my sink than absolutely necessary as it clogs my pipes – expensive to call the plumber! I don’t want it on my hands or any more than necessary in the bowl.
I stir and do all of my stretch and folds with a strong stainless spoon – spray my straight sided containers with enough oil that my my bread “pours” right into my loaf pan – which I now use butter to grease lightly the sprinkle with semolina flour after having trouble with the bread sticking badly a few months ago..
This recipe fits so easily into the rhythm of life… I use Jacks empty jar method of making my starter and it never fails.. even if I leave it for weeks in the frig it pops right up in a few hours.. Thank you so much! if you don’t want my videos on your site feel free to take them down or let me know and I will.
/Users/patriciavmerrell/Pictures/Photos Library.photoslibrary/resources/derivatives/C/CA1E0078-E735-4EDC-B77B-1F1F31A46021_1_105_c.jpeg
/Users/patriciavmerrell/Pictures/Photos Library.photoslibrary/resources/derivatives/B/B1C7811B-5C47-4E7A-814A-BD323CF365C9_1_105_c.jpeg
Great to hear all of this, Patricia! Thanks so much for taking the time to share all of your notes — so helpful for others.
I tried copying and pasting your links into my browser, but unfortunately I can’t get them to work. Would love to see them, but don’t go crazy trying to send them.
Also, can you elaborate on this: “Jacks empty jar method of making my starter”? I would love to learn more!
This sourdough bread is so easy and so delicious! I make this at least twice a week. This recipe is perfect and do easy to follow! I’ve learned so much from you, thanks!!
So great to hear this, Kel! Thanks so much for writing 🙂 🙂 🙂
Can i add fresh strawberries to this you think? Im up to my ears in them right now!
Hi Ashley! I worry about the strawberries adding a lot of moisture to an already very moist dough… I worry it will make the dough unmanageable. You of course can try, but part of me thinks a jam or compote would be a better use for your strawberries.
Hi Ali, thank you so much for sharing your recipes with all of us. I had never attempted bread baking until a friend recommended your blog in 2020. What started as a pleasant distraction while we remained in our home has turned into a hobby that I’ll be enjoying for the rest of my life. Thank you! <3 At this time, I need to replace my 8.5 x 4.5-inch loaf pans, which brand or kind would you recommend? I wanted to purchase them from your store, but for some reason, I couldn't find any listed. Wishing you and your family all the best!
So nice to read all of this Melissa! I love that bread baking has become a hobby for you 🙂 🙂 🙂 For 8.5×4.5-inch pans, I love this brand. I also really really love USA Pans. I have two 9×5-inch USA Pan and a few other sizes, and they are wonderful.
Hi! I love this recipe and it’s one of my favorites to use. I was wondering what I needed to do to double it? I’ve been baking for gifts, and if I can bake more than one loaf at a time, that would be super helpful! Thanks in advance!
Hi Hannah! Apologies for the delay here! Just double the quantities and follow the instructions. The timing should still be the same. After the bulk rise, divide the dough in half; then proceed with the recipe. Let me know if you have any other questions!
Is it possible to make this with less salt for someone who is trying to reduce their sodium intake? Thank you!
Yes! I think you could successfully cut the salt in half. Keep in mind the dough might rise more quickly as a result.
Hi there! Very excited to try this recipe! Wondering if it would be possible to bake it in a ceramic dish instead. I suppose I would have to bulk ferment and or shape it in a similar sized Batard and preheat the ceramic pan in the oven, then transfer…
Hi Jasmine, This is a very wet dough, and I worry that shaping it will be problematic. I have two other recipes I think will work better for your ceramic dish: Simple Sourdough Bread, Step by Step and Easy Sourdough Bread (Whole Wheat-ish)
This is such an easy, go-to recipe! Excited to stock up some loaves in the freezer! How do you suggest storing to use now and for freezer friendly? Thank you!
Hi Sadie! I would tuck the loaves in a ziplock bag. If you want to really protect them from freezer burn, you could double up the ziplocks. I find the xlarge (2-gallon) size to be handy for freezing loaves of bread.
Best sourdough bread I’ve made so far! Must try!
Great to hear, Kiko! Thanks for writing 🙂 🙂 🙂
Do you think i could add pumpkin puree to this?
Sure! I would consider reducing some of the water due to the extra moisture the pumpkin puree will add.
Hi Alexandra! I baked the sandwich bread this morning and it looks perfect. The method is easy to follow. Sticky dough but was able to do S&F, 4x. I proof overnight and risen so fast, our condo is 71F warm. I used my small lidded pan and it looks gorgeous. It is meant to be shared but hubby wants the bread for himself. Thank you for baking sourdough bread fun.
Wonderful to hear all of this, Lilibeth! Thanks so much for writing and sharing your notes. Love that your husband doesn’t want to share … I get it 🤣🤣🤣🤣🤣
I am so grateful for your recipe and guidance. It is my first try with sourdough and it is a major success. I had chosen a loaf pan which was too small, as it was starting to go over the edges, after chilling all night. So I transferred it in the morning to a larger loaf pan. It took 5 hours to rise again. It took about 6 hours, but rose as pictured. Your bake time and temp was exactly right too. It was perfect and so tasty. Lovely crumb and tangy flavor. I got my starter from Breadtopia. Thank you so much! -Kate
Wonderful to read all of this, Kate! Thank you for sharing your notes, too. Nice work transferring the dough to a proper pan and being patient… that’s not easy, but a too-small pan would have ruined it. Thanks for writing!
Hi! I’ve made this bread twice so far and everyone loves it! Looking forward to making it at least weekly to keep up with all the eating. 🙂 How do you store it to keep it fresh, and how long should it stay fresh? Thank you for a great recipe – can’t wait to try others!
Great to hear, Lauren! I prefer storing the bread in a ziplock bag at room temperature. Sourdough lasts for a while before getting moldy… I’d say well over a week. That said, always reheat day-old bread either in the toaster or toaster oven before serving.
I LOVE this recipe! I’ve been making it for months and the bread always turns out great!! Thank you for the wonderful and easy to follow recipes!
Great to hear, Julie 🙂 🙂 🙂 Thanks so much for writing.
Hey Alexandra,
I just made this today. Looks amazing! Have made sourdoughs before, but love that this is in a loaf pan. So much easier for me. My years old starter is a mix of whole wheat & all purpose flours. I adjusted down the water a bit and the dough was so lovely. Thanks for the detailed video & instructions, a great help to me.
So nice to hear this, Anna 🙂 🙂 🙂 Thanks for writing. Nice work using your judgment to adjust the water.
I llove this recipe and have made it several times but am wondering if I can make this in a bread maker as well?