
Simple Sourdough Ciabatta Bread
This post may contain affiliate links. Please read my disclosure policy.
Last month, while posting a photo of this brioche loaf on Instagram, I posed a question: If 2020 was the year of banana bread and focaccia, what will be THE bread of 2021?
Which bread, I asked, did everyone want to learn how to make most?
Of all the responses, which included everything from fougasse to hoagie rolls, a crusty baguette was the most frequently cited, ciabatta following closely behind.
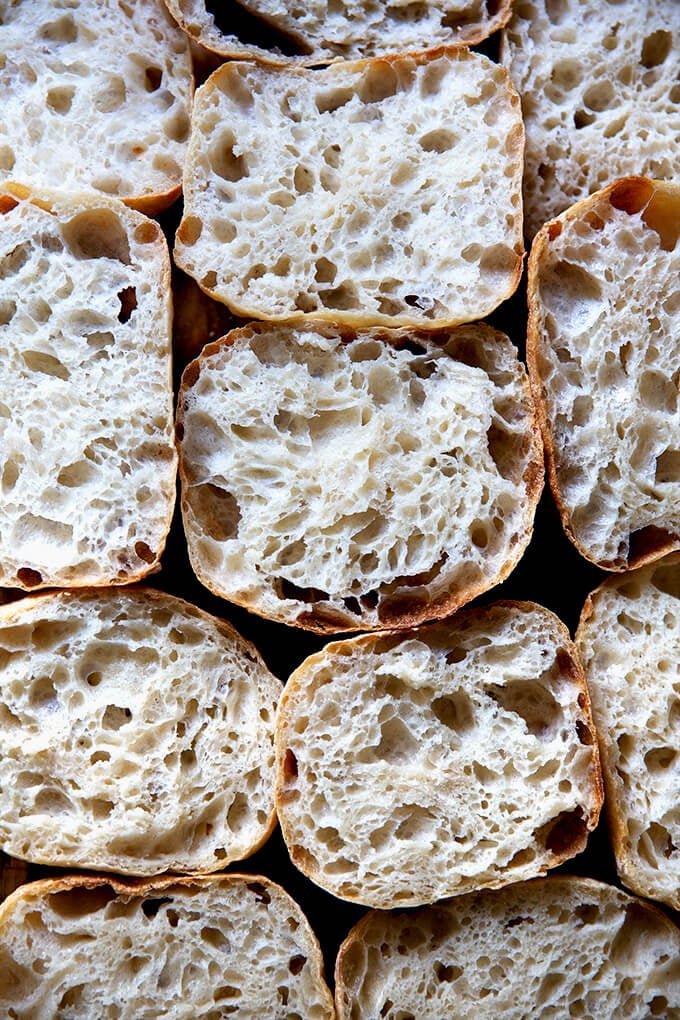
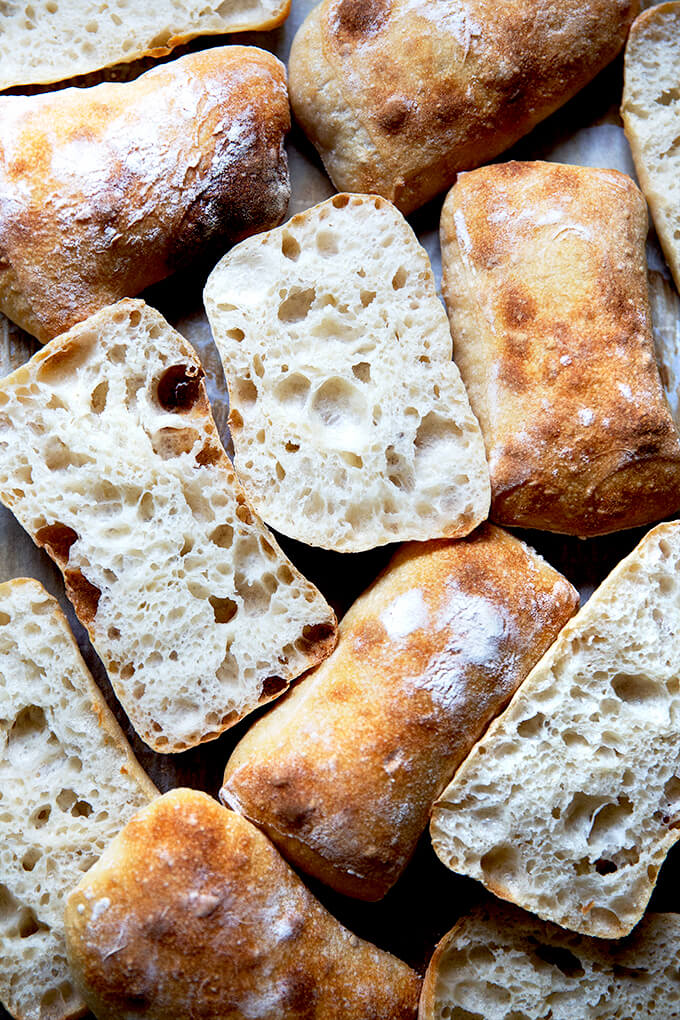
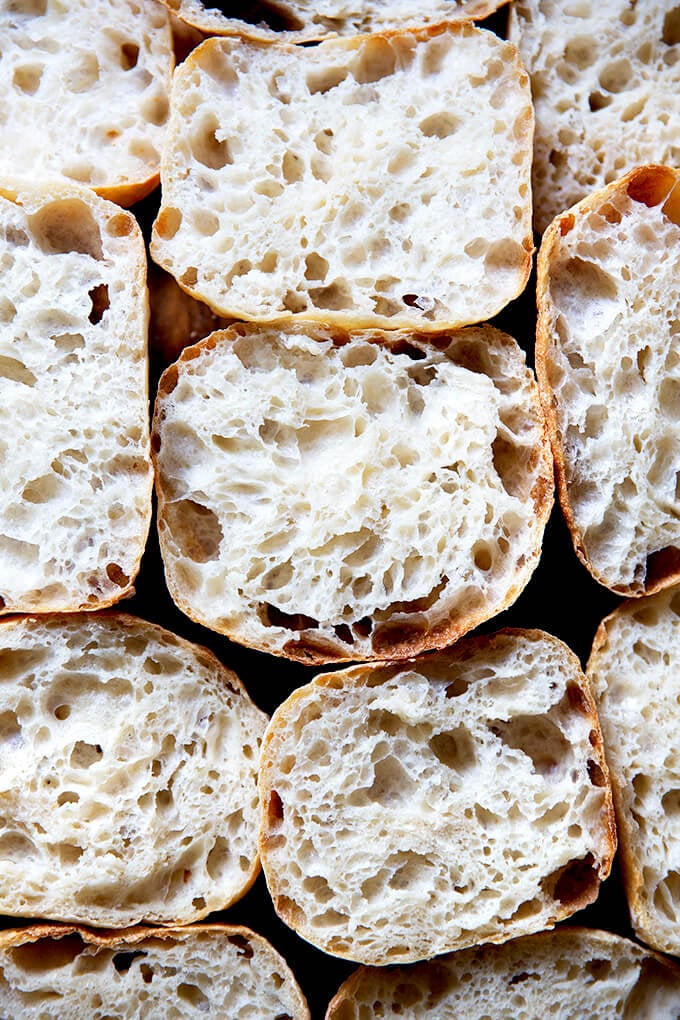
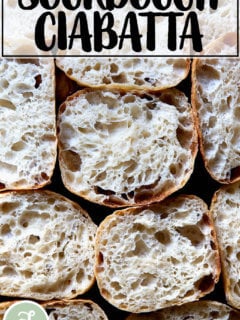
I’m excited to say today, after a few weeks of experiments, I have a wonderful sourdough ciabatta recipe to share. It has a thin, but crisp crust, a beautiful honeycomb crumb, and a lovely lightness and chew. It’s perfect for sandwiches.
And best of all: it’s truly simple. Made with four ingredients, this recipe requires neither an autolyse nor preferment, neither a preheated Dutch oven nor baking stone. If you have a sheet pan, you’re good to go.
What’s more, there’s no shaping or scoring, no balling up dough or creating tension. Truly, after the bulk fermentation, which includes some fridge time, you turn the dough out onto a floured work surface, pat it into a rectangle, and divide it into 8 roughly equal pieces. You then transfer those pieces, irregularly shaped and all, to a sheet pan, and bake them one hour later.
But can I tell you the most exciting part? This dough makes a decent — a more than decent — baguette! It’s not super crusty, but it’s a nice baguette nonetheless, flour-dusted and unscored, with a crumb and flavor better than any other I’ve attempted previously.
Friends, I hope you love this recipe. It’s on par with this sourdough focaccia recipe in terms of simplicity and effort, but it’s a totally different animal. I can’t wait for you to give it a try.
PS: If sourdough isn’t your thing, please try this yeast-leavened ciabatta bread recipe.
This post is organized as follows:
- 3 Tips for Sourdough Success
- What is Ciabatta?
- Sourdough Ciabatta, Step by Step
- Ciabatta Sandwich
- Sourdough Ciabatta “Baguettes” 🥖🥖🥖
3 Tips for Sourdough Success
Before you get started with this recipe, here are my three tips for sourdough bread baking.
- It starts with your starter.
- This will sound obvious, but: it starts with your starter. Before you mix a loaf of sourdough bread, you must ensure your starter is bubbly and active. I like to feed my starter at night before bed, let it rise and fall overnight; then feed it again in the morning. By midday, it’s ready.
- Use a digital scale.
- I say this all the time, but using a scale to measure the ingredients for a loaf of sourdough bread makes all the difference. So much of sourdough bread baking is simply a matter of using the precise amount of water given your environment and given the flour you are using. If you use cups to measure you are simply not being precise, and as a result, you will not be able to make meaningful adjustments should the recipe as written not work out perfectly.
- Use a straight-sided vessel for the bulk fermentation.
- With sourdough bread baking, one frequent problem bakers run into is over-fermentation. If you let the first rise go too long, the dough will over-ferment and become a sticky, unsalvageable mess. A straight-sided vessel allows you to see when your dough has truly increased in volume by 50%, 75%, 100% or whatever volume increase you are after.
- The vessel I use in this recipe, similar to this one, is 8 cups. Most grocery stores carry storage vessels similarly sized.
What is Ciabatta?
- Originating from the Lake Como region of northern Italy, ciabatta means “slipper” in Italian. Traditional ciabatta is characterized by this slipper shape as well as an extremely porous and chewy texture.
- Traditionally, ciabatta dough is very wet, calls for very little yeast, and requires a long, slow rise.
- Traditional recipes, too, often call for making a biga (a preferment), which helps produce that light, porous texture.
Sourdough Ciabatta, Step by Step:
Gather your ingredients: bread flour, water, salt, and a sourdough starter. I am a proponent of buying a starter (see recipe box for sources), but if you are up for it, you can build a starter from scratch in just about 1 week.
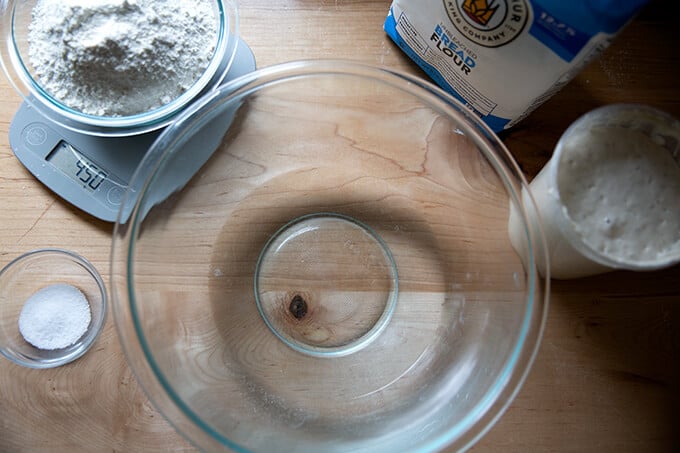
For this recipe, you’ll need: 100 grams sourdough starter, 360 grams water, 450 grams flour, and 12 grams salt. It’s 80% hydration.
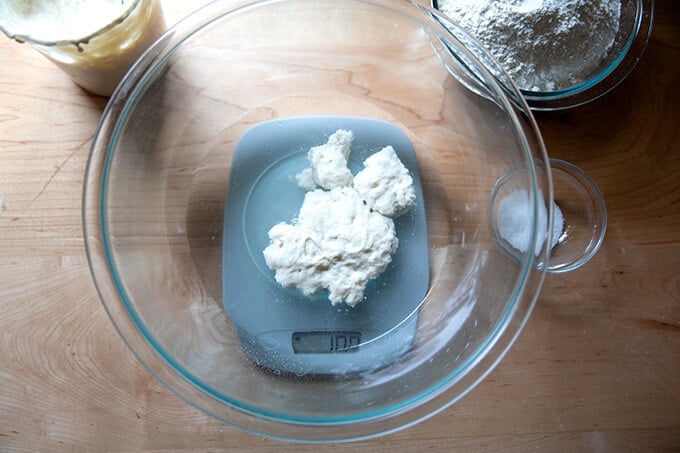
Mix together the water, sourdough starter, and salt.
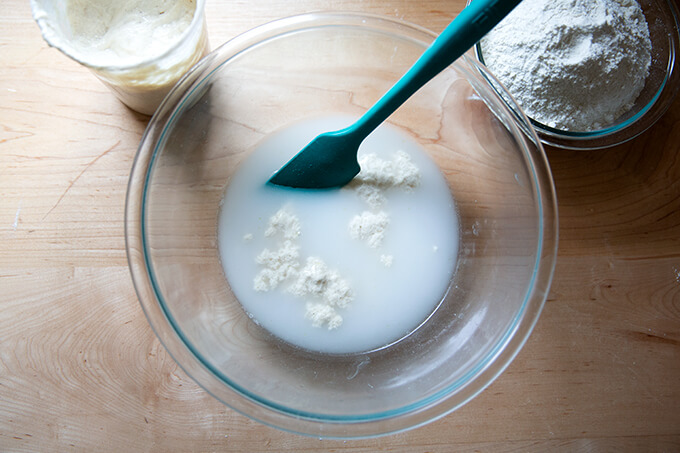
Add the flour and mix to form a sticky dough ball.
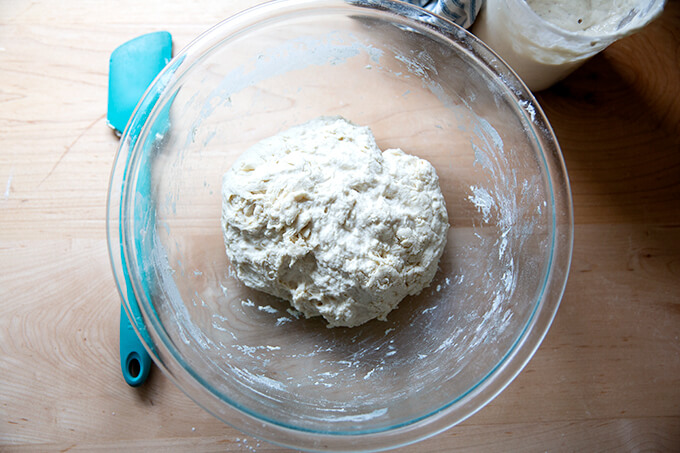
Cover the bowl and let rest for 30 minutes. Then perform a set of stretches and folds. See the video above or in the recipe box for guidance. This is what the dough will look like after one set of stretches and folds.
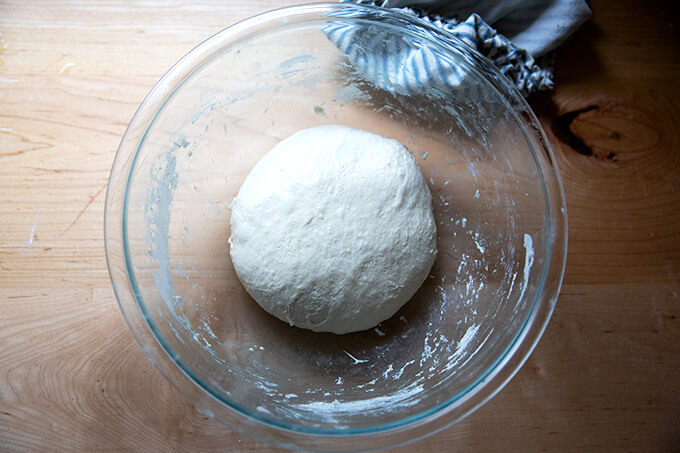
This is what the dough will look like after 4 sets of stretches and folds.
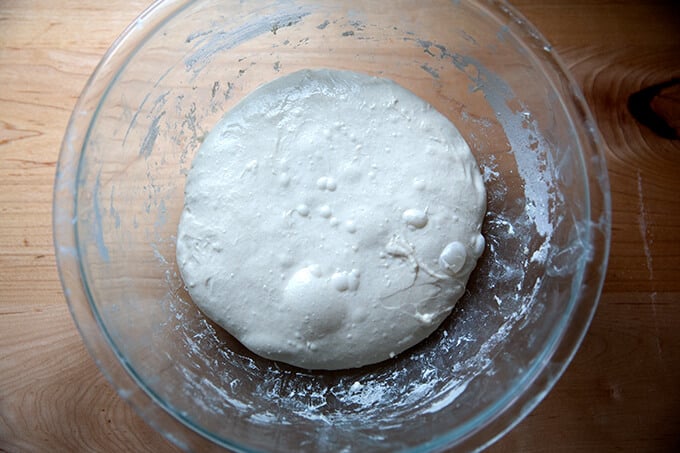
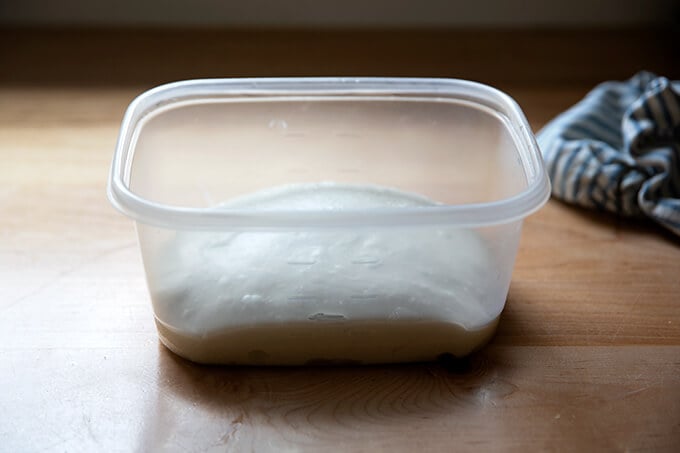
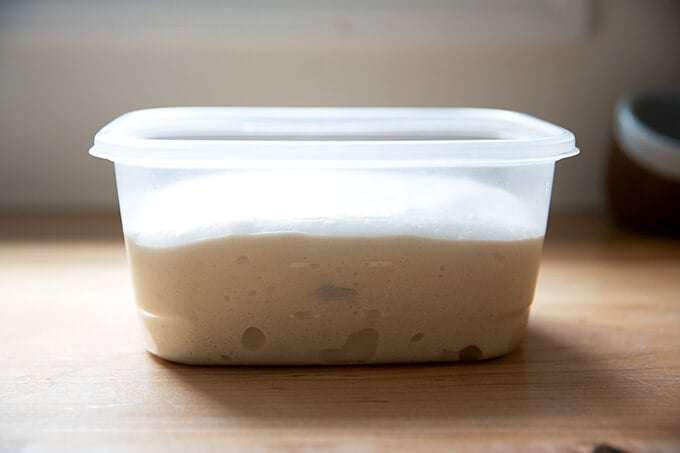
Transfer dough to a straight-sided vessel (this one is 8 cups, but anything similarly sized will do) for the bulk fermentation (the first rise):
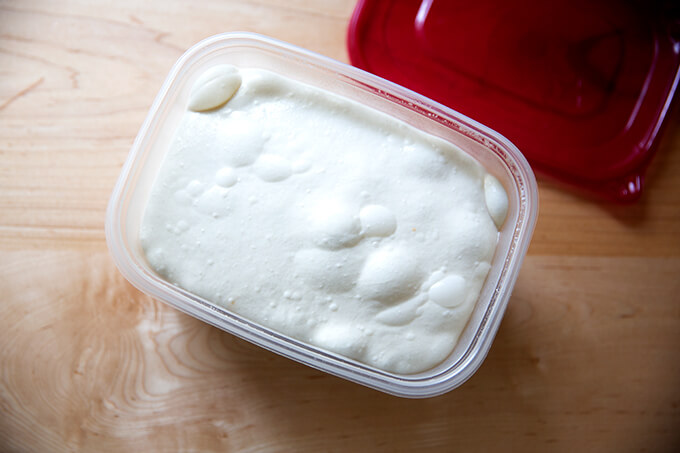
Mark the height of the dough on the vessel, cover the vessel, and let the dough rise until it increases in volume by roughly 75%.
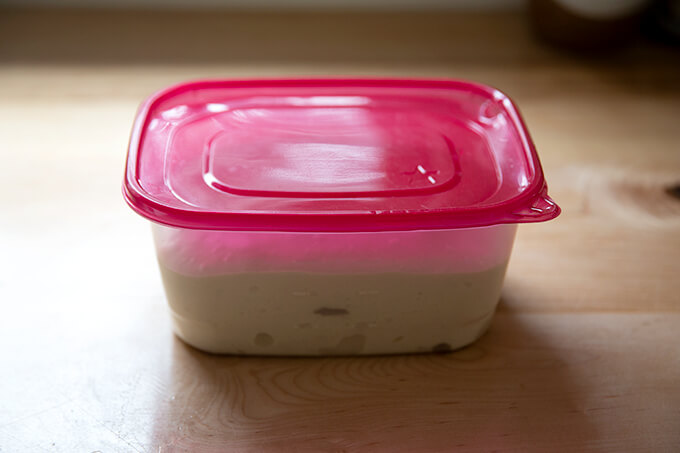
When the dough has increased by 75% (roughly), place a lid on the vessel, and transfer it to the fridge for 12-24 hours.
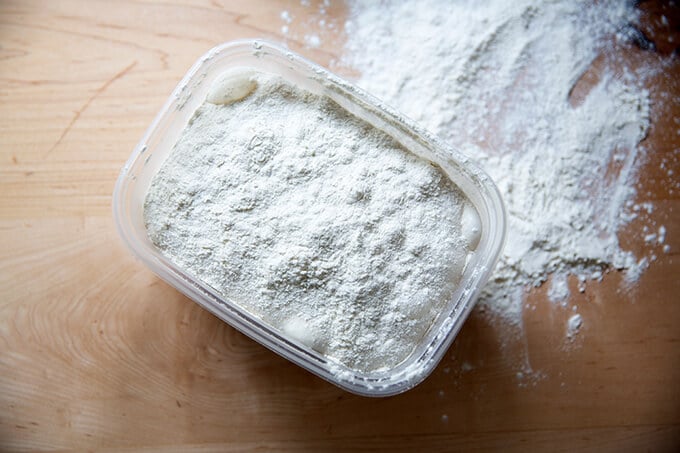
When ready to bake, remove the vessel from the fridge.
Dust the top of the dough liberally with flour. Dust a work surface liberally with flour, too.
Turn the dough out onto the prepared work surface.
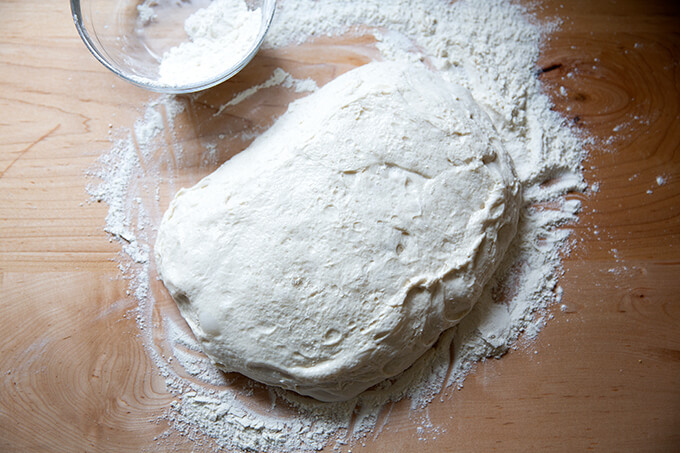
Pat the dough into a rectangle.

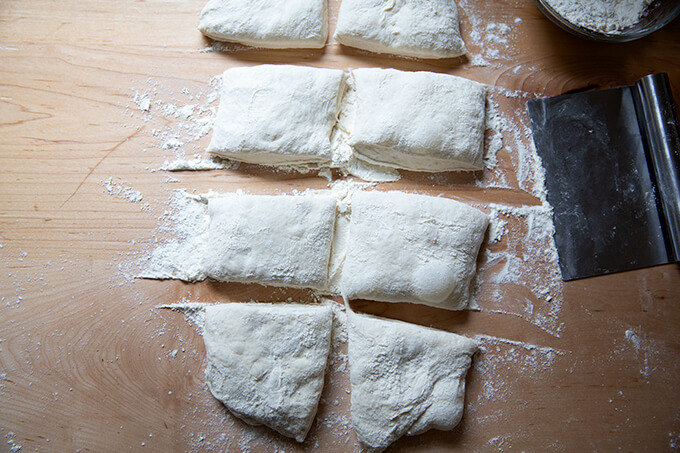
Cut the rectangle into 8 roughly equal portions.
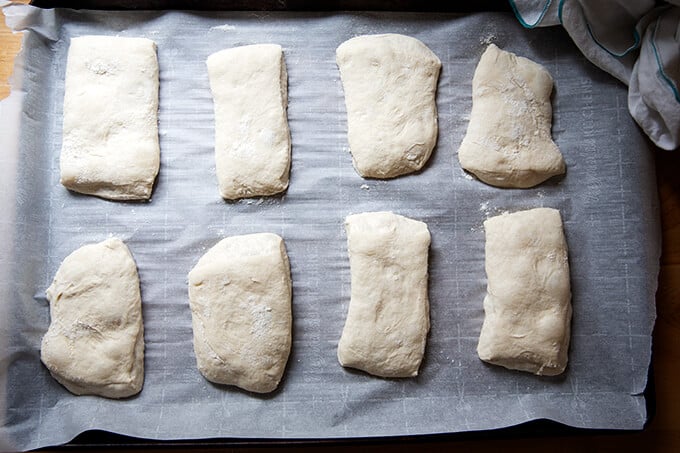
Transfer the portions to a parchment-lined sheet pan. Let rest for 1 hour. Then transfer to a 475ºF oven for 10 minutes. Lower the heat to 450ºF and bake for 10 minutes more.
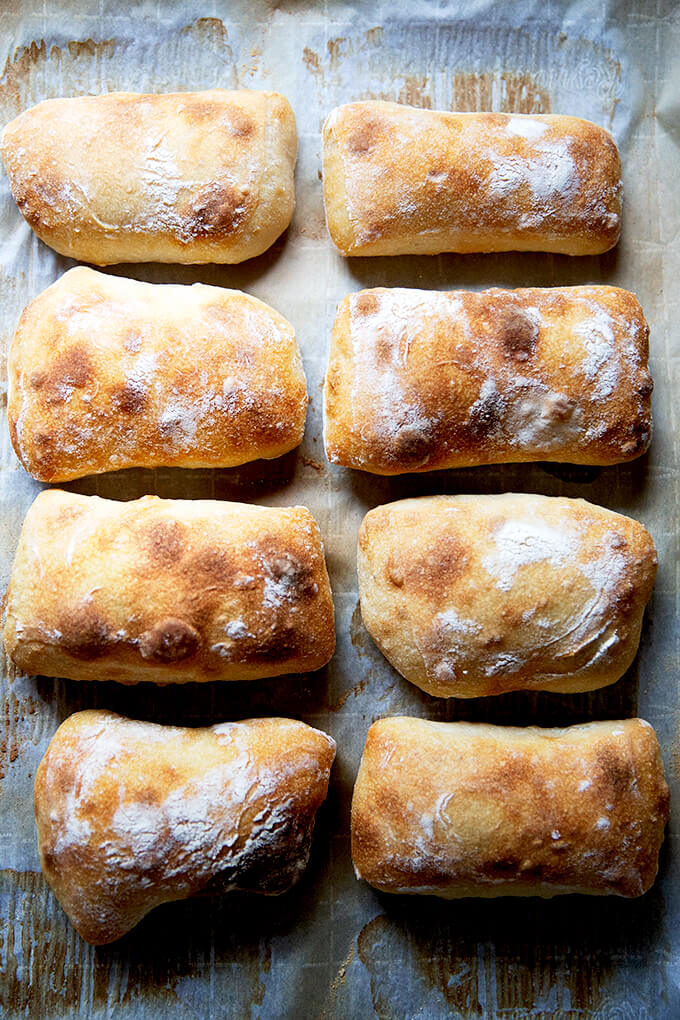
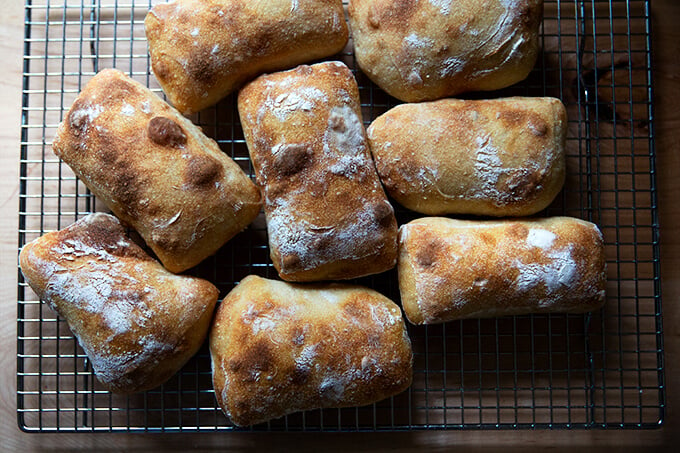
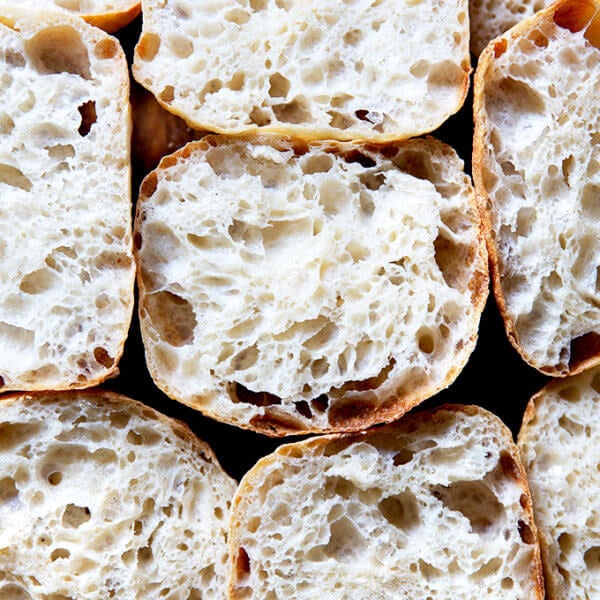
Transfer the rolls immediately to a cooling rack, and let cool for at least 20 minutes before cutting.
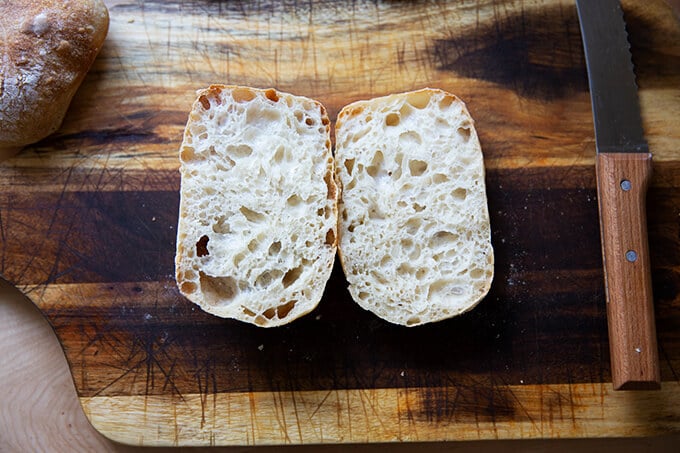
How pretty is that crumb?
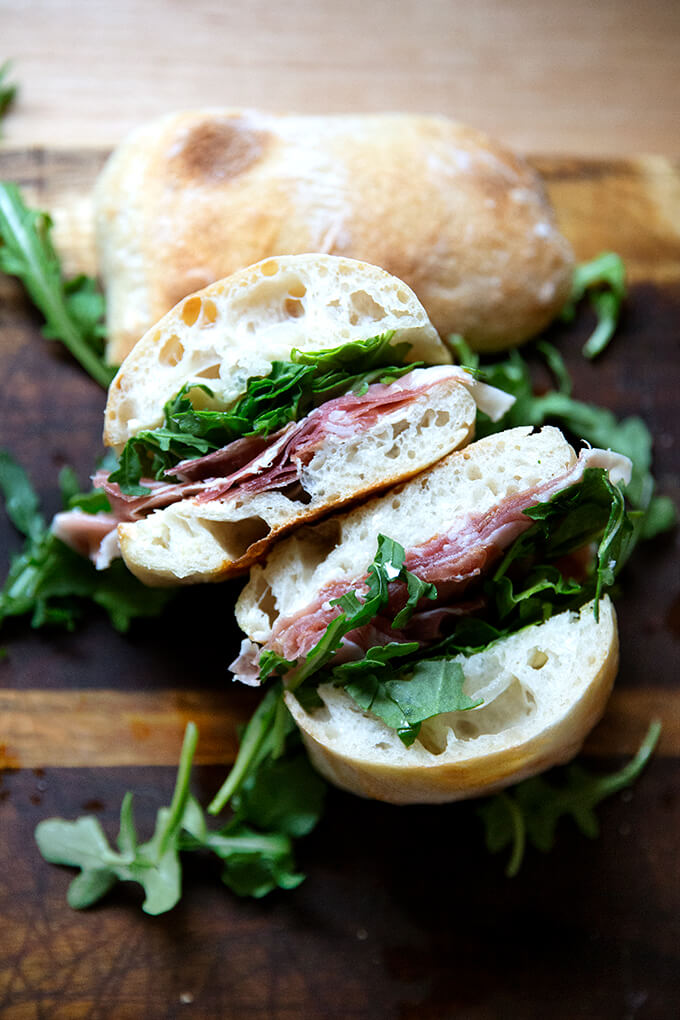
Ciabatta Sandwich
I have written about this favorite sandwich before, so forgive me if you know the story. It comes from Gabrielle Hamilton’s Blood, Bones, and Butter, a favorite book, and it’s something Gabrielle’s ex-husband, Michele, made for her during their courtship. If you have the book, the story is on page 163.
In short, the success of the sandwich relies on a delicate balance: “the perfection of three fats together — butter, olive oil, and the white fat from prosciutto or lardo.” To make it, spread good bread with “cool waxy butter,” top with prosciutto (more than you think), and arugula. Drizzle it all with good olive oil.
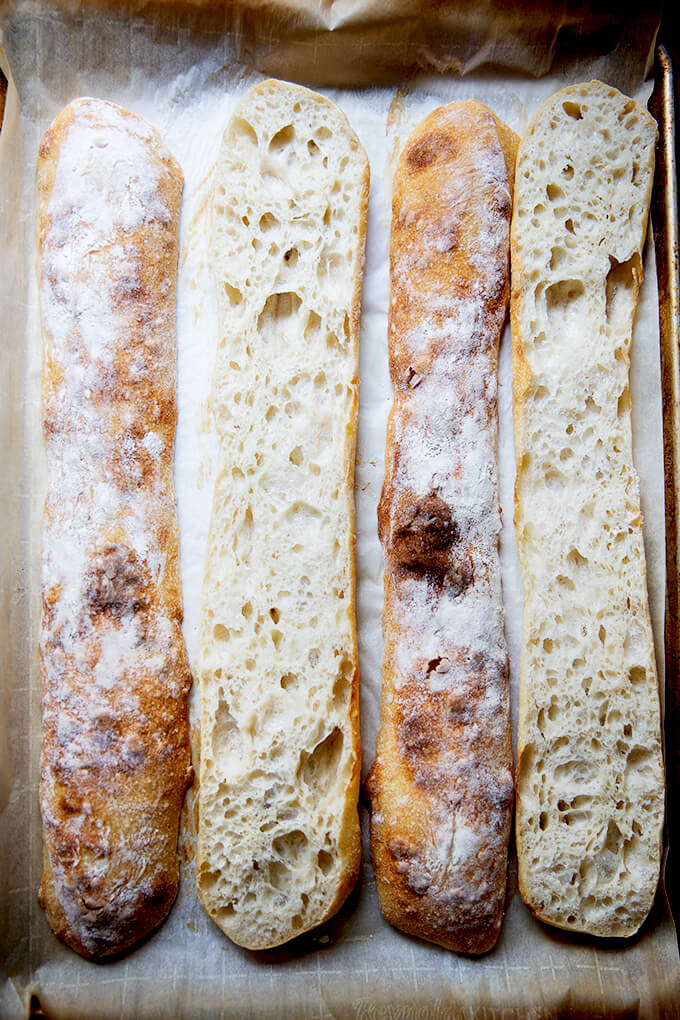
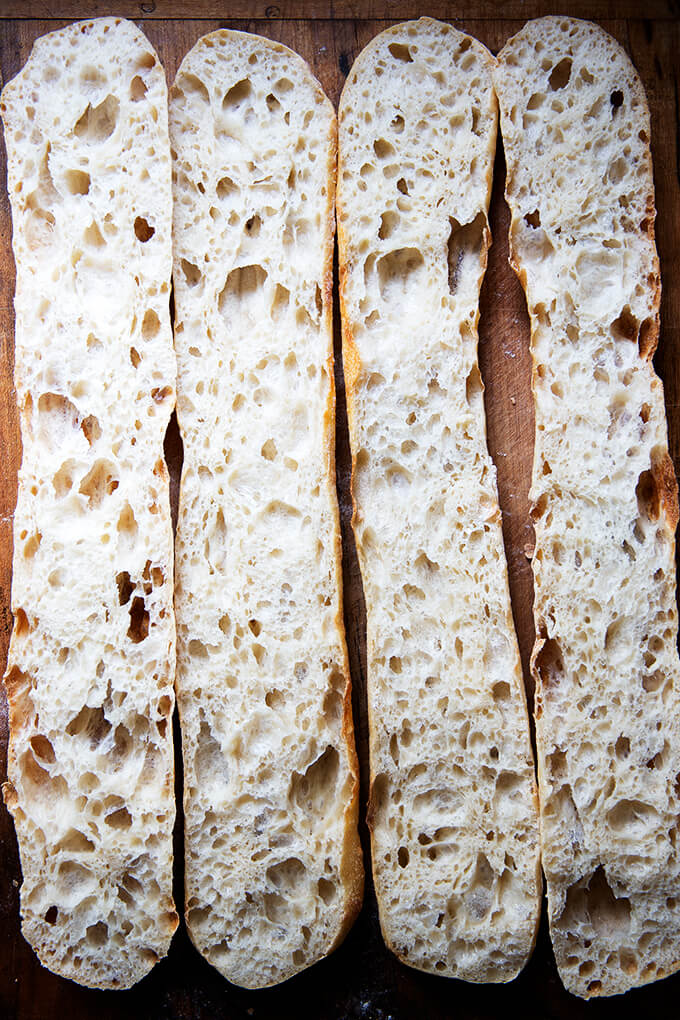
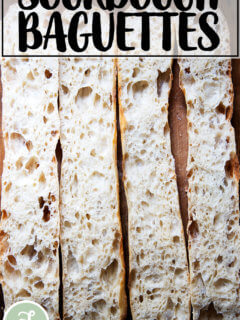
Sourdough Ciabatta “Baguettes” 🥖🥖🥖
To make baguettes, follow the same process, but instead of dividing the rectangle of dough into 8 portions, divide it into two. I find an extra-large sheet pan to be necessary to bake both baguettes at the same time. If you don’t have an extra-large sheet pan, I would bake one baguette at a time, and orient it at a diagonal angle from one corner to another.
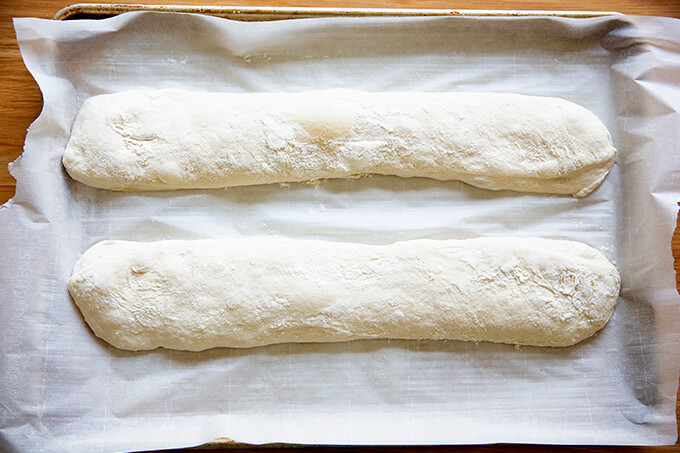
Bake the baguettes at the same temperature and for the same amount of time as the rolls.
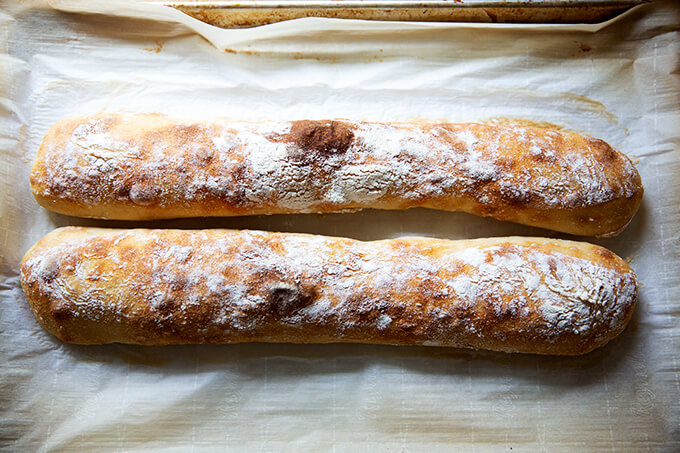
Not bad for the effort, right?
These ciabatta “baguettes” would be great vessels for giant sandwiches. I’ve been craving Bahn mi since
Simple Sourdough Ciabatta Bread
- Total Time: 24 hours 20 minutes
- Yield: 8 Rolls
- Diet: Vegan
Description
Notes:
- You need an active sourdough starter. You can build a starter from scratch in just about 1 week. But I am a huge proponent of buying a starter. Here are two sources:
- As always, I highly recommend investing in a digital scale before beginning any bread baking adventure.
Flour: I have had success using all-purpose flour, but if you can get your hands on bread flour, that is ideal, especially if you live in Canada or abroad. Moreover, if you live in Canada or abroad, you may need to reduce the water amount. Consider holding back some of the water during the mixing process to ensure you don’t end up with a soupy mess.
Straight-Sided Vessel:
- The vessel I use in this recipe, similar to this one, is 8 cups. Most grocery stores carry storage vessels similarly sized.
- Using a straight-sided vessel for the bulk fermentation will help prevent over-fermentation because it allows you to see when the dough has truly increased by 75% (or slightly more or less) in volume.
Ingredients
- 360 grams (about 1.5 cups) water
- 12 grams (about 2 teaspoons) salt
- 100 grams (about 1/2 cup) active sourdough starter, see notes above
- 450 grams (about 3.5 cups) bread flour, see notes above
Instructions
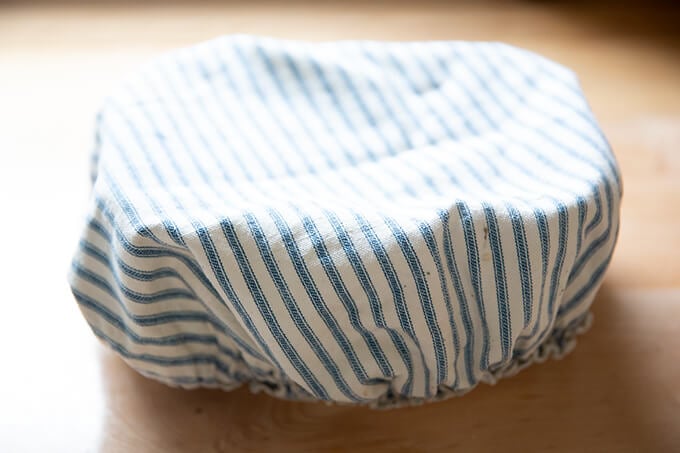
- Mix the dough: Place the water in a large bowl. Add the salt and stir briefly. Add the starter and stir briefly to incorporate. Add the flour, and stir until you have a wet, sticky dough ball. Knead briefly with your hands if necessary to incorporate the flour. Cover with a tea towel or cloth bowl cover and let sit for 30 minutes.
- Stretches and folds: With wet hands, grab one side of the dough, and pull up and to the center. Rotate the bowl a quarter turn, and repeat the grabbing and pulling. Do this until you’ve made a full circle. (Watch the video for more guidance. I do a few more pulls and turns in the video.) Cover the bowl. Repeat this process three more times at 30-minute intervals for a total of 4 sets of stretches and folds over the course of two hours. (In the video, I switch to coil folds for the last two sets of stretches and folds.)
- Bulk fermentation: Transfer the dough to a straight-sided vessel. Cover the vessel with a towel. Let rise at room temperature until the dough nearly doubles in volume (shoot for a 75% increase in volume). Times will vary depending on your environment and the strength of your starter. Recently, this has taken about 4 hours for me, but don’t worry if it takes longer for you. Cover vessel with a lid (ideally) or a towel (if you are using a towel, slick the top of the dough with oil to prevent it from drying out.) Transfer to fridge for 12-24 hours.
- Shape: Remove vessel from fridge. Remove lid. Sprinkle top of dough liberally with flour. Turn dough out onto a floured work surface. Pat dough into a rectangle. Sprinkle top with flour. Use a bench scraper to cut the dough in half vertically. Then make three cuts equally spaced in each half to create 8 small rectangles.
- Line a sheet pan with parchment paper. With floured hands, transfer each rectangle to the prepared pan, gently pulling outward. Cover the pan with a towel. Let stand for one hour.
- Bake: Heat oven to 475ºF. Transfer pan to oven and bake for 10 minutes. Lower heat to 450ºF, rotate pan, and bake for 10 minutes more. Remove pan from oven. Transfer ciabatta rolls to a cooling rack. Let cool for 20 to 30 minutes before slicing.
- Prep Time: 24 hours
- Cook Time: 20 minutes
- Category: Bread
- Method: Oven
- Cuisine: American, Italian
This post may contain affiliate links. Please read my disclosure policy.


514 Comments on “Simple Sourdough Ciabatta Bread”
I followed it to almost to a T using my 10 yr old starter, I couldn’t wait 12 hrs and did about 6. Lol I thought I could post a pic. Not seeing that option, they did puff up
Great to hear Antoinette! Thanks for writing 🙂
I’ve been making this ciabatta recipe several times without a fault, it’s now our favourite bread recipe. Thanks for sharing!
Wonderful to hear this, Alain! Thanks for writing 🙂
Should it be 12grams or 10 grams salt? Your recipe shows both. I did 12, and then saw 10 when I was re-reading.
I also did the full amount of water and it’s not soupy but not a ball of dough, either. I’m in NZ and saw the note about overseas cutback of water too late! Should I add more flour?
Katy, so sorry about the confusion here! I just edited the part in the post where it says 10 grams. I always use 12 grams. (10 grams, incidentally would be fine.)
Regarding your texture … I’m likely too late here. What did you end up doing? I would consider just pushing along without adding more flour — you might find with the stretches and folds that the dough becomes less wet and more elastic.
Let me know how it went!
I ended up adding a bit of flour, maybe 1/3 cup, didn’t measure. The dough was very wet but just shy of soupy. They turned out beautifully! I’ve already eaten two 🙂 Thanks for the great recipe!
Wonderful to hear this, Katy! Thanks for reporting back!
Hi Alain, Thanks so much for this recipe. I tried it and it worked well for me! I love that it doesn’t require a lot of ingredients to bake it!!👍
However I am a novice sourdough baker still and forgive me for this burning question in my mind: what is the difference between a sourdough ciabatta and a sourdough bread? I would appreciate if u can share some idea? 🙏
Hi Nalini! Sourdough bread refers to the general category of breads leavened by a sourdough starter (as opposed to commercial yeast). Sourdough ciabatta is a specific type of sourdough bread. It’s characterized by a wild, amorphous, porous crumb, and a thin but crisp crust as well as a “slipper” shape.
hi..my ciabatta turns out great. i made half the portion. i wonder if i could add a bit of oil.
Would be great if i could post the picture of my ciabatta but there is no option to post a picture.
Great to hear this, Amelia! Yes, absolutely add a bit of oil to the dough. I would start with a tablespoon or two 🙂
Thanks so much for the reply. I will do so in my next attempt.
Hi Alexandra! Would love to try your Ciabatta. May I ask what flour did you use for dusting the dough after refrigeration? Thanks.
Hi! I use all-purpose flour.
Could this also be made into smaller rolls to serve as dinner rolls? If so, do you know what the baking instructions would be?
Hi Laura! I think you could. Are you wanting to ball up the dough and make round rolls?
This is my go to bread recipe these days. Always turns out great! Thank you!
Great to hear, Josh!
Love this recipe. My husband’s Italian and these were a big hit.
Oh yay! Wonderful to hear this, Heather. Great to hear a real Italian approved 🙂 🙂 🙂
Have just made my 3rd batch of these ciabattas and they are fabulous. Tried several years ago making my own sour dough starter and it was a miserable failure. Took your hint and ordered starter from Breadtopia and it worked like a champ. So sourdough success at long last. Thank you, thank you!
One question, each batch has stuck to my parchment paper. I read online that this is not uncommon and to just use a little nonstick spray on the paper. Do you think that would change anything about the way these bake and the lovely bottoms they have?
So nice to hear this, Carolyn! So glad you went the purchased-sourdough-starter route … saves so much heartache 🙂
I don’t think using nonstick spray would affect the bottoms of the ciabatta adversely at all. Go for it! Out of curiosity, do you remember what brand of parchment you are using?
I tried this and it came out amazing! Any word on the instant yeast update version you mentioned? I have been looking so hard as well, for a recipe for NY Style Italian Bread, like the crispy loaves you will find in the white bag at a good Italian bakery. It would be amazing if you could post a recipe for that. I think that style of bread may be lower hydration with a tighter crumb. I could be wrong. The internet is severely lacking a reputable recipe, I’ve looked everywhere. Options for braided and unbraided. But all that aside, this is a truly great Ciabatta.
So nice to hear all of this! I thought I was ready to post my yeasted ciabatta recipe, but when I made it most recently, I again got a big hole running down the middle of it. It’s so frustrating. I think I’m almost there… will be experimenting today!
Brilliant instructions and video. Its my first attempt at ciabatta and the results were perfect!
I followed yourbrecipe to the T except that I autolysed just the flour and water first and then added the mature starter plus 20 gm of olive oil. I notice that some ciabatta recipes include oil and some don’t for some reason
I was worried the rolls might flatten out without support of a couche but they didn’t and they really puffed up in the oven.
Thanks again for sharing this super easy recipe!
PS I’ve just posted done pics and a link to your recipe on the Facebook “Perfect Sourdough” group.
Oh yay, wonderful to hear all of this, Dave! Thanks so much for writing. Yes, you are right, some ciabatta recipes call for olive oil and some don’t. In my Bread Baker’s Apprentice book, Peter Reinhart offers a ciabatta recipe with and without olive oil, so I don’t think one way or the other is right, though olive oil sounds absolutely delicious and I 100% am going to ad it next time around 🙂 🙂 🙂 I’ll try to find the Facebook group. Thanks!
I have not made this yet but will soon. I have a question about timing. With all the steps with letting the dough rest and rise, what time of day do I start this recipe so I’m not doing steps in the middle of the night or in the evening? I tend to bake bread in the morning while it is cooler out. Clearly, I’m a little challenged here with the clock, lol.
P.s. I made your brioche rolls for Memorial Day weekend and they were pure fabulosity. They looked like I had bought them from a bakery. 💛
Hi Lynne! I often start this bread in the late morning, early afternoon. That way, it’s ready to go into the fridge before I go to bed, and I can bake it in the morning. I do the same thing for the yeast-leavened variation, too. Great to hear about the brioche rolls. Thanks for writing!
Hi Alexandra, greetings from Shanghai. I have just made a whole batch and it was a total success! Bearing in mind I did not have bread flour on hand and did it all under 6 hours, I am sure my next batch will turn out even better. For people out trying this for the first time, don’t fret if the dough doesnt look right – my dough at the end of step 2 was a soggy mess and after bulk ferment it was still not as smooth and formed as the picture shown. Chucked in the oven anyway and I am so glad that I did!
Thank you for this amazing recipe! I’d be thrilled if there is any flavoured ciabtta recipe in the future XD
Great to hear this, Jade! Thanks so much for writing and thanks so much for encouraging others to trudge on should things look not so promising 🙂 🙂 🙂 I’m so impressed you did it all under 6 hours. Someone else skipped the cold proof, and I’ve been meaning to try that as well.
Excellent recipe! I like the timing of it. We had this for brunch today. Mmmm so good!
Wonderful to hear, Nancy!
These rolls are by far my families favorite! I can’t seem to keep them in the house, sandwiches have become amazing!! Would I go ahead and double everything if I am making a double batch?
Great to hear this, Lisa! And yes, absolutely. I just did this in fact in preparation for a week away with the family. Worked great!
This has become my weekly recipe. The outcome is always perfect. I make the dough into 6 sandwich size ciabattas. Thanks for a great and foolproof recipe.
Wonderful to hear this, Louisa! Thanks for writing 🙂 🙂 🙂
Hi I haven’t made this yet but was wondering if it would harm it to leave it for longer in the fridge? I was hoping to make the dough a couple of days ahead of baking it.
Yes, absolutely! I would say at least 48 hours.
Can the recipe be made into loaf form (1-2 loaves) instead of rolls? I’m anxious to try it but would prefer a loaf. Thank you!
Yes, absolutely!
I’ve been making standard sourdough bread for a while but had never made ciabatta until this recipe. It is absolutely phenomenal and I will definitely be adding this recipe into my bread rotation! The buns are soooo pillowy yet sturdy enough to hold everything for a sandwich. For anyone with a family who already loves their homemade bread… i highly suggest doubling this recipe! While I doubled the ingredients, I made 12 buns rather than 16 just to get the bun size I wanted.
I do have one question though: while the ciabatta were cooked all the way through (temp verified) mine did not brown on top as much as yours did. Were your photos taken after some additional toasting? I’m wondering if the colour is also affected by the type of flour used – I used plain all purpose flour.
Thanks!
Hi Rachelle! Great to hear all of this! Thanks so much for writing and sharing your notes about doubling.
Regarding the color, there was no additional toasting. You could try increasing your oven temperature by 50 degrees or so next time around. Just keep an eye on them to make sure they’re not browning too quickly. Every oven is different, and it’s likely your oven is just a little cooler than mine.
The all-purpose flour you are using isn’t bleached, right?
Thank you! I am just about to bake another round of them today, so I will try increasing the oven temp as you suggested.
And yes – I have been using unbleached all-purpose flour.
I added a few pinches of flower for texture and 3 more grams of salt (personal preference) and they come out amazing! I’ve made sourdough for nearly a year now and this ciabatta recipe made the most beautiful and soft-textured loaves I’ve made yet! So much fun handling decorate dough like this, thank you for this recipe!
So great to hear this, Jan! I am always up for more salt, so I would totally be down with this 🙂 🙂 🙂 Thanks so much for writing!
The ciabatta was amazing. I followed the recipe to a T at 9600 ft. I really appreciate the video and the great recipe!
Great to hear, Cindy! Thanks for writing 🙂
My dough looks sooo much wetter than yours, and sticks to my fingers and the sides of the bowl. Should I add more flour to begin with, or can I add flour as I’m doing the stretches and folds? Or do I just go with it as is? It’s so hard to work with when it’s so wet. I used 80/20 bread flour to whole wheat flour. Is that causing me trouble? Thank you! I have made these rolls a few times and they have been hit and miss for me. When they are on, though, they are amazing!
Hi! It is very possible the whole wheat flour is the culprit. Questions: are you using a scale to measure? Do you live in a humid environment? And what type of whole wheat flour was it?
I am using a scale to measure. I live in a drier environment. I used King Arthur Organic Whole Wheat Flour. Today, I am experimenting with 50/50 Bread Flour/Whole Wheat flour. I read that whole wheat flour actually absorbs more water than bread flour, and my dough is less sticky! Fingers crossed that they do not turn out like rocks. Trying to use more whole grains for health…have you ever tried 100% whole wheat?
OK, great to hear the dough is less sticky… keep me posted on how they bake. They might be a little denser, but they shouldn’t be like bricks.
I have never tried 100% whole wheat flour. I have to admit I am not the best at using whole wheat flours because texture of bread is so important to me, and typically, the more refined (less healthy! 😩) flours create lighter, loftier loaves.
Hi, I’m wondering what the protein % in the flour you used is. Also, did you used a 100% hydration starter? Thanks!
Hi! YEs, 100% hydration starter. Protein is 12.7% (King Arthur Flour bread flour)
Hi! I just made these this morning and everything went according to plan except…oooof they burned on the bottom. I did 475 and middle rack of the oven, then lowered to 450 and rotated. One step I missed is letting the cut rectangles hang out for an hour. Instead I just cut them and in the oven they went. Could that be the reason? Or is it because of my old dark baking sheets?
Otherwise they look great!
Hi Erin! I don’t think the burning is a result of not letting the cut rolls rest for an hour. It is possible that it is the baking sheets. Was there a lot of excess flour on the bottom of the rolls?
Does your oven tend to run hot?
Next time, I would start at 450ºF or even 425ºF. You might need to cook them longer at the lower temperature but that should prevent the burning bottom. You could also double up your sheet pan to create more of an insulating layer. I do this when I make challah.
Oh cool I never thought of doubling up the baking sheets! Might try that next time. Or maybe take this as a sign to buy the Nordic ware sheets I’ve been eyeing up for years 😉 . By the way they tasted great!
Thanks!!
Oh yay, great to hear! And I hear you: I have two Xlarge and two standard-size rimmed baking sheets, and they’re all due to be replaced, but I can’t get myself to do it. In time!
Your wordless video is perfect. Like the kids playing piano in the background at the end.
Thank you, Gina 🙂 🙂 🙂
I am making these on a regular basis now. I am not a great baker, but these turn out perfectly every time. I bake mine longer at 450, an extra 5 minutes, and they turn out great. I’m eating one right now!
Oh yay! So great to hear this, Cindy! Thanks for writing and for sharing your notes 🙂 🙂 🙂
I do like seeing your video as they are simple and easy for begginer like me. Thank you so much!
Can I bake these on a silicone baking mat, or does it have to be parchment paper? Thank you! Love your recipes and videos!
Absolutely! And thank you 🙂 🙂 🙂 Means a lot.
I made the baguettes. I messed up and after the 4 lift and folds I stuck the dough straight into the refrigerator where it stayed overnight. The next day I got the recipe back out and saw that the bulk fermentation should have taken place at room temperature until the dough almost doubled. I read up on the internet about refrigerated bulk fermentation and decided I had ruined the dough, but I put it on the counter anyway to come up to room temperature and see what happened. It came up to temperature and rose normally. I shaped it into 2 baguettes and let them rest for an hour and then I popped them in the 475 oven with a cake pan under them holding some ice cubes. After 12 minutes I turned the oven down to 450 and let them bake another 12 minutes. The baguettes were the best thing I’ve ever made in my life. The crust was crispy and chewy, the inside was completely wonderful. This is the most forgiving dough on earth!
Yay! Wonderful to hear this, Cindy!! Thanks so much for sharing your baguette-baking method as well… I’ve been meaning to experiment with water/ice trays in the oven but have yet to get around to it. Will try soon.
And regarding the cold fermentation: I often stick the dough in the fridge after the stretches and fold phase for timing purposes. The fridge is such a great tool for making bread (sourdough or yeast) work with your schedule, so keep that in mind … you did nothing wrong!
Hi Ali,
I love your bread recipes and i made the Ciabatta recipe previously and it was delicious. I want to make again for the holiday weekend. I wont be able to bake in the 12-24 hour window after refrigerating the dough. I kept it in an additional 24 hours will the recipe still work?
Absolutely! Keep it in the fridge until you’re ready 🙂
Hi Alexandra, thank you for this surprisingly simple recipe. The rolls are delicious but I wish the crust was softer. They were pretty hard out of the oven, the top softened considerably within 30 minutes but the bottom stayed hard and thick. Any suggestions? Also, mine were a dusky dull brown not like yours.. did you put egg or oil on the crust?