Homemade Ricotta Cheese Danishes with Lemon Zest
This post may contain affiliate links. Please read my disclosure policy.
These cheese danishes, a Nigella Lawson recipe, are made with a food processor dough and a lemon zest-scented ricotta cheese filling. The food processor allows the cheese danish pastry dough to come together in seconds. The dough is flaky and buttery and combined with the lemony ricotta filling, it’s consistently one of the most delicious breakfast pastries I turn out of my kitchen. Truly restaurant worthy.
You know what I hate? When I stumble upon this line in a recipe: refrigerate overnight.
‘Stumble upon’ being the key here. As in, surprise! Gotcha! You thought you’d have me in your belly this morning? Ha! Nice try. Let’s reconvene tomorrow, K?
This past Sunday I was expecting my Auntie to arrive in the early afternoon. She was making a special trip to help me out with the kids, and I wanted to welcome her with something extra special.
Nigella Lawson’s cheese Danishes, a recipe I had spotted in How to Be a Domestic Goddess the night before, sounded ideal for a number of reasons: the pasty is made in the food processor; the filling contains lemon zest and ricotta cheese, two of Auntie’s favorite ingredients; and at one point in the recipe Nigella notes that the cheese Danish is her all-time favorite.
It was the intro to the recipe that got me. Nigella describes the practice of making this sort of pastry dough in the food processor as revolutionary not only because the dough comes together in seconds but also because it produces an authentic Danish pastry. She even includes a word of encouragement from Beatrice Ojakangas, the Scandinavian chef who taught her the method via Dorie Greenspan: “Don’t think you’re cheating by taking the fast track — this is how it’s done these days all over Denmark.”
Fast track. I never suspected the phrase ‘refrigerate overnight’ to be in a ‘fast-track’ recipe. Lesson learned. And truthfully, I should have known better — these sorts of recipes almost always require a lengthy rest period.
Or do they?
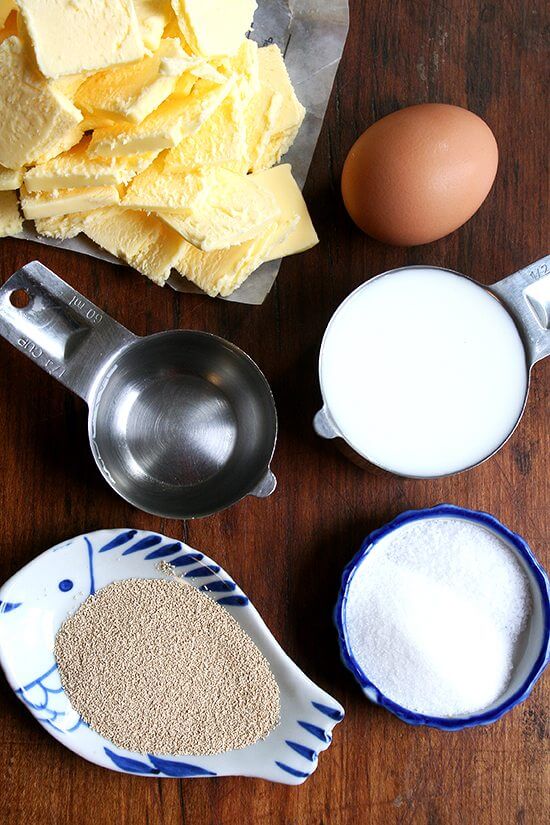
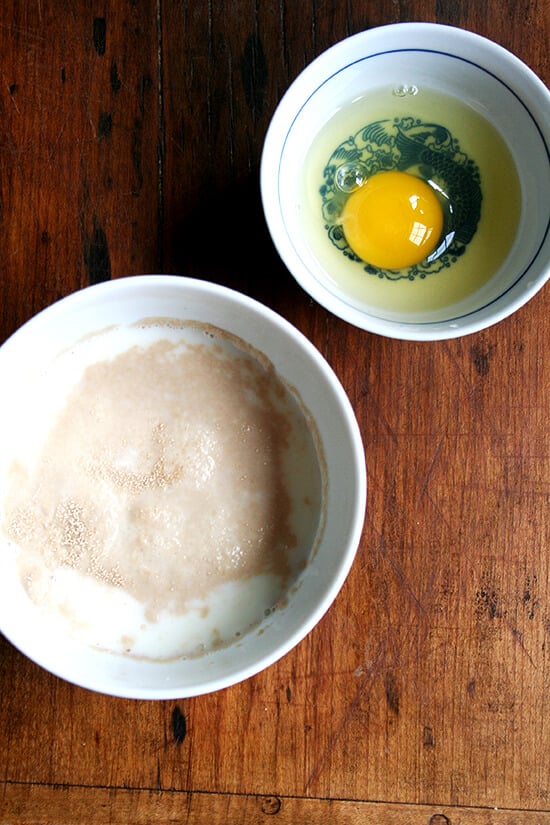
Remember now, Auntie would be arriving around 2 pm. Perhaps I still had time. Perhaps the true test of the domestic goddess was making croissant-style pastries in one quarter the amount of time? I would have to make a few changes, the first being to give the yeast a little push — instead of processing it with the flour, sugar and salt, I would “bloom” it with the water and milk and a little bit of the sugar.
The overnight refrigeration, too, would have to be condensed to two hours, and a 30-minute chill period, omitted. And most importantly, under no circumstances would I be allowed to throw a tantrum when the pastry did not behave, bake, or taste as I had hoped. Disposition of a true domestic goddess would foremost be preserved.
When Auntie called to tell me she was passing IKEA — just 20 minutes out — I placed the Danishes in the oven. And when Auntie walked through my door, I pulled a tray of beautifully golden, feather-light, lemon-ricotta filled, flaky parcels from my oven.
Truly, of all the baking efforts I have made over the years to transform my kitchen into one of my favorite cafes, none has succeeded more than this food processor Danish pastry — it was as if we were dining at 18th and Guerrero or 23rd and Lombard or 6528 Washington Street. These Danishes are spectacular.
Now, do I advise taking this extra-fast-track route? For the sake of keeping stress to a minimum, maybe not. Because what is actually really nice about this recipe is that the dough in fact can be — wait for it — refrigerated overnight. What’s more, the dough can actually be refrigerated for as long as four days, which means if you were to make the dough today or tomorrow, cheese Danishes could, with little effort, be in your Saturday or Sunday — both even — mornings.
It’s a beautiful thing. Planning ahead. Reading instructions. One day I’ll learn.
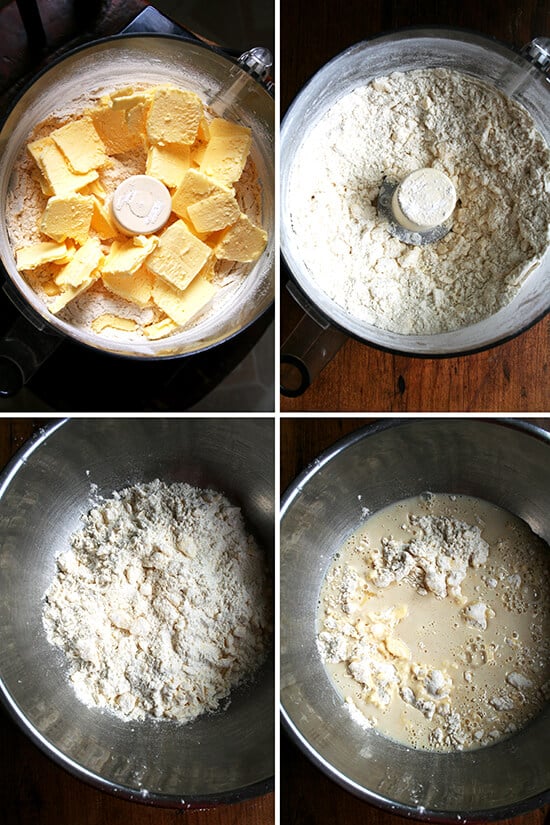
With a food processor, the dough comes together in seconds:
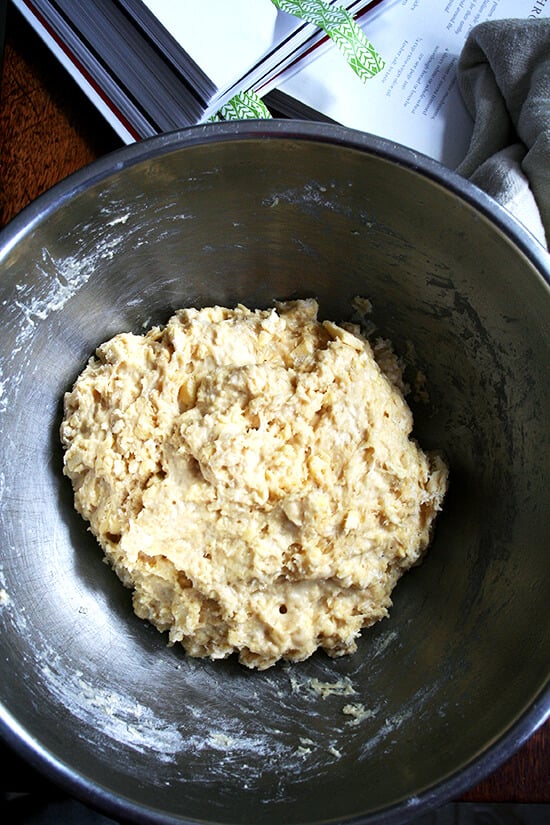
It then rests in the fridge overnight or for as long as four days:
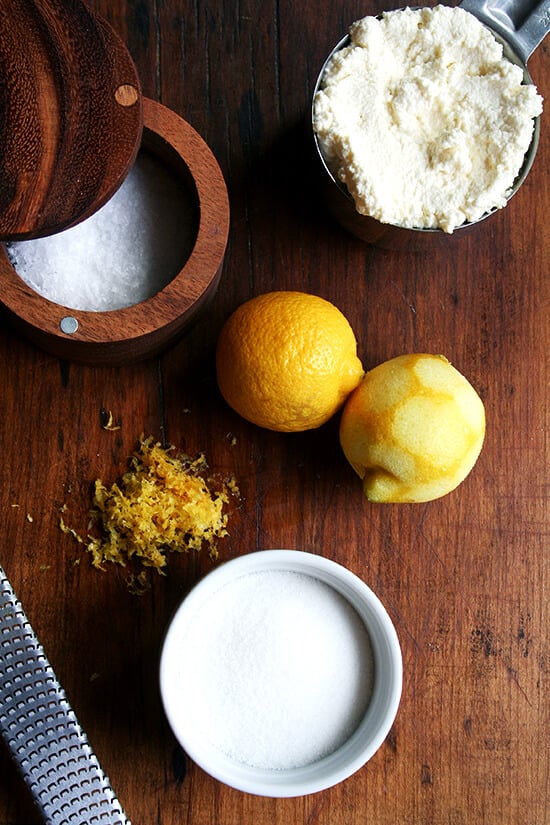
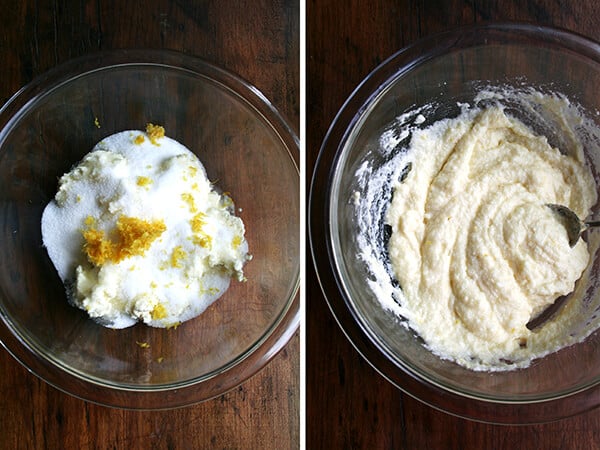
In the meantime, make the filling, a mixture of ricotta, lemon zest, salt and sugar:
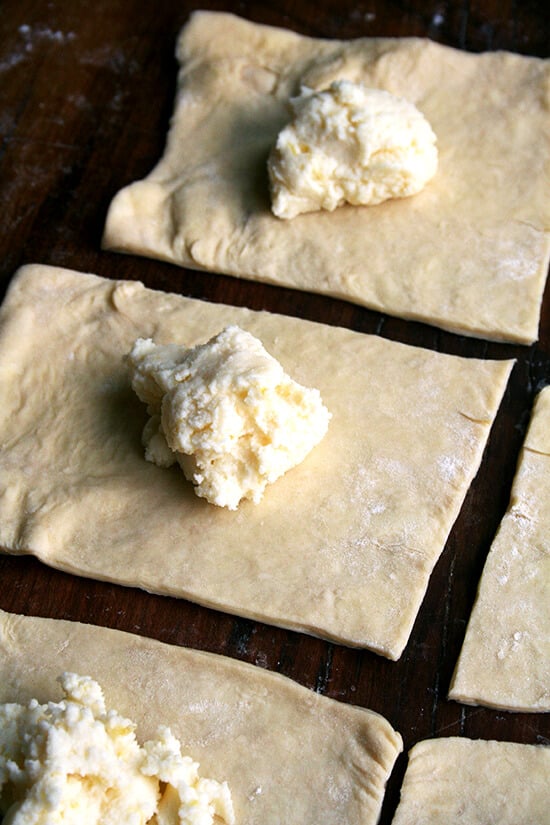
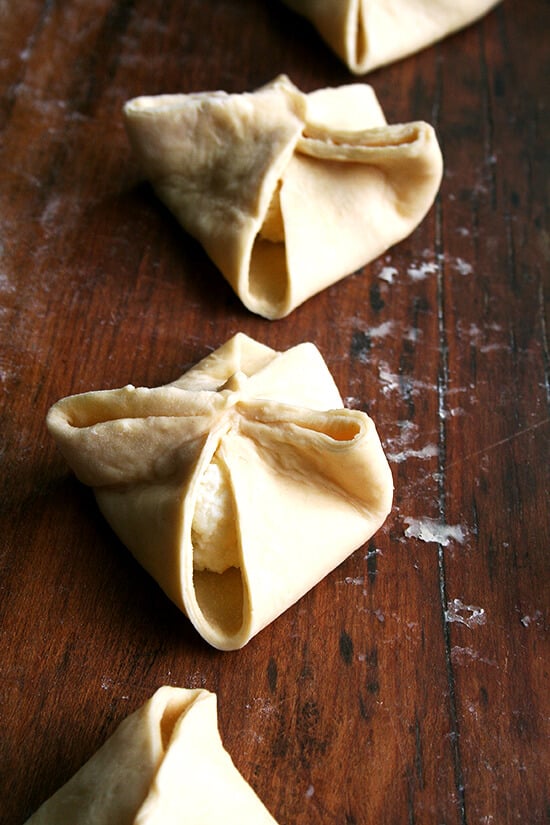
Assembling the parcels requires rolling and folding and filling and pinching:
The assembled Danishes make one last 1.5-hour rise before baking for 15 minutes:
I had a couple of comments/questions regarding the rolling out process and how to do it without adding too much flour. I hope this video offers some guidance:

Homemade Ricotta Cheese Danishes with Lemon Zest
- Total Time: 11 hours 40 minutes
- Yield: 12-16 pastries
Description
Source: Nigella Lawson’s How to Be a Domestic Goddess
Notes: As noted above, the dough for these Danishes should rest in the fridge overnight. I have included notes below if you need to rush the process along — the Danishes can be made start to finish in as few as 6 hours.
The filling amount listed below is for 6-8 pastries. Double it if you are making the full amount of pastries.
Day-old pastries reheat quite nicely at 350F for 10 minutes or so.
Ingredients
processor danish pastry:
- 1/4 cup (60 ml) warm water
- 1/2 cup (125 ml) milk at room temperature
- 1 large egg at room temperature
- 2 1/4 cups (286 g) all-purpose flour
- 1 package (2.25 tsp. | 7 g) instant yeast
- 1 teaspoon kosher salt
- 1 tablespoon (25 g) sugar
- 1 cup (250 g) unsalted butter, cold, cut into thin slices
cheese danish:
- 1/2 quantity of the processor danish pastry
- 1 cup ricotta cheese (I used homemade bc it’s SO easy and SO delicious)
- pinch of salt
- 1 tablespoon lemon zest
- 6 tablespoons sugar
- 1 large egg, beaten
- 3 tablespoons unsalted butter, melted and cooled
egg wash:
- 1 egg beaten with 2 tablespoons of milk
Instructions
make the pastry:
- If you are using rapid-rise yeast or fresh yeast and have planned ahead such that you know you will be refrigerating the dough overnight: Pour the water and milk into a measuring cup and add the egg, beating with a fork to mix. Set aside. If you need to speed up your cheese-danish-making process or want to make sure your yeast is alive and well: Sprinkle yeast over the warm water and milk with a little bit of the sugar (I take 1/2 teaspoon from the 1 tablespoon) and let stand until the mixture starts to foam a little bit. Then, beat egg with a fork until broken up and add to milk-yeast mixture. Beat mixture with fork again until just combined. Set aside.
- Place a large bowl near your food processor. Then put the flour, yeast (if you haven’t mixed it with the milk), salt and sugar in the processor, and give it one quick whizz just to mix. Add the cold slices of butter and process briefly so that the butter is cut up a little. You still want visible chunks of butter about least 1/2 inch in size — about 5 short pulses.
- Empty the contents of the food processor into the large bowl, then add in the milk-egg mixture. Use your hands or a rubber spatula to mix the ingredients together, but don’t overdo it: expect to have a gooey mess with some butter lumps pebbling it. Cover the bowl with plastic wrap, put in the refrigerator, and leave overnight or up to 4 days. (Note: If you have “bloomed” your yeast as noted in step 1, you can get away with two hours in the fridge at this step.)
- To turn the dough into pastry, take it (or half of it — I find it easier to work with half the amount of dough at this step) out of the refrigerator and roll the dough out roughly into a 20-inch square, using flour as needed. Fold the dough square into thirds, like a business letter, turning it afterward so that the closed fold is on your left, like the spine of a book. Roll the dough out again into a large square, repeating the steps above 3 times (see video for guidance).
- Wrap the dough in plastic wrap, and put it in the refrigerator for 30 minutes (you can keep it in the refrigerator for up to 4 days, if you haven’t already done so at the earlier stage), or refrigerate half to use now and put the other half in the freezer to use later. Note: If you are pressed for time, skip this 30 minute chill time.
make the danishes:
- Combine the cheese, sugar, salt, lemon zest, egg, and butter to make the filling. Roll out the pastry into a big rectangle and cut it in half. Divide each half into fourths and place a tablespoon of filling on each piece of dough. Fold the opposite corners up together and seal with a pinch. Place on a baking sheet lined with parchment paper and brush with the egg wash. Leave them to rise until they double in size, about 1 1/2 hours; they should then feel like marshmallow. Note: With both these cheese danishes and the prosciutto & gruyere croissants, it never looks as though the pastries have doubled nor does the texture of the dough feel like marshmallow. I just stick them in the oven after 1.5 hours regardless of how they look.
- Meanwhile, about 30 minutes before they’re ready to be cooked, preheat the oven to 350°F. Pinch corners back together if they have come apart, then place in the oven and bake for 15 minutes or until puffy and golden brown.
- Remove to a wire rack to cool.
- Prep Time: 11 hours
- Cook Time: 25 minutes
- Category: Breakfast
- Method: Oven
- Cuisine: French
This post may contain affiliate links. Please read my disclosure policy.





96 Comments on “Homemade Ricotta Cheese Danishes with Lemon Zest”
love this, love Nigella too, her savory pie in that same cookbook, I think, is one of my favorite dishes ever, love this food processor adapted Danish technique too at a quarter of the time! So thank you for this recipe!
seems there is a mistake with 2.25 cups flouer that are 286 grams.
I’m slightly confused … does the whole recipe yield 8 danishes (two 20-inch sheets divided into four squares each)? You mentioned that you halve the dough … is that just to make it easier to handle/roll? Thank you.
Yes, exactly! 8 danishes total. I halve the dough because I find it easier to work with. I chill half of the dough while I’m forming 4 of the danishes.
Is the filling amount here enough for all eight danishes? I am confused also! Do you think I could substitute room temperature cream cheese for ricotta? Thanks!
Hi! The filling is for 8 danishes. It is confusing — the dough yields enough for 16 pastries. If you want to make all 16 pastries, double the filling. And yes, definitely re cream cheese!
In that case, with more than a cup of fillling, you will need 2 T of filling per danish, not one.
Right?
Hi Jennifer, I would not add much more than a heaping tablespoon of filling per danish … you don’t want them oozing out too much. You may have leftover filling. Is that what you are asking?
Hello! I had a question about the filling as well. In the original description of the filling, it reads “In the meantime, make the filling, a mixture of ricotta, lemon zest, salt and sugar:” but in the actual recipe an egg is also included. My filling was much looser and of a more liquid consistency than the pictures of the filling. Clarification please- to egg or not to egg??
Hi! The first time I made these, I forgot to add the egg, and it worked fine, so I never add the egg when I make these. I don’t think it’s necessary, though I don’t think it would do any harm. If your mixture looks too liquidy, you may want to add it, but if just looks like whipped ricotta, I think it will be fine to leave out.
Do you think this dough would work as pain au raisin?
Thank you
Yes, absolutely!
Yes I used to get cheese danish at the deli I worked at and never found them since they had raisins and a sweet drizzle over top .
I will try this recipe to see if they are the same
Hi Alexandra,
Could I substitute mascarpone for ricotta?
I would imagine, yes, though I can’t say with 100 percent certainty as I’ve never tried. But I say go for it.
The dough is really good. I found the lemon ricotta bland. I added a cherry compote on the second batch. I will reuse as a base for a savory egg pastry.
Great to hear this, Bill!
I made these twice over the last week. I had tried making them, many years ago, directly from the Nigella recipe, to disastrous results. Since I am now more experienced I wanted to try again. First time, pretty good. Second time, big hit. I’m sure it helped that I read the recipe correctly the 2nd time (not that experienced yet!) I’m also particularly new to pastry, so I do have a question. The half of the 2nd batch I have left over is in the fridge. I did all the steps to it through wrapping it in plastic wrap. So, when I’m ready to use it, do I just roll it into the rectangle for shaping and filling, or do I need to laminate and let it sit in the fridge again 1st? Thank you!
Wonderful to hear this, Debby!
In regard to your question, yes: just roll it into the rectangle for shaping and filling.
So glad this has been a success!
I am finally able to make my favorite pastries from Lithuania myself!! Thank you for this amazing gift.
One question — my ricotta filling is MUCH more liquid, while yours appears solid. Is it because I have store-bought ricotta? I’m using the “double cream” ricotta. Any recommendations other than making my own ricotta? I end up not using as much filling (and bake the leftovers separately in a little dish) because it will start leaking out.
Hi Liepa! Wonderful to hear this 🙂 🙂 🙂 I love this recipe, too.
Regarding the ricotta, you could either continue what you are doing: using less filling; or you could strain the ricotta through a cheese cloth lined sieve or a coffee filter — you can do this in the fridge overnight — to remove some of the liquid.
Let me know what you end up doing!
Hi! Just came out of the oven!! I tried grading the cheese since I don’t have a food processor. And it worked!! Thank you so much for the tip!!! I need more practice rolling it out though. I’m gonna try the other one with the meat and Gouda.
-Steph
I gotcha 🙂 🙂 🙂 Great to hear grating the butter worked. Thanks so much for writing!
Sorry. Not grade cheese. I meant butter!!!! Hahaha. I have cheese in my mind. 😝 it looks so good!!!!
Quick questions! How long do you think the dough can be frozen? I’m a little concerned about the yeast… Also, other recipes to use the dough?
Your instructions and videos for pastries have been so fabulous, you have given me confidence to try to conquer them!
Thanks
I would say at least 3 months. Here’s the other recipe I use with this dough: Smoked Ham (or Prosciutto) & Cheese Croissants
So nice to hear this, Laurie!
Hello, if I decide to freeze half of this dough, should I finish the rolling part first or can I freeze prior to rolling it out?
thanks
L
You can freeze it prior to rolling it out!
I just made morning buns with this dough. Came out excellent! 375 for 18 minutes in buttered muffin tin.
Some I spread melted butter on and sprinkled with sugar, cinnamon and cardamom (these were rolled in spiced sugar when they came out of the oven). Others with everything bagel spice. And others with bittersweet chocolate discs. The outside was shatteringly crisp and the inside so soft and pillowy.
Thank you so much for this versatile dough recipe!
Oh my gosh I’ve been dying to make morning buns!! Totally trying this. Thanks so much for writing and sharing. Also, love the idea of the savory one. Yum!
can I use store bought puff pastry? Also, I love almond paste. Any way I can incorporate with the ricotta mixture?
Thank you.
Bianca
Worth a shot! I’ve never tried but I imagine it would work brilliantly. Regarding the almond paste, sure! I would maybe give it a whirl in the food processor first; then mix in a tablespoon or two or to taste to the ricotta mixture. I love almond paste too. An almond croissant is about my favorite thing in the world 🙂
Thank you for your reply and yes, almond croissants are heavenly. I tried it with the puff pastry and I had a hard time getting the corners to stick even with wetting. ugh. still good, though.
Bianca
OK, good to know, thanks for the update Bianca! Bummer the puff pastry wouldn’t stick.
Do you think that one could use the same dough and filling to make one long danish (to be cut) rather than small individual danishes?
Yes, absolutely!
Hi Alexandra, I have a question if you don’t mind, when the pastries are assembled do you think they could be refrigerated further and then baked instead of leaving 11/2 hours? Or frozen? Keen to try this at the weekend, they look delicious and thank you so much for all your fabulous recipes.
Jennie
Yes, absolutely! I have not done this, but I am fully confident it will work. I would be sure to store them in an airtight container so that the dough does not dry out in the fridge or freezer.
Thank you for your kind words!