
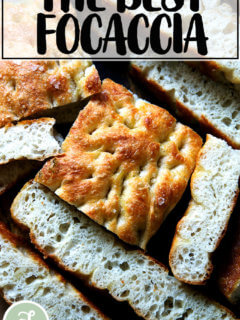
Overnight, Refrigerator Focaccia = The Best Focaccia Bread Recipe
This post may contain affiliate links. Please read my disclosure policy.
Cold, refrigerated dough is the secret to making delicious focaccia! Allowing the dough to rest 18 to 48 hours in the fridge will yield extra-pillowy and airy focaccia, though if you are pressed for time, you can make this start-to-finish in 3 hours. This 4-ingredient recipe requires only 5 minutes of hands-on time. Video guidance below!
⭐️⭐️⭐️⭐️⭐️ Review:
“Love this recipe! I’ve made this so many times that I’ve lost count. Super simple and delicious. My family loves it. Whenever someone asks me for a focaccia recipe, I always show them this one. This recipe is awesome. Thank you for sharing!” — Lucy
I’ve said it before and I’ll say it again: focaccia is the bread recipe for beginners. Why? Because:
- The no-knead, 4-ingredient dough takes 5 minutes to mix together.
- It requires no special equipment, no tricky shaping technique, and no scoring.
- If you have a 9×13-inch baking pan and your fingertips (for dimpling), you’re good to go.
- It emerges soft and pillowy, olive oil-crusted, golden all around, and it’s completely irresistible.
In sum, it’s hard to beat focaccia (pronounced foh-kah-chuh) in the effort-to-reward category. If you are intimidated by bread baking, this is the recipe I suggest making first, both for its simplicity and flavor. After all, this focaccia bread recipe is adapted from my mother’s simple peasant bread recipe, a recipe that has removed the fear of the bread baking process for many.
For the past few months, I’ve been making the focaccia bread recipe from my cookbook Bread Toast Crumbs, but changing the method: using more yeast, using less yeast, doing longer, slower rises at room temperature, doing longer, slower rises in the refrigerator. Find the results below.
This post is organized as follows:
- What Makes The Best Focaccia
- Four Tips for Success
- How This Focaccia Recipe Differs from Others
- Focaccia Bread Ingredients
- How to Make Focaccia, Step by Step
- Adding Rosemary, Herbs and Other Toppings to your Focaccia Dough
- How to Make a Focaccia Bread Art
- Tomato Focaccia
- How to Make a Focaccia Bread Sandwich
- Can I Skip the Overnight Rise?
PS: Once you master this simple focaccia, try your hand at this simple sourdough bread recipe, another recipe that requires minimal effort but yields spectacular results.
What Makes The Best Focaccia?
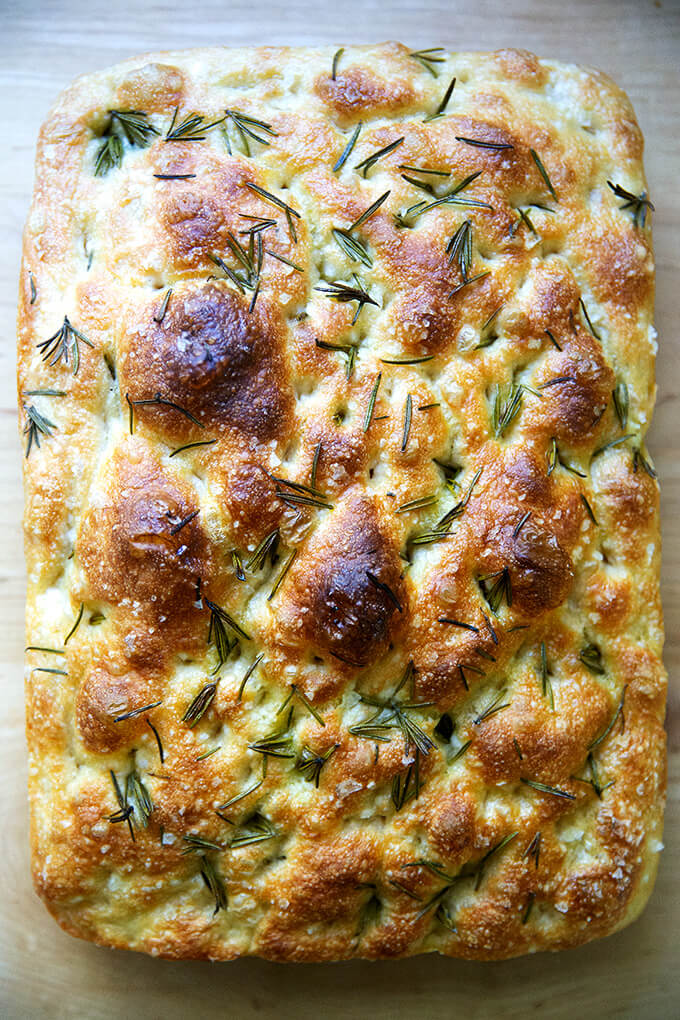
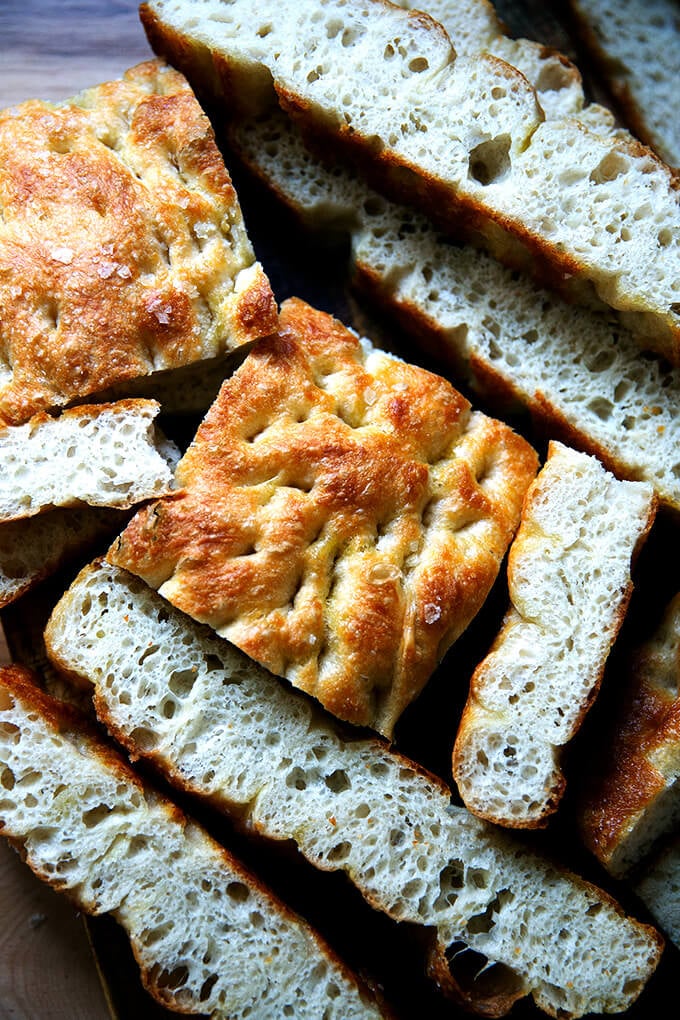
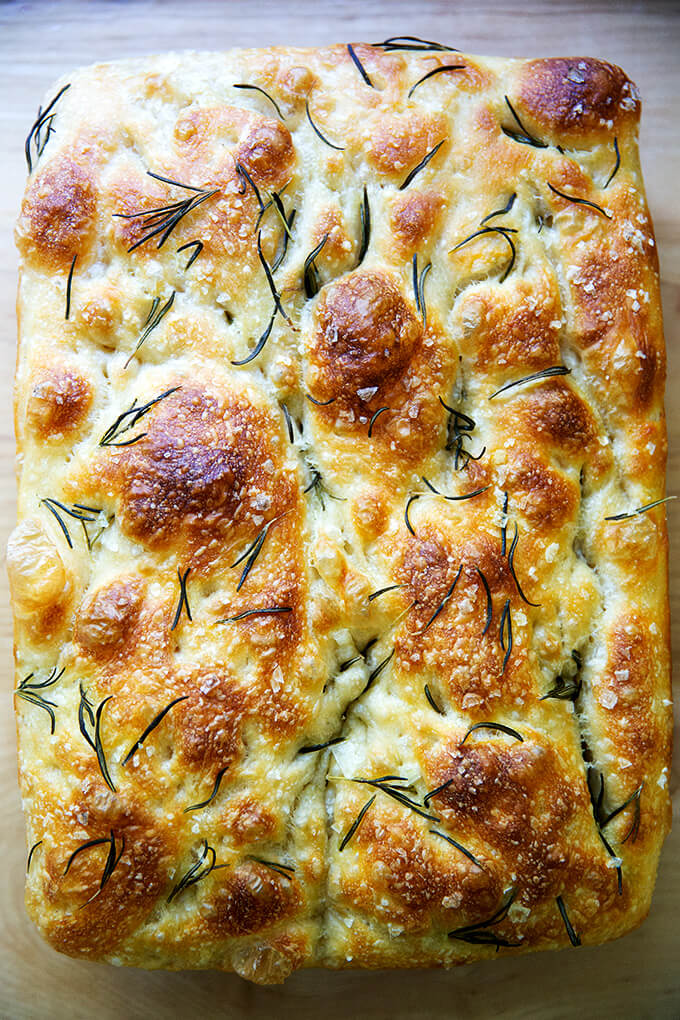
I’ll spare you all the details of the various experiments and skip straight to what I’ve found creates the best focaccia, one that emerges golden all around, looking like a brain, its surface woven with a winding labyrinth of deep crevices: high-hydration, refrigerated dough.
This is nothing novel—many bakers extol the virtues of the cold fermentation process—and it came as no surprise to me either: it was, after all, past-prime Jim Lahey refrigerated dough that showed me how easy focaccia could be: place cold, several-days-old pizza dough in a well-oiled pan, let it rise for several hours or until it doubles, drizzle with more oil, dimple with your fingers, sprinkle with sea salt, then bake until done.
Employing a refrigerator rise requires more time because the cold environment slows everything down initially, and during the second rise, the cold dough takes time to warm to room temperature. The overall effort, however, is very hands-off, and the result — a light, airy, pillowy dough — is well worth it.
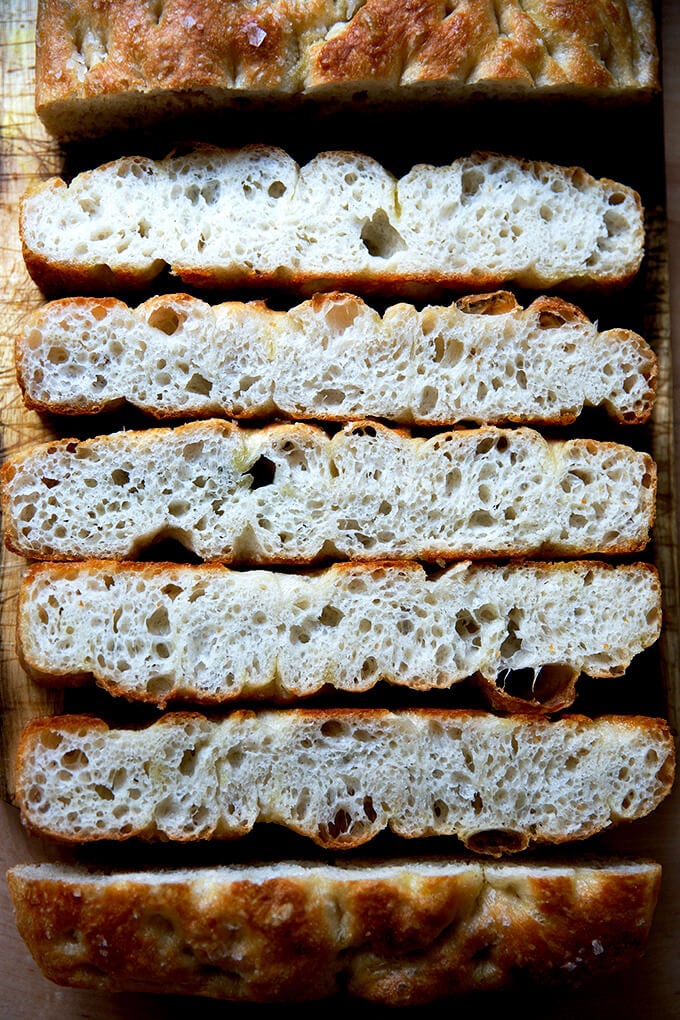
As important as refrigerating the dough is using a high hydration dough, meaning a dough with a high proportion of water relative to the flour. The high proportion of water will create a dough with beautiful air pockets throughout. (Incidentally, this is the secret to making excellent pizza dough as well as light, airy sourdough sandwich bread.)
How This Focaccia Recipe Differs from Others
There are lots of focaccia bread recipes out there, so why make this one? This one differs from many of the recipes out there in two ways:
- The long, cold, refrigerator rise.
- The absence of sugar or honey or any sort of sweetener.
Why isn’t there any sweetener in this recipe? Simply stated, a sweetener is just not needed — the yeast, contrary to popular belief, does not need sugar to activate or thrive. Sugar will speed things up, but when you’re employing a long, slow rise, speed is not the name of the game.
Moreover, and this is getting a little scientific, but during the long, cold fermentation: enzymes in both the flour and the yeast will break down the starches in the flour into simple sugars, which will contribute both to flavor and to browning, again rendering sugar unnecessary. Cool, right?
Four Tips for Success
- Allowing the dough to rest 18 to 24 hours in the fridge yields the best results. (You can leave the dough in the fridge for as long as 72 hours.)
- A buttered or parchment-lined pan in addition to the olive oil will prevent sticking. When I use Pyrex or other glass pans, butter plus oil is essential to prevent sticking. When I use my 9×13-inch USA Pan, I can get away with using olive oil alone.
- Count on 2 to 4 hours for the second rise. This will depend on the temperature of your kitchen and the time of year.
- After the second rise, dimple the dough, then immediately stick the pans in the oven — this has been a critical difference for me in terms of keeping those desirable crevices. If you dimple and let the dough rise again even for 20 minutes before popping the pan in the oven, the crevices begin to dissolve.

Ingredients
- Flour: bread flour or all-purpose flour will work equally well here. If you live in a humid environment or abroad, I suggest trying to get your hands on bread flour. King Arthur Flour is my preference.
- Yeast: SAF Instant Yeast is my preference, but active dry yeast works just as well. See recipe box for instructions on how to use active-dry yeast in place of instant.
- Salt: I say this all the time, but a big part of making a good loaf of bread comes down simply to using the right amount of salt given the amount of flour you are using by weight. It’s like anything: bread has to be well seasoned. At a minimum, use 10 grams (2 teaspoons) of salt for every 500 grams (4 cups) of flour. I highly recommend investing in some good, flaky sea salt for sprinkling on top of the focaccia dough — it tastes better than the more finely ground varieties of salt. I use Diamond Crystal kosher salt for the dough, but any salt you have on hand will work just fine for the dough.
- Water: There is a lot of water in this dough — it’s 88% hydration — and all of that water helps produce a light, airy, pillowy dough.
- Olive oil: Olive oil both in the bottom of the pan and on top of the dough is essential for encouraging nice browning, flavor, and that quintessential oiliness we all love about focaccia.
- Rosemary or other seasonings: Rosemary is a classic focaccia topping, and you can either sprinkle it over the dough before baking or you can chop it up and add it to the dough. Many people love sun-dried tomatoes and olives in their focaccia. See below for how to incorporate these other ingredients into your focaccia dough.
How to Make Focaccia Bread, Step by Step
Gather your ingredients: 4 cups (512 g) flour, 2 teaspoons (10 g) salt, 2 teaspoons (8 g) instant yeast (SAF is my preference), 2 cups (455 g) water:
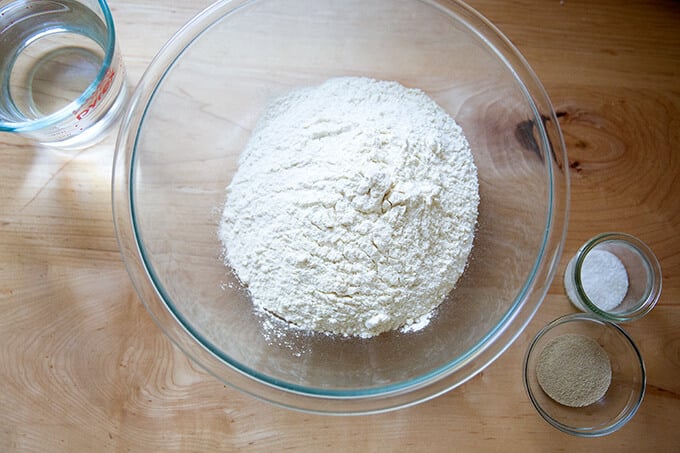
Whisk together the flour, salt, and yeast first:
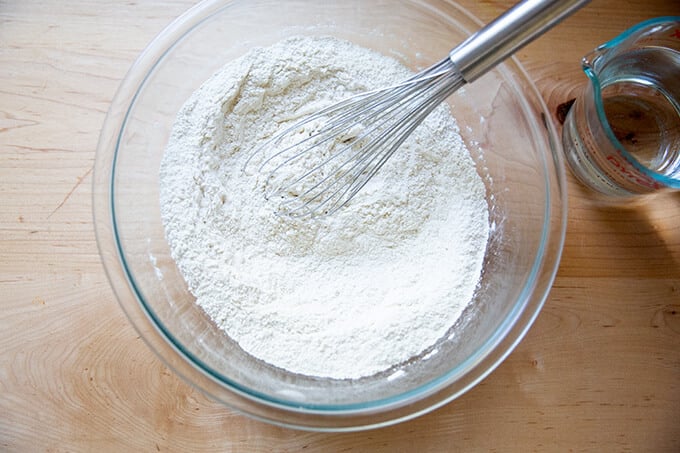
Add the water:
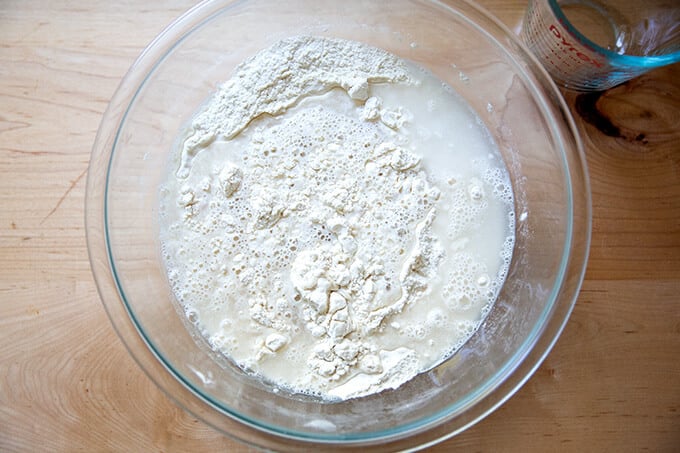
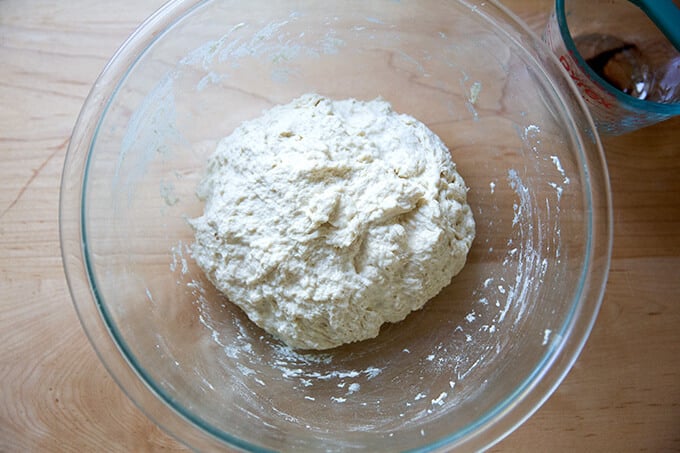
Use a spatula to stir the two together.
Slick the dough with olive oil:
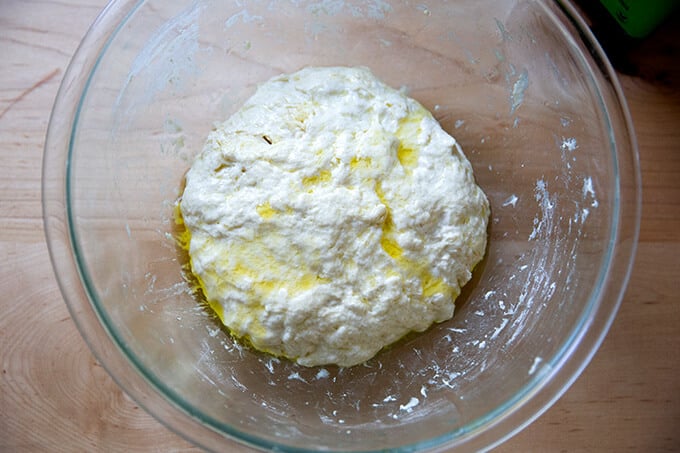
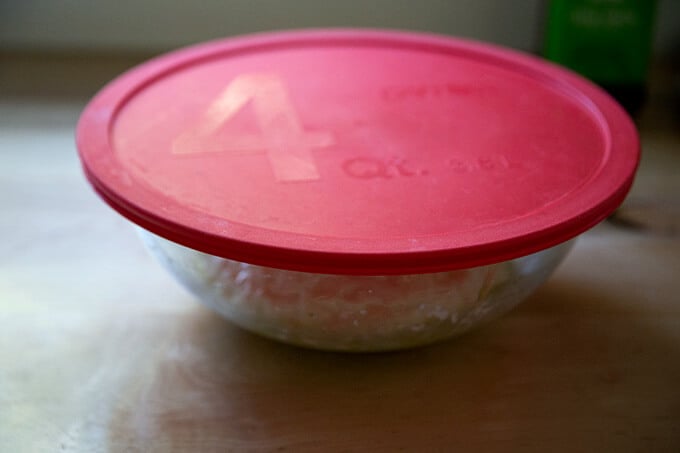
Slick the surface of the dough with olive oil; then cover the bowl. You all have one of these, right? Stick the bowl in the fridge immediately; leave it there to rise for 12 to 18 hours (or longer—I’ve left it there for as long as three days). NOTE: It is important the dough really be slicked with olive oil especially if you are using a cloth bowl cover or tea towel as opposed to plastic wrap or the lid pictured in the photo below this one. If you are using a tea towel, consider securing it with a rubber band to make a more airtight cover. If you do not slick the dough with enough oil, you risk the dough drying out and forming a crust over the top layer.
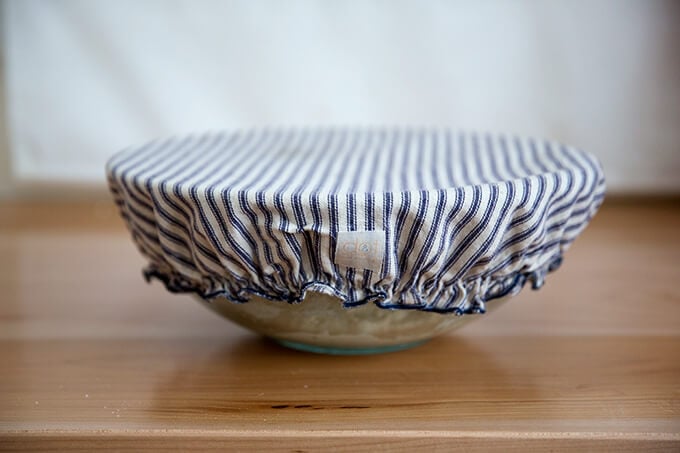
Another option: the lid that comes with the 4-Qt Pyrex bowl. This is handy for fridge storage because you can stack things on top of it.
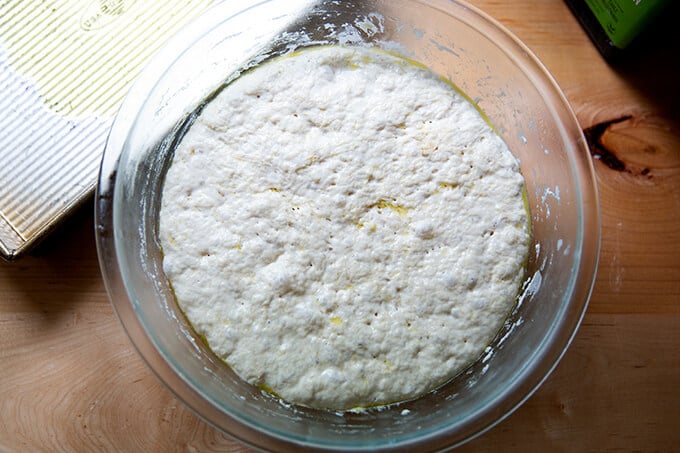
Remove from fridge, and remove the cover:
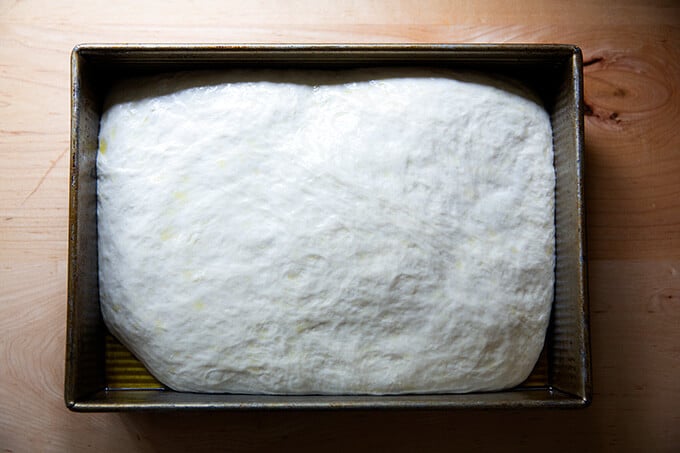
Deflate the dough and transfer to a prepared pan. I love this 9×13-inch USA pan. If you don’t have one you can use two 8- or 9-inch pie plates or something similar. If you are using glass baking dishes be sure to grease the dishes with butter before pouring a tablespoon of olive oil into each. (The butter will ensure the bread doesn’t stick.) Don’t touch the dough again for 2 to 4 hours depending on your environment.

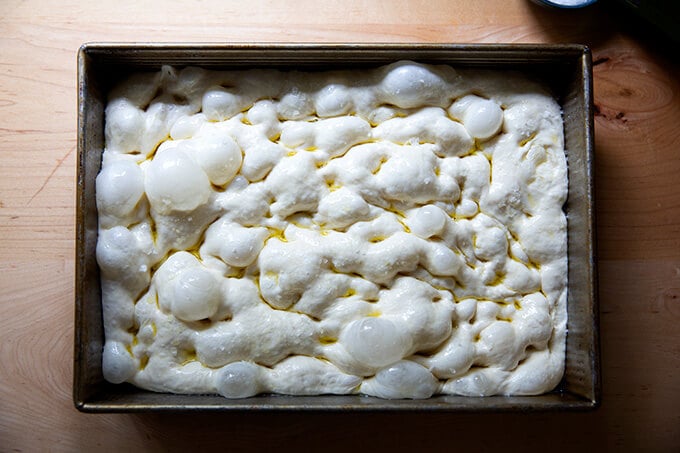
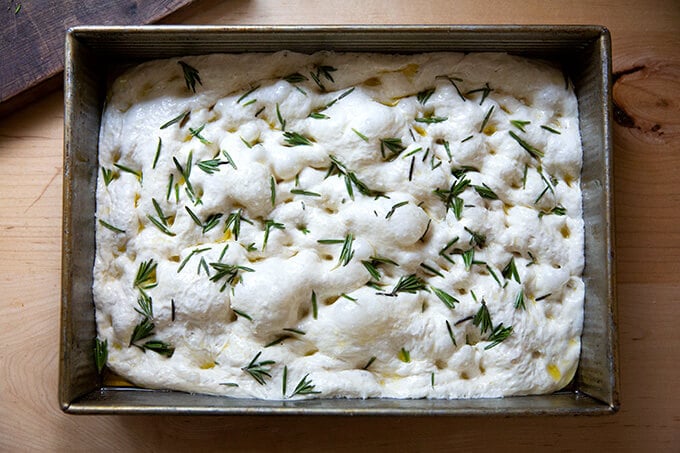
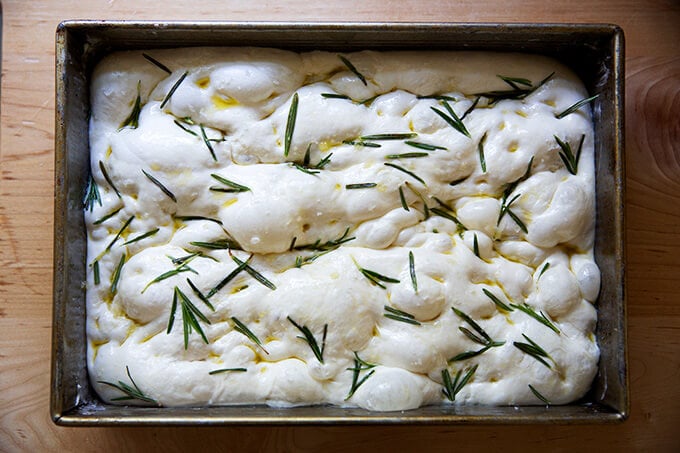
After two to four hours, or when the dough looks like this…:
… it’s time to dimple it! You can use simply olive oil and salt — I recommend good, flaky sea salt for this. Note, the dough in the photo below spent three days in the fridge, and the dough was super bubbly!
if you are using rosemary, sprinkle it over the dough. Then pour two tablespoons of olive oil over the dough, and using your fingers, press straight down to create deep dimples. Sprinkle with flaky sea salt — again, something like Maldon is great here.
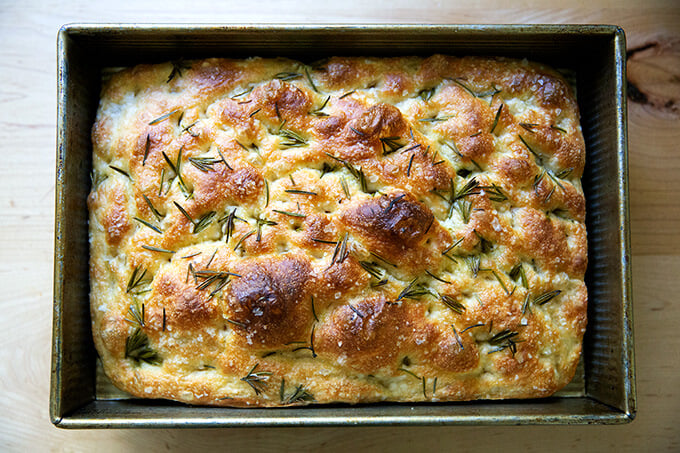
Transfer to oven immediately and bake at 425ºF for 25 minutes or until golden all around. Remove focaccia from pans and place on cooling racks.

How to Incorporate Rosemary, Herbs, and Other Ingredients & Toppings into Your Focaccia Dough
One of the most frequently asked questions I get is: How can I add other toppings or ingredients to my focaccia bread? You can do this in two ways:
- Add them on top as you would rosemary or other herbs. The key is to make sure the ingredients are slicked lightly with olive oil to ensure they do not burn in the oven. I like to sprinkle the rosemary over top of the dough, then drizzle it with olive oil, then dimple the dough.
- You can add them directly to the dough. In step one, when you whisk together the flour, salt, and instant yeast, add your ingredients — chopped olives, sun-dried tomatoes, roasted garlic — to the flour and toss to coat; then add the water.
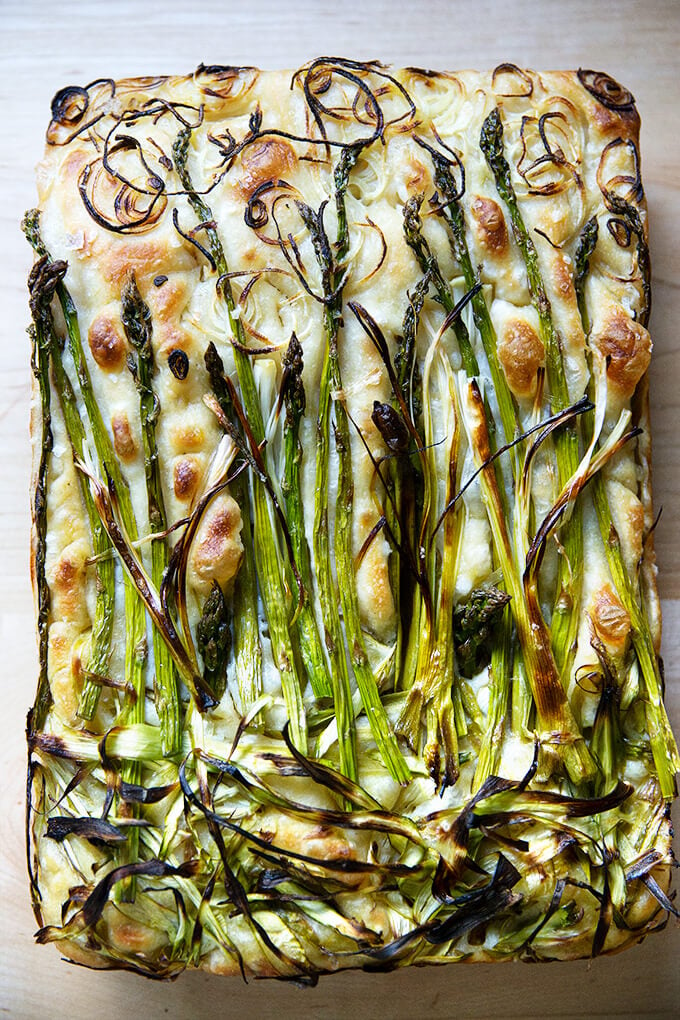
How to Make a Focaccia Bread Art
Pictured above is my “Ode to Spring” (🤣) Focaccia Bread Art (or Garden Scape). As noted above, the key with adding toppings is to slick them lightly with olive oil to ensure they don’t completely char. Keep in mind that some items will char, and a little charring is not a bad thing.
To make a focaccia bread art:
- Follow the recipe through the step in which you dimple the dough just before baking. Arrange your toppings — sliced peppers, asparagus, scallions, olives, tomatoes, onions, etc. — over top and dimple again, pressing the ingredients into the dough to embed them — you can be more aggressive than you think.
- Brush the entire surface with olive oil; then sprinkle with sea salt.
- Bake as directed.
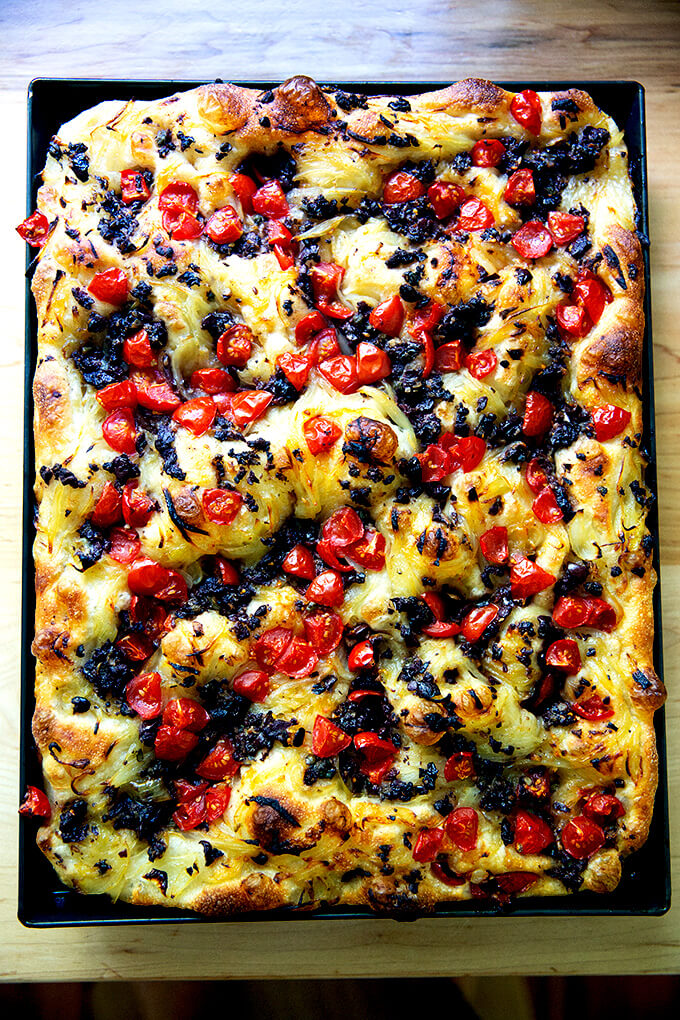
Tomato Focaccia
Pictured above is a cross between pissaladière and tomato focaccia. I love the addition of tomatoes to pissaladière because it adds a freshness and brightness, a hit of acidity to offset the sweet caramelized onions and salty anchovies, olives, and capers.
You can use any summer tomatoes you have on hand — diced cherry tomatoes, Roma, plum, sliced beefsteak tomatoes, heirloom tomatoes, etc. If you choose to dice up Roma or plum tomatoes, there is no need to seed them, but leave any juices lingering on the cutting board behind.
Top the unbaked focaccia with a thin layer of tomatoes; then bake as directed.

How to Make Focaccia Bread Sandwiches
One of my favorite things to do with either the rounds of focaccia or the 9×13-inch slab of focaccia is to make a giant sandwich: simply halve the whole finished loaf of focaccia in half crosswise; fill it as you wish, close the sandwich; then slice and serve.
Here’s one of my favorites: Roasted Red Peppers, Olive Tapenade, & Whipped Honey Goat Cheese
Can I Make this Overnight Focaccia Without the Overnight Rise?
Yes, you can. In fact, in my cookbook, Bread Toast Crumbs, I do not employ an overnight rise. Start-to-finish it can be made in about three hours. The finished bread will not be as pillowy, but it will still be light, airy, and delicious.
To skip the overnight rise, simply let the mixed dough rise at room temperature until doubled, about 1.5 to 2 hours. Then proceed with the recipe, knowing the second rise will only take about 30 minutes.
The Best, Easiest Focaccia Bread Recipe
- Total Time: 18 hours 30 minutes
- Yield: 2 loaves
Description
Cold, refrigerated dough is the secret to making delicious focaccia! Allowing the dough to rest 18 to 24 hours in the fridge will yield extra-pillowy and airy focaccia, though if you are pressed for time, you can make this start-to-finish in 3 hours. This 4-ingredient recipe requires only 5 minutes of hands-on time. Video guidance below!
Adapted from the focaccia recipe in Bread Toast Crumbs.
A few notes:
- Plan ahead: While you certainly could make this more quickly, it turns out especially well if you mix the dough the day before you plan on baking it. The second rise, too, takes 2 to 4 hours.
- If you are short on time and need to make the focaccia tonight: Let the mixed dough rise at room temperature until doubled, about 1.5 to 2 hours. Then proceed with the recipe, knowing the second rise will only take about 30 minutes.
- You can use various pans to make this focaccia such as: two 9-inch Pyrex pie plates. (Use butter + oil to prevent sticking.) One 9×13-inch pan, such as this USA pan — do not split the dough in half, if you use this option, which will create a thicker focaccia . A 13×18-inch rimmed sheet pan — this creates a thinner focaccia, which is great for slab sandwiches.
- As always, for best results, use a digital scale to measure the flour and water.
- I love SAF instant yeast. I buy it in bulk, transfer it to a quart storage container, and store it in my fridge for months. You can store it in the freezer also.
- If you are using active-dry yeast, simply sprinkle the yeast over the lukewarm water and let it stand for 15 minutes or until it gets foamy; then proceed with the recipe.
- Flour: You can use all-purpose or bread flour here with great results. If you live in a humid environment, I would suggest using bread flour. If you are in Canada or the UK, also consider using bread flour or consider holding back some of the water. Reference the video for how the texture of the bread should look; then add water back as needed.
Ingredients
- 4 cups (512 g) all-purpose flour or bread flour, see notes above
- 2 teaspoons (10 g) kosher salt
- 2 teaspoons (8 g) instant yeast, see notes above if using active dry
- 2 cups (455 g) lukewarm water, made by combining 1/2 cup boiling water with 1 1/2 cups cold water
- butter for greasing
- 4 tablespoons olive oil, divided
- flaky sea salt, such as Maldon
- 1 to 2 teaspoons whole rosemary leaves, optional
Instructions
- Make the dough: In a large bowl, whisk together the flour, salt, and instant yeast. Add the water. Using a rubber spatula, mix until the liquid is absorbed and the ingredients form a sticky dough ball. Rub the surface of the dough lightly with olive oil. Cover the bowl with a damp tea towel, cloth bowl cover, or plastic wrap and place in the refrigerator immediately for at least 12 hours or for as long as three days. (See notes above if you need to skip the overnight rise for time purposes.) NOTE: It is important the dough really be slicked with olive oil especially if you are using a cloth bowl cover or tea towel as opposed to plastic wrap or a hard lid. If you are using a tea towel, consider securing it with a rubber band to make a more airtight cover. If you do not slick the dough with enough oil, you risk the dough drying out and forming a crust over the top layer.
- Line two 8- or 9-inch pie plates or a 9×13-inch pan (see notes above) with parchment paper or grease with butter or coat with nonstick cooking spray. (Note: This greasing step may seem excessive, but with some pans, it is imperative to do so to prevent sticking. With my USA pans, I can get away with olive oil alone; with my glass baking dishes, butter is a must.)
- Pour a tablespoon of oil into the center of each pan or 2 tablespoons of oil if using the 9×13-inch pan. Using two forks, deflate the dough by releasing it from the sides of the bowl and pulling it toward the center. Rotate the bowl in quarter turns as you deflate, turning the mass into a rough ball. Use the forks to split the dough into two equal pieces (or do not split if using the 9×13-inch pan). Place one piece into one of the prepared pans. Roll the dough ball in the oil to coat it all over, forming a rough ball. Repeat with the remaining piece. Let the dough balls rest for 3 to 4 hours depending on the temperature of your kitchen (Note: no need to cover for this room temperature rise).
- Set a rack in the middle of the oven and preheat it to 425°F. If using the rosemary, sprinkle it over the dough. Pour a tablespoon of oil over each round of dough (or two tablespoons if using a 9×13-inch pan). Rub your hands lightly in the oil to coat, then, using all of your fingers, press straight down to create deep dimples. If necessary, gently stretch the dough as you dimple to allow the dough to fill the pan. Sprinkle with flaky sea salt all over.
- Transfer the pans or pan to the oven and bake for 25 to 30 minutes, until the underside is golden and crisp. Remove the pans or pan from the oven and transfer the focaccia to a cooling rack. Let it cool for 10 minutes before cutting and serving; let it cool completely if you are halving it with the intention of making a sandwich.
- Prep Time: 18 hours
- Cook Time: 30 minutes
- Category: Bread
- Method: Oven
- Cuisine: Italian
This post may contain affiliate links. Please read my disclosure policy.


4,152 Comments on “Overnight, Refrigerator Focaccia = The Best Focaccia Bread Recipe”
Thank you for your quick response. I love your style and your recipes!
Thank you, Toni 😍😍😍
Holy guacamole! You weren’t kidding about it sticking. I used a ton of olive oil on the bottom, but next time (and there will be a next time) I will use parchment as well. (used a glass 9×13). The recipe is awesome. Hugs Ali.
Olive oil alone is not enough!! You have to use either butter or parchment to prevent sticking. Glad there will be a next time!
I should say that 85% of it came out unscathed. :). Just part of the bottom didn’t. Oops!
phew 😅
The USA 9″ x 13″ pan is the best. Nothing sticks to it. Doesn’t need to be buttered and no need for parchment. Well worth the investment! I have been replacing all my baking pans one by one with USA pans – and I live in Canada!
I LOVE my USA pans, too 😍😍😍
Hello, What salt substitutes do you recommend for kosher salt and in what quantities?
My current options at the grocery store are regular table salt and sea salt. Thank you and I’m looking forward to trying this recipe.
Hi Mara! If you have a scale, use 10 g salt. If not, use 1.5 teaspoons table salt or fine sea salt. 😍
Thank you so much for your prompt reply! 🙂
Loved your recipe.!!!! My first time baking and was really glad that it came out well. Taste and texture was good but was stuck to the tray and had to try hard😞 Nevertheless it was all gone in an hour !!!! Can you please add tips on how to store to ensure the bread stays crispy. I love your blog and video , no noise, clear steps. Glad that I found your blog…
So nice to hear this, Abby! Glad you like the vids 😍 And yes: butter or parchment in addition to the oil is necessary with some pans to prevent sticking. There really is nothing you can do to keep the crust crisp after a day. A ziplock bag (or an airtight vessel) is the best way to keep the bread fresh the longest. On day 2, you have to reheat it before serving. The good news is that it revives beautifully in the oven (350F for 15 minutes) or the toaster.
Ali, someone always asks, so let it be me! I have Celiac disease and must use GF flour. I saw previous comment about water, but will it need to rise?
How do you convert it? Since no gluten, does it still need to be in the refrigerator overnight? I can’t wait to try this recipe!
Hi Bonetta! I really cannot make any promises here, but no, there is no need for the overnight rise. It would truly be a matter of mixing the dough, getting it into the pan, letting it rise till it doubles; then dimpling and baking. I have no idea if gf dough can even dimple (??) and I think, as you note, it will take some trial and error getting the amount of water right because all gf flours absorb water differently. I truly wish I could offer you more promising advice, but I just don’t have the experience.
Thank you so much! Trying today!
It didn’t work well. I think it was because of the flour I used. Took twice as much water, and took twice as long to cook. The outside was hard as a rock! Inside was good, though. I am going to keep tweaking this until it works! Thanks for the recipe!
I was just thinking, it wouldn’t hurt for me to add more yeast…
Thanks for the recipe! For the second rise, do you leave the dough uncovered? Or would it work better to cover it loosely with plastic wrap so it doesn’t dry out?
Uncovered! The dough should be coated nicely in olive oil, which protects it from drying out.
I’ve made your peasant bread a couple of times and a lemon ricotta pound cake but this has to be the easiest bread recipe ever. I decided to make just half of your recipe. I spent 5 minutes before bed making the dough and putting it into the refrigerator. I went to work the next day and when I came home I put it into a well buttered 8 by 8 glass baking dish to set for 2.5 hrs. The total hands on time is only about 10 minutes. It slid out of the baking dish with no sticking. It had a nice thin crispy crust and was absolutely delicious. Do you have any thoughts about adding any herbs on top before baking?
So great to hear this, Terry! It is such a low-effort, high-reward bread, right?
Some fresh rosemary added along with the sea salt on top would be delicious!
This focaccia is so delicious and easy! We couldn’t finish it all the first day and found it stale the next. What tips do you have for keeping it fresh and/or freezing half of the recipe?
Wonderful to hear this, Stella! I store day-old bread in an airtight bag or container. The crust will get soggy on day two, so you reheat it in the oven at 350ºF for 15 minutes or toast slices before serving. To freeze, place the cooled bread in a ziplock bag. Freeze for up to 3 months.
I love the video and your style is straightforward which is great for a cook that wants to get down to business. I’ve made this recipe twice and each time it didn’t work out. I am not sure what I did wrong. I used activated yeast which I dissolved in the half a cup of boiling water before putting 1 1/2 c of cold water in, then added it to the flour mixture. My 2nd rise was 2.3 hours. I used a 13 x 9 pan and I baked it at 425 for 30 minutes. My bread didn’t rise and it also as not cooked through. Any help is greatly appreciated.
Jennifer, hello! I think you’re killing the yeast by sprinkling it over the boiling water. If using active dry yeast, combine the 1/2 cup boiling water with 1.5 cold water first. The combined liquid should be perfectly lukewarm. (Boiling water will kill the yeast.) Then sprinkle the yeast over top. When it foams, which should be in about 15 minutes, then proceed with the recipe.
This is such an easy recipe and hard to mess up. I bake it free form on a lined baking sheet so I don’t have to worry about greasing the edges of a tray and get one large loaf.
Love this, Nisha 😍😍😍
If I only have active dry yeast on had, do I reduce the water in the recipe by the amount used to activate the yeast? And would I use 2.5 tsp of ADY instead of the 2tsp instant (I’ve read I should increase ADY by 25% for substitutions)? In a different recipe I microwaved some water to warm it and used a thermometer to make sure it wasn’t too hot. The recipe didn’t turn out great but I think it was for other reasons as the yeast bubbled beautifully . Is that okay vs using boiling water?
This recipe looks great! Can’t wait to try it.
If I only have active dry yeast on had, do I reduce the water in the recipe by the amount used to activate the yeast? And would I use 2.5 tsp of ADY instead of the 2tsp instant (I’ve read I should increase ADY by 25% for substitutions)? In a different recipe I microwaved some water to warm it and used a thermometer to make sure it wasn’t too hot. The recipe didn’t turn out great but I think it was for other reasons as the yeast bubbled beautifully . Is that okay vs using boiling water?
Hi! No need to reduce the water! Make the lukewarm water has instructed: combine 0.5 cups boiling water with 1.5 cups cold water. (Best to use a scale so if you are using one, be sure the water weighs 455g). Sprinkle the yeast over top. Let it stand for 15 minutes or until it gets foamy; then proceed with the recipe.
Hi. This recipe looks lovely! I only have bread flour on hand though. Can that be used in place of all purpose flour? Also, can the dough be frozen? If so, when should it be placed in freezer?
Hi Jan! Yes, absolutely re bread flour! I haven’t tried freezing this dough, but my gut is telling me to have you freeze it immediately after mixing it. When you are ready to bake it, thaw it in the refrigerator for a day; then transfer to the pan you are planning to bake it in and proceed with the recipe.
So you don’t let it raise at all before the refrigerator ? I am so surprised and intrigued . Always thought it needs to grow before putting it in cold
Hi Inna! Nope … it goes straight from being mixed to the fridge.
One more question so sorry to bother you again: I have dry active yeast but it’s not instant should I dissolve it in the warm water first ? And follow afterword your recipe
Yes! Sprinkle it over top; let it stand for 15 minutes or until it gets foamy; then proceed.
This was my first attempt at focaccia and it was a huge hit with my family. The instructions were very easy and the resulting bread was fantastic. The texture and flavor were exceptional. My husband said it was better than any he’s gotten in restaurants. I prepared the focaccia in two round cake pans. We had one with Potato Leek soup for lunch and we had the second one with Lasagna for dinner. Thanks for such an easy to prepare recipe.
Wonderful to hear this, Londa!!
Hi, thanks for posting your recipe! I just made my dough to go in the refrigerator and I noticed that my dough did not hold together as well as yours does in the video. It was in between a dough ball and a batter. I used a scale to measure the AP flour, salt, yeast and water. So I just put the oil on and put it in the fridge. Any suggestions? Should I add more flour to get your consistency ?
Thanks!
Hi Patrick! Nice work using the scale. Since you measured with a scale, I don’t think you should do anything else … it definitely is a wet dough. Keep me posted tomorrow when you turn the dough out into your prepared pan.
No need to worry about making it come together as a ball. It’s really not necessary. When you bring it out of the fridge it needs to spread out into the pan anyway. I also used a scale so the ingredients are all correct. It turned out perfectly and I have made it many times since. I’ll be teaching my grandchildren to make this one. So easy and soooo tasty!
Hi there! I tried your recipe and, oh my god, it was definitely the most successful ‘bready’ focaccia I’ve tasted! It came out crispy on the outside and soft on the inside
I used half amount of ingredients, plus a teaspoon of Italian Herbs mixed in the dough for flavor and taste.
On the bad side, it barely stuck against the bottom of baking tray after completing the baking time. I had put a moderate amount of olive oil to the baking tray before placing the proofed dough on. However, after cooling down for a few minutes, it partly came off when I used a small knife with minimal force.
Overall this is one of the best and successful recipes I have been looking for! Definitely a 5-star rating!
Wonderful to hear this, Jean! sticking is such a bummer … you definitely have to use a little but of butter before the oil to ensure no sticking. Or parchment. Or a different pan. My USA pan never causes an issue. My Pyrex pan does. Anyway, so glad you were able to salvage the bread and that you loved it. Yay 🍞🍞🍞
Absolutely beautiful, the best recipe I’ve ever used.
Thank you
You did a great job, this is the best recipe so far I came across, thanks for sharing this lovely recipe.
Hello
I have been having a hard finding yeast and can only find active dry. will this work?
Thanks
Hello again. I do see above that active yeast is ok. One more question, is it ok to mix with dough attachment in mixer vs rubber spatula?
Oh good! Glad you found it. And yes re mixer. Keep in mind that it is a very wet dough, so the dough will not wrap around the dough hook the way it does with other doughs.
Hi,
I followed all the steps and my 2 balls of dough are currently sitting in my kitchen in the pie plates. Is it possible for me to make them tomorrow morning, even though I have already taken them out of the fridge / they have been sitting out for 2 hours? Please let me know! Thank you!!!
Hi! I’m likely too late here, but yes! I would deflate them again, coat them in oil, and transfer to the fridge
Hi! Not too late — thank you for getting back to me so quickly!! Real quick…what do you mean by deflate them?
Oh great! If the dough has risen, just kind of punch it down and ball it up again. I hope this makes sense!
I think I under-baked by just a few minutes and I didn’t get the large holes, but it was really good (only 1 piece left!). Very tasty, the husband loved it, and super easy. Thanks for this great recipe.
Wonderful to hear this, Faye! Regarding the large holes, how long was your first rise in the fridge? And how long was your second rise?
I left it in the fridge for 23 hours and second rise was about 3-3.5 hours, I think. The lack of large holes did not affect the taste, it was wonderful and I will try again. I did half the recipe so maybe that had an effect? Still, no complaints here! Thank you for the great recipe.
Ok, great to hear, Faye! It’s possible that a half recipe had an effect. Sounds as though you did everything right!
Hi! Can I use Kosher salt on top instead of flaky salt? i’ve been looking around and haven’t found any. I also have pink himalayan salt.
Definitely! I would use the pink himalayan salt.
thank you! I have them resting uncovered now! I’m so excited. Is there such thing as too much oil? im thinking i may have gone tish overboard with the oil coating lol. (i just really don’t want it too stick lol)
No such thing as too much oil 🙂 🙂 🙂 That said, the best barrier for non sticking is to use butter first; then oil. With my USA pan, I can get away with oil alone. With my Pyrex baking dishes, oil alone doesn’t cut it … you have to use butter first. Keep me posted on how it bakes!
It was so AMAZING!!! I made two loaves and it came out perfect 🙂 best recipe ever i’m saving this for life!
Yay!! So happy to hear this, Nicole 🍞🍞🍞🍞
hi i am not getting holes and crevice in my focaccia when baking they close up ? i am using the over night recipe from your web site
Hi Brad! Are you using a scale to measure? What type of flour are you using?
I am about to start this recipe but would like to make it an art project too and add a “garden scape” – could you let me know WHEN in the process you think it’s a good time to add the veggies on top?
Hi Dana! Sorry for the delay here. I have SO been meaning to try this. This is what I would suggest: after the second rise, when you are ready to dimple and bake, I would dimple the dough very gently, just to spread it out; then top with your garden scape. If necessary, dimple again once the vegetables are on top to press them into the dough and secure their location a bit. Hope that helps! Let me know how it turns out.
Thanks for your reply! It turned out perfect!!! Thank YOU!
I’ll send you a photo on your intagram!
Oh wonderful! So nice to hear this!
Tastes really good (especially after adding some garlic on top!) but the dough was much firmer and not at all sticky like the pictures, so when I baked it, it was a bit dense. Next time should I add more water to the dough?
Hi Matilda! Question for you: are you using a scale to measure the flour? And what type of flour are you using?
I have made this now five times in lockdown and it’s honestly the best focaccia I’ve ever had. So easy to make but looks so impressive! I’ve used strong white bread flour instead of all purpose and fresh yeast instead of dry (I’ve just doubled the amount of yeast in the recipe) and it’s worked a treat, plus made versions with fresh rosemary and pitted green olives studded into it – although if doing an olive version, ease up on the sea salt as it can get very salty then! Will be my go-to crowd and party pleaser forever more! Xx
Oh Anette! So wonderful to hear this. Nice tip re salt + olives, too. Thanks so much for writing 🍞🍞😍😍
Love, love, love this recipe! Quick. easy and delicious. I will be teaching my grandchildren how to make it very soon – ages 11 and 9. They will love dimpling the olive oil laced dough. Thank you so much for the recipe. It will be in my family for life.
Oh yay! Wonderful to hear this, Heather. And yes, the dimpling is so much fun … no matter how hold you are 😍😍😍
Hello, Ali! Thank you for sharing this recipe. May I know if the oven needs to be in convection setting (w/ circulating air) or just the conventional setting ? I tried to bake this without the circulating air and color didn’t look golden at 30minutes. Is it okay to bake it a bit longer? I was afraid it might get harder if it take longer period. Btw,
I followed the recipe to the T and used a scale too. Thank you! 😊
Hi Sarah! I do not use convection here, but I am all about finding what works for your oven. Does it typically run cool? I think the first step would be to increase the oven temperature by 25 degrees. Keep an eye on it to ensure it isn’t browning too quickly. No harm in baking it a little longer, too.
What type of flour are you using?
Thanks for your quick reply! I’m not quite sure if the oven is really at 425F once it beeps after pre-heating (I’m using Breville Smart oven). Seems I need to validate that one though.
I’m using an all-purpose flour. Thank you!
OK, interesting! Yeah, I would crank it up!
I’ll increase the temp on my next round. I’ll give you an update. Thanks again!
PS. My mom loves your focaccia recipe. I’ve been trying several recipes but this is only my mom approved 🙂
Oh yay! So nice to hear this. Keep me posted!
Hello! Thank you so much for this recipe. I am from UK and trying it. Following it exactly as said, BUT just not working. The mix is very very wet and even after stirring vigorously for 10 mins, it does not really come together. I am using all purpose plain flour, fast action dried yeast and keeping it apart from the salt in the bowl before adding the warm water. Just not coming together into a more solid shape. Any help would be lovely, thank you!
Hi Guy!
Sorry for your troubles! Thanks for the details.
I think you need to reduce the water amount. Try holding back 50-75 g of the water. If it feels too dry when you mix, slowly add more water until it looks right. Note: this dough is very wet and sticky — it won’t look like a smooth and elastic kneaded dough (reference the video).
Once you get the water level right, there will be no need to keep the salt separate before… are you doing an autolyse? Just add everything at once, and mix.
Thank you so much for your response and speed of reply, sincerely appreciate it. I’ll be honest, I had no clue what autolyse was until I just googled it! And no, I am not doing that, should I? Does it help? Will definitely take your tip on the water adjustment. I did see your video but yours came together- it was wet and not solid but it came together, mine was very liquid. Hopefully, your adjustment will do the trick!
Ok, perfect! And no, no need to autolyse 🙂 🙂 🙂
Tried it, works wonderfully. Thank you very much once again for this delicious recipe Ali, incredible!
Wonderful to hear this, Guy!