
Easy Sourdough Sandwich Bread
This post may contain affiliate links. Please read my disclosure policy.
As I mentioned a few weeks, a number of requests about how to make my mother’s peasant bread with a sourdough starter encouraged me to dip my toe into the wonderful world of naturally leavened breads. You can read more about that experiment here, which led to this simple sourdough focaccia recipe, an adaptation of my favorite yeasted, refrigerator focaccia.
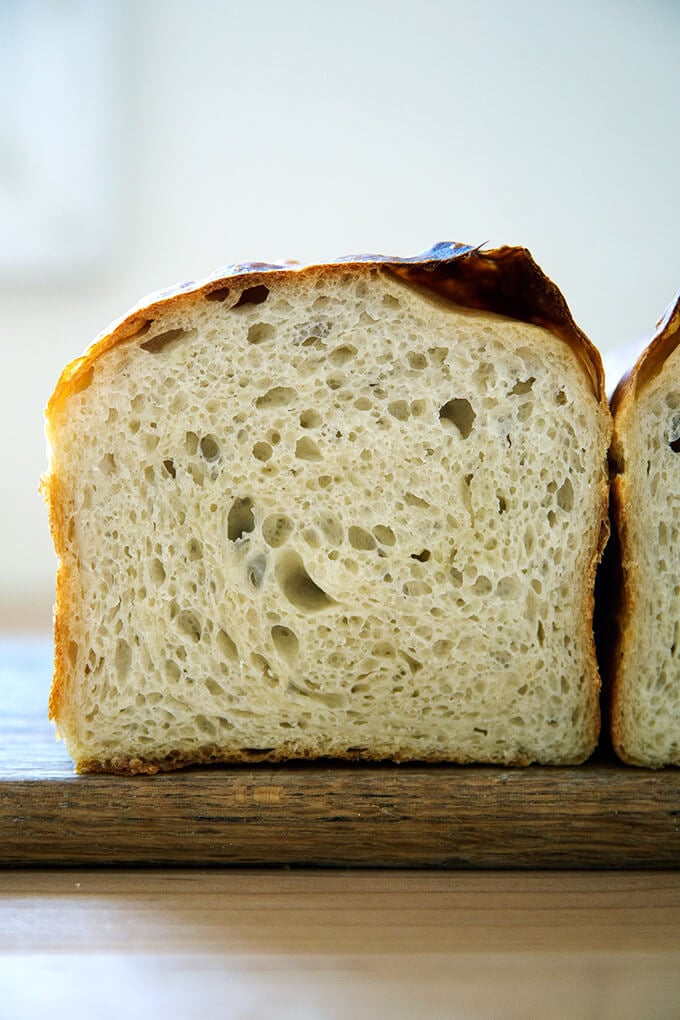
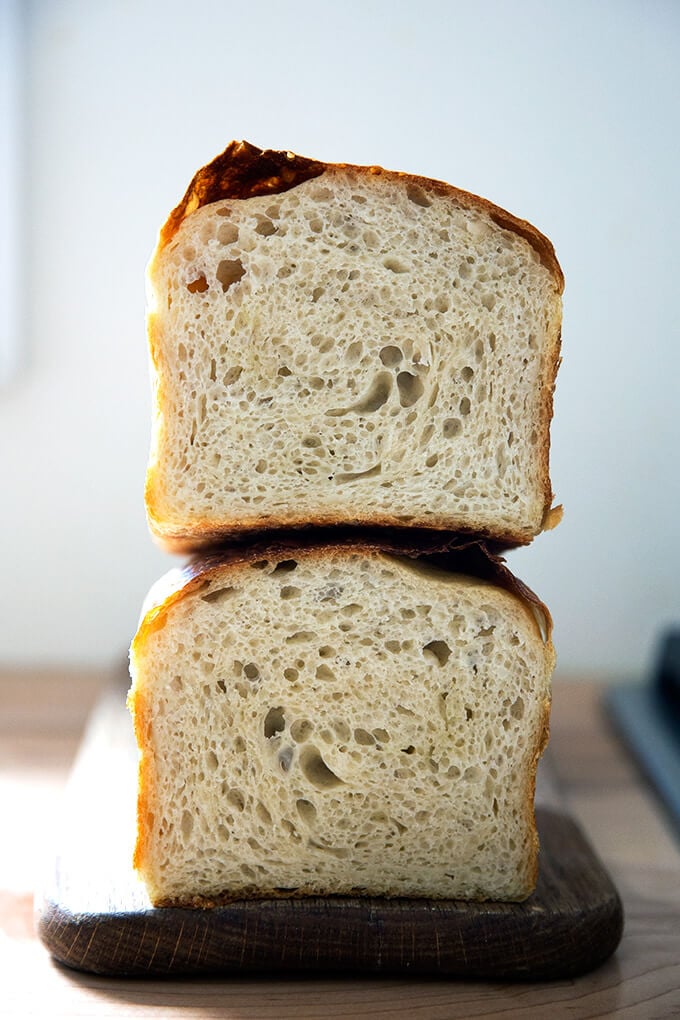
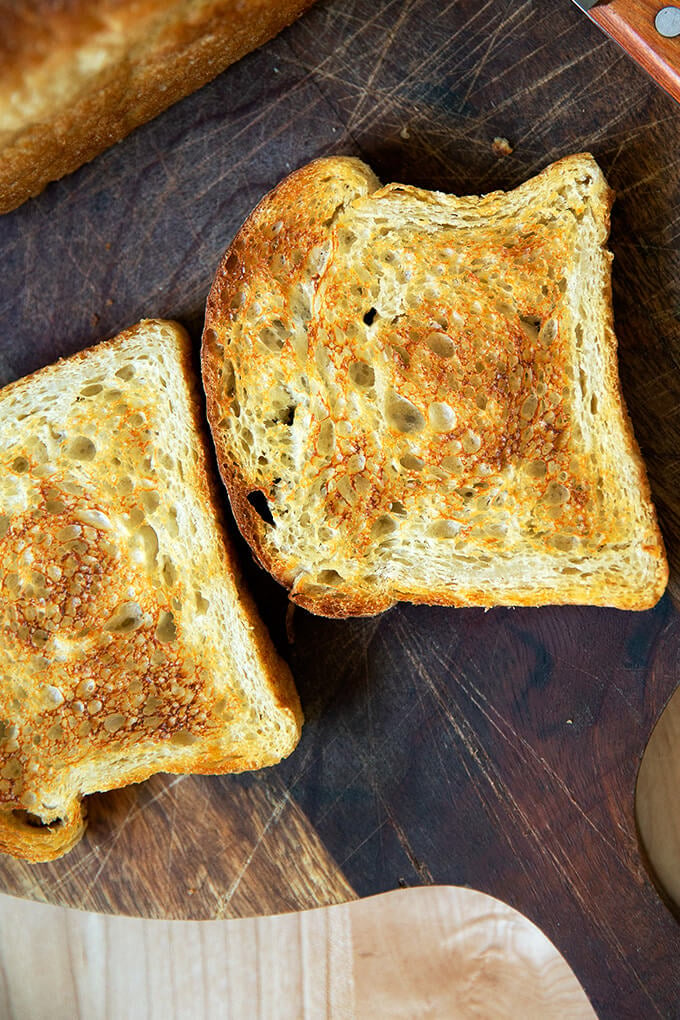
It also led to this sourdough toasting bread, which is essentially the same formula, just baked in a different vessel and without the slick of oil and sprinkling of sea salt on top. I’ve been making this bread even more often than the focaccia these days because I love the shape: it’s so nice for morning toast and for sandwiches.
PS: How to Build a Sourdough Strater from Scratch
PPS: How to Activate, Feed, and Maintain A Sourdough Starter
Simple Sourdough Toasting Bread: What You Need
- A sourdough starter. I recommend buying one (read why here). But if you’re up for it, you can make one from scratch in just about a week.
- Time. As with the focaccia, this bread rises first for about 6 to 18 hours (depending on the time of year and strength of your starter), then again for another 4 to 6.
- A large loaf pan. I’ve been using this 10 x 5-inch loaf pan. If you only have two smaller loaf pans, such as 8.5 x 4.5-inch pans, you’ll need to split the dough in half after the first rise.
That’s it! Ready? Here’s the play-by-play:
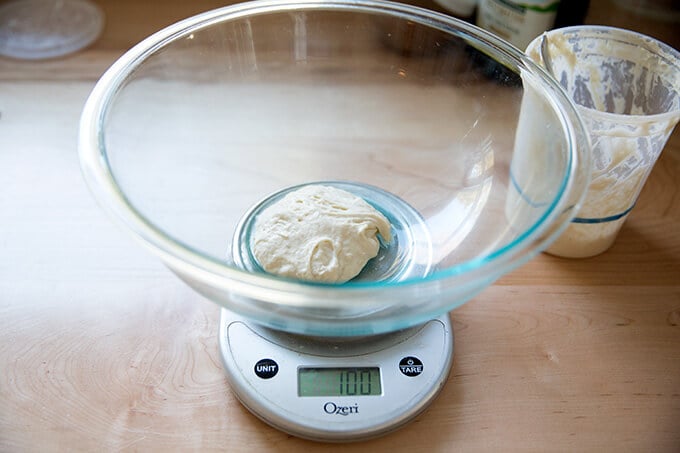
As always, when mixing sourdough doughs, it’s best to weigh everything with a digital scale. Start with 100 g starter. (If this looks familiar, it is: this is the same basic process for the sourdough focaccia.)
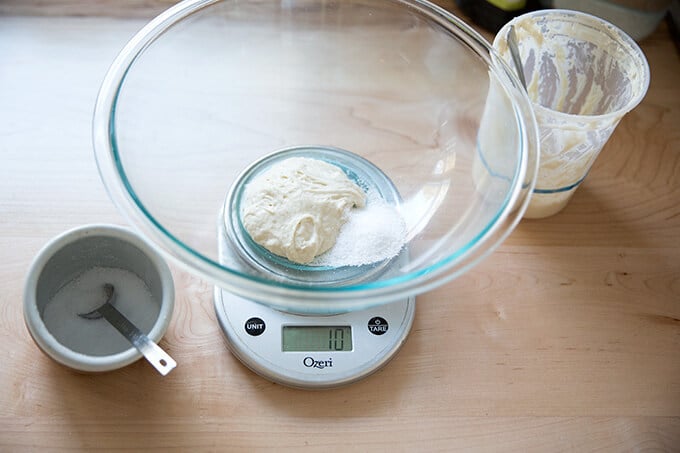
Add 10 g kosher (or other) salt.
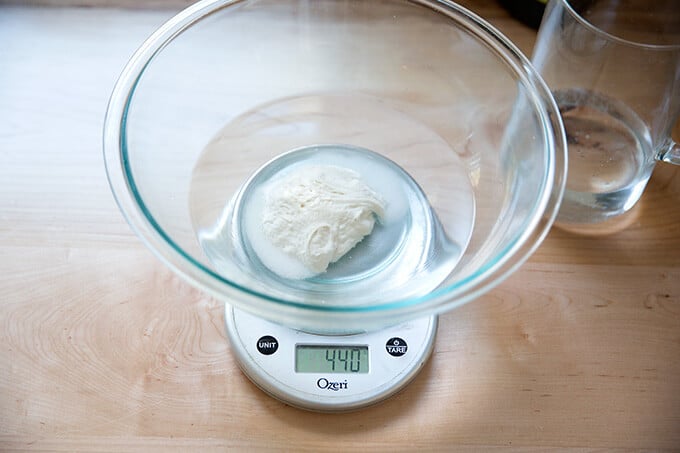
Add 430 g water. (Or less, see recipe for notes.)
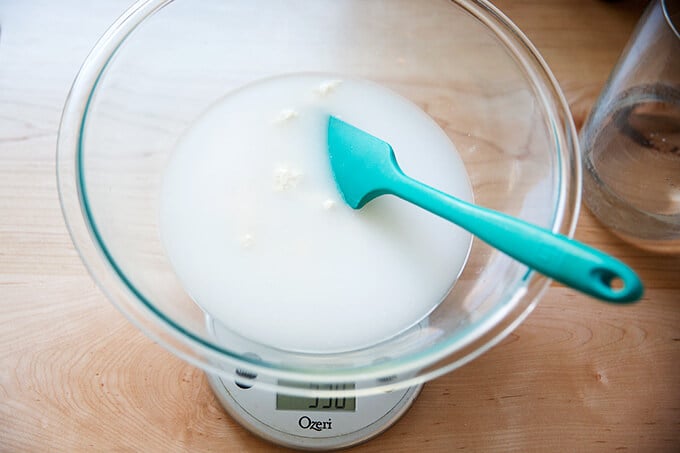
Stir to combine.
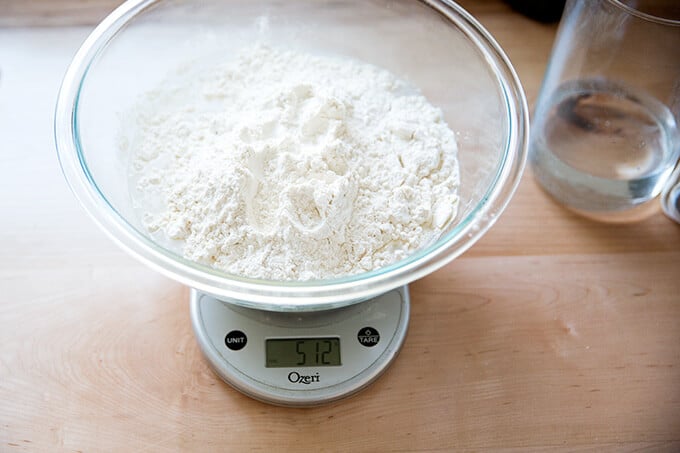
Add 512 g bread flour.
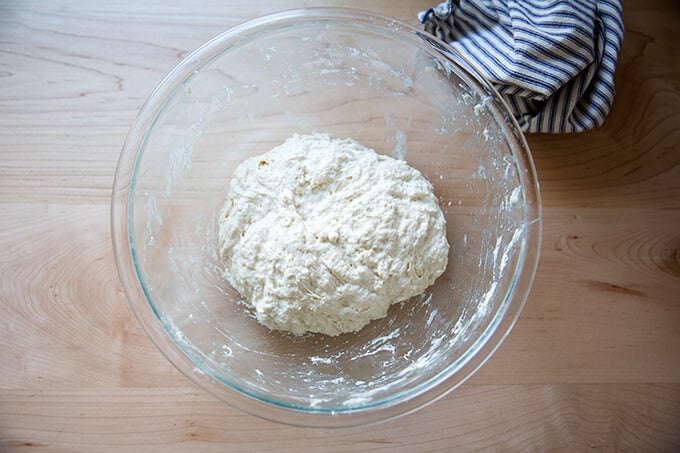
Stir to form a sticky dough ball.
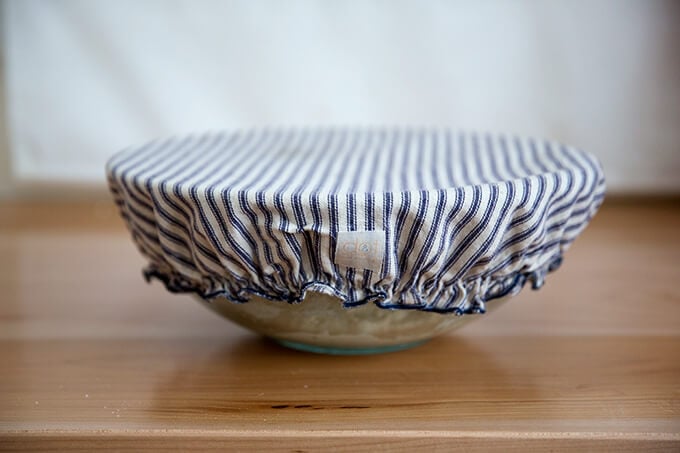
Cover with a towel or bowl cover, and let rest for 30 minutes. Then, perform a series of stretches and folds. See video for guidance. Repeat this 3 more times for a total of 4 sets of stretches and folds during the first two hours. Then, let rise for 6 to 18 hours* (see recipe notes) at room temperature:
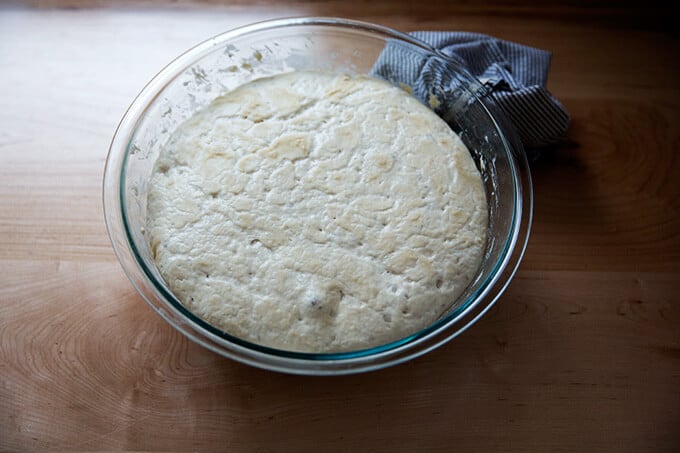
After 6 – 18 hours, it will look something like this:
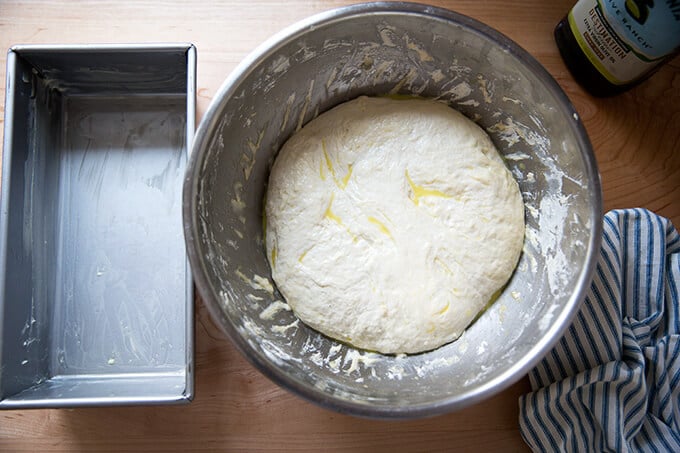
Drizzle the surface of the dough with a little bit of olive oil; then fold the dough inwards from the sides to deflate.
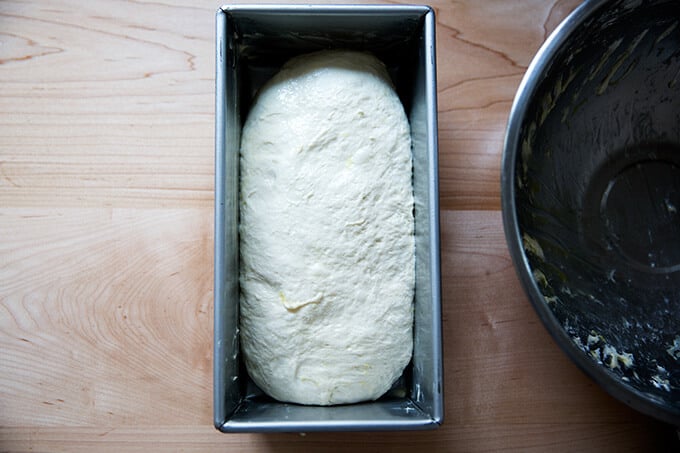
Transfer dough to loaf pan.
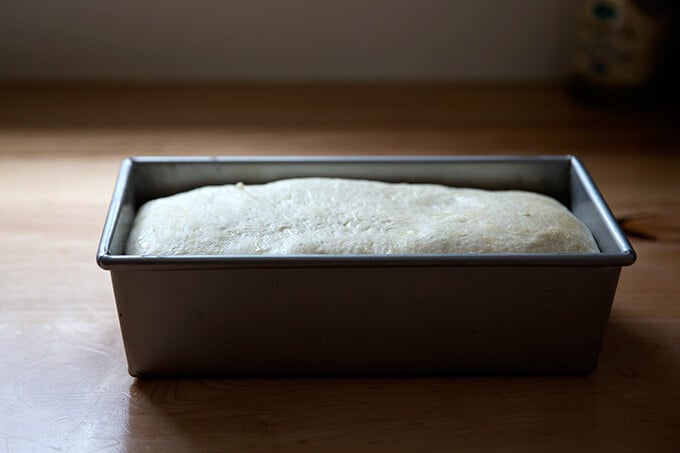
Let rise till dough just begins to crown the rim of the pan, about 6 hours.
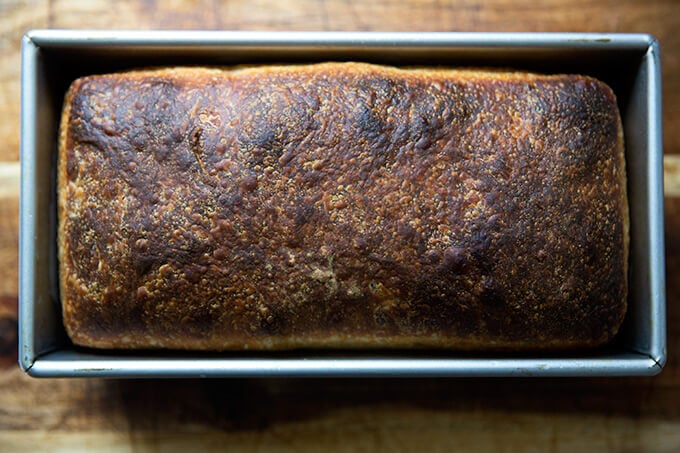
Bake for about 45 minutes.
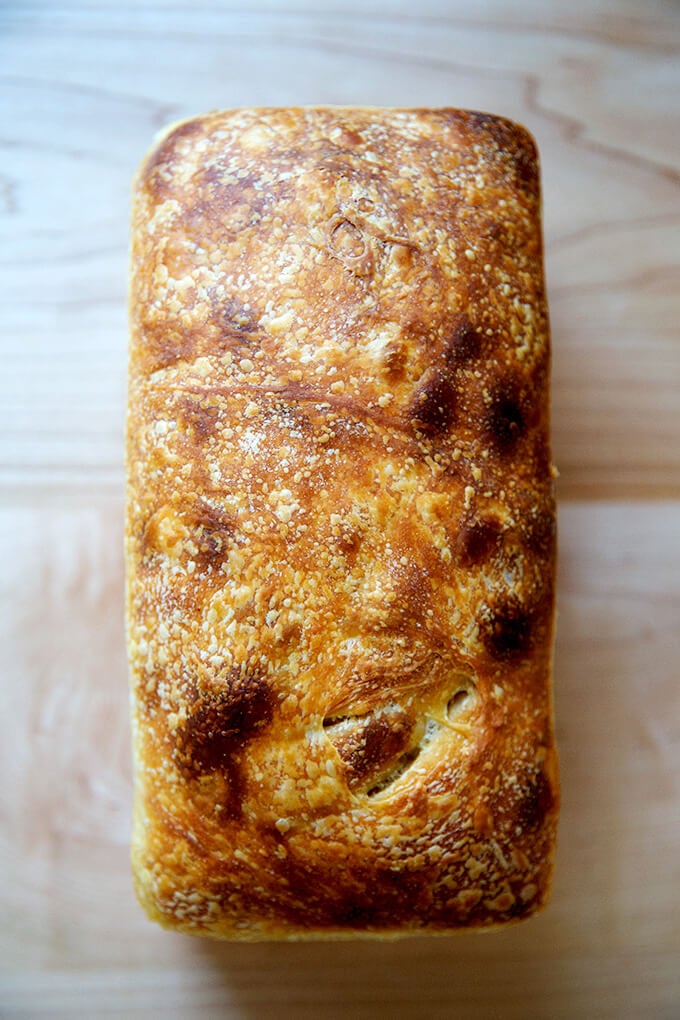

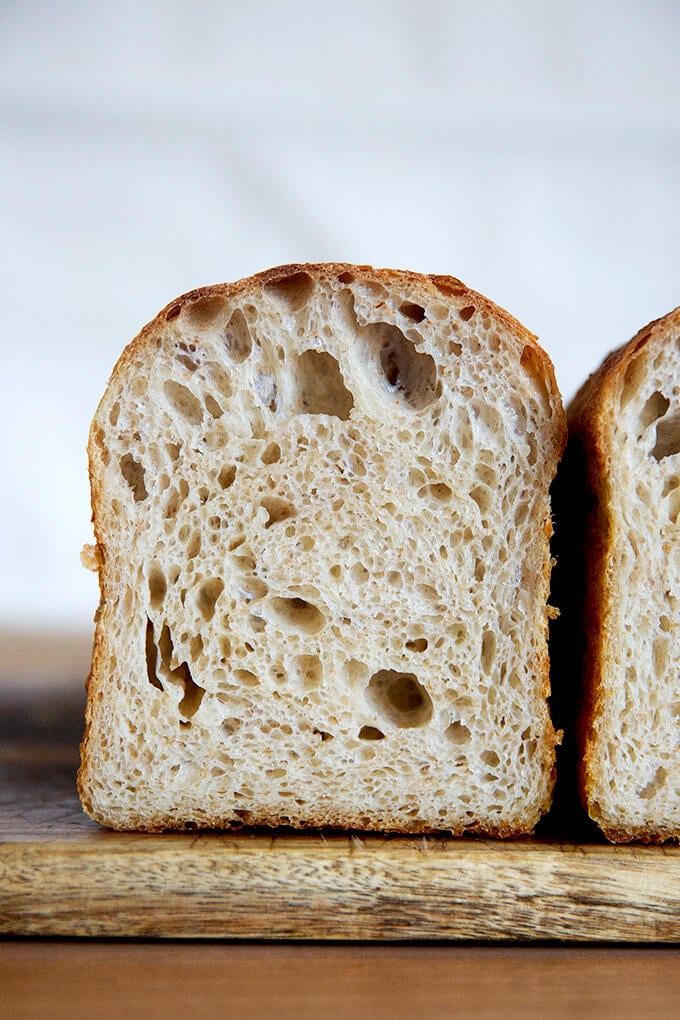
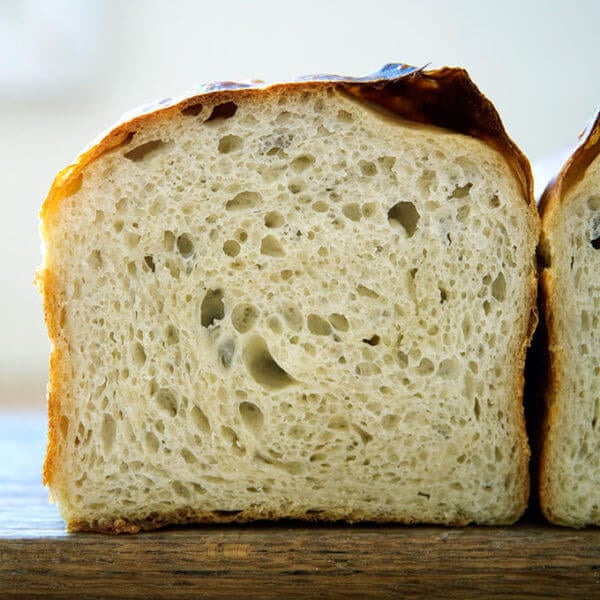
I baked this loaf in a tall-sided pullman loaf. Love the shape!
Easy Sourdough Sandwich Bread
- Total Time: 24 hours 40 minutes
- Yield: 1 loaf
Description
** UPDATE: VIDEO GUIDANCE IS HERE **
The makeup of this dough is the same as this sourdough focaccia. Here, the dough is baked in a loaf pan, and there is no sea salt on top.
This recipe yields one large loaf. You’ll need a 10 x 5-inch loaf pan, such as this one. If you only have two smaller loaf pans, such as 8.5 x 4.5-inch pans, you should probably split the dough in half after the first rise.
Plan ahead: This dough rises first for 6 to 18 hours (or less if it is super hot out or if you live in a humid area) or until the dough doubles in volume; then again for about 4 to 6 hour or until the dough crowns the rim of the baking vessel.
Troubleshooting: If you have issues with your dough being too sticky, please read this post: Why is my sourdough so sticky? The 4 common mistakes.
If you’re just getting started with sourdough, check out this post first. You’ll find tips there on procuring a starter as well as how to feed it and maintain it. If you’re up for making your starter from scratch, you can do so in just about 1 week.
Water: Chlorine in water can adversely affect sourdough. Leaving water at room temperature for 24 hours will allow most of the chlorine to escape. When I am in the habit of making sourdough bread, I fill a large pitcher with water and leave it out at room temperature. I use this for my sourdough breads and starter. Truth be told, I’ve used water straight from the tap and have not noticed a difference.
Water quantity: Also, depending on where you live and the time of year, you may need to cut the water back. If you live in a humid environment, for instance, I would suggest starting with 400 g or 420 g water. If you are not using bread flour, you also may need to cut the water back a bit. So much success with sourdough relies on getting the water quantity right.
Starter: I use a 100% hydration starter, meaning it is equal parts by weight flour and water. If you need guidance on how to maintain a starter, see this post.
Ingredients
- 100 g (about 1/2 cup) active starter, see notes above
- 10 g (about 2.5 teaspoons) kosher salt
- 430 g water, (or less, see notes above) room temperature
- 512 g (4 cups) bread flour, such as King Arthur Flour
- a few tablespoons extra-virgin olive oil
- room temperature butter, for greasing
Instructions
- Mix the dough: Place the starter, salt, and water in a large bowl. Stir with a spatula to combine — it doesn’t have to be uniformly mixed. Add the flour. Mix again until the flour is completely incorporated. If you have a straight-sided vessel, transfer the dough to it — it really helps monitor the rise and allows you to see the true growth in volume of the dough.
- Perform one (or more) “folds”: 30 minutes after you mix the dough, reach into the bowl and pull the dough up and into the center. Turn the bowl quarter turns and continue this pulling 8 to 10 times. See video for guidance. If time permits, repeat this “folding” step every 30 minutes for the first two hours. (Note: even if you perform just 1 fold, your dough will be in good shape.)
- Drizzle with a splash of olive oil and rub to coat. Cover bowl with a tea towel or bowl cover and set aside to rise at room temperature (70ºF/21ºC) for 4 to 18 hours — if it is super hot out or if you live in a humid environment, it may only take 4-6 hours. When the dough has nearly doubled in volume (or UPDATE: increased in volume by 50%, which is when I now end the bulk fermentation), it is ready. (Note: Do not use an oven with the light on for the bulk fermentation — it will be too warm. It is best to rely on visual cues (increasing in volume by 50% or doubling if you’ve had success with doubling) as opposed to time to determine when the bulk fermentation is done. A straight-sided vessel makes monitoring the bulk fermentation especially easy.)
- When the dough has nearly doubled, grease a 10 x 5-inch loaf pan with butter (or nonstick spray). Drizzle dough with a few tablespoons of olive oil. Rub your hands with a little bit of oil to coat. Use your hand to release the dough from the sides of the vessel, being careful not to completely deflate the dough. Video guidance here. Turn dough out onto a work surface. Quickly, shape the dough into a rectangle — I fold the dough envelope-style first; then I use a bench scraper to shape the dough into a rough rectangle. Transfer dough, seam-side down to prepared loaf pan and gently stretch into an oblong shape. (At this point, you can transfer the pan to the fridge if it makes sense with your schedule: rub the dough with oil and cover with a cloth bowl cover or plastic wrap. Transfer to the fridge will the next day. Then proceed with the recipe.)
- Leave alone for 5 to 6 hours or until dough begins reaching the rim of the pan — this may take less time when it is very warm out. Do be patient with this second rise: to get good height, the dough should be near the rim of the pan before you transfer it to the oven.
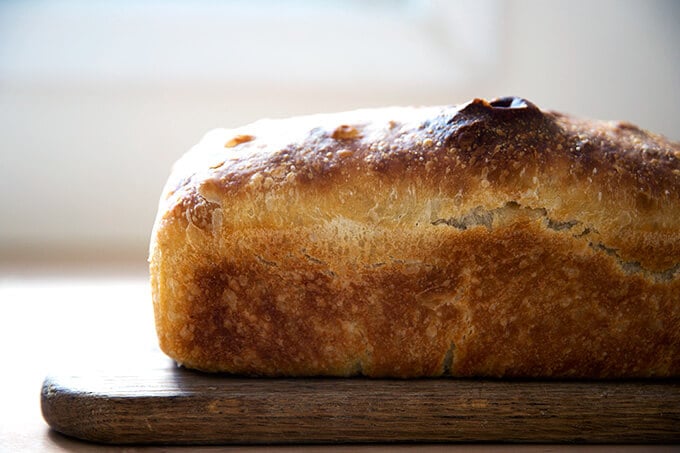
- Heat oven to 425ºF. Transfer pan to the oven and bake for about 20 minutes. Reduce heat to 375ºF. Bake for 20 to 25 minutes more or until golden all around. If you have an instant read thermometer, it should register 206-210ºF or so before removing. Remove pan from oven and turn bread out onto a cooling rack. Cool at least 30 minutes before slicing.
- Prep Time: 24 hours
- Cook Time: 40 minutes
- Category: Bread
- Method: Sourdough/Natural Leavening
- Cuisine: American
This post may contain affiliate links. Please read my disclosure policy.


898 Comments on “Easy Sourdough Sandwich Bread”
How about measurements for those of us who don’t own scales?
Thank you
Just added volume measurements!
An alternative to buying a starter is checking local bakeries! My local bakery gives away their starter for free. I have also had a lady who sells her bread at the farmer’s market give me a starter that she had going for several years!
Smart! Good point. And how nice of the woman at the farmer’s market?!
Would this be what Pyrex calls a 1.5 qt loaf pan?
I don’t think they’re quite the same, Karen. I just filled a 1.5 qt bowl with water and dumped it into my loaf pan. The loaf pan can fit about 3+ more cups of water, so I think it’s closer to a 2-qt or even slightly larger loaf pan. If you look for a loaf pan designed for a 1.5-lb loaf, you should be safe.
My dough tripled in volume after 12 hours on first rising. Should I leave for full 18 hours or go with what the dough seems to be telling me?
Go with what the dough seems to be telling you! I’ll edit recipe now.
After experiences with “Friendship” bread and Kombucha I was somewhat hesitant to invite another live culture into my kitchen. But, in spite of your warning and Jim Lahey’s slightly scary instructions in his Sullivan Street cookbook I decided to give it a go. I did start out with the SAF yeast in my fridge (it has been in there so long I consider it a local) but let it sit out for a few days so the ambient critters could join the party. I divided the mix in half and although they started out the same and were in the same environment, they developed completely different personalities. One developed a mellow slightly sweet smell and the other one was just vile! I am happy because I wasn’t really sure how to tell if my culture was “good”. I discarded the evil twin and this week made my first loaves with the good twin.
The recipe made 4 mini loaves (5 1/2 x 3 1/2). Because of my schedule, I let the first rise go for a full 24 hours and the second rise about 3.5 hours. I baked for 15 min at 425 and 15 min at 375. They have a really nice sourdough flavor and that shiny crumb I associate with sourdough bread. The size is perfect for appetizers, tea parties or just portion control.
So interesting, Clare! I’ll have to check out Lahey’s recipe. He’s such in inspiration. And I’m so happy mini loaves worked out here for you. Love the idea of having smaller loaves on hand. And me, too: I love the shiny crumb.
Hi..i tried this recipe..the upper part didn’t become brown even after 45 minutes it was still white, hence kept for more time to make it brown. Feared that the bread will become hard took it out keeping for 10 mins more. Must admit that the inside part was super soft, however not happy with the top crust it became quite hard. What should i have missed?
Bummer! What kind of flour did you use? It wasn’t bleached, was it? Does your oven run cool? Do you have an oven thermometer?
I used normal maida flour..looks like it was bleached..i should use unbleached flour? No i dont have oven thermometer nor do it think my oven run cool
I think that’s the problem: bleached flour will not brown well at all. Yes, use unbleached flour and unbromated flour as well: are you able to find King Arthur Flour?
This bread turned out great. It’s so simple (you just have to remember to start it the night before!). I used olive oil to grease the pan. The crust came out simply divine. It was excellent toasted as well. This will become a regular in my house! I was a little worried because when I put it in the pan it was quite a loose dough. There really was no shaping it. I think perhaps my starter is a little more liquidy? I’ll add a little extra flour next time.
So happy to hear this! And yes, I need to make a note: I think depending on climate (and other variables, too), some people may need to use more or less water. Or, as you say, more flour. Thanks for writing.
I had the same issue with my dough. It easily doubled in the first rise, but when I transferred it to the pan, it was very loose. It’s doing its second rise as I type this… so I’m glad to hear it turned out well for you too even though it was loose! Fingers crossed.
Michelle, how did it end up turning out?? I’m thinking the change of seasons could be playing a role, too. Going to add a note about reducing water as the weather warms up. Do you live in a humid climate??
It was a major fail! Sadly that second rise never happened. I mean, it did not rise hardly at all once I transferred it to the loaf pan. I live in Los Angeles and it’s been more humid than normal but still pretty dry.
I tossed it out because after it didn’t rise within the 6-8 hour timeframe, I let it continue to sit overnight on the counter and was just afraid to bake it at that point. I’m so baffled as to what went wrong.
One note though – I did use AP flour instead of bread flour because it’s what I use when I make boules. Any ideas?? Thank you!
Michelle, such a bummer! I do think bread flour makes a difference here. Once I used all-purpose in the sourdough focaccia recipe, and I was not pleased. Bread flour absorbs more water, so if you use ap flour, the dough is going to be even wetter. Also, I am noticing even here in upstate New York that as it gets warmer out, the sourdough is rising much, much faster. Also, my mother lives in CT, where it is very humid, and she has to cut the water back in this recipe for it to work.
If you are game for trying it again, I would 1. Use bread flour. 2. Cut the water back by 20 g. 3. Consider using less starter if you want that long overnight rise.
You are using a scale, correct?
Sorry for the trouble!! I really hate when bread recipes in particular don’t work out for people.
Hi! I made this recipe three times already, and each time the crust came out pale, almost white. The first time around I followed the recipe to a tee. Next time, because I’m from Europe (Romania) and our flour usually absorbs less water, I only used 350 grams. The third time, thinking the dough had been over proofed the first and second time around, I let it rise in the fridge through the night (12 hours), then another eight at 25 degrees Celsius, in the bowl until it doubled in size, then in the pan until it hit the rim. This time around I got great oven spring, which tells me that the dough was probably not over proofed, but I still have no color in the crust. Have you got any idea what’s happening? Any help would be greatly appreciated.
Hi Andreea! Thanks for writing. Question: are you using bleached flour?
I think I am, but it’s my usual flour with which I bake all sourdough bread, that comes out of the oven dark brown. Do you think this may be the reason?
Hmmm, very interesting. My experience with bleached flour is that the loaves are very pale, but if you have had success with other loaves using bleached flour, then I’m a little puzzled. My suggestion would be to use unbleached flour and see what results you get using that first.
When you use bleached flour with your other loaves, are you baking them in a covered Dutch oven first? Or at higher heat? And is there any sweetener in the dough? Sugar, honey, maple syrup all contribute to browning. There is no sugar in this dough, so browning will be especially minimal when using bleached flour.
Well, turns out I was wrong. I did a quick search and apparently we have no bleached flour, because it’s banned in the EU. Sorry for the confusion. So no, no bleached flour, although I do use a refined flour, more suited for pastry I guess, and yes, I use higher temperatures. I bake my loaves somewhere between 464ºF and 392ºF and I use steam in the first ten minutes or so of baking. On my last try with this loaf, I used a higher temperature and it indeed browned more, but unevenly, on the top part at least. The parts that were in direct contact with the pan came out a nice golden color.
I’ll try higher temperatures and a less refined flour and come back to report on the results. 🙂
Interesting! OK, keep me posted and good luck!
Hey! Happy to report that the combination of higher heat, steam and a less refined flour did the trick. The bread came out beautifully brown and I can’t wait to taste it. Thank you for your help!
Oh yay! So happy to hear this. Thanks for writing back. I’m feeding my starter now to make focaccia for my parents tomorrow. Can’t wait.
Hi, has anyone tried this with whole wheat flour?
I would try using 1 cup (or 25%) whole wheat flour to start. I’ve tried it using 100% freshly milled flour, and it was just too dense. You may be able to get away with 2 cups or 50% wheat flour.
So excited to see this recipe after your teaser mention a few months ago!! Love the peasant bread recipe, and I always had wanted to tweak it to use my sourdough starter but never got around to it, and so it was a wish come true to have you adapt it for us!! I’m hoping to try this with whole wheat too, either by adapting one of the multigrain recipes in your book or just trying it with 1/2 or mostly whole wheat flour and adding vital wheat gluten to give it more bounce and lightness. If it turns out well I’ll come back to report!
Oh please report back! So happy to hear all of this 🙂
Does adding the salt so early on not inhibit the rise? Or does the long proof take care of this? Most sourdough recipes I e seen add the salt later on in the process.
Hi Griffin! You are right: many sourdough bread recipes call for adding the salt at a later part of the process. I skip this step … find it to be a pain and not truly necessary. The salt may slow the rising down a little bit, but I always count on a long-ish slow rise for sourdough.
I ended up having to take a lot of this recipe on faith, but I’m glad I did. I ended up doing a 24 hour first rise, with my dough in the fridge for the first 12 hours to get as much “sour” as I could into the bread. I’m glad I did, because I ended up adding another cup and a half or so of flour after the first rise, because my dough looked more like cake batter than anything. The addition of flour I think knocked out some of my tartness, but got the dough to a banana bread consistency I was much more comfortable with. There was no way I wasn’t going to be able to shape this dough, though, and I’m almost tempted to call it a batter instead of a dough. The second rise only took 2 or so hours to crown the top of the tin, but my kitchen is HOT so that’s to be expected.
The end product is delicious, a little spongy, but moist on the inside and crunchy on the outside. Thanks!
Hi Jordan! So interesting re flour and having to add so much more. Questions: are you using bread flour or all-purpose? And are you using a scale to measure the flour? So glad this turned out well for you in the end!
turned out perfect. I ended up adding more flour (by weight) than what the recipe called for.
Wonderful to hear this, Dan!
I see a lot about using bread flour vs AP flour. I actually use AP flour all the time. I’m on a budget and the extra to get bread flour just can’t be spared. I do have to reduce the water but I also live in a very humid city. Honestly this recipe is totally functional and delicious with AP so I would encourage people to not let it stop them
Rebecca I’m so happy to hear this. I switched to bread flour because it seemed to be more foolproof here, but prior to going on this sourdough bender, I always used ap flour. Glad to know ap flour works for you in this recipe, and I’m glad you’ve been able to adapt the recipe for your humid climate. Thanks for writing.
I use King Arthur bread flour and had to add considerably more flour to the recipe. We live in a dry climate so I’m not sure what the reason is. Bread is going in the oven now so cross your fingers for me!
Fingers are crossed! Question: did you use a scale to measure the flour?
Any notes/suggestions on using a stand mixer and an oven with a proof setting?
I don’t recommend the oven proof setting for sourdough bread … I think it’s best to let it take its course at room temperature. I’ve tried letting the dough rise in an oven that I preheated for 1 minute and then shut off, and it just was too warm for the dough, and caused it to weaken … when I turned it out, it was impossible to shape, no spring, etc.
In terms of a stand mixer, I would knead the dough for 10 minutes or so until it looks smooth.
Oh my goodness! This bread turned out perfectly on my first try. I usually make the standard style loaves but this is just great for everyday sandwiches. The process had me a bit worried but as it turns out, a little patience, and a little less water in an Arizona climate,is the key to this fabulous bread. Thanks so much for sharing this.
Oh yay! So happy to hear this, Kellie!
I used normal maida flour..looks like it was bleached..i should use unbleached flour? No i dont have oven thermometer nor do it think my oven run cool
Could I use all whole wheat flour instead of bread flour?
You could try, but the loaf will be very, very dense. I don’t like using more than 25% whole wheat flour for this reason. If you want to learn more about how I feel about whole wheat flour in general, read this post: Easy, Whole Wheat(-ish) Sourdough Bread
I followed this recipe as closely as possible only substituting AP flour for bread flour. It’s very cold where I live so had to leave my dough to proof above my fire place for almost 24 hours. When I turned it out to shape it was goopy mess. Any ideas why? I am wondering if my fire place was too warm a place and weakened the dough. It’s on it’s second rise now so fingers crossed when it goes in the oven!
Hi! Two thoughts: 1. The fireplace spot is likely too warm. When I’ve tried to let sourdough rise in my barely warm oven, the same thing happens: goopy, weak dough. I think you need to let it rise at room temperature and just be patient.
2. I have had success using all-purpose flour here, but when people have trouble with it, I suggest they use bread flour, which will make for a less wet dough. Question: are you using a scale to measure the flour?
my started is more watery then what yours looks like on the picture, should I add more flour to the recipe to soak up the additional water? thank you
Couldn’t hurt to add a little more flour! Are you using a scale?
Will be starting this loaf today. Ali, can I use some of the Anson Mills Rye and or Graham to add up to the 512g of flour? I was thinking of using 15g of each …. thanks.
Yay! And yes, definitely. I almost feel like I can’t NOT add a little bit of each of those flours into every bread I make now. Happy Baking Lu!
I am a newbie to Sourdough and wanted to try in a loaf pan as it just works better for the family. I’d tried with my own sourdough starter with some pretty uninspiring results. I followed the advice here and bought Breadtopia’s sourdough starter and brought that up per directions then followed this recipe.
I used a flour from Bob’s Red Mill which said on the front was ok for bread (said All Purpose flour as opposed to bread flour which made me a little wary!). Protein content was 11% ish so from a gluten standpoint I figured this was ok???
I followed all the measurements and upon making the initial mixture I noted it looked much wetter and looser than described here. I added 50g more of the flour and this helped but still looked looser. I decided go with it though.
End result was great. Just came out of the oven. I used parchment liner and olive oil which helped me remove from the pan.
Overall very happy with this recipe but I think I might add a bit of whole-wheat bread flour to this to make it a bit easier to handle.
Thanks for the instructions and recipe!!!!
So happy to hear this Pallav! Given that you used ap flour with an 11% protein content, it makes sense that the dough was a little wetter. Nice job following your instincts and adding more flour. I love adding some stone ground flour to this bread — even just 50 g (as in this recipe) makes a difference.
I love the way this loaf turns out using the weight measurements. But just an FYI, 440g of water is nearly 2 cups –quite a bit more than 1.75. You’d have quite a different loaf if you put 12% less water in.
Thanks for this, Brad! It’s so important to measure all of the ingredients by weight for this exact reason… there’s so much variation with volume weights.
I baked this in Pyrex bowls today like your peasant bread. I found the crumb very uneven and a bit dense. There were some bigger holes at the bottom, but none throughout. What did I do wrong?
Hmmm … was the dough very wet? do you live in a humid climate? If so, I think to fix it, it would just be a matter of reducing the water. Also: what kind of flour are you using? And how long was each of the rises?
The dough didn’t seem abnormally wet—it looked similar to your photos. I’m using unbleached bread flour. The first rise was overnight and the second was about four? I waited until the dough crowned the rims of the bowls.
It sounds as though you did everything right. Not sure how to advise from here. If you want to give it another go, I would maybe reduce the water by 25-50 g. And maybe try doing a cold refrigerator proof after the bulk fermentation or baking it more crusty boule style as here: https://alexandracooks.com/2019/11/07/easy-whole-wheat-ish-sourdough-bread/
Success! Wonderful recipe and instructions. I made two loaves, using 25% wholewheat flour and 75% bread flour. Followed the instructions exactly, although my scale stopped working as I weighed the bread flour, so I kind of guessed when to stop adding. Second rise took 7 hours in a rather cold kitchen. Next time I will help the dough along by putting it in the oven with the light on.
I now wonder if I can halve the recipe.
Thanks for your excellent guidance.
So happy to hear this, Janet! I love adding a little whole wheat flour to this one as well. My second rises often take 6-7 hours in my cold kitchen too 🙂
Regarding halving the recipe, I would imagine you could, but I can’t say for sure because I haven’t tried. I will try to give halving the recipe a go sometime soon and will report back.
I tried this and the taste was amazing but the rest was so-so, surely fault of my own however wondering for some assistance in diagnosing the cause.
I used AP/B flour (only thing I can find right now) and followed the recipe. I let it sit on top of the fridge for about twelve hours for first, then same for the second at 6 hours. I used a glass bread pan and waited for it to double in size BUT… it was an 8.5L x 5W x 4H bread pan and the dough never rose to the top, however did double. I baked for the time stated but the center is like an uncooked pound cake, very dense and spongy, with the crust very leathery and chewy. The house is at 70 degrees consistently.
Any thoughts to what the problem could have been? Thanks!
Hi Sean!
It sounds as though you are really close to getting it right. OK, a few thoughts: After the first rise, when you transferred the dough to the loaf pan, did the dough still feel as though it had some spring in it? Or was it very liquidy and without strength? Are you using a straight-sided vessel to gauge when the dough doubles?
Also, I think your loaf pan is too small which could explain partly why the center is uncooked. For that size loaf pan, you would bake off 3/4 of this dough or half, which would make for a small loaf, but there wouldn’t be baking issues.
If you are willing to give this another go, I would suggest letting the dough rise on the counter, even if it is a bit cooler. I have not had success using my oven as a warm spot for my sourdough doughs to rise. I know the top of the fridge is cooler than a slightly warm oven, but I worry it still might be too warm.
Final thought: you might consider reducing the water if you found the dough too liquidy. This dough, by the way, is the same as this focaccia. I recently added a video there. It might be helpful to watch just to reference how the dough should look/feel after the first rise.
Keep me posted on your experiments!
Hi Alexandra! I’m experiencing a similar fail to a previous poster – I tried an overnight first rise and the dough had around tripled! Folding the edges in (like in your video) brought it down a lot, and it’s now been halved & second-rising in 2 smaller loaf pans for around 10 hours. I’m afraid it’s not going to happen. Could the first “over rising” be the culprit? I used bread flour and the 440g of water. (Thank you in advance!)
Hi Johanna,
It’s possible that it overproofed. My dough has tripled, however, and it has been fine, so there may still be hope. What size pans were the two smaller loaf pans? I worry that a 8×4-inch loaf pan will actually be too big for half the dough, so when you’re assessing the rise, it may look as though it’s not making as much progress as it should, but it probably is doing more than you realize. Question, when were folding the dough down, was there any spring left in it? Or did it feel very liquidy and kind of like it had lost all strength?
Hi! The link to the video that shows how to fold the dough (after the first proof) doesn’t seem to be working for me. Is the link broken? Thanks!
I’ll fix it! Sorry about this.
Hi again! When the link takes you to IG, are you able to watch the video?
That video shows the folding process that I use here, though the video is actually for focaccia. You can watch the folding process here, too: Sourdough Focaccia. You’ll just want to tuck it under a little bit more to get it in your loaf pan… I’ll try to get a video of making this bread up soon.
The link still doesn’t work for me, strangely – it takes me to a sports highlights Instagram account. But I watched the focaccia video, so thanks for that!
Ok, great, good to know! Going to remove it … it probably works for me since I’m logged in. Glad the focaccia video was helpful!
I used about 1/2 whole wheat flour, 1/2 AP with 4 Tbls vital wheat gluten mixed in. The dough was pretty sticky . When I proof dough, I heat a mug of water in the microwave for a couple minutes, and then place the dough inside the microwave, uncovered, with the hot cup of water. I live at 7000 feet in a dry climate, and it rises up like a champ! This took 6 hours on the first rise and only a couple hours on the second. SO good! Thanks!
Wonderful to hear this! Thanks so much for writing. Such great tips to create a cozy environment for the bread to rise 😍🍞
Mine got pretty hard/crunchy on the outside. Was it just too long baking? The internal temp wasn’t high enough earlier…
Hi Taryn! It sounds as though it was baked a little too long. Are you using an instant read thermometer? If so, that’s fantastic. Such a great tool.
Does your oven run on the hot side? If so, next time you could bake it at 375ºF for the entire time, extending the baking time by 5 minutes or so or until it’s done. OR, you could bake it at 425ºF for 15 minutes then lower the heat.
Dear Alexandra,
I would like to give this recipe a try and I have a question: did you consider the second rise in the fridge over night? Would it work?
It absolutely would work! I would grease the loaf pan well with butter, transfer the dough to the loaf pan, lightly coat the top with a bit of oil, cover with a tea towel; then transfer to the fridge to proof.
I am doing the second rise in the fridge. Should I let the dough get to room temperature before going in the oven? Or can it go straight from the fridge into the hot oven?
No need! It can go straight from the fridge to the oven. It’s much easier to slash, too, when the dough is cold.Diana! Shoot I was thinking was in regard to the sourdough boule … I’m so sorry. Yes, I would let the dough come to room temperature first! I’m going to email you now. Hope I’m not too late.
Thank you for holding my hand through this process!! Flour is so scarce in my area so I have to get this process right!
The dough didn’t do a 2nd rise in the fridge overnight. It looks the same. Nothing happened. Should I leave it on the counter for awhile before baking? I am set to go straight from fridge to oven but not sure about this one…
Hi Diana! Sourdough definitely does not change much in the fridge, so it makes sense that it looks the same. Is the dough in the loaf pan? I would leave it on the counter until the dough starts to visibly grow before transferring it to the oven.
Hahaha! Nope, it is not in oven yet! I am baking in the Pyrex bowls. I will give it some time to rise (not sure how long?) and then bake. Btw, I did not know that you are on IG. I will post pics and tag you!!
Ok, phew! Wonderful to hear this. It may take 5-6 hours at room temperature … just a heads up. Keep me posted!