
How to Make Homemade Rye Bread
This post may contain affiliate links. Please read my disclosure policy.
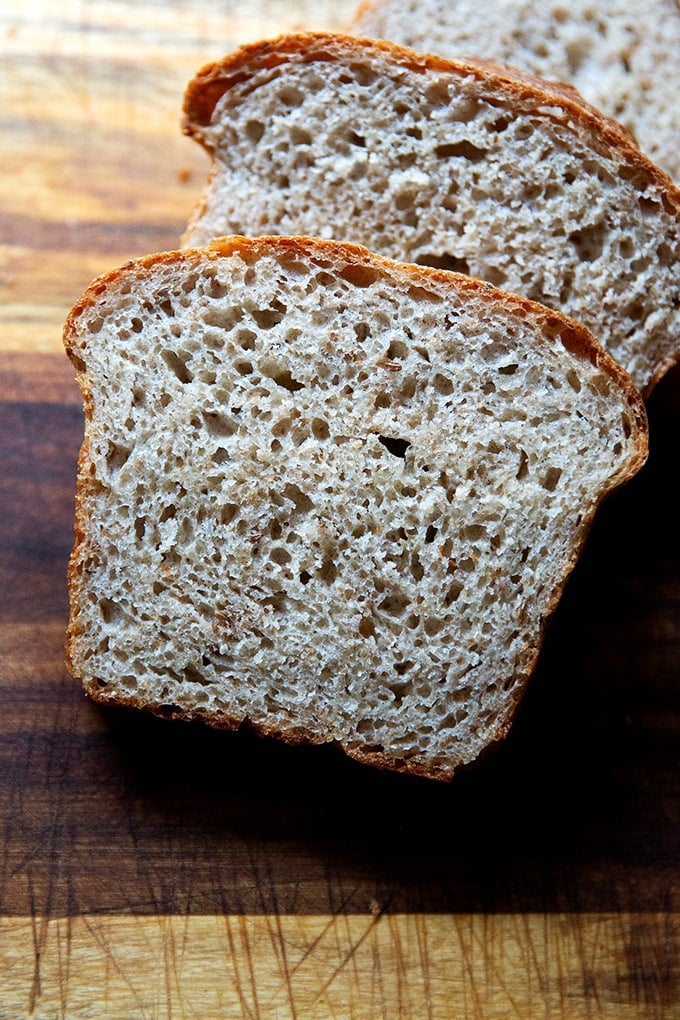
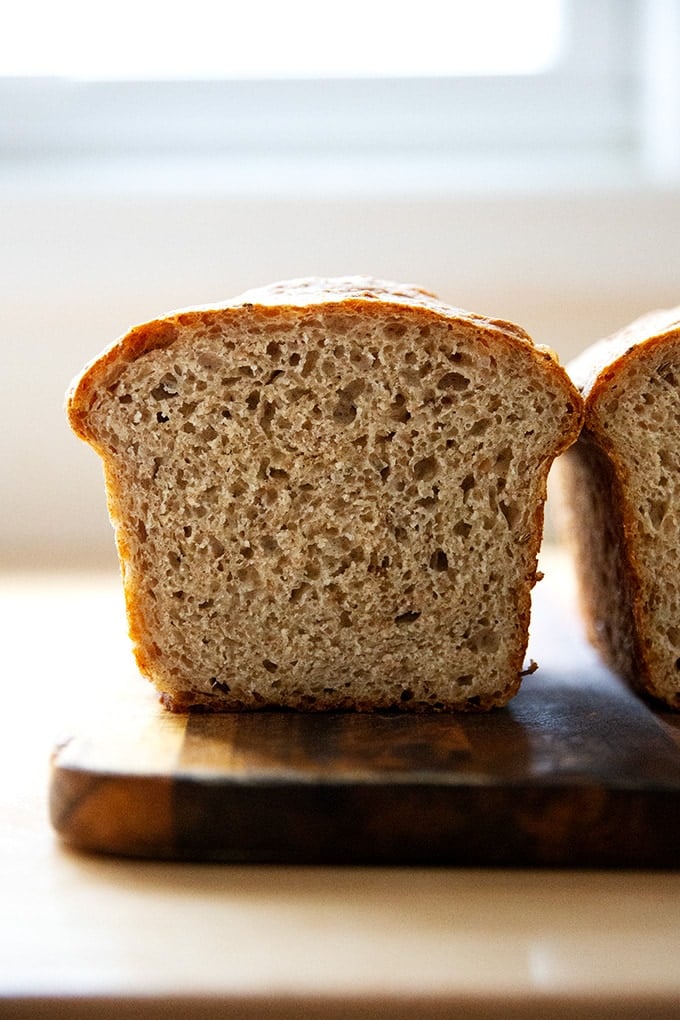
Made with a mixture of bread and rye flours, a small amount of honey, and a few teaspoons of caraway seeds, this simple no-knead rye bread tastes beautifully tangy with a hearty, chewy texture perfect for sandwiches or toast. It comes together in no time and bakes in a single loaf pan, but the recipe can be doubled, and the baked bread freezes very well.
Rye bread has a reputation of being dense and heavy as well as aggressively sour in flavor. While some people love these qualities, others, understandably, do not. I love a rye bread with a subtle tang and a hearty but not leaden texture.
This no-knead rye bread is just that: made with a mixture of bread and rye flours, the texture of the finished loaf is light enough for a sandwich but makes excellent toast as well. A small amount of honey balances out the sourness and lends a nice chew, while caraway seeds, which can be left out, impart subtle notes of citrus and anise.
This recipe calls for 1 cup of rye flour and 3 cups of bread flour, and while you could play around with increasing the proportion of rye in this recipe (which is roughly 20% by weight), keep in mind that the more rye flour you use, the denser your bread will be. Why? Because rye flour is different than wheat flour in a number of ways, namely:
- Higher in Bran and Minerals: Flour with a high amount of bran and minerals will produce bread that is lower in volume because the sharp shape of the bran cuts the gluten network.
- Different Proteins + High in Pentosans: Wheat flour contains two gluten-forming proteins: glutenin (which promotes elasticity) and gliadin (which promotes extensibility). When these proteins mix with water, gluten begins forming. Rye flour on the other hand contains gliadin and a protein called glutelin (similar to glutenin). It also is high in pentosans (a polysaccharide composed of carbon sugars). The pentosans absorb water and compete with the gliadin and glutelin for moisture, which inhibits the development of gluten in rye breads.
Got all that? I’m still processing it. It comes from Jeffrey Hamelman’s Bread, which is a great resource if you like to understand the science behind bread baking. I have to confess I have never made a recipe from the book, and I pull it out seldomly but when I do, I always find the answer I am looking for (and more!).
Homemade Rye Bread, Step by Step
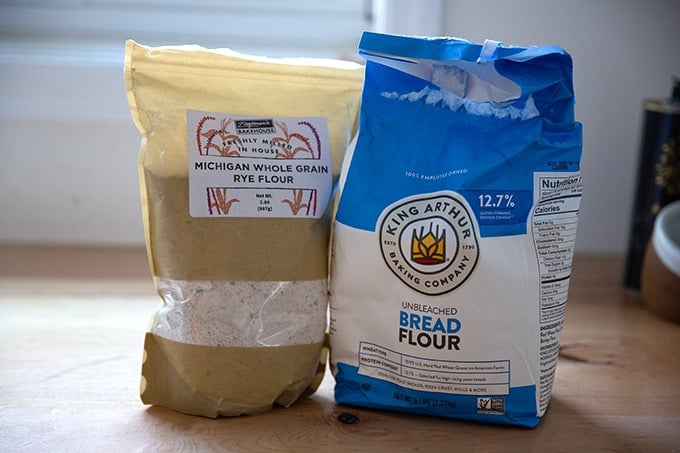
This recipe calls for a mix of rye flour and bread or all-purpose flour. I’m using Zingerman’s freshly milled rye flour.
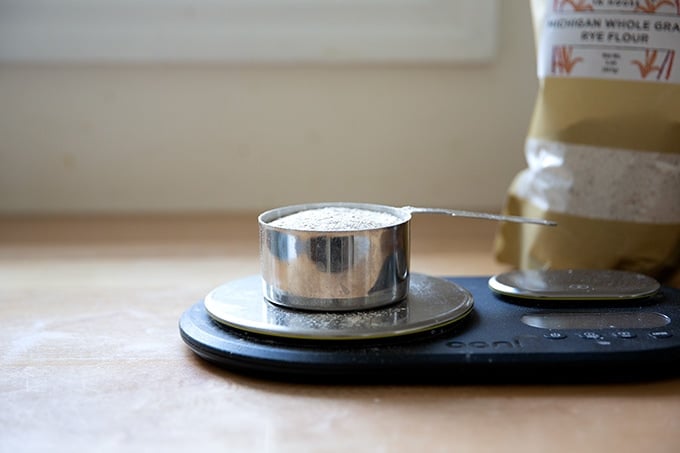
The Importance of Using a Scale
I was curious as to how much 1 cup of this particular rye flour would weigh, so I set my measuring cup on the scale and spooned in as much flour as I could without it spilling out.
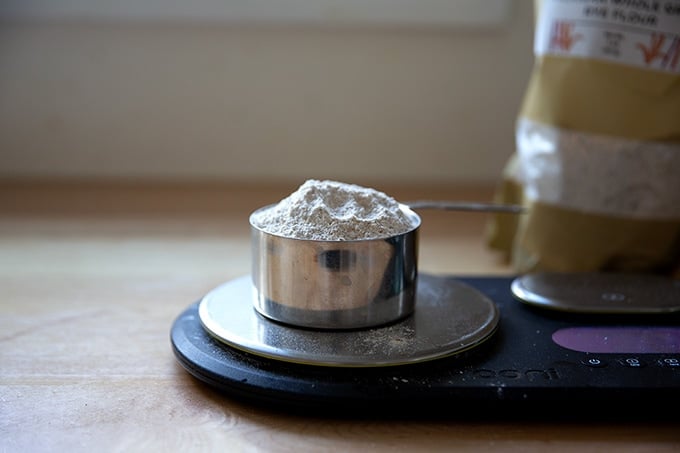
I was able to get 96 grams of flour in without spilling, then I gently shook the cup…
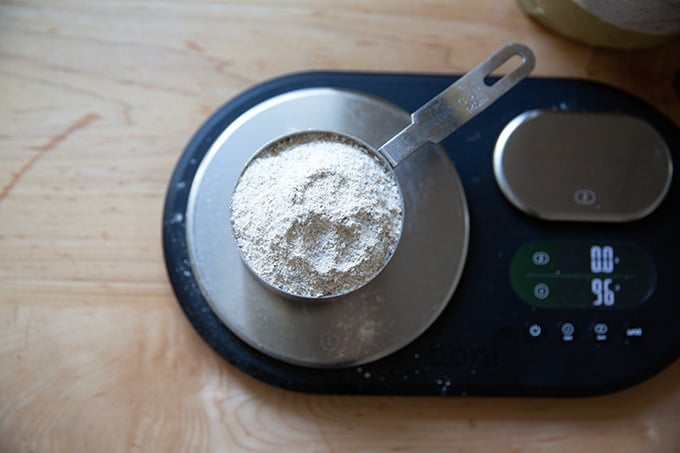
… which brought the flour down to just below the rim of the measuring cup. This is an example of why it is so important to use a scale. Depending on how we measure, 1 cup of flour can vary dramatically in weight.
Once you have your ingredients measured accurately…
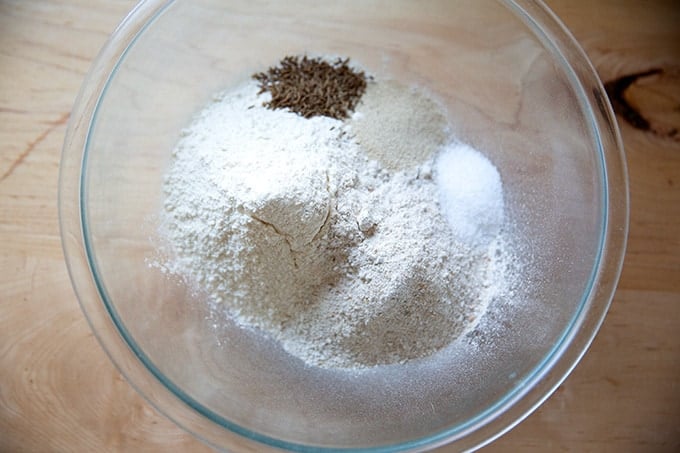
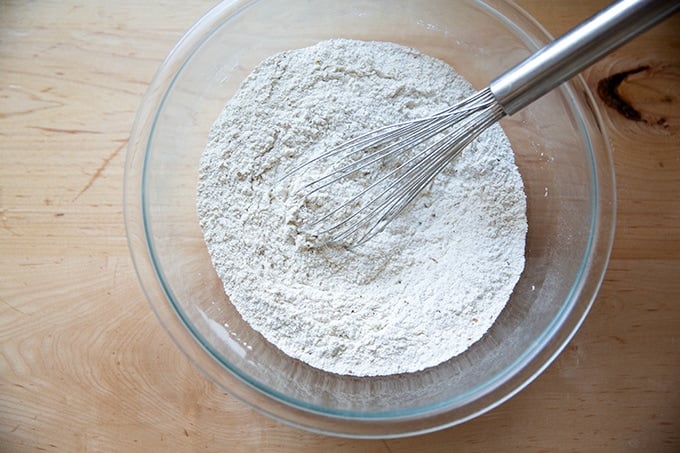
whisk together the flours, salt, instant yeast, and caraway seeds, if using.
Whisk together the water and honey until the honey dissolves, then add the mixture to the bowl, followed by the oil.
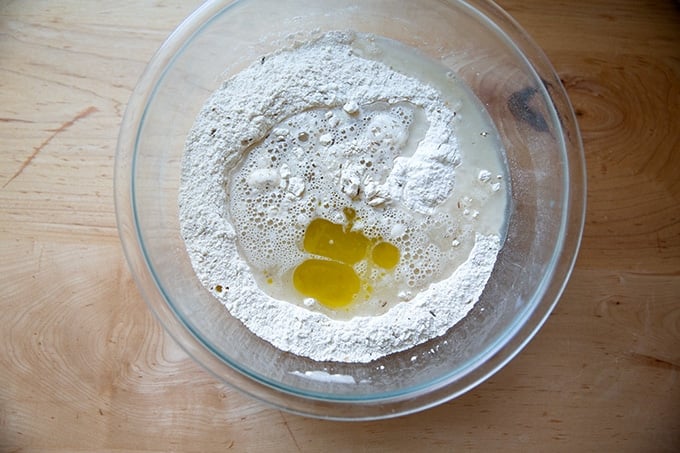
Stir with a spatula until you have a sticky dough ball.
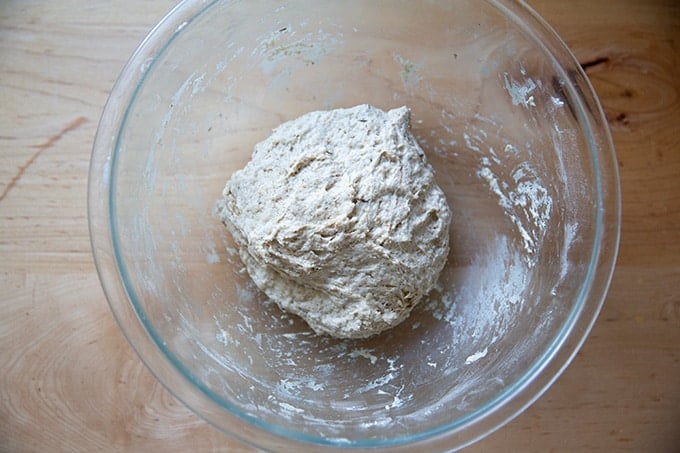
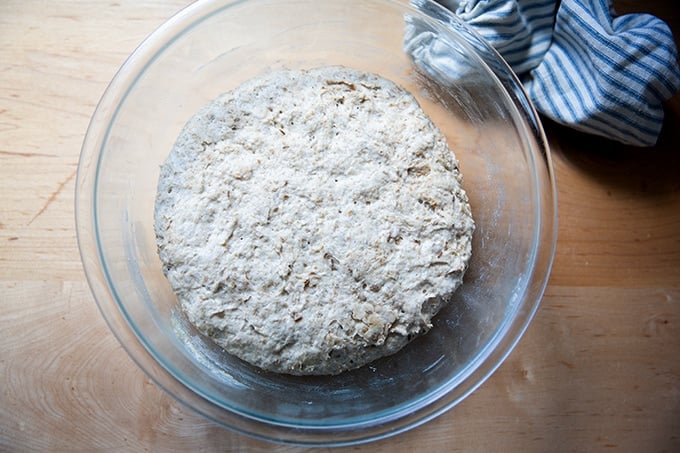
Cover the bowl and let rise until doubled, 2 to 3 hours.
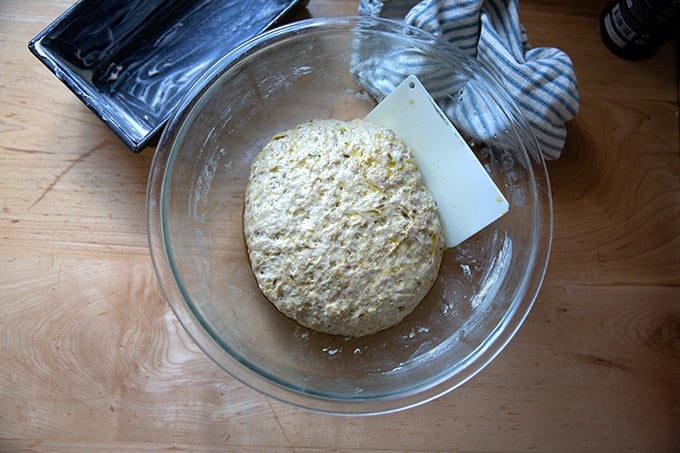
Rub the surface of the dough with a tablespoon of oil, then deflate the dough.
Turn the loaf over, then roll into a loaf shape.
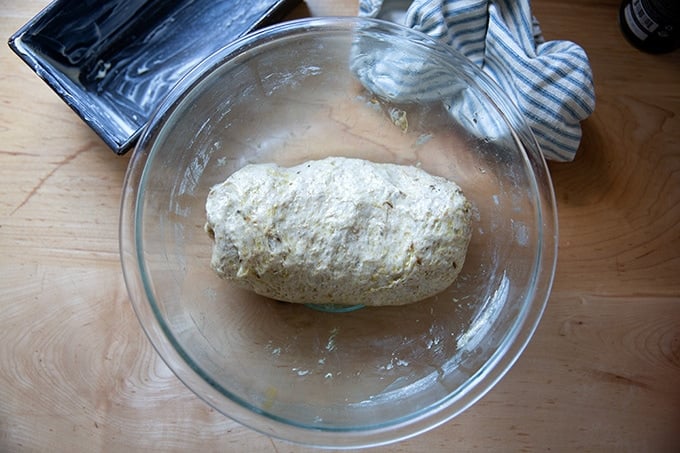
This video may help:
Transfer to a buttered 8.5×4.5-inch or 9×5-inch loaf pan.
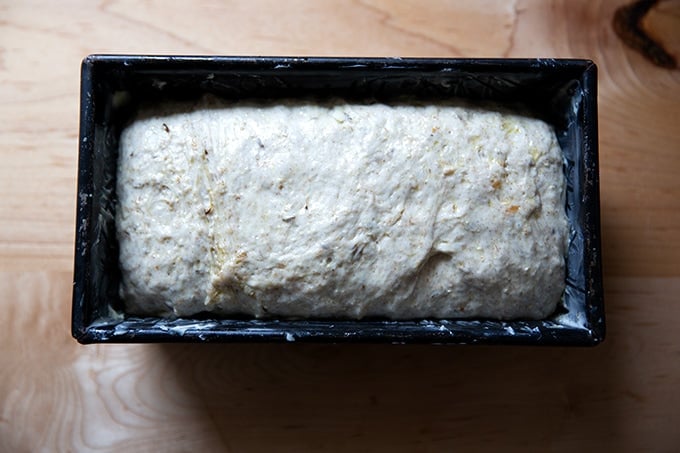
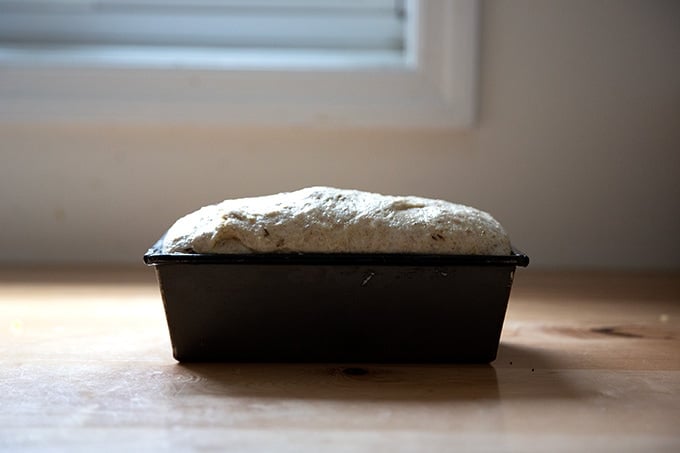
Let rise until the dough crowns the rim of the pan by about an inch.
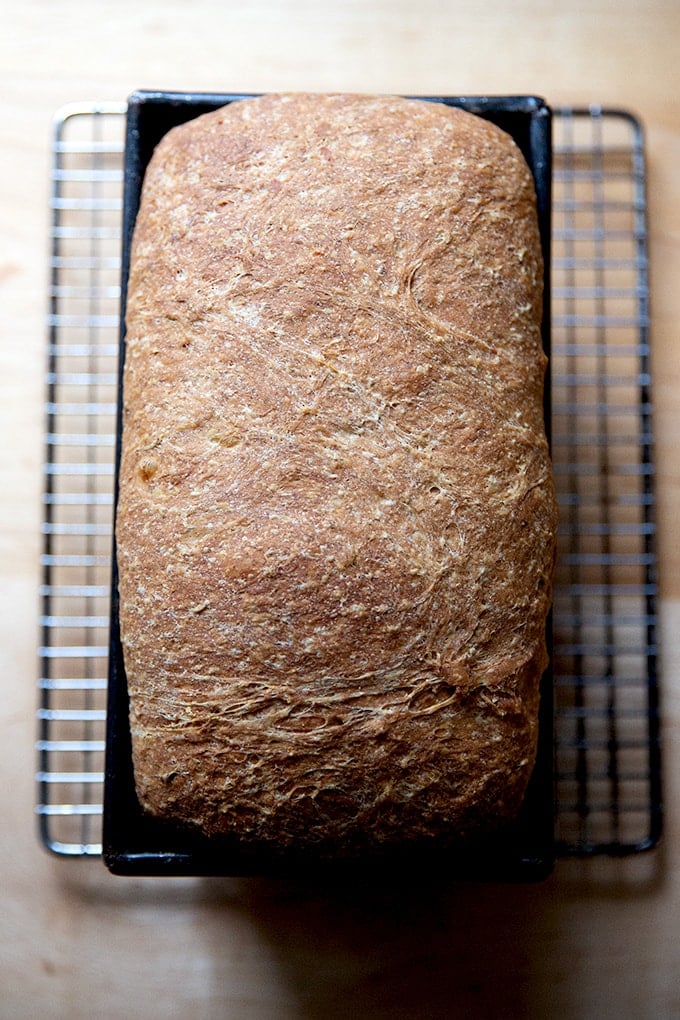
Bake for 45 minutes at 375ºF.
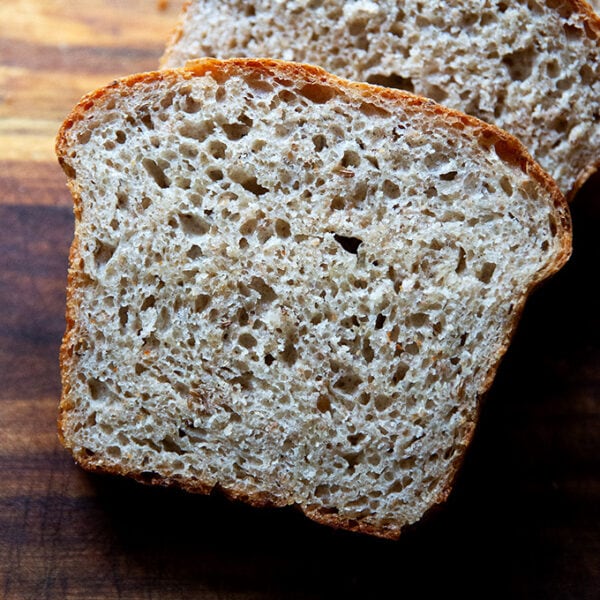
Let cool for at least 30 minutes before slicing. I like to slice it, then freeze it in bundles of 3 to 4 slices.
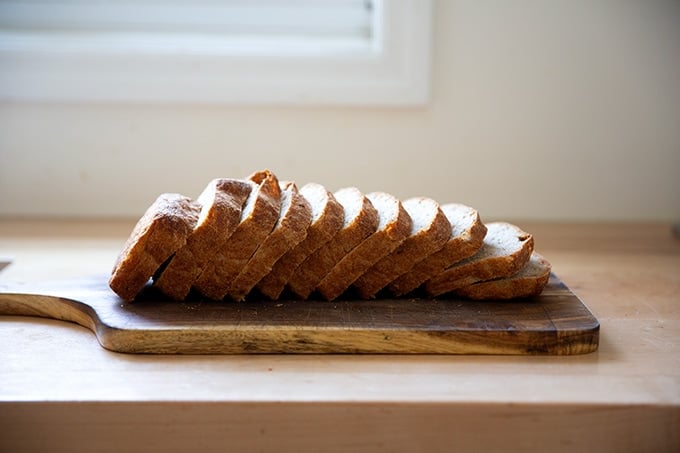
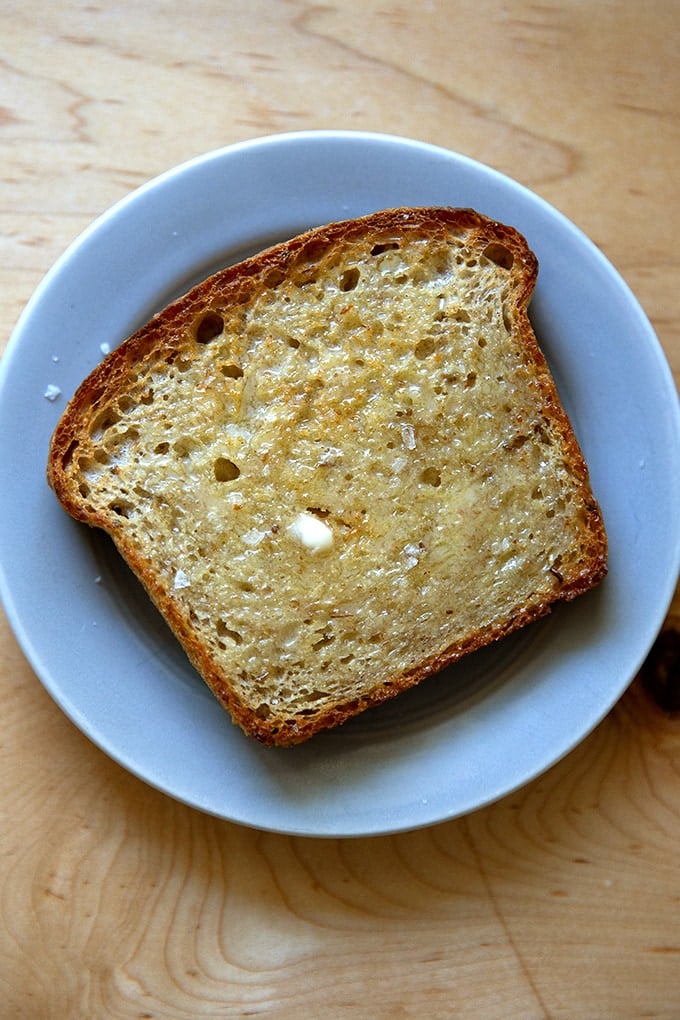
Like the maple-oat bread and the three-seed bread, this one makes great toast:
How to Make Homemade Rye Bread
- Total Time: 5 hours 45 minutes
- Yield: 1 loaf
- Diet: Vegetarian
Description
Adapted from my cookbook, Bread Toast Crumbs.
Changes from the original recipe include:
- The vessel: This one is baked in a single loaf pan as opposed to two 1-quart Pyrex bowls. You can use an 8.5×4.5-inch pan or a 9×5-inch pan. And 8.5×4.5 -inch will produce a slightly taller loaf.
- Weight of the rye flour: I find a cup of rye weighs roughly 96 grams, whereas in the book I was using 128 grams for a cup of rye. See post above for more details.
- Added an additional tablespoon of honey.
- Reduced the oil to 1 tablespoon.
- Reduced the water by 1/4 cup.
Notes:
Salt: I always use Diamond Crystal kosher salt. If you are using Morton’s kosher salt or fine sea salt use half the amount by volume or the same amount by weight.
Yeast: If using active dry yeast, sprinkle the yeast over the lukewarm water-honey mixture and let stand for 10 minutes; then proceed with the recipe.
Caraway: If you don’t like the flavor of caraway, simply omit the seeds or use less: 1 to 2 teaspoons or to taste.
Ingredients
- 3 cups (384 g) bread or all-purpose flour
- 1 cup (96 g) rye flour, see note
- 2 teaspoons (10 g) kosher salt, see note
- 2 teaspoons (10 g) instant yeast, see note
- 1 tablespoon (9 g) caraway seeds, see note
- 1.75 cups (395 g) lukewarm water
- 2 tablespoons (42 g) honey or maple syrup
- 2 tablespoons (28 g) extra-virgin olive oil, divided
- Softened unsalted butter, for greasing
Instructions
- In a large bowl, whisk together the flours, salt, instant yeast, and caraway seeds, if using. In a medium bowl, whisk together the water and the honey until the honey is dissolved. Add to the flour, followed by 1 tablespoon of the oil. Using a rubber spatula, mix until the liquid is absorbed and the ingredients form a sticky dough ball.
- Cover the bowl with a damp tea towel or a cloth bowl cover or plastic wrap and set aside in a warm spot to rise for 2 to 3 hours, until the dough has doubled in volume.
- Preheat the oven to 375ºF. Grease an 8.5×4.5-inch (or 9×5-inch) loaf pan generously with softened butter.
- When the dough has doubled, drizzle the remaining tablespoon of olive oil over the top and use your hand to rub the oil over the surface to coat. Use your hand again to release the dough from the sides of the bowl, then flip the ball over so that the oil side is down. Roll the dough into a coil or into a loaf shape, then transfer to your prepared pan seam side down. Watch this video for guidance.
- Let the dough rise on the countertop (preferably in a warm, draft-free spot) for 45 minutes to an hour or until the dough has risen significantly in the pan — it should be doming above the rim of the pan by about one inch. See photos for reference.
- Transfer the pan to the oven and bake for 45 minutes, or until the top is evenly browned. Remove the pan from the oven and turn the loaf out onto a cooling rack. Let the loaf cool for at least 30 minutes before slicing.
- Prep Time: 5 hours
- Cook Time: 45 minutes
- Category: Bread
- Method: Oven
- Cuisine: American
This post may contain affiliate links. Please read my disclosure policy.


167 Comments on “How to Make Homemade Rye Bread”
I how could I substitute sourdough starter to the yeast?
HI, I would omit the yeast, and use 50 grams of starter: mix the water with the salt and honey, add the starter, stir, then add the flours and caraway. It will be a wet, sticky dough. You can try doing one set of stretches and folds 30 minutes after you mix it. Then let it rise until it increases in volume by 75% or so. Then proceed by transferring the dough to a loaf pan, which you can transfer to the fridge for 24-48 hours or continue to let proof at room temperature. Bake the same as directed in the recipe.
I have a question about this recipe. I use your recipe for the Peasant Bread made in two Pyrex bowls but baked in a 1-1/2 pound loaf pan at 400 degrees for 45 minutes with an additional 5 minutes “naked” (out of the pan) and upside down in the oven. It is our house bread and always available. ❤️❤️❤️ Why is the temp for the rye bread so low?
Hi Victoria! Great to read all of this. I think you could get away with baking the bread at a lower temperature, but I just find for all loaf pan recipes, 45 minutes at 375ºF works great. There’s also 2 tablespoons of honey in this bread, which will promote browning. Hope that helps 🙂
I will definitely try it….
Hope you love it 🙂
I would like to use King Arthur medium rye flour and King Arthur AP flour. The rye flour is 106 gm per cup and AP flour 120 gm per cup. Your recipe says 96 gm rye, and 384 AP flour. Which weights should I use thank you
Hi Laurel,
I would use 384 grams AP flour and 96 grams rye flour. Good luck!
Do you think I could bake this off in muffin tins for rolls? Thanks for all your great recipes and videos- I’m a big fan!
Yes, absolutely! See this recipe if you need a little more guidance: Easy, No-Knead Dinner Rolls
The recipe worked great in a buttered muffin tin- I just had to shorten the baking time!
Great to hear, Lisa! Thanks so much for sharing 🙂
Would love to turn this into Sourdough Rye!!
Hi! Did you see the comment above regarding how to adapt for sourdough?
Thank you so much for doing this. I’ve been trying to make a loaf version (although I do the pyrex bowl version frequently, sometimes you want a loaf for sandwiches) and this is it! And, like always, you simplified the whole process. I see in the comments you added the sourdough element. You are the best.
Thank you, Christine 🙂 🙂 🙂 I find the loaf shape to be so handy for sandwiches and toast. Hope you love it!
Delicious and simple to make, as always! My first attempt was extremely sticky, but came out beautifully anyway. I don’t make anyone else’s bread any more and frequently share your recipes with friends. Thank you so much!
Thanks so much, Sian 🙂 🙂 🙂 So nice to read all of this.
Great result! I’d put some more rye flour next time. Over-proofed a little the dough, so my bread is mushroom shaped (30 min was plenty sufficient for the 2nd rise) but still it came out great, bouncy and delicious! I would double the recipe. Thank you!
Great to hear! Thanks so much for writing. I think as it warms up, the proof will take less time… I’ll make a note! It felt like summer here the past few days, and my bread was rising like crazy. Loved it 🙂
Hi Ali, made this this morning and finished this afternoon and followed the recipe as written. It came out wonderful, perfect crumb and texture. Sliced it all up and put in sandwich bags three slices per bag. Had to taste it before and had the butter handy, and so happy with it. One question though, my wife said it didn’t seem to be so much as rye bread and wonder if you could add more rye flour to improve that taste. Any thoughts? Thanks for all your great recipes.
Great to hear Don!
Question: what type of rye flour were you using? I think you could definitely increase the amount of rye up to 128 grams. I also think the type of rye you are using could contribute to the amount of rye flavor you are tasting in the finished loaf.
Thanks Alexandra. I used Milanaise organic whole rye flour. The flour is made in Canada. I think I’ll try it with the increased amount as you suggest.
Ok, great — that sounds like beautiful flour! Yeah, I would try increasing.
Is it correct that the all purpose flour should then be adjusted accordingly i.e. reduced 32g?
I wouldn’t! Just add more rye.
Hi Ali, regarding the rye flavor, farmers that I buy my rye flour from at the market told me that the flavor we all associate with rye bread actually comes from adding molasses to the mix and the sour from sourdough and rye flour actually has a less pronounced subtle flavor. I’ll be making this tomorrow. Cheers.
This is so interesting Frank! Now I want to revisit this recipe both with molasses and sourdough starter. Thank you!!
Can this be made gluten free
I don’t think so I’m afraid! I’ve never seen gluten-free rye flour … unless there is some sort of rye flavoring you could add?
Thank you for another great-looking and so clearly explained recipe. I will definitely try it! I discovered your easy overnight focaccia a while ago and I now make it every single week. So forgiving and delicious. And it keeps brilliantly. But today I have a technical question about bread, which I can’t find an answer online: does yeast-based long fermentation (as in the focaccia recipe) reduce gluten just as much as sourdough long fermentation? Is fermentation time the key to gluten reduction or does sourdough work in a different way to ‘digest’ the gluten? I hope you can help.
Hi Christine! Great to hear about the focaccia 🙂
As I understand it, time is the most important factor contributing to the breakdown of gluten: as the dough ferments, the gluten degrades — enzymes in the flour/dough essentially “eat” up the gluten.
I’m sure there are some nuances to the inclusion of a sourdough starter in a bread dough that perhaps contribute to making a bread more digestible, but I think it mostly has to do with time: sourdough by nature is a slower process, which gives the gluten time to break down.
Thank you so much for taking the time to reply – your answer confirms what I thought. I’m no chemist, but logic brought me to the conclusion that time was the main factor. One more reason to love your focaccia recipe!
Can I add onions to this? I used to buy an onion rye and can no longer find it!
Yes! I would start with 1/2 cup of finely diced or grated onion. You can toss the onion with the dry ingredients.
Added the onions! The result was perfect!!! Thank you!
Hooray! I’m so happy to hear this 🙂
Fantastic chew and texture. So nice and easy being no knead! I might try to bump up the rye next time as was mentioned in another comment. I wonder though about the honey – can I leave it out entirely without adjusting anything else? I don’t really like the hint of sweet in my savoury breads.
Hi Jung! Yes, you can leave out the honey.
I made this without any honey but added a small handful of raisins. I like how raisins balance the caraway seed without creating an actual sweet note. The original book recipe always came out damp for me; this tweaking is superb. Thanks for the revision.
Oh yay! Great to hear, Amy. I will try the raisin version soon. Thanks for the idea 🙂 🙂 🙂
This form is preventing me from seeing the recipe! AND I can’t send in an evaluation if I can’t access the recipe.
Hi Paula! I’m not sure what form you are referring to. Please take a screenshot and email it to me, so I can understand better what is interfering wtih you seeing the recipe: alexandra@alexandracooks.com
Made this bread measuring all ingredients and using a dark rye flour that I had on hand. The bread came out perfectly!! My husband loves it. Nice brown crust all around. Baked it in my 9×5 William Sonoma Goldtouch bread pan. Lovely!!
Wonderful to read this, Mary! Thanks so much for writing 🙂 🙂 🙂
Can’t wait to try this recipe. Can no longer find good rye bread so will have to try making my one and your recipes are always delicious, straightforward and foolproof.
Thank you – hope to see you again soon (in Hillsdale?)
Meryl
I hope you love it Meryl! Unfortunately, I have no plans to be back at hillside anytime in the near future, but hopefully next spring for the launch of the pizza book! Hope all is well. xo
Another perfect bread recipe! Thank you
Great to hear, Carol! Thanks so much for writing 🙂 🙂 🙂
I want to make this Rye Bread. I eat WFPB and do not consume oil.
Can I leave out the oil and still have a successful loaf of bread?
Thanks
Liz
Definitely! Go for it.
Wonderful recipe, tastes great- especially toasted! Thanks for another great recipe.
Great to hear, Peggy! Thanks for writing 🙂
Rainy day Sunday was perfect for baking this with dregs of bags of Bob’s Red Mill Organic Dark Rye and KA Bread Flour. Made up the difference with KA ap flour, but did use the full amount of the rye. No caraway on hand, so I subbed fennel seeds. It’s a huge winner. The scent was intoxicating. Both rises were right on time and the bake produced a gorgeous loaf/crumb. We shared one wonky slice (is there always one?) untoasted and enjoyed toast this morning. It won’t edge out your flax quinoa bread which we always have on hand, but we will definitely enjoy the variety. Thanks Ali!
Oh yay! So nice to read this, Leslie! Love the idea of fennel seed here. And I’m so happy to hear you love the quinoa-flax bread, too… that might be my favorite toasting bread, too 🙂
Baked yesterday, toasted and enjoyed with poached eggs today. I still giggle over how many years I went afraid to bake bread of any kind and today you have me joyfully baking bread of all kinds. Family spoiled and bread baking self confidence attained. This rye is now my new favorite..and that’s saying something!
So nice to hear this, Hillary! And you are too kind 🙂 🙂 🙂 Thank you 💕💕💕
Love your cookbooks and recipes.
Made this bread and it was perfect.
If I wanted to make this rye bread using a KNEADING method how would you change the recipe.
Thank you ..
Thank you, David! I worry about kneading only because the dough is so wet. If you want to knead, I would suggest using less water from the start. I’d hold back at least 50 grams. Did you want to knead by hand or with a mixer?
HiI made this twice and measured it exactly. Both times the dough was so wet it would not form a ball for the first proofing. I added more bread flour the first time around. I did not add anymore the second time around and the bread was light but very fragile and ripped when slicing. I used Polish rye flour #2000 and King Arthur bread flour. Do you think it’s the rye flour??? New to baking bread. I also used a glass pan the second time. Should I only use metal pans for bread? Otherwise the taste is AMAZING and I will definitely make it again, just wondering what is the best way to make the dough not so wet?
Thanks
Anna
Hi Anna! It’s possibly the variety of rye flour but it’s more likely an issue with measuring and environment.
Are you using a scale to measure?
And do you live in a humid environment?
If you are not using a scale, that would be my first suggestion to ensure you are measuring accurately. This one is reliable and affordable.
In the meantime, look at the photos and see if the texture of the dough resembles yours. If you live in a humid environment, you may need to hold back some of the water.
Thank you! I will try to add water slowly instead of the whole amount at once. I do use a scale. I absolutely LOVE this bread so I will continue practicing. Thank you!!
Loved this rye loaf. Can it be doubled? If I am going to this much work, I’d like to get two loaves out of it. (not really that much work)
Great to hear, Jane! And yes, it definitely can be doubled.
Confused about salt and yeast measurement. I usually weigh just my flour. This time I tried to weigh the salt and yeast. But it seems that it takes more than 2 teaspoons of yeast to make 10 grams..? i always just used teaspoons before. So I’m confused. Love your recipes! Got your book too! Thanks
Hi Pat! It is possible you may need more teaspoons than called for. For the yeast, I think it’s less critical: 2 teaspoons should be plenty. For the salt, depending on what kind of kosher salt you are using, you may need more than 2 teaspoons. I would stick to your scale for the salt! Thank you re book… means the world 🙂
This is such an easy recipe but you’d never know it by the bread-it is just perfect in every way! The flavor is classic rye and will be in my family for years to come! Thank you for sharing the recipe!
Great to hear! Thanks so much for writing CJ.
I just made a new batch and when I finished I realized I did not use my measuring spoons because with the weights in grams you provide, a bowl and scale are really all that’s needed. After an ingredient is added to the given weight (free pour) I’d zero out my scale ready for the next ingredient. I did use a measuring cup but next time I’ll leave it out eliminating another dirty dish. Thanks Ali!
This bread is amazing! It came out better than I could have hoped for! I measured by weight and after the first proof I thought my dough was too wet but I went with it and perfection was baked! Yum!
Hooray! Great to hear, Karen! Thanks so much for writing 🙂
Is it possible to make the dough one day and bake the bread the next day? If so, what would be the method?
Yes! There are several ways to do so, but I would suggest mixing the dough, transferring it to a bowl, covering it tightly with a lid or plastic wrap — make sure the dough has room to grow in the bowl — and sticking it in the fridge immediately. Remove it the following day when you have time and immediately deflate it, transfer it to the prepared pan and let it make its second rise.
Alternatively, you could use cold water and 1/2 teaspoon instant yeast, and let the dough rise all day or night at room temp. The fridge version gives you some more flexibility bc the dough can stay in the fridge for a long time without risk of overfermenting.