Duck Leg Confit: 3 Hours, 3 Ingredients
This post may contain affiliate links. Please read my disclosure policy.
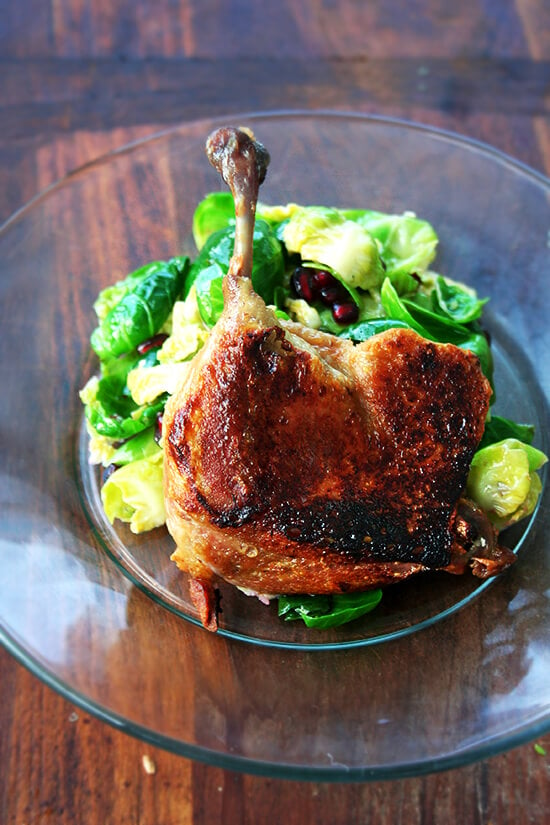
This duck leg confit recipe bucks tradition, calling for three ingredients and three hours of time. You don’t need a supply of duck fat; you don’t need to devote three days of your life. This recipe and method will yield restaurant-worthy duck leg confit as well as a supply of duck fat to keep on hand for future duck leg confit experiments.
What is Duck Confit?
Confit is an ancient method of preserving, born out of necessity: by salting meat, cooking it, and storing it in fat, it could keep without refrigeration for months on end.
Today, the method is no longer used (typically) to preserve meat, though it still yields incredibly tasty meat.
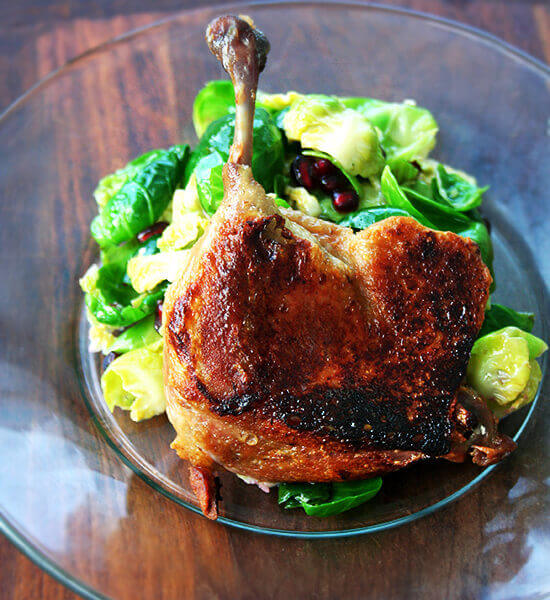
For duck leg confit, duck legs first cook slowly in salt and fat till the meat is nearly falling off the bone. Before serving, the legs are crisped in a pan till golden all over.
3-Ingredient, 3-Hour Duck Leg Confit: The Story
On January 23rd, 2006, two cases of duck legs arrived at Fork, the restaurant where I was working, and per the day’s to-do list, I threw them into hotel pans, covered them with a layer of kosher salt, then headed to the walk-in to find the duck fat.
This was how we made duck confit at Fork: 1 case of duck legs per hotel pan, liberal coating of kosher salt, duck fat submergence, tight covering of aluminum foil, two and a half hours in the oven.
But when I got to the walk-in, I couldn’t find the duck fat. I looked and looked. I had made the mistake more than once of declaring we were out of something when we weren’t, and so I looked some more. Shit, I thought.
But before running to the chef, Thien Ngo, I looked and looked again. It had to be there. I was positive this was the greatest conspiracy of the inanimate I had ever faced. There was no way two 8-quart tubs of duck fat had walked out of that walk-in.
But after awhile, I had to tell Thien. He looked too. He couldn’t find it. We suspected it had been tossed. There had been a lot of turnover in the kitchen staff in recent weeks, and it was likely someone had innocently trashed the duck fat, a supply Thien had been building for eight years, a supply that grew more flavorful with every use, the key ingredient to one of the restaurant’s staple dishes.
After Thien berated me for allowing this to happen, noting that this — me! — was why he could never take a vacation — oh, the drama! — let alone a day off, he set to work rectifying the situation.
Into each hotel pan he tossed pounds and pounds and pounds of butter along with a few sprigs of thyme and lots of salt. Then he cooked the legs just the same: tightly covered with foil for two-and-a-half hours. And when those legs emerged from the oven, we stored them just the same: legs in one tub; fat, clearly labeled, in another.
That evening, the line cooks crisped up those duck legs as always, standing them up dramatically against mounds of frisée tossed with crispy lardons and pan-seared Brussels sprouts. Nobody suspected a thing. Losing 16 quarts of duck fat turned out to be not such a big deal, but if the specificity of the date is any indication, I’ve never quite recovered from the experience.
Have you ever wanted to make duck confit at home? Have you been deterred by the two-day process as well as by this ingredient: 3-quarts of duck fat? Have you searched to no avail for duck fat at your grocery store? Have you looked online only to discover that such a purchase might set you back 50 bucks or so before shipping?
Well, if so, I have some good news: you can make pretty damn good duck confit in about three hours with only three ingredients: duck legs, salt, and butter. It may not be traditional, but it might be the fastest, most-delicious bistro-style meal you ever prepare. What’s more, after you make it once, you’ll start building your own supply of duck fat, which, so long as you run a tight ship, you might just have on hand forever.
PS: Perfect Pan-Seared Duck Breasts with Port Wine Sauce
PPS: Looking to complete your French-bistro dinner at home? Try this: Chocolate Pots de Crème
How to Make Duck Confit: A Step-by-Step Guide
Making duck confit is a two-part process: first the legs braise slowly in fat; then the legs are seared stovetop to crisp up the skin.
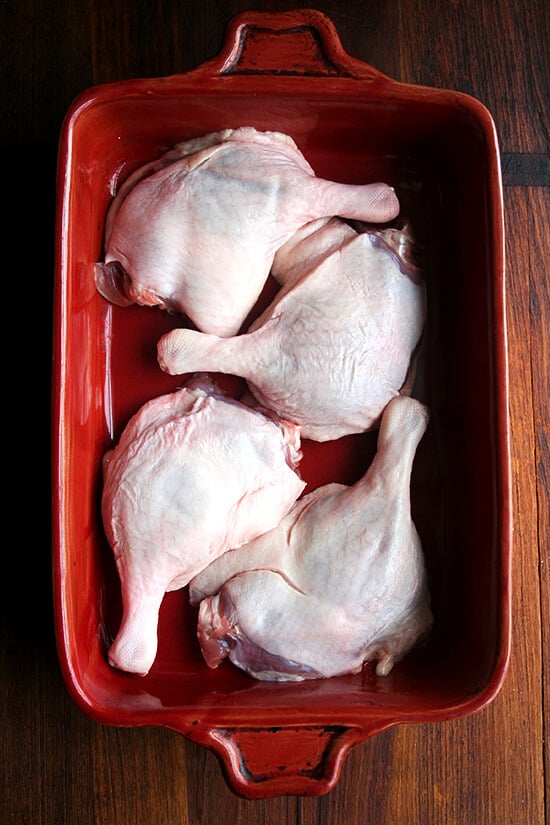
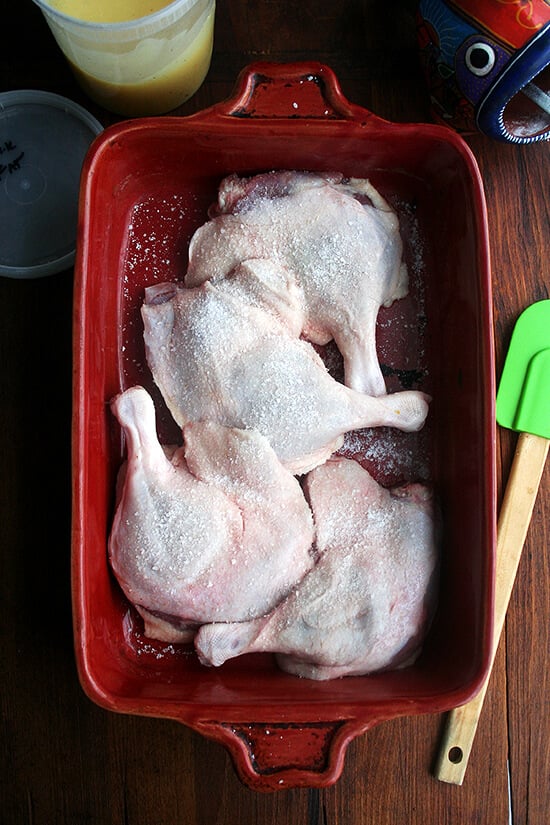
Step 1: Nestle 4 legs snugly into a baking dish:
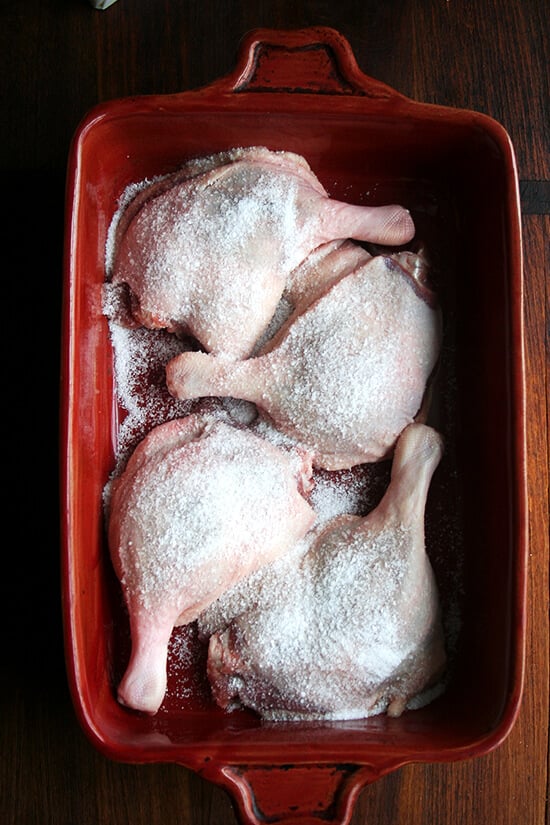
Step 2: Sprinkle with 1 tablespoon kosher salt:
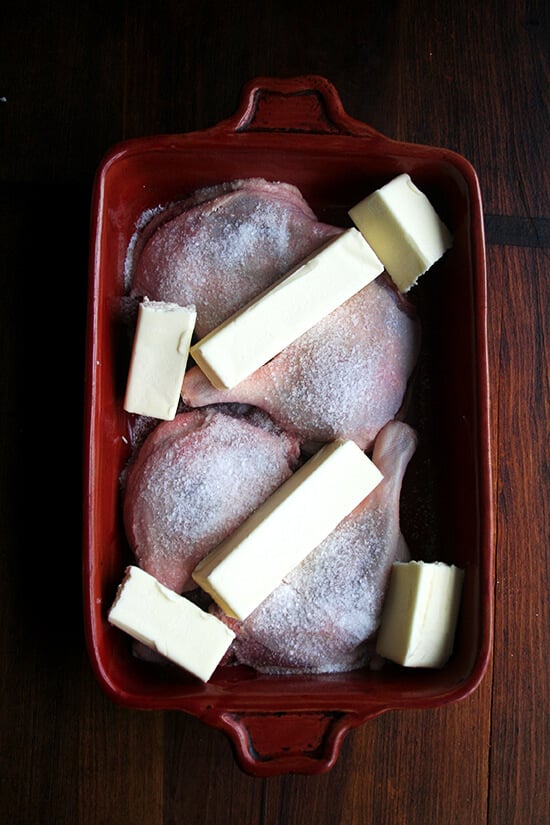
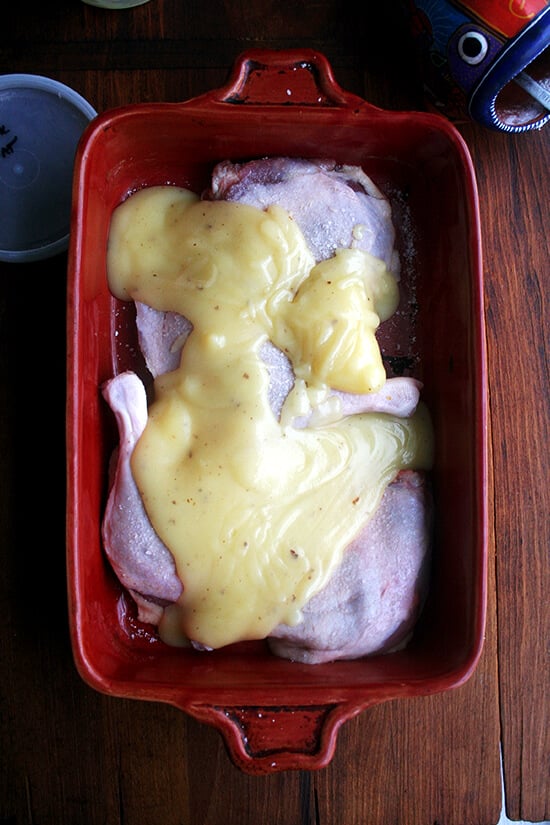
Step 3: Cover with a pound (2 cups) of butter. Before you are deterred by the quantity of butter, take a look at the third photo below with the retrieved fat.
Step 4: Transfer to the oven in a tightly covered pan for 2.5 hours:
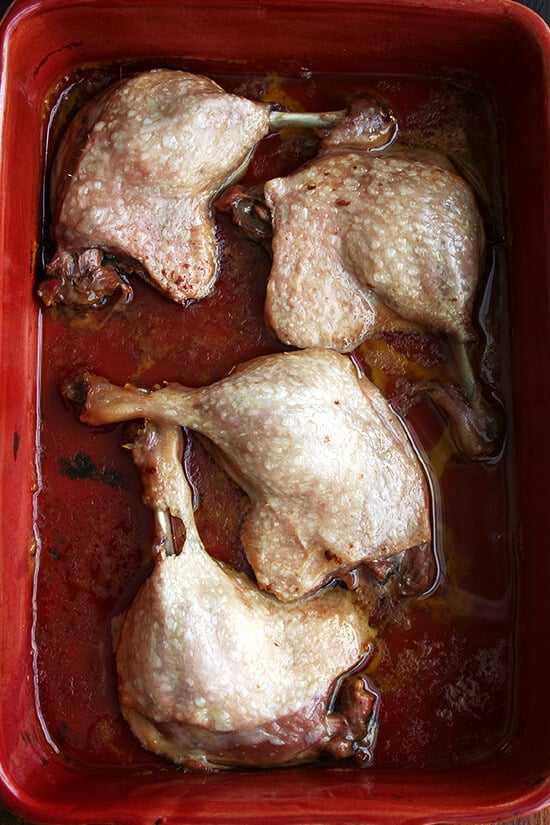
Step 5: Remove duck legs from pan and set on a plate. Transfer fat to a storage vessel.
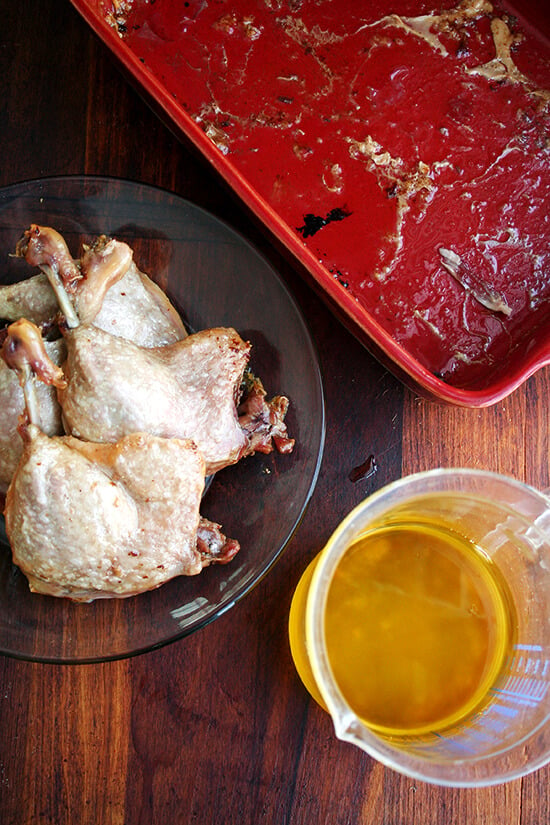
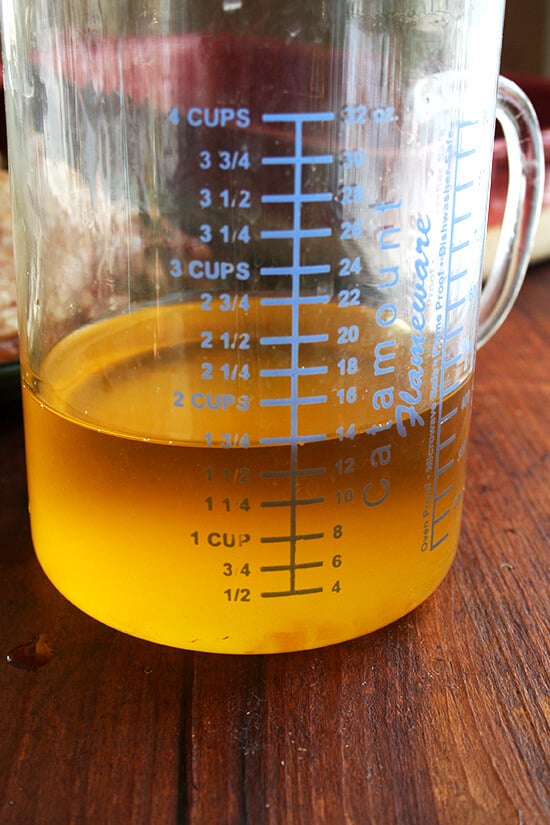
This is the amount of fat retrieved from the baking pan: 1.75 cups. So essentially, only about 1/4 cup of fat — that’s 1 tablespoon per leg — goes into the cooking of these legs.
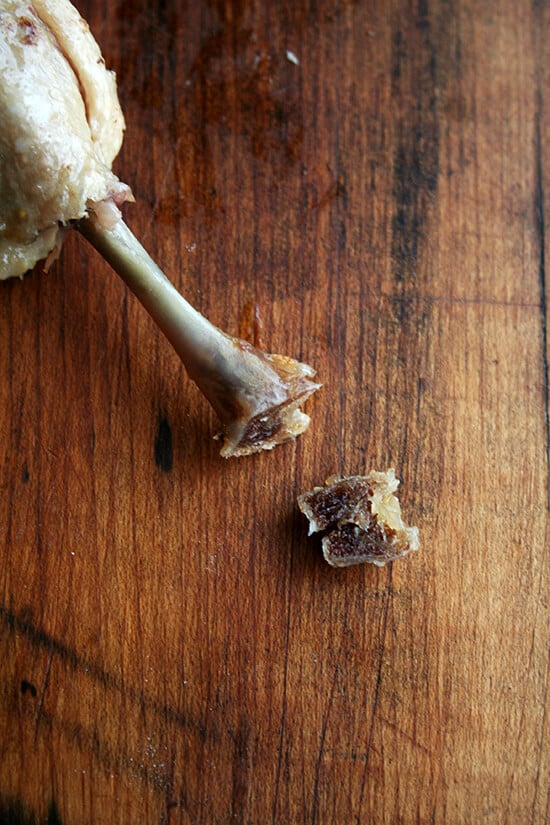
And when you are ready to crisp up the legs, if you feel like being fancy, use the heel of your knife to whack off the end of the bone…
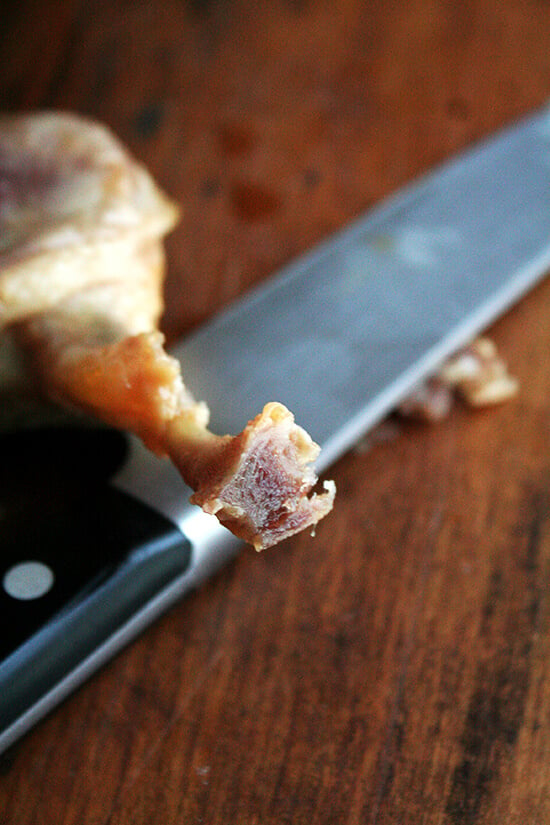
and trim away any fat extending up the bone:
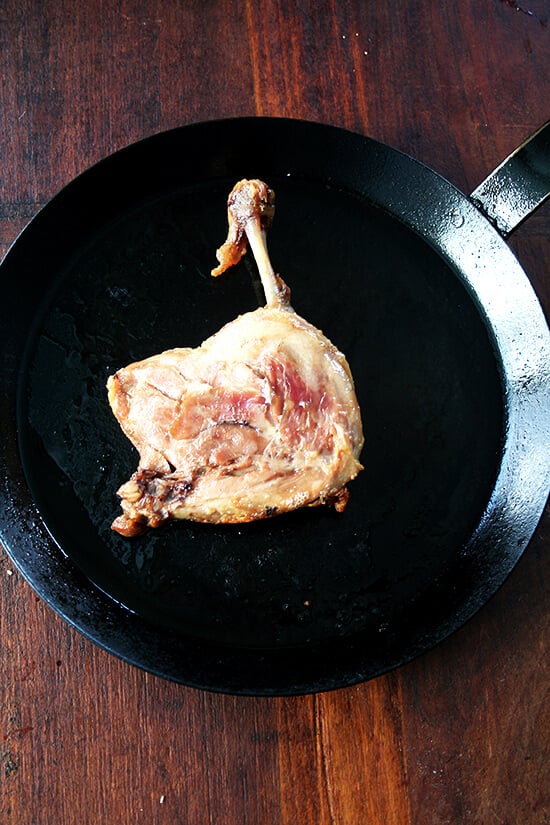
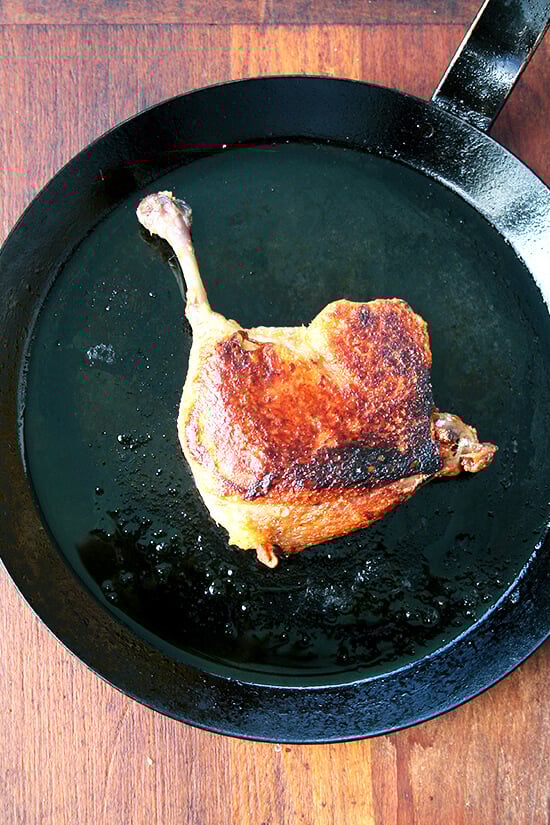
To prepare the duck legs for serving, place skin side down in a hot pan:
Store the duck fat:
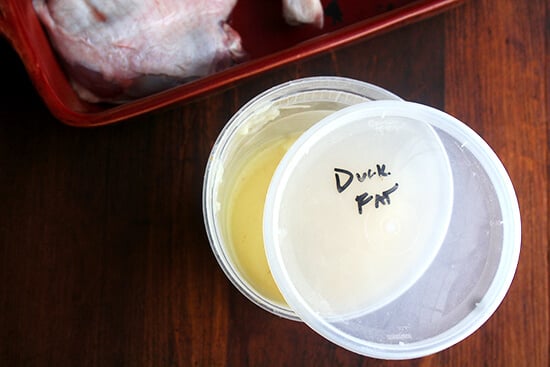
The next time you make confit, use your newly created supply of duck fat:
Duck Leg Confit: 3 Hours, 3 Ingredients
- Total Time: 2 hours 50 minutes
- Yield: 4
Description
This is not a recipe for making traditional duck confit, which tends to be a lengthy three-phase process of salting, rinsing and then simmering in fat. Rather, it’s a recipe inspired by the duck confit made by Chef Thien Ngo at Fork, when he discovered his many-years old supply had been mistakenly trashed.
Traditionally, too, confit is stored in fat, which will preserve it for months. You certainly could do that, but if you plan on crisping up the legs within a few days, it’s easier to store the legs and fat separately.
Serve the confit with a simple green salad tossed in a shallot vinaigrette. Do not be deterred by the amount of fat here (or in any confit recipe). Very little fat ends up in the meat, and the duck confit itself does not taste fatty.
Ingredients
- 4 duck legs
- 1 tablespoon kosher salt
- 1 lb. butter
Instructions
- Preheat the oven to 325ºF.
- Place duck legs in a 9×13-inch or other similarly sized baking pan — you want them to fit somewhat snuggly (more snug than what you see in the pictures is just fine). Sprinkle with the tablespoon of kosher salt. Cover legs with sticks of butter, breaking the sticks in half if necessary. Cover pan tightly with aluminum foil — use a couple of sheets of foil if necessary. Be sure to wrap tightly.
- Bake for 2.5 hours. Remove pan from oven. Let cool briefly, then remove foil to cool completely. Once cool enough to handle, transfer legs to a plate (if serving immediately or within the next few hours) or a storage container (if serving on subsequent days). Transfer fat to a storage container. Label it duck fat. Store in fridge indefinitely. When you make confit again, use this fat in place of butter. (Note: You may need to pop your vat of duck fat in the microwave so that you can pour it out of its container. Alternatively, plop the container into hot water, or let it sit at room temperature for a few hours.)
- If possible, bring the cooked duck legs to room temperature an hour before cooking. If you feel like being fancy, use the heel of your knife to whack off the top half of the bone nub at the end of each duck leg (see photo for guidance). Also, trim off any fat extending up the bone. Note: this is purely for presentation purposes and truly is not necessary.
- Preheat the oven to 350ºF. (Note: preheating the oven is only necessary if you’ve stored your legs in the fridge.) Heat a cast iron skillet over medium heat. You should not need to add any fat to the pan — the duck legs should have enough fat clinging to their skin sides. Once hot, add duck legs skin side down. Let them crisp undisturbed for a minute or two. Shake the pan to make sure the skin isn’t sticking. If it is, use a spatula to gently separate the legs from the pan, being careful not to tear the skin. Continue crisping, repositioning the legs if necessary to ensure the skin is browning evenly, about 5 to 8 minutes total. If the legs have been refrigerated, once the skin is nicely crisped, transfer pan to the oven (no need to flip the legs over) for 5 to 10 minutes or until the meat is nicely heated through. If the legs have not been refrigerated, you probably can get away with just flipping the legs over and cooking for one minute skin side up. You don’t want to cook the legs too much on the flesh side or the meat will get too tough.
- Prep Time: 5 minutes
- Cook Time: 2 hours 45 minutes
- Category: Dinner
- Method: Oven
- Cuisine: French
This post may contain affiliate links. Please read my disclosure policy.



46 Comments on “Duck Leg Confit: 3 Hours, 3 Ingredients”
Man, I love Duck Confit. I’ve had it precisely one time but I will always and forever remember that experience. More than anything I’ve been deterred by the cost of acquiring pounds of duck fat as my local market just started carrying it and a tiny 1/2 lb tub is selling for 8 dollars or so?
THIS looks amazing, I can’t wait to try…both this and the chicken recipe!
I know, there is nothing like the taste of duck confit, right? I hadn’t made it in ages, and I’ve made it three times in a little over a week — so good! I know, duck fat is so pricey, but I suppose the 1/2 lb for $8 isn’t so bad: you could get away with using a pound in this recipe, and compared to many sources, $16/lb isn’t too bad.
Thought of you with the Greek chicken. It’s one of my favorites — the smell of the cinnamon sticks in butter is too good.
I’ve never been deterred by too much butter 🙂
OMG is it really this easy? I’ve always been intimidated. Definitely going to try this for Christmas or New Years.
That galette looks divine! And thank you for reminding me about the Baked Fontina…heaven!
It never occurred to me that you could use butter instead! Clever solution. Your chicken kapama looks amazing too.
It works beautifully Alicia! Happy Holidays!
Gorgeous! I am lucky enough to get local duck and duck fat that isn’t too pricey, but I’m tempted to try the butter method.
Great idea. I’ve heard you can use olive oil, too.
Sounds like the chef was a real gem 😉 This looks delicious.
So many recipes, so little time!! I think that I’ve never thought of myself as someone who would make duck confit….somehow up there in the stratosphere and out of my ‘home cook’ realm but you, as usual, inspire me to reach beyond my ‘norm’! Thank you for that! The chicken kapama recipe looks too good not to make! The final bits of the kitchen project progress slowly, finishing painting, picking out art for the wall, thinking about the pegboard wall project dedicated to YOU! 😉 The ceiling, which is HIGH after I tore down the second false one, is a light, light blue and reminds me of the sky….I’m going to put up an old print of the Last Supper, not because I am really religious, but because it was what hung over my grandmother’s couch in a little house in a little town in Oklahoma the whole time we were all growing up and visiting her! She was a cook in a cafe in Woodward, Oklahoma, and her kitchen was filled with fried chicken that we floured in paper bags and glasses of iced tea in metal glasses, all sorts of pies and noodle dishes…I could go on and on….I love the culture of food and when meeting a fellow ‘foodie’ we find ourselves exclaiming happily over our latest recipe or pan or method! The Holidays bring all that to a crescendo, the last bittersweet Autumn days before the long Winter sets in….obviously, your post today has brought out my inner writer! Thanks for all of the lovely dishes over the past year!
Laurie, your kitchen sounds as though it is coming along beautifully! I love a light-blue ceiling. Our front porch here has a light blue ceiling, and when it’s warm out, I love sitting out there and looking up at it — it kind of has that beaded board look. Your grandmother sounds amazing, and I love the idea of hanging something that hung in her kitchen. Was her fried chicken the absolute best? I can’t imagine. Can’t wait to see picture of the finished kitchen! And, you have to try the duck confit…it is so easy and so delicious! Merry Christmas, Laurie! xoxo
G’day! I LOVE duck, true!
Confit is something I always wanted to do; based on your photo and recipe, is now on my list to do! Thank you!
Cheers! Joanne
Good luck with it Joanne!
What a great alternative method! I’ve been wanting to make confit for a while now. This looks so delicious!
http://www.inbetweenmimosas.blogspot.com
Oh my gosh, exciting! You don’t have to let them cool! Just be careful while crisping the skins — the pan shouldn’t be too hot but it also shouldn’t be too cold. It should gently sizzle if that makes sense. And, I think I noted this, but you might have to rearrange/reposition the legs every so often to make sure all sides of the skin are browning. Hope that helps! Hope they turn out well!
Hi Alexandra, just found your wonderful website. Making this for dinner tonight with the Sprout salad, do I have to let the duck cool completely before crisping the skin?
Ali, it was perfect! Did what you suggested. Let it sit for maybe 15 minutes while we prepared the Brussels Sprouts (had forgot that we needed to cook them, was too busy beating husband at Cribbage)
We live in Sonoma County, the center of great food and this was by far the best duck we have ever had.
We have a Friday night tradition of Cocktails, Cards and Cuisine Last night was Martinis, Cribbage and Duck, couldn’t have been better.
So Jonathan (DH) wants to know if you have a good cassoulet recipe to use any left over duck in?
Yay! I am so happy to hear this. Your Cocktails, Cards and Cuisine night sounds like a ball. My husband LOVES cribbage, and we haven’t played in years, but I love it, too. You are inspiring me to dust off our board. Maybe today: the punch is made; soup (Vermont cheddar cheese) and spanakopita are heating; now we just need a game.
So jealous that you live in Sonoma County. I traveled up there with a few friends about five years ago now while I was living in southern CA. So beautiful. We ate very well during that weekend.
As for the cassoulet recipe, I do not have one that I feel confident about passing on at the moment, but that is high on my list of things to work on this winter. I remember the chef at the restaurant making it, and he kept it pretty simple: white beans cooked in stock with carrots, celery, onions, bay leaf, and sliced sausage. It was so good, but he had that knack of just throwing things together without recipes and making everything taste delicious.
I will report back as soon as I make one. I have a file with about 10 recipes saved that I need to compare and contrast.
Thank you so much for reporting back about the duck confit. Nothing makes me happier! Happy Holidays!
Hi Ali,
So question is did you win? So making the duck again tonight for New Years Eve…. you probably won’t see this tonight, but my container of duck fat from the first time is mostly just butter. So I guess just get it to room temp and spread it around as best as possible?
Have a great New Years and so glad I’ve found your website, looking forward to lots of new cooking adventures for 2014.
Haha, I love it. We still haven’t played…booo. New Year’s Resolution #1: Play more cribbage. I may need some pointers.
So sorry I didn’t see this last night. And I should make a note in the recipe, because it might take a long time for your butter/fat to get to room temperature. If you need to rush it, you can plop the whole container in some warm water, or you can microwave it briefly until it is soft, or honestly, you could probably melt it (you could run the whole tub under hot water to release it from the container) completely in a sauce pan because it’s just going to melt down once it’s in the oven anyway.
Hope you had a wonderful NYE. Happy 2014! Thank you for your nice comments.
As soon as I saw this recipe, I knew I needed to try it! And so, I did. I made it tonight with roast potatoes and brussel sprouts in a balsamic reduction sauce, and it was one of my favorite dinners I’ve ever cooked. Thank you for your beautiful recipe!
Yum! I am so happy to hear this. The whole meal sounds delicious…I love a balsamic reduction. You are so welcome, and thanks so much for writing in! Happy Holidays!
I’m always stowing away ideas for my next dinner party — this one sounds spectacularly simple and impressive! Pinning! Thanks for your expert advice. I love duck legs.
Thanks, Sophie! me, too. I had forgotten how much I love them until I started making them again recently. Happy New Year!
My goodness… I’m so sorry you got yelled at. I’ve had bosses like that. You are such a talented cook, I hope you didn’t stay in that situation long… but if you did, you clearly have learned quite a bit and then some. I will make these at some point. My French husband will shower me with kisses and newfound admiration. And I’m making your fontina pear galette for our Christmas as well as to take to a party the next day. Excited. LOVE your blog. So glad to have found you. Happy Christmas.
Rachel, you are so kind. Thank you for your nice comment. You know, I left the restaurant when it stopped being fun and when I felt I had stopped learning. Sometimes I wish I had stayed longer — of course there was lots more to learn — but my place in the restaurant just stopped being what it was when I first arrived. If that makes sense?
I hope you had a Merry Christmas and Happy New Year and that your French husband showered you with lots of kisses and admiration! Sorry I am just getting to this 🙁 I’m so behind in everything these days.
This looks amazing! I am trying it on the weekend…. I’m a single guy newly out on my own for school. I only bought 2 duck legs. Should I adjust the amount of butter. I am also going to try the chicken recipe soon as a poor/cheap student egg noodle meals are a staple of mine!
So fun! OK, what size pan are you using? If you have a small enough pan, like a pie plate or smaller, I think you could probably decrease the fat to 1/2 a pound. The key is to have the legs nearly submerged, and don’t worry about over doing it — if you can swing, say, 3/4 of a pound of butter, that’s probably ideal.
The chicken was one of my faves as a child and continues to be today. Hope you like it, too! Let me know if you have any other questions!
Hi Ali,
Went to our favorite winery this weekend, Unti in Dry Creek Valley, and the delightful women we worked with was talking about how this one wine we tasted would go so well with Duck Confit. I immediately mentioned your recipe and how wonderful it was and she said she also follows you and was dying to try it. We waxed on and on about your site and the photos… anyway, small world. So now there are two reasons for you to come out and visit Sonoma County 🙂
I’m planning this again for Valentines Day. It’s one of my husband’s favorite things. (I do four legs and save two for a papperdelle dish that I’m still experimenting with.)
btw, that new mac and cheese looks outstanding…
Oh my gosh, that is too funny! And yes, I would absolutely love to get out to Sonoma. I often feel nostalgic for CA but especially this time of year, when winter all of a sudden feels like it’s been hanging around a little too long.
Love your idea of making 4 legs at a time and using two of the legs for the pappardelle dish, which sounds amazing — so, do you make a sort-of duck confit ragu? Do you make the noodles yourself? I think I need to try this. Pappardelle is one of my favorites.
Did I tell you I made a cassoulet? I didn’t make it with duck confit because I thought I’d try to get the bean part right first, but I did bake it with two fresh sausage links and with breadcrumbs on top, covered first, uncovered second, and it was pretty good — the beans and breadcrumbs were delicious; the sausage was overcooked and dry. I think it’s almost there. Will keep you posted.
Always nice to hear from you!
Can you double (or even triple) the amount of butter if your cooking vessel is large enough? Will only 1lb. of butter totally cover the duck legs?
Yes, absolutely. 1 lb. of butter won’t completely cover the legs, but it is enough fat to ensure proper braising when covered with foil. But, yes, you can’t go wrong with more butter.
BTW, Alexandra…do you know what most bosses and disposable diapers have in common? They’re always on your butt, usually full of ca-ca, and should be changed on a regular basis…lol!!!
Hahahaha, I love it!! So true 🙂
I tried this recipe last week. I really liked it. It’s certainly a new favourite! 🙂
Wonderful to hear this, Ashna! I love duck confit this time of year.
Thanks for this wonderful recipe (and hilarious story!)
We raise French White Muscovy ducks and we eat duck at just about every meal. Muscovy ducks aren’t as greasy as other ducks (they actually aren’t from the mallard duck line as all other ducks are.) I am getting a nice supply of fat from all these ducks, but nothing like the 2 quarts needed! So this recipe (with the butter) will come in very handy! Will be making this for tomorrow’s meal!
Can you use the same method with whole chicken legs?
I’ve never tried, so I can’t say for sure, but that sounds kind of amazing. I say go for it! And report back please 🙂
I’ve tried this recipe twice now with slight alterations to the meat and fat used (pheasant both times with butter once and bacon fat the second time) and there will definitely be a third! The directions are easy to follow, the meals have been delicious, and I love the background story in the blog!
So happy to hear this, Joseph! I hope baby Hazel one day will approve, too 🙂 🙂 🙂
So delicious, so easy, so impressive! I made this for a dinner party, and it was such a success, satisfying, yet light and a very pretty presentation. When crisping the skin, you have to be sure not to let your cast iron pan get too hot or it will burn the skin. I roasted the duck on Wednesday (but could have roasted earlier) and then crisped it up on Friday, having taken it out of the fridge for at least 3 hours. This meant less time heating up in oven. I used D’Artagnan duck legs, which had a lot of skin, so a pair of tongs helps to manipulate the legs so the skin crisps up all over. Some of the guests didn’t know it was duck and thought they didn’t like duck until later the mystery bird was revealed. To their surprise, they were converts. It’s a great recipe and really fun to make.
So happy to hear all of this 🙂
Hi. If I only use 2 duck legs in a tight casserole dish with the right ratio of butter, etc., do I still roast it for the same amount of time or what is the procedure? Thanks
Yes! Same amount of time, but you can get away with using less fat. The key is that the legs cook basically submerged in fat.