Easy Sourdough Sandwich Bread
This post may contain affiliate links. Please read my disclosure policy.
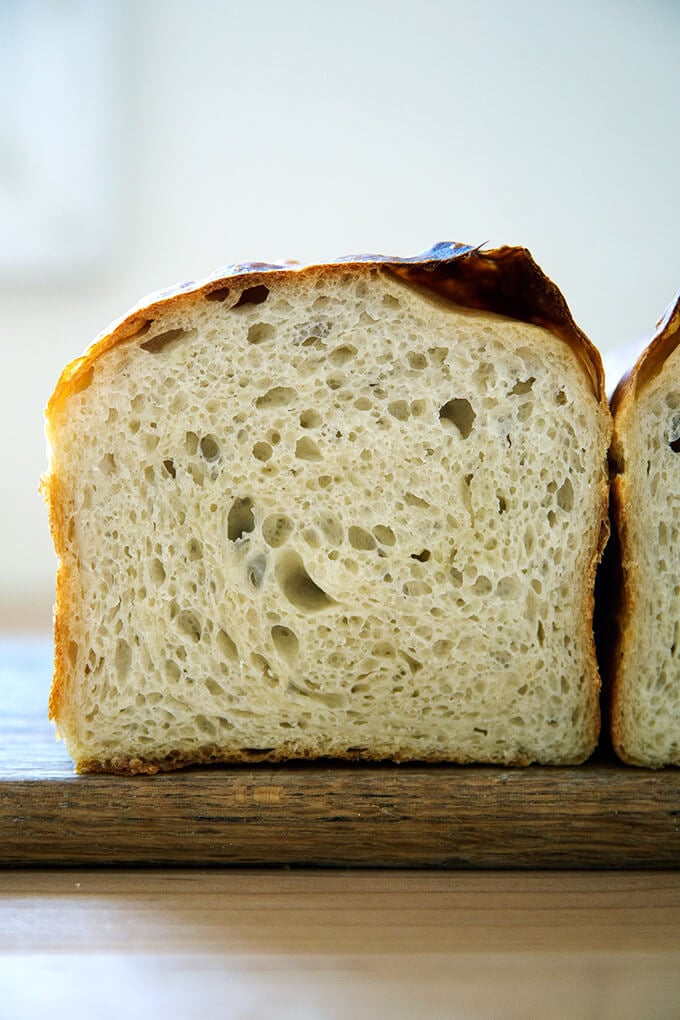
As I mentioned a few weeks, a number of requests about how to make my mother’s peasant bread with a sourdough starter encouraged me to dip my toe into the wonderful world of naturally leavened breads. You can read more about that experiment here, which led to this simple sourdough focaccia recipe, an adaptation of my favorite yeasted, refrigerator focaccia.
It also led to this sourdough toasting bread, which is essentially the same formula, just baked in a different vessel and without the slick of oil and sprinkling of sea salt on top. I’ve been making this bread even more often than the focaccia these days because I love the shape: it’s so nice for morning toast and for sandwiches.
PS: How to Build a Sourdough Strater from Scratch
PPS: How to Activate, Feed, and Maintain A Sourdough Starter
Simple Sourdough Toasting Bread: What You Need
- A sourdough starter. I recommend buying one (read why here). But if you’re up for it, you can make one from scratch in just about a week.
- Time. As with the focaccia, this bread rises first for about 6 to 18 hours (depending on the time of year and strength of your starter), then again for another 4 to 6.
- A large loaf pan. I’ve been using this 10 x 5-inch loaf pan. If you only have two smaller loaf pans, such as 8.5 x 4.5-inch pans, you’ll need to split the dough in half after the first rise.
That’s it! Ready? Here’s the play-by-play:
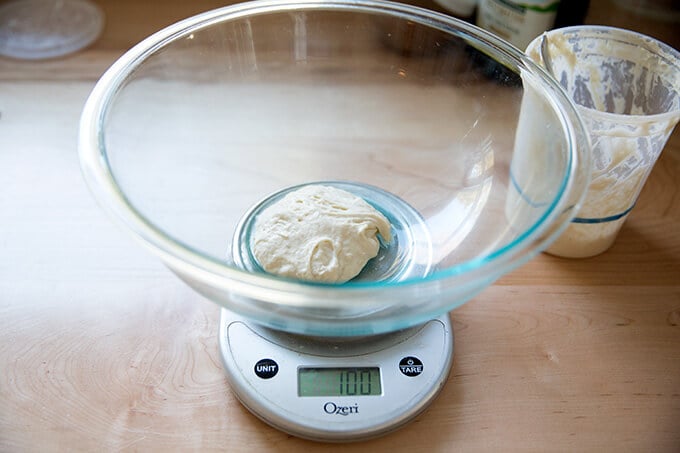
As always, when mixing sourdough doughs, it’s best to weigh everything with a digital scale. Start with 100 g starter. (If this looks familiar, it is: this is the same basic process for the sourdough focaccia.)
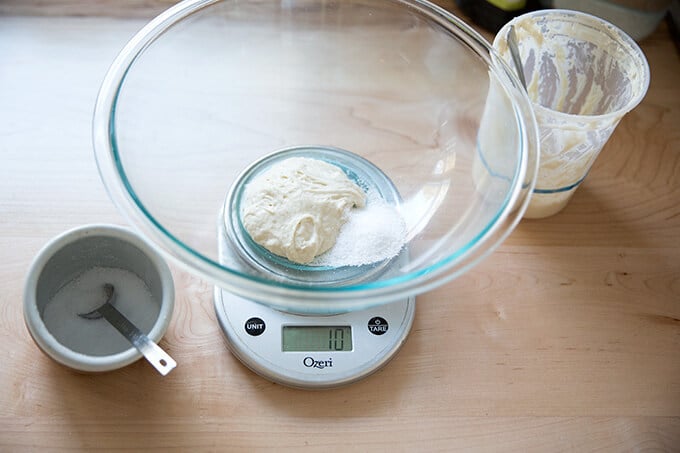
Add 10 g kosher (or other) salt.
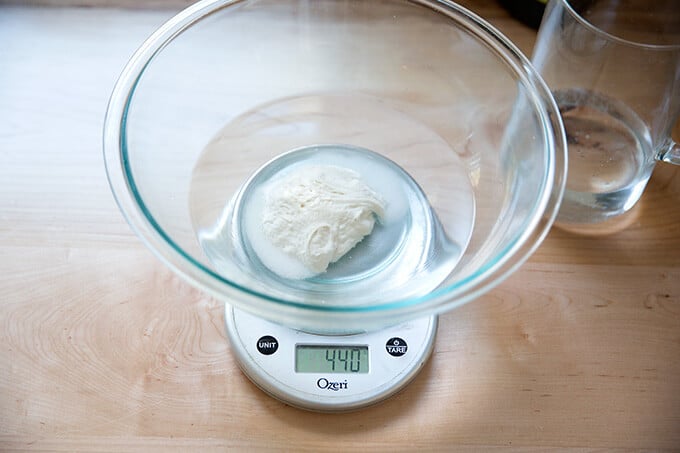
Add 430 g water. (Or less, see recipe for notes.)
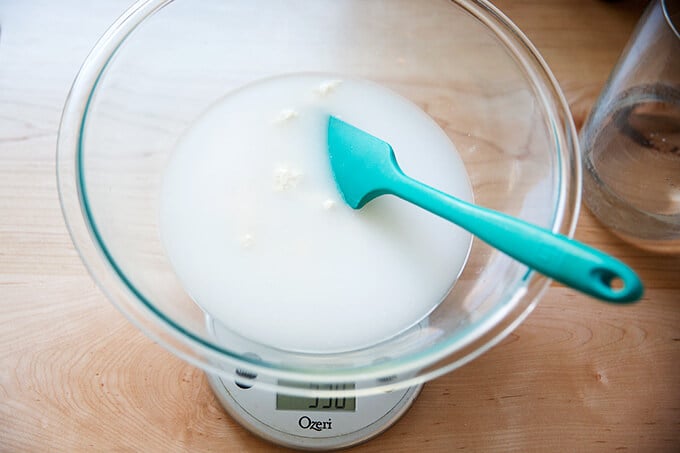
Stir to combine.
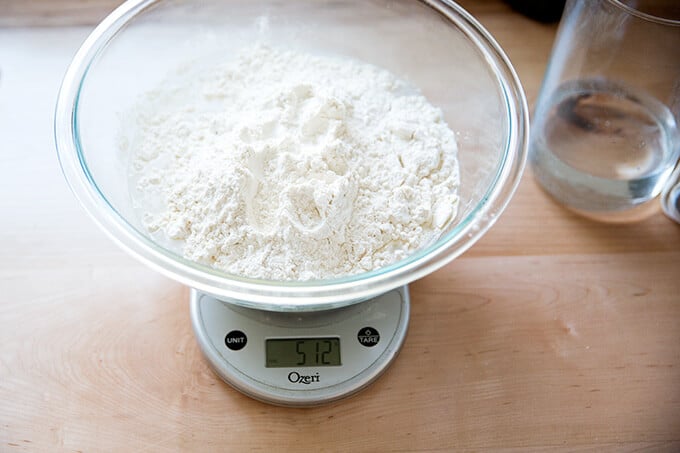
Add 512 g bread flour.
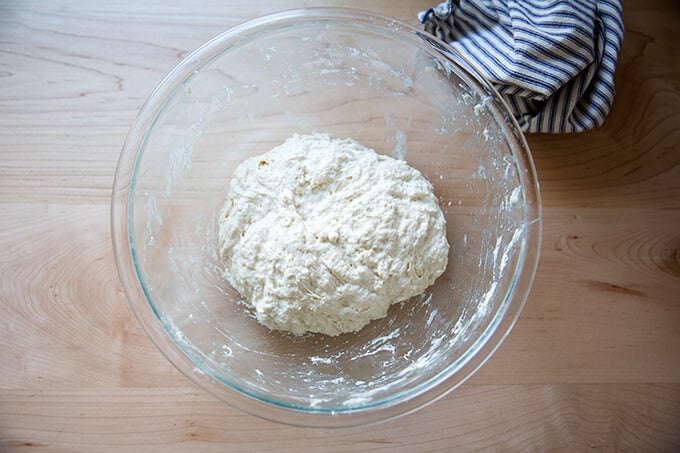
Stir to form a sticky dough ball.
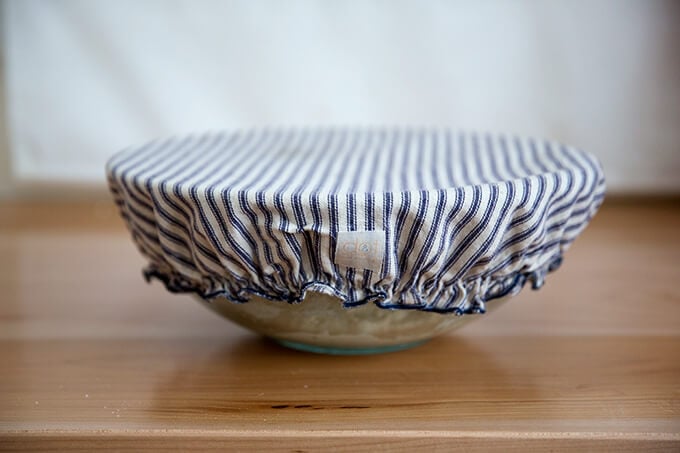
Cover with a towel or bowl cover, and let rest for 30 minutes. Then, perform a series of stretches and folds. See video for guidance. Repeat this 3 more times for a total of 4 sets of stretches and folds during the first two hours. Then, let rise for 6 to 18 hours* (see recipe notes) at room temperature:
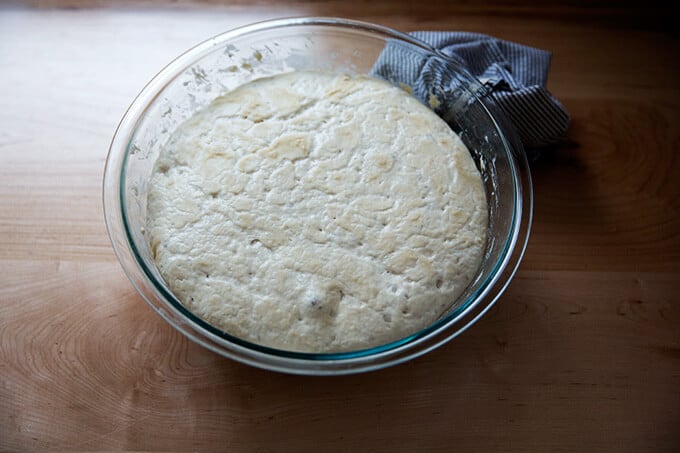
After 6 – 18 hours, it will look something like this:
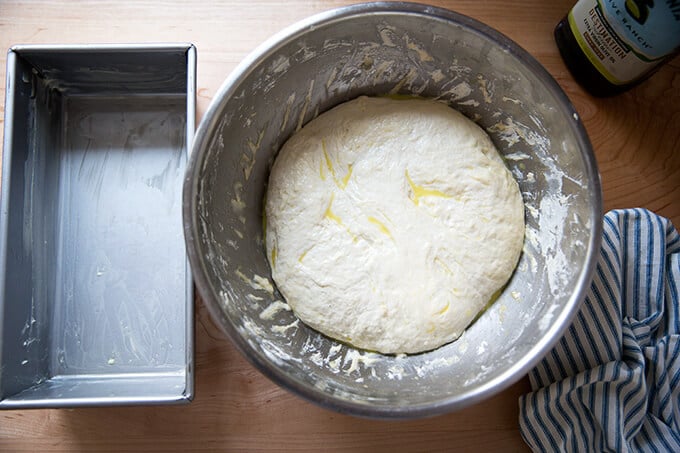
Drizzle the surface of the dough with a little bit of olive oil; then fold the dough inwards from the sides to deflate.
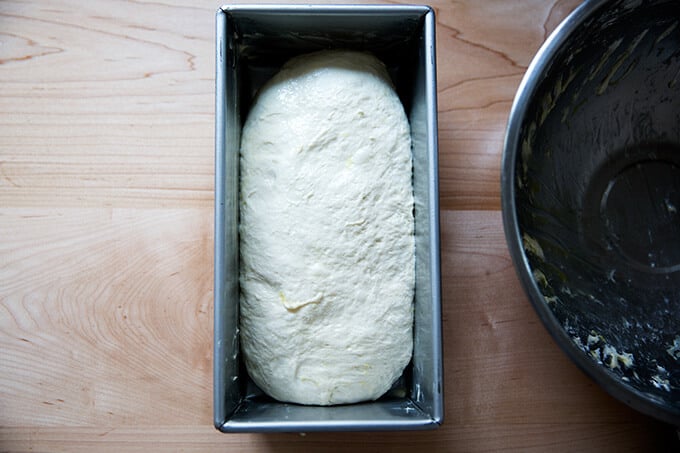
Transfer dough to loaf pan.
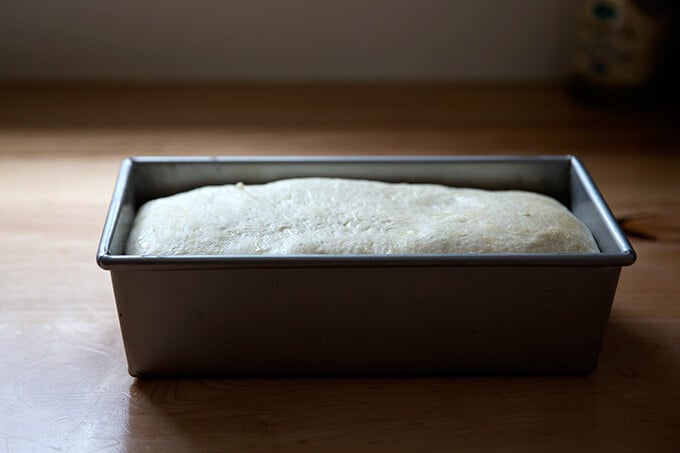
Let rise till dough just begins to crown the rim of the pan, about 6 hours.
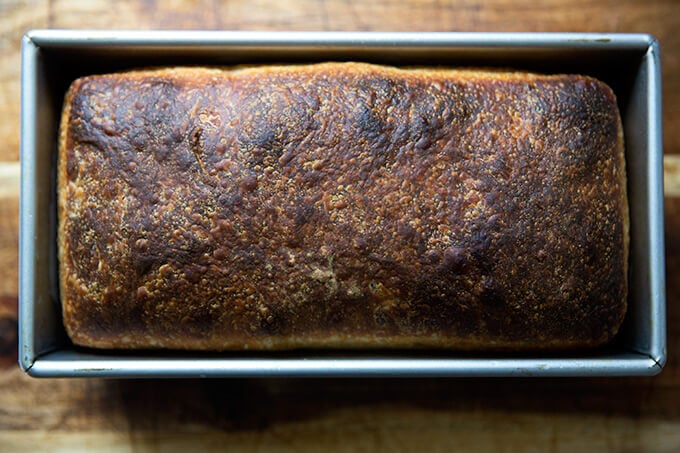
Bake for about 45 minutes.
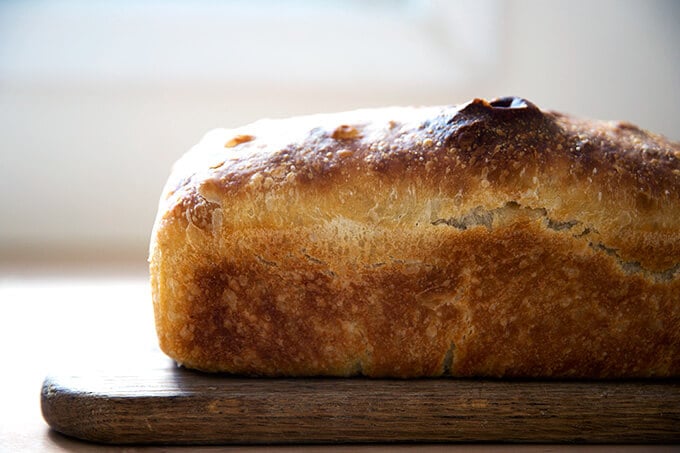
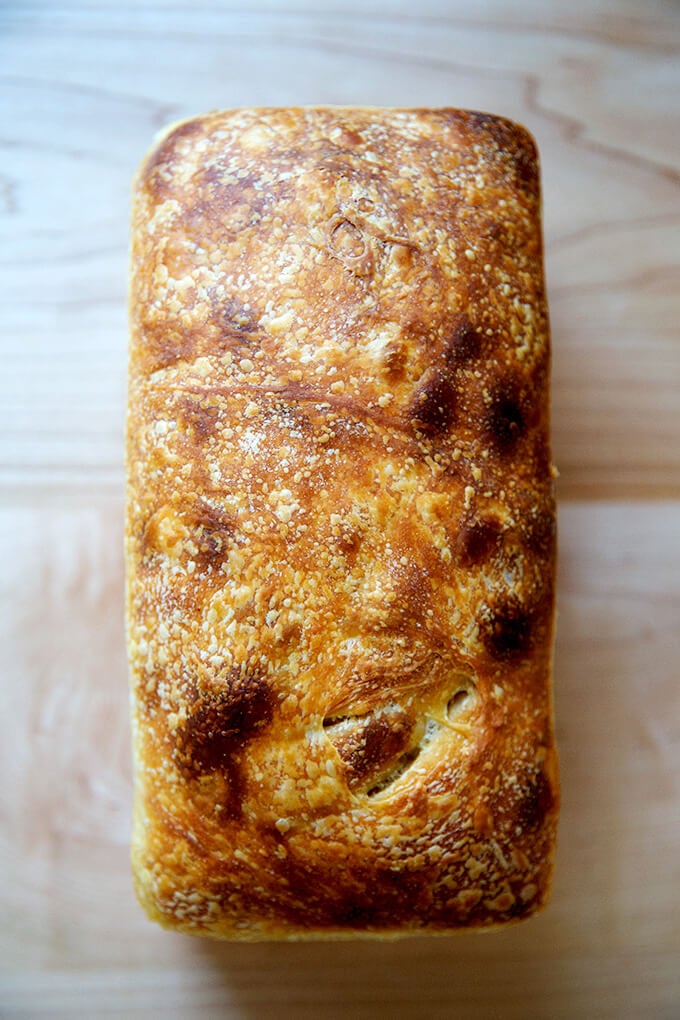
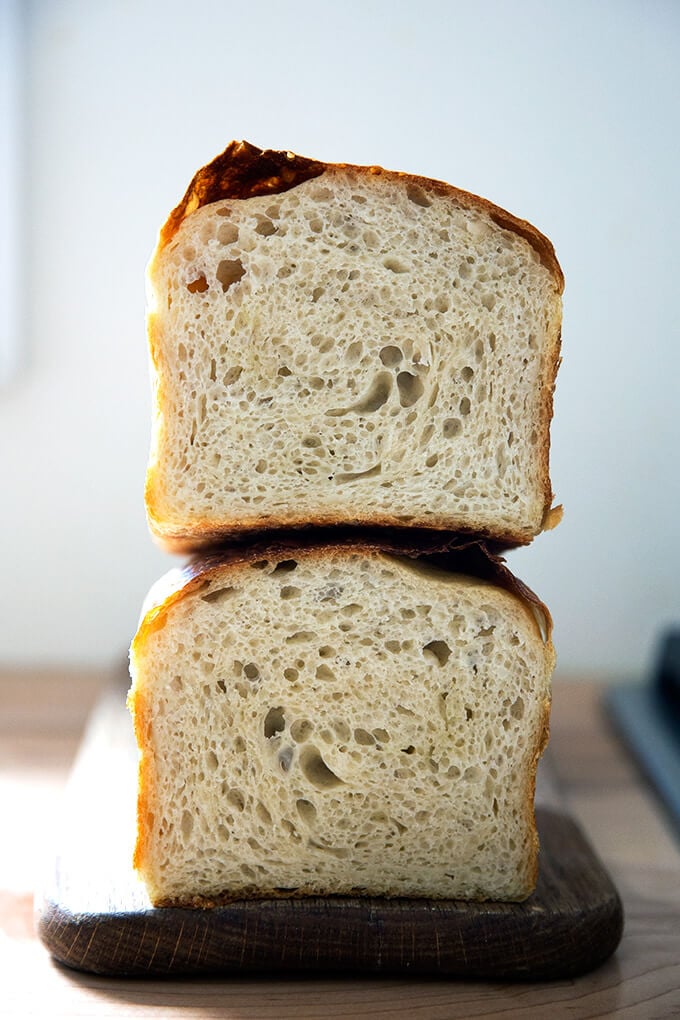
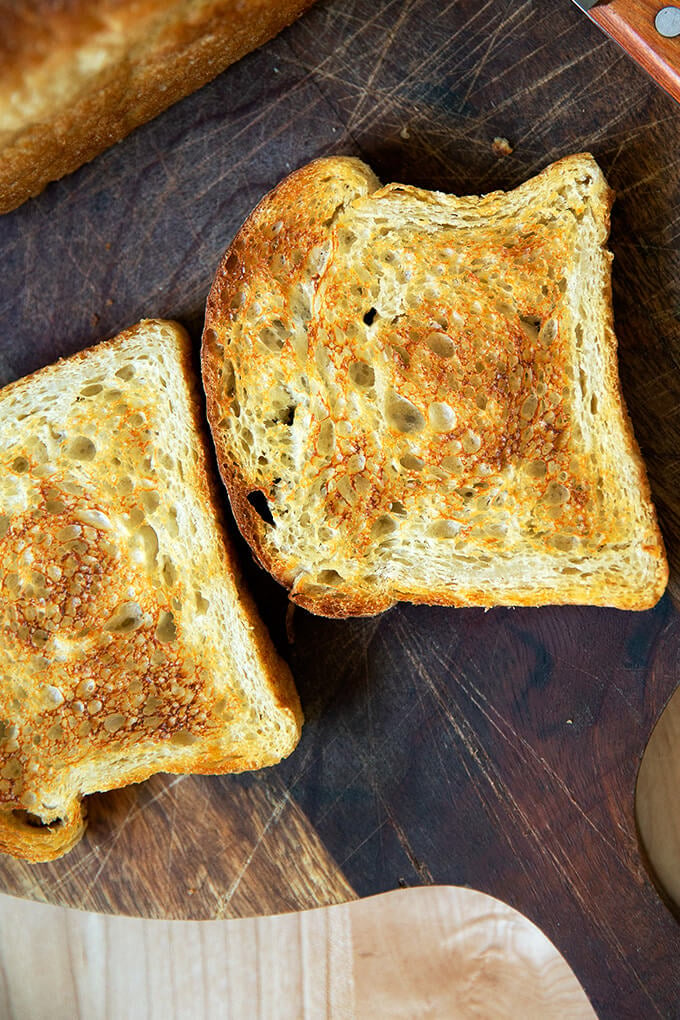

I baked this loaf in a tall-sided pullman loaf. Love the shape!
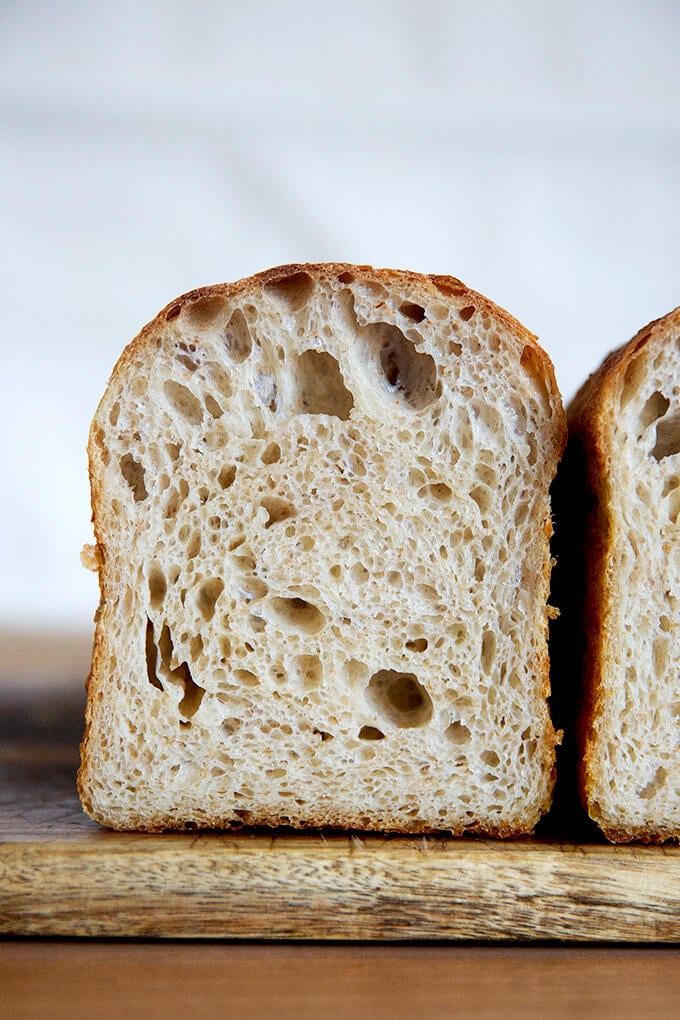
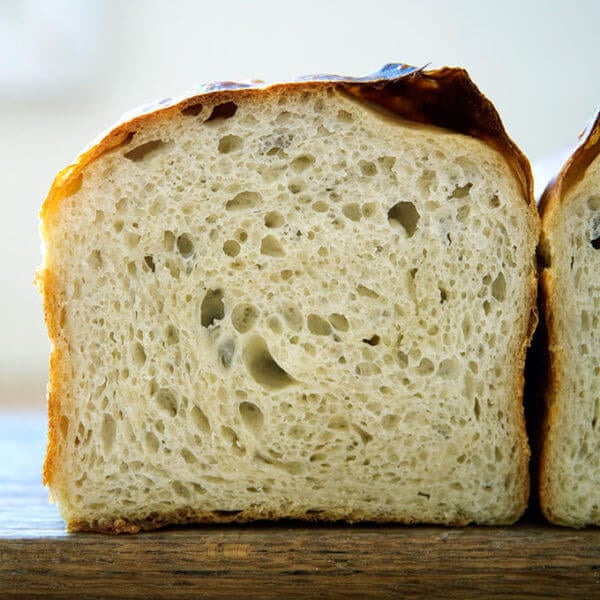
Easy Sourdough Sandwich Bread
- Total Time: 24 hours 40 minutes
- Yield: 1 loaf
Description
** UPDATE: VIDEO GUIDANCE IS HERE **
The makeup of this dough is the same as this sourdough focaccia. Here, the dough is baked in a loaf pan, and there is no sea salt on top.
This recipe yields one large loaf. You’ll need a 10 x 5-inch loaf pan, such as this one. If you only have two smaller loaf pans, such as 8.5 x 4.5-inch pans, you should probably split the dough in half after the first rise.
Plan ahead: This dough rises first for 6 to 18 hours (or less if it is super hot out or if you live in a humid area) or until the dough doubles in volume; then again for about 4 to 6 hour or until the dough crowns the rim of the baking vessel.
Troubleshooting: If you have issues with your dough being too sticky, please read this post: Why is my sourdough so sticky? The 4 common mistakes.
If you’re just getting started with sourdough, check out this post first. You’ll find tips there on procuring a starter as well as how to feed it and maintain it. If you’re up for making your starter from scratch, you can do so in just about 1 week.
Water: Chlorine in water can adversely affect sourdough. Leaving water at room temperature for 24 hours will allow most of the chlorine to escape. When I am in the habit of making sourdough bread, I fill a large pitcher with water and leave it out at room temperature. I use this for my sourdough breads and starter. Truth be told, I’ve used water straight from the tap and have not noticed a difference.
Water quantity: Also, depending on where you live and the time of year, you may need to cut the water back. If you live in a humid environment, for instance, I would suggest starting with 400 g or 420 g water. If you are not using bread flour, you also may need to cut the water back a bit. So much success with sourdough relies on getting the water quantity right.
Starter: I use a 100% hydration starter, meaning it is equal parts by weight flour and water. If you need guidance on how to maintain a starter, see this post.
Ingredients
- 100 g (about 1/2 cup) active starter, see notes above
- 10 g (about 2.5 teaspoons) kosher salt
- 430 g water, (or less, see notes above) room temperature
- 512 g (4 cups) bread flour, such as King Arthur Flour
- a few tablespoons extra-virgin olive oil
- room temperature butter, for greasing
Instructions
- Mix the dough: Place the starter, salt, and water in a large bowl. Stir with a spatula to combine — it doesn’t have to be uniformly mixed. Add the flour. Mix again until the flour is completely incorporated. If you have a straight-sided vessel, transfer the dough to it — it really helps monitor the rise and allows you to see the true growth in volume of the dough.
- Perform one (or more) “folds”: 30 minutes after you mix the dough, reach into the bowl and pull the dough up and into the center. Turn the bowl quarter turns and continue this pulling 8 to 10 times. See video for guidance. If time permits, repeat this “folding” step every 30 minutes for the first two hours. (Note: even if you perform just 1 fold, your dough will be in good shape.)
- Drizzle with a splash of olive oil and rub to coat. Cover bowl with a tea towel or bowl cover and set aside to rise at room temperature (70ºF/21ºC) for 4 to 18 hours — if it is super hot out or if you live in a humid environment, it may only take 4-6 hours. When the dough has nearly doubled in volume (or UPDATE: increased in volume by 50%, which is when I now end the bulk fermentation), it is ready. (Note: Do not use an oven with the light on for the bulk fermentation — it will be too warm. It is best to rely on visual cues (increasing in volume by 50% or doubling if you’ve had success with doubling) as opposed to time to determine when the bulk fermentation is done. A straight-sided vessel makes monitoring the bulk fermentation especially easy.)
- When the dough has nearly doubled, grease a 10 x 5-inch loaf pan with butter (or nonstick spray). Drizzle dough with a few tablespoons of olive oil. Rub your hands with a little bit of oil to coat. Use your hand to release the dough from the sides of the vessel, being careful not to completely deflate the dough. Video guidance here. Turn dough out onto a work surface. Quickly, shape the dough into a rectangle — I fold the dough envelope-style first; then I use a bench scraper to shape the dough into a rough rectangle. Transfer dough, seam-side down to prepared loaf pan and gently stretch into an oblong shape. (At this point, you can transfer the pan to the fridge if it makes sense with your schedule: rub the dough with oil and cover with a cloth bowl cover or plastic wrap. Transfer to the fridge will the next day. Then proceed with the recipe.)
- Leave alone for 5 to 6 hours or until dough begins reaching the rim of the pan — this may take less time when it is very warm out. Do be patient with this second rise: to get good height, the dough should be near the rim of the pan before you transfer it to the oven.
- Heat oven to 425ºF. Transfer pan to the oven and bake for about 20 minutes. Reduce heat to 375ºF. Bake for 20 to 25 minutes more or until golden all around. If you have an instant read thermometer, it should register 206-210ºF or so before removing. Remove pan from oven and turn bread out onto a cooling rack. Cool at least 30 minutes before slicing.
- Prep Time: 24 hours
- Cook Time: 40 minutes
- Category: Bread
- Method: Sourdough/Natural Leavening
- Cuisine: American
This post may contain affiliate links. Please read my disclosure policy.


899 Comments on “Easy Sourdough Sandwich Bread”
Can I use parchment paper when proofing in the tin and when baking? as this is easier for washing and prevent it from sticking in the tin.
Sure!
I might like this better than the original boule style sourdough. In my opinion this has a more pronounced “sourdough” flavor. The dough is trickier to work with and I folded it wrong before putting in the loaf pan but it still rose and came out great. I like that the crust is not as hard-core as a loaf baked in a Dutch oven while the interior still has that nice sour dough texture. I used a 12.5×4.5×3.5 loaf pan and it worked very well with this recipe and makes a nice small sandwich sized slice.
You can also have bread in 1.5 days vs 3-4 days 🙂
I look forward to making again with the correct envelope folding technique.
Great to read all of this, Dierdre! Thanks so much for writing and for sharing your notes/thoughts. I tend to agree about the crust — I don’t love it when it’s super crusty.
Can’t wait to try this! I am wondering if this could work in a silicone baking pan? Have you ever tried? TIA. 🙂
Hi Anne! I don’t love silicone because it tends to make for a very soft crust. That said, if you don’t mind that texture, then go for it. It will work! The texture will be affected, however.
This recipe never fails to turn out wonderfully, even when my dough is slack. I have a question about baking in a cast iron loaf pan without parchment paper. This is the way I usually proof my dough in the fridge: I line my cast iron loaf pan with parchment paper, I put my dough in that pan and cover it with another cast iron loaf pan placed upside down to make a lid. I then let it proof in the fridge. I bake it in the oven removing the lid after 30 minutes. This kind of makes a loaf pan sized dutch oven of sorts. But I really dislike using the parchment paper bc of the creases it makes in the bread. Should I butter both of the cast iron loaf pans and then put the dough directly in the pans to proof? Or should I oil the cast iron loaf pans and cover with cornmeal? I didn’t know if baking it cold from the fridge would make it stick more? Or other suggestions? Thank you! I thought it might be more likely to stick to cast iron than enamel covered cast iron.
Hi Stacey,
I think it might just take some experimenting. My cast iron skillet almost is non stick at this point (but it’s very old and well seasoned) so part of me wonders if you need anything. That said, I’d hate for a loaf to stick and be ruined. Typically, I find butter to be the best nonstick barrier, so I would start with that 🙂
Thank you . Mine are new and I only use them for bread. But I think the fridge proof isn’t the best for cast iron bc of the moisture. I was starting to see rust. So I was proofing the dough in a regular metal or glass loaf pan lined with parchment paper, then transferring them to the cast iron loaf pans to bake. I will experiment with the butter and see what happens. Do u think i should put rice flour on top of the butter or just try butter alone? And do you recommend a certain type of parchment paper? I’m going to order some unbleached parchment paper for when Im in a hurry. Thank you!
I don’t think rice flour is necessary. I like the If You Care brand of parchment paper. I like King Arthur Baking’s parchment as well, but it might be bleached. Good luck!
My sandwich bread ended up coming out super flat! But I used all the correct flour. What could be the reason for this?
Are you using a scale to measure? Are you new to sourdough or experienced?
I am making this recipe for the first time. However, I feel like my dough is very thin/watery more than my regular sourdough is this normal I followed your recipe. Thank you.
It’s a very high hydration dough. Are you using a scale to measure? What type of flour are you using? And do you live in a humid environment? You absolutely could hold back some of the water to make the dough work better in your environment 🙂
Love this recipe – made it every week for months and then all of the sudden this last loaf didn’t rise the second time. After the first rise (which was really good) I moved it to my bread pan and let it sit all morning, normally it would be ready to put in the oven by 3pm but it hasn’t rose at all. Any thoughts on what could have happened?
Hi! Is it very cold where you are? Did you make any other changes to the recipe? Was your starter at its peak when you used it?
Hmm. Yes it’s been really cold this week. Subzero temperatures but it was like 70 something in my house. I’m unsure on if my starter was really bubbly. It doubled/rose but I don’t think it was as bubbly as it normally gets. Does that still make a difference?
I like to feed my starter twice before using it, to ensure it’s rising in a timely manner. So yes, the cold temperature + the not-super-strong starter will slow down the rise of the dough. What did you end up doing? Did the dough ever rise? It’s odd to me that the first rise went well, but the second did not… it almost makes me think the dough over-fermented during the first rise. When you transferred it to the loaf pan, did the dough feel strong? Or was it weak and puddly?
It was in the weaker side. I think it may have over fermented during the night possibly. I baked it and it tastes great, it’s just smaller
Can you explain the proofing in the fridge . How long do you put it in the refrigerator and do you have to wait any time between taking it out of the refrigerator and baking
After the bulk fermentation, you can transfer the dough to its pan, and you can transfer the pan (tucked into a large ziplock or at least well wrapped to prevent the dough from drying out) to the fridge for 24-48 hours. Yes, you will need to let it proof at room temperature until the dough rises to the rim of the pan.
Hi Alexandra! Baked my first loaf of sourdough today. Had great success with both rises – both an hour or two under your reco so I watched them like a hawk. My loaf was a bit chewy/dense though it did look similar to your final bakes. Based on your notes and feedback in the comments I’ll use less water next time. I’m also wondering about the hydration of my starter – I have been feeding 1:1:1. Would you recommend 1:2:2 or higher? Is that unique to this bread or would you use a similar ratio feed for every bake? Thanks so much!
Yes, using less water should help.
I do feed my starter closer to 1:2:2, but I’m not that precise about how much starter I start with: I discard most of my starter leaving just a couple of tablespoons behind, then I’ll feed it with equal parts by weight flour and water (100 grams each or so).
I made this bread last night with my new starter, Jan Arch, and it came out beautifully! Thank you for the wonderful recipes and tips!
That said, I had a kitchen mishap that I thought you might find humorous. After preheating the cast iron Dutch Oven, I took it out of the oven to plce the bread on it. Rather than putting it straight onto my marble pastry board, I put out a silicone trivet for it – big, big mistake!
While I was scoring the dough, the trivet melted onto the cast iron. Of course, I didn’t realize it until I had put the pan back in the oven and looked to see the trivet was no longer there. Needless to say, the kitchen was quite smelly (not in a good way) and smoky while the bread baked.
As I said, the bread came out beautifully! After everything cooled, the clean-up of the melted trivet was a breeze, thankfully. I have now ordered Lodge silicone trivets as the off-brand certainly did not do the job. I think I will also stick to 450F for preheating as well.
Baking is always an adventure! 🙂
Oh boy!! That is an adventure… I’m just glad cleaning was a breeze. I get so mad at myself when I do things like that and then create lots of work for myself as a result. One lost trivet is a small price to pay! And you’ll have a beautiful Lodge trivet to remind you always of this baking mishap. Thanks for sharing! So glad the loaf turned out beautifully.
I’ve made several loaves with this recipe and have had great results!
Great to hear, Susan! Thanks so much for writing 🙂
This recipe was quite easy and the bread was delicious, but for some reason the top part of my bread was just pale, the sides were golden brown. So, I’m not sure what I did wrong. Any suggestions? Thank you!
Try increasing the temperature next time around: start it at 450ºF and see if that helps.
Thank you for the wonderful recipe. I do have a quick question – mine doubled pretty quick so I shaped and placed in the pan to rise overnight in the fridge. It looks flat and maybe even deflated but then I noticed my bread pan is bigger (13.385×5.3). Would you transfer to a smaller pan? Let rise longer and bake anyway? Also, when you take out of the fridge to bake do you let it get to room temp?
Hi! If you are looking for a taller loaf, I would transfer the dough to a smaller pan.
Yes, leave the loaf at room temperature until the dough it rises so that it reaches the rim or crowns the rim of the pan; then bake it.
I ended up leaving it in this larger pan and let it rise a few hours in my kitchen after taking it out of the fridge – It wasn’t as tall as my partner would’ve liked for sandwiches, but I think it came out almost the perfect size, crumbs were perfect and it is super soft! Overall, it was a great success and marked as the new GoTo sandwich bread. I’d probably do x1.25 of the recipe next time for my size of pan. Anyway, just wanted to thank you again for the wonderful recipe and for being so responsive and helpful to everyone in the comments. Have a wonderful day!
So nice to read all of this, Inbar! I think 1.25x the recipe is a great idea for the larger pan. Thanks you for your kind words, too 💕💕💕
I’m new to SD baking, and this loaf is the best so far. It is delicious with a moist texture and lovely flavor. I really doubt any would be better for toasting/sandwich bread. I gave 4 stars only because it did have some very large bubbles shortly before baking. Probably my fault, and I’m wondering if I over hydrated somewhat or perhaps somewhat over fermented the second time. I would love feedback regarding this. It did have a large gap between the brown, thin crust and the bread top where the bubbles were. I didn’t know whether to pop them before baking or not, so I didn’t
Great to hear Nancy! You can definitely pop those big bubbles just before baking. And overproofing is definitely a possibility, too, but it all just takes practice and some trial and error to learn when the optimal time to transfer to the oven is — I always rely on the visual cues with my pan. When the dough reaches the rim or just slightly crowns it, it’s ready for the oven.
Do I do anything different if I do a double batch?
Nope!
I’ve made this bread twice now and it has come out excellent. Super soft with a chewy crust. Thank you for your easy descriptions to follow! I let my bread rise in the pan about an inch higher than the rim, and I really like it, a few more holes, but the kids like how tall it it!
Great to hear, Michelle! Thanks so much for writing 🙂
Using 2 smaller cast iron loaf pans. What temperature and times should I use?
Same temperature. I would play it be ear on the timing… maybe 5 minutes less?
This is my favorite sourdough recipe of all time! I make it at least once a week. I would love to try some add ins such as cinnamon raisin, green chili cheddar, etc. do you have any recommendations for this?
I would do it after the second set of stretches and folds — sprinkle your ingredients over the dough; then stretch and fold; repeat the s&f twice more at 30 minute intervals.
MichelleMann64@gmail.com
Is it OK if I proof in the refrigerator for at least 12 hours? Also, I am curious to know if you have tried Tom Cucuzza fast method without the stretching folds for the sandwich style bread. Do you think it will turn out to use this method?
Hi! I am not familiar with the Tom C method, but I am all about simplicity, so definitely give it a go! And yes, re the cold proof. Good luck!
This was my first time making bread with my sourdough starter. I followed the recipe and instructions perfectly and it turned out great!
Great to hear, Tami! Thanks for writing 🙂
Does this recipe work well to do a double batch?
Yes!
Hi Ali! I’ve had great luck with many of your recipes and would love to try this one as well. Can I use discard for this recipe? Sounds wonderful!
Hi Jenna! Thank you 🙂 I’m not sure you’ll get quite the right rise if you only use discard. I’d use a pinch of yeast if you’re going to use discard, or I’d use active starter for this one for optimal results.
This has become my family’s favorite sourdough recipe! I’ve made it multiple times now!
I do have a question though! Our house is very cool (especially because of winter) and it seems to take my dough a lot longer than 12 hrs to rise. How long is too long for it to rise? If it seems like it is taking longer than 24hrs to rise, would the dough be ruined at that point and not bake up well? This especially happens when it’s rising again in the loaf pan. It doesn’t seem to rise very much even though I know my starter is good (fed/active and bubbly when used in recipe) and bread and flour are good as well. How long is too long for the second rise to rise? I hope this makes sense!
Thanks!
Great to hear, Rachel!
There’s really no time limit. Things to keep in mind: make sure your dough is in a protected environment if it’s taking that long. I would conside sticking the whole pan in an xlarge (2 gallon) ziplock bag to ensure the dough doesn’t dry out.
Another thought: you can start with lukewarm water to help things move along, especially in the winter. And while I caution against using the oven with the light on because it can be too warm for sourdough and you risk overfermenting, you can try to find a cozy place for your dough to rise.
Hope that helps!
Love this recipe, my go to.
I just got a Pullman pan, and was curious if you bake yours with the lid on or off?
Great to hear 🙂
I have not used a pullman pan with this one, but if you want a squared off loaf (with a flat top), definitely use the lid. You may want to bake the loaf without the lid towards the end for 5-10 minutes to allow it to brown a bit.
Been following your sour dough videos on YouTube! You have the best videos! I made the sandwich loaf today and came out perfectly. Do you have a video where you add add ins to sour dough batards? I’m struggling with shaping them when I do.
Great to hear! And no, I don’t have a video that shows how to add add-ins, but I have been meaning to make one. Stay tuned! In the meantime, add them just before the third set of stretches and folds. Do at least 3 sets of s&fs after you add them to ensure they are incorporated evenly.
Hi , inloo look be this bread and I have made it a few times. What is the maximum I can leave the dough after bulk ferment in the fridge? 72 hours too much?
Thank you!!
Hi! Hard to say. 72 hours does feel a touch long. I’d say 48 hours for sure.
I love this recipe I make bread once a week it comes out perfect every time . Best recipe for great sourdough bread!!! Thank you
Great to hear, Maryjo! Thanks for writing 🙂
Three loaves of this bread in the oven now, they look fantastic. I don’t know how many times I’ve made this recipe, but it turns out great every single time! When I need a recipe I go to Alexandracooks first!
Awww, so nice to read this, Terrill! Thanks so much for writing 🙂 🙂 🙂
in step number 1 you didn’t include the need to cover the dough with plastic wrap or a tea towel during the rise. If it isn’t covered it will begin to dry out on top.
First time making this SD sandwich bread and it came out amazing and my kids absolutely love it! I’ve been making your Simple SD bread for past couple of years and was really excited to see that you have a sandwich bread version. two questions:
– How do you store your bread? wrap it with anything, bread box ( if so, do you recommend one?)
– Do you have a SD recipe for rolls? Specifically, making the rolls (not baking them) and then freezing them. So the dough is stored in the freezer and ready to be made for a dinner later in the evening? I’ve tried a couple recipes online but none of them worked out well.
Hi! And great to hear 🙂
I store bread in a ziplock bag. If this is icky to you, any container with an airtight lid is ideal. I find this keeps the crumb the softest for the longest. I always reheat day-old bread to revive the crust (and the crumb, too) — a toaster oven, toaster, oven, etc. all work well to reheat day-old bread.
No recipe for rolls, but it is on my to-make list 🙂 Hopefully sometime this year… I work at snail’s pace these days 🙂
Regarding freezing unbaked sourdough: I don’t find it works well. Even after just a week in the freezer, the dough loses its oomph. I’d suggest baking, letting cool, then freezing.
A ziplock bag in the fridge or at room temp?
Room temperature!