
Simple Sourdough Pizza Crust: A Step-by-Step Guide
This post may contain affiliate links. Please read my disclosure policy.
Here is my guide for making sourdough pizza crust at home. As far as sourdough pizza recipes are concerned, this one is as simple as it gets — it’s made with all-purpose flour and there is no autolyse or preferment. Everything gets mixed together at once and you are on your way! Ready? Wake up your starter! Let’s do this 🍕🍕🍕
One of the most frequently asked questions I’ve received these past few weeks is: “Have you ever replaced the yeast in “X” bread recipe with sourdough starter?”
And specifically: “Could I use sourdough starter in your pizza dough recipe?”
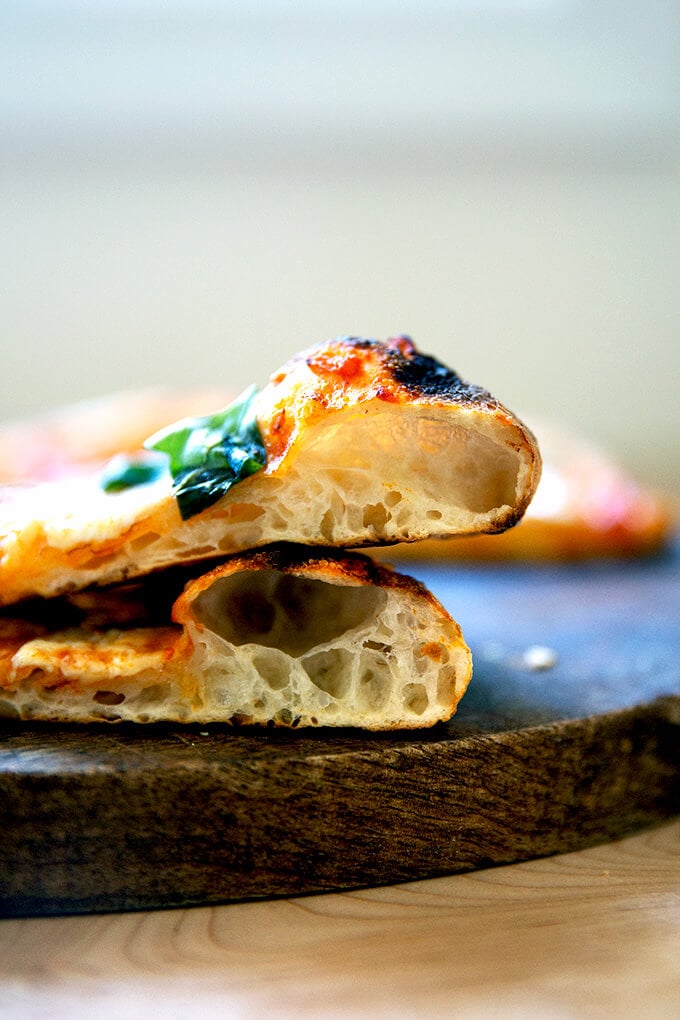
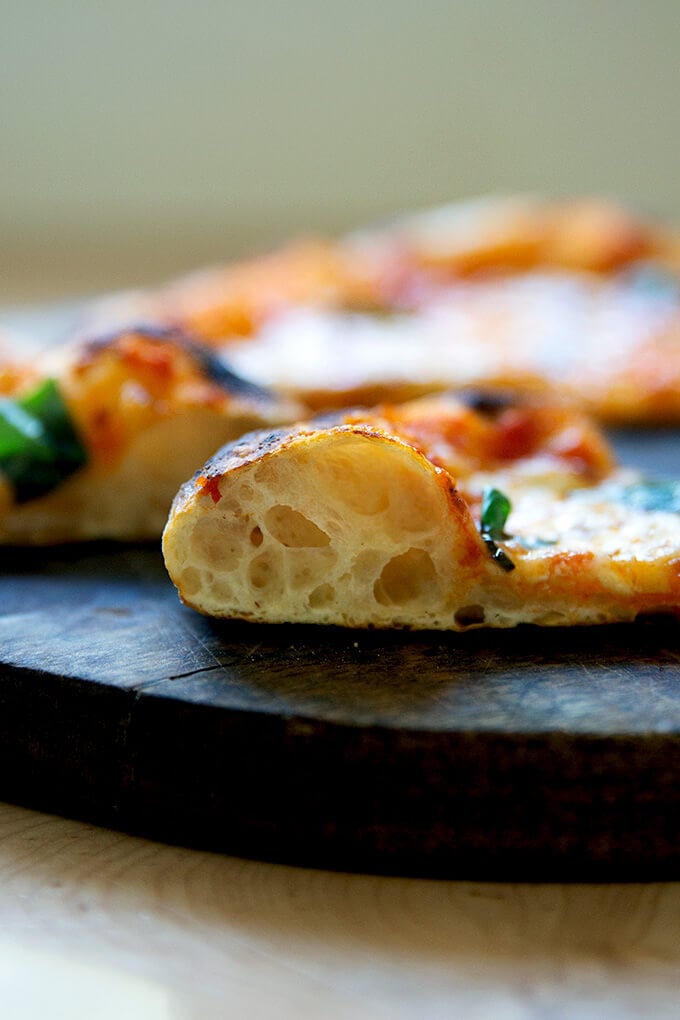
Yes! And today, I’m going to show you how. The process is very similar to how I make yeast-leavened pizza, and the resulting pies are similar: ballooned and blistered edges with crisp but pliable crusts. In the recipe below, there are instructions for making three favorite pizzas 🍕🍕🍕:
- Classic Margherita
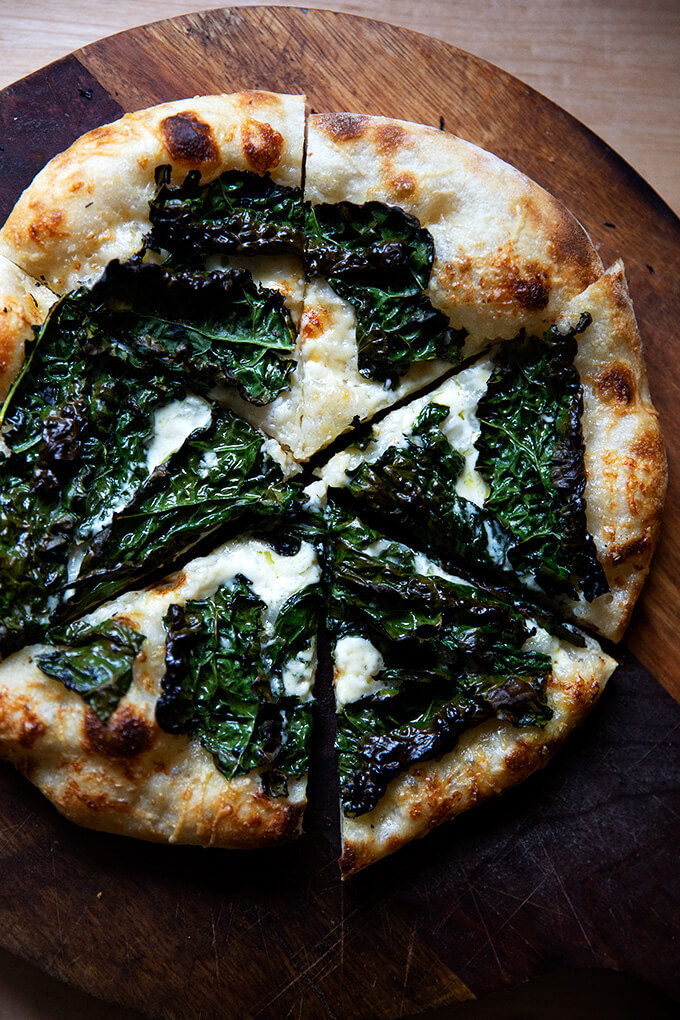
- Kale and Crème Fraîche
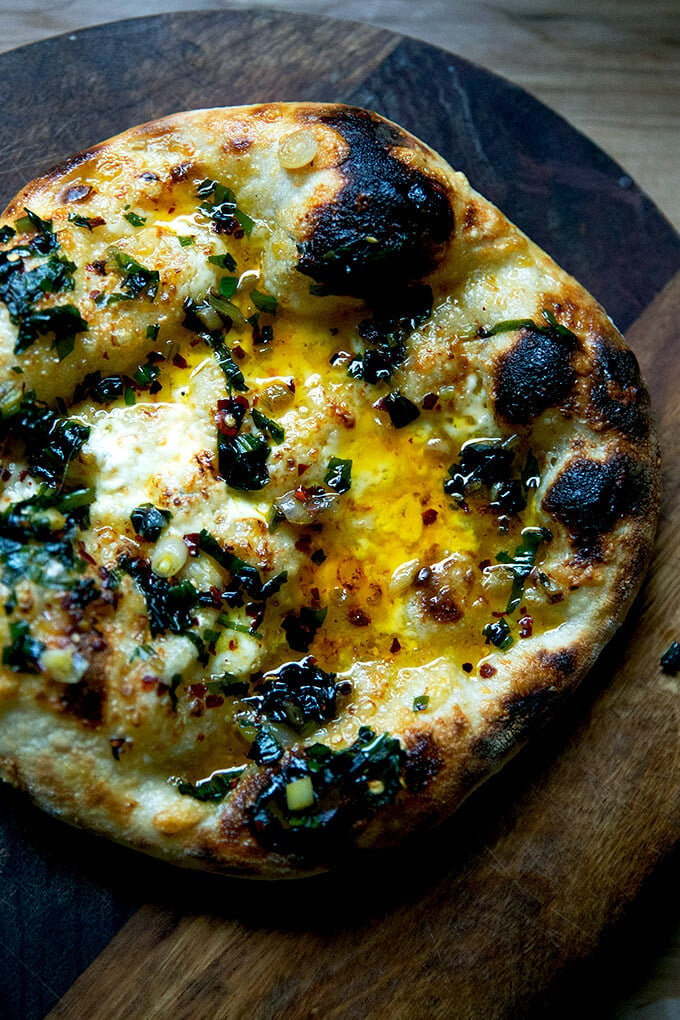
- Naked Pizza with Spicy Scallion (or Ramp!) Oil … made this on Instagram over the weekend
Simple Sourdough Pizza Crust: The details
This sourdough pizza crust is …
- Basic! Given supply constraints, I didn’t get creative with the flour mix here. This dough is made with 100% all-purpose flour. You absolutely can use bread flour or tipo 00 flour (read more about tipo 00 flour here) if you can get your hands on either. If you have been having a hard time finding flour, Baker’s Authority is a great option — great prices, too, even with shipping tacked on.
- 75% hydration. This is a classic sourdough formula: 375 g water, 500 g flour. (Note: This calculation is not quite accurate, because I am not including the weight of the water and flour of the sourdough starter in the calculation.)
- Simple! As with all of the sourdough recipes on this site, there is no autolyse or preferment or levain. I do call for some stretches and folds, which build strength in the dough. I like to do 4 stretch and folds, but even if you can only perform one stretch and fold, your dough will benefit.
Can you Freeze Sourdough Pizza Dough?
Yes. In my experience, the pizzas made from frozen dough do not spring as high upon being baked, but they still taste delicious.
Also, in my experience, the more time dough spends in the freezer, the more air bubbles the dough seems to lose. After 1 week in the freezer, my dough will bake up beautifully. After 3 weeks in the freezer, my dough will be less bubbly and will bake into a thinner and crisper crust.
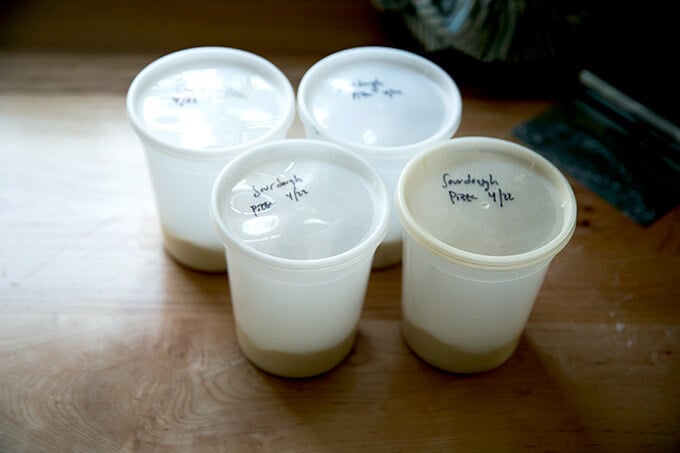
To freeze sourdough pizza dough: make it through step 4 in the recipe below or until after you transfer the portioned rounds to quart containers. At this point, transfer the quart containers to the freezer. To thaw, remove a container (or more) and let thaw in the refrigerator for 1 day or thaw at room temperature for 8 hours. Then, proceed with the recipe.
5 Keys to Excellent Pizza Every Time
Regardless if you are using yeast or sourdough, these (for me) are the keys to making excellent pizza at home every time.
- High-hydration Dough: When handled properly, doughs with a high proportion of water relative to the flour bake into beautiful, ballooned-pocketed crusts.
- Refrigerator time: After the first rise, time (at least 6 hours, but up to 3 days) in the fridge further develops flavor and improves the texture of the pizza dough.
- 1 hour at room temperature: If time permits, letting the dough come to room temperature an hour before baking, allows for easier shaping — room temperature dough will more easily stretch into a round than cold dough.
- Minimal handling of dough: Using a delicate hand to shape the dough, preserves the air pockets created during the fermentation process. I learned this from Jim Lahey:
“As soon as I began really paying attention to how I shaped my pizza rounds by taking care to use a gentle hand, I noticed a difference in the finished product. The air pockets pervading the unbaked round really affect the texture of the baked pizza.”
- Baking Steel: As you might know, I am a huge fan of the Baking Steel. In sum: steel is a better conductor of heat than stone — i.e. it transfers heat to the dough faster — which promotes great oven spring which translates to glorious bubbles throughout the dough. (Read more about the Baking Steel here.)
To be clear, I do not think you need to use a sourdough starter to make excellent pizza at home. A high hydration dough + leavening of choice + proper handling will give you excellent pizza every time, including that baked in a skillet: How to Make Excellent Skillet Pizza.
Here’s my guide to making yeast-leavened pizza dough at home: How to Make Pizza

Pizza Night
My cookbook, Pizza Night, which includes 52 pizza and 52 salad recipes, one pair for every week of the year, as well as five simple desserts is now available for preorder 🍕🍕🍕
It’s organized seasonally and includes recipes for the home oven, outdoor oven, the grill, Sicilian-style, Detroit-style, grandma-style, skillet pizzas, gluten-free, and more. There are both yeast and sourdough recipes for every style of pizza in the book.
Get your copy here: Pizza Night.
New to Sourdough?
If you are intimidated by sourdough bread baking, I have a free email course that covers the basics: Sourdough: Demystified.
And if you are looking for other easy sourdough bread recipes, this simple sourdough focaccia recipe, as well as this simple sourdough bread recipe, are the recipes I suggest attempting first, both for their simplicity and flavor. Another great beginner’s bread recipe to try is this overnight, refrigerator focaccia, which requires minimal effort but yields spectacular results.
PS: Easy, Homemade Pita Bread Recipe
PPS: My Mother’s Peasant Bread: The Best Easiest Bread You Will Every Make
Here’s the simple sourdough pizza crust play-by-play: As always, a scale is essential for best results. You need water, flour, salt, and a sourdough starter. I am a proponent of buying a starter (see recipe box for sources), but if you are up for it, you can build a starter from scratch in just about 1 week.
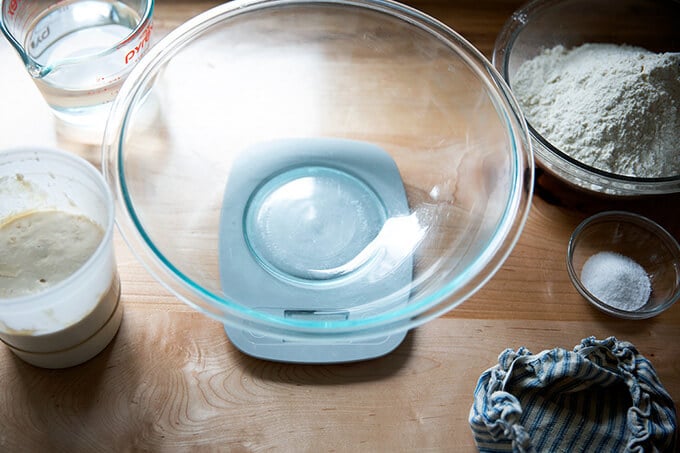
Combine 375 g water, 100 g sourdough starter, and 10 g salt in a bowl. (See notes in recipe box about using less water if you live in a humid environment.)
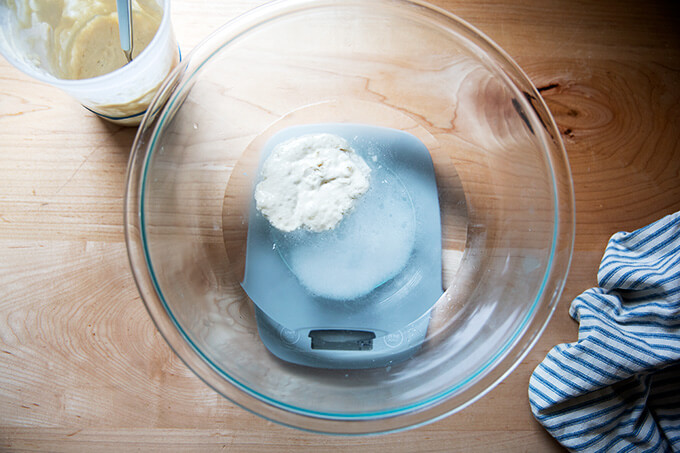
Stir to combine; then add …
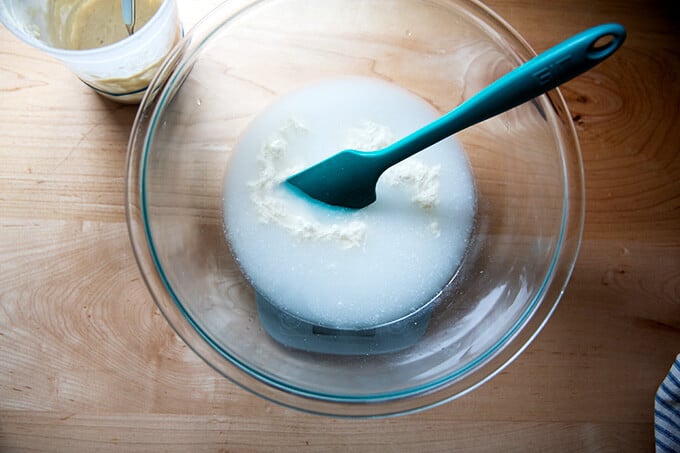
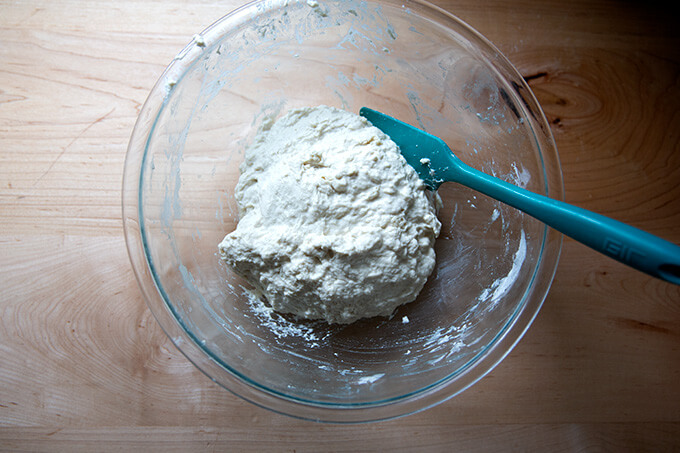
… 500 g all-purpose flour.
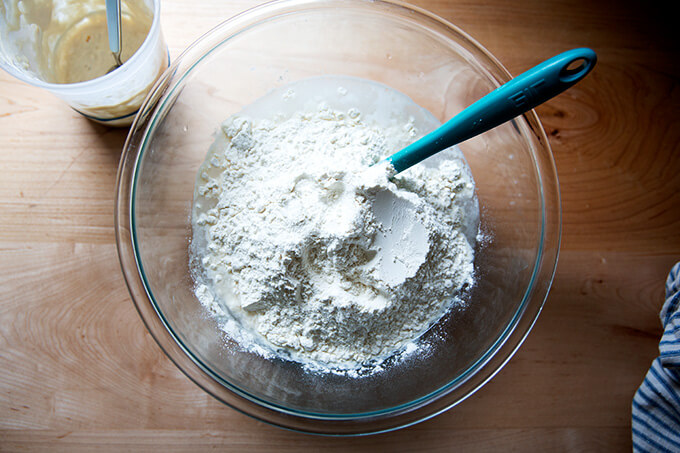
Stir until you have a sticky dough ball.
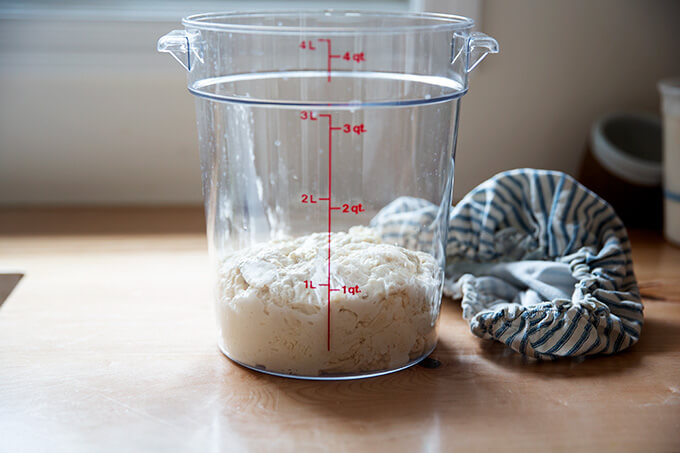
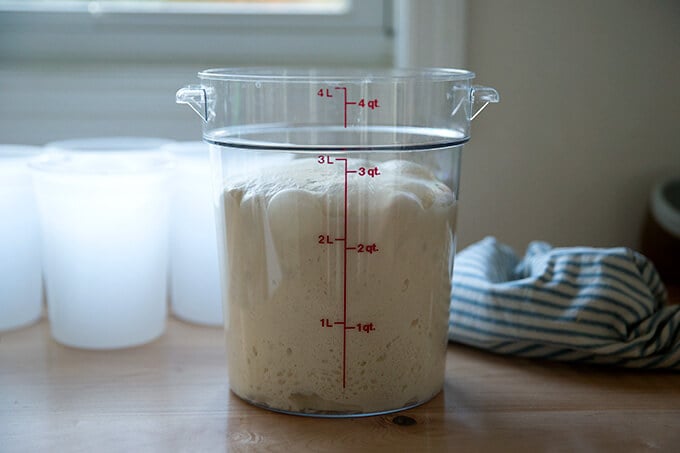
Transfer to a straight-sided vessel (if possible) and let rest for 30 minutes. Then, “stretch and fold” the dough (see video for guidance) 4 times at 30 minute intervals. Cover the vessel. Let it rest for 6 to 12 hours (see recipe notes for timing) or until the dough…
… has about doubled in volume. (Note: This is a little bit more than double. Ideally you don’t want your dough to rise much beyond double. More recently, in fact, I stop the bulk fermentation when the dough has increased in volume by 50%.)
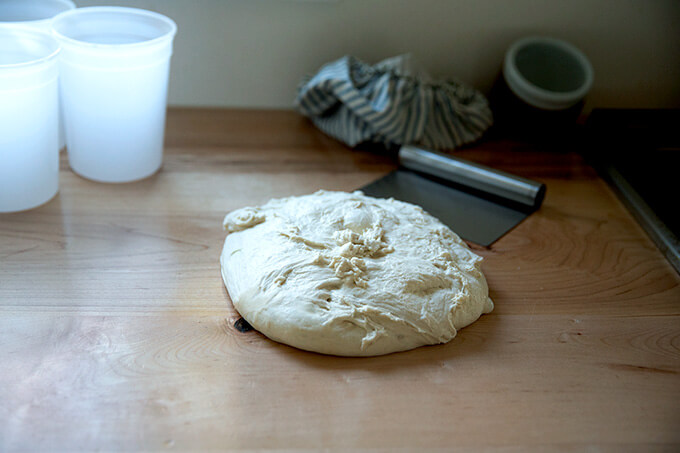
Turn dough out onto a work surface. Use flour here as needed.
Portion into 4 equal pieces, again using flour as needed.
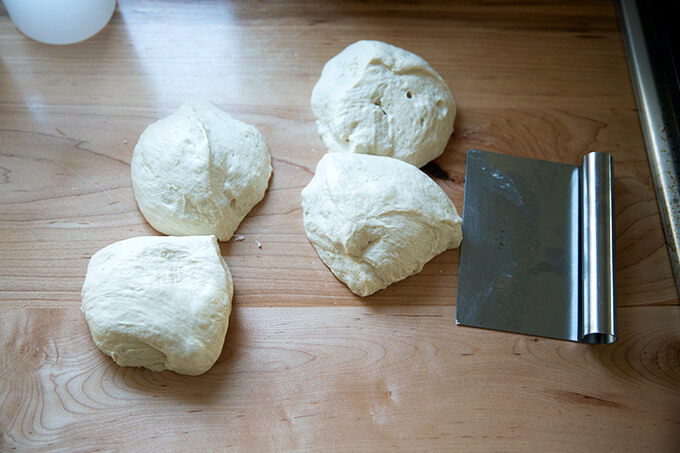
Ball up and transfer to quart (or other similar-sized) containers (I love these deli quart containers). Transfer to the fridge, ideally for at least 6 hours and up to 3 days.
An hour prior to baking, remove a round (or more) of pizza dough, and place it on a floured work surface. If you have a Baking Steel, place it in the upper third of your oven, and heat the oven to 550ºF. (See recipe for other options.)
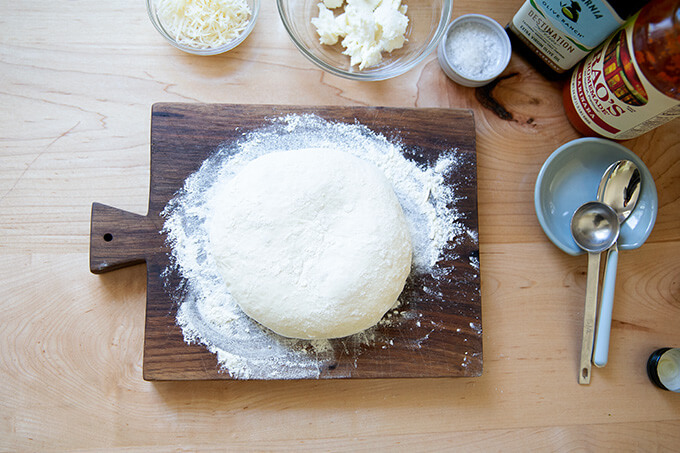
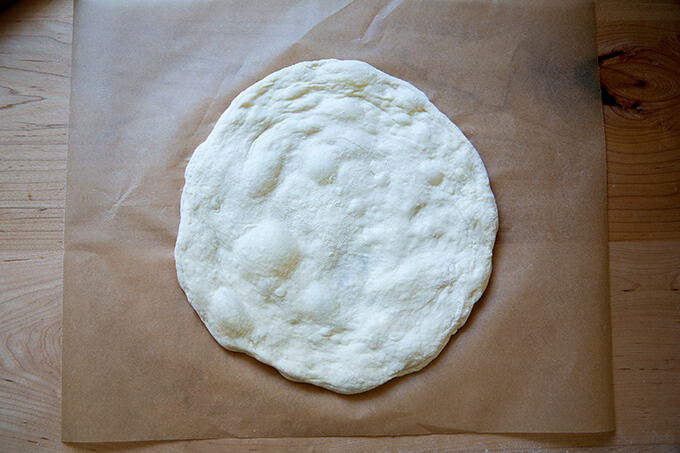
Delicately stretch the dough into a round, trying as best you can to preserve those air pockets.
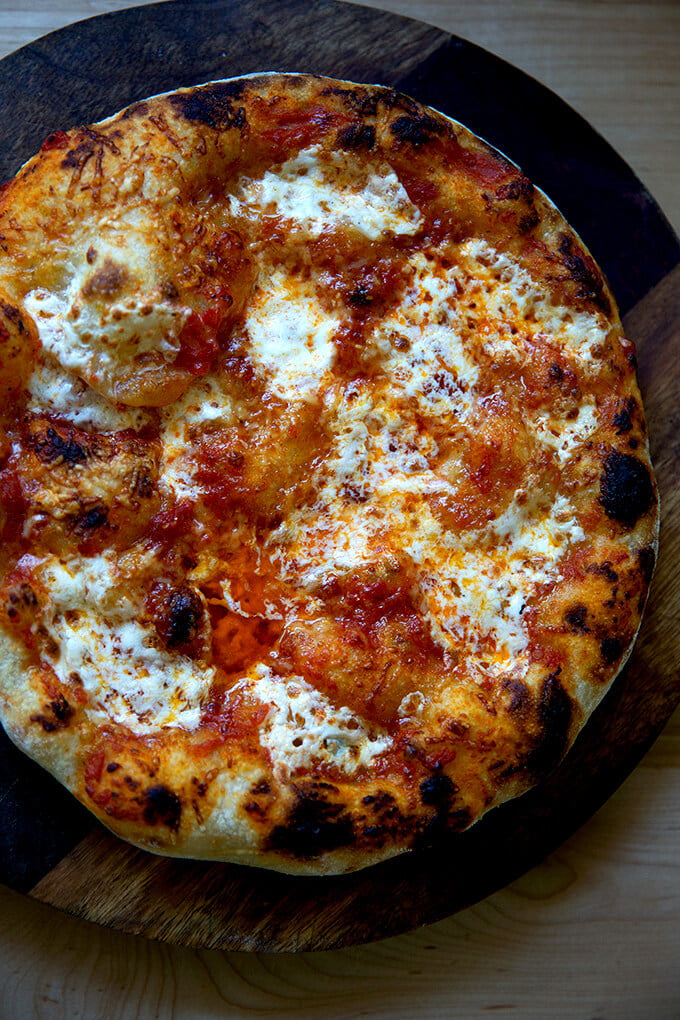
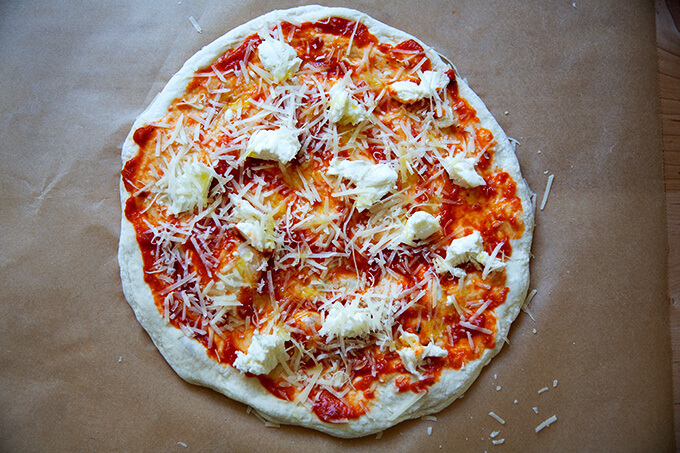
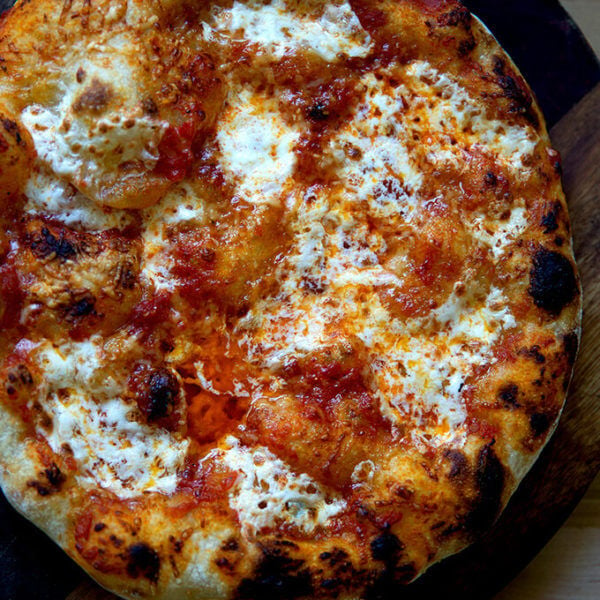
Top as you wish. This one is spread with tomato sauce and topped with fresh mozzarella, parmesan, olive oil, and sea salt.
Transfer pizza, parchment paper and all to a preheated Baking Steel or stone in a 550ºF oven. Bake 5 to 6 minutes or until cooked to your liking.
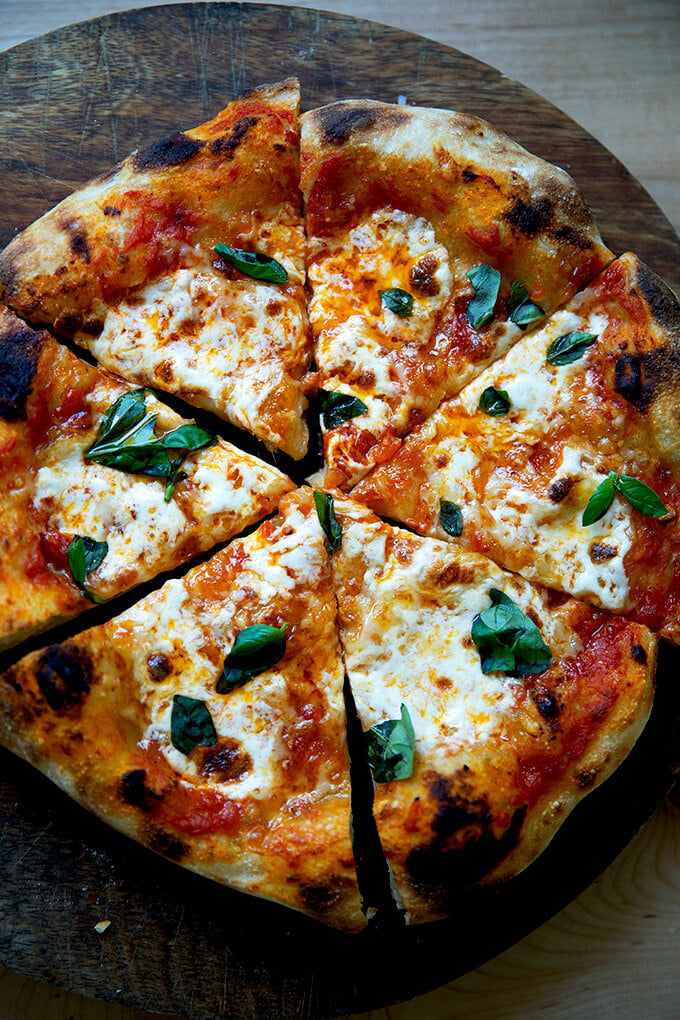
Slice and serve.

A little fresh basil is always nice.
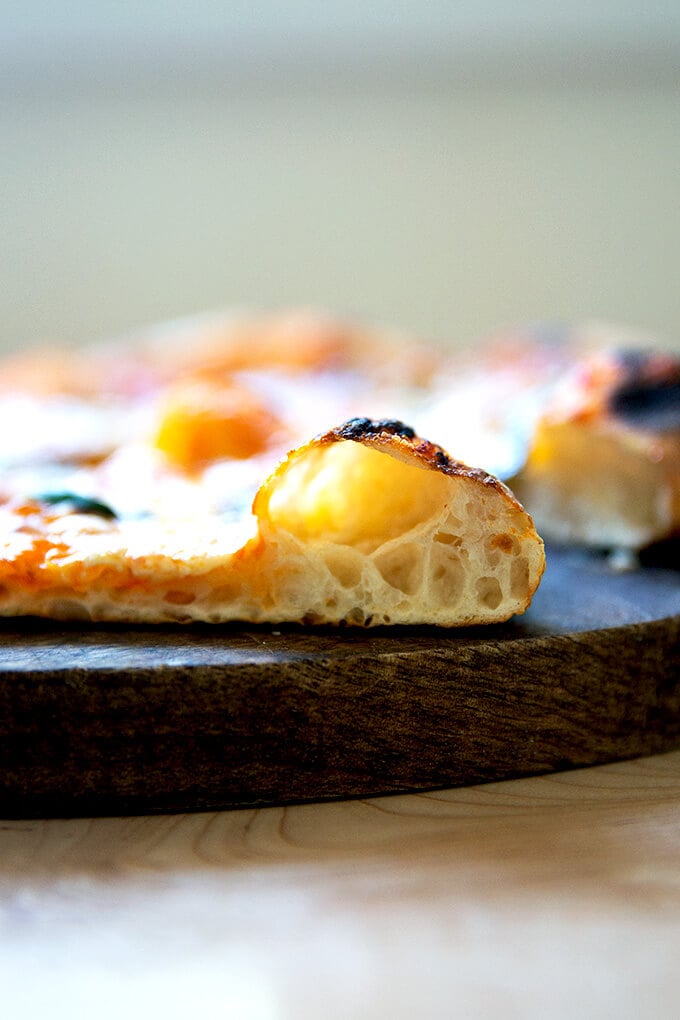
This is the beauty of the Baking Steel: oven spring!
Another favorite: kale + crème fraîche:
Another favorite: “naked” + spicy scallion (or ramp) oil:
Simple Sourdough Pizza Crust
- Total Time: 1 day + 1 hour
- Yield: 4 pizzas
Description
**Attention Pizza Fans**: My pizza cookbook, Pizza Night, is now available for pre-order. Get your copy here: Pizza Night
What you need to make this recipe…:
- …a sourdough starter. Ideally, you want to use your starter 4 to 6 hours after you feed it, when it has doubled in volume and is very bubbly and active. You can build a starter from scratch in just about 1 week. Or you can buy one. Here are three sources:
- …time. Once your starter is ready to go, this recipe requires an initial 6 – 18 hour rise, followed by at least 6 hours in the fridge or up to 3 days.
Timing/Schedule:
The more I make sourdough, the more I realize that the timing of each bake depends so much on the time of year and the temperature of my kitchen. In the summer, because it is warm and humid, the first rise (bulk fermentation) of all my sourdoughs takes between 6 – 8 hours; in the winter it will take longer, 10 to 12 hours.
It is best to rely on visual cues. For the bulk fermentation, you want the dough to double or less than double: I now end my bulk fermentation when the dough has risen by 50% to 75% in volume. This is why I cannot recommend using a straight-sided vessel (as opposed to a bowl) enough. It makes gauging the first rise easier.
If at any point you are worried the dough will over-ferment — say, for example, the bulk fermentation is nearly complete but you are tired and want to go to bed — stick the vessel in the fridge and pick up the process in the morning. (Note: If your dough rises above double, don’t despair … my dough has tripled in volume during an overnight rise, and the resulting dough still had plenty of strength and spring.)
Schedule: I like mixing this dough in the evening, performing 4 stretch and folds before I go to bed (if time permits), then letting the dough complete its bulk fermentation at room temperature (68ºF) overnight or in the refrigerator (especially in the summer, when my kitchen is much warmer). In the morning, it’s typically ready to be portioned (if it rose at room temperature), transferred to quart containers, and stashed in the fridge. If I had let my dough spend time in the fridge for the bulk fermentation, I remove it in the morning, and let it complete its bulk fermentation at room temperature. Once complete, I portion the dough and stash it in the fridge. Sometimes I’ll use the dough that same evening; sometimes I’ll use it the following day or the next. I encourage using the dough within 3 days.
In short: If you want pizza for the weekend, mix your dough on either Wednesday or Thursday.
Troubleshooting: If you have issues with your dough being too sticky, please read this post: Why is my sourdough so sticky? The 4 common mistakes.
Water: If you live in a humid environment or if you are making this on a particularly humid day, consider starting with less water, such as 335 grams of water, which will bring the hydration down to 70%. This amount of water will still produce a light airy crust but the dough will be more manageable.
Flour choice:
- Due to supply issues, I’ve been making this recipe with all-purpose flour, and it works beautifully. You absolutely can use bread flour or tipo 00 flour if you can get your hands on either. If you can’t, know that all-purpose (unbleached) flour works great here. If you use 00 flour, you’ll likely need to reduce the amount of water. I would start with 350 g, and adjust moving forward based on your results.
Favorite Pizza-Making Tools:
- Baking Steel
- Pizza Peel
- Parchment Paper: I bake my pizzas on parchment paper on my Baking Steel. Parchment allows for easy transfer from peel to steel.
- Cast Iron Skillet: If you do not have a Steel or stone, you can use a cast iron skillet. Rub a half teaspoon of oil over its surface, transfer a stretched dough round to the skillet. Top as desired. Bake at 450ºF for about 15 minutes.
- Quart Containers for storing dough
Ingredients
For the dough:
- 375 g water (or less, see notes above)
- 100 g sourdough starter, active and bubbly, see notes above
- 10 g salt
- 500 g all-purpose or bread flour
For each Margherita pizza:
- 2 tablespoons tomato sauce
- 1 to 2 oz mozzarella
- handful of grated Parmigiano Reggiano (less than an ounce)
- drizzle olive oil
- pinch sea salt
For each kale and crème fraiche pizza:
- extra-virgin olive oil
- a couple handfuls of baby or Tuscan kale
- 1 to 2 cloves garlic
- Sea salt, such as Maldon
- 2 tablespoons crème fraîche
- grated Parmigiano Reggiano, about 1/4 to 1/3 cup
For each naked pizza with ramp or scallion oil:
- 1/4 cup olive oil
- 1/4 cup minced scallions or ramps
- 1 teaspoon crushed red pepper flakes
- 1 to 2 tablespoons crème fraîche
- handful grated Parmigiano Reggiano
- sea salt
Instructions
- Mix the dough. Place the starter, salt, and water in a large bowl. Stir with a spatula to combine — it doesn’t have to be uniformly mixed. Add the flour. Mix again until the flour is completely incorporated. Transfer to a straight-sided vessel (if you have one.) Cover vessel with tea towel or cloth bowl cover and let stand 30 minutes.
- Stretch and fold: after 30 minutes have passed, reach into the vessel and pull the dough up and into the center. Turn the vessel quarter turns and continue this pulling 8 to 10 times. See video for guidance. Let the dough rest for another 30 minutes; then repeat the stretching and folding. If possible, repeat this cycle twice more for a total of 4 stretch and folds. By the 4th cycle, you will notice a huge difference in the texture of the dough: it will be smoother, stronger, and more elastic.
- Bulk fermentation: Cover vessel with a tea towel or bowl cover and set aside to rise at room temperature (70ºF/21ºC) for 4 to 18 hours (the time will vary depending on the time of year, the strength of your starter, and the temperature of your kitchen; see notes above) or until the dough has roughly doubled in volume. (UPDATE: In the past I have recommended letting the dough rise until it doubles in volume. If you’ve had success with this, continue to let the dough double. Recently, I have been stopping the bulk fermentation when the dough increases by 50% in volume, and I feel my dough is even stronger in the end.) Note: Do not use your oven with the light on for the bulk fermentation — it is too warm for the dough. When determining when the bulk fermentation is done, it is best to rely on visual cues (doubling in volume) as opposed to time. A straight-sided vessel makes monitoring the bulk fermentation especially easy because it allows you to see when your dough has truly doubled.
- Portion and shape: Turn the dough out onto a work surface and shape into a rough ball, using as much flour as needed — the dough will be sticky. Using a bench scraper, divide the dough into 4 equal portions. Sprinkle portions with flour. With floured hands, roll each portion into a ball, using the pinkie-edges of your hands to pinch the dough underneath each ball. Transfer each round of dough to a plastic quart container, cover, and store in fridge for at least 6 hours or up to 3 days or transfer to the freezer (see notes in post about thawing).
- Make the pizzas: Pull out a round (or more) of dough from the fridge one hour before you plan on baking. Dust dough with flour and place on a floured work surface. Let sit untouched for about an hour (a little longer or shorter is fine). Place a Baking Steel or pizza stone in the top third of your oven. Set oven to 550ºF. Heat oven for at least 45 minutes but ideally 1 hour prior to baking.
- Shape the dough: Gently shape dough into a 10-inch (roughly) round handling it as minimally as possible. (See video for guidance.) Lay a sheet of parchment paper on top of a pizza peel. Transfer the dough round to the parchment-lined peel.
Top and Bake
- To make a classic Margherita-style pizza: Spread 2 tablespoons of tomato sauce over the surface of the dough. Top with mozzarella to taste. Sprinkle with parmesan to taste. Drizzle with olive oil. Sprinkle lightly with sea salt. Shimmy the pizza, parchment paper and all into the oven. Bake pizza until top is blistered, about 5-6 minutes. Transfer to cutting board. Sprinkle with basil, if you have it. Cut and serve. Discard parchment paper.
- To make a kale and crème fraîche pizza: Place the kale in a small bowl, drizzle with olive oil, season with sea salt, and toss. Spoon crème fraîche over the dough leaving a 1/2-inch border or so—I use about a tablespoon per pizza. Sprinkle with minced garlic and a handful of grated Parmigiano Reggiano. Top with the kale. Shimmy the pizza, parchment paper and all into the oven. Bake pizza until top is blistered, about 5 – 6 minutes. Transfer to cutting board. Cut and serve. Discard parchment paper.
- To make a naked pizza with scallion oil: Heat 1/4 cup olive oil in a skillet with 1/4 cup of minced scallions (or ramps!) and 1 teaspoon crushed red pepper flakes. Keep it over low heat while you make the pizza. Spoon crème fraîche over the dough leaving a 1/2-inch border or so—I use about a tablespoon per pizza. Sprinkle with a handful of grated parmesan. Shimmy the pizza, parchment paper and all into the oven. Bake pizza until top is blistered, about 5 – 6 minutes. Transfer to cutting board. At this point, the scallions should be starting to “frizzle”. If they aren’t, crank up the heat until the oil is sizzling. Spoon a few tablespoons of the hot oil over the pizza (you’ll have extra oil). Sprinkle with a pinch of sea salt. Cut and serve.
- Prep Time: 24 hours
- Cook Time: 5 to 6 minutes
- Category: Pizza
- Method: Oven
- Cuisine: American, Italian
This post may contain affiliate links. Please read my disclosure policy.


1,110 Comments on “Simple Sourdough Pizza Crust: A Step-by-Step Guide”
Excellent!!!!
Simplicity At it’s best!!
I just added a bit of extra virgin oil from Spain 😉
THANK YOU!!!!!!!
Gracias from Cadiz (Spain)
Wonderful to hear, Chema!
I have found it necessary to leave the dough out for a few hours (i think i did 4) from the fridge before using. 1hr wasnt enough and the crust came out flat, hard and didn’t rise in the oven, but with the longer time, it rose and was soft and crispy and delicious. Everything else in this recipe worked out for me though and i love it.
This was great!
I’m a newbie to sour dough and pizza was a great introduction for my family. Everyone loved It!
I’m off to try your other sour dough recipes.
Great to hear, Elsa! Thanks so much for writing 🙂
Amazing recipe! Thank you!
After the 3 days, could I freeze the dough ?
Thanks for your help
Hi Stephanie! Sourdough does not freeze very well. You can, but I would try to thaw and bake within two weeks. You won’t get as many bubbles in your dough… it will still be delicious, just flatter and crisper. I prefer partaking the crust for no more than 1 minute; then freezing the baked round.
This is my go to recipe for sourdough pizza dough.
During the pandemic, my husband and I went to a favorite pizza place here in Boise called The Wilder. Their sourdough pizza dough is made in the company’s bakery located in Hyde Park which has delicious sandwiches and other goodies. When I took a bite of their pizza, I couldn’t believe what I was tasting. Amazing! So, I decided then and there that I was going to learn how to make my very own sourdough pizza dough that would taste like that.
This is the recipe to use if you want pizza dough that tastes as amazing as that first rate, bakery made pizza dough. Make sure you use 00 flour. There is no substitute.
Thank you, thank you, thank you!
So nice to read all of this, Julie! The Wilder sounds like a wonderful spot. I’m dying to visit Boise. Thanks so much for writing 🙂 🙂 🙂
I made this recipe and baked up the pizzas last night. It was fantastic! I doubled the recipe so have some left in the fridge. How long do you think it will last in there? Thank you so much!
Hi Dana! Great to hear all of this. I find the sweet spot to be 2 to 3 days in the fridge.
Delicious! I have made this dough a number of times and it is the families favourite.
Great to hear, Bob! Thanks so much for writing 🙂
This crust was amazing! Chewy, crispy and flavorful from the sourdough starter!!
Great to hear, Kelly! Thanks so much for writing 🙂 🙂 🙂
Do you preheat the skillet as well if you are using that? (Pizza stone is on the Christmas list now 😉 ) Would cookie sheets work in a pinch?
Hi Maria! What size cast iron skillet are you planning on using?
I do think a turned-over sheet pan is a better option just for ease — I find transferring dough to a hot cast iron skillet tricky. Make sure to use a sheet pan you don’t care about because it will warp a bit. Let it heat at 550ºF for at least 30 minutes. Use parchment paper for the transfer if you have it.
I use a cookie sheet fliped over and it works PERFECTLY! So good that I don’t feel the need to get a pizza pan or stone.
I LOVE this recipe! Wondering if you could share more about parbaking the crust in order to freeze it, and how to thaw and bake it later.
Great to hear, Allison! To parbake, I simply bake the round “naked” for about 90 seconds. Then I remove, let cool completely, and store in a ziplock bag — the jumbo bags are helpful for this. Thaw at room temperature… it will take an hour or two at the most. Then top and bake as usual.
Best sourdough pizza dough I’ve found yet. Chewy, crispy bottom, mouth watering.
If you follow the directions, you can’t mess it up.
Great to hear, Brittany! Thanks so much for writing 🙂 🙂 🙂
This is an easy to make, outstanding crust! Thanks so much; entire family always comments when we go out for pizza that “my” crust is better-and I must agree, so again, thank you!
So nice to hear this, Mark. Thanks so much for writing!
We had this for dinner tonight and it was amazing. First pizza on my new baking steel. The crust was amazing way better than Sourdough pizza experiment #i. But to be fair I also didn’t have my baking steel yet for that one. I made the dough Friday and only used 350g of water and AP flour. I was afraid my dough was still too gooey. But, it felt much better when I pulled it out of the fridge. I cooked the pizza on Sunday.
Great to read all of this, Shelley! Thanks so much for writing and sharing your notes regarding the timing and water quantities. So helpful for others!
Hi! Love this recipe, always comes out great. I am wanting to make some postpartum meals for my sister and wondering if you have tried freezing pizza with toppings? Not sure how well it would reheat and if it would be better just to parbake and freeze and then give them empty pizza crust to top with whatever.
Hi Alexi! I don’t love the results when I freeze the unbaked sourdough crust. I would par bake for a minute or 90 seconds first. You could either gift the parbaked crusts or you could then top the parbaked crusts and freeze those.
Love this recipe! Sometimes I stretch it out to get the bubbles and sometimes I use a rolling pin to get the pizza super thin and really crunchy! Either way, the flavor is amazing.
One question for you. I received a bag of Italian-Style Flour from KAF for Christmas and it’s 8.5% protein. If I use this in the recipe, do I need to decrease the water?
Hi Megan! Great to read all of this. I have used that KAF 00 flour. I would definitely reduce the water — if you don’t the dough will be very very wet.
Hello
Thank you for sharing this wonderful recipe, just wondering if this will cook well in a high temperature pizza oven?
Thanks
Hi Kim! I would reduce the water considerably otherwise it will burn. Try 320 grams water.
First off, I love your sourdough recipes! The focaccia, the bread, this pizza recipe are my go-to recipes! I’ve made this pizza dough recipe many times in my oven. Now we’ve purchased an Ooni and wondering if there is any adjustments to the recipe if we bake in high heat (850 degrees) and also wondering if any adjustments if we use 00 pizza flour. In the past, I used the KA Bread Flour.
Thanks so much!
Great to hear, Ann Marie! Thanks so much for writing. Yes, for the outdoor pizza oven (I have one, too!), I would reduce the water to 320 grams. Double 00 flour should be fine with 320 grams water. I also find with the lower hydration, I need to let the balls sit at room temperature for more like 3 hours. Be sure they are in an airtight vessel when they sit at room temperature — you can use a baking dish covered with plastic wrap. Good luck! Let me know if you have other questions about this.
Hi and thank you for this recipe. Do we need to add flour or oil to the individual containers once the dough is portioned out? I typically place balls on a floured sheet pan, or sometimes just oiled. Seems like they always stick anyway. I know in pizza kitchens their balls are placed in the proofing boxes without any flour or oil. I’m wondering why they don’t stick??
I find my dough balls don’t stick to the quart containers, but if you are worried you can lightly oil them or spray them with nonstick spray.
We ordered an outdoor pizza oven last week, so I took your Pizza School emails. Thank you very much! I can’t wait to get started. One question – Do we need to buy a pizza steel for the outdoor over, or is it mainly for a regular oven? All the pictures and videos I have look like the pizzas are baked right on the floor of the outdoor oven.
Hi! The Steel is just for the indoor oven. Your outdoor oven will already be equipped with a stone (or other) surface that will get sufficiently hot. Enjoy your oven! They’re fun 🙂
Question for you! Can I pre-bake the crusts and then add toppings next day and bake then? If so, what temp and how long? I’m throwing a party and if we bake everything individually (I only have one baking steel), it would take 2 hours for everyone to be able to eat. Haha
Yes! I parbake for 60 to 90 seconds at 550F. Let them cool completely then store at room temperature in a ziplock bag.
Looks like a great and simple recipe. Wondering if I could use the entire ball of dough (or half of it) and spread it on a cookie sheet and bake it? Not sure for how long….
Hi! I’ve never tried, but I would think half the amount of dough would be about right for a sheet pan. Be sure to use parchment or both butter and olive oil to prevent sticking. I would do something like 450ºF for 20-22 minutes.
Can they be put in a smaller container than1 quart for the cold ferment? Do they ride much in the fridge?
Rise*
Yes! They barely rise in the fridge.
This was excellent. I’ve been making pizza for years as my main hobby, but never really got into sourdough. I decided it was time and followed this exactly (opted for bread flour), and used the King Arthur sourdough starter. The only change was the baking method. I used one of my outdoor pizza ovens at temps around 750F and baked for about 4 minutes. It came out awesome; I wish I could attach a photo! Thanks for the solid recipe
Great to read this, Josh! And I’m glad it turned out well in the outdoor oven. I love using my outdoor oven — just got one in the fall, and it’s been so much fun. Thanks for writing 🙂
This is the best homemade pizza I have ever had
Great to hear, Kelly! Thanks for writing 🙂
It’s just my husband and me, so 4 crusts are too much if they don’t freeze well. Does this mixture work well when divided, or are there specific rules for dividing? Can’t wait to try!
Should be just fine to halve the recipe, especially if you are using weight measurements!
This sourdough pizza dough is really great. I especially love the tip about using parchment paper. I have tried unsuccessfully to make non stick pizza dough 3 years now, the kind that won’t stick to the pizza peel before you get it dressed and into the oven. The parchment paper eliminates this stress.
I do find this dough too sticky to handle in the final stretch and form. I did all the long rise etc. I still had to shape the dough on the peel instead of holding the ball in my hands using the stretch and form method before laying it onto the peel. Can you recommend directions to gage increasing flour so that it’s not too soft to shape in the end
Hi Margie! I would reduce the water from the start rather than try to add more flour later. Try starting with 350 grams water and see if that makes the handling process more maneageable.
I love this recipe but mmy pizza came out flat and the dough not done but the top blistered 😩 my starter was definitely ripe and ready. Well fed. I had made a couple of loaves of bread before the pizza. I am not sure where I went wrong. I used a pizza stone on third notch up in the oven. It took 15 minutes at 525 my oven only goes that high.
Hi! Are you using a scale to measure? What type of flour are you using? After the first rise, did the dough still have structure and strength? Or was it slack and very wet/loose?
Wow, definitely my go to pizza dough recipe. It’s super light and crisp all at the same time. I’ve tried lots of pizza dough recipes and this one is the best by far.
Great to read 🙂 🙂 🙂 Thanks so much for writing and sharing this.
Sooo good! This was my first attempt at making my own pizza dough and it came out perfect!! I followed the directions exactly and not only was it super easy, it wasn’t a whole lot of hands on which is always a bonus!
Great to hear, Kristin! Thanks so much for writing 🙂 🙂 🙂
Hi! Hoping you’ll respond as to all these comments are from 2022! Lol. Could I just half the dough and make two pizzas ? And we also have an air bake pizza pan – would you recommend using that or prefer a flipped over cookie sheet lined with parchment paper? Really hope you see this ASAP lol
Sorry just seeing this, Nicole! What did you end up doing?
Yes, you can halve the recipe.
I’m not sure what an “air bake pizza pan” is, so I can’t speak to that. A turned over cookie sheet will work great.
We have dough in the fridge for dinner tonight but wanted to test the flavour before refrigeration so gave 1/4 of the dough a quick knead and shaping and made focaccia with it after the 18 hour rise. It was one of the best things we’ve ever made. Period. Light and fluffy but with a nice crispy bottom crust and great flavour. My hubby has already declared that we’ll be doing this every time we use this recipe. We’re super excited for pizza tonight!! Thank you😊
Yay! Great to hear this Heather 🙂 🙂 🙂 Thanks so much for writing and sharing all of this.