
How to Make Fresh Homemade Ciabatta Bread
This post may contain affiliate links. Please read my disclosure policy.
This post will teach you how to make a crusty, open-crumbed loaf of ciabatta bread. Below you will find a detailed guide full of tips and tricks as well as a troubleshooting section with answers to FAQs to help you make a loaf of ciabatta bread with a crisp, golden exterior, and a light, airy crumb. Video guidance, too!
Friends, today I have a saga to share with you, one that fortunately ends happily: with a crusty, open-crumbed loaf of ciabatta bread, the recipe for which I hope you make soon and then all summer long, for beach lunches and mountain hikes, for dinner with friends and family, perhaps beside a fire or under twinkling bulbs strung from tree to tree, a pool of olive oil at the ready to dunk into at will. This has become one of my favorite homemade bread recipes.
Grab a cup of tea, let’s start from the top …
After posting this sourdough ciabatta bread recipe in April, I felt determined to make a comparable, yeast-leavened variation. For reasons I cannot explain, when I revisited a recipe I had posted here years ago, the photos for which looked promising, I couldn’t get it to work quite as well. The rolls, while tasty, had a tight, closed crumb, not as light or as open as I remembered (or as pictured).
In search of that more wild, amorphous crumb, which ciabatta is known for, I turned to my various bread baking books, namely The Bread Baker’s Apprentice, which noted that ciabatta often is made with a poolish or biga, meaning a small amount of flour and water mixed with a leavening agent and left to ferment for a short period of time.
This got me thinking: could I replace the 100 grams of sourdough starter in the sourdough ciabatta recipe with 100 grams of poolish? I gave it a go, stirring together 50 grams each flour and water with 1/2 teaspoon instant yeast and then letting it sit for three hours. When the surface of the poolish was dimpled with holes, I proceeded with the recipe, adding water, salt, and flour; mixing the dough; stretching and folding it; letting it rise, and finally transferring it to the fridge overnight.
The following morning, I turned the dough out onto a floured work surface, cut it into eight portions, and transferred them to a sheet pan. One hour later, I baked them.
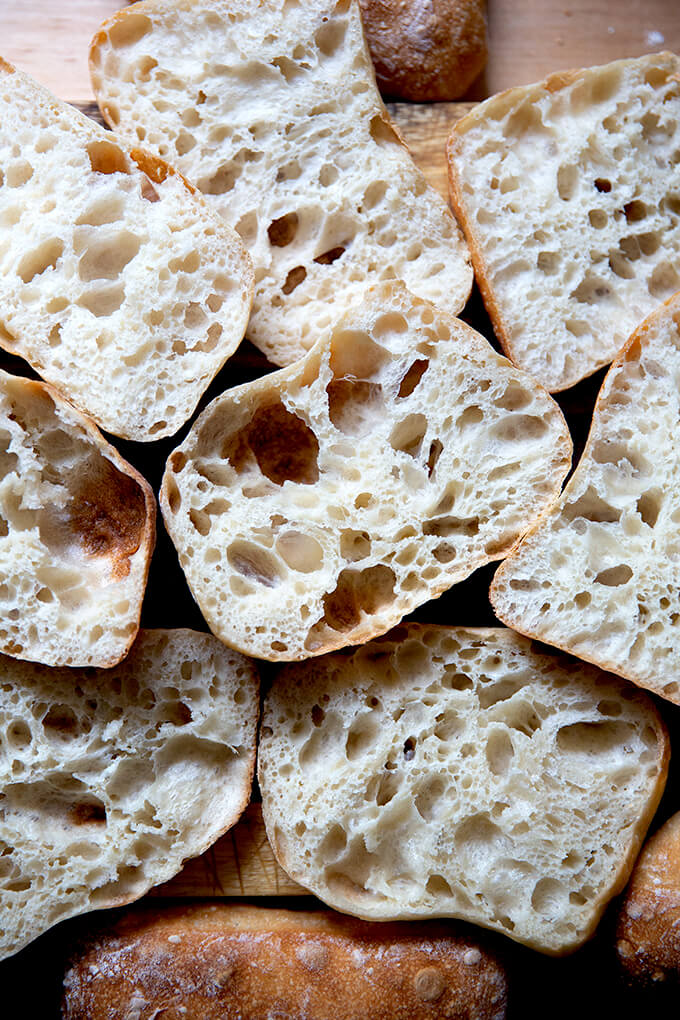
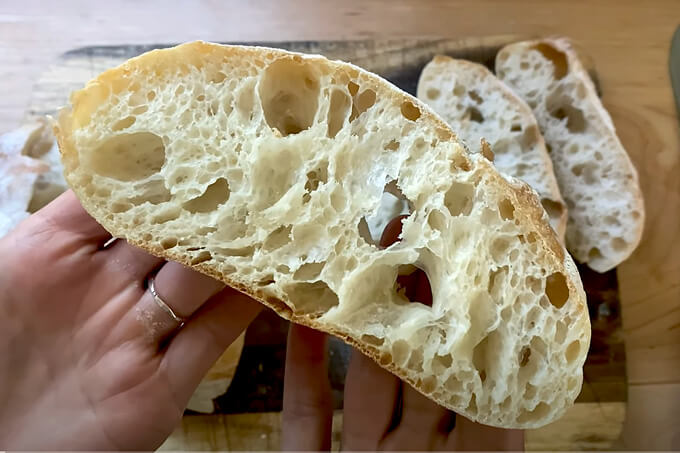
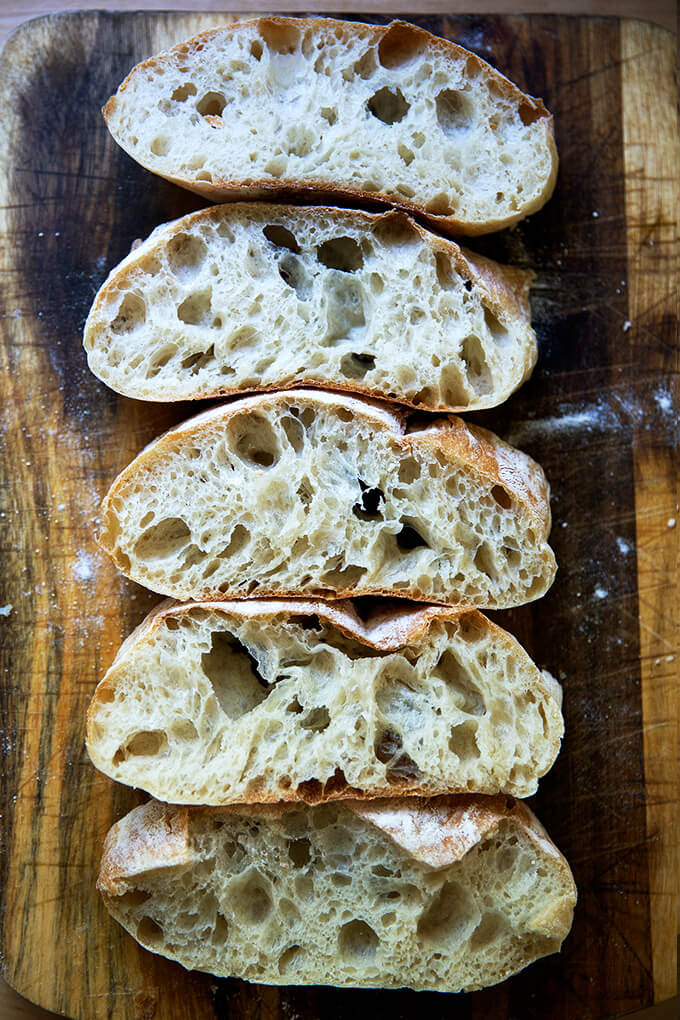
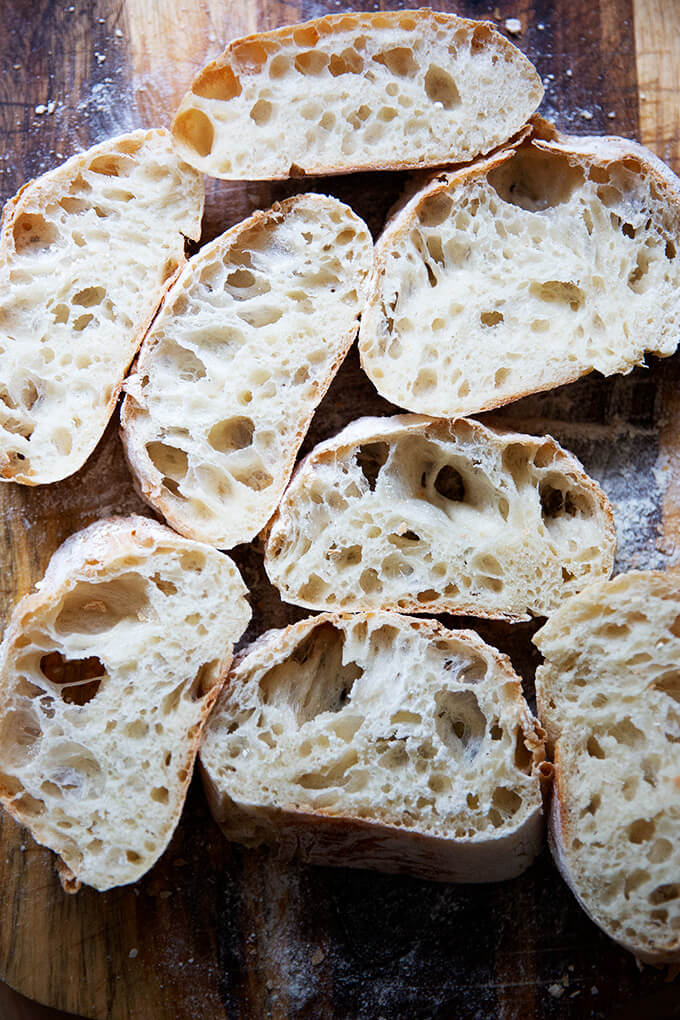
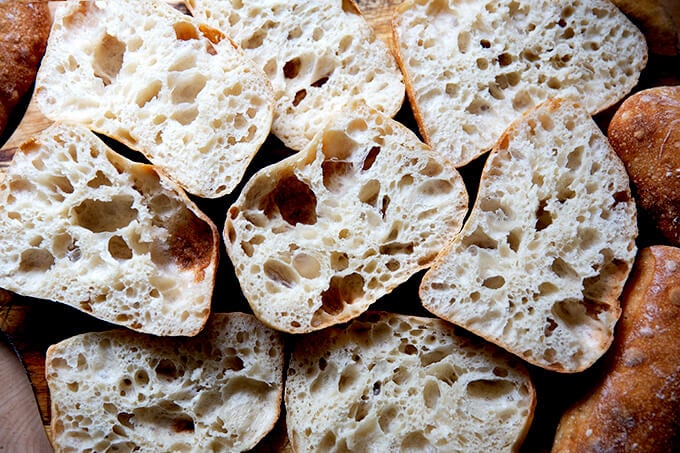
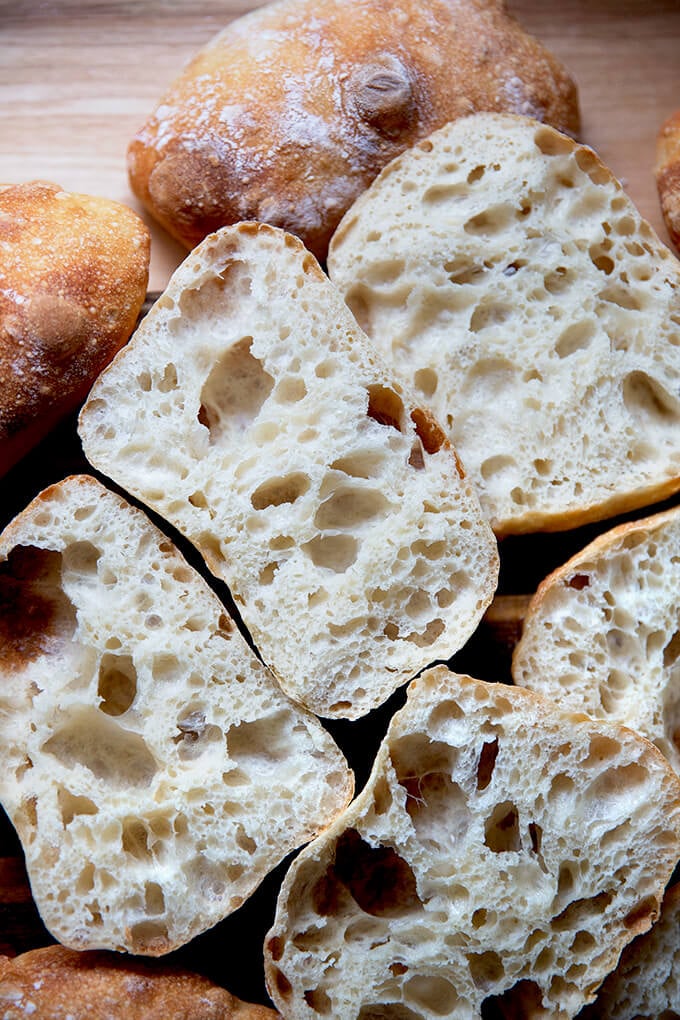
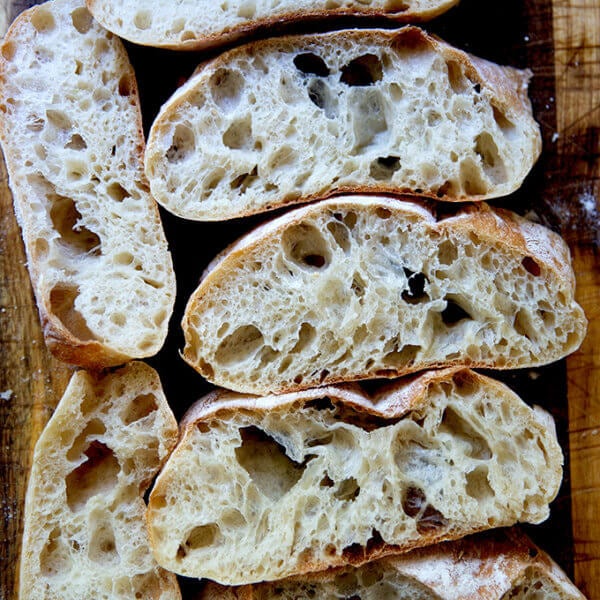
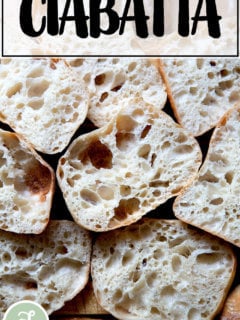
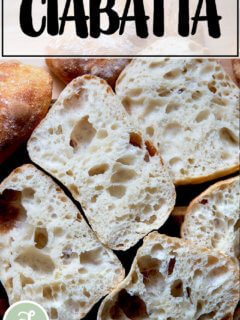
Friends! It worked beautifully. The crumb, while not quite as honeycombed as the sourdough version, was full of holes, giving the ciabatta its characteristic lightness and airiness. I felt really good about the recipe — it was simple enough, nearly identical to the sourdough version without having to use a sourdough starter, and very tasty.
I almost posted the recipe but anticipating that some people might want a loaf of ciabatta as opposed to rolls, I decided to test the recipe in loaf form.
This is where the saga begins. The two loaves I pulled from the oven, while crusty and beautiful from the exterior, were … HOLLOW! I had baked, in essence, two gigantic pita breads, perfect for housing torpedo-sized falafel. (Stay tuned … the saga continues! Kidding.)
This experience sent me on a tear to figure out where I went wrong. As I read about “tunneling”, I tried many things to fix the situation — lowering the hydration, increasing the hydration, kneading the dough, lowering the oven temperature, decreasing the amount of yeast, eliminating the cold proof — and in the process, I made many many loaves of hollow ciabatta. At the risk of sounding a little dramatic, this quest paralyzed me creatively — truly: without this ciabatta puzzle solved, I couldn’t create a single new recipe for the blog.
In the end, after doing a bit more digging, the fix was simple: to lengthen the final proof. Whereas the sourdough ciabatta can rest at room temperature for only an hour before baking; the yeasted ciabatta — at least in loaf form — needs much more time, more like 2 to 2.5 hours.
Why? Because, as I’ve learned, when under-proofed dough enters an oven, the yeast has lots of remaining energy, which leads to fast and furious gas production. This explosion of gas breaks the structure of the bread, causing the tunnel to form.
As soon as I extended that room-temperature proof, the tunnels, thankfully, vanished.
Friends, if I’m being honest, it is not without trepidation that I post this recipe. As I type, I have two bowls of ciabatta dough rising — just to be sure! I have made more ciabatta these past two months than any other bread I think ever (with the exception, of course, of my mother’s peasant bread), and though I am now consistently met with great results — with loaves that emerge from the oven flour-dusted, golden-crusted with both a chewy and light, porous texture — I still worry. Those hollow loaves haunt me.
As you can see, I’m a bit anxious for you all to give this recipe a try. My wish, as noted at the start, is for this to become your summer dinner bread, your trusty swiper for all those delicious, oily, corn-studded, tomato-infused, basil-specked dregs. They deserve it.
If you give it a go, please let me know how it turns out.
PS: Foolproof Pita Bread Recipe
PPS: Overnight Refrigerator Focaccia = The Best Focaccia
Traditional Ciabatta: An Overview
Let’s review what ciabatta is:
- Traditional ciabatta is characterized by a slipper shape as well as an extremely porous and chewy texture. Originating from the Lake Como region of northern Italy, ciabatta means “slipper” in Italian.
- Ciabatta dough is wet and sticky with hydration levels often 80% or higher. Both the recipe below and this sourdough version are 82% hydration. (If you are unfamiliar: To calculate hydration percentage, simply divide the weight of the water by the weight of the flour; then multiply it by 100. In this recipe, that’s 410/500=0.82 | 0.82 x 100 = 82%)
- Traditional ciabatta recipes call for very little yeast and a long, slow rise. Many recipes call for making a biga or poolish (as noted above), which helps produce that light, airy texture.
- Some ciabatta recipes call for milk or olive oil, but neither of these ingredients is required to make a traditional loaf of ciabatta.
And let’s review what ciabatta isn’t:
- Shaped! In the ciabatta bread recipe in Jeffrey Hamelman’s Bread, he notes: “There is no preshaping or final shaping—once divided, the dough is simply placed onto a floured work surface for its final proofing.” With the sourdough ciabatta bread recipe, I follow this no-shaping rule. In this yeasted recipe, I deviate! After a number of experiments, I prefer doing a pre-shape — it’s counterintuitive but I actually get a more open crumb when I preshape the dough. That said, for ciabatta rolls, I stick to the no-shaping rule — it’s nice not having to ball up 8 portions of dough. (Of course, you can experiment and see which method you like best.)
- Scored! Unlike other crusty loaves of bread, ciabatta is not scored.
Troubleshooting
If your dough does not cooperate the first time around, you may need to make some changes:
- Water: This is a very high-hydration dough, and depending on the flour you are using and your environment (if you live in a humid environment, for instance), you may need to reduce the amount of water. If, for example, when doing your stretches and folds, the dough never came together in a cohesive ball, I would reduce the water by 50 to 60 grams next time around.
- Flour: All flours absorb water differently. Through troubleshooting with people all over the world often with people making this sourdough pizza recipe, this yeast-leavened pizza recipe, and most recently this sourdough ciabatta recipe, the type of flour being used plays a critical role in how the dough turns out. Often the water needs to be reduced considerably for the dough to come together. If you live abroad or in Canada, you can either make the recipe once as written or add the water slowly, mixing as you do, until the dough resembles the dough in the video.
- Shaping: Because this is such a wet dough, shaping may be tricky. I have smooth, wooden countertops (there’s some sort of sealant on top) that work nicely for shaping, and I imagine granite and marble would work well, too. My mother loves her Roul’ Pat for shaping. All of this is to say, if you are having trouble shaping, the surface you are shaping on could be playing a role.
How to Make Ciabatta Bread, Step by Step
The first step of the recipe calls for making the poolish. To do so, gather your ingredients: flour, water, and instant yeast. SAF is my preference.
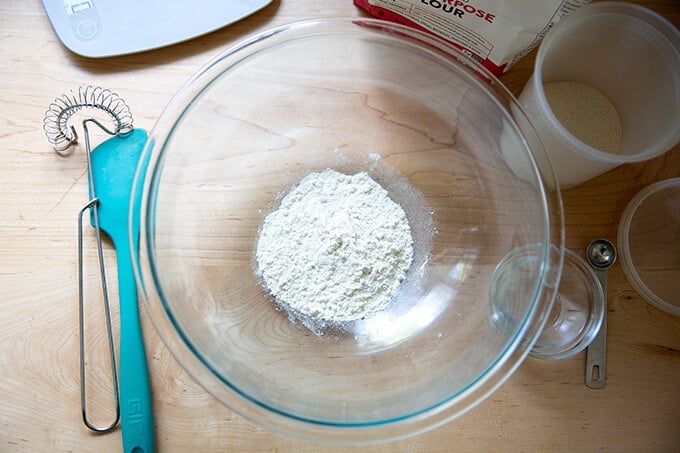
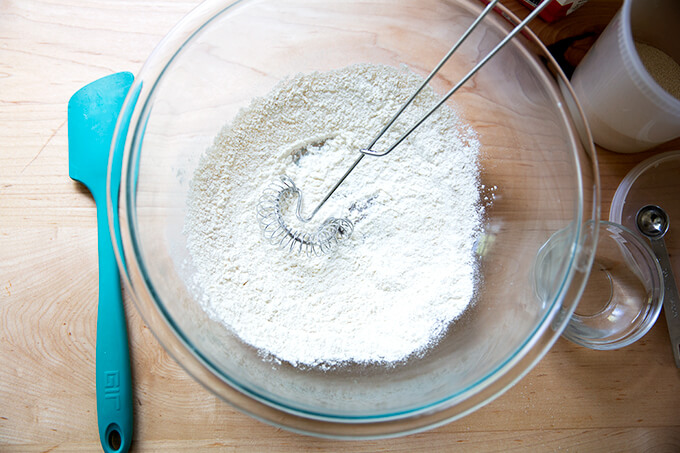
Whisk together 50 grams flour and 1/2 teaspoon instant yeast.
Add 50 grams water.
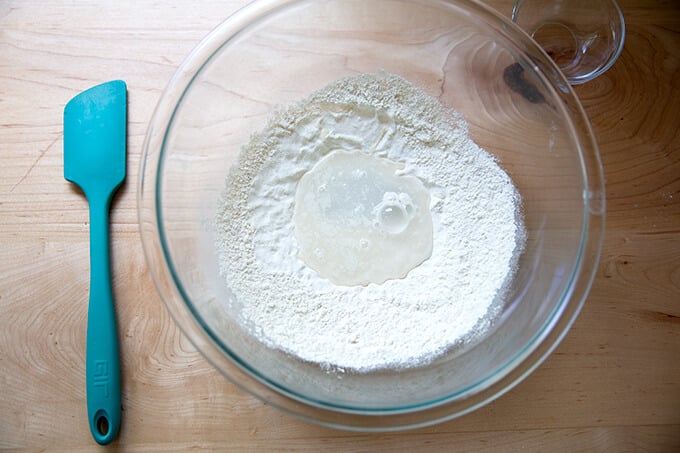
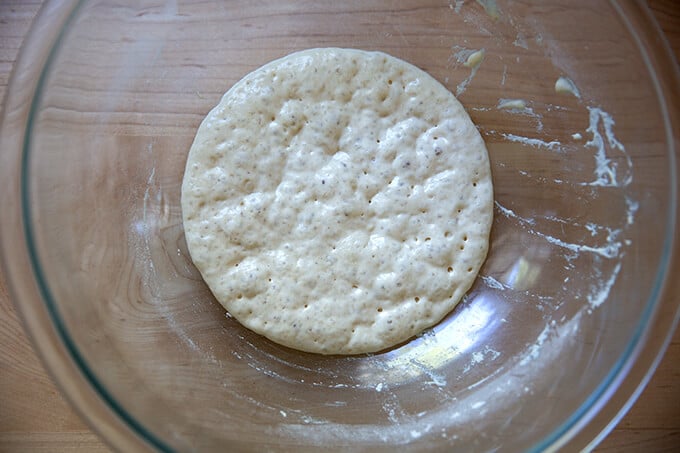
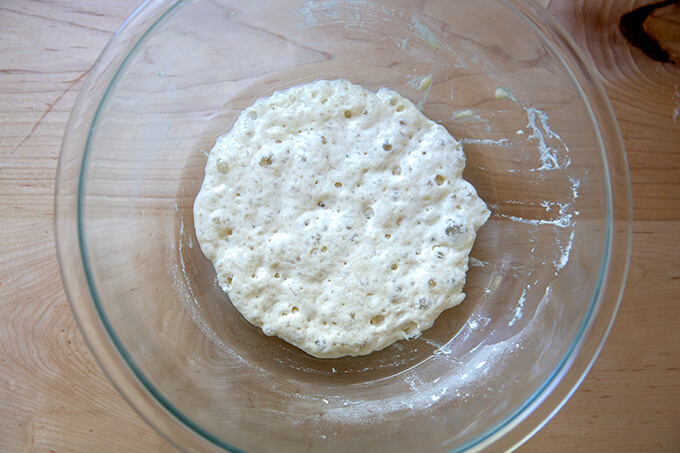
Stir to combine. Cover the bowl and let sit for 3 to 4 hours or until…
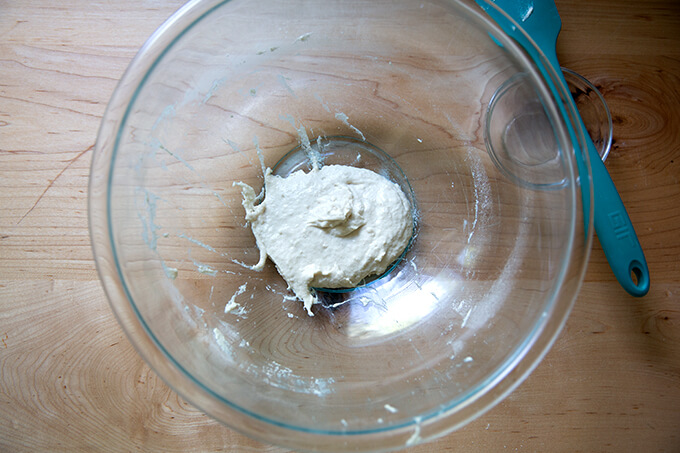
… the surface of the dough is dimpled with air pockets.
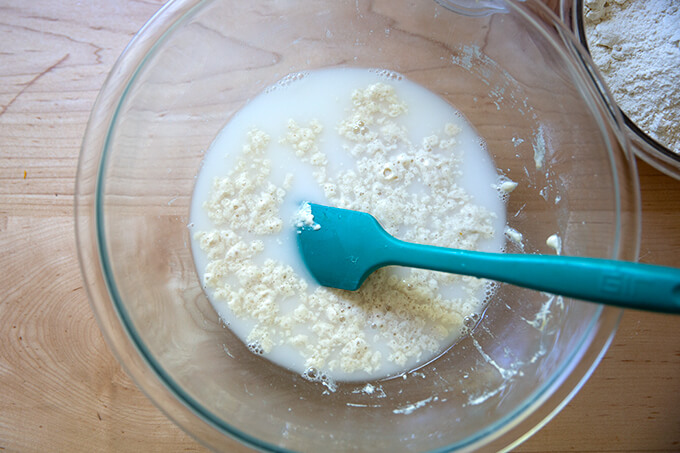
Add 360 grams water. (This part is really fun … the poolish bubbles up as a unit and floats on top of the water… it really feels alive!)
Stir to combine; then add 12 grams salt and stir again to combine.
Add 450 grams flour, preferably bread flour.
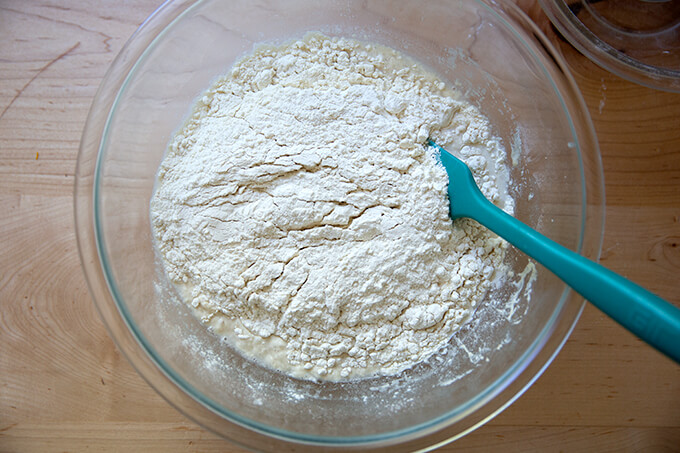
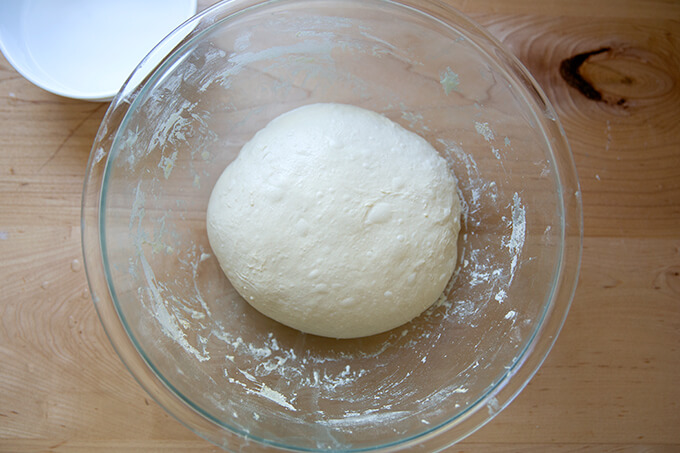
Using a spatula, stir until you have a sticky dough ball. Cover and set aside for 30 minutes.
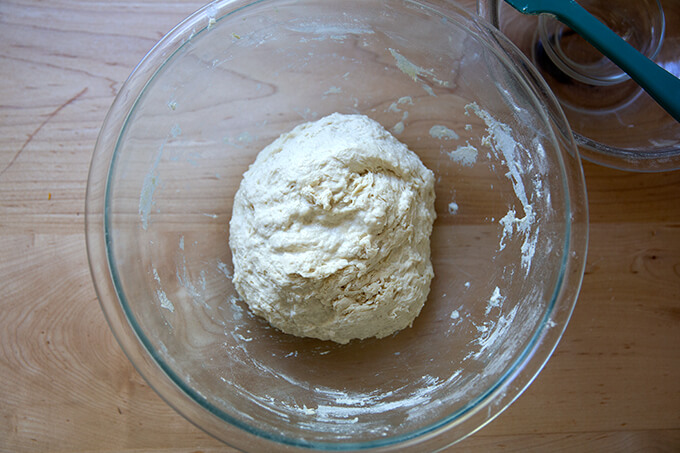
With wet hands, perform a set of stretches and folds, by grabbing one side of the dough, and pulling it up and to the center. Rotate the bowl a quarter turn, and repeat the grabbing and pulling. Do this until you’ve made a full circle. (Watch the video for more guidance. I employ a sort of “slap and fold” technique, which is helpful with this very wet dough.) Cover the bowl.
Thirty minutes later, repeat the stretching and folding.
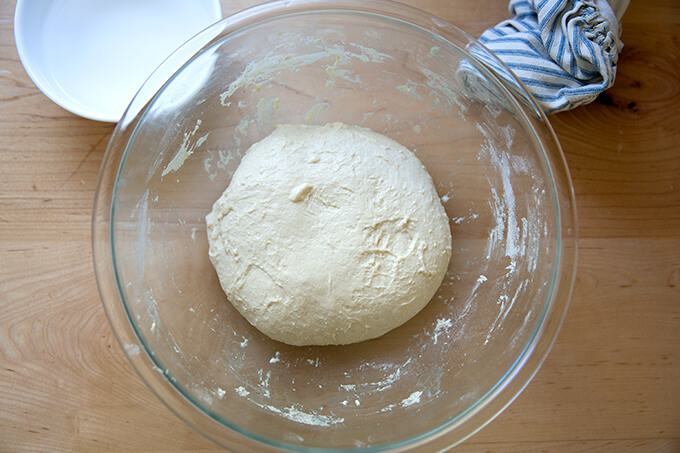
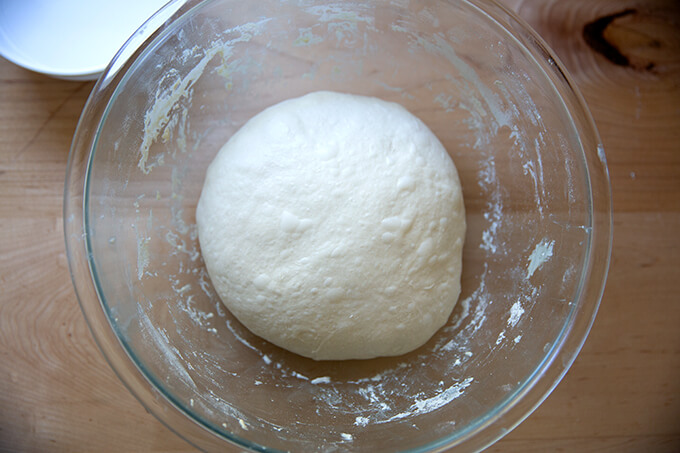
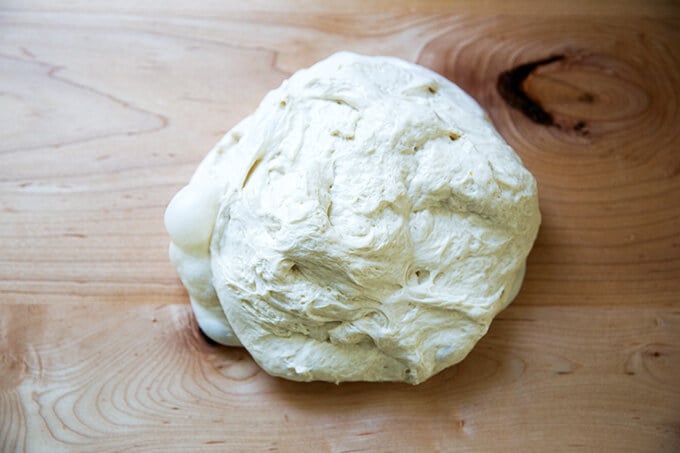
If time permits, repeat this stretching and folding twice more at 30-minute intervals. This is what the dough looks like after the third set of stretches and folds:
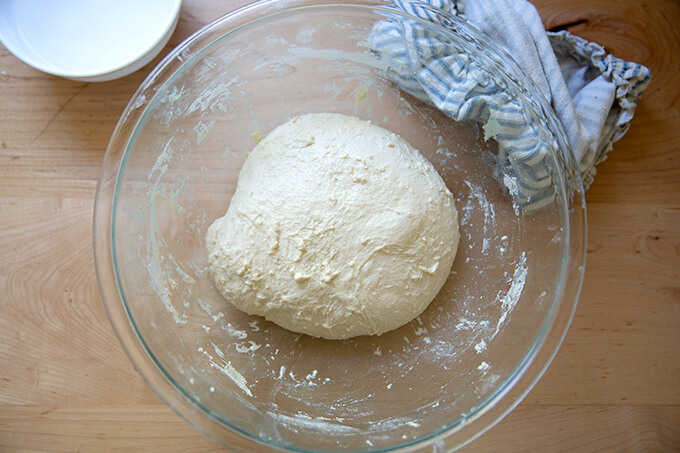
This is what the dough looks like after the 4th set. Feeling the dough transform from a sticky dough ball to a smooth and elastic one is really cool.
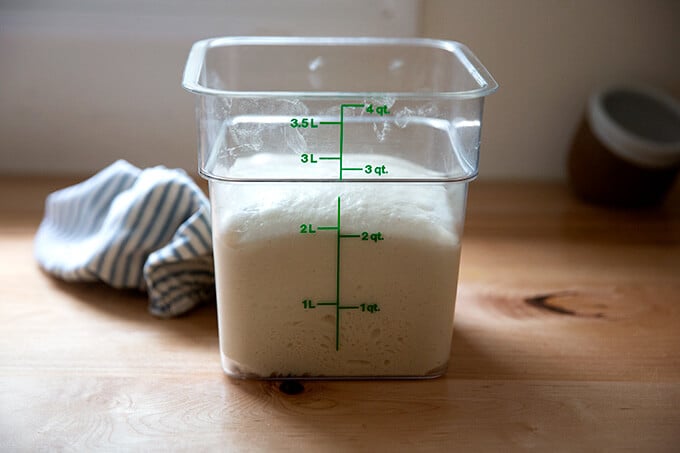
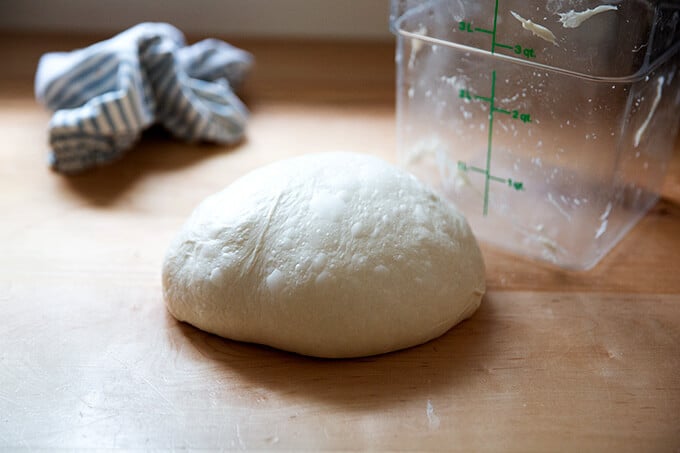
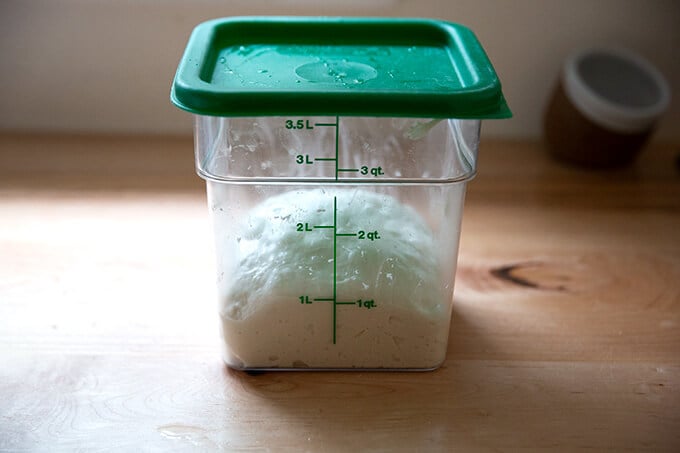
Transfer the dough to a straight-sided vessel and let it rise at room temperature until…
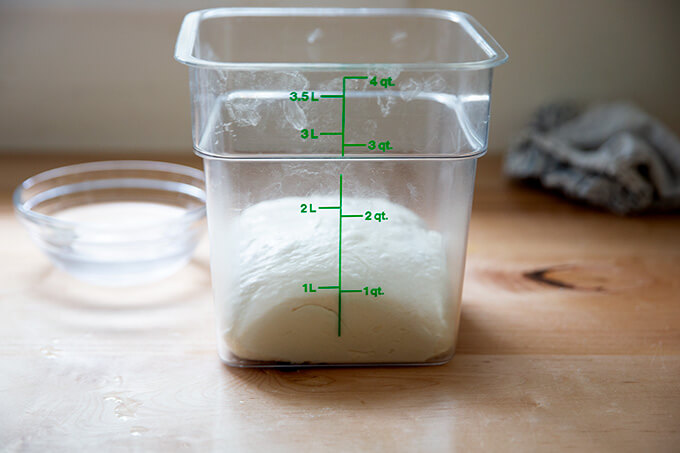
… it doubles in volume. (Note: If you don’t have a straight-sided vessel, you can simply let the dough rise in a bowl. I personally like using a straight-sided vessel because it allows me to see when the dough has truly doubled in volume.)
Then, punch down (deflate) the dough — I like to remove the dough from the vessel …

… and ball it up using wet hands.
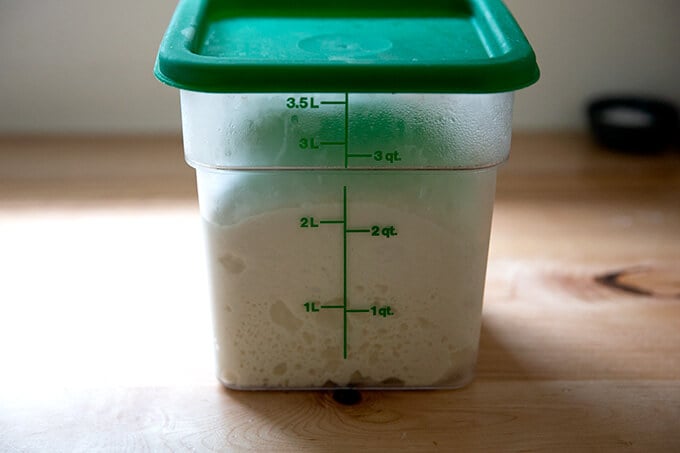
Return the dough to the vessel; then transfer to the fridge. (Another plus of using the straight-sided vessel is that it’s easier to store in the fridge than a bowl.)
The dough will likely double in volume overnight in the fridge.
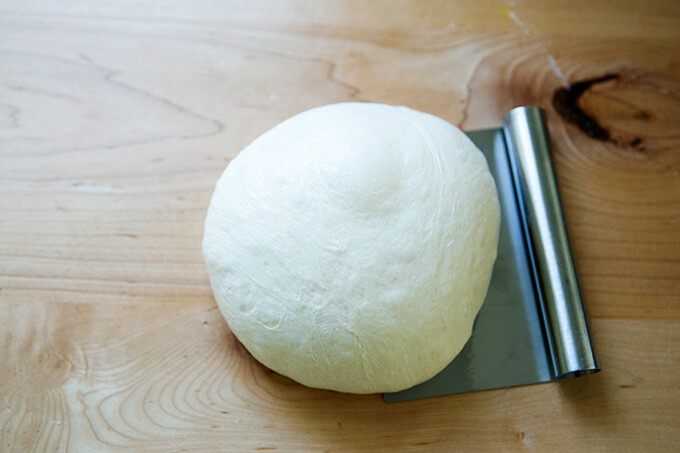
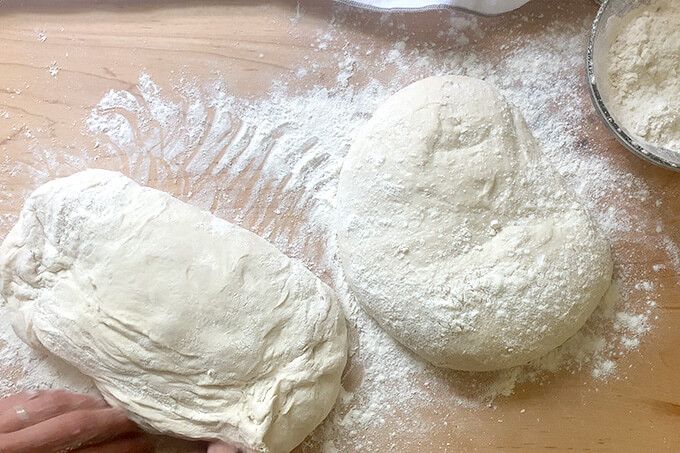
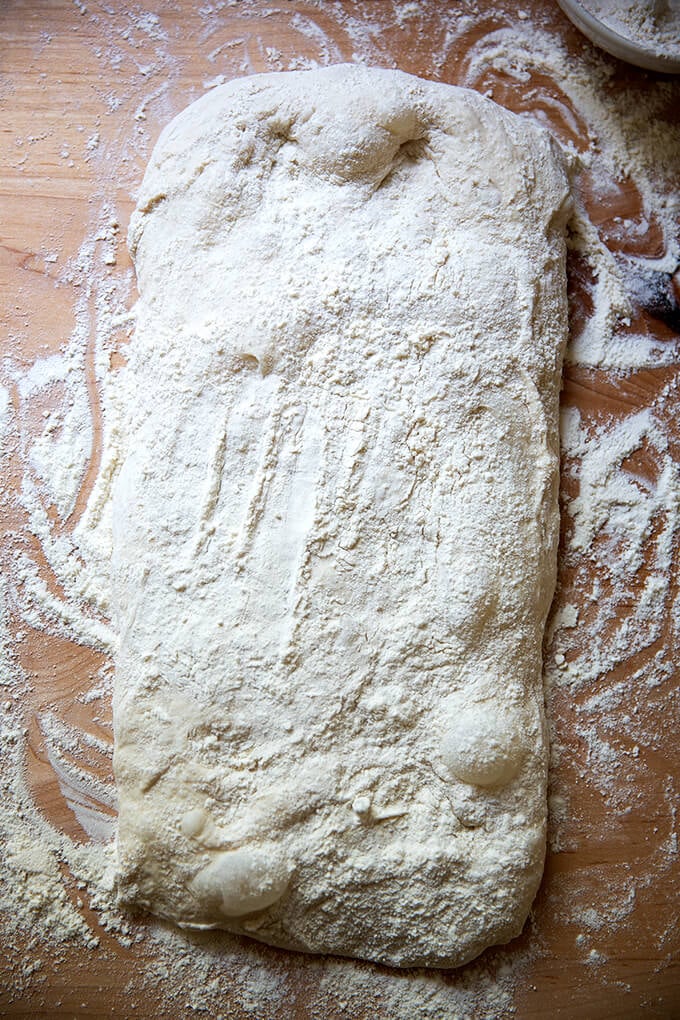
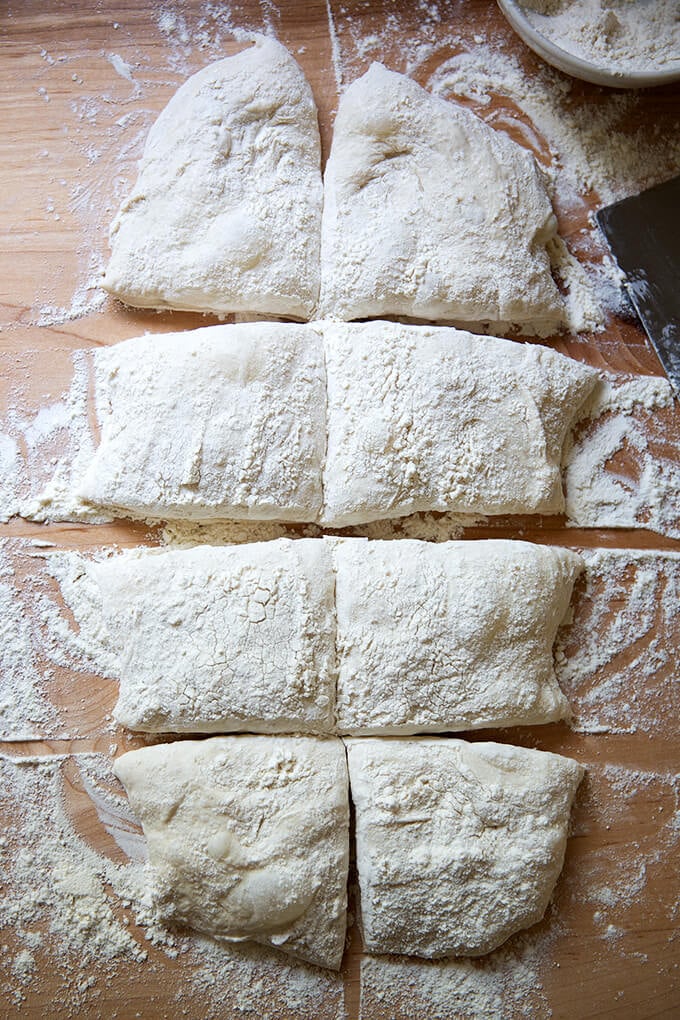
Remove the dough, turn it out onto a work surface…
… then ball it up. (Note: This is where I deviate from the traditional ciabatta-making method. If I were to follow the traditional path, I would have simply patted that blob of dough pictured above into a rectangle; the cut it in half. I find I get a more open crumb when I preshape the dough.)
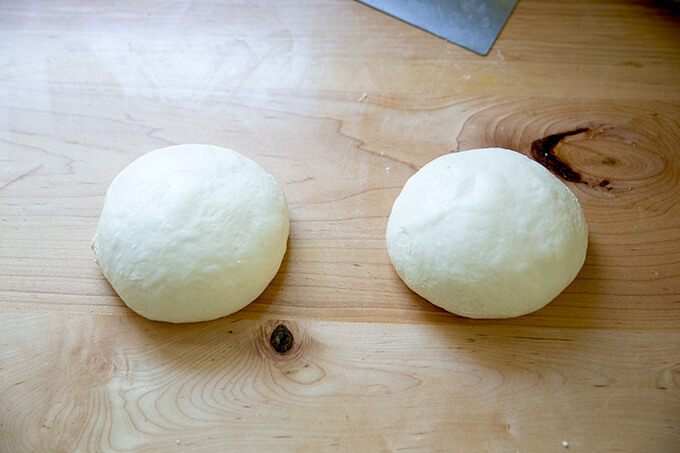
Divide the dough into two equal portions. Ball up each portion. I like to do this with very little or no flour — I find I get better tension with less flour.
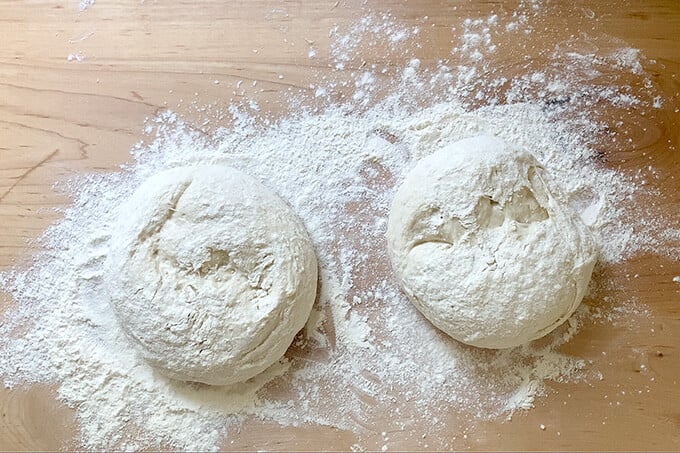
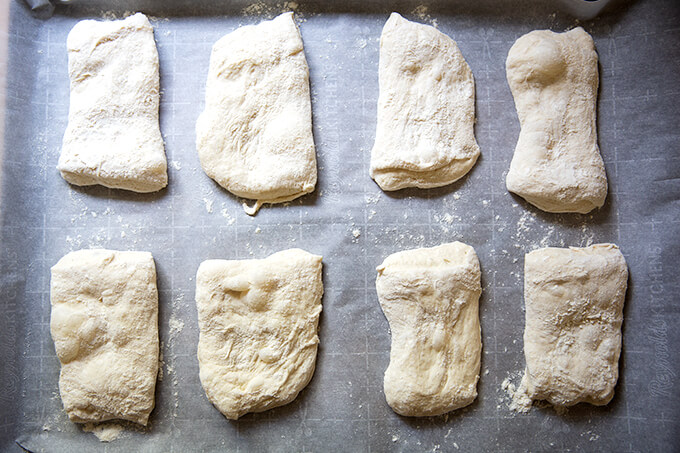
Sprinkle a work surface liberally with flour. Place the balls top-side down (the smooth side); then sprinkle the balls liberally with flour. Cover with a tea towel and let rest for 2.5 hours. Line a sheet pan with parchment paper.
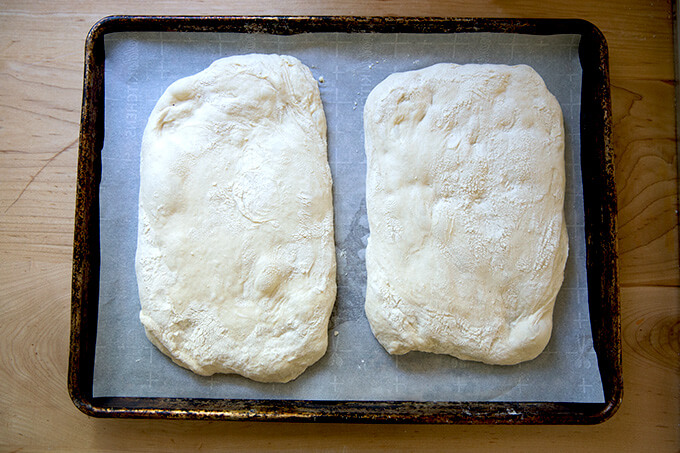
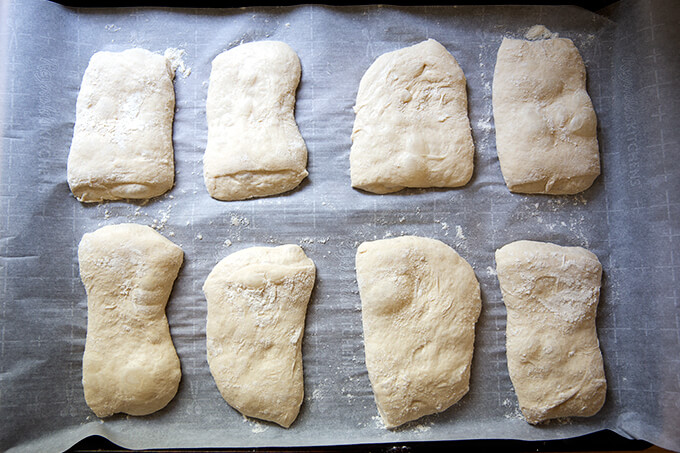
After the 2.5 hours… the dough balls will look like this:
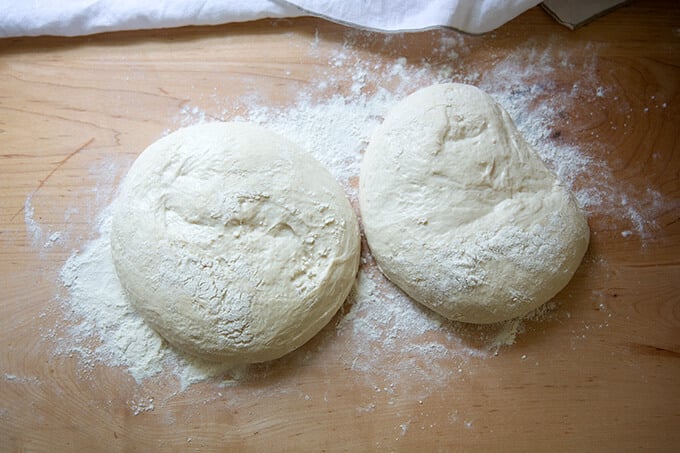
Turn the balls back over…
… then carefully transfer them to a parchment lined sheet pan.
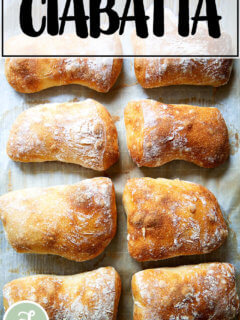
Bake at 425ºF for 20-25 minutes or until nicely golden:
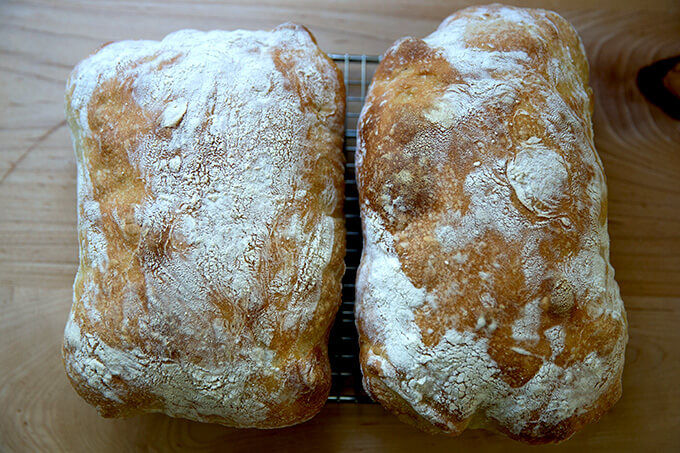
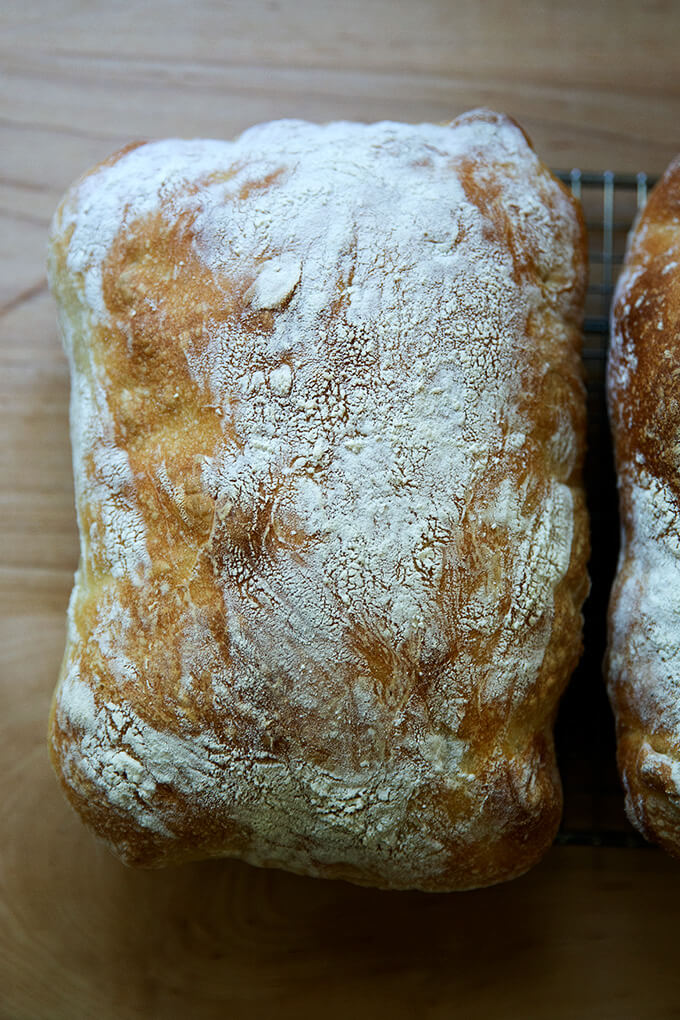
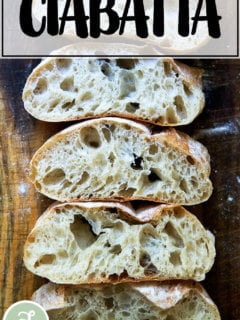
Let cool at least 20 minutes before slicing.
How to Make Ciabatta Rolls
Follow the recipe as outlined above or in the recipe box below until the step in which you remove the dough from the refrigerator; then, sprinkle a work surface with flour. Turn the dough out, sprinkle the surface with more flour, and pat it into a rectangle. (Note: This method, unlike above, follows a traditional ciabatta method — there’s no preshape or final shape. I prefer doing this with rolls for simplicity. It’s nice not having to ball up 8 portions of dough. If you wish, of course, you can ball up each round of dough.)
Divide into 8 portions.
Transfer to a sheet pan, cover with a tea towel, and let stand for 2 to 2.5 hours.
Transfer the pan to the oven, and bake at 425ºF for 20 to 25 minutes.

Let cool for at least 20 minutes before halving or slicing.

How To Make Fresh Homemade Ciabatta Bread
- Total Time: 24 hours 20 minutes
- Yield: 8 rolls
- Diet: Vegan
Description
This post will teach you how to make a crusty, open-crumbed loaf of ciabatta bread. It calls for making a poolish (a preferment), and it’s a very high hydration dough (82%), which means the dough will be wet and sticky. I highly recommend watching the video before attempting the recipe.
Notes:
- As always, for best results, use a digital scale to measure the flour.
- I have had success using all-purpose flour, but if you can get your hands on bread flour (I use King Arthur Flour Bread Flour, which is 12.7% protein), that is ideal, especially if you live in Canada or abroad. If you live abroad or if you live in a humid climate, this may take a try or two to get right — I suggest making it once as written; then reducing the water by 50 grams or so depending on your results.)
- I find a bench scraper particularly helpful for this recipe.
- I also really love using a straight-sided vessel (with lid) both for letting the dough rise and storing it in the fridge.
Ingredients
For the sponge:
- 50 grams (about 1/3 cup) all-purpose flour
- 2 grams (1/2 teaspoon) instant yeast, SAF is my preference
- 50 grams (about 1/4 cup) water, lukewarm or room temperature
For the ciabatta dough:
- 360 grams (about 1.5 cups) water, lukewarm or room temperature
- 12 grams (about 2 teaspoons) salt, kosher or sea salt
- 450 grams (about 3.5 cups) bread flour, see notes above
Instructions
- Make the poolish: In a large bowl, whisk together the 50 grams flour and the 2 grams (1/2 teaspoon) instant yeast. Add 50 grams water and stir with a spatula until combined. Cover the bowl with a tea towel or cloth bowl cover and set aside for 3 to 4 hours or until the dough’s surface is dimpled with holes.
- Make the dough: To the bowl of the poolish, add the water. The sponge should release from the bowl and parts of it, if not all of it, will float. Add the salt and stir briefly. Add the flour, and stir until you have a wet, sticky dough ball — dough will be very sticky. Cover with a tea towel or cloth bowl cover and let sit for 30 minutes.
- Stretches and folds: With wet hands, grab one side of the dough, and pull up and to the center. Rotate the bowl a quarter turn, and repeat the grabbing and pulling. Do this until you’ve made a full circle. (Watch the video for more guidance. I employ a “slap-and-fold” technique, which is helpful when handling these wet doughs.) Cover the bowl. If time permits, repeat this process three more times at 30-minute intervals for a total of 4 sets of stretches and folds over the course of two hours. If you are short on time, know that doing just one or two sets of stretches and folds is totally fine.
- Let it rise: Transfer the dough to a straight-sided vessel, if you have one, or leave it in the bowl if you don’t. Cover the vessel with a towel and let rise until doubled in volume. Punch down (deflate) the dough — if your dough is still in the bowl, you can deflate it using wet hands right in the bowl; if your dough is in a straight-sided vessel, it may be easier to turn the dough out onto a work surface and ball it up using wet hands to prevent sticking. Return the dough to the vessel, cover it with an airtight lid, and transfer it to the refrigerator immediately for at least 12 hours. The dough can remain in the fridge for as long as 48 hours.
- Portion and shape: (Note: This is where I deviate from traditional ciabatta bread recipes. See notes in the post above for the more traditional shaping method.) Turn the dough out onto a work surface. I prefer to do this step without flour, but absolutely sprinkle your surface lightly with flour as needed to make the dough manageable to work with. Using a bench scraper or your hands, shape the dough into a tight ball; then use the bench scraper to divide the dough in half. If you want perfectly even balls, each portion will way roughly 455 grams. Again, use the bench scraper or your hands to ball up each portion into a tight ball — see video for guidance.
- Proof: Sprinkle your countertop liberally with flour. Place the balls top-side (smooth side) down onto the flour. The seam-side will be on top now, and it may split open — this is fine. Sprinkle the top surface of the balls liberally with flour. Cover with a tea towel and let rest for 2.5 hours. After 2 hours of proofing, heat the oven to 425ºF.
- Line a sheet pan with parchment paper. When the dough has finished proofing, gently flip each ball over — I find a bench scraper to be helpful here. Then use both hands to stretch each ball out gently into a rectangular shaped “slipper”. Transfer to the prepared pan.
- Bake for 20 – 25 minutes or until the loaves are golden all around. Remove pan from oven. Transfer ciabatta rolls to a cooling rack. Let cool for 20 to 30 minutes before slicing.
- Prep Time: 24 hours
- Cook Time: 20 minutes
- Category: Bread
- Method: Yeast
- Cuisine: Italian, American
This post may contain affiliate links. Please read my disclosure policy.


262 Comments on “How to Make Fresh Homemade Ciabatta Bread”
Does it actually take 24 hours for the prep time?
It’s not active work, but yes, you start the day before, make the poolish, let it sit overnight, then proceed.
Hi Alexandra:
I’m going to give this recipe a shot because I haven’t had great results getting good crumb from my Cooke’s ciabatta recipe lately (probably because I didn’t have my scale). I noticed that in the video you stretch and fold and then do some slapping – and you speed it up to indicate that you do it for a while. However the instructions here only mention doing a couple folds in each stretch-and-fold session Personally I’ve only ever made ciabatta by doing a good ten minutes of kneading to develop the gluten, so I’m wondering whether just following the blog will be enough for gluten development? I feel like I should really manipulate the dough for a good ten minutes, but I could be totally wrong. It’s so hard to know with ciabatta, because it can be fussy…
Ciabatta can be fussy indeed. I don’t think you need to work the dough for a good ten minutes. But I do enjoy doing the slap and folds at the end of each set of stretches-and-folds because you really notice the dough transform. Are you still without a scale?? I do feel that for best results a scale is always best when measuring. If you don’t have a scale, the video may be helpful for referencing the texture of the dough at the various phases.
I had given up on making my favorite bread, I was reading your description of deception and sounded just like my experience. I followed your recipe and I am so happy with the result… Highly recommend this recipe and yes I used the scale, my dough got yo be a little too wet so I dunk my finger in flour instead of water during the slap and fold
Great to hear this, Ana! Thanks for sharing the tip about flour during the slap and folds, too…helpful for others whose dough might be on the wet side.
Made this twice in the last month and about to go for a third round today. Consistently great! What would you recommend for freezing? Either the dough or the baked bread. It would be nice to have some at the ready when I don’t have the patience to wait a whole day!
Great to hear, Ellen! I would freeze the baked bread. It freezes beautifully.
I made this Ciabatta today and it came out perfect,very happy! Thank you for the great recipe,and tips.
Great to hear, Deb! Thanks so much for writing 🙂
Hi, this is such a great recipe/instructions, my ciabatta worked out so well!! Waited very patiently to cut into mine and now that I have, I have started making some more already! Thanks so much!
Wonderful to hear this, Elysia! Thanks so much for writing 🙂 🙂 🙂
Haven’t tried the recipe, but looks great and comments are stupendous. I didn’t quite understand the pop-up texts in the video stating “Can use flour as needed” and “Again, can use flour as needed” appearing when working with the dough on the wooden board. Is this additional flour in reference to the dough sticking to the board or in reference to the stretching of the dough, i.e., it the dough were too wet. Thanks
Hi Robert! Sorry for the confusion: the pop-up texts regarding flour refer to additional flour if the dough is sticking to your work surface or hands.
Loved this recipe; made the two large loaves, will make the individual rolls next time. And your focaccia is another new go-to for me.
A question if you see this…will try your peasant sandwich loaves soon. Have made my own loaf breads for years, but the last batch was fluffy inside, crispy outside, so very tough to slice.
Have seen that buttering the top before baking makes for a softer crust…?
Thank you!
Hi Andrew! Great to read all of this. I think buttering should help keep the crust softer. I’m not sure what else you can do there… I’ll think on it.
Hi, I made this recipe a few times. I somehow get different results because I use different types of flours. However, the question yhat I wanna ask since I dont seem to get right results sometimes. Is the oven with or without ventillation? I almost always use the non ventilation setting when I bake bread but my ciabatta needs to be turned in order to have a nice color all over. I dont mind that. If I use the ventilation at the temperature above, the ciabatta get a little bit too dark and the crust a bit hard. So, please, what is the setting you use it this case?
Hi Catalina! I do not use ventilation (which I’m assuming is the same as the convection setting?) when I bake any of my breads. That said, if you are looking for more color, the ventilation perhaps at a lower setting is good option. Alternatively, you could use the non ventilation setting but raise the temperature. You can start at a higher temperature, then adjust after 10 minutes if the bread is browning too quickly.
I just realized I didnt let you know that this recipe is great and the ciabatta is very good. My only concern is about the crust since that is in most cases influenced by the baking temperature.
I really really love long fermented doughs (pizza, focaccia, ciabatta are among my favorites) so waiting is not a problem for me. Thank you ever so much for this great recipe!
I’m not familiar with instant yeast. I’ve been using starter. Can I use the starter instead of instant yeast and if so how much would I use?
Hi Will! Use this sourdough ciabatta bread recipe.
Perfect! I love ciabatta but normally have to drive a while to find a store that sells it. I made this recipe last night and it tasted equally as good as the loaf I normally buy. This is the perfect recipe! If you like ciabatta, then make this recipe and you won’t be disappointed. I didn’t change a thing!
Great to hear, Kirk! Thanks so much for writing and sharing your experience 🙂
Hi Alexandra, I’ve been making your focaccia for years and it’s my go to. I can do it without having to look at your recipe anymore 😅 I’d love to try ciabatta but I’m quite confused. Written it says to do the stretch and fold 4x but in your video, it says 3. Which one should I follow? I’m so new to bread and I’m so scared of messing it up 🫠
Can’t mess it up! Three or four times is fine, but shoot for 4. Good luck!
In regards to the sponge, you make mention that parts, if not all of it should release from the sides of the bowl and float. I was trying to pre-test it using the float test that is used for sourdough starters, but every time I dropped a spoonful in to water it immediately sank. After 5 and a half hours, it was still sinking so I decided to go for it anyway and pour the remaining water in the bowl. Only parts of it in the middle floated, but the sides didn’t release. I am wondering why all of it did not release and float, and how this will affect the overall final result of the bread? I measured everything on a scale and used all purpose flour for the sponge. I am using bread flour for the dough.
Did the sponge look bubbly? Or similar to the video and photos? Is it possible that your yeast is old?
I almost followed your recipe. After putting it in the fridge, I checked it after 3 hours to find that my dough had already doubled in size. Now that I’m shaping it into a loaf, I discovered I used 6 grams of yeast.
I think it’s going to be okay, though. The bubbles are nice and large and the ball is holding it’s shape surprisingly well. Looking forward to eating!
Wonderful! Hope the final product turned out great. Thanks for writing 🙂 🙂 🙂
Hi. Have made your ciabatta several times now with great success.
Even my husband has become a bread baking enthusiast and he fancies himself as a ‘top rated ciabatta baker’!!😂👏🏻👏🏻
I’m curious to know whether you have ever made an olive ciabatta version of your recipe. We are keen to try.
Thank you.
So great to hear, Sally! Love this. I have not tried adding olives, but I would suggest adding them after the second set of stretches and folds or rather right before the third set: sprinkle them over the dough, use the stretches and folds to incorporate them, then let the dough rest. Repeat with the fourth set of stretches and folds. I might start with 1 cup sliced olives?
Hi there-I’m really looking forward to making your ciabatta. I’m imagining lots of uses…I’d like to add some garlic confit. Should I do it between the folds? Thanks in advance.
I think with garlic confit, you could add it right at the beginning when you add the water. Between the stretches and folds would also work.
I’ve tried a number of ciabatta recipes, and this is my hands-down favorite! I make it into 8 large rolls that are perfect for a 1/3 lb burger or a deli sandwich, which freeze well so I always have them on hand. I LOVE that they only take about 20 minutes of total work!
My tip for handsomely square ciabatta rolls: After the long second rise, transfer them onto a tray of semolina flour. Then lift them out one by one, with four fingers hooked into the four corners of the roll (I use index/ring on each hand), and gently stretch them into a square as you transfer them to the baking sheet. They should come out the exact right size for frozen hamburger patties!
So great to read all of this, Geoff! Thanks so much for writing and sharing your shaping technique. I’m going to try! I love the idea of more evenly/handsomely shaped rolls.
Holy CRAP. I didn’t know I, as a normal human, could ever make bread this good. I am a bread rookie and just becoming more adventurous. When the grocery store was out of ciabatta, I decided to google it and stumbled upon this one. By the GRACE OF GOD! That’s how good this is! My husband is already asking me to make another batch. I live in Alabama and it’s pretty humid here; my first try turned out a liiittle too wet, but I’m going to reduce by 50g water per the troubleshooting next time and see if it’s EVEN BETTER next time. Thank you so much for the recipe!
Yay!!! How wonderful to read all of this Arianne! Thanks so much for writing 🙂
I’ll try this out and let you know how it goes. Is it possible to freeze to dough before before the final proof?
Thanks
Chris
I think you could. This is such a high hydration dough, however, that it worries me a little bit — I worry the freezing might compromise the texture of the finished ciabatta. That said: worth a shot!
I made this using all purpose flour and it turned out perfect! While I do have experience making bread I’ve never made ciabatta before and this recipe was so easy to follow and make correctly. This recipe was excellent and made the perfect bread for sandwiches, as a side of pasta or even just dipping in olive oil.
I made this using all purpose flour and it turned out perfect! While I do have experience making bread I’ve never made ciabatta before and this recipe was so easy to follow and make correctly. This recipe was excellent and made the perfect bread for sandwiches, as a side of pasta or even just dipping in olive oil. I will be making this again!
So nice to read all of this, Hannah 🙂 🙂 🙂 Thanks for writing.
Hi Alexandra, thanks for this recipe! I’m wondering how long the first rise (at room temp) usually takes before it doubles in size?
Hi Ruth! It all depends on the time of year and the temperature of your kitchen. In the summer it will rise more quickly than in the winter. I’d say around 2 hours on average.
Thanks Alexandra, that’s helpful to know!
Very nice video! The bread came out great. When you say 360 grams of water do you mean 360 milliliters? Metric liquid measure is usually in ml. But it was pretty close using grams, it’s the same as 1.5 cups US measure. Also the dough was quite sticky throughout the process, it stuck to my hands and the bowl. But it made no difference. Thanks for a great recipe! It took 25 hrs but well worth it. Will definitely make it again.
Great to hear, Marc! Thanks for writing. On my scale, when I measure in grams or milliliters, the amount is the same, so I just use all grams for consistency purposes.
This is a GREAT recipe. I make it a lot.
It might seem imposing at first but don’t let that keep you from doing it!
The only change I make is using half the salt (6 g) which seems more than enough.
The right flour is very important make sure to have the 12% version.
I find that leaving the dough in the fridge for days makes it better. One week is absolutely no problem.
Great to read all of this! Thanks so much for writing and sharing your notes 🙂
I’m trying out this recipe right now, but I had a question. When you cover the dough with a towel, do you keep it dry or dampen the towel? I’m very new to baking but I usually cover my pizza dough with a damp towel. What do you do here? Thank you!
Hi! I do not dampen the towel 🙂
What an amazing recipe. Will definitely give it a try. Yet I have one questio. Can we use active dry yeast instead of instant one.. if yes how much.
Await your reply. Thanks and regards
Kruti
yes! use the same amount.
I have made a fair amount of bread. This was my first try at ciabatta. I was looking for a recipe because we had just eaten some at a restaurant that was very good.
I watched your video and followed your instructions exactly (4 turns). It came out amazing!! I made it for a dinner we gave for two other couples. We went through the first loaf in one sitting. BIG HIT! I have already told some baking friends about your recipe. They want to make some, too. Thanks!
So nice to read this Marcia! Thanks so much for writing and sharing all of this.
First, I’m impressed with your devotion to your craft and all that you went through to perfect this recipe for others. I just pulled 2 loaves of Ciabatta out of the oven and they are perfect!! The crust is crunchy, chewy and the inside (for lack of a better word) is beautiful! Pretty time consuming for bread so to have it turn out so beautiful (because I watched your video and followed directions to the T) is magic and rewarding! I will be taking one of these loaves to friends for dinner tonight.
THANK YOU!!
I will find the time to make this bread again. It’s fun.
Awwww so nice reading all of this! Thanks so much for taking the time to write and share your experience. So glad it all turned out well, and I hope you do find time soon to make another batch 🙂 🙂 🙂
So this has ruined all other ciabatta for me. SO delicious, and the instructions are comprehensive and easy to follow. Amazing when eaten on its own or in recipes like bruschetta or chicken pesto sandwiches. Thank you for this recipe!
Great to hear, Hannah! Thanks for writing 🙂 🙂 🙂