
Sister Pie’s Salted Maple Pie
This post may contain affiliate links. Please read my disclosure policy.
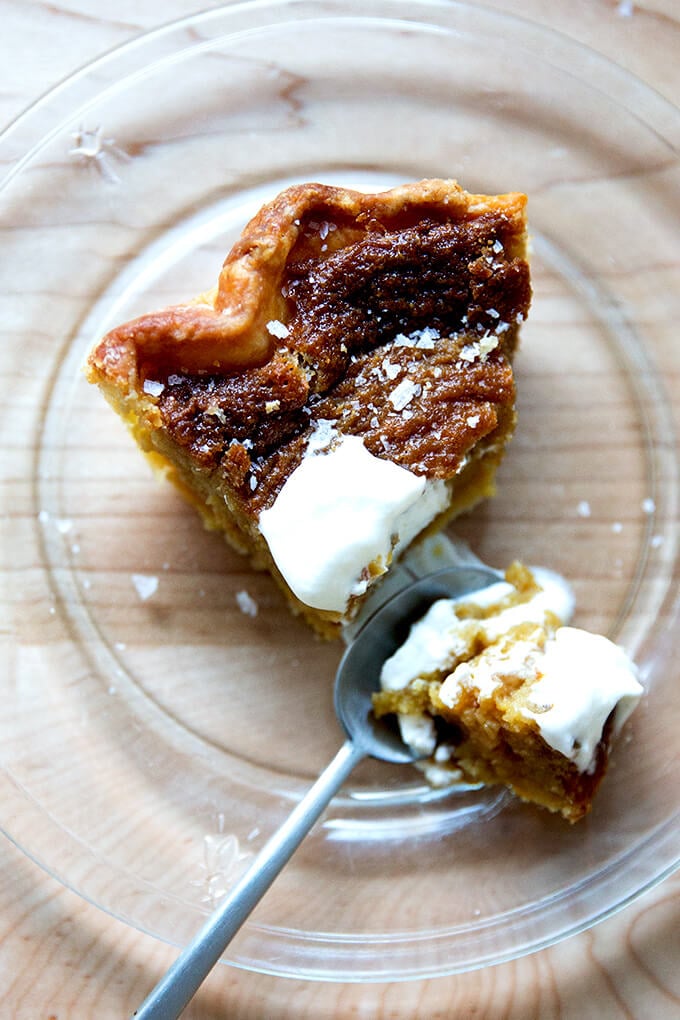
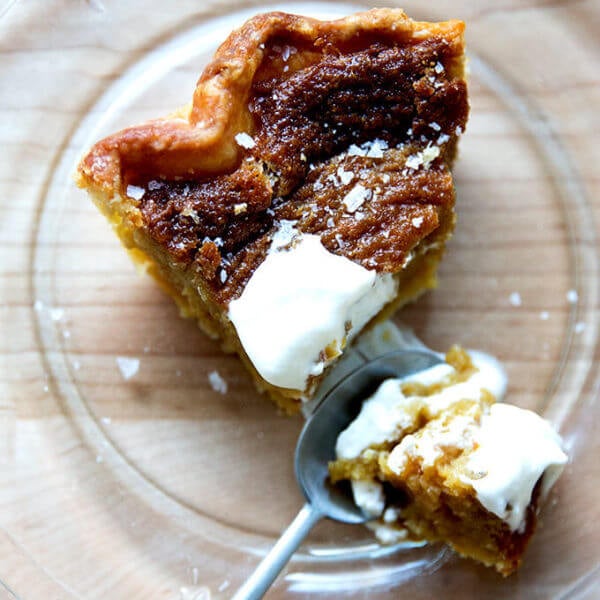
This salted maple pie is everything I want in a dessert: a sweet and salty custard in a flaky, buttery crust. Served with billowy whipped cream, it’s heaven, perfect for Thanksgiving, or for any fall or winter gathering.
A few days before last Thanksgiving, in search of one more pie to add to my dessert spread, I began paging through Sister Pie and landed on this recipe for salted maple pie, the bakery’s take on a classic chess pie, an old-fashioned Southern dessert which typically contains cornmeal, butter, sugar, and eggs.
Sister Pie’s version also contains cornmeal but is sweetened with maple syrup and is finished, once the pie cools, with a nice sprinkling of sea salt. I find it irresistible. I think you might, too.
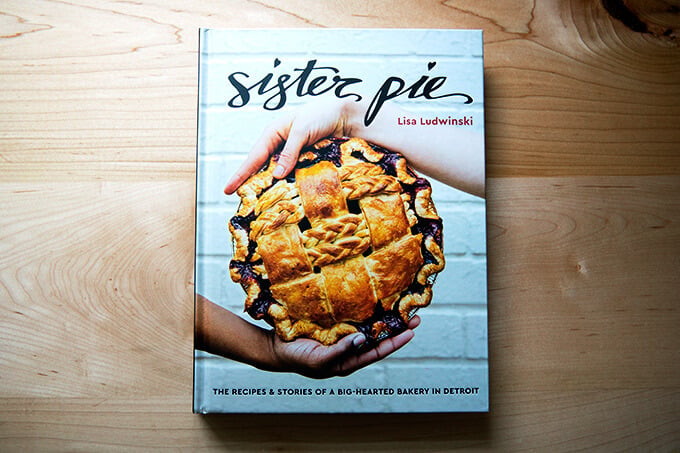
Sister Pie, if you don’t know, is a bakery in Detroit founded by Lisa Ludwinski, a Michagan native, and her cookbook came out a few months ago.
Though I’ve only made one recipe from the book, I have no doubt it’s going to get heavy use — the day after Thanksgiving, I curled up on the couch by the fire and read it nearly cover to cover, transfixed as much by its story as its recipes, the sweet and savory alike.
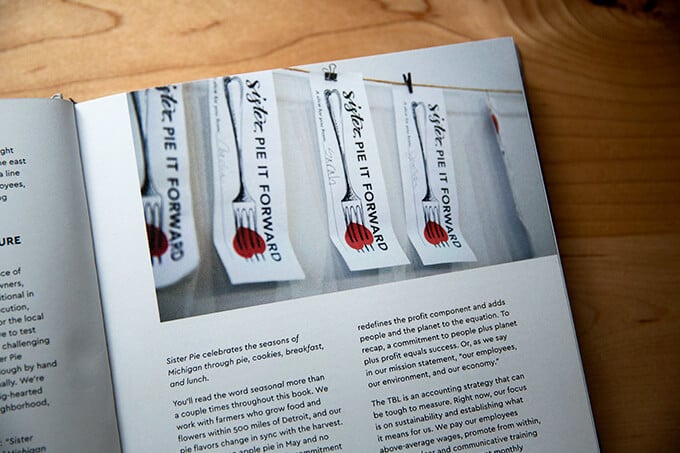
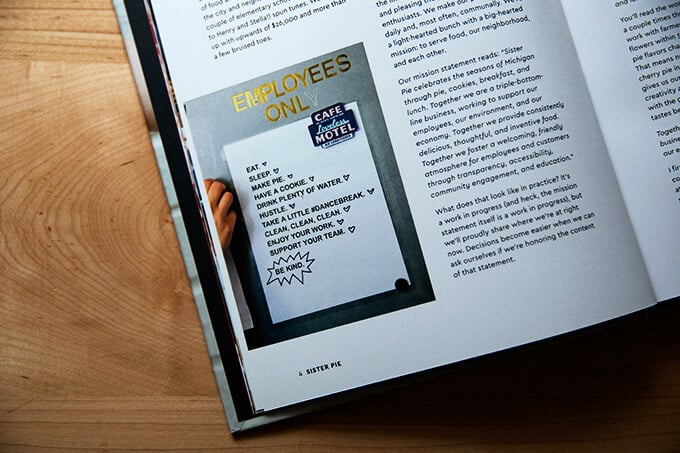
The introduction to the book, which includes the bakery’s mission statement and an analysis of each sentence, made me cry multiple times. This was one trigger: To support their mission of accessibility, they have a program — the Sister Pie-It-Forward program — that allows customers to pre-purchase pie slices, the paper representation of which gets strung along a pie-it-forward clothesline, ready for anyone to unclip at anytime and to use for any reason. No one leaves without a slice. Pie it forward. Can you handle it?
I don’t want to spoil too many more details, but Lisa also encourages her employees to dance, drink water, sleep, eat cookies, hustle, and be kind. I mean, what? Who? Where? Places and people like this really exist? Fellow cookbook collectors, bakers, and pie lovers: I think you should add Sister Pie to your wish lists.
Sister Pie’s Salted Maple Pie
- Total Time: 1 hour 30 minutes
- Yield: 1 pie
Description
Adapted from Sister Pie, a cookbook from the eponymous bakery in Detroit, this salted maple pie, to me, is everything I want in a dessert: a sweet and salty custard in a flaky, buttery crust. Heaven. It is perfect for Thanksgiving, but I think it’s nice for fall in general.
Pie dough recipe adapted from David Lebovitz. To make a double recipe (which I recommend if you are baking for the holidays, follow this recipe.)
I love my Emile Henry pie plate — it makes the best crust.
Ingredients
For the pie dough:
- 1 1/4 cups (160 g) all-purpose flour
- 1 tablespoon sugar
- 1/4 teaspoon table or kosher salt
- 8 tablespoons (114 g) cold, cubed butter, salted or unsalted
- 1/4 C. + 1 T. (71 g) ice water
For the pie:
- 3⁄4 cup (150 g) packed light brown sugar
- 10 tablespoons (142 g) unsalted butter, melted and cooled
- 1 cup (325 g) maple syrup
- 1⁄4 cup (32 g) fine yellow cornmeal
- 1/2 teaspoon kosher salt (1.5 g)
- 1–1⁄4 teaspoons pure vanilla extract
- 3 large eggs
- 1 large egg yolk
- 3⁄4 cup (188 g) heavy cream
For finishing:
- Flaky sea salt
- 1 cup heavy cream
- confectioner’s sugar
Instructions
Make the pie dough:
- In the bowl of a food processor, pulse the flour, sugar, and salt together. Cut the butter into small pieces, then add to the food processor. Pulse at 1-second intervals until butter is the size of peas—should be about 10 quick pulses. Add the ice water and pulse again about 10 times until the mixture is crumbly but holds together when pinched. Lay a clean tea towel on a work surface. Dump the crumbly dough mixture into the center of the towel. Grab the four corners of the towel together and twist to create a beggar’s purse, pressing the dough into a round. Use your hands to pack and flatten the round. If time permits, chill the dough for 30-60 minutes before proceeding, or better for 12 to 24 hours.
- On a lightly floured work surface, roll out the dough into a 13- to 14-inch round. Use as much flour as needed to prevent the dough from sticking, and every few rolls, flip the dough over. Transfer it to a 9-inch pie plate or pan. Trim dough that hangs over by a lot — leave at least an inch over hanging; you may not need to trim everywhere. Tuck the overhanging dough behind itself; then use your fingers to crimp the edge into a fluted pattern — video guidance here. Save the scraps in an airtight container in the fridge for another use.
- If time permits, chill the dough in the fridge until firm, about 30 minutes.
Parbake the dough:
- Heat your oven to 425ºF. If you have a Baking Steel or pizza stone, place it on a rack in the lower third of your oven. Lay a sheet of parchment across the pie plate and pour pie weights or dried beans or rice into the center until they reach the top of the pie crust. Use your hands to press the weights down and fit them into the edges of the fluted crust.
- Transfer the filled pie crust to a parchment-lined sheet pan and transfer to the oven for 15-20 minutes or until the edges are just beginning to color — do rely on the visual cues here. It sometimes takes my crusts a little longer to take on that light color at the edges.
- Remove the pan from the oven and carefully remove the pie weights or dried beans (which you can use again and again — let them cool completely; then transfer to a storage bag). Return the pan to the oven for another 2 to 3 minutes — it should take on only the slightest bit of more color all around.
Fill and Bake the Pie:
- Preheat your oven to 350°F.
- Make the filling: In a large bowl, whisk together the brown sugar and melted butter. Add the maple syrup, cornmeal, salt, and vanilla. Add the eggs and yolk and whisk again until very well combined or emulsified — this is important: several commenters have had issues with the mixture separating in the oven. Finally, add the cream and whisk one last time until emulsified.
- Place the pie plate on a parchment-lined baking sheet. Pour the filling into the pie shell.
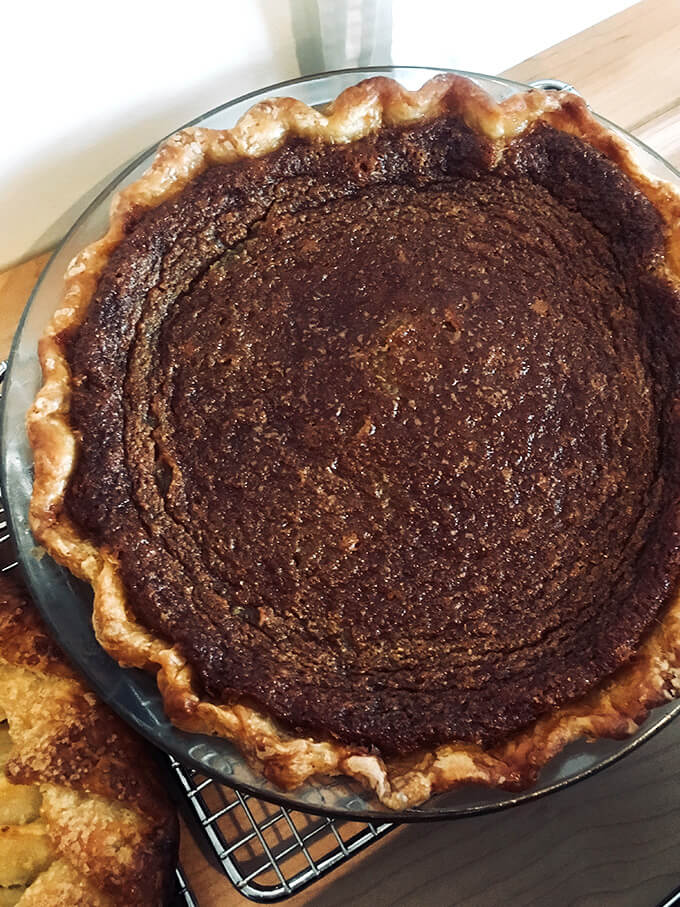
- Transfer the baking sheet with the pie on it to the oven and bake for 45 minutes to 1 hour, until the edges are puffed and the center jiggles only slightly when shaken. It will look slightly underbaked when you remove it but it will continue to set as it cools.
- Remove the baking sheet from the oven and transfer the pie to a wire rack. Sprinkle generously with flaky sea salt. Let cool for 4 to 6 hours. Once fully cooled and at room temperature, slice, and serve.
- To make the whipped cream, beat the heavy cream with a wire whip or in an electric mixer until soft peaks begin to form. Sprinkle in a small handful of sugar (or don’t — I actually like this whipped cream without any sugar because the pie is on the sweet side) and a big pinch of flaky sea salt and beat until peaks begin to get firmer. Taste. Add more sugar (if using) and salt to taste. Beat until peaks begin to hold their shape or until they reach a texture you like — I like billowy, not-quite-stiff peaks. Store in fridge until ready to serve.
- Store leftover pie, well wrapped in plastic wrap, or tucked into a jumbo ziplock bag, or under a pie dome, at room temperature for up to 3 days.
- Prep Time: 30 minutes
- Cook Time: 1 hour
- Category: Dessert
- Method: Oven
- Cuisine: American
This post may contain affiliate links. Please read my disclosure policy.


90 Comments on “Sister Pie’s Salted Maple Pie”
Is the pie supposed to be quite jiggly in the middle area?
It’s been in for 45 minutes, as my oven runs a little hotter.
The crust is already browned and the top of the pie is dark.
But it’s jiggly. 😬
Thanks!
Yes! It took mine 1 hour to bake yesterday. And when you remove it from the oven, it will still be slightly jiggly in the center… it continues to cook/set as it cooks.
Oh man, this recipe didn’t quite come together for me – but I think my crust may have been the culprit. I unfortunately didn’t have a chance to make my dough the day before, so only did the 30 minute chill time. The parbake resulted in lots of butter leaching out – which I believe may have contributed to my filling staying too jiggly even after about an hour and 25 minutes of baking – SO much butter bubbling around the filling during baking. Although it won’t work for Thanksgiving dinner tonight (still cooling and too soft) hopefully it will set overnight and still have some sort of enjoyment factor tomorrow. All this being said, it smells delicious. I think the moral of the story is to definitely give your pie dough plenty of chill-time!
Bummer to hear this! I do think I need to add some notes about the texture of the pie upon removal… it took mine at least an hour yesterday… I think 1 hour 5 minutes, and the center still is a little jiggly upon removal — I think that’s why the original recipe calls for letting the pie cool for at least 6-8 hours before serving… it continues to cook/set as the pie cools.
I ‘cheated’ & used a store bought pretzel crust but yummmmm! My desserts never get many raves but this one did, in a sea of other desserts!
Yay! So nice to read this. I love this pie so much 🙂 🙂 🙂
So delicious! I made this for Thanksgiving instead of my usual pecan pie and it was a hit! I subbed coconut milk (unsweetened full fat canned) for the heavy cream. I couldn’t tell the difference it you know I never made the pie before so there ya go! I also bought coconut whipped cream. I also used Kosher salt to sub for sea salt because that’s what I had,
I will always make this crust now, too! It was so flaky and just perfect!
Thank you for this recipe! It’ll be my Thanksgiving pie tradition from now on!
So happy to read this, Joyce! Thanks so much for writing and sharing your notes regarding substitutions — so helpful for others! Happy Thanksgiving 🙂
I used a Publix crappy 9 inch pie pan and I have a lot of extra filling. Is this normal or should I get a bigger pan? Still waiting for it to cook to see how it comes out
Hi! I feel like a 9-inch pan should be fine but maybe the crust of the purchased crust is thicker? How did it turn out?
It turned out amazing. I used 1 batch of filling for 2 pies and people went crazy for them. I’m making more right now.
Oh great! Wonderful to hear. Thanks for reporting back 🙂
This pie was awful. The brown sugar all settled in the bottle of the bowl when I was done “combining” ingredients so when I filled my par baked crust half the sugar seemed like it didn’t make it in (my pie crust (store bought) was 9 inches so too small for all this filling) then after all said and done cooled and serving, the filling was not combined, and it was WAY too buttery… I don’t know man but this was all a bummer
Maybe the filling needed to be heated on the stove to actually combine and melt the sugar
Kate, I’m sorry to read all of this… not sure how to advise as I’ve never experienced what you are describing. You do not need to heat the filling to ensure that it combines thoroughly. Did you make any other changes to the recipe? It definitely should not taste too buttery, so it sounds as though the ingredients never emulsified before mixing or somehow separated? Regardless, I’m sorry. I know how frustrating it is when recipes don’t turn out well, and I’m also bummed to hear this because this is one of my favorite pies.
I made this pie today and I think something may have gone wrong (though we have not eaten it yet–it’s only 2 hours into cooling).
I should say first of all that I am not what you might call an accomplished baker. But following your instructions (and the videos), I finally made a pie crust that I was happy with and which didn’t look farcical after being rolled and placed in the pie dish. The par-baking went well too and it looked pretty much as it did in your video/photos. So I made the filling, combining/whisking enthusiastically by hand, filled the crust and popped it in the oven.
At the 45 minute mark it looked good: the filling was even across the top but only very lightly browned and extremely jiggly. So I let it go another 10 minutes. When I opened the oven the center had risen like a souffle and some butter seemed to have separated. I took it out of the oven. The risen filling subsided immediately but the top of the filling was more pockmarked than even. And there were a few “puddles” of butter. More butter emerged as it began to cool but most of this has been re-absorbed. The original puddles, however, are still there and I suspect will just harden on top once it’s done cooling.
Am I correct in thinking that I did not whisk it sufficiently to bring the filling completely together? It did look fine when I was pouring it into the crust. Or did I over-bake?
You can see what it looks like right now in this Twitter thread:
https://twitter.com/WhiskyOpinions/status/1738990330920284211
I will say it smells very good and we fully expect to enjoy eating it. Whipped cream over the top will hide the imperfections.
I should add that my problems are unlikely to have had stemmed from the crust. I made the dough last evening and chilled it for something like 16 hours. I also chilled the rolled out dough in the pie dish for 30 minutes before blind baking it. The crust was pristine (and the little “nimkis” I made with the crust trimmings, ajwain and salt were also excellent).
I fear I needed to combine the filling ingredients much more energetically than I did. Perhaps next time I’ll break out some machinery for the purpose.
Hi! Apologies for the delay here. I’m not sure where things went wrong. I have never experienced the puddles of butter you are describing, and it’s possible they came from the crust but also possible that they came from not mixing the filling enough, though it sounds as though you gave it a good go. I hope it turned out well in the end! I viewed the photo of your crust, which looked great.
I had the same issue as other commenters- separating of the filling immediately after mixing, resulting in melted pools of butter on top of the filling when I put it in the pie shell and then in the oven. It felt wrong, and luckily I read the comments shortly after putting the pie in the oven, so I pulled it out, poured the filling back into the bowl (very awkwardly) and then used an electric hand mixer to combine the ingredients more thoroughly. I think the problem is in the wording of the recipe. It only says to “whisk” until combined, not indicating emulsification at any step- the author only mentioned emulsification in a response to a commenter who had this same issue. This wording from reading the recipe only can easily be interpreted as just combining the ingredients with a fork. Hopefully mixing with an electric mixer will make it turn out alright! Given the other reviews, I am skeptical.
I’m sorry about your trouble here. I’m so perplexed by this issue. I have made this pie at least a dozen times at this point and never have had an issue. I’ve updated the post to say “well combined” and “emulsified.” I hope that prevents further issues for others.
I think the extra mixing did the trick! When I put it back in the oven the butter didn’t pool at the top as it cooked. There was a bit of butter pooling right at the end when I pulled it out but it seemed to reincorporate once it cooled. It was delicious (too sweet for me, but the sweetness level is evident from the ingredients). Tasted like a syrup soaked pancake.
OK great! Hopefully your comment as well as the updated language in the directions will prevent further issues. Thanks for following up.
Thank you so much for sharing this! I’m a metro Detroiter and have had the pleasure of enjoying a slice of this wonderful pie at Sister Pie and knew I wanted to try it at home. But before the cookbook came out, the recipe was posted in our local newspaper (and later on a well-known food website). Then the book came out and all 3 had slightly different measurements for the ingredients – and in one recipe, an instruction to strain the ingredients before pouring into the pie shell!
I made the pie using a combination of the first two recipes and while it wasn’t bad, it wasn’t the same as the bakery. Fast forward almost 10 years later, I found the recipe on your site and knew I could trust you to get it right. I made it yesterday (but using Cook’s Illustrated’s Foolproof All-Butter Pie Dough because it’s my go-to) and it was perfect. Thank you for solving the mystery of this pie (and providing the weights)!
So nice to read this, Danielle! Thanks so much for writing. It’s truly one of my favorite pies 🙂