
Simple Sourdough Focaccia: A Beginner’s Guide
This post may contain affiliate links. Please read my disclosure policy.

Sourdough is having a moment. Longtime sourdough bakers may cringe at this proclamation, just as our grandparents likely roll over in their graves when they hear “toast” is a thing.
But it’s true. I cannot open a magazine without seeing a feature on a bakery and its naturally leavened loaves; I cannot scroll through Instagram without seeing a crumb shot of a halved sourdough miche, a beautiful web of irregular holes, or an intricately scored, thick-crusted boule being presented like Simba to the animal kingdom.
My interest in sourdough in recent months has been spurred by a number of requests about how to make my mother’s peasant bread with a sourdough starter. Initially, I thought why? The beauty of the peasant bread is that it doesn’t require a starter or a long rise or any fussy techniques; it can be on your table start to finish in three hours. Everyone will rave.
Over the years, I’ve been able to answer questions relatively easily about how to make the peasant bread morph into something else: a boule with a thick crackling crust — thank you Jim Lahey — or a thinner round to use for pizza or something palatable for the gluten-free crowd.
But achieving that sour taste — even a subtle sour taste — is something yeast, even with a long slow rise cannot achieve. And, moreover, natural leavening is natural leavening — no yeast allowed.
So I began experimenting. I tried reviving my old starter, long neglected in my fridge, and when it proved altogether spent, I ordered one from Breadtopia. I followed the instructions to activate it, and within a day, I had a vibrant, bubbling starter.
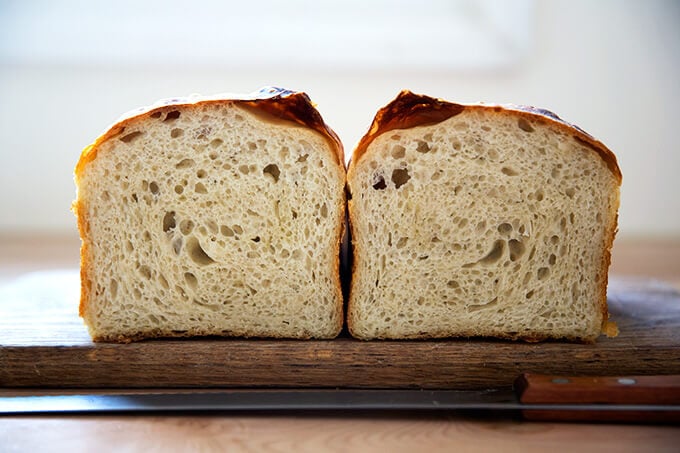
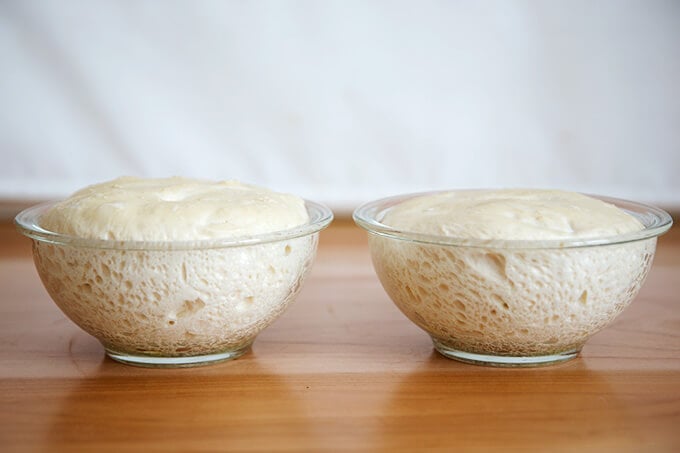
After a bit of trial and error, I soon found a nice rhythm, mixing the dough in the afternoon, letting it rise all evening, splitting the dough into two portions and plopping each into a buttered Pyrex bowl in the morning. By early afternoon, the bread was ready to bake. The resulting loaves looked just like the peasant bread, golden crusted, soft crumbed, but with a nice subtle sourness. (Photo below.)
Using the sourdough peasant bread proportions, I decided to make focaccia, my favorite, a bread I love for so many reasons: its versatility — sandwich bread, appetizer, dinner bread — and its flavor and texture: the oil-crisped crust, the generous amount of salt, the chewy crumb.
I also think focaccia is an ideal bread with which to begin a sourdough journey. Why?
- First, it requires no special equipment — not a Dutch oven or a Baking Steel to create a thick crust; not two Pyrex bowls to create a golden, less-thick crust. You likely have a 9×13-inch pan somewhere in your kitchen. This is all you need.
- Second, it requires no tricky shaping technique on a floured work surface. Shaping free-standing sourdough boules is an art and it takes practice and repetition. It’s a beautiful thing when you get the hang of it, but it can be frustrating until you do.
- Third, it requires no scoring. With focaccia, you don’t need a razor sharp lame — you use your fingers to dimple the dough.
For those intimidated by sourdough bread baking, this recipe, as well as this simple sourdough bread recipe, are the recipes I suggest making first, both for their simplicity and flavor. Another great beginner’s bread recipe to try is this overnight, refrigerator focaccia, which requires minimal effort but yields spectacular results.
Curious about Sourdough? Let’s Start From the Top.
You need a sourdough starter, and you can make a sourdough starter from scratch in just about a week. I only recommend doing so if it currently is summer (or a very warm fall) where you are. While it is immensely satisfying to build a starter from scratch, there is no shame in buying one for a few reasons, namely: when you purchase a starter, you are guaranteed to have a strong, vigorous starter from the start.
I’ve purchased sourdough starters from King Arthur Flour and also from Breadtopia. Both were easy to feed and activate. Once your starter arrives, follow this guide on How to Activate, Feed, and Maintain A Sourdough Starter.
Four Reasons to Buy (or Procure) a Starter
- First, if you’re curious about sourdough, get to it! Making a starter from scratch takes weeks. I did it once many years ago following the instructions in Tartine Bread, and after nearly losing my mind, I literally jumped for joy when I dropped a spoonful of my starter into a cup of water, and it floated. Making a starter from scratch is a really cool exercise, and it’s something to be proud of should you succeed (or not!), but why not start experimenting with an active sourdough starter while you build a starter from scratch on the side?
- Second, feeding a mature starter will help you understand how to build one from scratch. You’ll observe how a starter rises and falls, what happens when you feed it more regularly, what happens when you neglect it, how it smells at various stages, etc.
- Third, they’re relatively cheap (or free if you get one from a friend).
- Fourth, maybe you embark on a sourdough journey and decide it isn’t for you. Why go through the trouble of building a starter till you know you enjoy the process of sourdough baking?
Begin with an Easy Recipe
As noted above, I think focaccia is a perfect sourdough-bread-baking starting point. It will teach you the fundamentals of working with sourdough without the potentially frustrating steps of shaping, scoring, and baking with a Dutch oven. The recipe below also can be baked in a loaf pan, another great option if you do not want to deal with shaping and scoring and Dutch ovens.
PS: Whole Wheat(ish) Sourdough Bread recipe
PPS: Essential Equipment For Sourdough Bread Baking
How to Make Sourdough Focaccia: A Step-by-Step Guide
Get a starter. If you don’t have a starter and don’t have a friend who can lend you one, I recommend buying one. I bought mine from Breadtopia, and I’ve managed to keep it alive for 6 months now. Score!
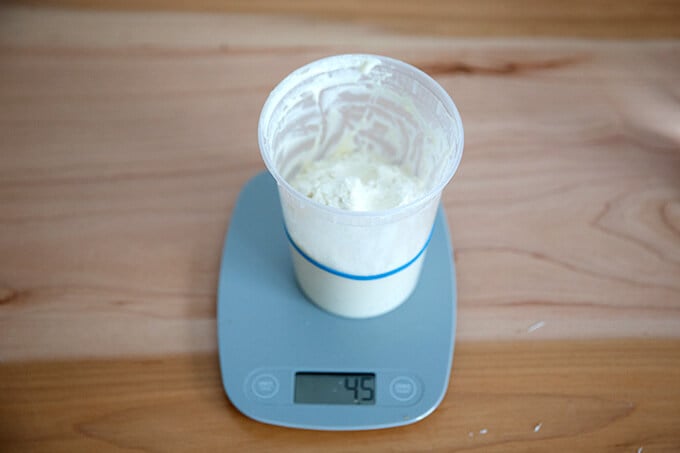
I store my starter in this quart container. When I’m ready to use it, I discard some of it, and add about 45 g flour…
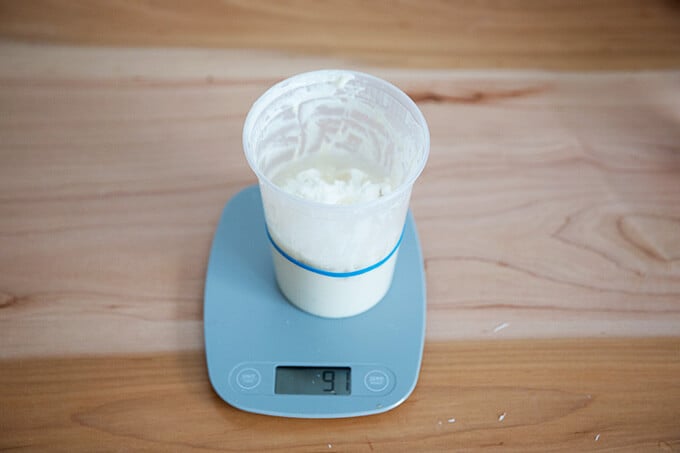
… and 45 g water. You don’t have to be exact, but when you’re getting started, I think it’s helpful to weigh both the water and flour. Depending on how long the starter has been in the fridge, it may need one or two feedings before use.
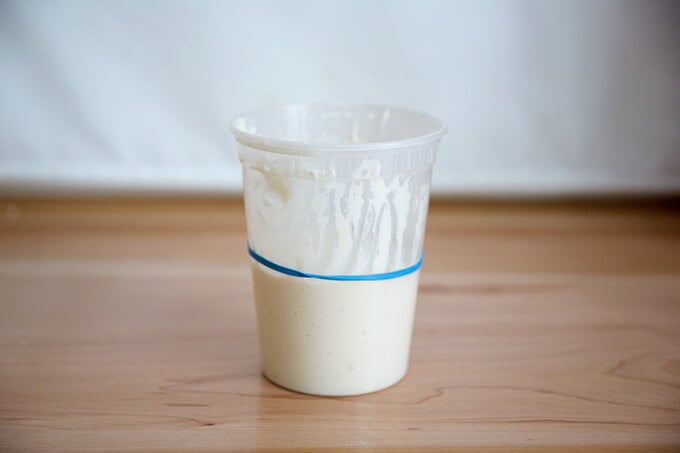
If you stick a rubber band around your starter vessel, you’ll know when …
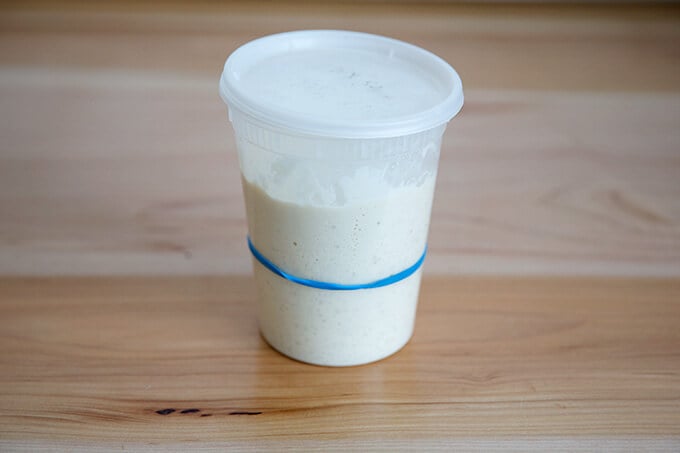
… it has doubled and is ready for use.
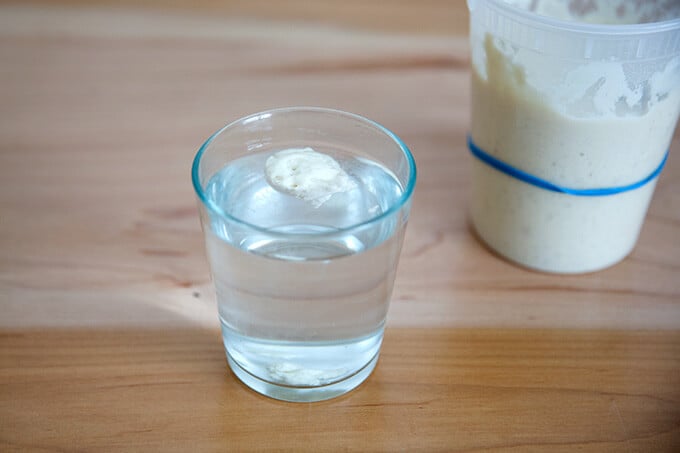
If you need reassurance as to if it’s ready, you can do the float test: drop a spoonful of starter into a glass of water. If it floats, it’s ready.
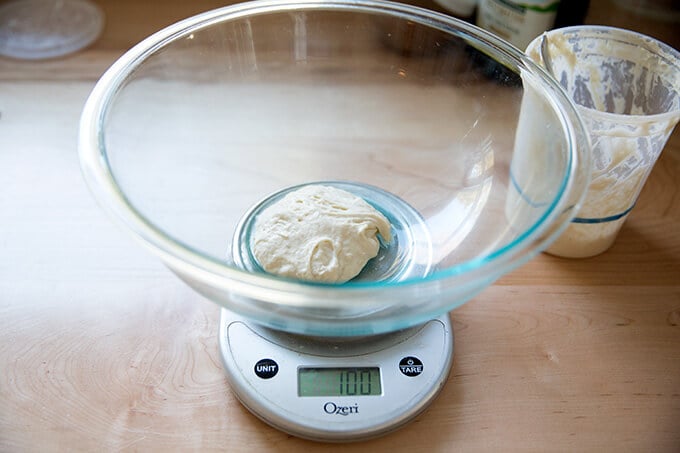
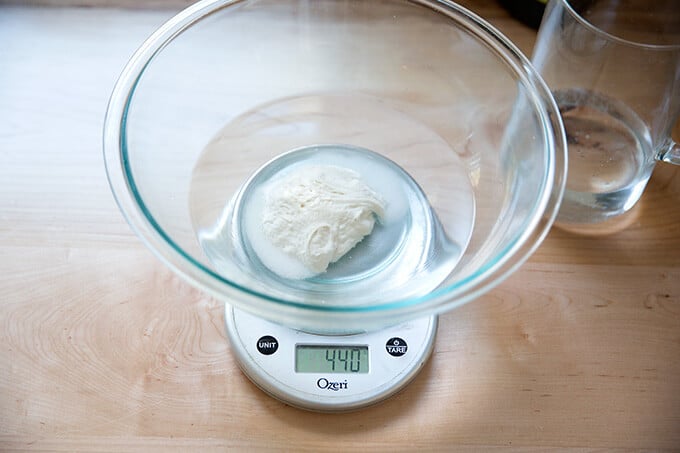
As with all bread, when mixing sourdough doughs, it’s best to weigh everything with a digital scale. Start with 100 g starter.
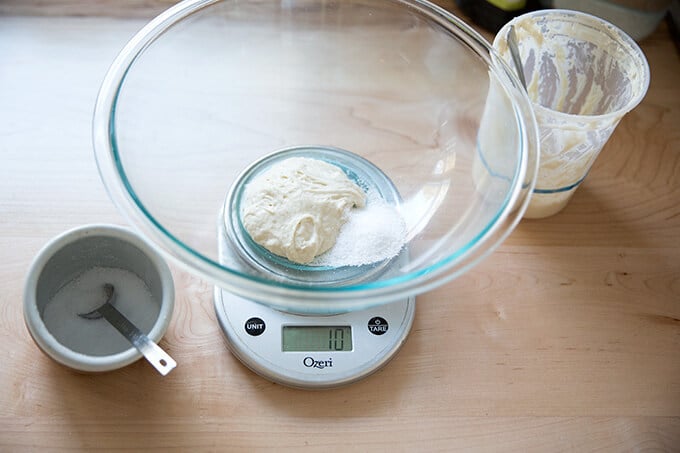
Add 10 g kosher (or other) salt.
Add 440 g water. (See recipe notes: If you live in a humid environment, you may want to use less.)
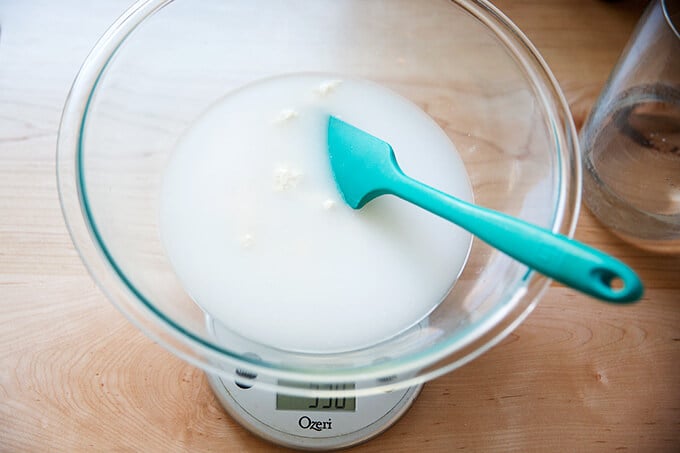
Stir to combine.
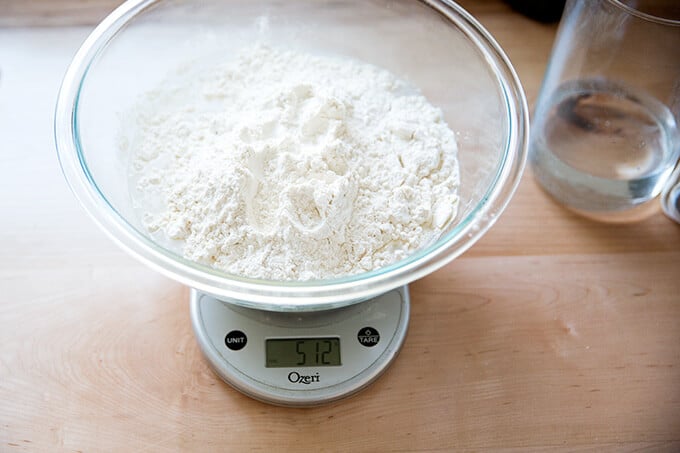
Add 512 g bread flour.
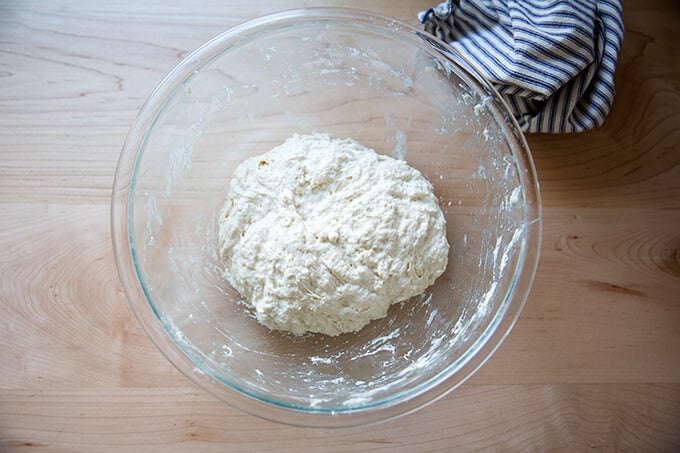
Stir to form a sticky dough ball.
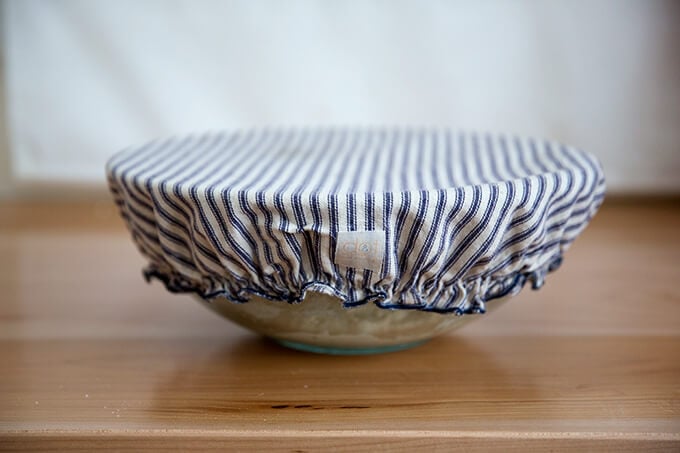
Cover with a towel or bowl cover, and let rise for 8 – 18 hours at room temperature (times will vary depending on the time of year and how warm your kitchen is … in the summer, this may take only 4 hours):
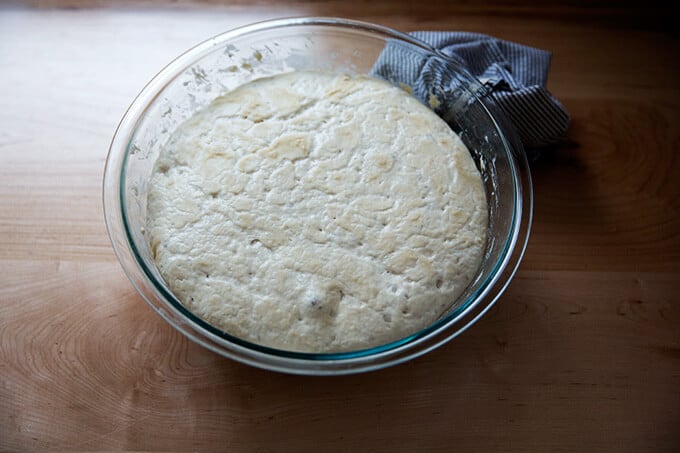
When it doubles …
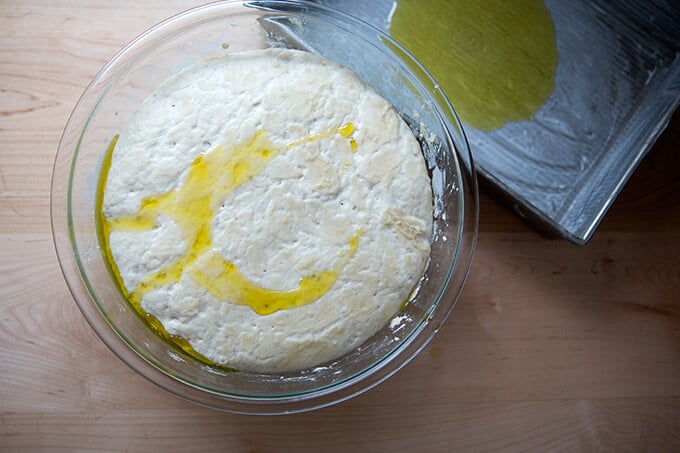
… drizzle it with some olive oil.
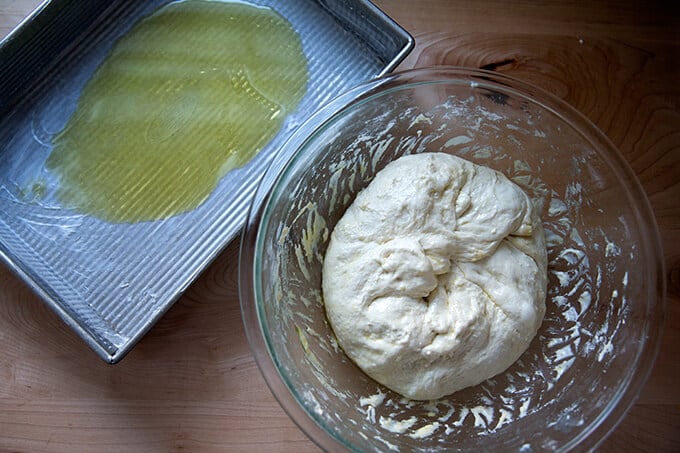
Deflate the dough by pulling the sides into the center.
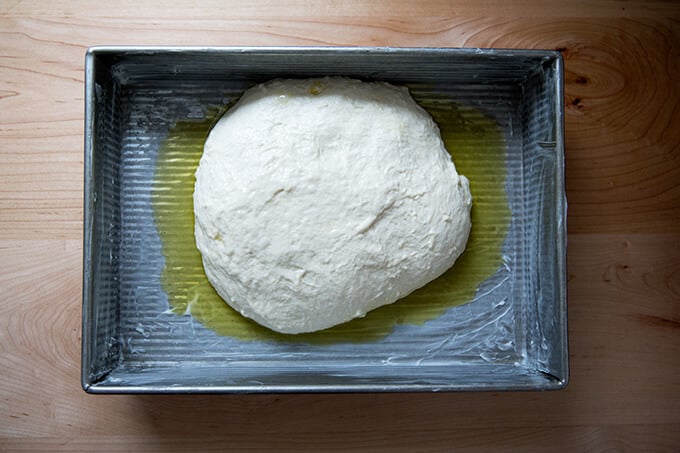
Dough, ready to make it’s second rise, which will take 5-6 hours. Love this USA Pan.
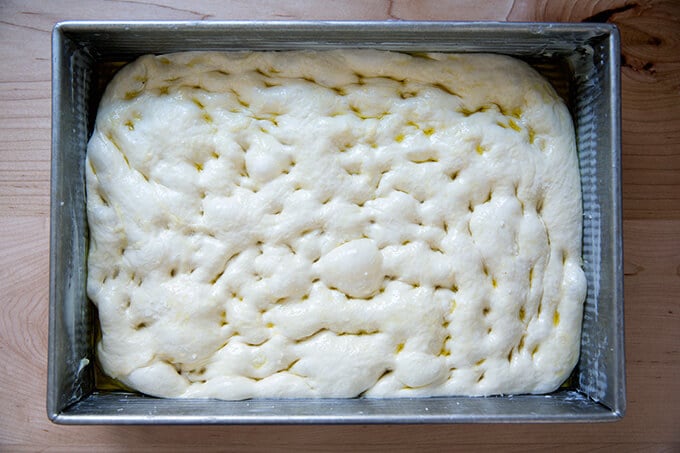
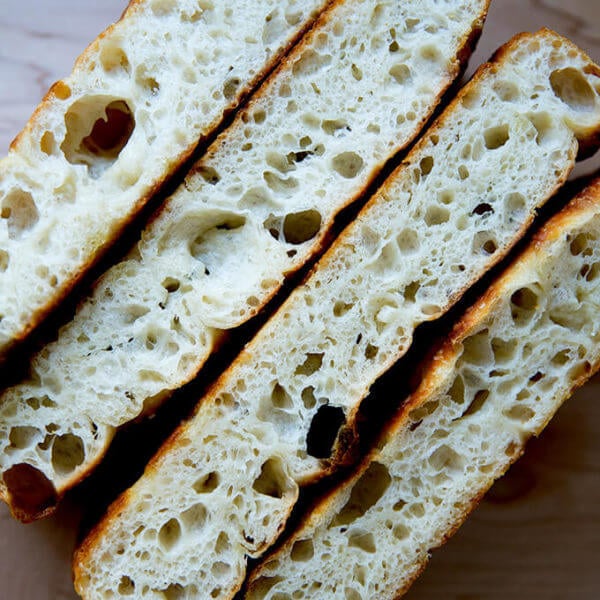
After 5-6 hours, the dough is ready to be dimpled and stretched and salted. Bake at 425ºF for 25 minutes.
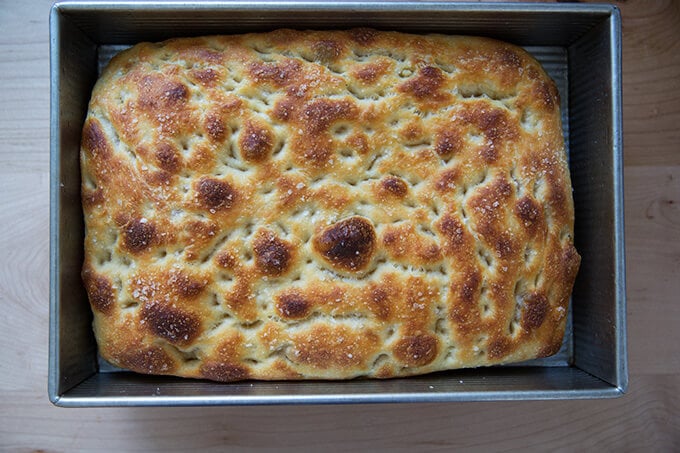
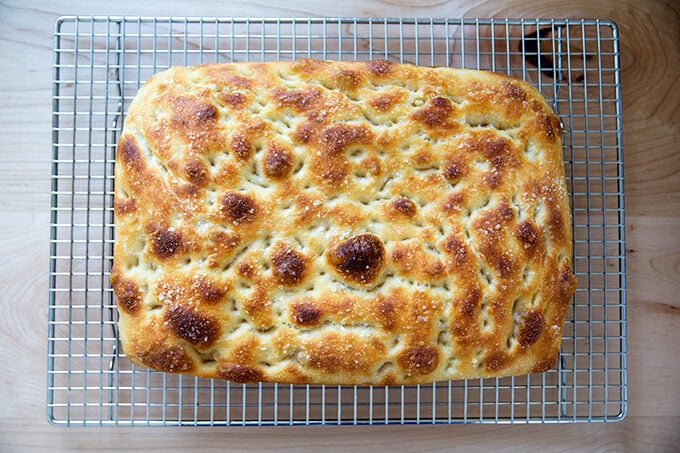
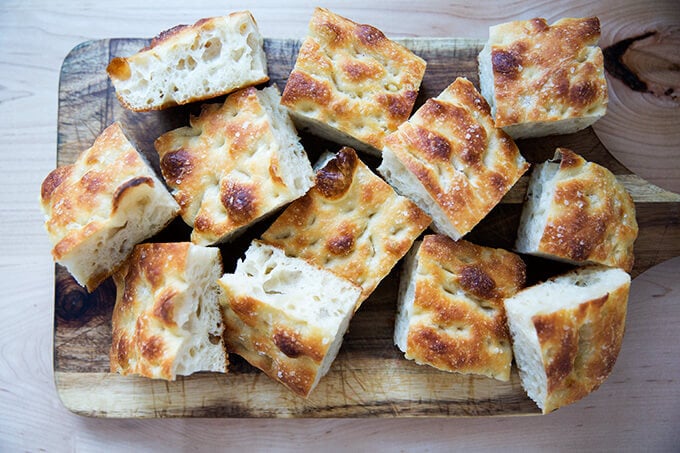
Just-baked sourdough focaccia:

Simple Sourdough Focaccia
- Total Time: 24 hours 25 minutes
- Yield: 1 loaf
Description
Adapted from my favorite yeasted, slow-rise focaccia recipe — overnight refrigerator focaccia — this recipe replaces the yeast with a sourdough starter.
UPDATE: Video guidance is here! Watch up above or click the link below in the recipe card.
What you need to make this recipe…:
- …a sourdough starter. I bought mine from Breadtopia. It was easy to activate. There are no instructions on the package itself; follow the instructions on the video here.
- …time. Once your starter is ready to go, this recipe requires an initial 4- 18 hour rise, followed by a second 4- to 6-hour second rise. After the initial rise (depending on the time of year and temperature of your kitchen), you can deflate the dough, and stick it in the fridge for 8 to 10 hours (maybe longer), which might help you regarding your schedule. Keep in mind, when you remove the dough from the fridge and transfer it to a pan, it will still need to rise for another 5- to 6- hours.
- …water. Apparently, chlorine in water can adversely affect sourdough. Leaving water at room temperature for 24 hours will allow most of the chlorine to escape.When I am in the habit of making sourdough bread, I fill a large pitcher with water and leave it out at room temperature. I use this for my sourdough breads and starter. Truth be told, I’ve used water straight from the tap and have not noticed a difference.
Water quantity: Depending on where you live and the time of year, you may need to cut the water back. If you live in a humid environment, for instance, I would suggest starting with 430 g water. If you are not using bread flour, you also may need to cut the water back a bit.
Timing:
The more I make sourdough, the more I realize so much depends on the time of year and the temperature of my kitchen. In the summer, because it is so warm, the first rise (bulk fermentation) takes between 4 – 6 hours; in the winter the first rise takes 12 – 18 hours.
The key with this recipe is to make sure the first rise doesn’t go too long — you want the dough to nearly double. A straight sided vessel (as opposed to a bowl) makes gauging the first rise easier. (Note: If your dough rises above double, don’t despair … recently my dough tripled in volume during an overnight rise, and the resulting focaccia was still delicious, light, airy, etc.)
A few thoughts: If you are making this focaccia in the summer (northern hemisphere), use 50 g of starter and check the dough every couple of hours. If you are making this in the winter, use 100 g of starter, and plan for a long first rise.
Troubleshooting: If you have issues with your dough being too sticky, please read this post: Why is my sourdough so sticky? The 4 common mistakes.
Flour choice:
- I’ve been using King Arthur Flour’s special patent flour — bought a 50-lb. bag of it at Restaurant Depot. Its protein content, 12.7%, is the same as the protein content of its bread flour. I also have used all-purpose flour (11.7%) with success, but I recommend bread flour, which seems to be more reliable for people especially those living in humid climates. If you only have ap flour on hand, you may consider reducing the water a bit — bread flour absorbs slightly more liquid than all-purpose flour.
Ingredients
- 50 g – 100 g (1/4 to 1/2 cup) active starter, see notes above
- 10 g (about 2.5 teaspoons) kosher salt
- 430 – 440 g water (1.75 cups – 1.75 cups + 2 tablespoons), room temperature, see notes above*
- 512 g (about 4 cups) bread flour, see notes above
- 3 tablespoons extra-virgin olive oil, divided, plus more for drizzling
- Nice, flaky sea salt, such as Maldon
Instructions
- Place the starter, salt, and water in a large bowl. Stir with a spatula to combine — it doesn’t have to be uniformly mixed. Add the flour. Mix again until the flour is completely incorporated.
- If time permits, perform one “fold”: 30 minutes after you mix the dough, reach into the bowl and pull the dough up and into the center. Turn the bowl quarter turns and continue this pulling 8 to 10 times. See video for guidance.
- Drizzle with a splash of olive oil and rub to coat. Cover bowl with a tea towel or bowl cover and set aside to rise at room temperature (70ºF/21ºC) for 4 to 18 hours (the time will vary depending on the time of year, the strength of your starter, and the temperature of your kitchen — in summer, for instance, my sourdoughs double in 6 hours; in winter, they double in 18 hours. Do not use an oven with the light on for the bulk fermentation — it will be too warm. It is best to rely on visual cues (doubling in volume) as opposed to time to determine when the bulk fermentation is done. A straight-sided vessel makes monitoring the bulk fermentation especially easy because it allows you to see when your dough has truly doubled.).
- When dough has doubled, place 2 tablespoons of olive oil into a 9×13-inch pan. (I have been using this USA Pan, which I love. I have had no sticking issues. If you are using a glass pan, you may, as a precaution, want to butter it it first — I have had disasters with bread sticking when I’ve used oil alone with other baking vessels.)
- Drizzle dough with a tablespoon of olive oil. Use your hand to gently deflate the dough and release it from the sides of the bowl. Gently scoop the dough into the center of the pool of oil in your prepared pan. Fold dough envelope style from top to bottom and side to side to create a rough rectangle. Turn dough over so seam-side is down. Video guidance here.
- Rub top of dough with oil. Leave alone for 4 to 6 hours, uncovered, or until puffy and nearly doubled.
- Heat oven to 425ºF. Rub hands lightly with oil, and using all ten fingers, press gently into the dough to dimple and stretch the dough to nearly fit the pan. Sprinkle generously with sea salt. Transfer pan to the oven and bake for about 25 minutes or until golden all around. Remove pan from oven and transfer bread to a cooling rack. Cool at least 20 minutes before slicing.
- Prep Time: 24 hours
- Cook Time: 25 minutes
- Category: Bread
- Method: Oven
- Cuisine: Italian
Incidentally, this same recipe can be used to make sandwich bread. You need one large loaf pan, 10×5-inches, such as this one.
As noted above, this same recipe can be baked, like the original peasant bread recipe, in buttered Pyrex bowls. More on this soon.
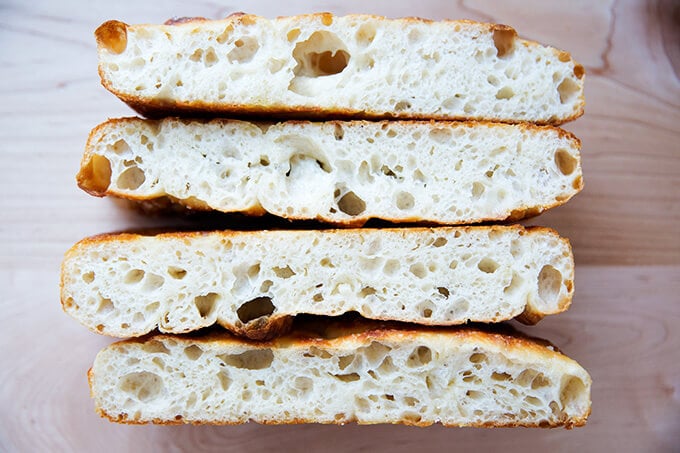
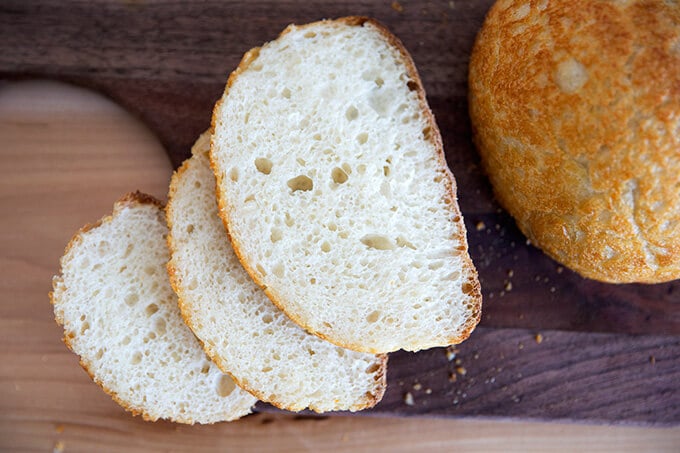
Just-baked sourdough peasant bread.

Sliced sourdough peasant bread.
This post may contain affiliate links. Please read my disclosure policy.


1,241 Comments on “Simple Sourdough Focaccia: A Beginner’s Guide”
Just made this for the first time. WOW! Great taste and texture and very easy to follow. Tests my patience But we’ll worth the wait.
Wonderful to hear this, Paul!
This is the most simple and marvelest recipe.
It turns out perfectly well every time and it’s delicious.
Everyone loves it. Thank you so much for sharing your recipe.
Wonderful to hear this, Agnes! Thanks so much for writing.
I did my initial rise on the counter yesterday then put into baking pan & fridge overnight as it got too late to bake. Finished up the final 5-6 hour rise back on the counter, poked my finger holes, sprinkled with everything bagel seasoning then baked. I was worried it wouldn’t turn out because it was SO wet it barely held the holes. Despite my fears, it rose and crusted beautifully! Hubby said it was quite literally the best bread he’s ever eaten. I might mess with the hydration ratio be t time but it’s hard to mess with perfection!
So wonderful to hear this, Jo! I have been there with this dough as well — I’ve dimpled the dough and been so worried I overfermented the dough and that it wouldn’t turn out, but it always seems to in the end. Messing with the hydration is not a bad idea … I think lowering it will still give you great results. Thanks for writing!
I have had such mixed results with this recipe. I’ve made a brick once, twice it just hasn’t really risen as much as I’d want, and once I got the perfect fluffy focaccia bread. I’ve made a yeasted version in the past with no problems, and I use your sourdough bread recipe on the regular. I’m not sure what I’m doing wrong!
I have a feeling you’re probably over-fermenting the dough. How long generally are you doing the bulk fermentation for? And do you have a straight-sided vessel to monitor the bulk fermentation?
I used this recipe to make focaccia yesterday (thank you) and it is delicious but on the dry side, especially the crust which is quite hard and hasn’t softened as sourdough bread crust usually does. Any idea why?
Hi AJ, it sounds as though something went wrong… I’m thinking your dough maybe over fermented. Can you tell me a little more about your experience? Are you using a scale? How long was the bulk fermentation? When you dimpled the dough, did it have strength? Or did it feel very slack, wet, and without strength?
You may want to check out this Troubleshooting Post, too.
Hi Alexandra, thanks for replying to my post. I think you are right, the dough may have over-fermented. I kept it at high 60s degrees overnight for about 8 hours and almost doubled (80% or so). Then I poured it into the baking dish and it was firm, folded as you do, then 4 hours at 75-78 degrees (grew by about 20% or so); when I dimpled it, it didn’t have much strength, I did notice by watching your video that it didn’t spring up like yours. The taste is very different from my sourdough bread, it’s flat without that complex mix of sweet & sourness that my sourdough has so I wonder why it wouldn’t actually be sour if it over-fermented. I’m curious, how does the taste of our focaccia compare to the taste of your sourdough?
Hi AJ,
It’s so interesting to read this because I would have thought it had over fermented during the bulk fermentation, but if it had strength when you folded it after it was in the baking pan, then it didn’t over-ferment at that phase. BUT, the fact that it didn’t spring back when you dimpled it is definitely a sign of over-fermentation. Hard to know when/where it went wrong.
Because this is a relatively fast sourdough bread (as opposed to the boules I make, which proof in the fridge for at least 24 hours before baking), this is less sour tasting. If you want more of a sour taste, you can cold proof it for a few hours or up to 24 hours before baking, but I wouldn’t try that till you make it work with a room temperature proof.
Hi I have made this recipe a few times and I’m wondering for the proof in the pan can I put it in the fridge after folding it for a few hours then would I bring it to room temp before dimpling and adding toppings , maybe 2 hours before baking ? I want to serve it from oven and I have about 11 hrs before serving after bulk .
Thank you I love all your recipes ❤️
Yes, absolutely! I just like to be sure to coat the dough in oil (it likely will be) before it goes in the fridge. Keep in mind that the room temperature proof may take a little bit longer because the dough will be cold. Good luck!
Hi Alexandra,
My family are focaccia mad after tasting your recipe. I am making two focaccias. I will double the recipe but when do you recommend l separate the dough into two portions?
Thanks in advance!
Wonderful to hear this, Monica! I would split it after the bulk fermentation … when you transfer to the two pans. Thanks for writing!
Thank you for the recipe! Super yummy! It was worth the wait. I didn’t butter the pan so I had some sticking issues (totally my fault)…I ordered the USA pan! I can’t wait to try it again!!
You will LOVE your USA pan!! Yay. So nice to hear this, Lori.
I started making sourdough recipes since the pandemic started. This is one of our go-to favorites. I am in upstate New York, but I have the advantage of the warmth of a pilot light on top of my gas woodstove to help revive and ferment. After mixing the dough mid-morning – we’re eating fresh sourdough focaccia with dinner around 6pm. Excellent recipe.
So nice to hear this, Elise! And hi from a fellow upstater! I do love that this one comes together relatively quickly as far as sourdough bread recipes go. Thanks for writing!
This is awesome! I added dried rosemary to the mix and to the top. My dough was almost soupy and I had my doubts, but it turned out perfectly. I baked it in a stoneware bar pan and all of the measurements and times were fine. I’m north and it is cold but I have a show off starter who likes to bubble up fast so this didn’t take nearly the time. Use your intuition and your judgement and this bread will be great. I poured out some Extra virgin olive oil, grated asiago and flaky salt and cracked pepper, and it was divine to dip into. Thanks for the recipe!
So nice to hear this, Marcie! Love that you have a show off starter 🙂 🙂 🙂 Asiago cheese on top sounds amazing 🎉🎉🎉🎉
Hi on what rack of the oven should you bake the bread? Thank you.
I bake it right in the middle.
For timing purposes, can it spend some time in the fridge?
Yes, absolutely! Anytime after you mix the dough, ideally after you perform one set of stretches and folds. You can also put it in the fridge after the bulk fermentation.
I finally got my sourdough starter going as it should so i decided to try this foccacia as per your advice. It’s a little fussier than your easiest foccacia recipe but still worth it. The main reason I’m writing is to say how incredible this dough is if you make it with your mother’s peasant bread method. I rub a little olive oil over the dough before the second rise to keep it from drying out as it takes longer to rise. This is better than cake.
So nice to hear all of this, Annier! And great tip about rubbing the dough with oil if baking it in the bowls. Thanks so much for writing.
Really good recipe 👌👌
Great to hear, Michael!
I added some kalamata olives and rosemary on top before the final bake- yum!
Great to hear! Sounds delicious 🙂
Easy to make! Thanks for the recipe!
Great to hear, Jackie!
I love this recipe! I recently experimented by adding some sundried tomatoes but they all burned up by the time the bread was baked. Any ideas on how I should add toppings? Should I add them halfway or just bake them in instead of topping?
Thank you!
Hi Jenny! Great to hear! I would add them after you do one set of stretches and folds. And then do a few more sets of stretches and folds at 30 minute intervals to incorporate them evenly into the dough.
Hi there! I’ve made this recipe many times with regular yeast and love it; it’s my go to pot luck dish! I’m now planning to try it as my first bake with a sourdough starter and had a question about the timing. In the recipe you mention that during the bulk ferment phase if the timing doesn’t line up the dough can be punched down and stored in the fridge but that it will need 4-6 hours more to rise after being placed back at room temperature. Is that time in addition to the bulk ferment or the time mentioned after shaping in step 6 of the recipe? Thank you!
Hi Sage!
That 4 to 6 hours will be after step 6: once you get it into the oiled pan, it will need about 4-6 hours at room temperature before you dimple it and bake it.
Hi there. I’ve had great successs with your simple sourdough and sourdough focaccia recipes. Curious, did you recently change your second rise time for focaccia to 4-6 hours? I think I made it in the spring and it was suggested second rise less than an hour. I guess I’ll find out because I’m pinched for time so won’t be able to leave it for that long before baking…..
Hi Janet! Nope, I haven’t changed the recipe. The second rise has always been about 4-6 hours. Hope it turned out OK!
I’m new to baking with sourdough (or baking bread in general), so I tried this easier recipe first. Holy cow this focaccia is amazing! I’m finding it hard to not eat the whole thing tonight. The instructions were easy to follow and the video was helpful. Conquering this recipe gives me the confidence to try other sourdough recipes
The Focaccia I’ve been looking for! Thank you so much, it was so delicious I gave my neighbor 1/2 of it right away so we wouldn’t eat it all! For toppings I put roasted garlic, thyme & kalamata olives along with the salt….amazing!!!
Oh yay! Wonderful to hear this, Cheryl! Your toppings sound amazing 🙂 🙂 🙂
It was really really wet, so wet that when I poked my fingers in before cooking it just smoothed over again, thus it too much longer to cook, it turned out ok but next time I would use less water.
Hi Kate! Are you using a scale to measure the flour and water?
yes, digital scales, the wholewheat recipe of yours was also very wet, we do live in the west coast of Scotland which is very wet
OK, bummer to hear this. I think a lot has to do with the difference in flour, too. Over the spring and summer, when lots of people were making sourdough, I heard from lots of people from the UK that their doughs were much wetter than what they saw in the videos that accompany each recipe. So, yes, I think it’s a matter of finding the right ratio of water given the flour you are using.
I love this recipe. I make it all the time. Once I learned the intricacies of my own sourdough starter, it’s easy to realize how adjustable the recipe is (water quantities, flour quantities, time to rise, etc.) If your focaccia comes out poorly and you followed this recipe, try making some adjustments. Use the recipe as a guide rather than an instruction manual.
Great to hear this, Colette! Thanks so much for all of this good advice and encouragement — so helpful for others 🙂
Hey there! I just now took this beauty out of the oven, but mine rose far too much in the oven and I had to bake it around 45 minutes to get it to brown on the top.
It rose 14 hours over night and then another 5 in the pan, it had nearly doubled.
Also, it looks dry on top, yours doesn’t. Do I baste it with olive oil when it comes out of the oven?
I have not yet tasted it… 😊
Hi Britta! I do not baste it with olive oil out of the oven, but it gets a hefty drizzle/coating of olive oil before dimpling and salting it. Did you do that?
How did it end up tasting? Does your oven run cool?
Thank you for your reply! I did not yet notice that my oven runs cool to be honest.. but I thought to try and bake it at 450 next time.
Yes, before putting it in the oven it was coated with olive oil (from the oil that was in the pan and then my hands).
It tasted amazing though! I also read from someone else in here that the dough was really wet. Mine was too, so I might need to adjust the water amount a tad.
Should I try the 450 before adjusting water?
Hi Britta! I think you can do both. It’s such a wet dough that I think you could safely reduce some of the water and get great results. Also you can start the bread at 450ºF and always adjust after 10 minutes if it looks as though it is browning too much. Let me know how it turns out next time around!
This is amazing. Thank you! I am a terrible baker and I pulled this off perfectly! Delicious. So crispy and yet airy. Now I have to try not to make this every day.
So great to hear this, Rosie! Thanks so much for writing 🙂 🙂 🙂
Absolutely fantastic recipe! I’ve made it a 100 times – my family loves it! ❤️
Great to hear, Dagmar! Thanks so much for writing 🙂
Oh my. This was my first try at focaccia. It is quickly being gobbled up by my family.. there won’t be any left for diner! It is delicious!
So great to hear this, Kerry! Thanks so much for writing 🙂 🙂 🙂
Came out perfect! My new favorite foccacia recipe!
Wonderful to hear this, Alain!
I made this for a small dinner party tonight. Oh my- what a lovely bread!!! Thank you for sharing the recipe.
Wonderful to hear this Patricia! Thanks for writing!
Can this sourdough bread be made un thw crock pot?
I don’t think so.
This is such a easy recipe to follow because you’ve included a terrific video to go along with the instructions. I’ve made it quite a few times and it’s loved by everyone who tries it. I did sprinkle dried Rosemary and salt over the dough before baking!! Yum! Looking forward to trying more of your recipes!!
Thank you!!
So nice to hear this, Rose! Dried rosemary sounds delicious here. Thanks so much for writing 🙂
Made this today. I was perfect! I added garlic powder, parmesan cheese, Italian herbs and crushed red pepper flakes! So delicious
So nice to hear this! Thanks so much for writing 🙂