
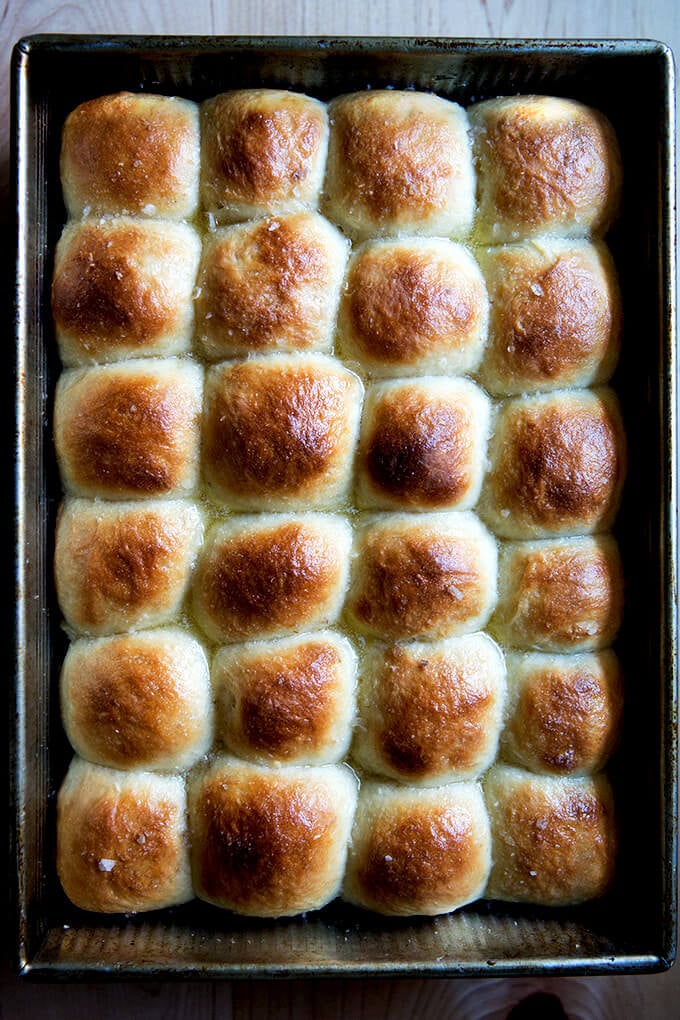
No-Knead Buttermilk Pull-Apart Rolls
This post may contain affiliate links. Please read my disclosure policy.
If you like to make bread for holiday gatherings or dinner parties, a great way to get a jumpstart on preparations is to make the dough a day in advance.
Know this: any bread recipe you love can be mixed a day ahead of time and stashed in the fridge to rise. Or, if you like making rolls, you can make your recipe up to the point where you shape the rolls and stick them in the baking pan, at which point you can stick the pan in the fridge.
As I said, you can do this with any bread recipe you love, but if you don’t have one in mind, I have a thought: buttermilk pull-apart rolls. This is a recipe from Bread Toast Crumbs, my cookbook, and I made it recently with one small change: instead of splitting the dough and baking the rolls in two pans, I fit all 24 rolls in one 9×13-inch baking pan.
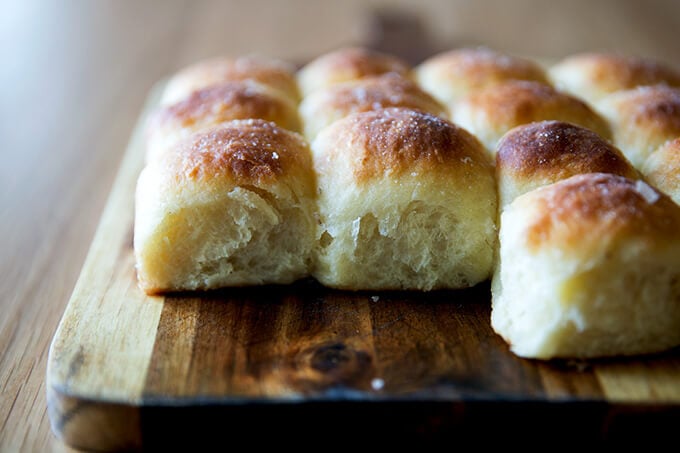
It’s fun seeing a whole mess of rolls all squished together, and my children enjoyed pulling the mass to pieces. Slightly sweet, soft and squishy, these pull-apart rolls resemble Parker House rolls in both taste and texture and are such a festive bread to serve at Thanksgiving or really any holiday gathering. Easy peasy, too. (There’s both video and photo guidance below.)
I’ve said it before, and I’ll say it again: Homemade Bread: Yes. You. Can. 🍞🍞🍞 Everyone will rave. (There’s nothing to it!)
Happy Thanksgiving, My Friends! I hope all of your preparations are going well. Happy to answer any bread (or other) questions you might have.
PS: No-Knead Thyme Dinner Rolls
Buttermilk Pull-Apart Rolls How-To:
Video Guidance in Three Parts:
Part 1: Mixing the Dough.
Part 2: Shaping the Rolls.
Part 3: Baking the Rolls.
How to Make Buttermilk Pull-Apart Rolls, Step by Step
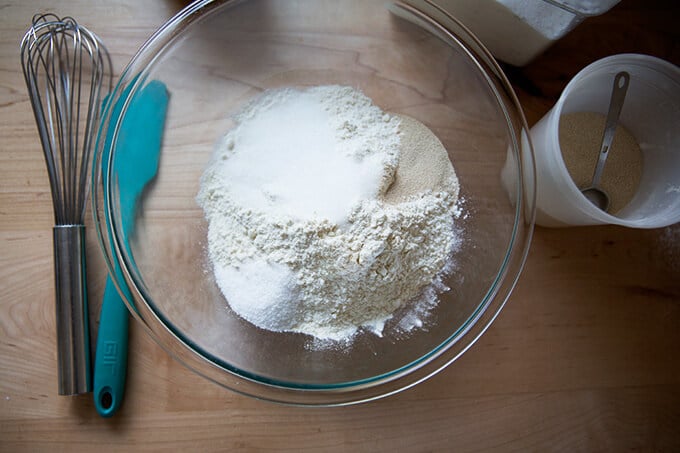
Mix together the dry ingredients: 4 cups all-purpose flour, 2 teaspoons instant yeast, 2 teaspoons kosher salt, 2 tablespoons sugar. (Metric measurements offered below.)
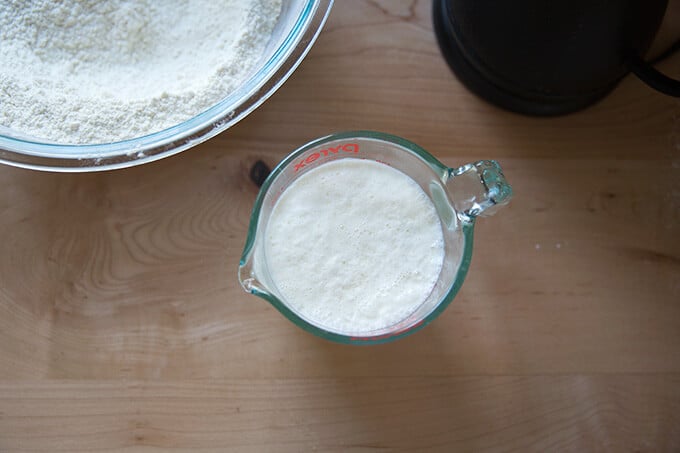
Pour 1 cup boiling water over 1 cup buttermilk and let stand for 10 minutes.
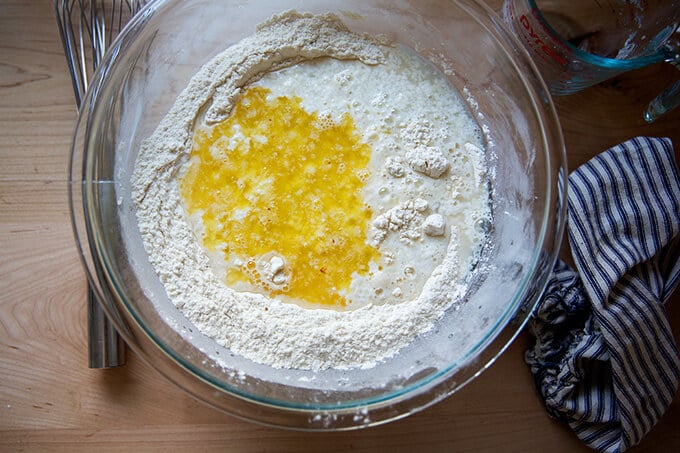
Add the buttermilk-water mixture along with 4 tablespoons melted butter to the bowl of dry ingredients.
Mix to form a sticky dough ball.
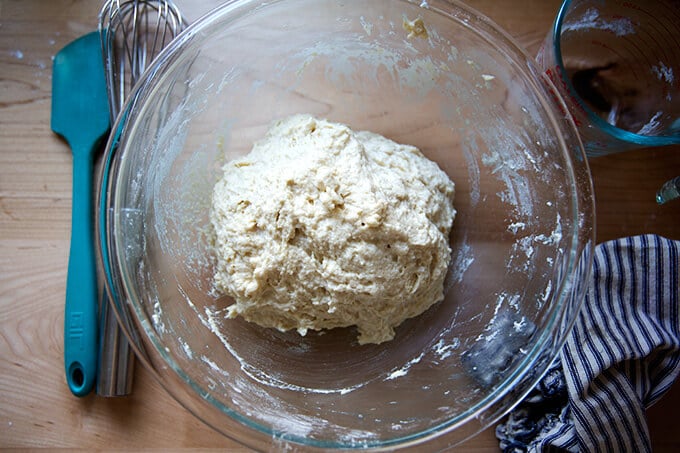
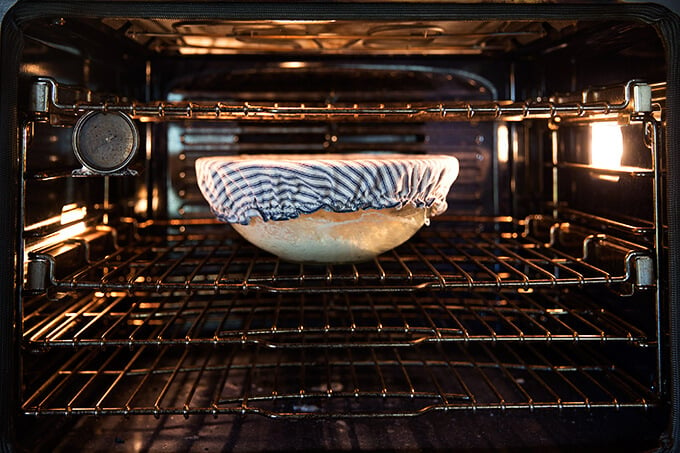
Let rise in a warm spot for 2 hours (see recipe notes for details). Love my Dot and Army cloth bowl cover.
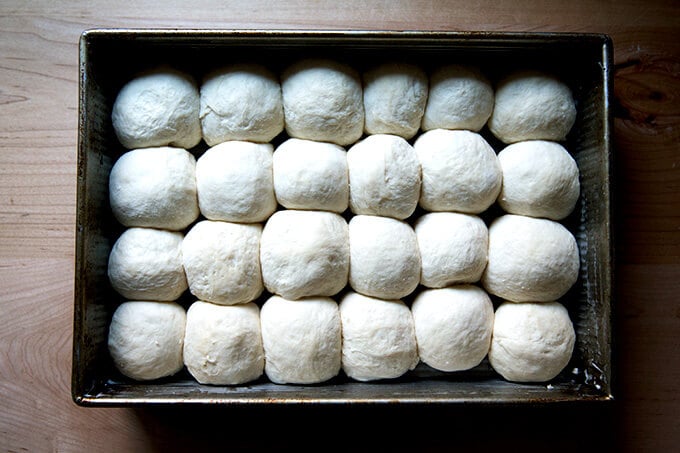
After 2 hours, the dough will look something like this:
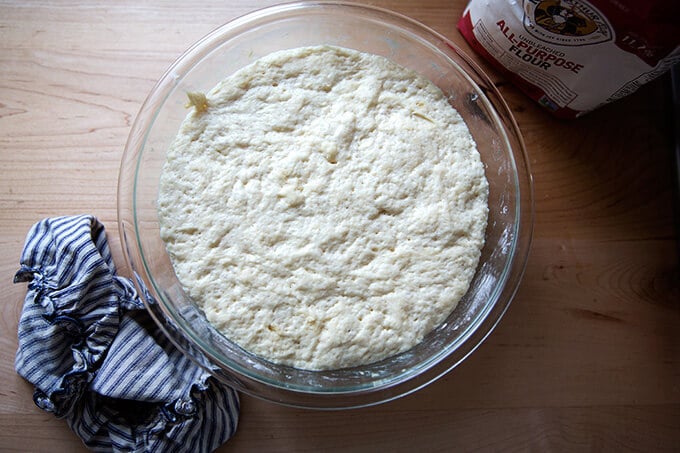
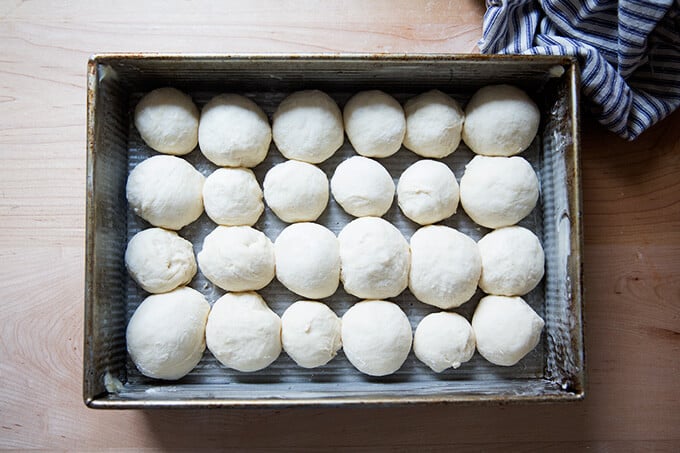
Turn it out onto a floured work surface. Divide the mass first into 4 equal portions, then each into 6 equal (roughly) portions to make 24 small pieces. (Video guidance here.) Shape each piece into a round and fit into a buttered 9×13-inch pan. (I love this 9×13-inch USA pan for so many things.)
If you have trouble shaping, try this simple technique:

Cover and refrigerate overnight.
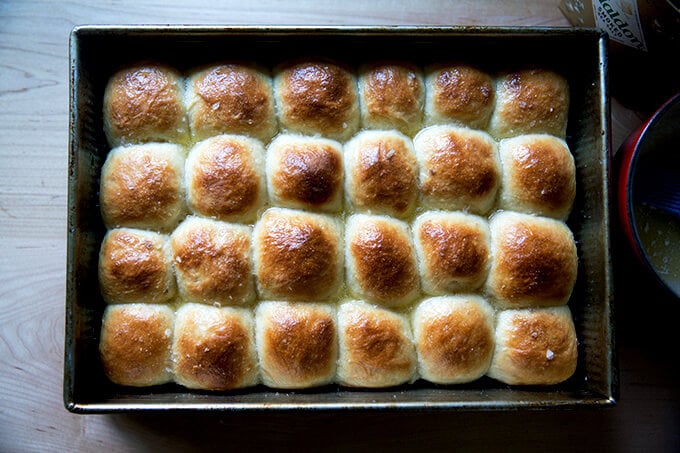
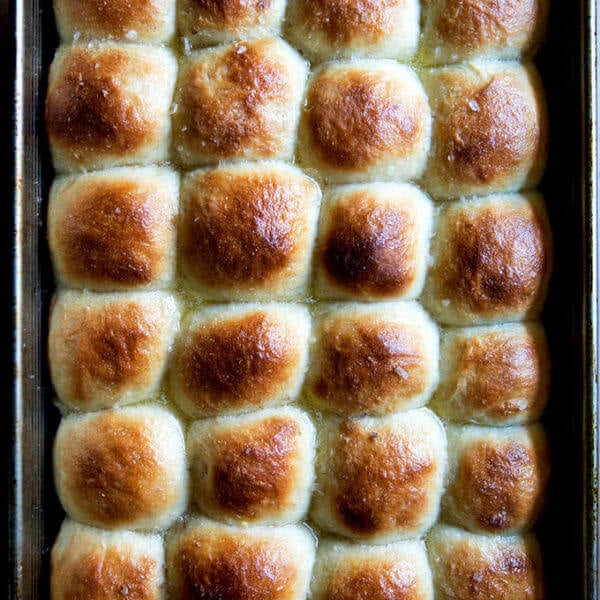
The following morning, let come to room temperature for 30-45 minutes, then bake at 375ºF for 25 minutes.
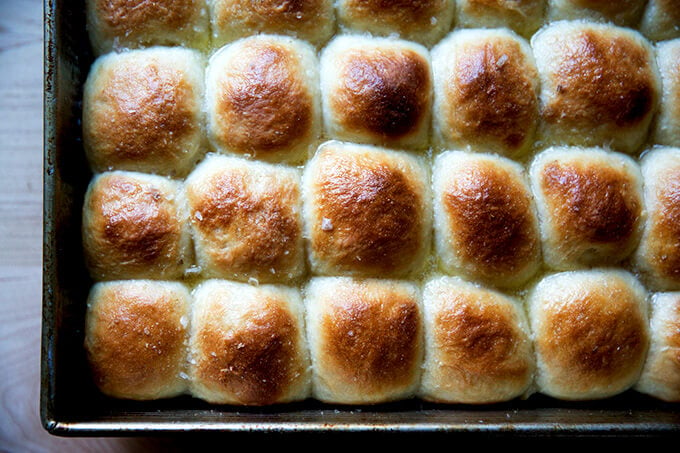
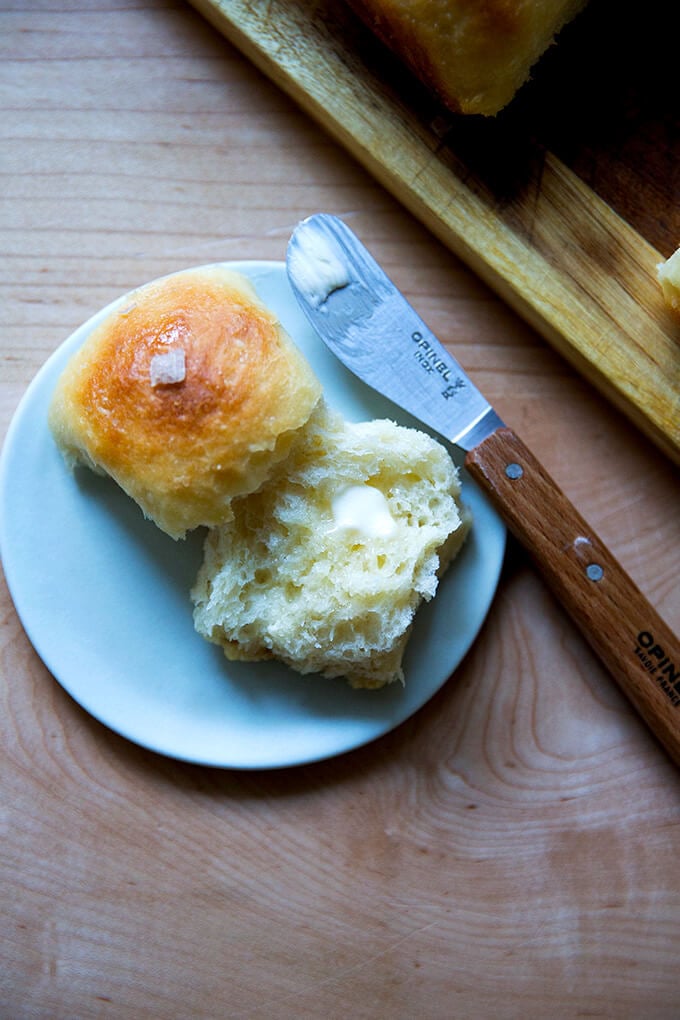
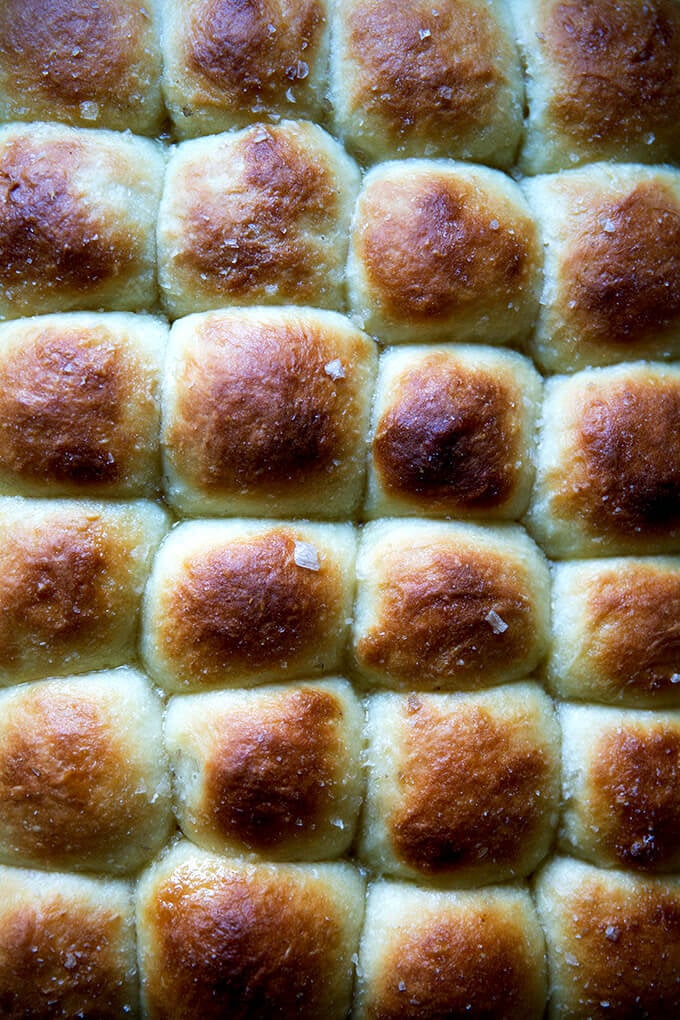
Out of the oven, brush the rolls with 2 tablespoons melted butter and sprinkle with sea salt.
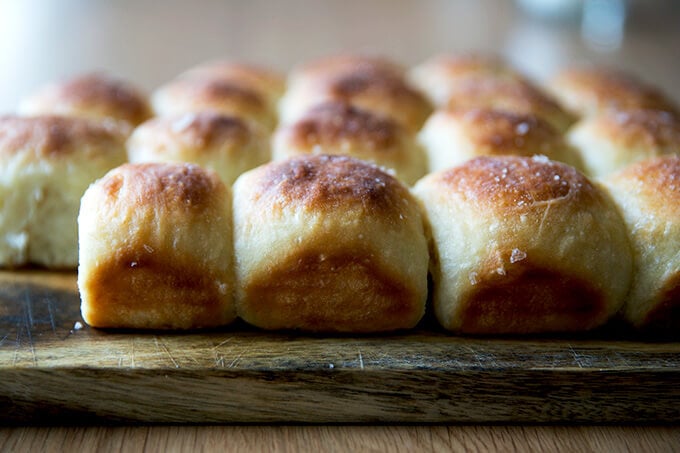
Serve immediately with softened butter.
No-Knead Buttermilk Pull-Apart Rolls
- Total Time: 3 hours 25 minutes
- Yield: 24 rolls
Description
Adapted from Bread Toast Crumbs
Notes:
- Salt: I now make these with 10 grams of kosher salt, which is about 3 teaspoons of Diamond Crystal brand, but which will vary from brand to brand. Use what you like. If you are sensitive to salt, stick with 2 teaspoons.
- Warm place to rise: To create a warm place for your dough to rise, preheat your oven for 1 minute, then shut it off.
- Other vessels: If you don’t have a 9×13-inch pan, you can use two 8- or 9-inch round or square pans. I love this 9×13-inch USA pan.
- Water: If you live in a humid environment, consider holding back 2 to 4 tablespoons of water (15 to 30 grams) — this dough is very wet and sticky, and while you can use as much flour as needed while shaping, you might save yourself some trouble by holding back some of the water from the start.
- Preparing the dough in advance: I have received questions about how many days the shaped rolls can stay in the fridge, and I recently experimented. I let the shaped rolls (with the pan wrapped in plastic wrap) sit in the fridge for 48 hours before baking them. While the texture was the same — as feathery light as ever — I did not like the flavor, which tasted sour, but not in a pleasant way. So, unfortunately, I cannot recommend stashing these in the fridge for much more than 18 – 24 hours.
Ingredients
- 4 cups (512 g) all-purpose or bread flour, plus more for shaping
- 2 to 3 teaspoons kosher salt (10 g), see notes above
- 2 tablespoons (25 g) sugar
- 2 teaspoons (8 g) instant yeast
- 1 cup (236 g) boiling water, or less, see notes above
- 1 scant cup (236 g) buttermilk
- 6 tablespoons melted butter, divided
- flaky sea salt
Instructions
-
In a large bowl, whisk together the flour salt, sugar, and instant yeast.
-
In a 2-cup liquid measure (or something similar), pour the boiling water over the buttermilk and let stand for 10 minutes. Give it a stir. The buttermilk will likely look curdled. This is okay.
-
Pour the buttermilk mixture and 4 tablespoons of the melted butter over the flour mixture. Stir until a sticky ball of dough forms. Cover the bowl with a tea towel, cloth bowl cover, or plastic wrap and set aside in a warm place to rise (see notes above) for 2 hours, or until doubled in bulk.
-
Grease a 9×13-inch baking dish. Flour a work surface and sprinkle flour lightly over the dough and around the edges. The dough will be very sticky, so use flour as needed. Gently coax the dough out of the bowl onto the floured work surface and shape into a rough ball (video guidance here) using flour as needed. Use a bench scraper to divide the ball into 4 equal portions. Shape each portion roughly into a ball, then use a bench scraper to divide each ball into 6 roughly even portions (about 45 grams each if you feel like measuring) to create 24 small pieces total.
-
Using as much flour as necessary, shape each piece roughly into a circle. It’s okay if each piece is a little misshapen. Place the dough balls into the prepared pan, spacing them evenly apart.
- At this point, you can cover the pan and refrigerate overnight. Otherwise, heat the oven to 375ºF. Let the dough rise, uncovered, for 25 to 35 minutes, or until the dough pieces have puffed to almost fill the pan. (Note: If you refrigerate overnight, remove the pan 30 to 45 minutes prior to baking.)
-
Transfer the pan to the oven and bake for 20-25 minutes, or until golden brown. Note: If the rolls aren’t beginning to brown after 10-15 minutes, turn the oven up to 400ºF. Remove pan from the oven and immediately brush the surfaces of the rolls with the remaining 2 tablespoons of melted butter. Sprinkle flaky salt over top to taste. Let the rolls cool in the pan for 5 minutes, then turn the pan out onto cooling racks and invert onto a plate or serving platter.
- Serve warm with more butter on the side.
- Prep Time: 3 hours
- Cook Time: 25 minutes
- Category: Bread
- Method: Oven
- Cuisine: American
This post may contain affiliate links. Please read my disclosure policy.


289 Comments on “No-Knead Buttermilk Pull-Apart Rolls”
These are OMG good. Made a half batch and immediately regretted that i didn’t make the full recipe after the first bite, second toll, third roll, forth roll. Enough said.
Yay 🎉🎉🎉🎉 So nice to hear this, Annier! Thanks so much for writing.
How far ahead can you prepare the dough?
I would say at least 24 hours. If you need to do it longer, be sure to brush the shaped balls with oil and tuck the pan into a large Ziploc (2-gallon) bag to prevent a crust from forming on the dough.
Question: Alexandra, Could you make and freeze ahead? Could I take the rolls out of the freezer in the morning and bake after they rise?
Yes, absolutely!
Thamk you for another delicious recipe and tutorial. Just made these and the kids ate the whole pan!
Wonderful to hear this, Ash!
Over the years I have tried many different roll recipes. This recipe is not only the easiest, but it produces the most delicious rolls ever!
So nice to hear this, Dustin! Thanks so much for writing. Happy Baking!
Hi there!! Not sure if you will see this, but if I wanted to make these for Thanksgiving can I freeze them? I saw that you said that it was possible. Would it be best to bake them completely, or stop after step 5 and freeze. Thank you so much!!! Hope you are good.
-Christy
Hi Christy! Sorry for the delay here. You can definitely make the recipe through step 5 and then freeze them OR you can make them completely let them cool, freeze, thaw at room temperature; then re-heat before serving. Either method works great. Do what’s best for you in terms of timing and oven space.
Question: Can you skip the initial two-hour proof and stick the dough directly in the fridge to shape the rolls the next day? Proof in pan at room temperature and then bake?
Hi Joshua, and yes, definitely! Apologies for the delay here. Happy Thanksgiving!
Brilliant! Thank you for the recipe and the reply. I know it’s a crazy busy time. This recipe was great and the rolls were well-received at my thanksgiving table for two!
So nice to hear this, Joshua! Thanks so much for reporting back!
These are delicious and a must on my holiday table. As I am planning for my feast for just 2 this year, I realized I had never commented on their goodness!
Great to hear, Carla! Thanks so much for writing. Happy Thanksgiving!
Hi Alexandria
– These rolls are delicious – I have made them many times. I am now an avid sour dough baker and wondering if I can use the discard from my starter in place of the buttermilk.
Thanks. Have a wonderful holiday.
Anne
Hi Anne! So sorry for the delay here. And great to hear all of this.
I have not used discard in this recipe, but my suggestion would be to use some of the discard in place of a combination of the water and flour. So, if you want to use 100 grams of starter or discard here, I would subtract 50 grams of water from the 1 cup (236 g) of water, and I would subtract 50 grams of flour from the 512 grams of flour.
Does that make sense?
Or are you trying to omit the buttermilk altogether? Finally, are you still planning on using yeast?
These are so good! I made some to try out before the holidays and my husband’s eyes lit up. He said “you have to make these for Thanksgiving!” This is from the man who always talks me down from my overly ambitious menu plans and wants me to buy everything at the store. (-:
I was surprised that my buttermilk didn’t look curdled as you said but they turned out so it didn’t matter.
So great to hear this, Carol! I am mixing up my dough today for tomorrow’s dinner. So glad your husband approved, too! Happy Thanksgiving!
Has anyone tried this with gluten free flour (cup4cup)? Thoughts? Adjustments?
By the way – I love all your recipes and your acct is the most delightful thing on Insta.. to watch you prep and bake or cook is a wonderful pastime..
Thank you, Anne-Brigitt! Nice to see your name here. I hope all is well! I have not tried g-f flour here. The one g-f bread recipe I have borders on being a batter, so I wouldn’t suggest using it here. That said, I wonder if you could look at that recipe, maybe replace some of the liquid with buttermilk, and then bake it in muffin tins, which would give you a roll shape. Let me know if you give it a go!
Great idea – I will try this and let you know!! Happy Thanksgiving 🦃
Do you think I could use oat milk with apple cider vinegar to make a dairy free buttermilk?
Yes, absolutely!
Hi! I’ve been making your sourdough sandwich bread since the spring (Covid sourdough like every else). My whole family loves it! Thank you so much for such an amazing recipe!
My question For this recipe is, could I use yogurt instead of buttermilk? I can do the lemon juice in the milk trick as an alternative, but wouldn’t mind using up this languishing yogurt in my fridge if you think it would work.
Hi Zoe! So nice to hear this! So sorry for the delay here regarding using yogurt. I have never tried with this particular recipe, but I have used yogurt in other bread recipes, so I think it will 100% work here. Go for it!
Thank you!!! I’ll let you know how it goes!
So easy! Guaranteed hit at the holiday table!
Thank you Ali for helping make baking bread
accessible to the masses! Love all your recipes!
Great to hear this, Janine!! And thank you for your kind words 🙂 🙂 🙂
Can I use active dry yeast instead of instant?? 😬
I accidentally (like didn’t read the directions) and put 1 tsp of ADY in the half recipe. Then I freaked out and mixed the rest of the packet in a bit of water with a pinch of sugar to dissolve and activate, then mixed that in. It has been 2 hours and it is raising fine. I have no idea if I did the right thing till I taste it after baking, I guess.
How did it turn out? I do these things all the time. Amount of yeast is actually something that is very forgiving.
Turned out fine, the dough seemed a bit slack, but not sure, since i never made them before. I bought some instant yeast yesterday!
Great to hear re instant yeast! It’s a game changer. Are you using a scale to measure?
Yes! So sorry for the delay here. You’ll want to sprinkle it over the water-buttermilk mixture once it has cooled — be sure it has cooled sufficiently. You want the liquid to be lukewarm so that it doesn’t kill the yeast. Sprinkle the yeast over the buttermilk mixture and let it stand for 15 minutes; then proceed.
Thanks. I treated the non-instant yeast as I do when making recipes that call for it. The rolls were great, looking forward to trying them again with instant yeast! And I do have a scale, thanks.
Ok great, wonderful to hear all of this!
These are delicious! Yet another one of your recipes to add to my collection.
It was only 4 of us this year for thanksgiving so I actually have rolls left over. How should I store them to ensure freshness?
So great to hear this, Cristi! I am a fan of ziplock bags or other airtight containers/vessels. Ziplock is not environmentally ideal, but I do think it works better than the environmentally friendly options I’ve tried (paper/cloth). If you don’t think you’ll eat the rolls in the next few days, freeze them!
Made these yesterday to go with soup for a group of young adults. Because our family is accustom to whole wheat, this was a practice run before Christmas. I substituted in1 cup home-ground white whole wheat flour. I personally only got to taste one. They ate the entire pan! I would say these were a winner. Wondering if I can get away with a higher ratio of whole wheat to white all purpose flour?
So great to hear this, Susan! I think you can definitely try adding more. I personally never do much more than 50% whole wheat flour, but home-ground, stone ground is something I’m not completely familiar with in terms of how to recommend substituting. I would just experiment with 2 cups and see how it goes … if it’s too dense, next time, use a little bit less. Happy baking!
Made this again today! I used King Arthur Flour dried buttermilk powder instead of buying buttermilk. It’s 1/4 cup powder for 1 cup of buttermilk so no fuzzy calculations for this recipe! I mixed the butter in with the buttermilk and boiling water so they cooled down together. Also I added a tablespoon of King Arthur Flour pizza dough flavor to give a garlicky flavor. Instead of using a plain butter brushing on top of the rolls, I used Kerrygold’s garlic and herb butter. It added a really nice touch. Really nice savory rolls!
Oh yay, Sonia! Thank you so much for sharing this and for sharing the powdered buttermilk conversion … so helpful. I really need to buy both of these products you mention bc they sound soooooo nice to have on hand. Love Kerrygold, too, and will look for that garlic-herb butter. Thanks for writing, Sonia!
Ali,
I am making these today and will freeze after baking. What are your thoughts re brushing with butter/sprinkling salt right out of oven. Do you think it matters if I do this step then freeze or hold off until I reheat and then brush with butter/salt?
Hi Denise! I think it would be fine either way, but I like your idea of holding off until you reheat them — I think it will taste fresher and better.
Fantastic recipe, thank you so much for sharing! I first tried making some mainly to use up my buttermilk but they were so good I made another batch (I made half portions) 2 days later. Love them! Your recipes (sourdough, bagels) are really easy to follow and very doable!
So nice to hear all of this, Christie! Thanks so much for writing. Someone messaged me recently saying she had used this dough to make cinnamon rolls and it worked beautifully … can’t wait to try!
Fell flat so it is hard to know what it would have been. Of course, the texture was terrible. I thought the rising process throughout was delicate. I wondered at the small amount of yeast. Also I am unconvinced that no kneading will work for bread.
Hi Sandra! Bummer to hear this didn’t work out. Questions: What type of yeast are you using? Are you using a scale to measure? What do you mean by “the rising process was delicate”? Did the dough double in volume during the first rise?
This recipe is perfection! I was looking for dinner rolls to serve with ham and bean soup. I didn’t plan ahead to allow for the overnight proofing that most recipes require. These rolls came out soft, flaky and delicious. The buttermilk enhances the flavor. This recipe will be my new go-to for dinner rolls. Thank you for sharing!
So wonderful to hear this, Jan! Thanks so much for writing 🙂 🙂 🙂
Can I use active dry yeast, if so , how do I go about it ? Thanks in ad Vance
Hi Jordan!
To use active dry yeast, in place of the boiling water, use 1 cup of lukewarm water: combine 3/4 cup cold water with 1/4 cup boiling. This will be perfectly lukewarm. Sprinkle the yeast over the lukewarm water and let it stand for 15 minutes. Then proceed with the recipe.
Phenomenal recipe! I was craving buttermilk biscuits but I don’t have a biscuit cutter. I’m so glad I found this recipe. The rolls were a heavenly mix of doughy yeasty rolls and buttery buttermilk biscuits. These will be my go-to dinner rolls from now on and I’ve passed the recipe along to a few others. Thanks for the wonderful recipe!
Wonderful to hear this, Christina! Thanks so much for writing and thanks for sharing the recipe with others, too 🙂
If I were eloquent in speech, I would write a poem. But I am not. All I can say is, these are DAMN GOOD AND DAMN EASY. And I am slightly emotional eating them. You know, I love cooking, I actually owned a restaurant and was the chef (not classically trained, but it was my kitchen, so I get to call myself chef). I cook pretty good. But baked bread always stumped me, too rigid in instructions, very little room for error. I always wondered how women baked in the old days and without scales! But you have made a baker out of me. I took this recipe and made savory rolls filled with cooked down and rouxed up leftover french onion soup + plenty of crushed fresh garlic, carmody and feta cheese. And because the center of rolls always seem like missed opportunities I lined up smooshed medjool dates right smack in the middle, like a tootsie pop. This is currently in the oven, if it is pretty and there is still some light, I will post on IG and tag you. 🙂
I did just bake off a batch following this recipe and THOSE are the ones that made me weepy. Thanks, seriously, for these approachable recipes that never sacrifice taste or quality. <3
Oh! I used kefir in place of the buttermilk, stopped buying buttermilk, too short a shelf-life, however I always have greek yogurt, sour cream, and/or kefir and they seem to work great as buttermilk substitutes. I do water down the sour cream or yogurt usually. The kefir I use as 1:1 replacement.
Tina!! Oh my goodness, thank you for all of this 🙂 🙂 🙂 I don’t know where to begin? It means the world to hear you find the recipes approachable because that is my primary goal with bread baking — too often recipes are overly complicated and the results don’t warrant the effort. Your Medjool date rolls sound amazing — I live on Medjool dates with almond butter all day long. And thank you for your tips re buttermilk substitutions — so many people have a hard time finding it, so it’s nice to be able to offer substitutions. I love kefir. Will try that next. Thanks again for writing!
Hi! I haven’t made these yet, but I was just wondering if I can use this recipe to make the peasant bread?? I like this recipe because it uses buttermilk, so I was just wondering…
Yes, absolutely! Go for it 🙂
Alexandra! I am a full on fan! I was introduced to your recipe from a friend and have wow’d so many guests and shared the recipe so many times. I even have the book , which is so beautiful and fantastic! These dinner rolls will be my next go to! Thanks so much for sharing.
Oh yay, so nice to hear this, Maureen!! Thanks so much for writing and for sharing all of this … means a lot 🙂 🙂 🙂
We made these rolls for Easter dinner, and they were just perfect. So easy, soft and pretty. The half-pan leftover slowly disappeared from the cupboard over the next couple days, reaching this incredible stale-but-not-hard, delightfully chewy state that worked perfectly with your to-die-for mustard sauce. I can’t seem to rate or leave a review on that one, so I’m adding it here: Ohmyword, your family is such a treasure trove of tasty recipes! I am not a mustard person (would never purposely add it to a sandwich, but wouldn’t turn a mustarded sandwich away), but this sauce is *incredible*. We regularly make real Bavarian pretzels around here, and this mustard sauce will be replacing our cheese sauce. It’s just heavenly. I couldn’t stop dipping and gobbling whatever bread I could find! Thank you, thank you, so much for sharing it with us!
Oh yay! Kritin, thank you so much for all of your nice comments! ALSO: thank you for letting me know you couldn’t leave a comment on the mustard sauce post … for some reason comments were not allowed there. I am going to copy and paste your comment from here to there (hope that’s OK with you!) Also Bavarian pretzels with this sauce sounds absolutely amazing. Thank you for writing!
Hi, I would like to try making this. I am thinking: instead of shaping them into dough balls and baking them in a pan, I would like to plop the dough into muffin tray and bake them, like how you did it in your easy, no-knead thyme dinner roll recipe. Do you think this recipe will work using the muffin tray method? Thank you very much!!
I do think it will work! Go for it. Love this idea 🙂
Thank you so much! I baked this before I received your reply, so I baked them in a 8 x 8 pan (I halved the recipe). They are so good! Half the rolls were gone within 5 minutes . Thank you again. Next time, I will try the muffin tray method.
Oh yay! Wonderful to hear this 🙂 Thanks for reporting back.
Very silly question! I noticed that the dough is nearly identical to the peasant loaves (why, yes, I do make it often enough to not need the recipe anymore) and I’m wondering since the amount of liquid is the same (2 cups), if I could just bake this one in 2 bowls instead of doing the rolls? I absolutely want to do the rolls eventually; I just rarely have the time on week days for the extra step and also FINE I AM LAZY!
You absolutely can bake these in two bowls 🙂 🙂 🙂 I totally hear you re: TIME. Sometimes there is just not enough.
I have been reading through the comments to see if anyone else asked this question but I did not see it. So my question is, can I prepare the dough, shape the biscuits then freeze the unbaked dough? Can I bake from frozen or will the dough need to thaw out first? Very excited to put these on my Thanksgiving table!
Hi Clarissa,
Theoretically, you can — I have done this with other doughs. You will definitely need to thaw overnight in the fridge or at room temperature for 4-6 hours before baking. That said, I have not tried doing this with this recipe, and I would hate to lead you astray, especially on Thanksgiving. I am inclined to advise you to simply bake them ahead of time, freeze them, then reheat on Thanksgiving. I worry about freezing the unbaked dough.
Hey! It’s my first making this! I hope they turn out good…it was very sticky to work with
How can I avoid that the next time around?
Thanks for your feedback
Elaina 🙂
Hi Elaina! Are you using a scale to measure the ingredients?
These rolls were a big hit last Thanksgiving, so I’m looking forward to baking them again this year. I plan to bake them ahead of time and then freeze them. I have some questions about reheating:
1. Do you suggest reheating at 350 for 10 minutes?
2. Do you separate the rolls first or leave them attached?
3. What kind of pan do you reheat in? Should rolls touch?
4. I assume I don’t cover them with foil?
Thanks!
Great to hear, Pam! I would thaw them at room temperature overnight on the counter. And I would reheat at 350ºF for at least 10 minutes … they may take more like 15 minutes — just keep an eye on them.
I would leave them all connected — no need to separate. You can reheat them on a sheet pan. No need to use foil.
Happy Thanksgiving!
Hello! I am trying this recipe for the first time. I saw in comments that it could be frozen at step 5… how much extra time would the dough need to come to temperature/rise before baking? I’d like to have warm rolls if possible. Thank you very much for recipes that are consistently so good!
Hi Nicole, I would transfer the pan to the fridge the night before Thanksgiving; then bring it to room temperature on Thanksgiving morning to rise at room temperature.
Alternatively — and this is the advice I give more often because it’s just simpler — simply bake the rolls entirely the day before serving. Let them cool completely. Transfer to a ziplock bag (still all stuck together), then on Thanksgiving, while the turkey is resting/being carved, pop them in the oven for 15-20 minutes at 3500F.
Good luck! And Happy Thanksgiving!