
Prosciutto & Arugula Sandwich on Ciabatta
This post may contain affiliate links. Please read my disclosure policy.
 ciabatta bread, it's delicious. // alexandracooks.com")
In addition to mascarpone sorbet, my gnudi-making debacle, which left me with pounds of semolina flour in my pantry, has led to another pleasant discovery: relatively easy and completely delicious ciabatta-like sandwich rolls.
It turns out that when one cup of the all-purpose flour in the peasant bread dough is replaced with one cup of semolina flour, the loaves transform a bit, becoming at once chewier and lighter in texture and slightly more golden in color.
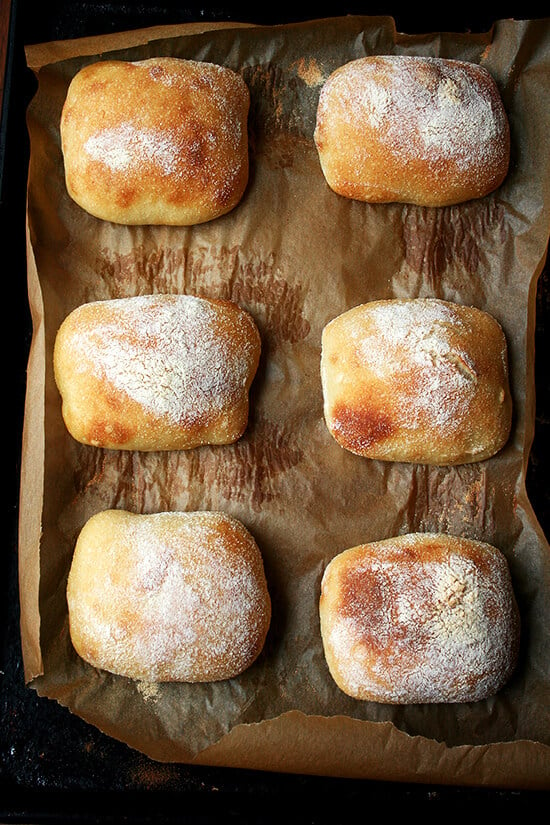
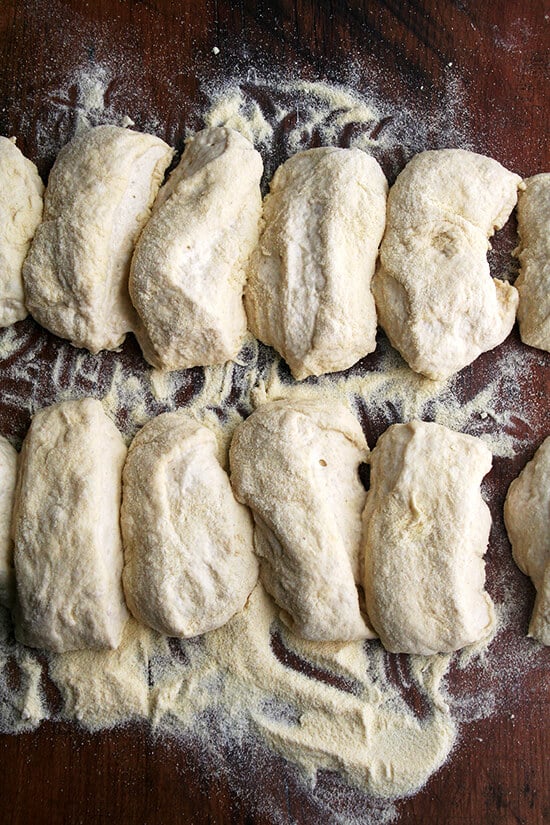
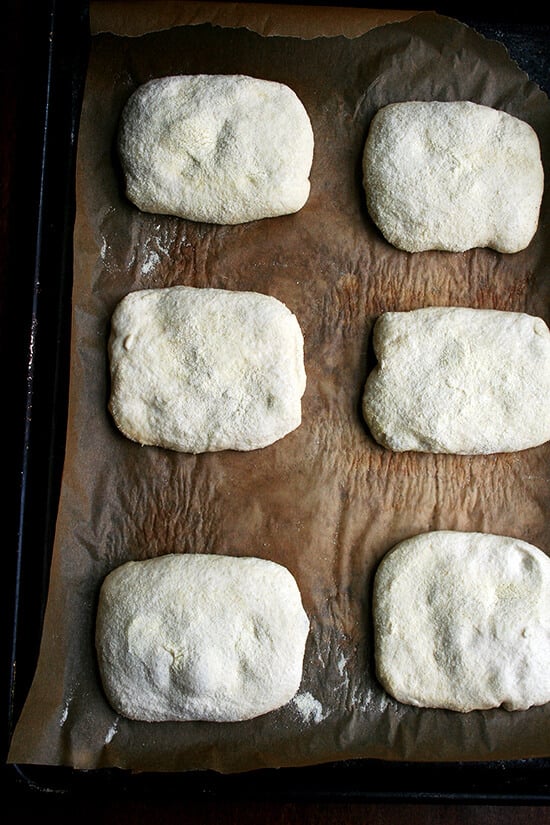
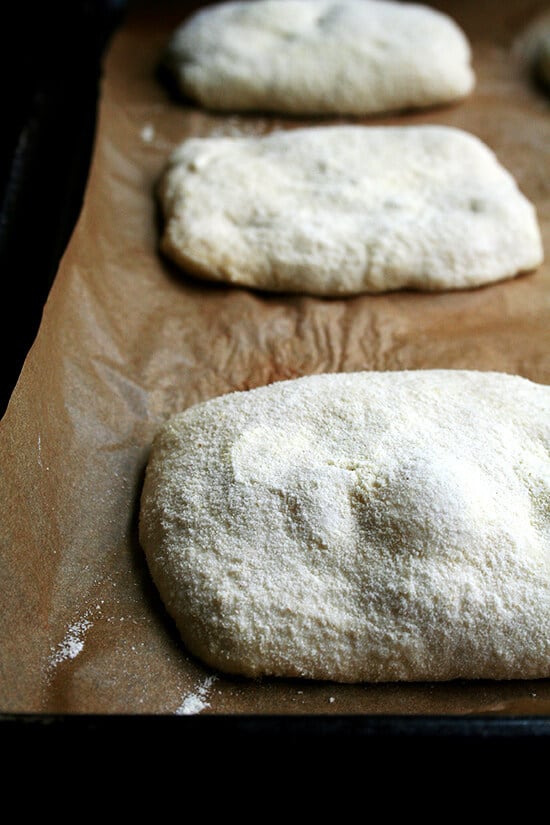
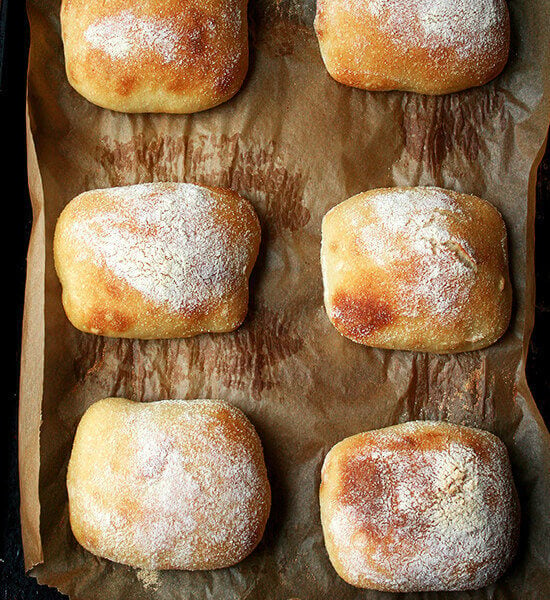
And when the dough, instead of being shaped into two loaves, is portioned into roll-sized pieces and sprinkled, just like those ever-so-promising gnudi, heavily with semolina flour, and gently stretched into squares or elongated “slippers,” it bakes off into light sandwich rolls, crispy on the exterior and soft on the interior.
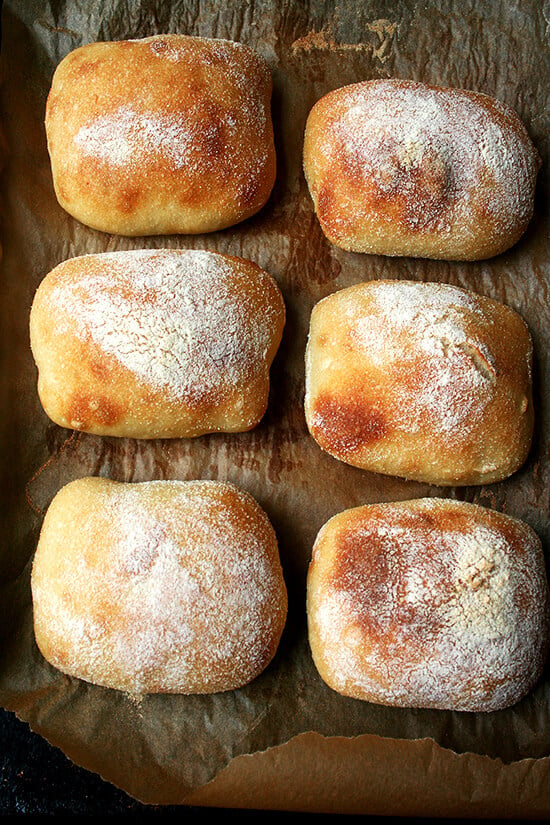
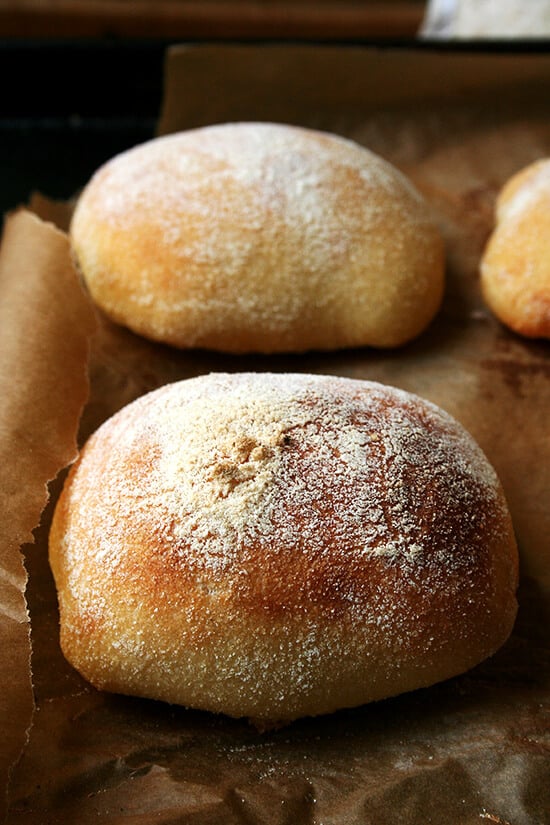
But when the unbaked rolls are allowed to be pampered just a bit more by an overnight rest in the fridge, they bake off even more beautifully, becoming even crispier on the exterior, more porous on the interior, feather-light in weight, gorgeously golden in color, and resembling in taste the most delectable ciabatta, so well suited for housing any number of sliced meats and cheeses, fried eggs and bacon, or slices of mozzarella and tomato.
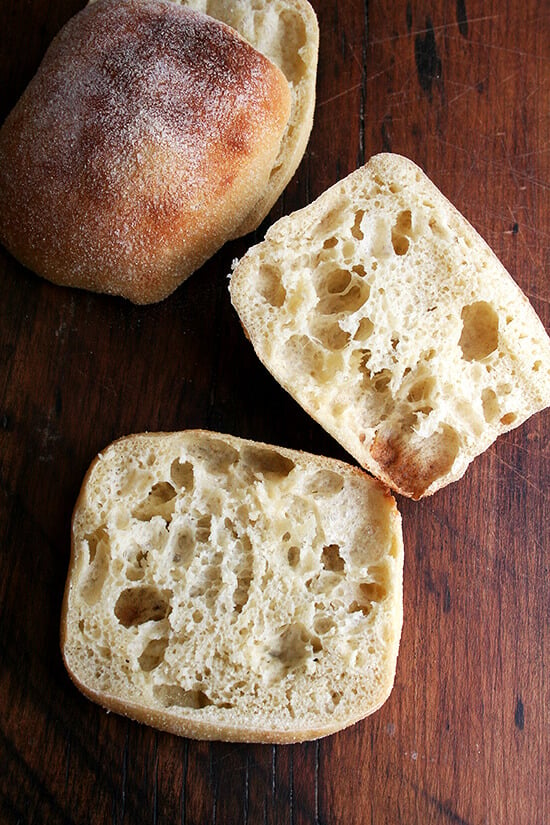
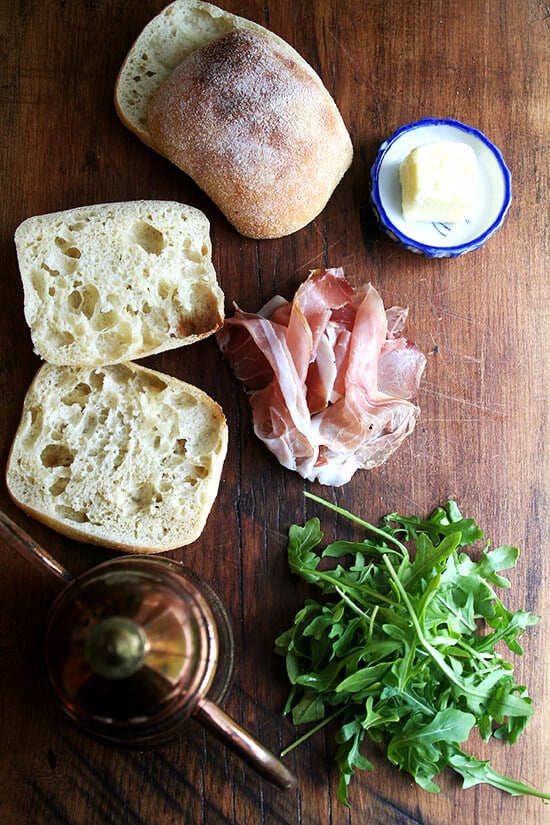
Upon halving the rolls and observing the beautiful web of craters stretching from crust to crust, I couldn’t help but think about a sandwich I have dreamt about making and eating since reading Gabrielle Hamilton’s Blood, Bones & Butter last summer.
The sandwich, prepared by Gabrielle’s ex-husband during their courtship, at its core is simple — arugula and prosciutto drizzled with olive oil layered between good bread. Anyone could prepare this quite well. And Michele (the ex-husband), who had dressed the sandwich with oil pressed from olives from his own orchards in Puglia, gave it a good go. But it turns out that perfect execution of this sandwich takes a little more thought.
For Gabrielle, the success of the sandwich relies on a delicate balance, “the perfection of three fats together — butter, olive oil, and the white fat from prosciutto or lardo,” and Michele’s sandwich, which needed a “smear of cool, waxy, butter,” as well as more meat, fell short.
While I can’t say that my palate would have discerned the trinity of fats working in concert to produce the perfection Gabrielle describes, I can appreciate the beauty of this sandwich and how such simple ingredients, each subtle in flavor, can work together in a synergistic fashion. Without any fancy pesto or creamy aioli or spicy mustard, the combination here is utterly delicious, and the first half of my sandwich disappeared quickly. But before I could declare my lunch a complete triumph, I returned to the fridge one last time. Despite my heavy hand, the sandwich needed more meat.
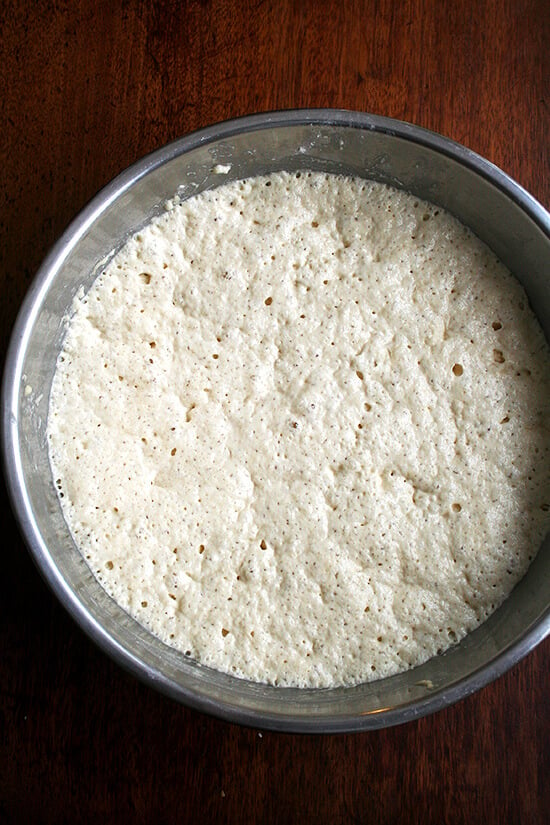
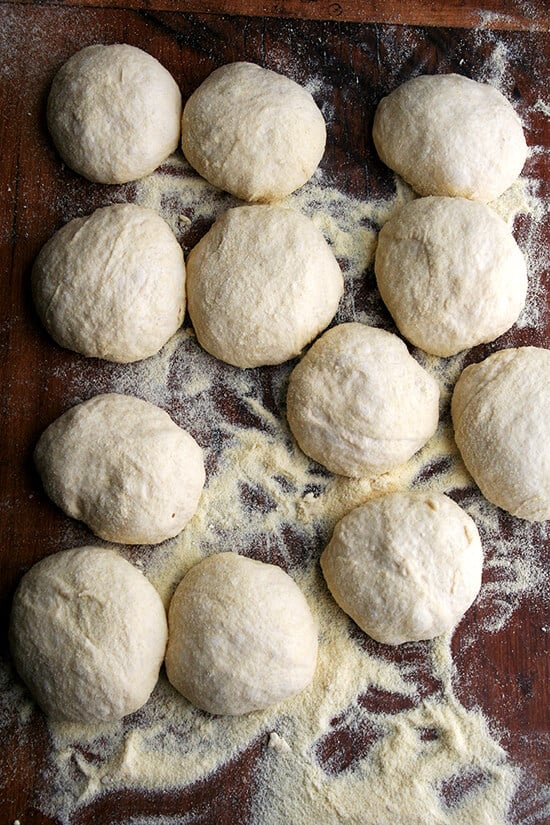
After a night in the fridge, the balls look like this:
The balls can be stretched into the classic “slipper” shape or into whatever shape you like best. I like rectangles:
 ciabatta bread, it's delicious. // alexandracooks.com")
Faux Ciabatta
- Total Time: 24 hours 20 minutes
- Yield: 12 rolls
Description
A few notes on ciabatta:
- Originating from the Lake Como region of northern Italy, ciabatta means “slipper” in Italian, and traditional ciabatta is characterized by this slipper shape as well as an extremely porous and chewy texture.
- Traditionally, ciabatta dough is very wet, calls for very little yeast, and requires a long, slow rise.
- Traditional recipes, too, often call for making a biga (a preferment), which helps produce that light, porous texture.
A few notes on this recipe: The dough for these rolls is simply the peasant bread dough made with roughly 1.5 cups of semolina flour and roughly 2.5 cups of all-purpose flour. The recipe yields 12 rolls, which is a lot to store in the fridge without doing some rearranging, which I am sure many of you are accustomed to doing, but which I know can be a hassle, too. I have made these ciabatta rolls twice now and both times have baked off six on the first day and six on the second day. Storing 6 rolls in the fridge on a small sheetpan is easier than storing a dozen on a larger pan. The change in texture of the rolls when baked on day 2 is dramatically different than when baked on day 1, but the rolls are still delicious on day 1 (just not as light and airy — not as much like ciabatta). If you have the space and if time permits, then by all means store all of the shaped rolls in the fridge overnight, but if you don’t, know that you can bake them on the first day you make them, too.
Ingredients
For the Ciabatta:
- about 3 cups (scant cups) (13 oz) all-purpose flour* (do not use bleached all-purpose)
- about 1 cup (a heaping cup) (5 oz) semolina flour plus more for dusting
- 2 teaspoons kosher salt
- 2 cups lukewarm water**
- 2 teaspoons sugar
- 2 teaspoons active-dry yeast***
* The 13 oz. of ap flour and the 5 oz of semolina flour is accurate — the total weight should be 1 lb. 2 oz, as it is in the peasant bread. If you are using dry measuring cups, the ratio might be a little off, but don’t worry too much — it’s a forgiving mixture.
** To make fool-proof lukewarm water that will not kill the yeast (water that’s too hot can kill yeast), boil some water — I use my teapot. Then, mix 1 1/2 cups cold water with 1/2 cup boiling water. This ratio of hot to cold water will be the perfect temperature for the yeast.
***I buy Red Star yeast in bulk (2lbs.) from Amazon. I store it in my freezer, and it lasts forever. If you are using the packets of yeast (the kind that come in the 3-fold packets), just go ahead and use a whole packet — I think it’s 2.25 teaspoons. I have made the bread with active dry and rapid rise and instant yeast, and all varieties work. If you are interested in buying yeast in bulk, here you go: Red Star Baking Yeast Also, if you buy instant yeast, there is no need to do the proofing step — you can add the yeast directly to the flour — but the proofing step does just give you the assurance that your yeast is active. King Arthur Flour sells SAF instant yeast.
For the Sandwich
- good bread (see ciabatta roll recipe below)
- butter, slightly softened
- prosciutto, thinly sliced
- arugula
- olive oil, good olive oil if you have some on hand
Instructions
- In a large mixing bowl whisk the flour and the salt. Set aside. Grease a separate large bowl with butter or olive oil and set this aside. (This is optional actually — I just let the bread rise in the same bowl that I mix it in.)
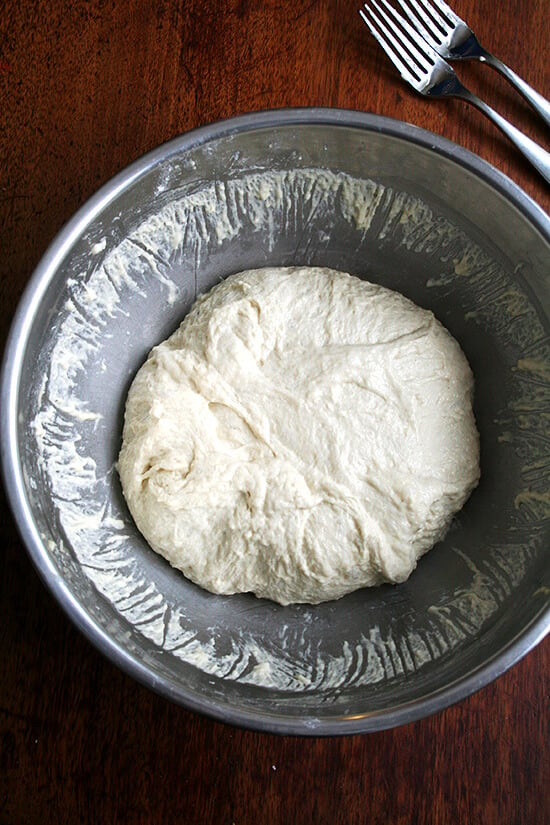
- In a small mixing bowl, dissolve the sugar into the water. Sprinkle the yeast over top. There is no reason to stir it up. Let it stand for about 10 to 15 minutes or until the mixture is foamy and/or bubbling just a bit — this step is just to ensure that the yeast is active. (See photos on peasant bread post for more guidance.) Now, gently stir it up, and add to the flour bowl. Stir this mixture up with a spatula or wooden spoon. Mixture will be wet. Scrape this mixture into prepared greased bowl from step 1. (Or, if you’re feeling lazy, just cover this bowl with plastic wrap or a tea towel.)
- Cover bowl with a tea towel or plastic wrap and set aside in a warm spot to rise for at least one hour. To create a warm spot: Preheat the oven at a low setting (200ºF or so) for a total of one minute (in other words, do not allow the oven to get up to 200ºF and then heat at 200ºF for 1 minute — this will be too hot), then shut it off.
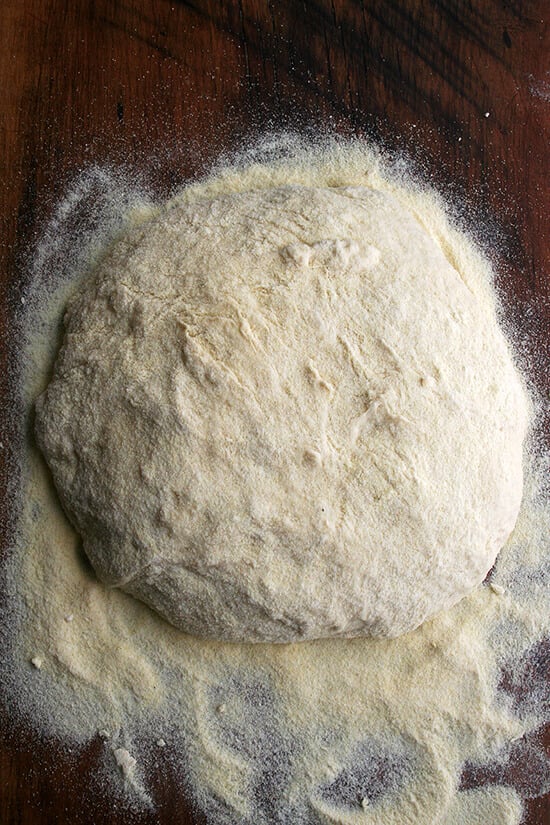
- Preheat the oven to 425ºF. Using two forks, punch down your dough, scraping it from the sides of the bowl, which it will be clinging to. As you scrape it down try to turn the dough up onto itself if that makes sense. You want to loosen the dough entirely from the sides of the bowl. Sprinkle a work surface generously with semolina flour. Sprinkle some more flour into the bowl with the dough. Turn the dough out onto the work surface and sprinkle with more semolina flour if it appears to be sticking anywhere. Using a sharp knife or a bench scraper, coating as needed with semolina flour, divide the dough into twelve roughly equal pieces. (This is what I do: divide the dough in half first; then divide each half in half; then divide each of these quarters into thirds.)
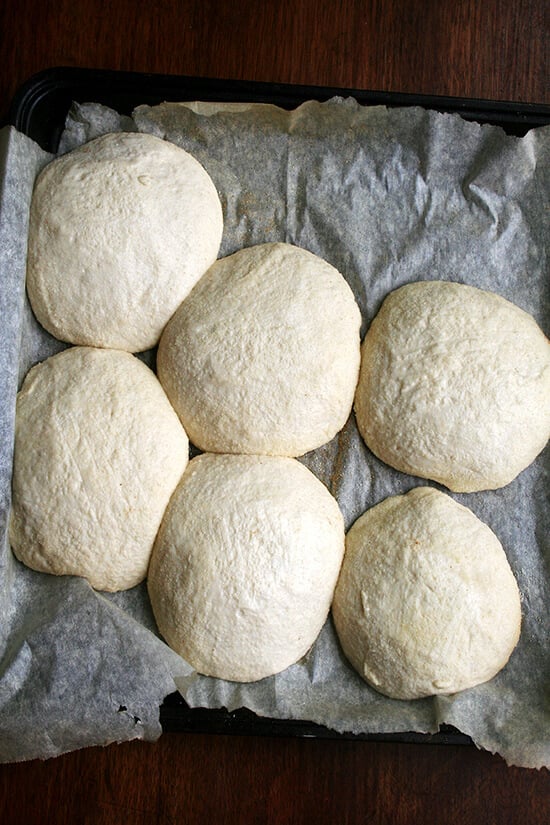
- Roll each portion of dough into a ball. If you are storing all of the balls of dough in the fridge overnight, place them on a parchment-lined baking sheet spacing them out evenly so that there is space around each ball if possible. Sprinkle each with semolina flour, then cover the pan with plastic wrap and store in the fridge. If you are planning to bake off some of the rolls immediately, let the balls rest on the work surface for 10 minutes. Meanwhile, line a baking pan with parchment paper. After the 10 minutes, gently lift up one of the balls and stretch it into a square or the more classic elongated “slipper” shape and gently lay it on your prepared baking sheet. Repeat with five more (or fewer) of the balls — six is a good number to bake off at one time. Let the rolls rise on the baking sheet for an additional 20 minutes then place them in the oven for 15 minutes on the lower or middle rack. Take a peak. If they are looking too golden after the 15 minutes, reduce the temperature to 375ºF. Bake for an additional 5 minutes or so. To check for doneness, peak under one of the loaves — it should look slightly browned and should sound hollow when tapped. Remove pan from oven and let rolls cool on cooling rack for 15 minutes or so before using.
- When you are ready to bake off the rolls that have rested overnight, sprinkle the balls lightly with more semolina flour, carefully lift each ball from the sheet pan, gently stretch each into the desired shape, and lay each shape on a parchment-lined baking sheet — try as best you can to not completely deflate the balls during this process. Let rolls rise for about 30 minutes — they won’t look significantly risen or puffy after the 30 minutes. Bake as directed in step 5.
- To make the sandwich: If you are using rolls, split them in half. Spread each half with butter. Don’t be shy. Top one half with a few slices (more than you think you will need) of prosciutto. Top the prosciutto with a handful of arugula. Drizzle both halves of the sandwich with olive oil. Close the sandwich and eat.
- Prep Time: 24 hours
- Cook Time: 20 minutes
- Category: Bread
- Method: Oven
- Cuisine: American, Italian
This post may contain affiliate links. Please read my disclosure policy.


70 Comments on “Prosciutto & Arugula Sandwich on Ciabatta”
Wow! I can’t wait to make this. Thank you so much for the detailed description. Blood, Bones and Butter was fantastic and filled with so much culinary inspiration.
Lisa — I know, wasn’t it? I want to give it to everyone I know?
Oh wow, these are beautiful!! I’m definitely going to make this soon as this is a sandwich that is already a favorite and I’m tired of buying ciabatta rolls! I meant to tell you a while back, but after I read about the gnudi debaucle I had to look up some info about them–I wasn’t familiar with the process or the dish, but I ran across an article that said to completely bury the gnudi in a tub of semolina. It didn’t seem like they needed to be turned or anything while they’re in it. I wonder if that might work. Have you made them again since?
Tracey — This is genius! THanks so much for sharing the technique. I haven’t made them again since, but I really want to. They just sound like something that is too good to not try at home at least once. I will definitely try the complete submersion technique next time around. And I will be sure to report back here when I do 🙂
Those ciabatta rolls look absolutely perfect, just like ones you’d find in a bakery! I’m in awe!
This looks like absolute perfection. Will try this weekend!
Your pictures are stunning. This sandwich looks like something that needs to be on my plate, stat!!
Mr & Mrs. P, Tracy, Julie — thanks!
Oh my goodness, these little rolls looks just like the ones they serve at Atticus in New Haven. I LOVE those rolls, which I would smear with butter and devour before even starting in on the black bean soup. I’m going to have to try these, and this sandwich, but sadly I think I’ll have to wait another 3 months before eating prosciutto (never really know if it’s on the do or don’t eat list while pregnant – I think Americans say no, Spanish probably say yes, and I’m guessing there are a lot of groups in between). I think in the mean time I’ll make a BLTs, and skip the mayo in favor of butter and oil. Delicious!
Talley — omg, I LOVED that black bean soup. I had kind of forgotten about it. I wonder if it’s still as good as it was? I’m heading up to the Have at the end of the month…must stop by Atticus! I hope you are feeling OK!
I don’t care if this is real or faux ciabatta, it looks fantastic! I love the giant holes!
wow… Beautiful ciabatta rolls!!!! Bet there were delicious!!!
Loveliest ciabatta ever! Am I surprised coming from ak? No. 😉
Great book Ali….I loved it…..I think I’ll go hunt it down to re-read….the sandwich looks amazing and I’ll add it to the evergrowing list of things I have to make when my kitchen is back amongst the land of the living….:)
Julie — I hope you like them!
Laurie — I have been wanting to reread this book, too. I just loved it. I find myself thinking about it often.
Carol — you are sweet. Thank you!!
Thank you so much for posting this recipe … it’s just what I’ve been looking for. They look amazing and I will definitely try them out this weekend.
I love rolls. I love sandwiches. I would eat a roll with everything or by itself. I’m thinking of all the fresh sandwiches I can make right now. I love this recipe!
Thanks, Pamela!
I love that book and I love your blog; both are feasts for the senses!
Darcy & Val — Thanks! I hope you do get to try them!
Julie — thanks so much! I know, isn’t it such a great book? I have wanted to post on various parts of it for so long, and I hope to share some of the other passages I find myself thinking about often in upcoming blog posts. We shall see 🙂
These rolls have been pinned, I can’t wit to try them. They remind me of the triangle shaped rolls from Costco, at least in looks.
I’m sold!
This bread looks spectacular! I can’t wait to try, very perfect for the start of picnic season!
A masterpiece of a post! Seriously~
awesome… just awesome!
The way my dog salivates when he sees food being poured into his bowl is the way I felt after reading this post and looking at your beautiful photographs. I loved your peasant bread so I can’t wait to try these rolls!
Oh Trish, I love it! I hope the rolls turn out well for you. I think I will be making them all summer!
My first time at your post & I love it.
I also recently found myself with more semolina flour than I knew what to do with and after an extensive search I found some of my favorite recipes.
semolina dumpling soup — https://smittenkitchen.com/blog/2008/05/semolina-dumpling-soup/
semolina pizza dough — https://leitesculinaria.com/79749/recipes-semolina-pizza-dough.html
roman gnocchi — https://www.foodnetwork.com/recipes/mario-batali/gnocchi-alla-romanaroman-style-gnocchi-recipe/index.html
Lissa, SallyBr, Aurora & Janie — Thanks!
Hi! I’m just starting to make these and have a quick question. When I was weighing the semolina 1.5 cups weighed almost twice what you have on the recipe (9.75 oz). I went with the cup measure, just on instinct. Can you double check that weight? I hope I haven’t screwed it up. Thanks!
Hi! I’m so sorry about this. I am sure the dry measurement is a little off, and I am going to make a note of it. The first time I made it, I weighed out 3 cups of ap flour, which is 13.5 oz, and then just poured semolina flour into the bowl to get the total weight up to 1 lb 2 oz. (I was estimating that 1 cup of semolina flour weighed 4.5 oz.) The next time I made it, I just weighed 13 oz of ap flour and 5 oz of semolina to make the numbers more round. So, the volume measurements are much less precise — I really should have noted this! — than the weight measurements. I’m so sorry. Honestly, I don’t think it will make a difference in a bad way — I have made the peasant bread with two cups of semolina flour (9 oz), and it came out beautifully. In any case, I’m going to make notes now. Again, sorry for the confusion!
Thanks for the reply! So far the dough looks great.
Oh, wonderful. Let me know if you have any other questions along the way! I think one of the keys when you go to shape the rolls is to handle the balls of dough that have rested in the fridge as delicately as possible so as to not completely deflate them. You can quite easily shape them into rectangles or slippers with a few gently motions. Hope that helps!
Your breads always looks amazing. so hungry now!
Thank you for this great recipe! I tried it over the weekend, but without room in my fridge for the individual rolls on baking trays, I let the whole batch of dough rest overnight in the fridge and then shaped the rolls, baking them after just a short rise. They turned out great! I have described this version on my blog, with a link back to your original recipe. I hope you don’t mind me sharing your recipe. -Alex
Alex — good work on just storing the dough over night in the fridge…that certainly would save space! And your rolls look perfect! So happy you liked them.
I was going to say the same thing about these rolls reminding me of the rolls at Atticus – they look perfect! I work in New Haven and can say that the black bean soup is just as wonderful as it has always been. Thank you so much for sharing this recipe. I have been wanting to make ciabatta for ages but have been so afraid of the potential let-down if it didn’t turn out like my favorite Atticus bread. Now I have no reason not to try!
Tara — how fun! I love New Haven. So happy to hear that the black bean soup is just as wonderful as always. We are definitely going to have to stop by when we are there at the end of the month. I am suddenly craving this black bean soup. We’ll of course have to find time for Bar, too. Can’t wait!
Thank YOU. I’ve been looking for a ciabatta roll recipe with no biga/starter. I have read that using biga creates an even better bread but I’m impatient and want to take a crack at it this way. I’ve started breads later in life, I’m 43 and have been trying bread recipes for less than a year but I love baking pastry and have been since age 3. My grandfather, a baker started me young. He would be thrilled to know I’ve finally given bread a chance. I will post back and let you know how my maiden voyage with ciabatta turned out. Thanks also for the very clear explanatory style directions. 🙂
Cindy — I think bigas do make better breads, but I am the same as you…a little impatient. I have made these several times already this spring and can’t get enough of them. Let me know if you have any other questions.
Hi Alexandra,
I’ve been meaning to leave a comment that I made these and liked the recipe very much. Will do it again for sure. I even made the sandwich (but used a super-creamy Brie instead of butter, so I guess I didn’t REALLY make it). Anyway, thanks again for these wonderful ideas.
More importantly than ciabatta and great sandwiches, though, congratulations on your new addition to the family. She is just beautiful. (And please don’t feel the need to reply to this!)
Lucy T, you are sweet 🙂 Thank you. Love the idea of making this sandwich with brie. I bet it tastes even more buttery. So glad you liked the ciabatta.
I made these today, but for some reason they didn’t rise very much in the fridge the second time, so I didn’t get those lovely air bubbles and they were quite flat. Also, I had a lot of difficulty stretching them into a rectangle shape since the dough was so sticky. Any suggestions?
Olivia, hi! Sorry to hear about your troubles. I have a few thoughts. What kind of yeast did you use? And How long did you let the first rise go? I just edited the instructions (and I’m sorry I didn’t do this before you made the rolls) but I made a few discoveries recently with rise times and yeasts. Active dry yeast seems to be a little more forgiving; instant yeast seems to be less forgiving, so it’s important that the first rise does not go too long if you use instant yeast — if you let it rise too long, the second rise will be problematic (non-existent even). So, and again I really need to clarify the recipe, but to be safe, I would let the first rise (regardless of yeast) to go no more than an hour especially since the second rise will be so long. As for sticking, I would say go liberal with the extra semolina flour — it adds a nice outer coating to the bread and helps prevent sticking to your fingers and the pan. Hope that helps! Let me know about yeast/first rise and I will get back to you.
Hi,
I just finished making 48 of these rolls, and while the making of them was not difficult, the end result is rather disappointing.
I’m an experienced baker, bread baking included, and I was pleased with the dough, the rise, etc.
The problem I ran into was that the rolls were more dense than airy, and had no holes. They were more like an english muffin than ciabatta.
Also they refused to brown….I had to turn the oven to broil for about a minute when they were done baking.
I did refrigerate my dough, I used rapid rise yeast, the first rise was just under an hour…
Any suggestions or thoughts on what I might’ve done wrong?
Thanks. 🙂
Jennifer, hi! And I am so so sorry for this delayed response as well to hear that the rolls didn’t turn out for you 🙁 That is always disappointing, especially when you dedicate so much time and resources and expect good results. OK, my first question is what kind of semolina flour did you use? That might be the issue with the browning, because someone else commented here and made the rolls over on her blog, and they puffed nicely, but they weren’t golden the way mine were, which made me curious as to the kind of semolina flour she was using: [link no longer active] I am a little perplexed about the texture. This definitely is a dough that benefits from being handled very delicately so as to not depress all of the lovely air pockets that form overnight in the fridge. Did you find that the rolls deflated a bit when you shaped them into rolls? Let me know, and I’ll brainstorm more. So sorry for the trouble with the recipe 🙁
Alexandra, what brand/kind of semolina flour do you use?
I use the Hodgson Mills brand. I have a picture on this post: https://alexandracooks.com/2012/02/10/rosemary-semolina-bread-with-sea-salt-from-seattles-macrina-bakery/
It’s really the only brand I can find. Do you have one you recommend?
Nope! Ihaven’t used semolina flour (yet!) but in reading the comments on this post, it seems that the brand may have a bearing on whether or not it browns, so I thought I’d try to use the same brand you used if I can. I know my usual store carries Hodgson Mills, so hopefully they’ll have their semolina flour. Thanks for your response!
Of course! I have been meaning to revisit this recipe. You are inspiring me.
Can this recipe be halved?
Lindsay, I am sure it can be, but I have never tried. I say go for it!