Easy Sourdough Sandwich Bread
This post may contain affiliate links. Please read my disclosure policy.
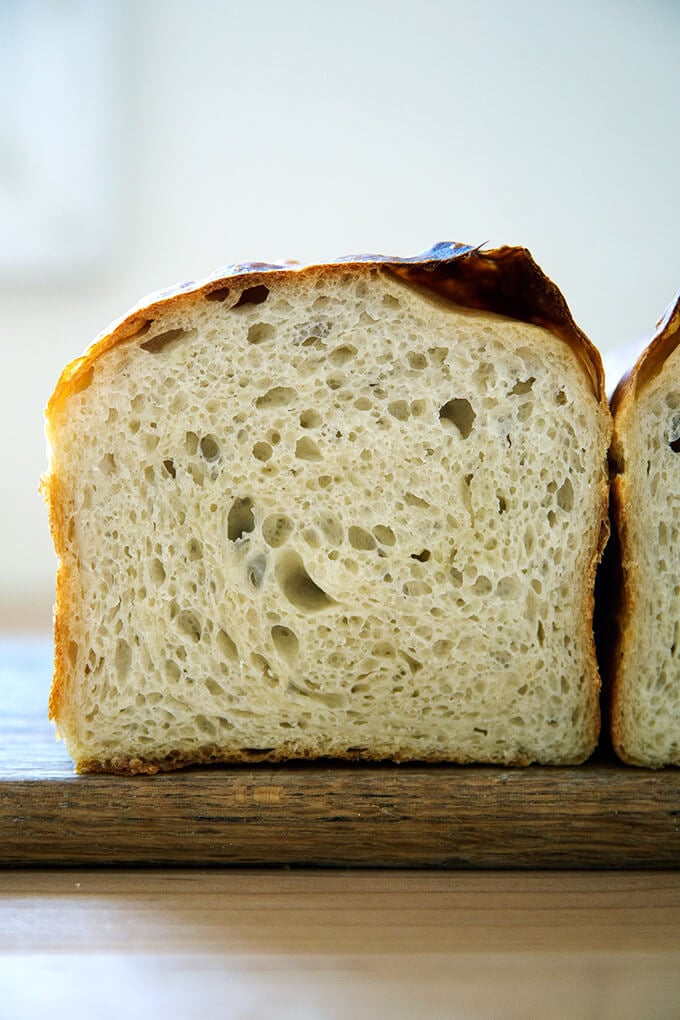
As I mentioned a few weeks, a number of requests about how to make my mother’s peasant bread with a sourdough starter encouraged me to dip my toe into the wonderful world of naturally leavened breads. You can read more about that experiment here, which led to this simple sourdough focaccia recipe, an adaptation of my favorite yeasted, refrigerator focaccia.
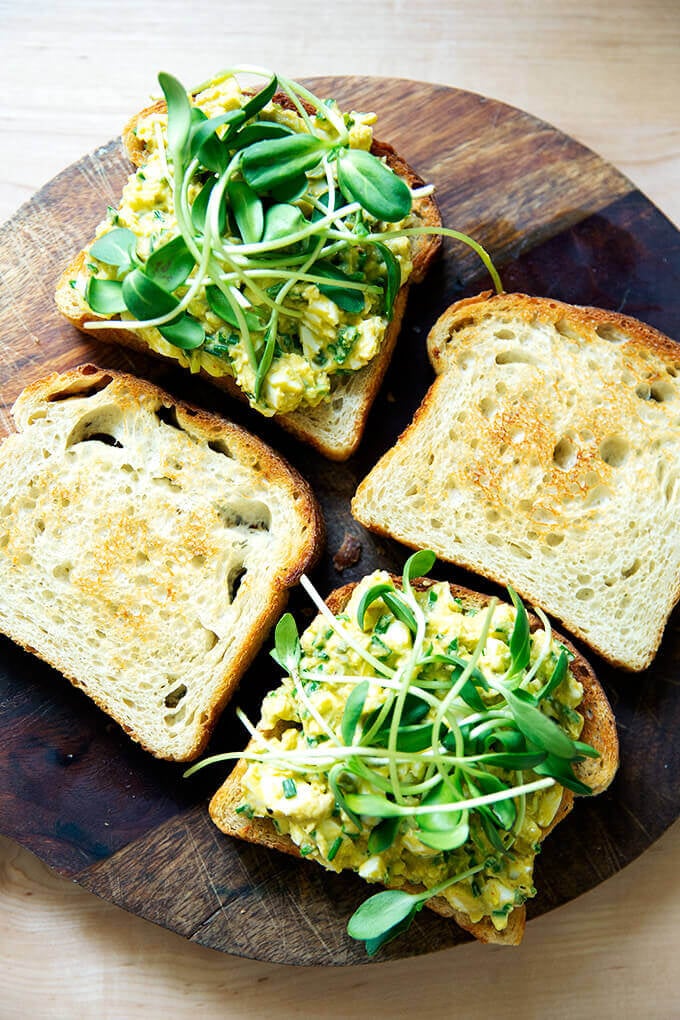
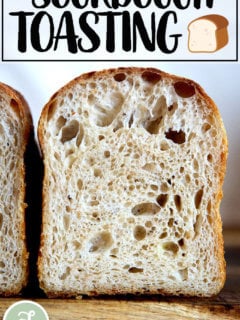
It also led to this sourdough toasting bread, which is essentially the same formula, just baked in a different vessel and without the slick of oil and sprinkling of sea salt on top. I’ve been making this bread even more often than the focaccia these days because I love the shape: it’s so nice for morning toast and for sandwiches.
PS: How to Build a Sourdough Strater from Scratch
PPS: How to Activate, Feed, and Maintain A Sourdough Starter
Simple Sourdough Toasting Bread: What You Need
- A sourdough starter. I recommend buying one (read why here). But if you’re up for it, you can make one from scratch in just about a week.
- Time. As with the focaccia, this bread rises first for about 6 to 18 hours (depending on the time of year and strength of your starter), then again for another 4 to 6.
- A large loaf pan. I’ve been using this 10 x 5-inch loaf pan. If you only have two smaller loaf pans, such as 8.5 x 4.5-inch pans, you’ll need to split the dough in half after the first rise.
That’s it! Ready? Here’s the play-by-play:
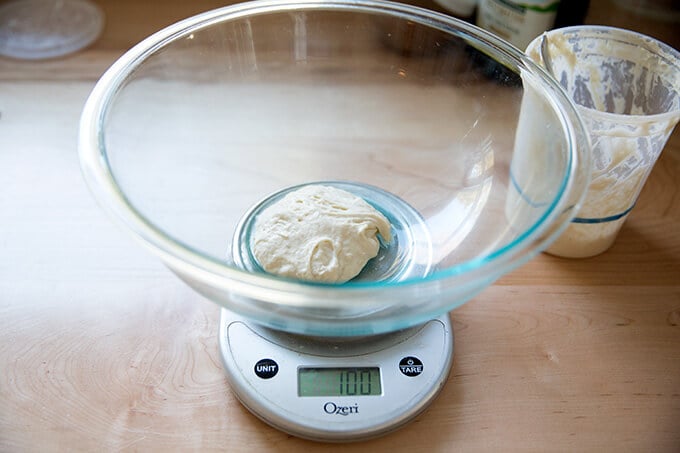
As always, when mixing sourdough doughs, it’s best to weigh everything with a digital scale. Start with 100 g starter. (If this looks familiar, it is: this is the same basic process for the sourdough focaccia.)
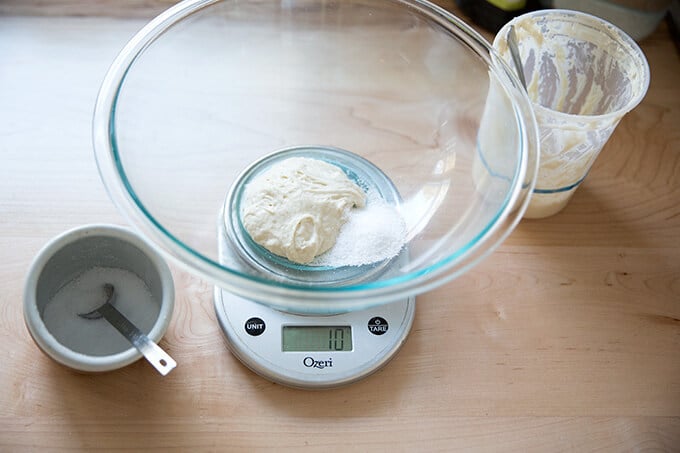
Add 10 g kosher (or other) salt.
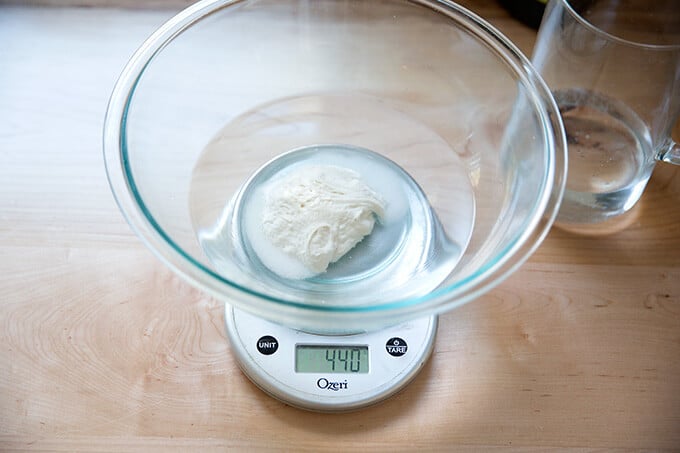
Add 430 g water. (Or less, see recipe for notes.)
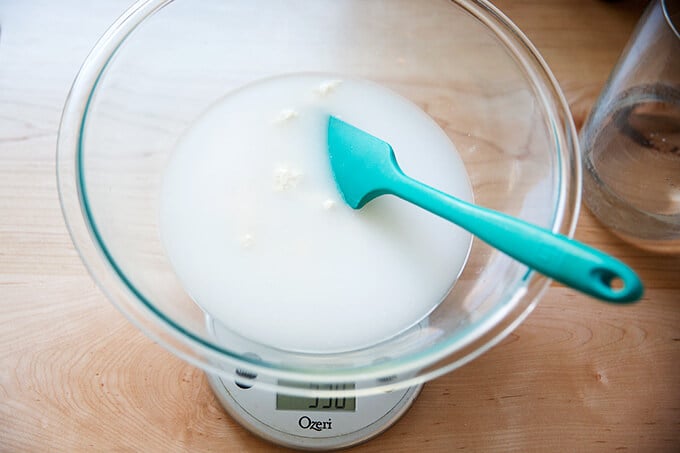
Stir to combine.
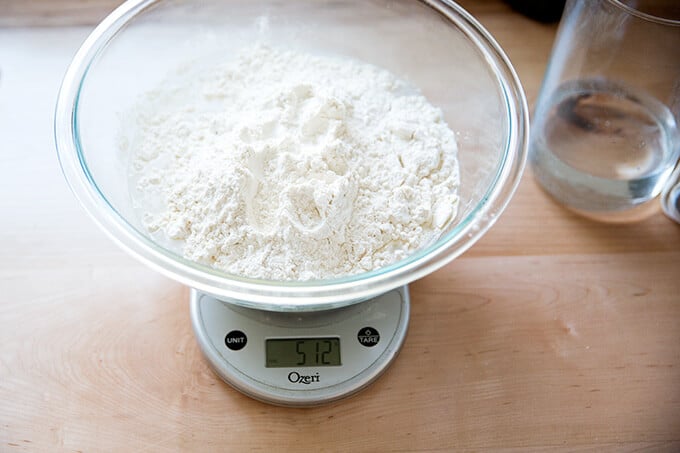
Add 512 g bread flour.
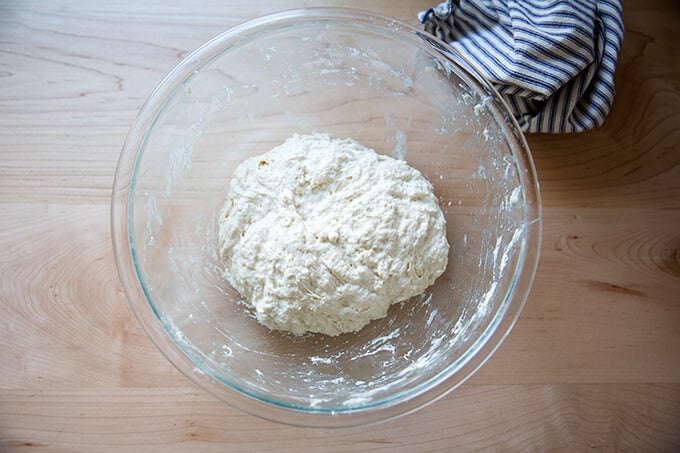
Stir to form a sticky dough ball.
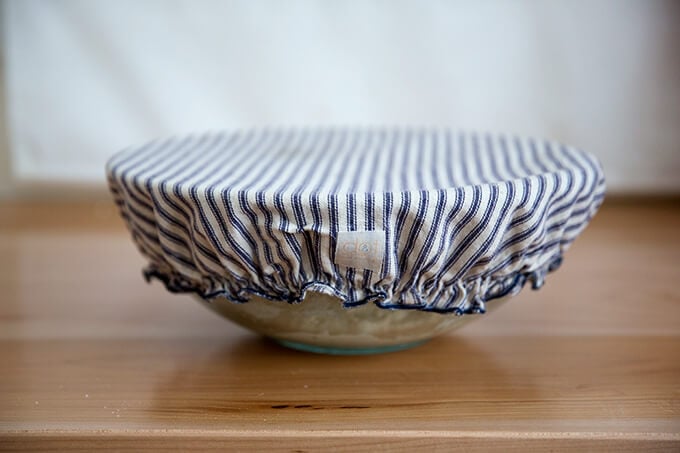
Cover with a towel or bowl cover, and let rest for 30 minutes. Then, perform a series of stretches and folds. See video for guidance. Repeat this 3 more times for a total of 4 sets of stretches and folds during the first two hours. Then, let rise for 6 to 18 hours* (see recipe notes) at room temperature:
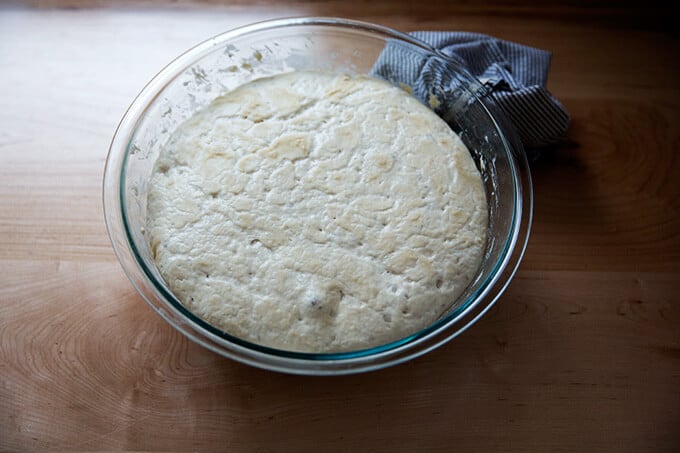
After 6 – 18 hours, it will look something like this:
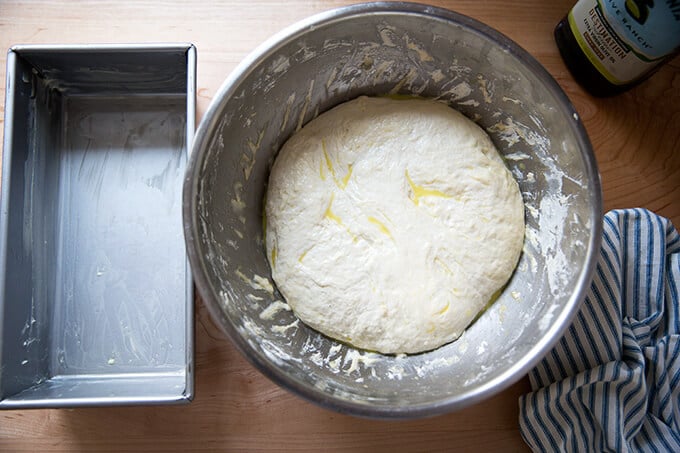
Drizzle the surface of the dough with a little bit of olive oil; then fold the dough inwards from the sides to deflate.
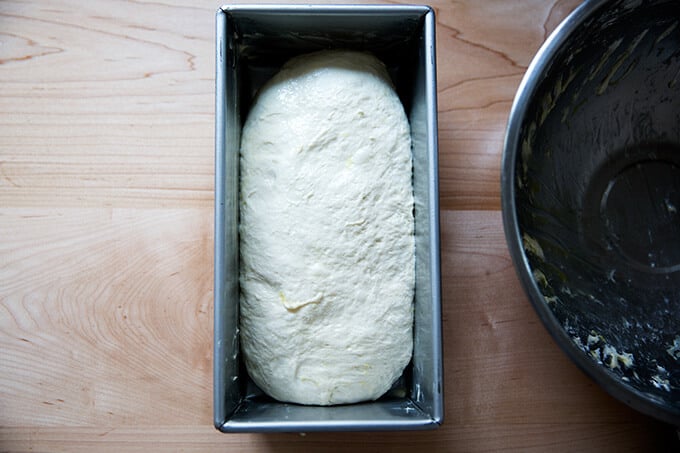
Transfer dough to loaf pan.
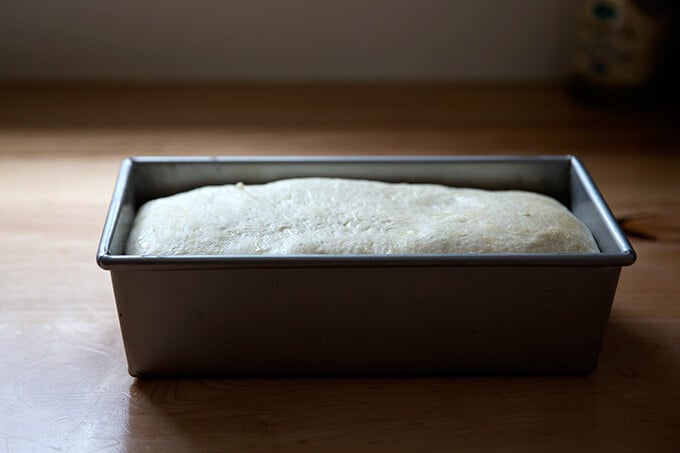
Let rise till dough just begins to crown the rim of the pan, about 6 hours.
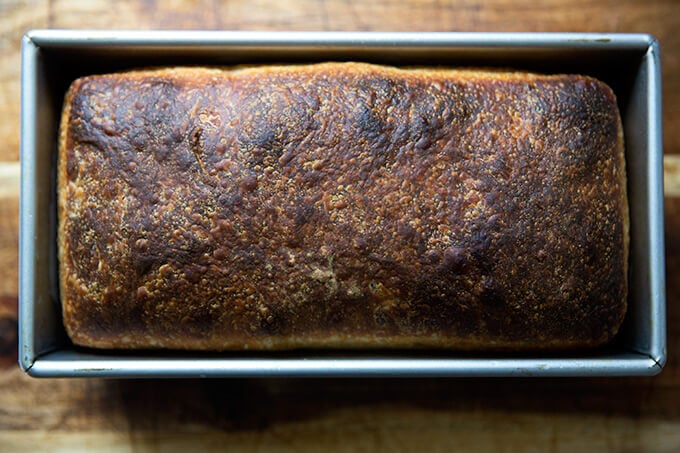
Bake for about 45 minutes.
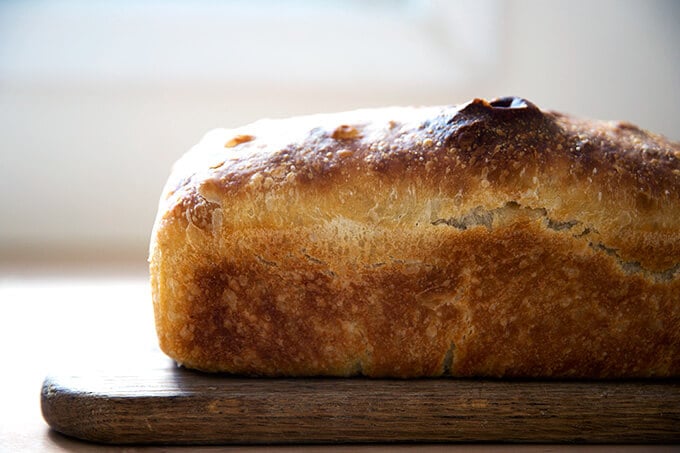
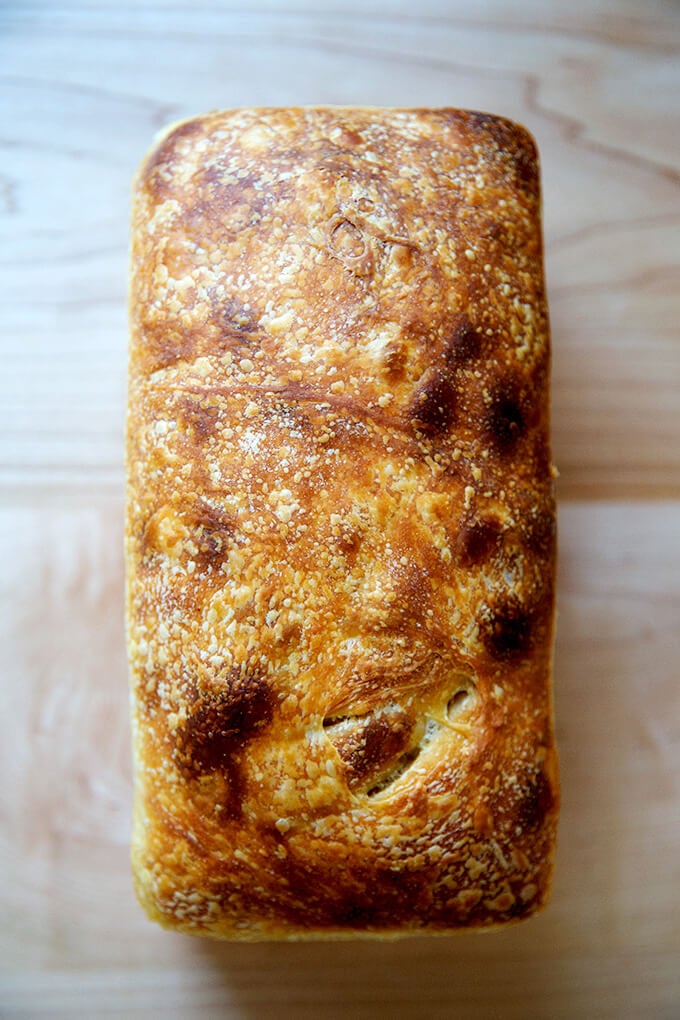
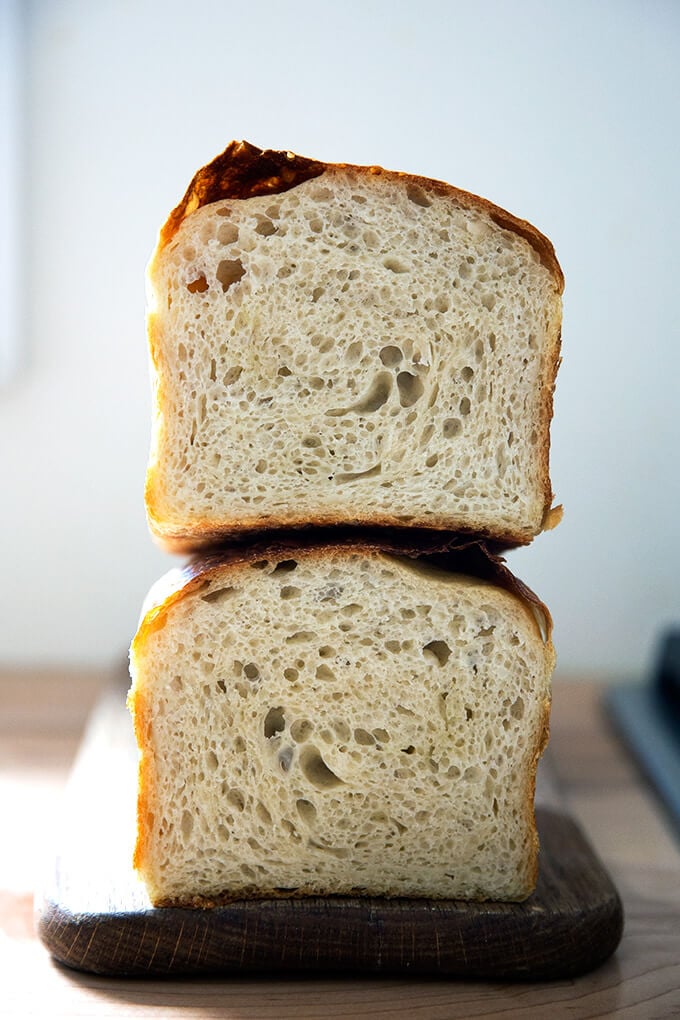
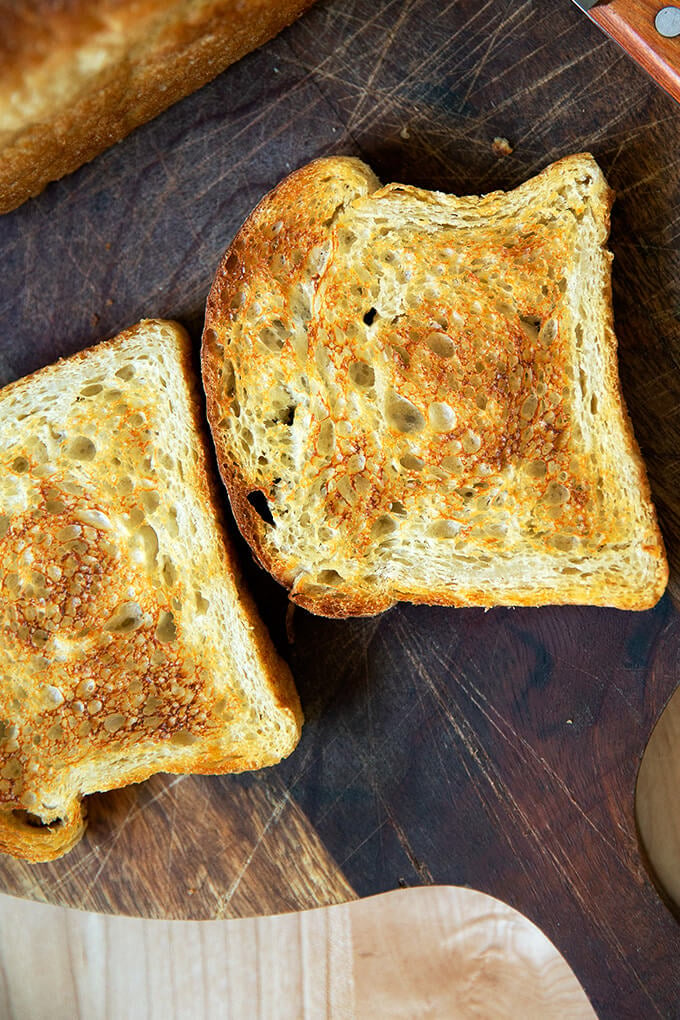
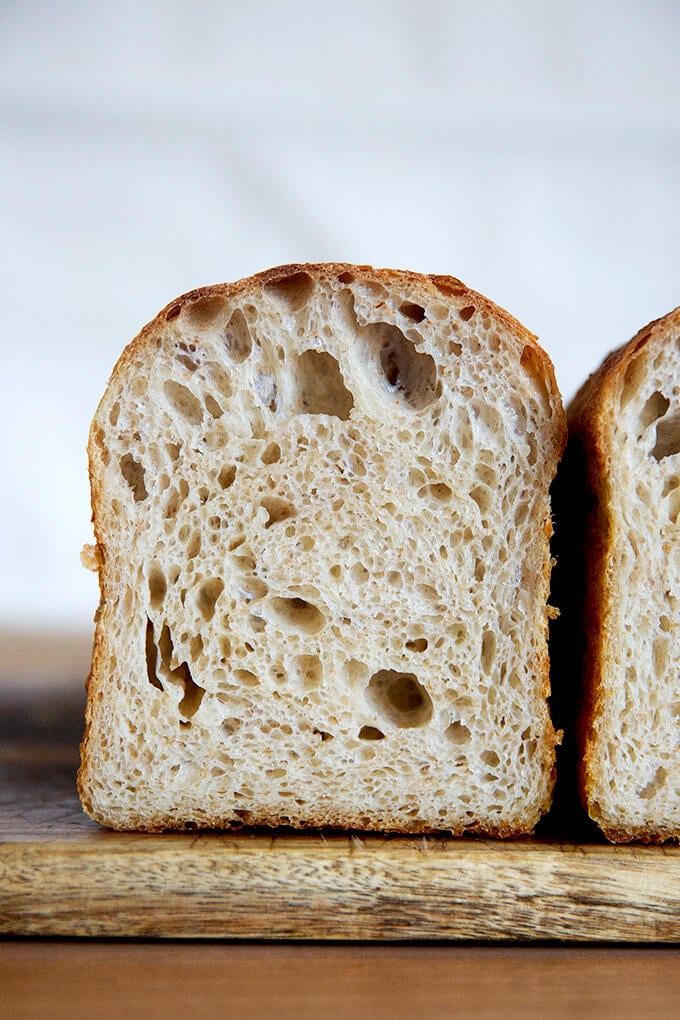
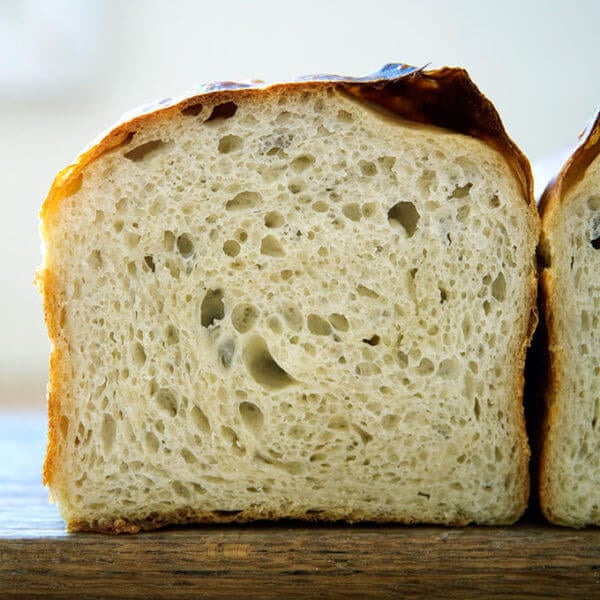
I baked this loaf in a tall-sided pullman loaf. Love the shape!
Easy Sourdough Sandwich Bread
- Total Time: 24 hours 40 minutes
- Yield: 1 loaf
Description
** UPDATE: VIDEO GUIDANCE IS HERE **
The makeup of this dough is the same as this sourdough focaccia. Here, the dough is baked in a loaf pan, and there is no sea salt on top.
This recipe yields one large loaf. You’ll need a 10 x 5-inch loaf pan, such as this one. If you only have two smaller loaf pans, such as 8.5 x 4.5-inch pans, you should probably split the dough in half after the first rise.
Plan ahead: This dough rises first for 6 to 18 hours (or less if it is super hot out or if you live in a humid area) or until the dough doubles in volume; then again for about 4 to 6 hour or until the dough crowns the rim of the baking vessel.
Troubleshooting: If you have issues with your dough being too sticky, please read this post: Why is my sourdough so sticky? The 4 common mistakes.
If you’re just getting started with sourdough, check out this post first. You’ll find tips there on procuring a starter as well as how to feed it and maintain it. If you’re up for making your starter from scratch, you can do so in just about 1 week.
Water: Chlorine in water can adversely affect sourdough. Leaving water at room temperature for 24 hours will allow most of the chlorine to escape. When I am in the habit of making sourdough bread, I fill a large pitcher with water and leave it out at room temperature. I use this for my sourdough breads and starter. Truth be told, I’ve used water straight from the tap and have not noticed a difference.
Water quantity: Also, depending on where you live and the time of year, you may need to cut the water back. If you live in a humid environment, for instance, I would suggest starting with 400 g or 420 g water. If you are not using bread flour, you also may need to cut the water back a bit. So much success with sourdough relies on getting the water quantity right.
Starter: I use a 100% hydration starter, meaning it is equal parts by weight flour and water. If you need guidance on how to maintain a starter, see this post.
Ingredients
- 100 g (about 1/2 cup) active starter, see notes above
- 10 g (about 2.5 teaspoons) kosher salt
- 430 g water, (or less, see notes above) room temperature
- 512 g (4 cups) bread flour, such as King Arthur Flour
- a few tablespoons extra-virgin olive oil
- room temperature butter, for greasing
Instructions
- Mix the dough: Place the starter, salt, and water in a large bowl. Stir with a spatula to combine — it doesn’t have to be uniformly mixed. Add the flour. Mix again until the flour is completely incorporated. If you have a straight-sided vessel, transfer the dough to it — it really helps monitor the rise and allows you to see the true growth in volume of the dough.
- Perform one (or more) “folds”: 30 minutes after you mix the dough, reach into the bowl and pull the dough up and into the center. Turn the bowl quarter turns and continue this pulling 8 to 10 times. See video for guidance. If time permits, repeat this “folding” step every 30 minutes for the first two hours. (Note: even if you perform just 1 fold, your dough will be in good shape.)
- Drizzle with a splash of olive oil and rub to coat. Cover bowl with a tea towel or bowl cover and set aside to rise at room temperature (70ºF/21ºC) for 4 to 18 hours — if it is super hot out or if you live in a humid environment, it may only take 4-6 hours. When the dough has nearly doubled in volume (or UPDATE: increased in volume by 50%, which is when I now end the bulk fermentation), it is ready. (Note: Do not use an oven with the light on for the bulk fermentation — it will be too warm. It is best to rely on visual cues (increasing in volume by 50% or doubling if you’ve had success with doubling) as opposed to time to determine when the bulk fermentation is done. A straight-sided vessel makes monitoring the bulk fermentation especially easy.)
- When the dough has nearly doubled, grease a 10 x 5-inch loaf pan with butter (or nonstick spray). Drizzle dough with a few tablespoons of olive oil. Rub your hands with a little bit of oil to coat. Use your hand to release the dough from the sides of the vessel, being careful not to completely deflate the dough. Video guidance here. Turn dough out onto a work surface. Quickly, shape the dough into a rectangle — I fold the dough envelope-style first; then I use a bench scraper to shape the dough into a rough rectangle. Transfer dough, seam-side down to prepared loaf pan and gently stretch into an oblong shape. (At this point, you can transfer the pan to the fridge if it makes sense with your schedule: rub the dough with oil and cover with a cloth bowl cover or plastic wrap. Transfer to the fridge will the next day. Then proceed with the recipe.)
- Leave alone for 5 to 6 hours or until dough begins reaching the rim of the pan — this may take less time when it is very warm out. Do be patient with this second rise: to get good height, the dough should be near the rim of the pan before you transfer it to the oven.
- Heat oven to 425ºF. Transfer pan to the oven and bake for about 20 minutes. Reduce heat to 375ºF. Bake for 20 to 25 minutes more or until golden all around. If you have an instant read thermometer, it should register 206-210ºF or so before removing. Remove pan from oven and turn bread out onto a cooling rack. Cool at least 30 minutes before slicing.
- Prep Time: 24 hours
- Cook Time: 40 minutes
- Category: Bread
- Method: Sourdough/Natural Leavening
- Cuisine: American
This post may contain affiliate links. Please read my disclosure policy.


902 Comments on “Easy Sourdough Sandwich Bread”
This is probably a strange question but, we’ve recently moved into a new place with a SUPER temperamental fire alarm RIGHT next to our stove. Whoever designed this townhouse was crazy! Anyway after a lot of experimenting and ear ringing it seems the highest I can have the oven without the alarm going off from the heat is 400F. Do you think 400F for 20 minutes instead of 425 will be enough to still get a decent rise? How would you adjust the bake time for a lower temp? Thanks!
Hi Lynn! That is frustrating! I think it will rise just fine at 400ºF. You may need to add on 5 minutes or so of baking time, but just keep an eye on it. It might take some trial and error to get right 🙂
Cover the fire alarm with a plastic cup or something else to keep it from going off.
Hi – love this recipe! Thought I would share the proportions that work for me in southern Ontario.
100 g active starter (100% hydration)
10 g sea salt
400 g water
mix
450 g hard bread flour (i have also had success cutting bread flour down to 400 g and using all purpose to make up the other 50g)
62g rye flour
mix
stretch and fold after 30 min four times.
rise over night
put into bread pan as described in recipe, let rise to top
brush with egg wash (gives the top a nice look)
bake 425 20 min then 375 for 20
if I’m off a few grams either way, still comes out great.
Thanks for the great recipe!
Oh I love this! Thanks so much for sharing your notes and proportions — so helpful for others. LOVE the idea of the egg wash … will do that next time. Thanks for writing!
Oh no! Typos!! I use 450 g bread flour (not 350 g) and can bring it down to 400g not 300g. I think. I make this bread every 3 days from memory and now I’m having a major brain fart. Is it possible to delete the original post and start again? Sorry!
No worries! I just edited your original comment. It’s all good! Let me know if you have any other changes 🙂
My husband and I have been trying to make sourdough bread on and off for years, and this recipe is the last one we’ll try–because it worked like a charm! Lovely texture, nice crust, wonderful rise, and great taste. Thank you *so much* for the video showing the whole process, I’ve gone through it multiple times and it’s a great help. I’ve got dough rising now to bake tonight, we’re just thrilled to have this recipe. Thank you!!
Oh yay, Daria! Wonderful to hear all of this. So glad it worked out well for you. Thanks so much for writing! And happy baking 🙂 🙂 🙂
I have made this recipe twice now and each time it has been excellent. I just wanted to fire of a huge THANK YOU! I love the videos and the instructions. Easy to follow and helpful and result in delicious sandwich bread.
So great to hear this, Jake! Thanks so much for taking the time to write.
This is a great tasting bread. My problem of late is that it has been difficult to remove from the pan after baking. The temperature is checked & accurate, but really sticks to the pan. Do you have any solutions for this problem?
Thanks
Hi Ronna! Great to hear. Are you buttering the pan well? I find butter or nonstick spray to be the best. Olive oil or other oil won’t create that nonstick barrier. If butter or nonstick spray doesn’t work, you can use parchment paper moving forward.
Has anyone tried this with a 13×5 Pullman loaf pan? 1.5x the recipe? 1.25x? I need this bread in my life!
Hi Carly! I have not tried a 13×5 Pullman, but I think 1.25x the recipe would work out well for that size. Good luck!
I ended up going with 1.3x the recipe. The loaf is best described as boisterously big! It is a solid 2, maybe 2.5 inches over the top of the pan and it rose very quickly. I will definitely play around with the amounts, probably reducing the starter to closer to the 100g in the recipe v. the 130g I used.
OH boy! OK, thanks so much for the update… I own one of those pans but have yet to use it here (or in years, actually) but would love to give it a try sometime soon, so I appreciate your notes.
Just made this for the first time today and it turned out absolutely perfect. The crumb is fluffy, with a delicate crisp crust and great flavour. I still love my traditional crunchy, chewy sourdough loaves, but this sandwich bread is so much lighter and more versatile. Thanks for the very detailed recipe – I’ll definitely be using it regularly in future.
So nice to hear this, Lauren! Thanks so much for writing 🙂 🙂 🙂
hi! loving all of your sourdough recipes, especially the videos – they’re so simple and helpful!
q: is halving this recipe ok if i just want one loaf?
Oy nevermind – realizing now you did use one pan! Phew.
Ooops, just seeing your second comment! Glad you realized 🙂 🙂 🙂
Hi Sandi! This recipe actually does yield 1 loaf. If you want to halve it, you would need a small loaf pan, something like 7×4-inches or so.
Hi !
I would like to try your recipe! May I know for the oven, so I turn on the fan as well?
Thanks.
Hi Maddie! I do not use a fan oven. I would bake it at your oven’s regular setting.
Hi Ali,
I usually make your focaccia but am trying this today! I like to add things to my bread (herbs, onion, garlic, cheeses). When’s the best time to add them? I usually add them to your focaccia recipe right away just because I’d hate to over work the bread later on and ruin the rising it’s done, but any tips on when the best time to add things would be? I plan to reduce the amount of water to 400 since onion does contain a lot of water. I’ll be using bread flour. Should I go less than 400g for water? I live in Michigan so it’s 60% humidity now.
Hi Olivia! If you’ve had success adding the ingredients at the beginning, keep doing that! That’s what I do with yeasted breads. Alternatively, you could add them after you do one or two sets of stretches and folds; then add the ingredients; then do a few more sets of stretches and folds.
I think 400 grams water should be just fine!
Hello! I was trying this recipe last night and the overnight dough has risen well but is still sticky and I cannot fold it into rectangle to put it into the bread pan. It’s just sticking to my hands and everywhere and falling apart. Is it likely that I used to much water at the beginning?
Hi Maddie! Does the dough have any structure and elasticity or is it a puddle? It’s possible that the dough over fermented. You can use a little bit of flour as needed, but if the dough over fermented unfortunately it’s not salvageable.
This one is delish. I used the full water amount and probably could have used a bit less because it was wet but it was still wonderful.
Great to hear, Lorrain!
Hi! I am in the midst of trying this recipe for the first time. I’ll be dividing the two in half after the bulk fermentation to shape into two smaller loaves. What would you recommend in terms of timing and temperature for the baking with the smaller vs larger loaves? Thank you!
Hi Marnie! I’m not sure I’m getting to you in time, but I would keep the temperature the same but reduce the baking time. I would cut off probably 10 minutes maybe a little bit more. Have you baked them yet?
I haven’t! I put it inthe fridge overnight for the bulk ferment. Will be shaping very soon and baking later. Thank you!
I am a huge fan of both this recipe and your whole wheat sourdough recipe. Im done trying other recipes as yours truly are as good as it gets! I appreciate the detail you have put into explaining your methods. Your recipes are always the ones I recommend to someone new to the world of sourdough.
Courtney, thank you! It’s so nice to read all of this. Means a lot. Thanks so much for writing!
Love this bread and the focaccia too! Simple steps to follow and turns out great every time. Wondering if it can be made into rolls? Would any of the steps be different other than the shaping for the last rise?
Hi Amy! Sorry for the delay here. Are you hoping to make pull-apart rolls or free-standing rolls? I worry a little bit that this dough is going to be very wet. I might consider reducing the water to make the shaping process a little more manageable.
I’m making this recipe again for the zillionth time. It’s always amazing. I wanted to share that I consistently double the recipe. I’ve put the bread into mini loaf pans, extra large ones and everything in between. I’ve even added cinnamon, sugar and raisins to some batches (this never turns into a perfect roll shape because the dough is so loose, but it’s still yummy). This is the BEST recipe!! Thank you so much!
Oh yay!! So nice to hear this Zoe! Thanks so much for writing, and thanks so much for sharing all of your variations. Question for you: how do you do the rolls? Someone was just asking about making rolls, and I advised them to consider reducing the water amount to make the dough more manageable, but perhaps that is not good advice!! Would love to know your method.
This bread was incredible! I’ve recreated your sourdough boule recipe over a dozen times and decided to give the loaf pan a try for easier and more uniform sandwiches slices. Wow! This might be my new favorite. I only had two 8.5inch loaf pans so I was able to make two smaller loaves which was fine, but I’d like to find a larger loaf pan for next time. It looks like the loaf pan you have linked in the recipe is unavailable – do you have any other recommendations? Would like to use your affiliate link if possible. 🙂
So great to hear this, Katie!! Thanks so much for writing. You are too kind to want to use an affiliate link… thank you 🙂 I think any 10×5-inch pan you can get your hands on will work, but this one looks promising.
I bought that exact pan and it turned out great. I’m trying a 13×5 Pullman pan today, at 1.5 times the recipe. Too late I saw that someone used 1.3 for this size pan. Oh well, fingers crossed.
I think it should be fine! Let me know how it goes. Good luck.
This recipe is the best and easiest sourdough loaf recipe I have found! I now make this bread every week and it always comes out amazing! My husband comments on how delicious this bread is every time I make it. Only four ingredients. Minimal hands-on time. Tasty bread every time. Thank you for the recipe! The video is so helpful too!
Wonderful to hear this, Amie! Thanks so much for writing!
I’m a novice bread baker and have made this and the focaccia, and both times it’s turned out perfect! I was wondering though if it could be made with partially whole wheat flour and how that might change the proportions? Thanks!
Yes, absolutely! I always advise starting small, subbing 50-100 grams of whole wheat flour for the white flour; then based on your results, you can add more or less next time around.
You recommend a 10×5 loaf pan….would this work with a 9×5? Or a 9×4 Pullman?
Thank you.
Hi Pamela! I think it might, just be careful not to over-fill the pan with dough. That’s where you’ll run into issues when it’s baking. If there’s too much dough in the pan, it won’t bake properly. I would just use your judgment. If you plop the dough in the pan, and it looks as though there is plenty of room for it to double, then you’ll be fine.
Made my first loaf and it turned out amazing. Love your videos. I like that you don’t talk throughout them….I just get distracted when others keep talking on their demonstrations.
I looked through a couple pages of the comments but didn’t find any info on the best way to store the bread and how long it will last without freezing. Could you please offer some suggestions?
So nice to hear this, Lisa, thank you 🙂 🙂 🙂 I store the bread in an airtight bag (like a ziplock) or vessel (like a Tupperware) for many days — honestly sourdough will not mold often for over 2 weeks. I always reheat day-old bread before eating — either in the toaster or in the oven. When I know I am not going to eat a loaf of bread in a timely manner, it’s best to freeze it shortly after it has baked and cooled completely. Ideally freeze it within a day of baking it so that you are freezing it at its freshest state. Let me know if you have any other questions!
Hi, I just made this bread and it turned out wonderful and delicious. I followed the recipe exactly. My question is in regards to after the bulk proofing when I needed to shape it and place in pan. The dough was loose, moist and a bit sticky. it would not hold shape. I was able to wrangle it into the pan. It only took about two hours to rise enough to bake. What could I adjust to help the dough have more shape?
I live in California. The humidity here was about 50% last night with the temp in the house overnight during bulk proofing probably about 66-68 degrees. The dough doubled overnight during about 9-10 hours. The starter was fed a couple hours before I used it and was in an active rise at the time.
Thank you for any advise. I am still fairly new to sourdough baking. We loved the bread!
Hi Jennie! Great to hear this.
It sounds as though all you need to do is reduce the water content. It doesn’t sound as though the dough over fermented and your timing all sounds right. Next time, try holding back 50 grams of water and see if you have better results. Thanks for writing!
Just delightful! A smooth and chewy crumb. I love your original no-knead recipe – with young children in the house sandwiches are a lunchbox staple and I’m pleased I tried this recipe – wholesome, delicious, and hands-off to boot! I substituted whole wheat flour for 50g of the bread flour. So excited I don’t have to buy sandwich bread anymore!
Wonderful to hear this, Courtney! I love using a little whole wheat flour here, too 🙂 Thanks so much for writing.
Hi Ali
Thank you for this recipe, I want to master it! 🙂
My first attempt the bread was extremely soir, uneadible. I let it rise for a lot of hoirs though (18?).do you think this could be the reason?
I am also so tempted to stretch a few more times. Just because it is such a small exersice that i am worried it wont jave any effect (or that I maybe didnt do it good enough the first time). Can you do the stretch and fold too many times?
Like somebody else mentioned I could also not shape it into a roll. The moment i folded it would in two seconds find its old shape back. Is this perhaps also because of too long rising?
Otherwise the rising went well and it was so nice and bubbly, and such an easy recipe!
So I am def going to try it again later in the week.
Hi Anne!
It’s possible you let the dough rise too long … 18 hours is on the long side in the summer and if you have a strong starter.
It’s also possible you need to reduce the water content. Do you live in a humid environment? You might want to read this troubleshooting post before giving the recipe another go.
My family loves this bread. If I half the quantity of flour how long do I need to bake please?
Hi Lavina! Great to hear this. I would reduce the baking time by about 10 minutes.
Thankyou xx
Thanks for sharing this recipe! After the stretch and folds, I added 3 tablespoons of olive oil to the dough during bulk fermentation, at which point it was swimming… so I decided to work the oil all the way through the dough rather than coat the outside. My mistake 🙁 the loaf had a wonderful even and open crumb, but it was totally saturated and gummy (still tasted great though!). I’m gonna give it another shot this weekend, and avoid repeating my mistake 😛 Do you suppose working all that oil into the dough was responsible for the wet crumb?
Hi! I don’t the oil is entirely responsible for the texture. Next time around, I would try cutting back the water slightly. Are you using a scale to measure everything?
A couple days later, I made this recipe again. The only differences this time were only coating the outside with olive oil, and a slightly longer cook time (30 minutes in the second stage at 375F) to get the nice browning on top. It came out perfect! I’ve been using a scale for measuring everything. The humidity may have been different that day too, hard to know for sure. In any case, this sandwich bread is my new favorite 🙂 Thanks for replying.
Wonderful to hear all of this! Thanks so much for reporting back 🙂 🙂 🙂
Excellent recipe! This will be a staple in my home.
Great to hear Sandi! Thanks for writing 🙂 🙂 🙂
HELLOO
I have recently started trying to make a sourdough loaf (I think you call it sandwhich bread) And have been getting very excited feeding and caring for my starter (he’s called Eugene)
however the loaf I was planning on baking is 36 x 16 x 11 centimetres 🙁
What changes should I make to your extremely helpful recipe to make it work please 😀
Kind regards
Ryan (and Eugene)
Hi Ryan! I’m having a hard time visualizing the pan, but I think you’ll need to double the recipe or maybe do 1.5x the recipe for a pan that large.
https://smile.amazon.co.uk/dp/B07FMJBNPL/ref=cm_sw_r_cp_apa_glt_fabc_Z2A6J328JA037Z9BD5ZX
It’s… 14 inches long
6 inches wide
4 inches tall.
Thank you for the reply! 🙂
That’s a nice looking pan! You can either make the recipe as is — the dough won’t crown the rim of the pan likely, or you can do I as I said earlier: make 1.5 x the recipe. See how it turns out; then adjust next time around.
Hey thank you again for the reply lol I did try the 1.5x and it was a little on the watery side and had deflated before 6 hours into the first long rest. It didn’t end well lol I think I just need to keep practicing. Love the step by step guide thank you 🙂
OK, next time around, I would cut the water back. You’re in the UK, right? When I troubleshoot with people from the UK, often the dough is on the wet side — the flours must absorb water differently. You can try holding back 50-100 grams of water and see how that affects the texture of the dough.
Thanks for the kind words!
Thank you SO much for sharing this recipe! I’m not an experienced bread baker at all and this was my first sourdough… and I was very nervous. But it came out STUNNINGLY. I’ve made some basic breads before but this is the first time I made something that tasted like it came from a fancy bakery. My whole (picky) family loved it. Thanks again for sharing! Will be picking up your book.
Wonderful to hear this, Erica! Yay for getting approval from the family, too. Thanks so much for writing 🙂 🙂 🙂
Ahhhhh I just came back to give 5 star rating. 😭 this is such a good recipe. Just what I was looking for. My bread has risen so nicely and I can’t wait to cut into it. Simple, no fuss, and amazing recipe. Will pass it on to friends and family. :))))))
Thanks so much xxxxx
Wonderful to hear this, Enbee! Thanks so much for writing 🙂 🙂 🙂