
The Best, Easiest No-Knead Brioche Buns
This post may contain affiliate links. Please read my disclosure policy.
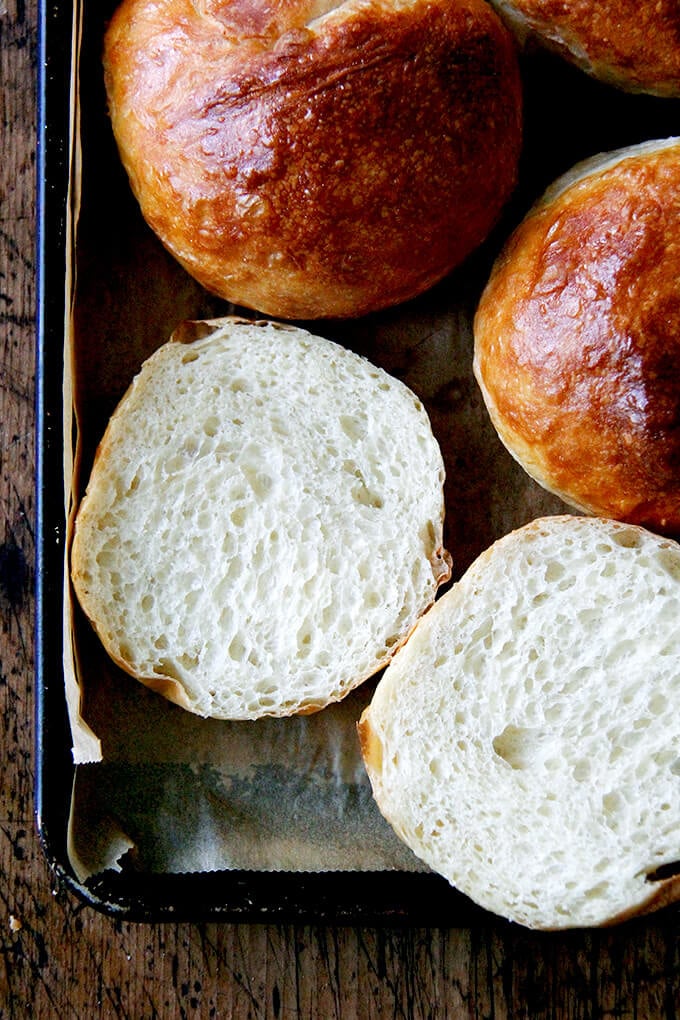
The dough for these no-knead brioche buns comes together in no time, and the buns are so light and airy. These buns are perfect for burgers, but they’re great for sandwiches of all kind! Video guidance below 🍞🍞

Today, I offer my sincerest apologies. On May 22, 2012, I posted a recipe for light brioche buns, promising you the brioche bun to end all brioche buns. Look no further, I said.
And then, in the recipe, I asked you to use not only bread flour but also a third cup of all-purpose flour. And I didn’t offer you any measurements in weights; I gave you cups only.
And I asked you to bloom your yeast in warm milk and warm water, but I didn’t tell you how warm the milk and water should be.
And I had you soften butter and massage it into the flour. I even asked you to scoop up the mixed dough and slap it down on the counter. And I asked you to knead your dough for 8 to 10 minutes until it was smooth and elastic.
Friends, I am sorry. I promise never to do this again. I promise never to ask you to use two types of flour unless it’s completely necessary. I promise never to ask you to bloom yeast. I promise to always give you weights of flour. I promise never to ask you to knead dough unless it serves some purpose.
I promise. I promise. I promise.
PS: Foolproof Homemade Bialys: A Step by Step Guide
How to Make Brioche Buns, Step by Step
The recipe included below is similar in makeup to the light brioche bun I once loved — there’s a little milk, a little butter, a little egg — but the method is simpler: in sum, it follows the Bread Toast Crumbs no-knead method.
Instant Yeast vs. Active Dry Yeast
In nearly every bread recipe on this site, I call for using instant yeast, SAF being my preference. The reason for this is because with instant yeast, you do not need to proof it — you simply stir it into the flour and salt or other dry ingredients just as you would baking soda or baking powder. Instant yeast makes bread baking so much easier and faster. If you can only find active-dry yeast, however, here’s what you do:
How to Proof Yeast
In general, proofing yeast simply requires sprinkling the active-dry yeast over the lukewarm water with a little bit of the sugar, letting it rest for 10-15 minutes or until the yeast gets foamy; then proceeding with the recipe. In this recipe, this is what you’ll do:
Whisk the egg with the water. Add the heated milk-butter mixture. Stir to combine. The mixture should be lukewarm to the touch. Sprinkle the yeast over top and let stand for 15 minutes or until it gets foamy; then proceed with the recipe.
Mix the Brioche Dough
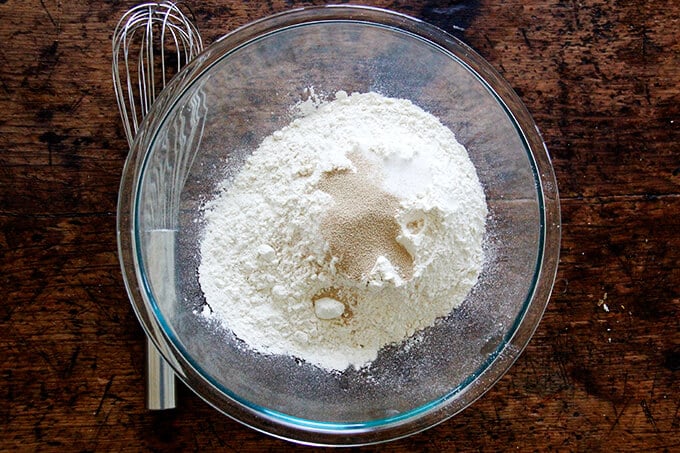
Whisk together the dry ingredients (flour, salt, sugar, and instant yeast). I cannot recommend enough using a digital scale to measure the flour. Volume measurements simply are not accurate.
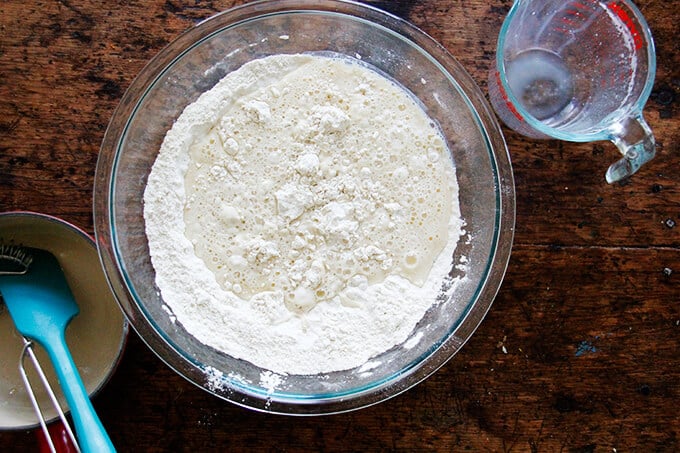
Create a lukewarm liquid by whisking together a hot milk-butter mixture into a cold water-egg mixture. The combined liquids will be perfectly lukewarm — no need to take its temperature.

Combine the wet and dry ingredients.
No Knead to Knead
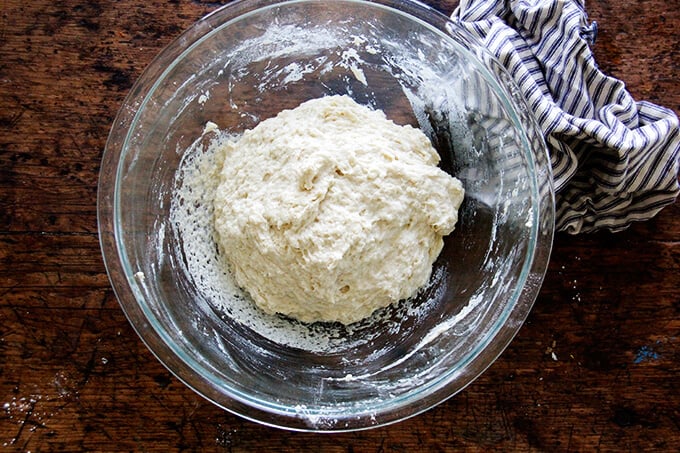
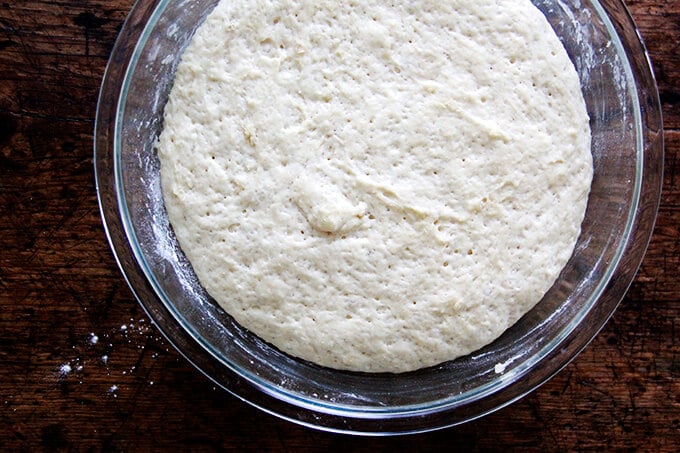
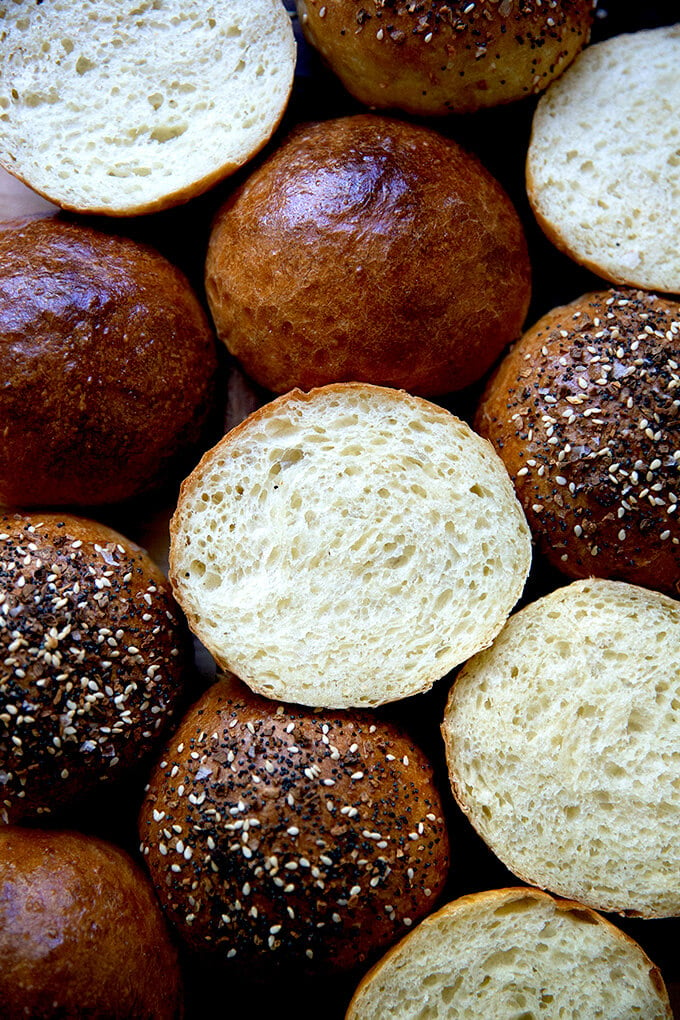
Mix with a spatula, stirring just until a sticky dough ball forms — no kneading necessary… save yourself the trouble! This is a high-hydration, wet dough. There is no need to knead it, which would require adding a lot more flour to the dough to make it manageable, which is what we don’t want. The high hydration dough makes for a light, airy crumb.
Place in a warm spot to rise (see the tip in the recipe box below for creating a warm spot to rise), and let rise till doubled.
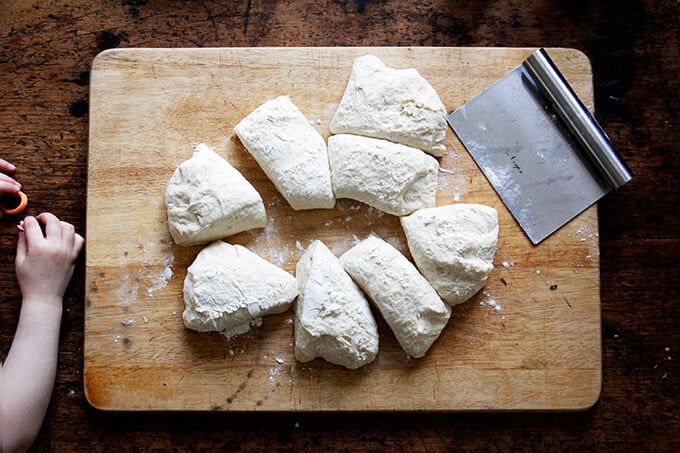
Punch the dough down using two forks.

Portion the dough into 8 to 10 pieces.
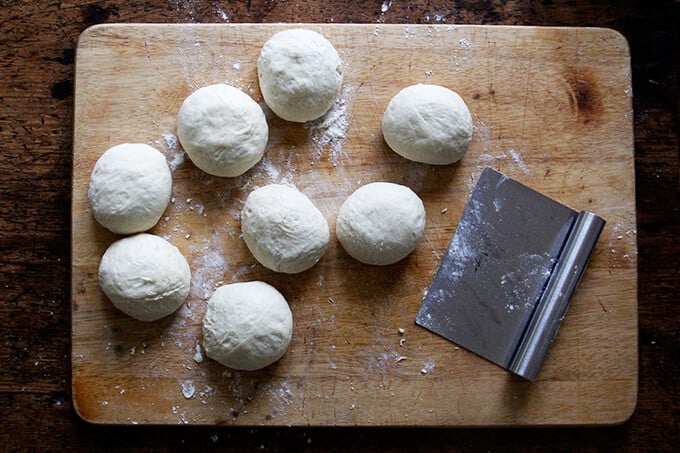
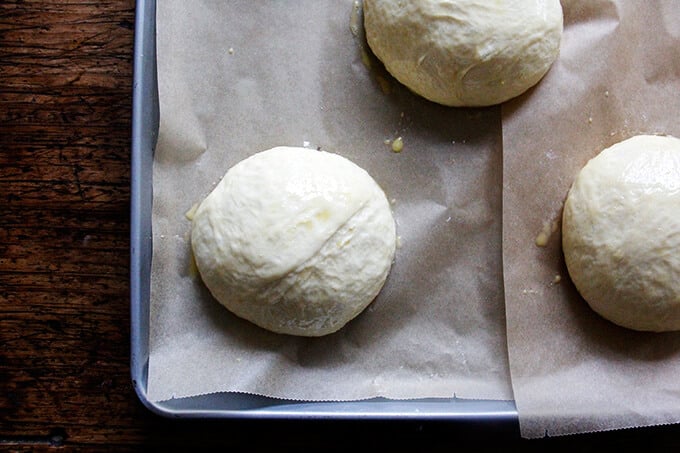
Shape the Brioche Buns
Using flour as needed, shape each portion into a ball, using the pinky edges of your fingers to tuck the dough under and create tension. See video for guidance.
Let the Buns Rise
Depending on the time of year and the temperature of your kitchen, the second rise here will take more or less time. The buns likely won’t double in volume, but they’ll look considerably puffed and they’ll feel light to the touch.
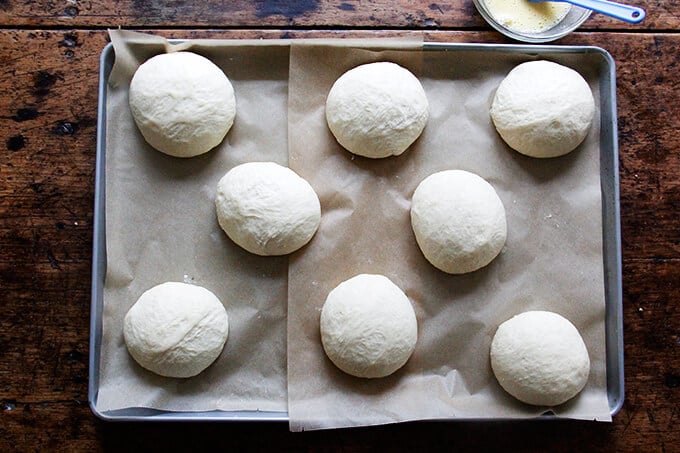
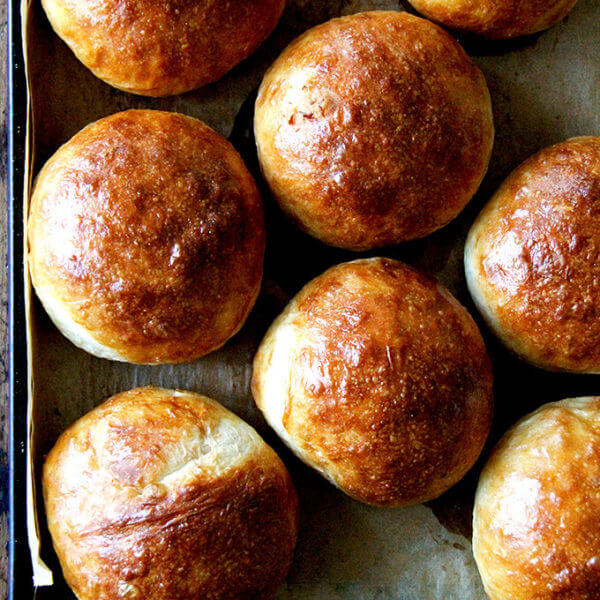
Brush each bun with an egg wash.
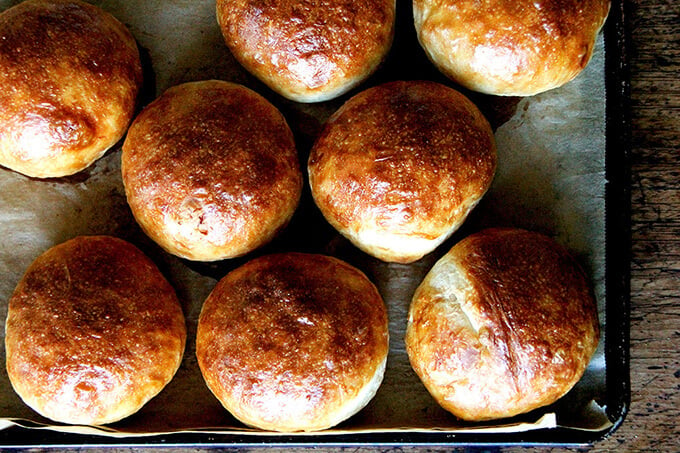
Bake the Brioche Buns
Transfer the pan to the oven, and bake for about 15 to 20 minutes or until the buns are evely golden.
Baking Timeline
You can make these rolls two ways:
- Mix the dough, let it rise for 2 to 3 hours, then shape and bake.
- Or you can mix the dough at night, store it in the refrigerator, and shape and bake in the morning.
I love the convenience of mixing dough at night and baking the following day, but you absolutely can mix and bake these the same day and get great results.
PS: No-Knead Thyme Dinner Rolls
PPS: Overnight Brioche Cinnamon Rolls
These brioche buns are perfect for burgers, pulled pork, and sandwiches of all kind, but I especially love them with Joanne Chang’s Famous Egg Sandwich from the Flour, Too cookbook:

You can sprinkle the buns with seeds or everything bagel seasoning, too:
The Best, Easiest No-Knead Brioche Buns
- Total Time: 3 hours 20 minutes
- Yield: 8-10 rolls
Description
If you have Bread Toast Crumbs, this is essentially 2/3 the light brioche recipe in the book with the sugar cut back by a bit more.
To create a warm spot for your bread to rise, turn your oven on for one minute, then shut it off. That brief blast of heat will create a cozy place for your bread to rise.
As always: for best results, use a digital scale to weigh the ingredients.
Water: Some people find this dough very wet and tricky to work with. If you live in a humid area, I would consider cutting some of the water back. If you are measuring with cups, hold 1/3 cup water. If you are using a scale, hold 75 g. You can always add the water back in when you are mixing if it seems dry. Reference the photos above and the video for how sticky/wet the dough should appear.
If using active dry yeast: Whisk the egg with the water. Add the heated milk-butter mixture. Stir to combine. The mixture should be lukewarm. Sprinkle the yeast over top and let stand for 15 minutes or until it gets foamy; then proceed with the recipe.
A Fun Variation: After brushing with the buns with the eggwash, sprinkle the buns with seeds or everything bagel seasoning.
Ingredients
- 4 cups (512 g) all-purpose or bread flour
- 2 teaspoons (10 g) kosher salt
- 2 teaspoons (8 g) instant yeast, see notes above if using active dry yeast
- 2 tablespoons (28 g) sugar
- 1 1/3 cups (300 g) cold water, or less, see notes above
- 1 egg
- 1/3 cup (78 g) milk
- 4 tablespoons (57 g) butter
- for the egg wash: 1 egg beaten with 1 tablespoon water
Instructions
- Whisk together the flour, salt, yeast, and sugar.
- In a medium bowl, whisk together the cold water and the egg.
- Heat the milk and butter together until the butter is melted. Pour this hot mixture into the cold water-egg mixture. The combined mixture should be perfectly lukewarm. Add it to the flour bowl and stir with a spatula till you have a sticky dough ball. Drizzle a teaspoon or two of olive oil over the dough and rub to coat — this prevents a crust from forming on the dough during the rising.
- Cover bowl and let rise in a warm area (see notes above) for 2 to 3 hours or until doubled. Alternatively, stick bowl in the fridge immediately and let it rise overnight or for 12 to 18 hours.
- Cover a work surface lightly with flour. Deflate dough, turn out onto work surface, and divide into 8 to 10 equal portions (use a scale and weigh each roll if you want perfectly even rolls: about 128 g each for 8 rolls and 102 g for 10 rolls). Using as much flour as necessary, roll each portion into a ball, and place on a parchment-lined sheet pan or two. I have an extra-large sheet pan (15x21x1) that I use to fit all 8 or 10 rolls on at once. (Note: If you refrigerate the dough, you can deflate it immediately after taking it out of the fridge … no need to let it come to room temperature first.)
- Let rise until the rolls puff and feel light to touch — 30-45 minutes roughly. Preheat the oven to 425ºF.
- Brush rolls with egg wash. Bake 15 to 20 minutes or until golden all around. Transfer rolls to wire rack to cool completely.
- Prep Time: 3 hours
- Cook Time: 20 minutes
- Category: Bread
- Method: Oven
- Cuisine: French, American
This post may contain affiliate links. Please read my disclosure policy.


520 Comments on “The Best, Easiest No-Knead Brioche Buns”
Great recipe! Have been eating for lunch, with mayonnaise and ripe homegrown Brandywine tomatoes, smiling between bites.
Oh that sounds amazing, Stephanie! Makes me happy to read this 🙂 🙂 🙂 Thanks for writing.
Hi thanks for the lovely recipie. Tried out this yesterday. It was good but eneded up with a bit of hard crust after sometime. Is it something to do with the oven?
What if we keep the dough in the fridge more than 18 hours? I have heard this type of dough can rest upto 3 days.
Please reply. Thanks 🙂
Hi Ami! Question: at what point did the crust develop? After you baked them? Days later?
If you keep the dough in the fridge for more than 18 hours, be sure to coat it in oil so that it doesn’t develop a crust. I would put it in a container with a lid as well.
I have never stored the dough for 3 days, so I can’t speak to that … worth a shot, but I wouldn’t recommend storing much longer than 1-2 days.
Wow… great baking minds think alike! I want to mix up the dough on Saturday morning and bake on Sunday night. It would be in fridge for approx 30 hours. What’s the worst that can happen?
Hi Carol! I think that should be just fine!
They came out so amazing! Perfect for my sliders. Your recipes are just fantastic
Oh yay! Wonderful to hear this, Manju! Thanks for writing.
I love your recipes. They are so simple and easy to follow and produce great results.
Thank you for sharing your ideas.
Thanks Faye!
Could this recipe be made ahead and frozen in dough form for a later bake? If so, at which point would you freeze? After first rise & shape but before second?
I found this answered in a previous comment on page 2!
Great!
Yes! I would freeze them right after you shape them into balls. Freeze them on a sheet pan; once they are frozen, transfer them to a ziploc bag or other airtight vessel/container.
Hello! This recipe is great. Just tryed it and all 8 buns are fluffy and smell really delicious. Because I don’t like egg wash, I gave them milk wash. Thank you!
I tryed and pita bread too, but only one from 6 puffed like yours, because I can’t bake on more than 250°C. But they still were delicious. 🙂
Great to hear this, Gal! Bummer about the non-puffing pita bread. Do you have a pizza stone or Baking steel?
I’ve made these a few times already, and it really is tasty. The latest time I made it I substituted a few tablespoons of the bread flour for whole wheat. 🙂
Wonderful to hear this, E! I love the addition of a little bit of whole wheat flour in so many bread recipes — flavor, aroma, texture… so good. A little can go a long way. Thanks for writing!
Super easy. First batch was DELICIOUS. Second batch slightly over baked. I will weigh ingredients next time. Absolutely loved the ease and FLAVOR of these brioche buns.
Wonderful to hear this, Michelle! And great re weighing next time around — I can’t recommend using a scale enough with bread baking!
Made this today using the same day method and it turned out amazing!
Do you think it would be possible to cut back the butter by half (or to nothing) for a lighter bun? These were great for me but my health nut family found them a little too decadent (although still delicious).
Wonderful to hear this! And yes, absolutely … I am always amazed by how delicious bread is when it is made with nothing but flour, water, and salt (and yeast or starter). So yes, cut back as you wish.
I am very new to baking yeast breads. This was a wonderful recipe. Followed your instructions exactly (your video was very helpful) and the buns turned out perfectly. I will be making these again and again. Thank you
Wonderful to hear this, Rosa! Thanks so much for writing. Happy Baking!
Just made these (again). This recipe is so good — not only is the final result the best-tasting buns ever, but the process itself is just so easy, relaxing, and enjoyable. I am new to making things with dough, so I find shaping the buns to be very fun. Thank you so much for this lovely recipe!
Wonderful to hear this, Olga! Thanks so much for writing 🙂
Just made these and they were perfect and delicious! This was my first time making brioche buns and it was such an easy, fool-proof recipe. I may never go back to store bought buns ever again.
Wonderful to hear this, Molyka! Thanks so much for writing.
I just made these and they’re wonderful! I made them for burgers, but my sister and I couldn’t resist tearing into one fresh out of the oven with butter. Will definitely make these again.
So great to hear this, Vanessa! Sometimes I make this recipe as pull-apart rolls for dinner … so good. Thanks for writing 🙂 🙂 🙂
Hello. Can you make this recipe with sourdough starter? Thank you.
Delicious! I made these wonderful rolls for our Christmas dinner and made 13 rolls, the perfect size. Next I’ll make them for hamburger rolls and make them larger 8 or 9. This recipe is easy and definitely a keeper.
So nice to hear this, Roxanne 🙂 🙂 🙂 Thanks so much for writing.
This was so good 🙂 I ran out of milk so used 1/2 cream, 1/2 water. My family loved it! I love fuss-free, no knead, no mixer recipes like these!!
Just one question: can these be frozen? Should I freeze the buns at the dough stage, or after out of the oven?
So great to hear this, Sheryl! And yes, they freeze beautifully. You can freeze them at either stage. If you want to freeze the dough, I would freeze it after you shape the dough into balls. Transfer the balls to a sheet pan and freeze them; then, once they are solid, you can transfer them to an airtight container. You can thaw them overnight in the fridge; then transfer them to a sheet pan to continue their second rise at room temperature.
If you freeze them once they have baked, simply be sure to let them cool completely before freezing; then transfer them to an airtight bag or vessel.
I’ve never commented on your recipes before although I’ve enjoyed many of them. This was excellent! I used it for some devilled ham sandwiches. Kind of hard not to eat the whole batch.
Devilled ham sandwiches sound amazing!! Thanks so much for writing. Great to hear all of this.
These are fabulous !!!
Great to hear, Alexa!
I made these with the overnight chill. When I pulled out the dough in the morning it hadn’t risen much at all. But I shaped them into rolls, set them on parchment paper in a Dutch oven and let them rise for approximately 2 hours. I baked them in a cold oven in a Dutch oven for about 45 minutes, taking the lid off for the last ten. They were beautiful, well risen and soft. I will definitely make them again.
Thank you for the recipe. It’s excellent.
If you’re curious about the bake from a cold oven King Arthur Flour did a post about it.
So great to hear this, Nicole! Nice work being patient with the second rise. I have done the cold oven bake with sourdough, but not with other breads. I’ll find the KAF blog post. Thanks for mentioning it!
I don’t understand why the internet isn’t showing more stars for this recipe. Its so easy and the results are a beautiful bun suitable for hamburgers or just a beautiful soup bun. I’ve made this recipes over 50 times and the comments are always so positive. Couldn’t be happier
So wonderful to hear this, Cindy 🙂 🙂 🙂 Thanks so much for writing!
Can this recipe use gluten free flour? If so, do I bake it the same as your gluten free peasant bread recipe?
Can this Brioche buns recipe use gluten free flour? If so, do I bake it the same as your gluten free peasant bread recipe?
Has anyone made these in an oblong shape for Hot Brisket Sandwiches?
Hi Kim! I haven’t, but this is a fantastic idea. I would simply shape the balls into rounds; then pull them gently outward to create more of an oblong shape. You might need to let the balls rest for 5-10 minutes before stretching them outward to allow the gluten to relax.
These were so easy to make I’ll be hard pressed to buy any buns from the store. I will definitely be saving and making this recipe again.
Wonderful to hear this, Brooke! Thanks so much for writing 🙂
Can this recipe be baked in a loaf pan?
Yes! I would do 1.5x the recipe for 2 loaf pans. If you have a 10×5-inch loaf pan, you can bake off this entire recipe in it, but if you have smaller loaf pans, and you don’t make any changes to the recipe, just be sure not to fill the pan higher than 3/4 full with dough. Hope that makes sense.
I’ve been making these ever since I found your recipe. I have a bunch of others of yours lined up to try, but these are just so good and so hassle free. Thank you so much!
So nice to hear this, Roxana! Thanks so much for writing 🙂 🙂 🙂
thanks so much for your dedication to teach! I have a couple of suggestions for beginners like me.
1). The instructions say to cut rolls, put on bake sheet and then let rise 45 minutes.. then in another place.. the step by step.. it says. “rise briefly”. That is confusing.
2): It would be great if you showed the bottoms of the bakery products.. ie: Brioche Rolls. . if the tops get that browned… beautifully.. how should be bottoms look?
Appreciate all the recipes.. for a new bread baker.. it is great..
Jim
Hi Jim! Thanks so much for the feedback. The next time I make these, I will take a photo of the bottoms — that will be a helpful reference for others.
Regarding question one, you’re right, that is confusing. As a note: Always follow the recipe in the recipe card. The step-by-step photo instructions are meant to give a general overview, and often are a little vague to keep it simple. The recipe box will have the detailed instructions and that is what you should follow (at least on my site!).
Thanks for writing!
These are THE best. My go to for burgers and sandwiches. I use them for our veggie burgers and also for tuna or turkey sandwiches, the slightly sweet brioche goes so well with the savory stuff inside. This is a staple in our home! Thanks Ali!
So nice to hear this, Efi! There is something so nice about a slightly sweet bread with a savory filling. Thanks for writing!
These are awesome! Turned out great and so easy. Light and soft. Thanks for this recipe!
Wonderful to hear this, Olga! Thanks for writing 🙂
Hello Ali, I wanted to let you know how grateful I am to have discover you and the recipes you share with your community.
Although I am a seasoned home cook, your videos and recipes have brought my cooking and co ride ce to another level.
I made those this past weekend and they turned out perfectly thanks to your clear concise and perfect instructions and video as have all the recipes I have made from your inspiration.
Thank you, from a grateful happy Montrealer fan!!!
So wonderful to hear this 🙂 🙂 🙂 Thanks so much for taking the time to write and to share all of this. I love Montreal. Haven’t been back in years, but it is one of my favorite cities.