
The Best, Easiest No-Knead Brioche Buns
This post may contain affiliate links. Please read my disclosure policy.
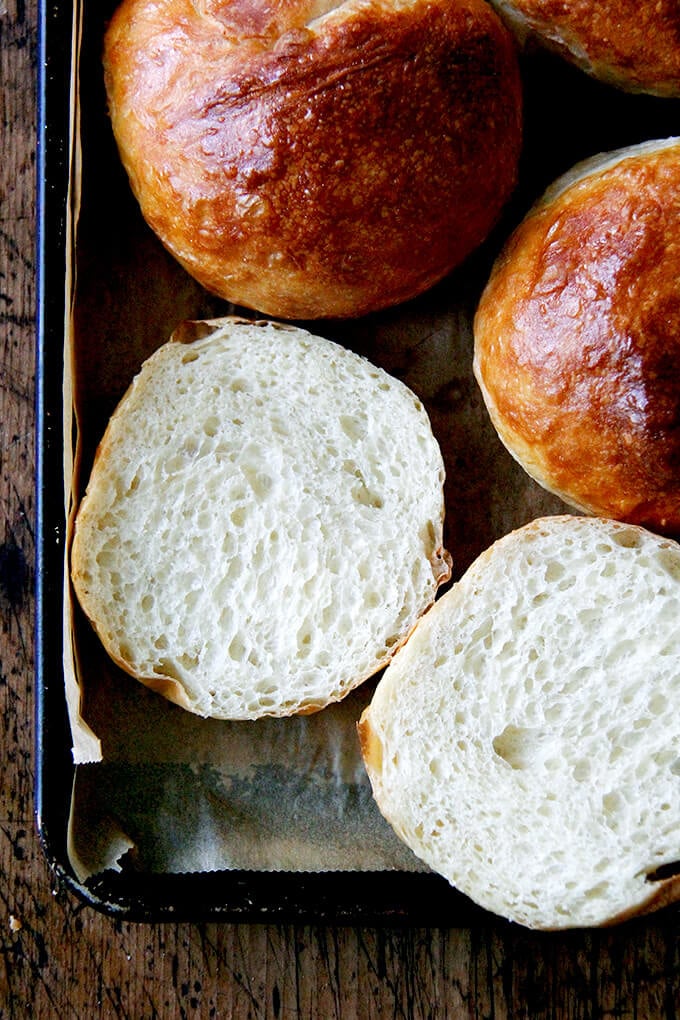
The dough for these no-knead brioche buns comes together in no time, and the buns are so light and airy. These buns are perfect for burgers, but they’re great for sandwiches of all kind! Video guidance below 🍞🍞

Today, I offer my sincerest apologies. On May 22, 2012, I posted a recipe for light brioche buns, promising you the brioche bun to end all brioche buns. Look no further, I said.
And then, in the recipe, I asked you to use not only bread flour but also a third cup of all-purpose flour. And I didn’t offer you any measurements in weights; I gave you cups only.
And I asked you to bloom your yeast in warm milk and warm water, but I didn’t tell you how warm the milk and water should be.
And I had you soften butter and massage it into the flour. I even asked you to scoop up the mixed dough and slap it down on the counter. And I asked you to knead your dough for 8 to 10 minutes until it was smooth and elastic.
Friends, I am sorry. I promise never to do this again. I promise never to ask you to use two types of flour unless it’s completely necessary. I promise never to ask you to bloom yeast. I promise to always give you weights of flour. I promise never to ask you to knead dough unless it serves some purpose.
I promise. I promise. I promise.
PS: Foolproof Homemade Bialys: A Step by Step Guide
How to Make Brioche Buns, Step by Step
The recipe included below is similar in makeup to the light brioche bun I once loved — there’s a little milk, a little butter, a little egg — but the method is simpler: in sum, it follows the Bread Toast Crumbs no-knead method.
Instant Yeast vs. Active Dry Yeast
In nearly every bread recipe on this site, I call for using instant yeast, SAF being my preference. The reason for this is because with instant yeast, you do not need to proof it — you simply stir it into the flour and salt or other dry ingredients just as you would baking soda or baking powder. Instant yeast makes bread baking so much easier and faster. If you can only find active-dry yeast, however, here’s what you do:
How to Proof Yeast
In general, proofing yeast simply requires sprinkling the active-dry yeast over the lukewarm water with a little bit of the sugar, letting it rest for 10-15 minutes or until the yeast gets foamy; then proceeding with the recipe. In this recipe, this is what you’ll do:
Whisk the egg with the water. Add the heated milk-butter mixture. Stir to combine. The mixture should be lukewarm to the touch. Sprinkle the yeast over top and let stand for 15 minutes or until it gets foamy; then proceed with the recipe.
Mix the Brioche Dough
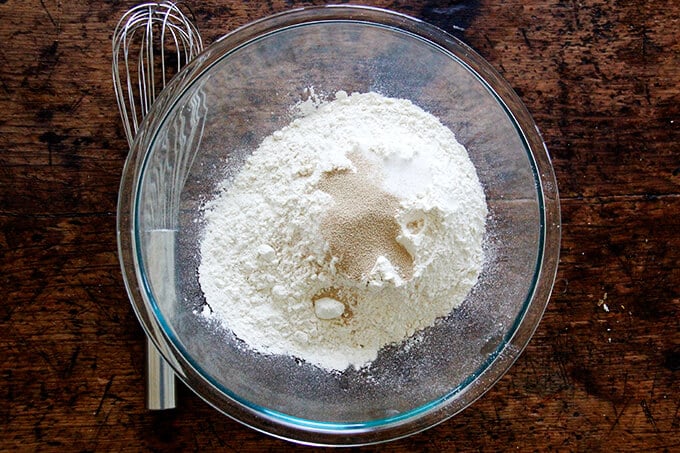
Whisk together the dry ingredients (flour, salt, sugar, and instant yeast). I cannot recommend enough using a digital scale to measure the flour. Volume measurements simply are not accurate.
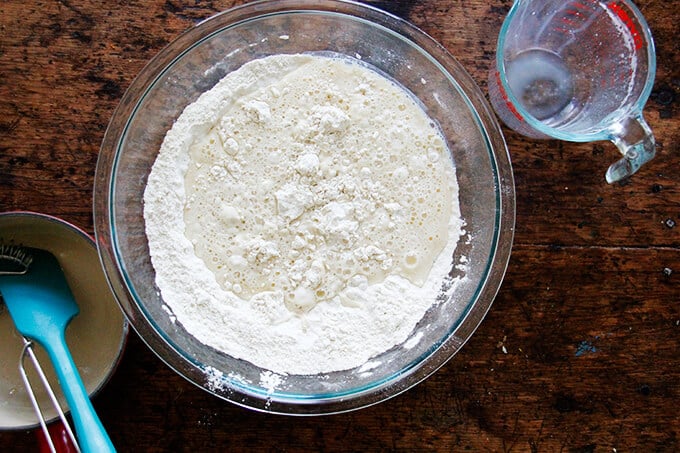
Create a lukewarm liquid by whisking together a hot milk-butter mixture into a cold water-egg mixture. The combined liquids will be perfectly lukewarm — no need to take its temperature.

Combine the wet and dry ingredients.
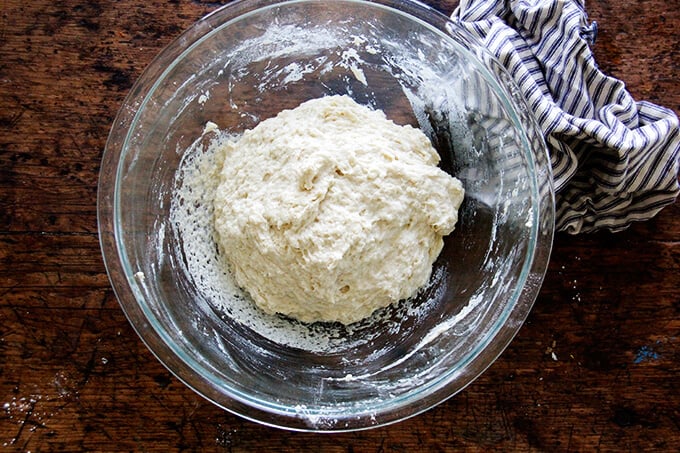
No Knead to Knead
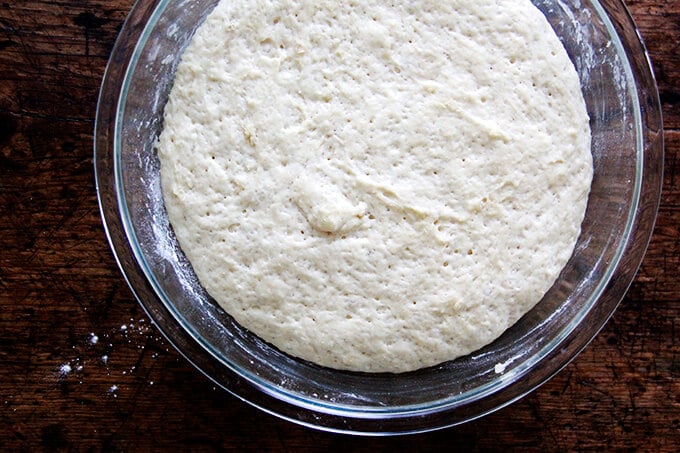
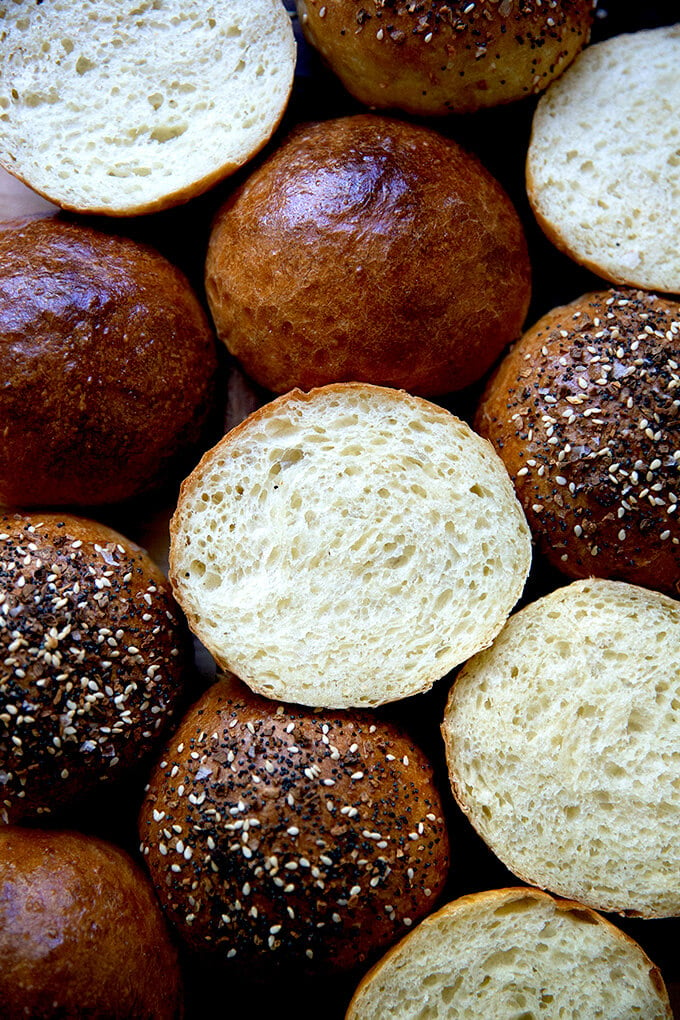
Mix with a spatula, stirring just until a sticky dough ball forms — no kneading necessary… save yourself the trouble! This is a high-hydration, wet dough. There is no need to knead it, which would require adding a lot more flour to the dough to make it manageable, which is what we don’t want. The high hydration dough makes for a light, airy crumb.
Place in a warm spot to rise (see the tip in the recipe box below for creating a warm spot to rise), and let rise till doubled.
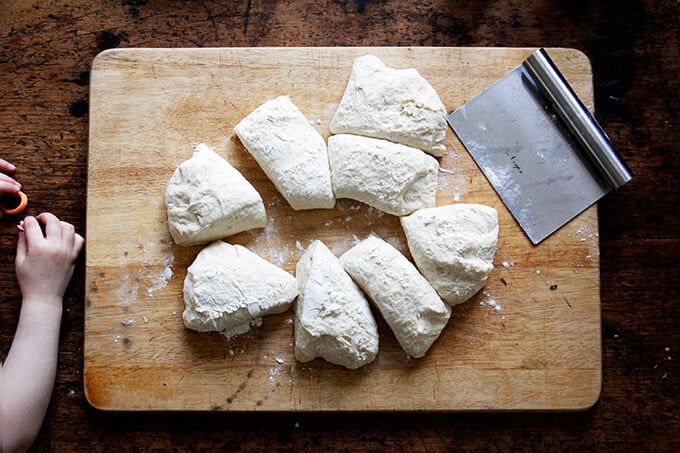
Punch the dough down using two forks.

Portion the dough into 8 to 10 pieces.
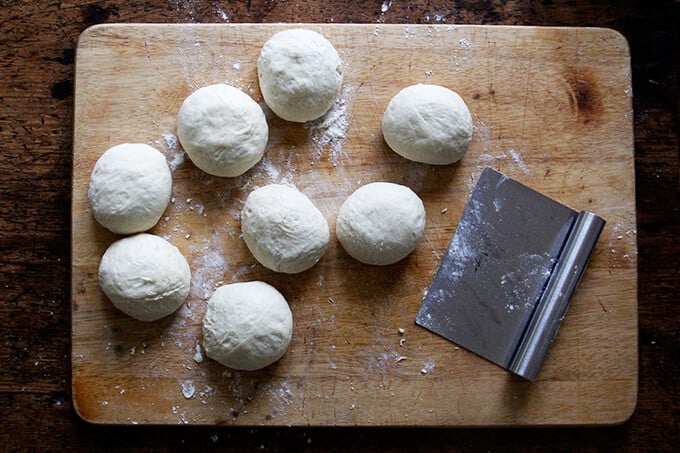
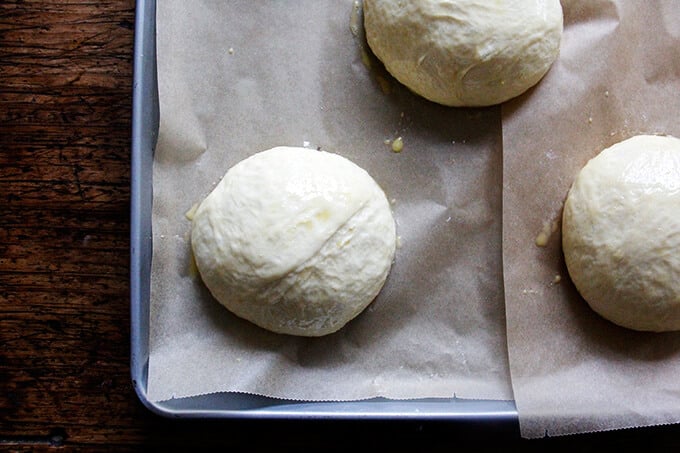
Shape the Brioche Buns
Using flour as needed, shape each portion into a ball, using the pinky edges of your fingers to tuck the dough under and create tension. See video for guidance.
Let the Buns Rise
Depending on the time of year and the temperature of your kitchen, the second rise here will take more or less time. The buns likely won’t double in volume, but they’ll look considerably puffed and they’ll feel light to the touch.
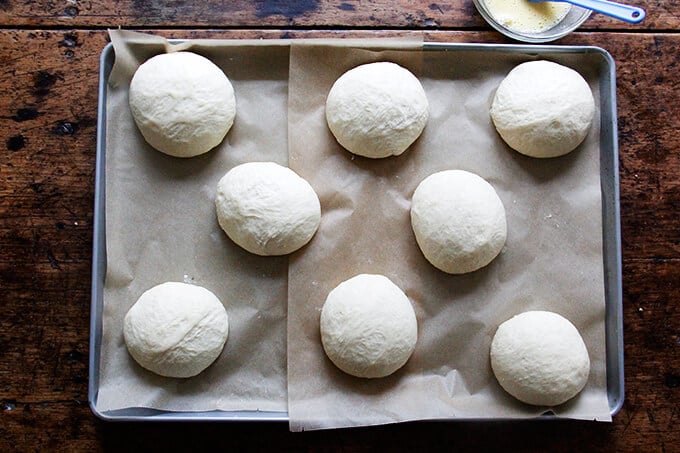
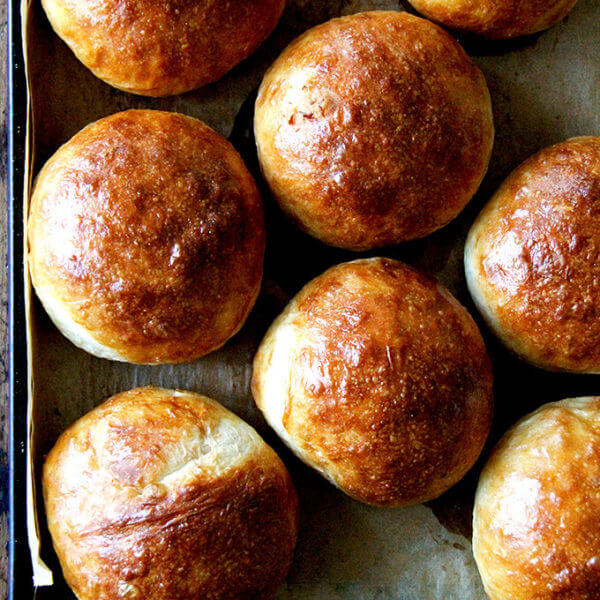
Brush each bun with an egg wash.
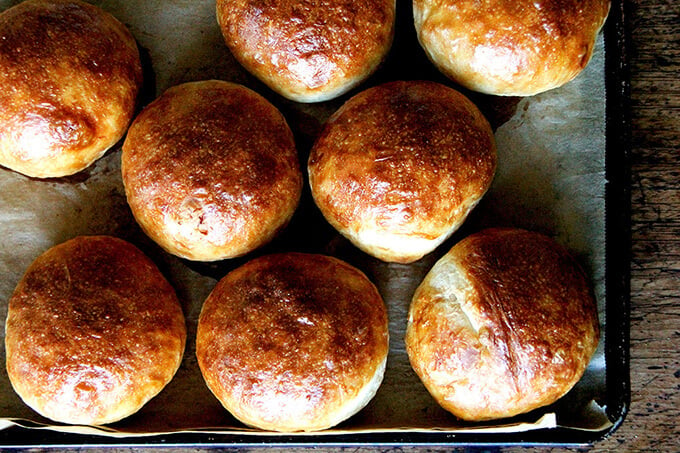
Bake the Brioche Buns
Transfer the pan to the oven, and bake for about 15 to 20 minutes or until the buns are evely golden.
Baking Timeline
You can make these rolls two ways:
- Mix the dough, let it rise for 2 to 3 hours, then shape and bake.
- Or you can mix the dough at night, store it in the refrigerator, and shape and bake in the morning.
I love the convenience of mixing dough at night and baking the following day, but you absolutely can mix and bake these the same day and get great results.
PS: No-Knead Thyme Dinner Rolls
PPS: Overnight Brioche Cinnamon Rolls
These brioche buns are perfect for burgers, pulled pork, and sandwiches of all kind, but I especially love them with Joanne Chang’s Famous Egg Sandwich from the Flour, Too cookbook:

You can sprinkle the buns with seeds or everything bagel seasoning, too:
The Best, Easiest No-Knead Brioche Buns
- Total Time: 3 hours 20 minutes
- Yield: 8-10 rolls
Description
If you have Bread Toast Crumbs, this is essentially 2/3 the light brioche recipe in the book with the sugar cut back by a bit more.
To create a warm spot for your bread to rise, turn your oven on for one minute, then shut it off. That brief blast of heat will create a cozy place for your bread to rise.
As always: for best results, use a digital scale to weigh the ingredients.
Water: Some people find this dough very wet and tricky to work with. If you live in a humid area, I would consider cutting some of the water back. If you are measuring with cups, hold 1/3 cup water. If you are using a scale, hold 75 g. You can always add the water back in when you are mixing if it seems dry. Reference the photos above and the video for how sticky/wet the dough should appear.
If using active dry yeast: Whisk the egg with the water. Add the heated milk-butter mixture. Stir to combine. The mixture should be lukewarm. Sprinkle the yeast over top and let stand for 15 minutes or until it gets foamy; then proceed with the recipe.
A Fun Variation: After brushing with the buns with the eggwash, sprinkle the buns with seeds or everything bagel seasoning.
Ingredients
- 4 cups (512 g) all-purpose or bread flour
- 2 teaspoons (10 g) kosher salt
- 2 teaspoons (8 g) instant yeast, see notes above if using active dry yeast
- 2 tablespoons (28 g) sugar
- 1 1/3 cups (300 g) cold water, or less, see notes above
- 1 egg
- 1/3 cup (78 g) milk
- 4 tablespoons (57 g) butter
- for the egg wash: 1 egg beaten with 1 tablespoon water
Instructions
- Whisk together the flour, salt, yeast, and sugar.
- In a medium bowl, whisk together the cold water and the egg.
- Heat the milk and butter together until the butter is melted. Pour this hot mixture into the cold water-egg mixture. The combined mixture should be perfectly lukewarm. Add it to the flour bowl and stir with a spatula till you have a sticky dough ball. Drizzle a teaspoon or two of olive oil over the dough and rub to coat — this prevents a crust from forming on the dough during the rising.
- Cover bowl and let rise in a warm area (see notes above) for 2 to 3 hours or until doubled. Alternatively, stick bowl in the fridge immediately and let it rise overnight or for 12 to 18 hours.
- Cover a work surface lightly with flour. Deflate dough, turn out onto work surface, and divide into 8 to 10 equal portions (use a scale and weigh each roll if you want perfectly even rolls: about 128 g each for 8 rolls and 102 g for 10 rolls). Using as much flour as necessary, roll each portion into a ball, and place on a parchment-lined sheet pan or two. I have an extra-large sheet pan (15x21x1) that I use to fit all 8 or 10 rolls on at once. (Note: If you refrigerate the dough, you can deflate it immediately after taking it out of the fridge … no need to let it come to room temperature first.)
- Let rise until the rolls puff and feel light to touch — 30-45 minutes roughly. Preheat the oven to 425ºF.
- Brush rolls with egg wash. Bake 15 to 20 minutes or until golden all around. Transfer rolls to wire rack to cool completely.
- Prep Time: 3 hours
- Cook Time: 20 minutes
- Category: Bread
- Method: Oven
- Cuisine: French, American
This post may contain affiliate links. Please read my disclosure policy.


516 Comments on “The Best, Easiest No-Knead Brioche Buns”
I’m thinking of adapting this recipe and making semla with it. Do you think they would bake up okay if I increase the amount of sugar for a sweeter roll? When I look at other semla recipes, the ingredients are very similar. I’ve tried a few semla recipe but wasn’t super happy with how they came out, but everything I’ve tried from your site has been wonderful!
Hi Vanessa! I have to admit, I had to google “semla” and now I’m very hungry. It looks so good. I think upping the sugar here would work beautifully! Go for it 🙂
I’m not sure if Vanessa ended up making semla, but I used this recipe as a base for cardamom buns and they turned out delicious! I upped the sugar just a touch and added a small amount of cardamom. Now that I know what semla is, I feel like the only thing better than straight cardamom buns is filling them with a smear of almond paste and whipped cream and making semla! Another winner, Ali!
So great to hear this, Jackie! This all sounds delicious especially right now in the middle of the coldest part of winter. Cardamom, almond, cream … so many of my favorite flavors. Thanks so much for writing and sharing your notes.
These are great and I’m a newb at making bread! I’ve noticed the few times making bread that its more dense than I expected… what am I doing wrong? It all tastes great, but I wouldnt mind if it was lighter, and fluffier….
Hi Amy!
It’s possible you need to let the dough rise a little bit longer, both the first time around and when the dough balls are shaped into rounds. How long roughly was each rise. Also: are you using a scale to measure?
Thanks for the recipes, these buns are excellent !
Big sucess for our burgers night 🙂 I am now looking at “potato buns”, I know you are working on a recipe. Would you know what’s the difference between standard vs potatoes buns ? Do you just replace some of the flour by mashed potatoes ? The recipes I found seem to use much less milk/water than you, is that due to the potatoes ? And also they all recommend using a stand mixer, not sure if it would work in a no-knead way ?
anyway, thanks again for this recipe and your website
Hi! I have a potato bread in my cookbook that calls for both boiled potatoes, which I mash into a purée, and some of the potato cooking liquid. I have to be honest, I have not made progress on making potato buns because this is my go-to burger night bun recipe.
I don’t think there is a traditional potato bun formula, but I think reducing the milk/water makes sense because the mashed potatoes lend a moistness. I think no-knead definitely can work, though a stand mixer might make it a little easier, though I would be inclined to go the no-knead route, and knead briefly in the bowl if necessary to form a cohesive dough.
I have made this recipe more times that I can remember! I love it. The buns are so easy to make and so delicious. Thank you so much for the recipe!! But I wonder, why are my buns light in color and not nicely browned like yours? Even with an egg wash. Maybe it’s just my oven?? It usually takes me longer to cook/bake things in my oven than what a recipe says.
Thanks!!
Hi Lily! So nice to hear this! You can definitely try cranking your oven up and seeing if you get better browning. What kind of flour are you using? It’s not bleached, right?
Can you freeze these?
YES! 🎉🎉🎉🎉🎉
Hi, if I want to double the recipe, does the yeast need to be doubled along with the rest of the ingredients? Thank you
Hi Leila! I would do 1.5 times the amount of yeast. Good luck!
This recipe turned out great, totally perfect for hamburger buns. Dividing into 8 seems like the perfect size for oversized smashburgers.
I do have a question about these. When I was young my grandfather used to get brioche buns that seemed chewier, were more yellow and were slightly sweeter. I’m thinking about slightly upping the amount of sugar and maybe adding another egg. In your opinion do you think I should add a whole egg or just a yolk, and if I do add another egg, or just a yolk, do I need to alter (reduce?) the amount of water? Also, what would happen if I slightly alter the balance of milk to water by adding more milk and reducing the water by a few tablespoons?
Great to hear this, Nick! Apologies for the delay here. Regarding your questions:
OK, because I hate having leftover whites on hand, I would go with the whole egg, but if it doesn’t bother you having a white on hand, it’s possible that the single yolk will be more effective in terms of adding color.
You may need to reduce the water amount, but I would say just slightly. I would measure the full amount of water, but hold back some of it. You can always add it back in slowly until you reach the right consistency if the mixture looks too dry.
If you were to “slightly alter the balance of milk to water by adding more milk and reducing the water by a few tablespoons”, it will be just fine.
One other thought: it’s possible that a little bit of honey might provide some color and some chew… might be worth experimenting with.
Hi Alex,
I would be interested to get your feedback about this whole no-knead business. For example how do you convert a ” knead recipe” to a no-knead one ? What makes it work or not work ? I guess you have to let the dough rest longer (can time replace kneading ? it works well for 72-hour pizza dough with cold fermentation), but what else ? Less yeast ? Different ingredients or different quantities ? How does no knead affect a recipe ?
Is it possible to get the same or almost same result as a standard recipe ? For example I am struggling to make a proper French brioche with no knead recipes, I find the result very dense (by the way, the best recipe so far is this one: https://www.weekendbakery.com/posts/brioche-the-no-knead-version/).
Thanks a lot !
Hi Ilann!
For me, it’s simply a matter of hydration — the more water or liquid there is relative to flour, the more you will be able to mix the dough by hand, meaning a spatula or spoon. If the dough is too stiff, a spoon or spatula won’t work, and you’ll have to do some kneading by hand to form the dough into a cohesive mass.
Lots of no-knead recipes call for a long slow rise, which helps with gluten development, but you don’t have to. My mother’s peasant bread is about 88% hydration and is ready in about 3 hours start to finish.
I have a no-knead brioche recipe as well!
Like you, this recipe is now my go-to for burger night! Made it 10+ times and it’s always a winner. I’ve adapted it a few times by replacing the milk with oat milk for my mom who doesn’t drink dairy, and it still turns out beautifully every time! The sesame seeds always add a nice “restaurant” touch 🙂
I also love this recipe to go with my BBQ pulled beef – a bit of butter and a slice of mozzarella or provolone… delicious!
So nice to hear this, Rachelle! Thanks so much for writing and sharing all of this. Great to hear that oat milk works — people ask all the time about non-dairy substitutes here. And your bbq beef sandwich sounds heavenly!!
I have a follow-up question actually… I want to make the buns in mini “slider” format to serve with my bbq pulled beef as an appetizer. Do you have any suggestions for modifying this recipe? I’m thinking of doing 16 small buns… maybe just need less time in the oven than the standard size?
Thanks!!
Love this idea! Yeah, I would just bake them for about 5 minutes less or so. It will work great!
This is the best no knead yet !I have made this many times with success every time Thank you ! Can I substitute honey for sugar ?
So great to hear this, Joan! Yes, absolutely re honey.
I can’t say enough good things about this recipe..I’ve doubled and tripled the recipe many times and it’s perfect every time. If I’m making the same day, I hold back a bit of water – if refrigerating overnight, I make as written (cold dough is easier to work with). I’ve make these for hamburger buns a restaurant and received many compliments!
So nice to hear this, Robin! Thanks so much for writing. Are you the one that DM’d me on IG with the photo of the restaurant buns?
Hi..yes, I am!! The restaurant was short lived (terrible owner who didn’t pull permits, didn’t pay employees or vendors), but these buns were a huge hit! Thank you so much for your work in developing these and sharing them…
Oh bummer about the restaurant/owner … no fun. But great to hear the buns were a success! Thanks again for writing 🙂
Hmm. A moral dilemma here. Did you ask Ali’s permission to use her recipe for monetary gain? Or purchase the rights?
Do you think that I could shape these buns into a longer shape to use for sausage sandwiches? Or would they just puddle, and I should just cut the sausage to fit?
I think you absolutely could shape the dough into sausage rolls! Go for it.
Hi there! I made these last week and am already getting requests from my family to make them again 🙂 can I double the recipe or should I do two separate batches?
Great to hear this, Kaitlin! Yes, you can double it.
I want to try these buns but since there are only two of us I wonder if the dough balls could be frozen and then taken out and baked?
Hi Sharon! Yes. I would freeze them on a sheet pan after you ball them up. Then transfer to an air-tight vessel once solid. When you thaw them, I would transfer them to the sheet pan (parchment lined) you plan on baking them on, and let them thaw and rise at room temperature until they are puffy and ready to be baked — this may take a few hours.
Alternatively, you can freeze the cooked buns, which works beautifully.
I would like to make hot dog buns for European weiners. A bit longer than regular weiners. What weight / portion of dough should I use please.
Hi Barbara, it’s hard to say exactly, but my gut is to suggest dividing the dough into 8 portions (roughly 128 grams each).
I made this recipe for the fist time today and these buns are all that you would expect from this recipe creator, DELICIOUS! Ali is my go to for any bread that I want to make, I make her Peasant bread regularly and change it up a bit with seeds, nuts, onions, and herbs. I bought her cookbook and highly recommend it as it is full of recipes that you will not find on line. I’m so happy with every recipe I’ve made and I’ve made many many many! Thank-you Ali! My picky husband thanks you too!
Awwww Victoria, this means a lot 🙂 🙂 🙂 Truly, thank you so much for all of this, and thank you for buying my book, and thank you for taking the time to write! So glad the buns turned out well.
Fabulosity. Made the rolls for Memorial Day. 8 larger ones.
Follow recipe closely and you are guaranteed success.
Great to hear this, Lynne! Thanks for writing 🙂
OMG…. I made these this morning and was amazed at how yummy but easy!! I was so impressed I am on my second batch now as I shared them with friends and family. Your recipe and video ( so helpful to have video! ) made it easy. Thank you so much…. I will be making these forever!
Yay! Wonderful to hear this, Megan! Thanks for writing 🙂 🙂 🙂
Hi from Malaysia, these burger buns look amazing, I recently made your pita breads and it was the best recipe I’ve ever used for pitas thank you! I’d like to know what protein content or brand of bread and all purpose flour you use for your no knead brioche and buns? Thanks
Hi Elaine! So nice to hear this! Apologies for the delay here.
King Arthur Flour bread flour: protein: 12.7%
King Arthur Flour all-purpose flour: protein: 11.7%
I halved the recipe, used bread flour, and refrigerated the dough overnight. The buns are so good and it is so easy, I can’t believe I made them. Thank you so much for the recipe!
So great to hear this! Thanks for writing 🙂
I recently had surgery and am unable to knead dough so looked up recipes for NO KNEAD!! This one is the best and as a matter of fact my husband says best rolls ever.. I just get out Big Red (Kitchen Aid mixer) and in a few hours done and done… I have shaped into hot dog roll shapes as well.. Perfect roll for every occassion..
Wonderful to hear this, Darlene! Thanks so much for writing and sharing. Glad the husband gave it the approval, too 🙂 🙂 🙂
Hi Alexandra. I decided to freeze half of the buns in dough form and bake the other ones. The baked ones turned out amazing! The frozen ones I put them in the frig to defrost at 10 am on Tuesday and 24 hours later I took them out of the frig and proofed them for 40 minutes and them baked them. They looked pretty good until I sliced them open and the top portion of the bun was pretty much hollow with a big air pocket. Do you have any idea of what causes that?
So strange! I don’t know what explains that. I would have guessed that maybe you didn’t proof them long enough, but you definitely did. Did they seem poofy when you put them in the oven? As in, did they look similar to the ones you baked off fresh before you put them in the oven?
Yes they looked poofy and similar to the ones I baked fresh. I still have a couple of frozen ones and will this time try defrosting and proofing them all at room temperature and see what happen.
OK, sounds good, keep me posted!
So I tried defrosting and proofing at room temperature which took 3 hrs. & 45 mins. and they turned out great.
So on my previous batch with the hollow air pocket in the top of the bun, I did some research that said if your temperature is too warm when proofing you could have this problem. I did turn on my oven for a few minutes and then turned it off and then put the buns in to proof so that may have been the issue with the second frozen batch being hollow. Thank you Ali.
OK, interesting, thanks so much for reporting back and sharing all of this! I’m relieved to hear the remaining buns thawed and bake up nicely. Thanks for writing!
About to try the recipe in a bit. I’ve never done a no-knead bread yet, but I’m just curious to know why you’re apologising for blooming yeast in a previous recipe. Isn’t that the way 90% of bakers do it? I’m a novice at baking by the way!!
I do have questions however (before I try this recipe out)
1. Get I still activate the yeast in the milk after it heats up? It makes me more confident with the bread lol
2. Can I ferment it for 4 hours? What would it do?
3. Standard brioche uses cold butter that is kneaded into the dough. Won’t completely melting it give a completely different texture than that of the regular brioche?
4. Can I make this into a braided loaf? I love the texture those make. What would be the time adjustment if ever?
5. Is there a way to make the inside texture similar to the silky and fluffy brioche? I understand that this recipe is completely different but is there much of a difference in flavour and texture?
I apologise for the very obnoxious questions, but thank you so much! Kneading still scares my from time to time, and this recipe will save me.
Hi!
Looking forward to making this recipe today!
Quick question, I pinned both this and the Easy Brioche loaf recipe, but i’m wondering if i can make buns out of loaf recipe and vice versa (loaf out of bun recipe)? It shouldn’t be an issue right? 10 buns is probably too much for us and I love the convenience of having a loaf around as well. Can I use either recipe, then half the dough (and use 1 for buns, the other for a loaf)?
Or, since the loaf bread calls for more flour, just use the loaf recipe instead?
thanks!!
Hi Arielli! Apologies for the delay here. Yes, you can! I might do the brioche loaf recipe because that’s a larger quantity: 6 cups of flour as opposed to 4 cups, and with that one, I know that half the recipe is perfect for 1 loaf pan. With the 4 cup recipe, a half recipe might make for a small-ish loaf … still great flavor, but if you want a good-sized brioche loaf, I would use the 6 cup recipe.
Hope that helps!
I finally made buns that look like the photos in the recipe! Easy and delicious! I’m looking like a pro!!!
I tried to add a photo but you are going to have to take my word for it! They are beautiful!
Thank you, Ali!
Yay! Wonderful to hear this, Bonnie! Thanks so much for writing 🙂 🙂 🙂
I used this recipe to make hot dog buns. I put the dough in a hot dog bun baking pan and covered with a sheet pan, weighed down by a cast iron pan. Baked at 375 for 18 mins and then took out to cool and slice. Delish…Thanks Ali for such an easy recipe.
So great to hear this, Mikki! Thanks so much for writing. Great to hear from YOU!! I guess I’m going to have to invest in a hot dog bun making pan 🙂 🙂 🙂
Hi Ali, I made the rolls this morning. They were great. Is sugar in the recipe optional?
Great to hear! And yes, I suppose the sugar is optional. I like the subtle sweetness it provides, but the texture of the rolls will not be altered if you leave it out.
These are great buns. The dough comes together quickly and effortlessly. The baked buns are moist, soft and airy but sturdy enough to handle a hot patty or generous sandwich filling. They’re not as buttery rich as traditional brioche that has copious amounts of butter and eggs in the dough, but they’re easier to make and a healthy alternative.
Hi! I notice you say that if you refrigerate the rolls, you don’t have to let them come to room temperature before dividing into buns. But then if the buns are shaped cold, will they still take 30-45 minutes to puff up before baking? Or will this take longer? Thanks! And will the “poke” test work to see if they have properly puffed up? (The indent from your poke will come back very slowly when they are ready for the oven?)
Hi! Because the buns are relatively small (as opposed to say a Pullman loaf), they will take about the same amount of time, but yes, they might take a little bit longer if they are cold. The poke test will work!
Will whole wheat flour work in this recipe? I have made them twice with white flour. The second time, I doubled the recipe so I could freeze some buns to have them at the ready for a burger night or for a delicious deli sandwich for lunch. I do love them as is, but would like to know if I can make them a bit healthier because once I make them I can’t stop eating them!
Hi Stacy! I think you could use as much as 50% whole wheat flour without adverse effects on the texture of the buns. As soon as you introduce lots of whole wheat flour to a recipe, the texture becomes denser and dryer, so I always advise starting small with the percentage of wheat flour you introduce.
Hope this helps!