The Best, Easiest No-Knead Brioche Buns
This post may contain affiliate links. Please read my disclosure policy.
The dough for these no-knead brioche buns comes together in no time, and the buns are so light and airy. These buns are perfect for burgers, but they’re great for sandwiches of all kind! Video guidance below 🍞🍞
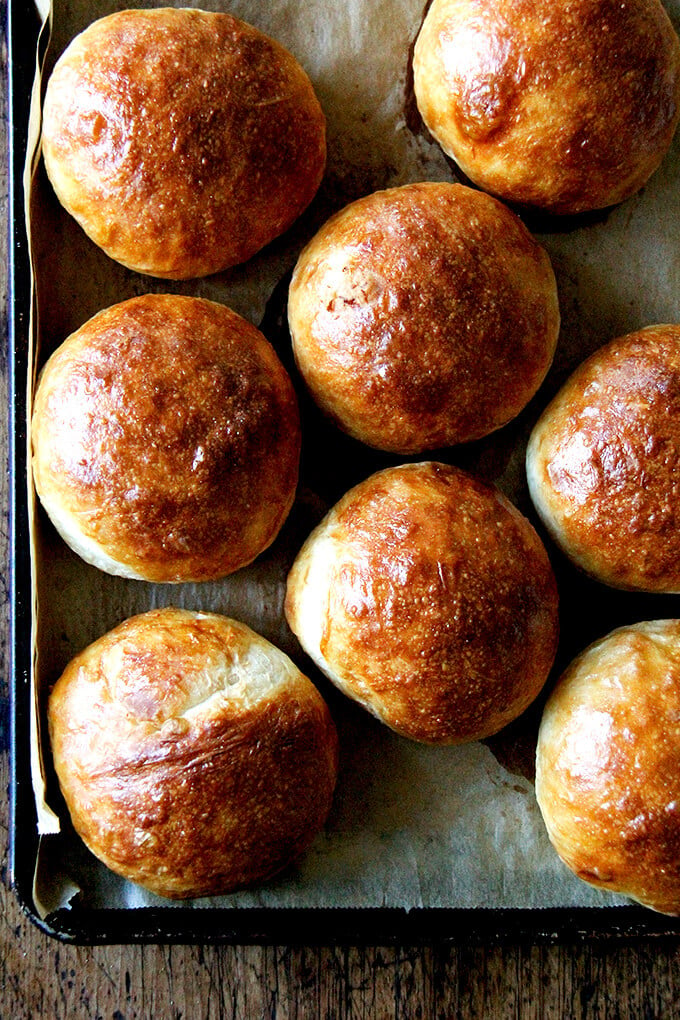
Today, I offer my sincerest apologies. On May 22, 2012, I posted a recipe for light brioche buns, promising you the brioche bun to end all brioche buns. Look no further, I said.
And then, in the recipe, I asked you to use not only bread flour but also a third cup of all-purpose flour. And I didn’t offer you any measurements in weights; I gave you cups only.
And I asked you to bloom your yeast in warm milk and warm water, but I didn’t tell you how warm the milk and water should be.
And I had you soften butter and massage it into the flour. I even asked you to scoop up the mixed dough and slap it down on the counter. And I asked you to knead your dough for 8 to 10 minutes until it was smooth and elastic.
Friends, I am sorry. I promise never to do this again. I promise never to ask you to use two types of flour unless it’s completely necessary. I promise never to ask you to bloom yeast. I promise to always give you weights of flour. I promise never to ask you to knead dough unless it serves some purpose.
I promise. I promise. I promise.
PS: Foolproof Homemade Bialys: A Step by Step Guide
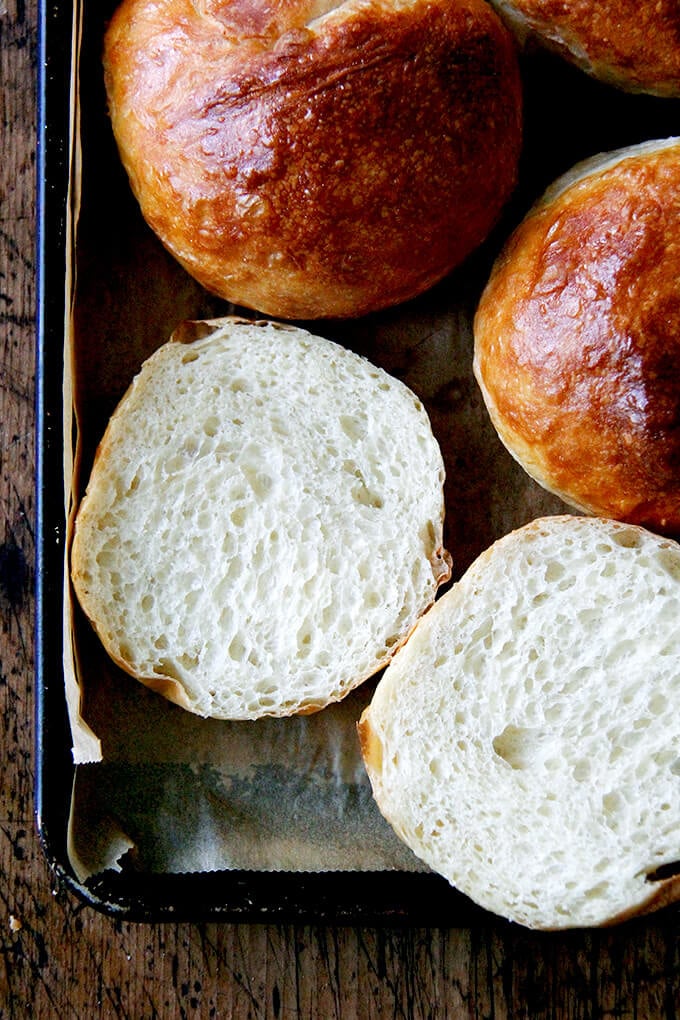
How to Make Brioche Buns, Step by Step
The recipe included below is similar in makeup to the light brioche bun I once loved — there’s a little milk, a little butter, a little egg — but the method is simpler: in sum, it follows the Bread Toast Crumbs no-knead method.
Instant Yeast vs. Active Dry Yeast
In nearly every bread recipe on this site, I call for using instant yeast, SAF being my preference. The reason for this is because with instant yeast, you do not need to proof it — you simply stir it into the flour and salt or other dry ingredients just as you would baking soda or baking powder. Instant yeast makes bread baking so much easier and faster. If you can only find active-dry yeast, however, here’s what you do:
How to Proof Yeast
In general, proofing yeast simply requires sprinkling the active-dry yeast over the lukewarm water with a little bit of the sugar, letting it rest for 10-15 minutes or until the yeast gets foamy; then proceeding with the recipe. In this recipe, this is what you’ll do:
Whisk the egg with the water. Add the heated milk-butter mixture. Stir to combine. The mixture should be lukewarm to the touch. Sprinkle the yeast over top and let stand for 15 minutes or until it gets foamy; then proceed with the recipe.
Mix the Brioche Dough
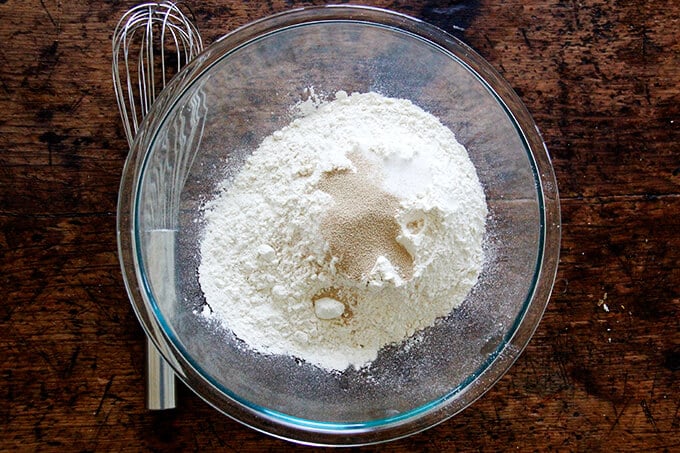
Whisk together the dry ingredients (flour, salt, sugar, and instant yeast). I cannot recommend enough using a digital scale to measure the flour. Volume measurements simply are not accurate.
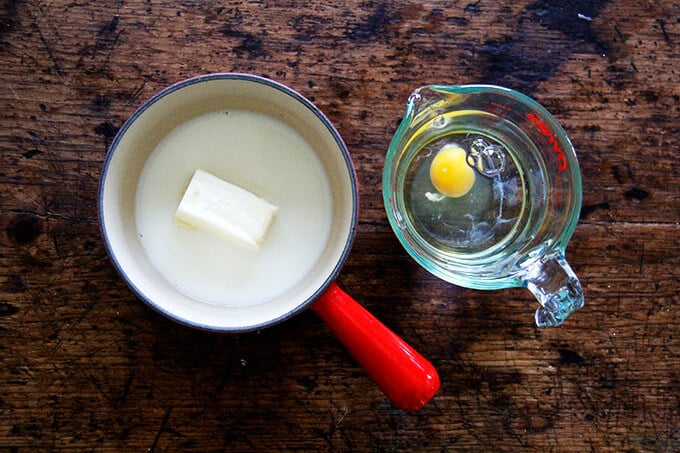
Create a lukewarm liquid by whisking together a hot milk-butter mixture into a cold water-egg mixture. The combined liquids will be perfectly lukewarm — no need to take its temperature.
Combine the wet and dry ingredients.
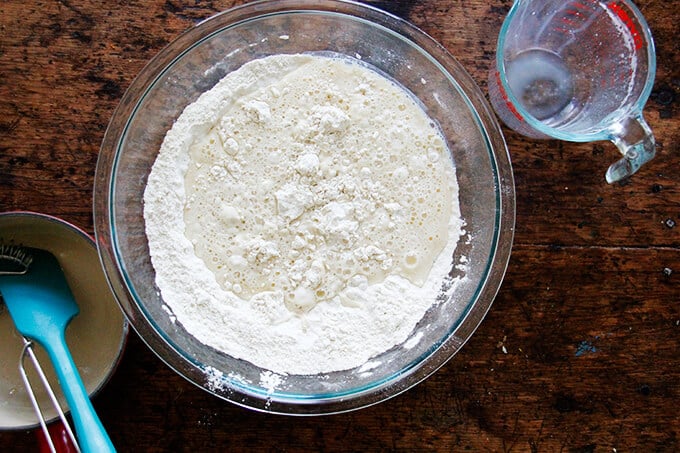
No Knead to Knead
Mix with a spatula, stirring just until a sticky dough ball forms — no kneading necessary… save yourself the trouble! This is a high-hydration, wet dough. There is no need to knead it, which would require adding a lot more flour to the dough to make it manageable, which is what we don’t want. The high hydration dough makes for a light, airy crumb.
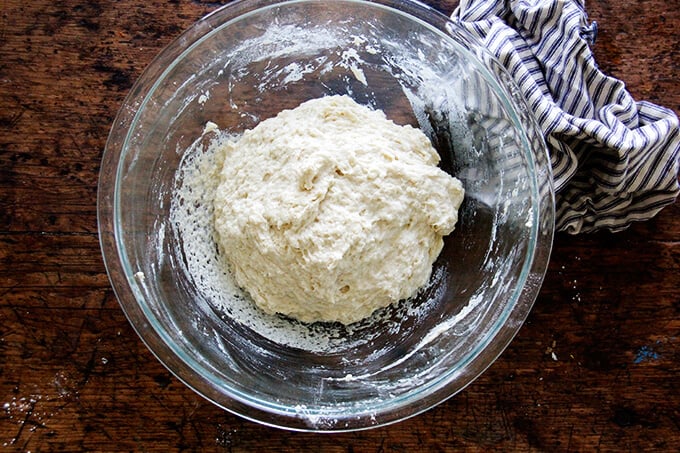
Place in a warm spot to rise (see the tip in the recipe box below for creating a warm spot to rise), and let rise till doubled.
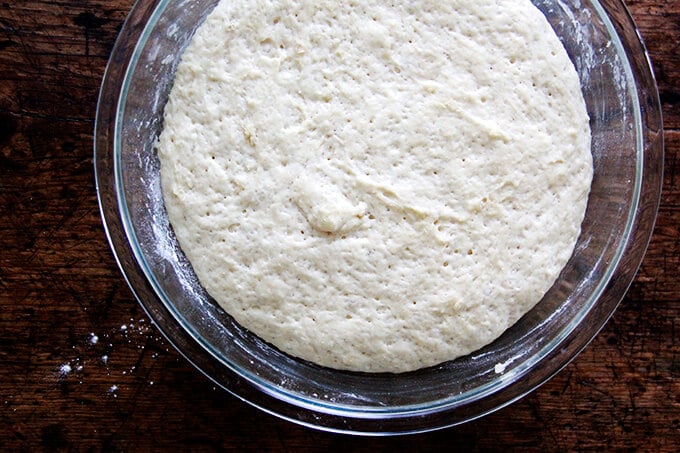
Punch the dough down using two forks.
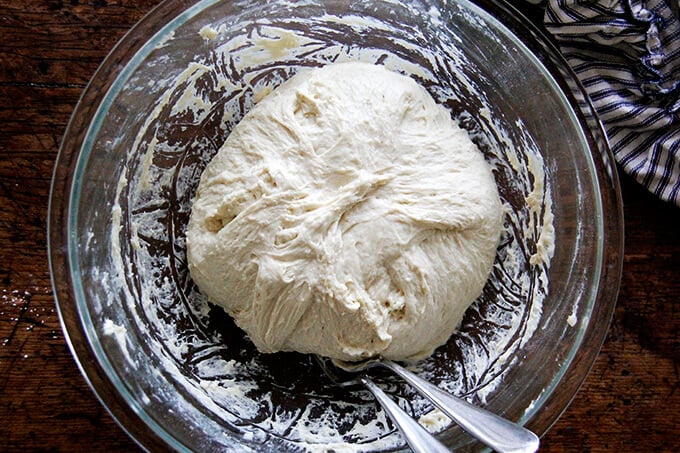
Portion the dough into 8 to 10 pieces.
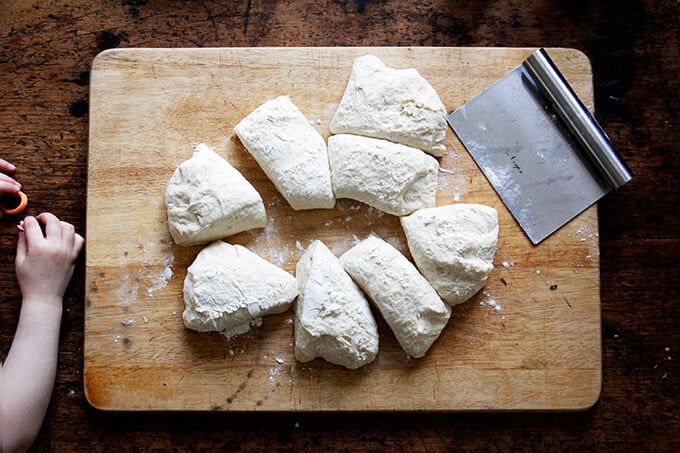
Shape the Brioche Buns
Using flour as needed, shape each portion into a ball, using the pinky edges of your fingers to tuck the dough under and create tension. See video for guidance.
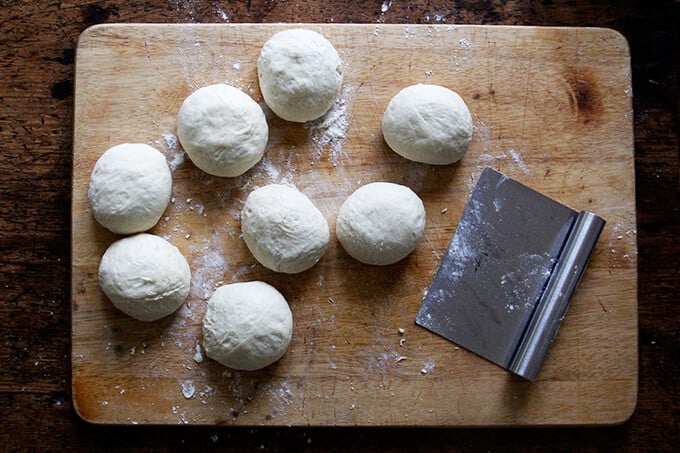
Let the Buns Rise
Depending on the time of year and the temperature of your kitchen, the second rise here will take more or less time. The buns likely won’t double in volume, but they’ll look considerably puffed and they’ll feel light to the touch.
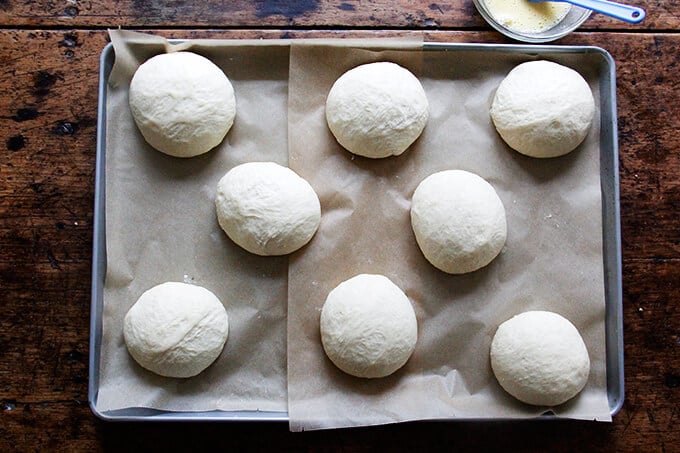
Brush each bun with an egg wash.
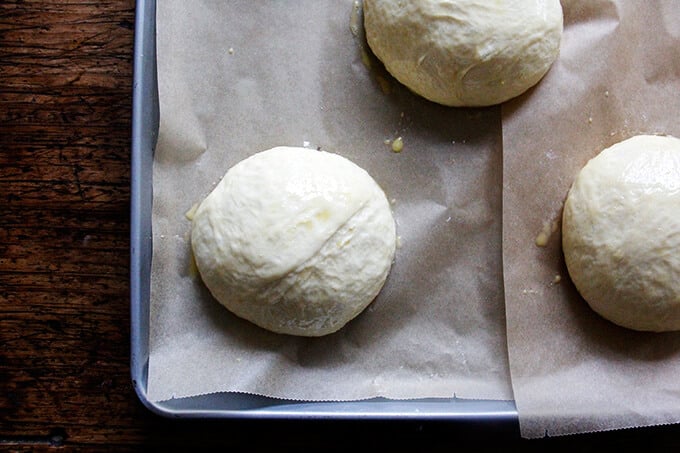
Bake the Brioche Buns
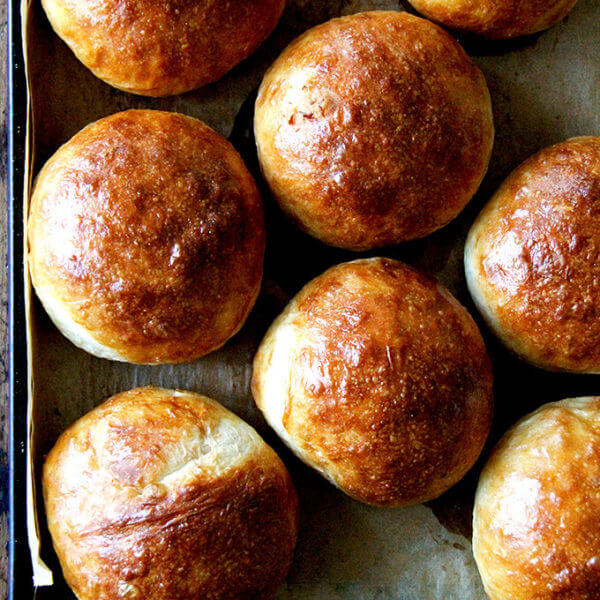
Transfer the pan to the oven, and bake for about 15 to 20 minutes or until the buns are evely golden.

Baking Timeline
You can make these rolls two ways:
- Mix the dough, let it rise for 2 to 3 hours, then shape and bake.
- Or you can mix the dough at night, store it in the refrigerator, and shape and bake in the morning.
I love the convenience of mixing dough at night and baking the following day, but you absolutely can mix and bake these the same day and get great results.
PS: No-Knead Thyme Dinner Rolls
PPS: Overnight Brioche Cinnamon Rolls
These brioche buns are perfect for burgers, pulled pork, and sandwiches of all kind, but I especially love them with Joanne Chang’s Famous Egg Sandwich from the Flour, Too cookbook:

You can sprinkle the buns with seeds or everything bagel seasoning, too:
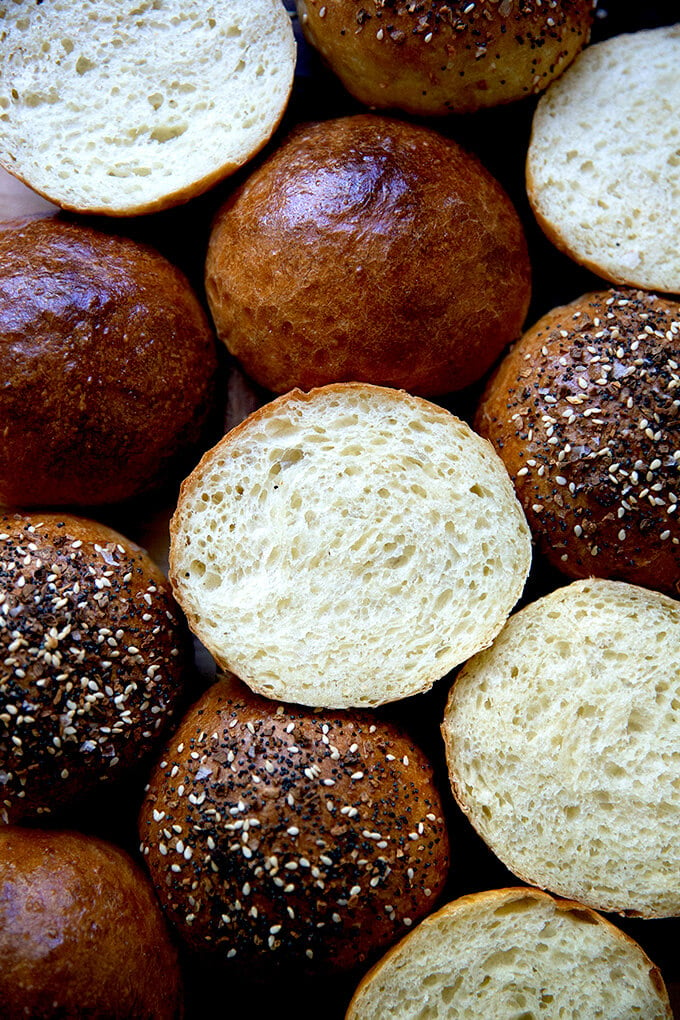
The Best, Easiest No-Knead Brioche Buns
- Total Time: 3 hours 20 minutes
- Yield: 8-10 rolls
Description
If you have Bread Toast Crumbs, this is essentially 2/3 the light brioche recipe in the book with the sugar cut back by a bit more.
To create a warm spot for your bread to rise, turn your oven on for one minute, then shut it off. That brief blast of heat will create a cozy place for your bread to rise.
As always: for best results, use a digital scale to weigh the ingredients.
Water: Some people find this dough very wet and tricky to work with. If you live in a humid area, I would consider cutting some of the water back. If you are measuring with cups, hold 1/3 cup water. If you are using a scale, hold 75 g. You can always add the water back in when you are mixing if it seems dry. Reference the photos above and the video for how sticky/wet the dough should appear.
If using active dry yeast: Whisk the egg with the water. Add the heated milk-butter mixture. Stir to combine. The mixture should be lukewarm. Sprinkle the yeast over top and let stand for 15 minutes or until it gets foamy; then proceed with the recipe.
A Fun Variation: After brushing with the buns with the eggwash, sprinkle the buns with seeds or everything bagel seasoning.
Ingredients
- 4 cups (512 g) all-purpose or bread flour
- 2 teaspoons (10 g) kosher salt
- 2 teaspoons (8 g) instant yeast, see notes above if using active dry yeast
- 2 tablespoons (28 g) sugar
- 1 1/3 cups (300 g) cold water, or less, see notes above
- 1 egg
- 1/3 cup (78 g) milk
- 4 tablespoons (57 g) butter
- for the egg wash: 1 egg beaten with 1 tablespoon water
Instructions
- Whisk together the flour, salt, yeast, and sugar.
- In a medium bowl, whisk together the cold water and the egg.
- Heat the milk and butter together until the butter is melted. Pour this hot mixture into the cold water-egg mixture. The combined mixture should be perfectly lukewarm. Add it to the flour bowl and stir with a spatula till you have a sticky dough ball. Drizzle a teaspoon or two of olive oil over the dough and rub to coat — this prevents a crust from forming on the dough during the rising.
- Cover bowl and let rise in a warm area (see notes above) for 2 to 3 hours or until doubled. Alternatively, stick bowl in the fridge immediately and let it rise overnight or for 12 to 18 hours.
- Cover a work surface lightly with flour. Deflate dough, turn out onto work surface, and divide into 8 to 10 equal portions (use a scale and weigh each roll if you want perfectly even rolls: about 128 g each for 8 rolls and 102 g for 10 rolls). Using as much flour as necessary, roll each portion into a ball, and place on a parchment-lined sheet pan or two. I have an extra-large sheet pan (15x21x1) that I use to fit all 8 or 10 rolls on at once. (Note: If you refrigerate the dough, you can deflate it immediately after taking it out of the fridge … no need to let it come to room temperature first.)
- Let rise until the rolls puff and feel light to touch — 30-45 minutes roughly. Preheat the oven to 425ºF.
- Brush rolls with egg wash. Bake 15 to 20 minutes or until golden all around. Transfer rolls to wire rack to cool completely.
- Prep Time: 3 hours
- Cook Time: 20 minutes
- Category: Bread
- Method: Oven
- Cuisine: French, American
This post may contain affiliate links. Please read my disclosure policy.





516 Comments on “The Best, Easiest No-Knead Brioche Buns”
Fabulous recipe which I’m sure will become a new family favorite! Quick question — can this be easily doubled? Or even tripled?
Yes! You don’t need to double or triple the yeast however. For a double batch, you could do 1.5 times the yeast. For a triple batch, double the amount of yeast will be fine.
Hi Ali!
Just wanted to drop you a note to tell you that I love this recipe. It’s so solid. I’ve made it several times. It always turns out exactly like your photos and makes wonderful sandwiches. I planned on using them for tonight’s dinner but my husband thought we needed to ‘sample’ them for lunch too, so he made us some quick bacon and egg salad sandwiches. They did not disappoint! Thanks again!
Sheri! Your pictures were amazing… I wish I could post them here!! The sandwiches look outrageously delicious and the buns themselves just look perfect. So great to read all of this. Thanks for writing 🙂 🙂 🙂
Hi Ali!
I wanted to drop you a quick note to tell you that I ‘Frankenstein-ed’ this recipe of yours by adding 100g of sourdough discard (and subtracted 50g of flour and 50g of water from the original recipe). Then I divided the dough into regular loaf pans instead of making buns. It made the perfect little sandwich loaves! So delicious! Thanks again for the recipe!
Yay!! OK, I am going to try this… I did attempt this once and did not have success so I will try your proportions. Fun! Thanks so much for sending 🙂
Excellent results and excellent directions. I haven’t made any kind of bread for about three
years and this was so easy and satisfying. I will certainly try the cinnamon roll version too.
Great to hear, Judy 🙂 🙂 🙂 Thanks so much for writing.
I made 8 yesterday. Next time I will make 10. They are wonderful. I will never buy rolls again. I’m going to try to use your recipe for brat buns also. I also make your bread. Everyone loves it. I have your cookbook, but haven’t tried anything other than bread yet. Thanks so much for these easy bread recipes.
So nice to read all of this, Barbara 🙂 🙂 🙂 Thanks so much for writing and sharing this.
I have made this recipe and it is delicious!! I was wondering if the dough can be started in a bread machine and then removed from the bread machine and shaped into rolls for the second rise before baking?
Great to hear! I don’t see why not? Go for it.
This recipe is fantastic! I always cut the recipe in half, using the whole egg and about 100g of water, per Alexandra’s suggestion to another comment. The buns turn out perfectly every single time!
Great to hear Leslie! Thanks so much for writing 🙂 🙂 🙂
I just made this for the first time. I cut the recipe in half but used 100 g of water based on the recommendation of a reader, and it turned out perfectly! I’m not surprised, of course, because your recipes are always 5 star.
Wat a keeper.
Great to hear, Victoria! Thanks so much for writing and sharing your notes. So glad the halved recipe worked well 🙂
I was wondering if this dough could be frozen. There are only two of us so 10 buns would go bad. I’m not a fan of freezing baked bread because it tends to dry out. Thank you for a great website!
I would freeze the dough immediately after you shape the balls. You can freeze them on a sheet pan, then transfer them to a ziplock bag once they’re solid.
Can this recipe be made with cup4cup gluten free flour.
Hi Lolly… I haven’t tried but I worry a little bit about using gf flour here. I don’t think you’ll be able to get the dough to hold its shape. It’s a very wet dough to begin with and if you use gluten-free flour, I worry the dough will be more like a batter than a dough.
I love this website and think it’s literally the BEST and my go-to for recipes. I made these buns this week, using the overnight/refrigeration method. Mine didn’t come out light and airy – rather they were dense. I used a digital scale for all measurements and had fresh ingredients. Is there anything else that could have caused that? It got pretty hard in the fridge, and I didn’t let it come to room temp.
Hi! Was the dough covered in the fridge? As in an airtight vessel? I think next time around, letting the dough come to room temperature will help. Once the buns are shaped, let them rest on the sheet pan until they really puff and feel light and airy to the touch.
Where did you get your cloth bowl cover? There are so many on Amazon.
Dot and Army: https://www.dotandarmy.com/products/extra-large-bowl-cover-perfect-for-breadmaking
Love them 🙂
Love this recipe. Overnight is the way to go. Makes full loaves instead of buns if you like. So versatile and truly delicious. Seeds yes!!!
Easiest recipe for making buns. I made 50/50 whole wheat/AP flour and made 10. I ate one with butter soon after they were out of the oven, for I could not wait to use them for burgers. Your recipes never disappoint! Delicious!!
Awww thanks, Sara 🙂 🙂 🙂 So nice to read this.
Sara, thanks for adding that the recipe works when adding whole wheat. I’ve already left a comment when I tried them, which of course, was a review stating how good the rolls are.
Great to hear, Barbara 🙂
Barbara, you are welcome. I am happy to know my comment helps. 😊
Wow! These were amazing and I’m not much of a bread maker. A million times better than store buns.
Great to hear, Michelle! Thanks for writing 🙂
These came out fluffy and delicious! I love that I don’t have to pull out my giant mixer to make them. I’m making another batch today for some tuna sandwiches…
Thank you, Alexandra! PS My daughter shares your name!!
I forgot to rate them! lol wheres the option for 10 stars???
Awww thanks Noreen! So nice to read all of this. Enjoy those tuna sandwiches!!
Hi Ali – I love brioche and am always searching for something close to the wonderfully chewy and rich ones I had in France. I’m wondering if it’s possible to up the egg/egg yolks/butter to make a more rich and decadent bread? Thanks!
Worth a shot! I’m not sure how to advise regarding the water… you might need to reduce to account for the added liquid.
I love your recipes and your website Ali. You’re my go to even before ATK. I’ve made so many delicious meals following your advice. I made these rolls to go with a pulled pork. they looked beautiful and I placed them on the rack they felt pretty heavy and I can’t figure out what made them so dense. Almost like a potato roll. I used KA bread flour and the full amount of water to get the right consistency and let rise for 2 1/2 hours and again 40 minutes after shaping. Mine had a slightly yeasty the flavor as well. Maybe I didn’t let them rise as long as they needed? Maybe I need new yeast.
Hi and thank you 🙂
Questions: are you using a scale to measure? Part of me wonders if you maybe need to reduce the water and increase the rise time, especially for the second proof — I find, especially as it gets colder out, the rolls need to proof longer. Do you remember how long they proofed before baking?
Thanks for your reply. I always use a scale. It was about 74 in the house and I proofed for 2.5 hr then 40 min after shaping. Maybe it needed longer, and I’m wondering if I baking a few more minutes would have helped. Still figuring out yeast baking since I’ve mostly been a sourdough gal. Both need practice and adjustment depending on conditions.
Looking forward to your Pizza book! Your dough recipe is a favorite after trying many!
Oh great to hear, Angela! Thank you 🙂 🙂 🙂
Yeah, try for an hour once the rolls are shaped and on the sheet pan… I should add some notes to the recipe.
I love your recipes, and have made the peasant bread at least once a month since finding your site. For the brioche buns, can I freeze unused dough for later use? Thank you for your lovely recipes and instructions!
AWESOME. I followed the recipe except used a little less sugar (prob – 1 tsp), and little less water (75% humidity here). Left in frig for 24 hours, used the egg wash, sesame seeds, and finally topped with a little melted butter. I let the buns sit on the cookie sheet for 45 min prior to baking. YUM! I finally have a fantastic bun recipe that is delicate enough for dinner rolls and sturdy enough for burgers. We used them for brisket sandwiches. BTW, I’ll use the recommended amount of sugar next time, You got it right! My daughter loves your book!
Thanks,
Cynthia from Texas
Awww so nice to read all of this, Cynthia 🙂 🙂 🙂 Thanks so much for writing and sharing your notes!
My first time to make bread and this recipe made me look like a bread expert.
I cheated though and kneaded it with a stand mixer. I also used the breadproof function on my oven.
So happy with the outcome. Thank you for sharing!
Great to read all of this! Thanks for writing and sharing 🙂
After so many years finally found this beautiful recipe! Light and perfect. Thank you!
Great to hear, Ella!
Can I do this recipe with self rising flour ?
Unfortunately, no.
Love this recipe, I always thought brioche buns were complicated to make, but as always you made it easy and foolproof. I’ve been making it for a few years now, and with the same ingredients I make 13/16 buns. I let them rise 4 hours instead of the 45mins, and they get significantly bigger so I can make more!
Oh I love this, Valentina! Thanks for writing and sharing your notes! So smart 🙂
For me, a no fail recipe! The ingredients come together quickly and I usually do the overnight rise, so the buns can be made at my convenience. Great flavor and light!
So nice to hear this Lyn. Thank so much for writing and sharing your notes 🙂 🙂 🙂
Merry Christmas, Ali.
So nice you take time to write. 🩷
Your recipes for brioche rolls and cinnamon buns will be featured this year at our table!
Wonderful to hear, Lyn! Happy holidays 🙂
I love this recipe. I didn’t have enough flour for it and I had to play around with the measurements, still it came out great and better than expected.
Great to hear, Brenda!
I wanted to drop a note as I am in the process of making these rolls once again. I first discovered this recipe during the pandemic and this recipe has become a staple over the years. I have made them countless times and always to perfection!
Great to hear, Joanne! Thanks so much for writing and sharing this 🙂
This is amazing like all of your bread recipes! Thank you so much
Great to hear, Melody! Thanks for writing 🙂
I am a super fan! Any chance this can be made vegan with appropriate substitutions?
I know lots of people have done this… you might have to search back through the comments. I think using alt milks and vegan butters have been the solution… not sure what people have done about the egg… maybe just omit it?
If using ‘active dry yeast’ is the weight used the same as’ instant yeast’ Thanks
Yes!