
My Mother’s Peasant Bread: The Best Easiest Bread You Will Ever Make
This post may contain affiliate links. Please read my disclosure policy.
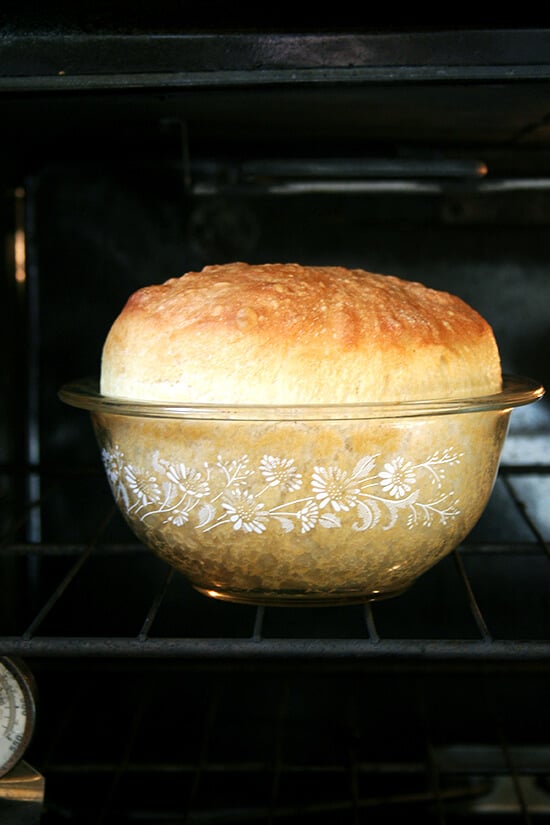
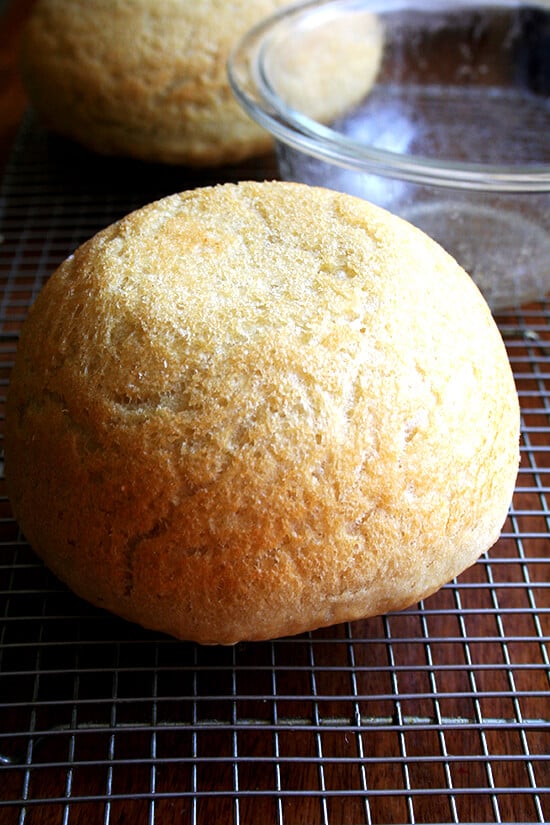
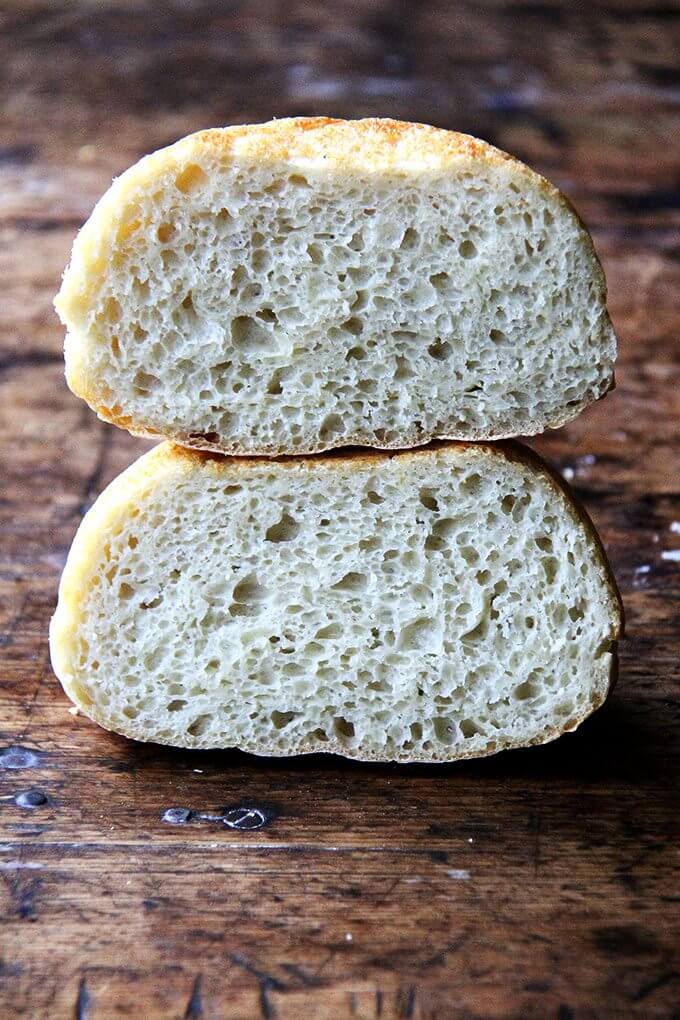
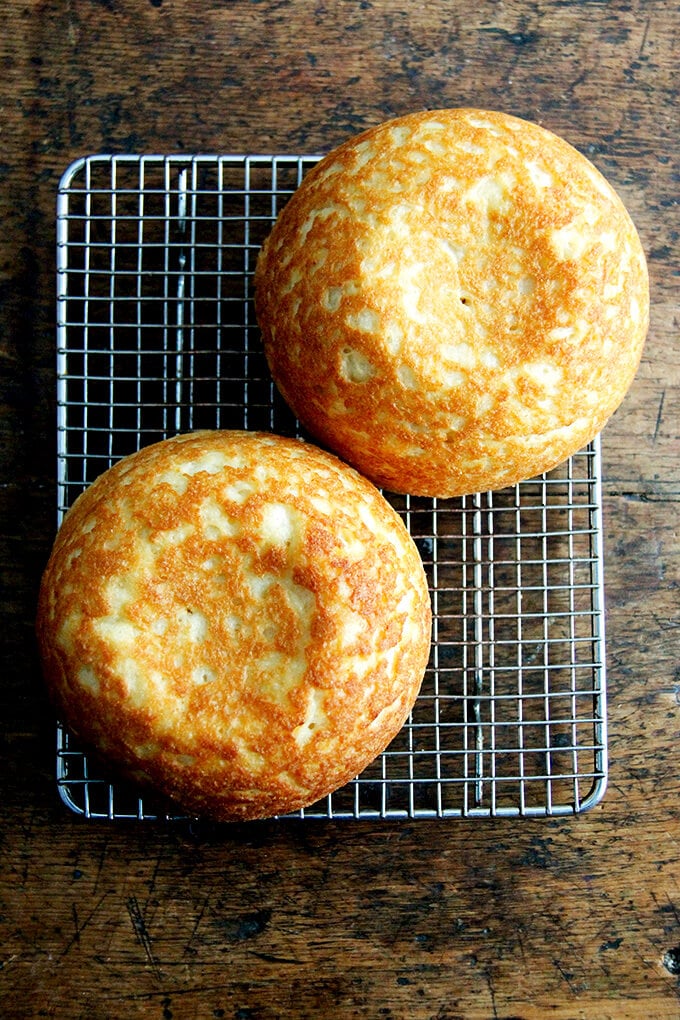
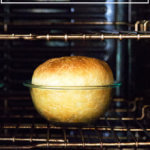
This is the no-knead bread recipe my mother has been baking for 45 years. Start to finish, it can be ready in three hours. It bakes in well-buttered Pyrex bowls — no need to preheat a baking vessel for this recipe — and it emerges golden and crisp with a soft, tender crumb. 🍞🍞🍞🍞🍞
When I tell you that, if forced, I had to pick one and only one recipe to share with you that this — my mother’s peasant bread — would be it, I am serious. I would almost in fact be OK ending the blog after this very post, retiring altogether from the wonderful world of food blogging, resting assured that you all had this knowledge at hand. This bread might just change your life.
The reason I say this is simple. I whole-heartedly believe that if you know how to make bread you can throw one hell of a dinner party. And the reason for this is because people go insane over homemade bread. Not once have I served this bread to company without being asked, “Did you really make this?” And questioned: “You mean with a bread machine?” But always praised: “Is there anything more special than homemade bread?”
And upon tasting homemade bread, people act as if you’re some sort of culinary magician. I would even go so far as to say that with homemade bread on the table along with a few nice cheeses and a really good salad, the main course almost becomes superfluous. If you nail it, fantastic. If you don’t, you have more than enough treats to keep people happy all night long.
The Magic of the Peasant Bread
So what, you probably are wondering, makes this bread so special when there are so many wonderful bread recipes out there? Again, the answer is simple. For one, it’s a no-knead bread. I know, I know. There are two wildly popular no-knead bread recipes out there.
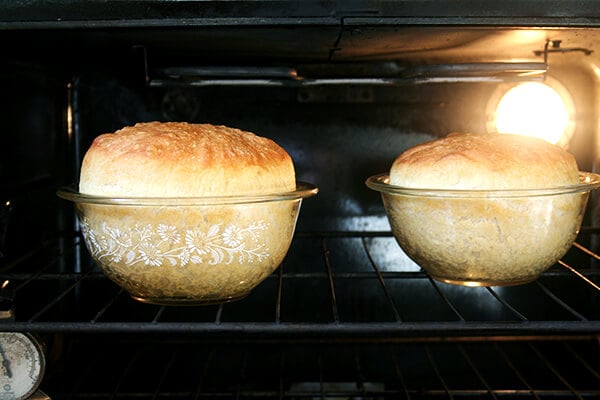
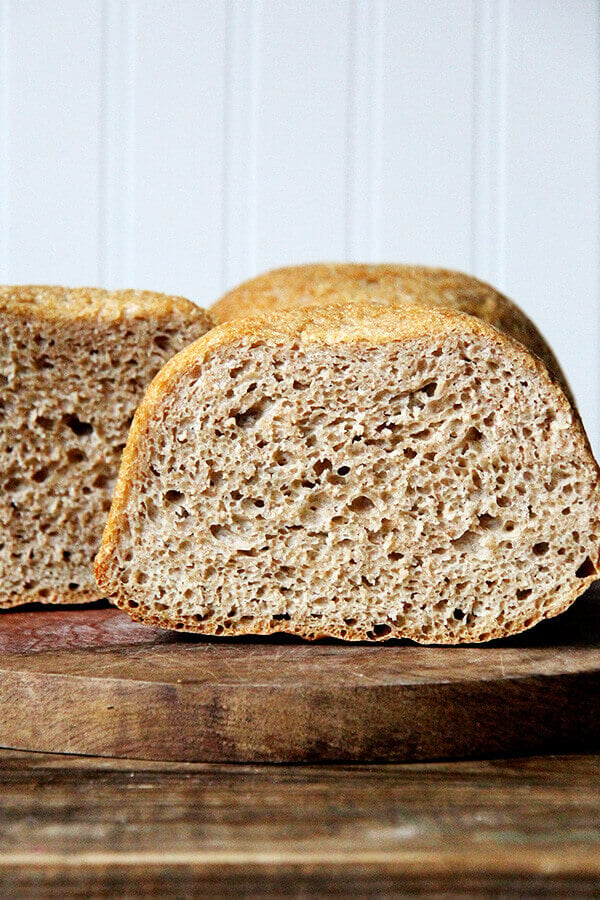
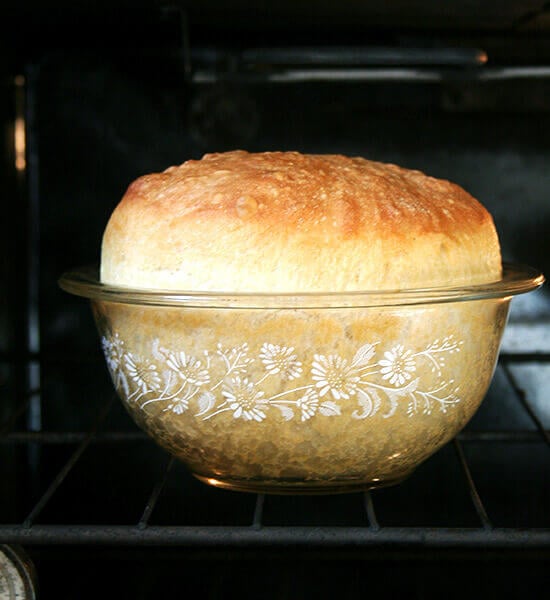
But unlike the others, this is a no-knead bread that can be started at 4:00pm and turned out onto the dinner table at 7:00pm. It bakes in well-buttered Pyrex bowls — there is no pre-heating of the baking vessels in this recipe — and it emerges golden and crisp without any steam pans or water spritzes. This is not artisan bread, nor is it trying to be. It is peasant bread, spongy and moist with a most-delectable buttery crust.
Genuinely, I would be proud to serve this bread at a dinner party attended by Jim Lahey, Mark Bittman, Peter Reinhart, Chad Robertson, Jeff Hertzberg and Zoe Francois. It is a bread I hope you will all give a go, too, and then proudly serve at your next dinner party to guests who might ask where you’ve stashed away your bread machine. And when this happens, I hope you will all just smile and say, “Don’t be silly. This is just a simple peasant bread. Easy as pie. I’ll show you how to make it some day.”
Peasant Bread Variations
Once you master the peasant bread, you can make any bread your heart desires — this simple no-knead bread recipe is the foundation of many of the other bread recipes on this site, namely this hugely popular overnight refrigerator focaccia and this simple homemade pizza dough. It’s even the inspiration behind this sourdough focaccia and this sourdough sandwich bread and this simple pita bread recipe.
The below post is organized as follows:
- How to Make Peasant Bread, Step by Step
- The Best Way to Store Bread
- Peasant Bread Dinner Rolls
- Peasant Bread Sandwich Bread
- How to Add Seeds and Nuts to Bread Dough
- How to Make Gluten-Free Peasant Bread
- How to Coat the Loaves in Seeds
- How to use Whole Wheat Flour
- How to Bake the Peasant Bread in a Dutch Oven
Many more variations on the peasant bread can be found in my cookbook, Bread Toast Crumbs:
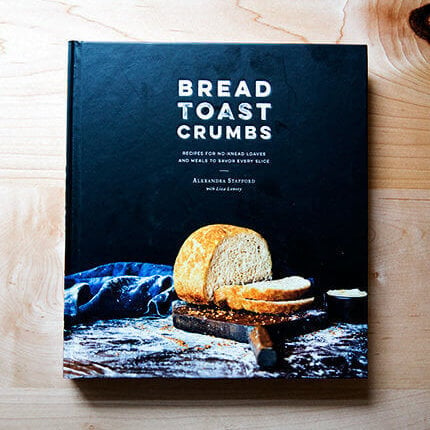
Bread Toast Crumbs
Love the peasant bread? There’s now a book filled with 40 simple bread recipes plus 70 recipes to use up every crumb of every loaf you bake.
How to Make Peasant Bread, Step by Step
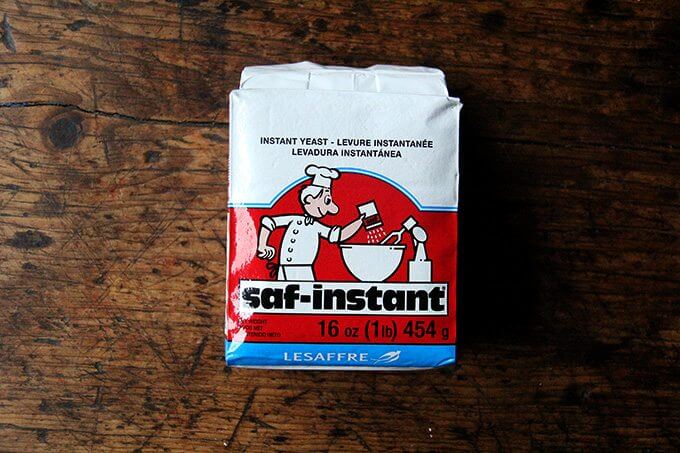
First: You need yeast.
This is the yeast I buy exclusively: SAF Instant Yeast. Instant yeast can be whisked into the flour directly without any blooming or proofing. If you want to stick to active-dry yeast, there are instructions in the recipe notes on how to do so. Red Star yeast is great.
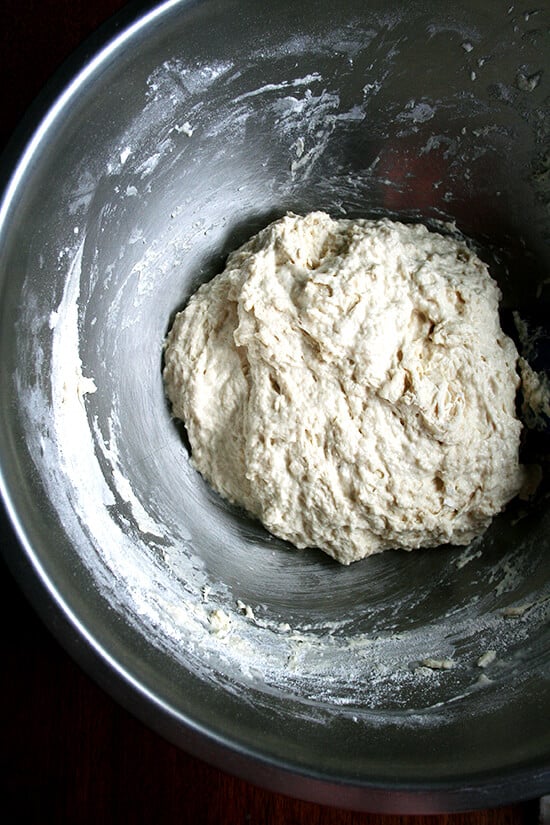
Whisk together flour, salt, sugar, and instant yeast. Add lukewarm water.
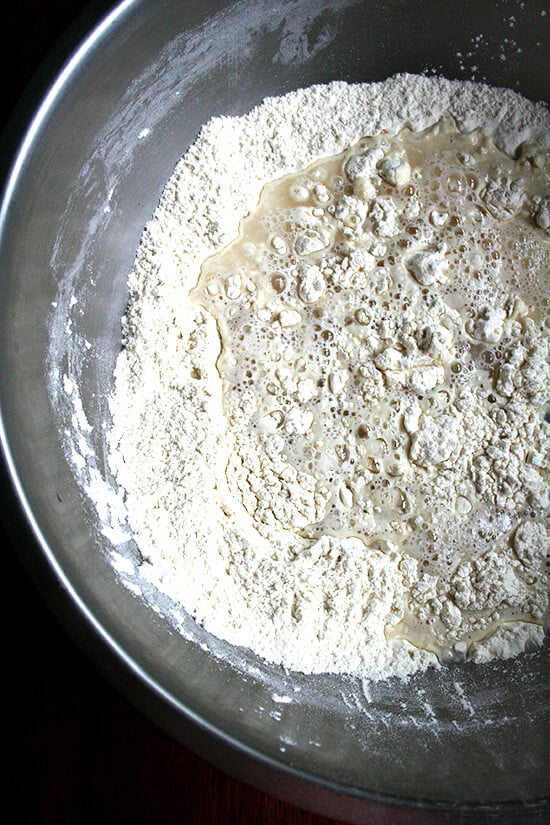
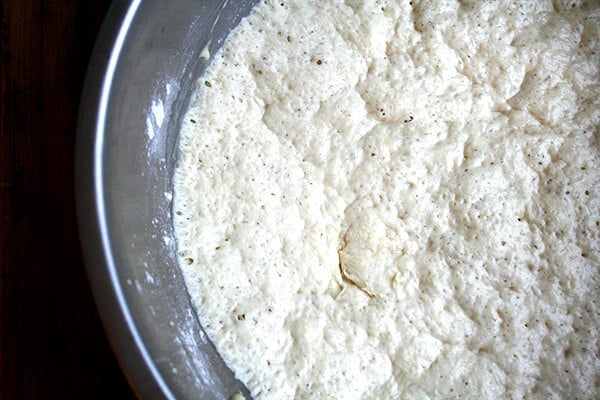
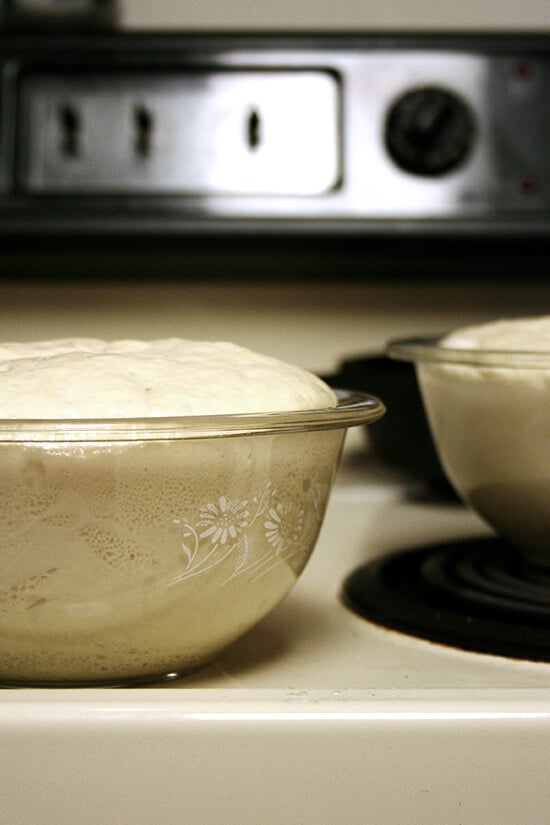
Mix until you have a sticky dough ball. Let it rise for 1.5 to 2 hours…
… or until it looks like this:
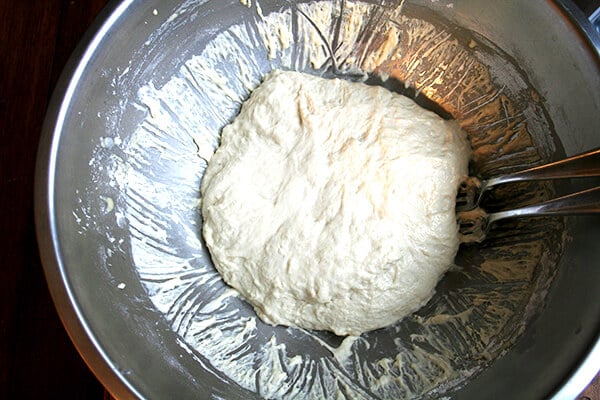
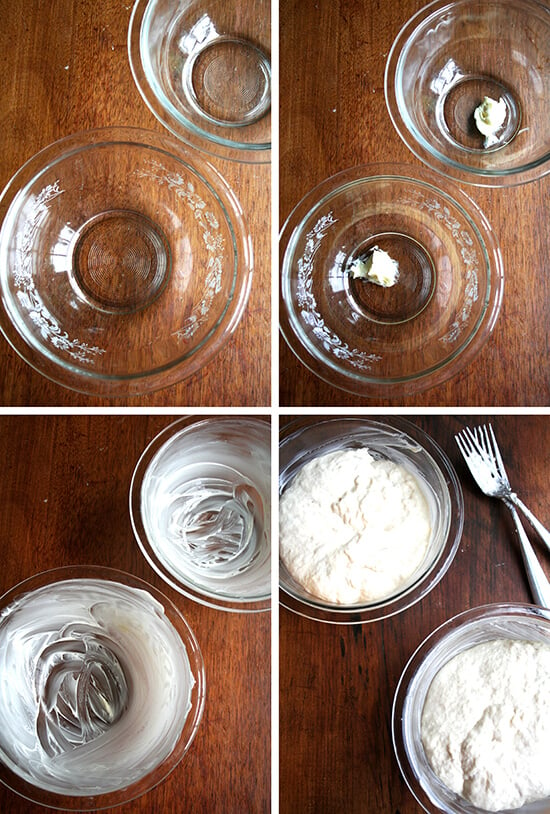
Punch down the dough using two forks.
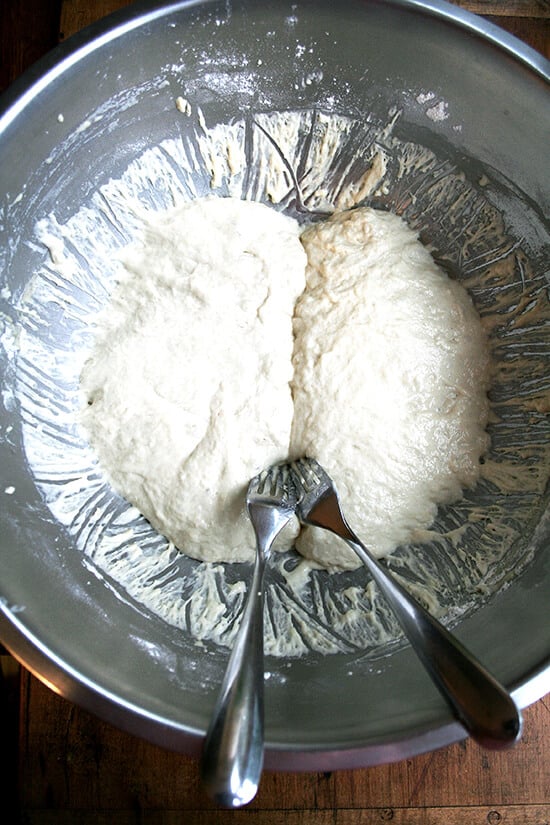
Then split the dough down the middle again using the two forks.
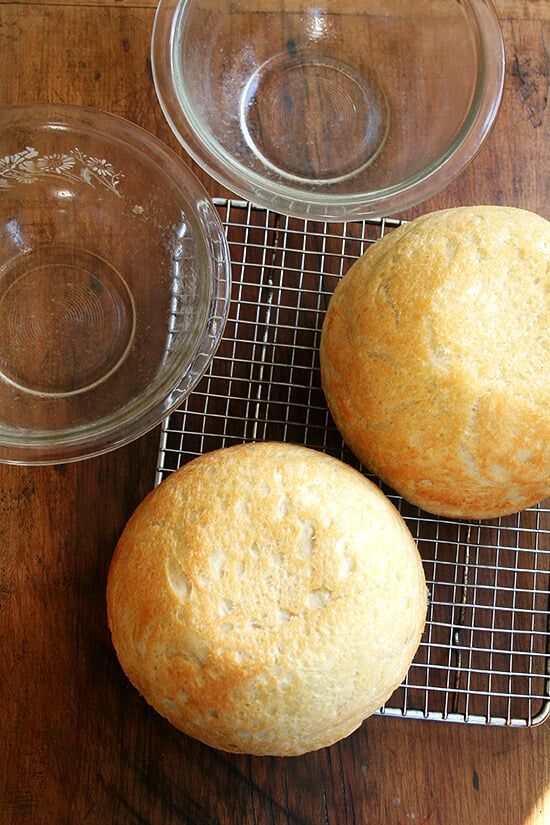
Because this is a very wet dough, it must be baked in an oven-proof bowl. I am partial to the Pyrex 1L 322 size, but any similarly sized oven-proof bowl will work.
Butter the bowls well; then transfer half of the dough to each prepared bow.
Let the dough rise again until it crowns the rim of the bowl, about 30 minutes.
Transfer the bowls to the oven to bake:
This bread is irresistible when it’s freshly baked, but it also makes wonderful toast on subsequent mornings as well as the best grilled cheese. It’s also my favorite bread to use for these egg salad sandwiches and for this no-tuna “tuna” salad.
The Best Way to Store Bread
If you want to store the bread at room temperature for 3 to 4 days, I think the best method is in a ziplock bag. I’ve tried other eco-friendly options, but nothing seems to keep bread freshest — the crumb the softest — better than a ziplock bag. You can re-use the bags again and again.
If you intend to keep the bread for longer, I would freeze it. I often slice bread as soon as it cools completely, transfer the slices to a ziplock bag, then freeze. This way, I know the bread was frozen at its freshest.
A ziplock bag will not prevent the crust of bread from turning soft, which is why I suggest always reheating day-old bread. I use a toaster at breakfast for slices of bread, and I reheat half or quarter loaves in the oven at 350ºF for 15 to 20 minutes when serving for dinner.
Bread revives so beautifully in the oven or toaster.
No-Knead Dinner Rolls
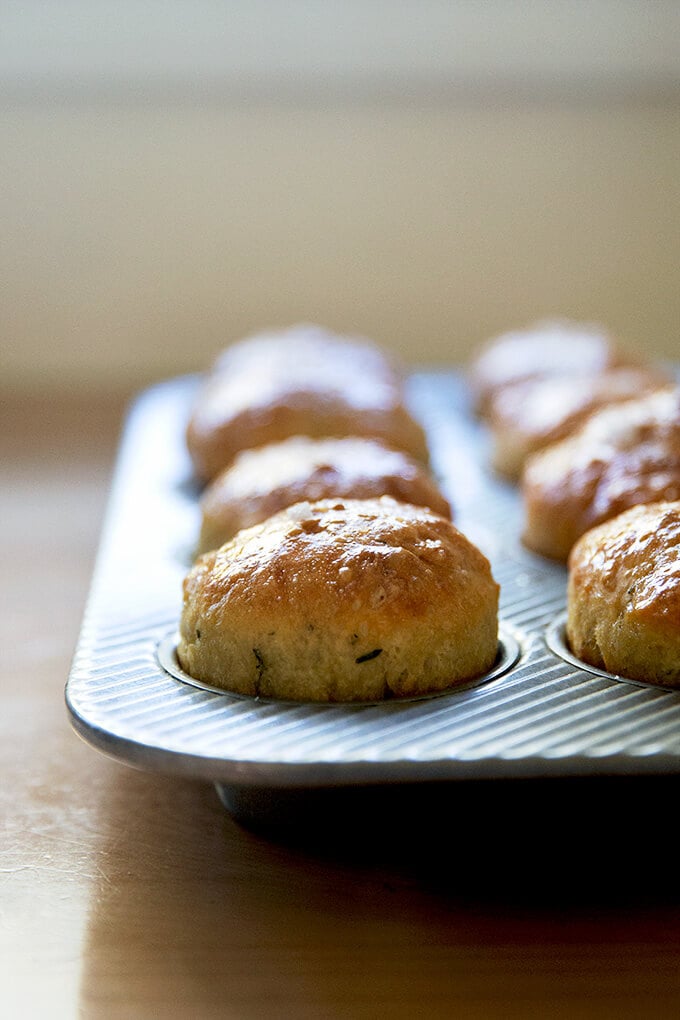
To use the peasant bread dough to make rolls, simply divide the dough into smaller portions and place in a buttered muffin tin as in these No-Knead Thyme Dinner Rolls (pictured above). This recipe for no-knead buttermilk pull-apart rolls is also based on the peasant bread as are these brioche pull-apart rolls.
No-Knead Sandwich Bread
To make sandwich bread, multiply the recipe below by 1.5 and bake the bread in two buttered 8.5×4.5-inch loaf pans.
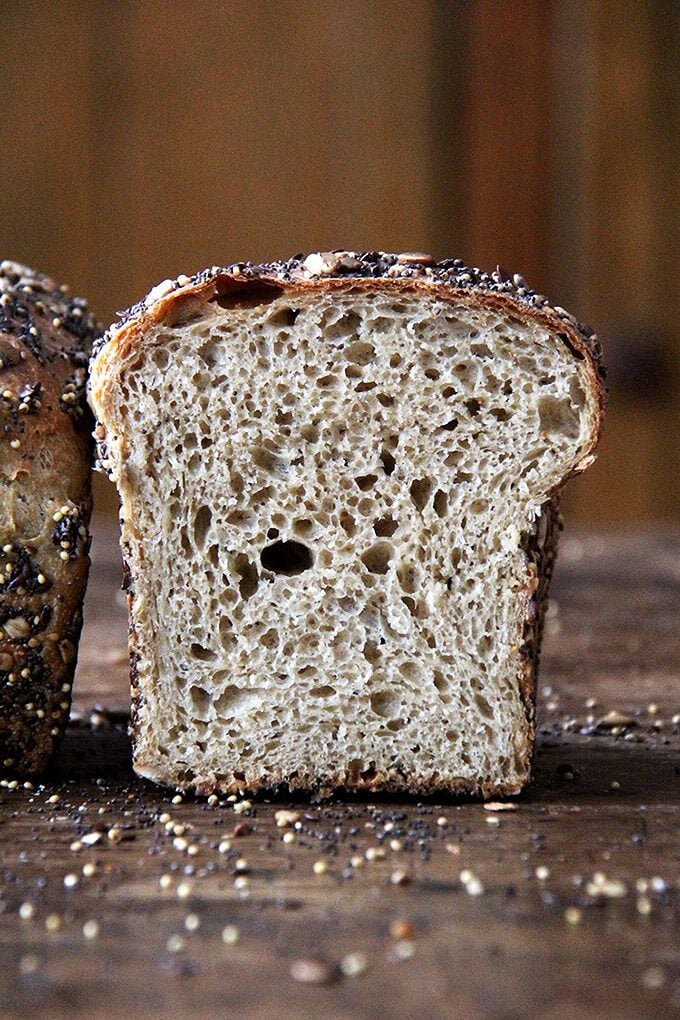
Made with half all-purpose flour and half King Arthur Sprouted Wheat Flour, these seed-coated sandwich loaves (pictured above) have a soft and light crumb. I really like KAF’s sprouted wheat flour, which is made from white whole wheat berries that, when sprouted, yield a creamy, sweet, milder-tasting flour. You can use 100% all-purpose or bread flour for an even lighter loaf or your favorite whole wheat flour in place of the sprouted wheat flour.
How to Add Nuts and Seeds to Bread Dough
To add seeds and nuts (or dried fruit and cheese), simply stir them into the dry ingredients. This recipe for Quinoa-and-Flax Toasting Bread will offer guidance on how much to add.
How to Make a Gluten-Free Peasant Bread
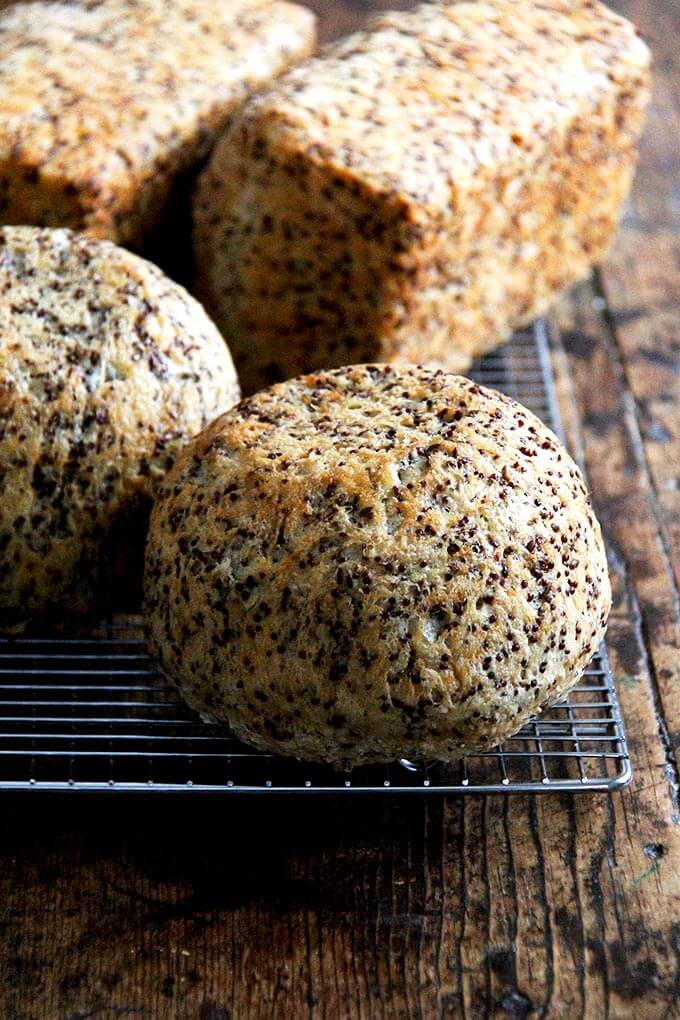
Making gluten-free peasant bread (pictured above) unfortunately isn’t as simple as swapping in gluten-free flour for the wheat flour. But the process and recipe is still super simple — in fact, because there’s only one rise, many people find the gluten-free peasant bread to be even simpler than the original. Find the recipe here: Gluten-Free Peasant Bread
How to Coat the Loaves in Seeds
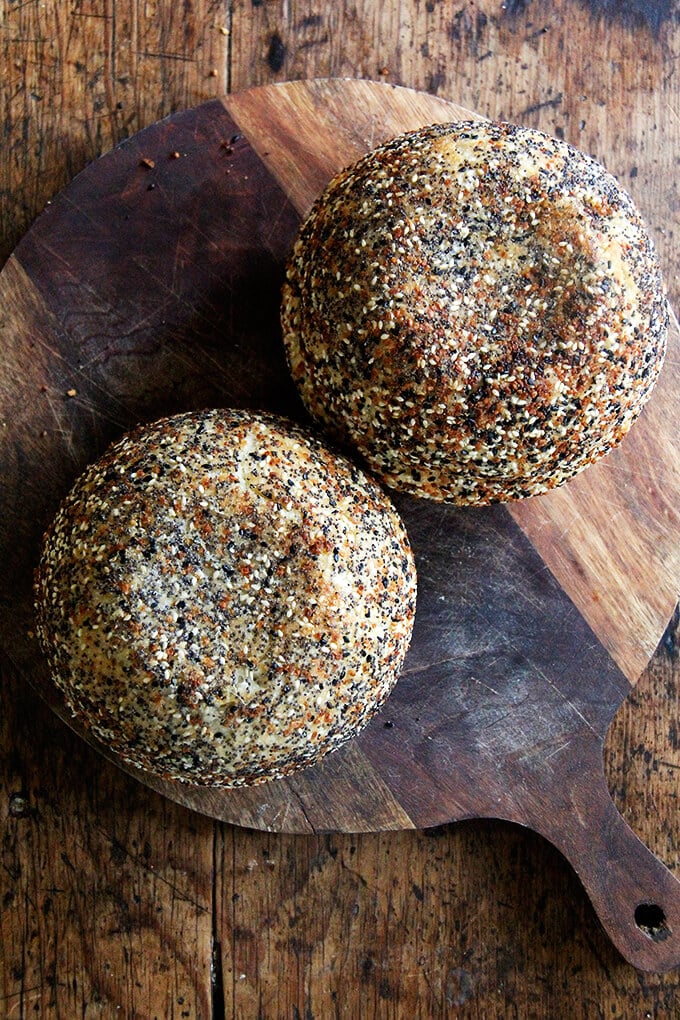
To coat the peasant bread in seeds, as pictured above, simply coat the bowls with everything bagel seasoning or with dukkah or sesame seeds or whatever seed mix you wish. The seed-coated loaves look so beautiful, and it’s amazing how much the flavor of the coating permeates the loaves. Find the recipe here: Everything Bagel Seasoning Peasant Bread
How to Use Whole Wheat Flour
To use whole wheat flour in the peasant bread, simply replace as much as 50% of the all-purpose flour with your favorite whole wheat flour: I like KAF’s sprouted wheat flour, and I’ve been loving the Cairnsprings Mill Trailblazer stone-milled flour. With the Trailblazer, I can use up to 75% of it in the peasant bread, and it yields a beautiful, chewy texture as well as a lovely flavor and aroma.
When using whole wheat flour, you may have to use more or less water — there is no rule as to how much more or less, and it will take some trial and error to get right because all flours absorb water differently. When I use KAF sprouted wheat flour, for example, I don’t change the water amount at all. When I use the Trailblazer flour, on the other hand, I reduce the water by at least 50 grams.
If you’d like to learn more about whole wheat flour and stone-milled flours, read this: Easy Sourdough Bread (Whole Wheat-ish)
How to Bake the Peasant Bread in a Dutch Oven
If you’re looking for more of a crackling crusted boule (characteristic of a loaf of sourdough bread) as opposed to the buttery crispness of the peasant bread, you can bake the peasant bread dough in a preheated Dutch oven.
There are detailed instructions below the recipe in the notes section, but one thing to keep in mind before you begin is dough hydration. The peasant bread is a very high hydration dough, meaning there is a lot of water relative to flour. Because baking the peasant bread in a Dutch oven will require some handling of the dough — to shape it into a round and to create some tension — you may want to reduce the water from the start. Consider holding back 20-30 grams of water to make the process more manageable for you.
My Mother’s Peasant Bread: The Best Easiest Bread You Will Ever Make
- Total Time: 2 hours 27 minutes
- Yield: 2 loaves
Description
Notes:
The bread:
This is a sticky, no-knead dough, so, some sort of baking vessel, such as pyrex bowls (you need two 1-qt bowls) or ramekins for mini loaves is required to bake this bread. See notes below the recipe for sources. You can use a bowl that is about 2 qt or 2 L in size to bake off the whole batch of dough (versus splitting the dough in half) but do not use this size for baking half of the dough — it is too big.

Peasant Bread Fans! There is now a book: Bread Toast Crumbs, a loaf-to-crumb bread baking book, filled with tips and tricks and answers to the many questions that have been asked over the years. In the book you will find 40 variations of the master peasant bread recipe + 70 recipes for using up the many loaves you will bake. Learn more about the book here or buy it here.
Ingredients
- 4 cups (512 g) unbleached all-purpose or bread flour
- 2 teaspoons (10 g) kosher salt
- 2 cups (454 g) lukewarm water (made by mixing 1.5 cups cold water with 0.5 cup boiling water)
- 2 teaspoons (8 g) sugar
- 2 teaspoons (8 g) instant yeast, I love SAF Instant Yeast, see notes below
- room temperature butter, about 2 tablespoons
Instructions
- Mixing the dough: In a large mixing bowl, whisk together the flour, salt, sugar, and instant yeast (I love SAF Instant Yeast). Add the water. Mix until the flour is absorbed. (If you are using active dry yeast, see notes below.)
- Let it rise. Cover bowl with a tea towel or plastic wrap and set aside in a warm spot to rise for at least an hour. (In the winter or if you are letting the bread rise in a cool place, it might take as long as two hours to rise.) This is how to create a slightly warm spot for your bread to rise in: Turn the oven on at any temperature (350ºF or so) for one minute, then turn it off. Note: Do not allow the oven to get up to 300ºF, for example, and then heat at that setting for 1 minute — this will be too hot. Just let the oven preheat for a total of 1 minute — it likely won’t get above 100ºF. The goal is to just create a slightly warm environment for the bread.
- Preheat the oven to 425ºF. Grease two 1-qt or 1.5-qt oven-safe bowls (see notes below) with about a tablespoon of butter each. Using two forks, punch down your dough, scraping it from the sides of the bowl, which it will be clinging to. As you scrape it down try to pull the dough toward the center (see video below for guidance). You want to loosen the dough entirely from the sides of the bowl, and you want to make sure you’ve punched it down. Then, take your two forks and divide the dough into two equal portions — eye the center of the mass of dough, and starting from the center and working out, pull the dough apart with the two forks. Then scoop up each half and place into your prepared bowls. This part can be a little messy — the dough is very wet and will slip all over the place. Using small forks or forks with short tines makes this easier — my small salad forks work best; my dinner forks make it harder. It’s best to scoop it up fast and plop it in the bowl in one fell swoop. Some people like to use flexible, plastic dough scrapers for this step.
- Let the dough rise again for about 20 to 30 minutes on the countertop near the oven (or near a warm spot) or until it has risen to just below or above (depending on what size bowl you are using) the top of the bowls. (Note: Do not do the warm-oven trick for the second rise, and do not cover your bowls for the second rise. Simply set your bowls on top of your oven, so that they are in a warm spot. Twenty minutes in this spot usually is enough for my loaves.)
- Bake it. Bake for 15 minutes. Reduce the heat to 375º and bake for 15 to 17 minutes longer. Remove from the oven and turn the loaves onto cooling racks. If you’ve greased the bowls well, the loaves should fall right out onto the cooling racks. If the loaves look a little pale and soft when you’ve turned them out onto your cooling racks, place the loaves into the oven (outside of their bowls) and let them bake for about 5 minutes longer. Remove from oven and let cool for 10 minutes before cutting.
Notes
- The bowls: The cheapest, most widely available 1-qt bowl is the Pyrex 322. Update: These bowls are becoming harder to find and more expensive. As a result, I’m suggesting this cheaper option: the Pyrex 3-piece set. You can split the dough in half as always (see recipe) and bake half in the 1-quart bowl and half in the 1.5 quart bowl. The loaves will not be the same shape, but they will be delicious nonetheless.
- Yeast: I buy SAF Instant Yeast in bulk from Amazon I store it in my fridge or freezer, and it lasts forever. If you are using the packets of yeast (the kind that come in the 3-fold packets), just go ahead and use a whole packet — It’s 2.25 teaspoons. I have made the bread with active dry, rapid rise, and instant yeast, and all varieties work. The beauty of instant yeast is that there is no need to “proof” it — you can add the yeast directly to the flour. I never use active-dry yeast anymore.
- If you have active-dry yeast on hand and want to use it, here’s how: In a small mixing bowl, dissolve the sugar into the water. Sprinkle the yeast over top. There is no need to stir it up. Let it stand for about 10 to 15 minutes or until the mixture is foamy and/or bubbling just a bit — this step will ensure that the yeast is active. Meanwhile, in a large bowl, whisk together the flour and salt. When the yeast-water-sugar mixture is foamy, stir it up, and add it to the flour bowl. Mix until the flour is absorbed.
- Troubleshooting: You can find step-by-step video instruction here.
- Several commenters have had trouble with the second rise, and this seems to be caused by the shape of the bowl they are letting the dough rise in the second time around. Two hours for the second rise is too long. If you don’t have a 1-qt bowl, bake 3/4 of the dough in a loaf pan and bake the rest off in muffin tins or a popover pan. The second rise should take no more than 30 minutes.
- Also, you can use as many as 3 cups of whole wheat flour, but the texture changes considerably. I suggest trying with all all-purpose or bread flour to start and once you get the hang of it, start trying various combinations of whole wheat flour and/or other flours.
- The single most important step you can take to make this bread truly foolproof is to invest in a digital scale. This one costs under $10. If you are not measuring by weight, do this: scoop flour into the measuring cup using a separate spoon or measuring cup; level off with a knife. The flour should be below the rim of the measuring cup.
- Here’s a printable version of this recipes that’s less wordy: Peasant Bread Recipe, Simplified
- How to Bake the Peasant Bread in a Dutch Oven: Preheat a Dutch Oven for 45 minutes at 450ºF. Dust a clean work surface with flour. After the first rise, turn the dough out onto the floured surface and shape it into a ball: I like to fold it envelope style from top to bottom, then side to side; then I flip it over and use the pinkie edges of my hands to pinch the dough underneath and create some tension. Transfer the dough to a sheet of parchment paper. Let rest for 20 minutes. If you feel your dough is spreading too much you can lift up the sheet of parchment paper, dough and all, and place it in a bowl of a similar size. After the 20 minutes, transfer the dough, parchment paper and all to the Dutch oven. Carefully cover it. Bake 30 minutes. Uncover. Bake 15 minutes more.
- To bake the peasant bread in a loaf pan: If you are using an 8.5×4.5-inch loaf pan or a 9×5-inch loaf pan, you can bake 3/4 of the dough in it; bake off the rest of the dough in ramekins or other small vessels … the mini loaves are so cute. You can also make 1.5x the recipe, and bake the bread in 2 loaf pans. If you have a large loaf pan, such as a 10×6-inch loaf pan, you can bake off the entire batch of dough in it. For loaf pans, bake at 375ºF for 45 minutes.
- How to Bake at Hight Altitude:
- First try the original recipe as written (preferably with a scale). You may not need to make any adjustments. One commenter, who lives at 9200 ft finds the original recipe to work just fine as is.
- If the original recipe doesn’t work, try adding a little bit more water because it rises fast and it is so dry: about a quarter cup for every 512 g of flour.
- Try decreasing the yeast to 1.5 teaspoons.
- If your dough is especially gooey, try decreasing the water by 1/4 cup. But, if you aren’t using a scale, my first suggestion would be to buy a scale and weigh the flour, and make the bread once as directed with the 2 cups water and 512 grams flour, etc.
- Punch the dough down twice before transferring it to the buttered Pyrex bowls. In other words, let it rise for 1-1.5 hours, punch it down, let it rise again for about an hour, punch it down, then transfer it to the buttered bowls.
- Variations:
- #1. Cornmeal. Substitute 1 cup of the flour with 1 cup of cornmeal. Proceed with the recipe as directed.
- #2. Faux focaccia. Instead of spreading butter in two Pyrex bowls in preparation for baking, butter one 9×9-inch glass baking dish and one Pyrex bowl or just butter one large 9×13-inch Pyrex baking dish. If using two vessels, divide the dough in half and place each half in prepared baking pan. If using only one large baking dish, place all of the dough in the dish. Drizzle dough with 1 tablespoon of olive oil (if using the small square pan) and 2 tablespoons of olive oil (if using the large one). Using your fingers, gently spread the dough out so that it fits the shape of the pan. Use your fingers to create dimples in the surface of the dough. Sprinkle surface with chopped rosemary and sea salt. Let rise for 20 to 30 minutes. Bake for 15 minutes at 425ºF and 17 minutes (or longer) at 375ºF. Remove from pan and let cool on cooling rack.
- #3. Thyme Dinner Rolls
- #4 Gluten-free
- #5. Everything Bagel Seasoning Bread. Simply coat the buttered bowls with Everything Bagel Seasoning. Watch a how-to on Instagram Stories here.
- #6: Whole Wheat Peasant Bread. Use as much as 50% whole wheat flour. I like King Arthur Flour’s white whole wheat flour (see this post) or sprouted wheat flour (see this post).
- Prep Time: 5 minutes
- Cook Time: 32 minutes
- Category: Bread
- Method: Baked
- Cuisine: American
This post may contain affiliate links. Please read my disclosure policy.


6,405 Comments on “My Mother’s Peasant Bread: The Best Easiest Bread You Will Ever Make”
I meant to drop by earlier (a few weeks back) and just say how much I enjoyed this bread! It’s so easy to make, it’s so delicious and thanks to having tried this bread, it’s now on my must-have list of recipes when I have guests over. Thanks so much for sharing, Alexandra!
This is a wonderful recipe and method. We stopped buying packaged bread several years ago and have found many great home recipes. This is one of the lightest breads I’ve found on our journey. Thank you so much for sharing it!
I just made this in the “faux” focaccia style in a 9×13 pan. I must say, it was so easy, and so delicious! Thanks for putting it up!!
I can’t stop making this bread. lol! My current method is 3 cups of AP and 1 cup of whole wheat flour. I divide the dough between a rather large pyrex loaf pan and a small chili bowl I bought at Wegmans. I am rewarded with a beautiful sandwich loaf for me and the fam and a small boule that I give to friends to entice them to try their hand at maing their own. Thank you!
Thanks for this recipe, I will try it with our campers this summer during our Farming and Food week. Wondering if you have ever added herbs to it or any other additions from the garden?
I just finished making this bread! It turned out so good!! The smell is WOW!!! I can’t wait to taste it!!!!!
I was so excited to stumble across your recipe! Last time I tried making bread I totally failed at it. My grandmother used to make the best homemade bread ever, so I have been trying to master it…but your recipe makes it THAT much easier! The end result was great, but my bread did seem a little dense. Is that normal or could it be due to me using bleached AP flour? (it’s all I had at home) When I pulled it out of the oven it was a bit pale with a doughy look to it (the top part only) so I put it in for a few more minutes, but still had that doughy look. Any advice would be greatly appreciated! Thanks! =) …Oh, I should mention I used a loaf pan and then put the rest in a 1.5 L bowl, just to bake off the remaining dough
Thanks so much for sharing this recipe! I just made it and it turned out AWESOME! I couldn’t have enough of it! As a mother of 14 mth old b/g twins I try to find simple, easy and yummy recipes and let me tell you this was a touchdown! Can’t wait to make it again!
Thanks so much for sharing this recipe! I love people who REALLY share a recipe including tips and all so that the other person will have the same success… You’d be surprised how “prideful” some can be by omitting important tips (sorry, pet peeve of mine : ) Anyway, that said, I was intrigued by your suggestion to put it in ramekins… what would be the measurements, cooking time and temp, etc? I think these would make such a lovely addition to the Thanksgiving table at each setting. Thanks again!!!
I have been making this bread for months now with my 4 year old. We love how simple and quick it is. We just got some bread loaf pans (larger ones) and I am baking some now testing out how it will work for sandwiches. Either way we love this bread. 🙂 Thanks for sharing your recipe!
Lisa — wonderful to hear this!
I made BREAD!!! Thank you, thank you, thank you for sharing your mother’s recipe. It’s delicious. I messed up at first- forgot to add the 1/2 cup of hot water to the cold water so my dough was dry. I thought I added too much flour so I didn’t have hope for this batch. Then I spotted the hot water so I dumped it in and mixed it up. Dough got very wet but I still wasn’t convinced it would turn out OK but it worked!! It was the perfect compliment to a pot of homemade soup at lunchtime.
I love making bread, but I’ve never made peasant bread, I can’t wait to try this one!
Quick question…in the list of ingredients, the butter is just for greasing the
bowls, right? There’s no oil in the bread itself?
Thanks so much!
Jeanne — that is right, no oil in the bread, just butter for greasing the bowls. Good luck with it!
My son is allergic to wheat and rice flours but can eat oat, corn, soy, and potato flour. I tried this bread tonight substituting with 3 cups of oat and 1 cup potato and it did not work at all. Any suggestions for substitutions with these flours?
Thanks!
Valerie — I haven’t been able to find a gluten-free formula that works well with this bread yet. Once I do, I will be sure to check back.
thanks for your recipe, yours mother’s bread is delicius!!! From Buenos Aires, Moni
Monica — wonderful to hear this!
I love this recipe! I have always had to add extra water…not sure why, maybe because I use bread flour instead of all purpose? One day my husband suggested I try to add honey as my extra liquid instead of water, tried it and it was wonderful. When I’m making the lukewarm water I use 1/2 cup honey 1/2 cup boiling water and 1 1/2 cup cold water, then I mix in the sugar and add the yeast.
This bread.. oh my.. It was fantastic. GOD BLESS YOUR SOUL :’D. I was hesitant to make the bread because my first try with a different recipe a few years back was a disaster, but boy am I glad I did. I will be making this as much as possible. I’ve also had to add more water to the flower in the initial stage, but it certainly worked out okay. I was wondering, how would I turn this into a cheese bread with cheddar? Do I just mix in some cheddar into the mixture? At what stage would I mix in the cheese?
Mint — wonderful to hear this! I wouldn’t add the cheese until the second rise. So, after you punch down the dough with your forks, you could do one of two things: 1.) Sprinkle cheese over top, and with floured hands, gently knead the cheese into the dough until it is incorporated. Then, split the dough in half and place in buttered bowls for the second rise. 2.) Split the dough in half and place each half on a lightly floured work surface. Sprinkle cheese overtop. Gently knead. Then place in buttered bowls for second rise.
Hope that helps!
My 2-year-old daughter and I just made this bread together today and I was delighted by how it turned out. We live at over 7,500 feet elevation, and bread is normally a total flop. Even in the bread machine it comes out as a brick. This bread is not only edible, but delicious! I think it came out a bit more dense than intended, but it is soft and lovely. My daughter had trouble filling the measuring cups so I think we used slightly less than 4 cups of flour, but the dough was still a bit dry. I added about 1/4 c. extra water to make the dough hold together. I also covered it for the second rise just to keep out the dust since my kitchen window was open, and it did great. I was truly surprised, given the lousy history of bread production in this house. I may try again and bake after the first rise, just to see what happens. It seems like things always go horribly wrong in the bread machine when the second rise fails. I felt like it went well this time, as both of my loaves reached the top. The first rise was truly impressive, though. The dough escaped the bowl and started to creep down the sides. I’ve never gotten that kind of volume increase at this elevation. I feel like this is a great recipe for this area and can’t wait to continue experimenting.
Kim — wonderful to hear this. I have had a few questions from Readers regarding elevation issues, and I never know how to advise because I don’t have any experience with this kind of baking. I hope your future experiments go well!
I just made this and you are right. It is the easiest bread I have ever made, but also the lightest and fluffiest. We went with half bread flour and half all purpose and switched the kosher salt. We weighed the ingredients instead of measuring and it actually came out to about 3 1/2 cups flour (I guess I am heavy on measuring). It is the most wonderful bread. I will be making this often. Thank you for sharing it. Suzi.
Suzi — wonderful to hear this! I think weighing is the best way to go — then there’s no question about if the flour was measured accurately. And I think many people have a heavy hand when it comes to measuring flour. Mine might be a little too light 🙂
I actually just found this recipe on pinterest while trying to find an easy bread recipe to bake fresh baked bread cause I LOVE it… this recipe was super easy and my bread came out amazing… after looking through everything I did use Bleached all purpose flower and i used 1 2.5L circle pyrex pan and a 1.5L rectangle pyrex bread pan… they both came out AMAZING and I love the buttery taste you get from buttering the pan prior to baking… can’t wait to make these again in the future… Thanks for the AWESOME recipe!!!!
Valerie — you are so welcome! And I am so happy to hear that you have had success with various-sized bowls. I love the buttery crust, too.
I just made this. I am proud of myself. While I am not a baker at all, this turned out rather nice!! Thank you so much for sharing!!!
This recipe turned out fantastic! I didn’t measure my yeast, I just used to envelopes of active dry, had lots of rise! I forgot to measure my water too when proofing the yeast, just eyeballed it, but when I added all the flour it was perfect so I guess it was the right amount XD I used 1tbs for each of my bowls, and had a bit left over from greasing so I just left it in the bottom of the bowl which ended up forming a very nice crisp crust on the top of the bread after turning out. This bread was crispy on the outside, like pizza hut’s deepdish pizza, and soft and chewy on the inside, akin to a rustic style french or artisan bread. VERY tasty! And honestly was the easiest bread I really have ever made….the easiest anything I have ever made. I didn’t have glass bowls and had to use these 2 large metal ones (one of them was my kitchenaid bowl) but the bread did fine! I think you could cook it in just about any oven safe dish. Definitely keeping this recipe around forever! Thank you (and your mom) so much!
^ TWO** envelopes
Just made this bread for my homemade sauce and oh my god .., so easy and the directions are very clear! What is the best way to store this bread?
Thank you, I made your mothers bread and it is delicious. For the second rising works best for me to just set the oven to 350 and put the dough in and bake in a ceramic oval for 50 minutes. For crustier bread splash water over the baking bread several times, generously.:):) Love it!
Thanks so much for sharing! This bread looks, and sounds, absolutely divine! I definitely must try it….soon!
I notice that there is no oil or butter in the actual making of the bread,only to oil the pyrex bowls. This recipe does not call for any oil is it? i have not tried this recipe yet.
Nafisah — that is correct! No butter/oil in the bowl, just butter for greasing the bowls. Good luck with it!
Thanks for the recipe! I have made this a few times since discovering it on Pinterest and it comes out great every time. Very simple too!
Eric — wonderful to hear this!
Yum-yum-yum! Hello Peasant Bread, good bye bread machine! June 10, 2013
FTG — love it!
I made this bread recipe yesterday. It turned out wonderfully. Ate it warm with your rhubarb jam recipe and it was fantastic. Also made grilled sliced turkey, gouda and garlic oil sandwiches with it and it was also fantastic. Can’t wait to make it again. I have been on a quest for making good bread in the last year or so and my husband insists that this recipe is better than any of the others that I’ve made (although I am also partial to average joe’s bread recipe, but that has to raise for at least 18 hours and that’s not always possible). Thank you so much for sharing!!!
Cathy — so wonderful to hear this. Isn’t it amazing how sometimes the simplest recipes are the best? Your sandwiches sound absolutely delicious. I might have to make paninis tonight — I don’t have gouda, but I have other cheeses so all I’ll have to do is make the garlic oil. Yum!
Could you just make one large loaf if you only have one oven proof bowl?
Sue — Yes! I haven’t done it, but several commenters have had success doing so. Just make sure your one oven proof bowl is large enough. What size do you have?